
2026 Q1 Product Updates
What shipped in Q1 2026, including event calendars, kiosk check-in, the badge designer, Zebra printer support, and seating chart color coding.
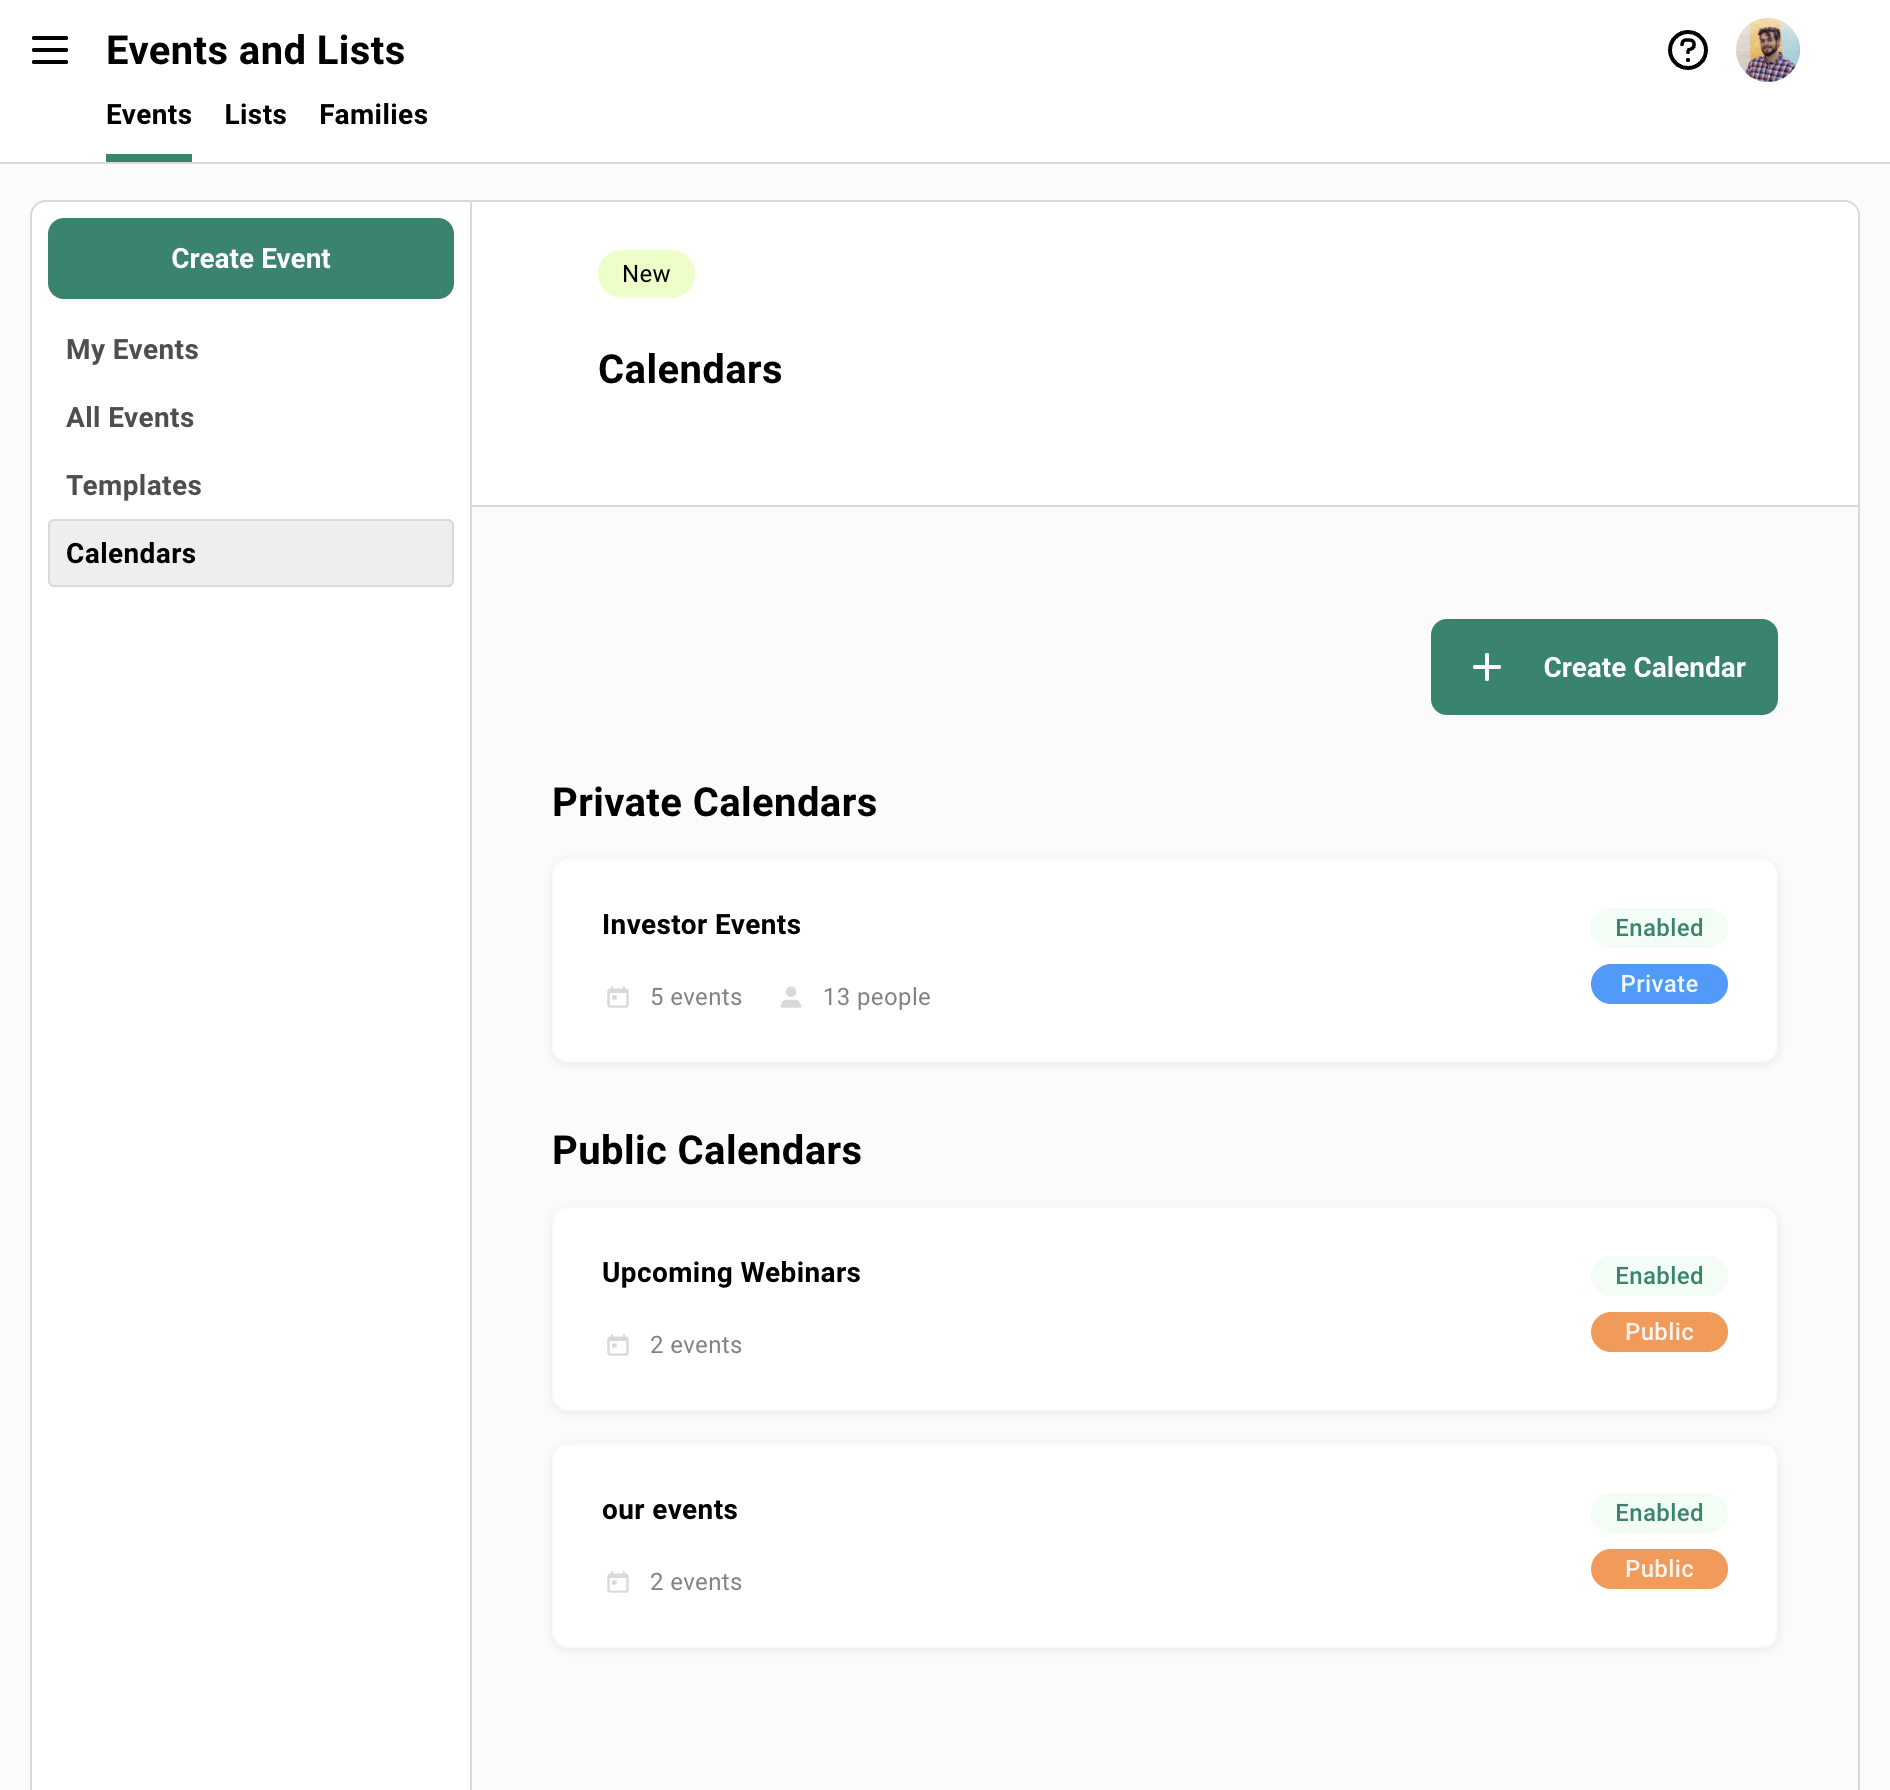
Calendars: Public and Private Event Listing Pages
Section titled “Calendars: Public and Private Event Listing Pages”You can now build event listing pages at their own URL. Public calendars let anyone see your upcoming programming in one place. Private calendars give each person on a contact list a personalized link.
Find it in the left nav under Calendars, available to all customers.
View Example Calendar Public calendars
Set a title, customize the URL slug, upload a logo, and add a description. Then add events manually. Nothing appears on a calendar automatically when you create an event in Gatsby. Every calendar is curated.
Each event entry shows the date, city, name, optional description, and a View Event button. Upload a featured image and override the event title in that event’s Link Preview settings. Those settings feed every calendar the event appears on.
Public calendars can be embedded via iframe on an external website.
URL structure: gatsby.events/your-org-slug/events/your-calendar-slug. The custom domain add-on replaces the root domain.
Private calendars
Associate a calendar with one or more contact lists. Events on a private calendar can be set without public links, so they’re not discoverable anywhere else.
To distribute: go into each associated contact list, open Campaigns, and insert the new merge tag. Each recipient gets a unique link tied to their contact record. If your calendar is tied to three lists, send three separate campaigns, one from each list. You cannot send directly from the calendar.
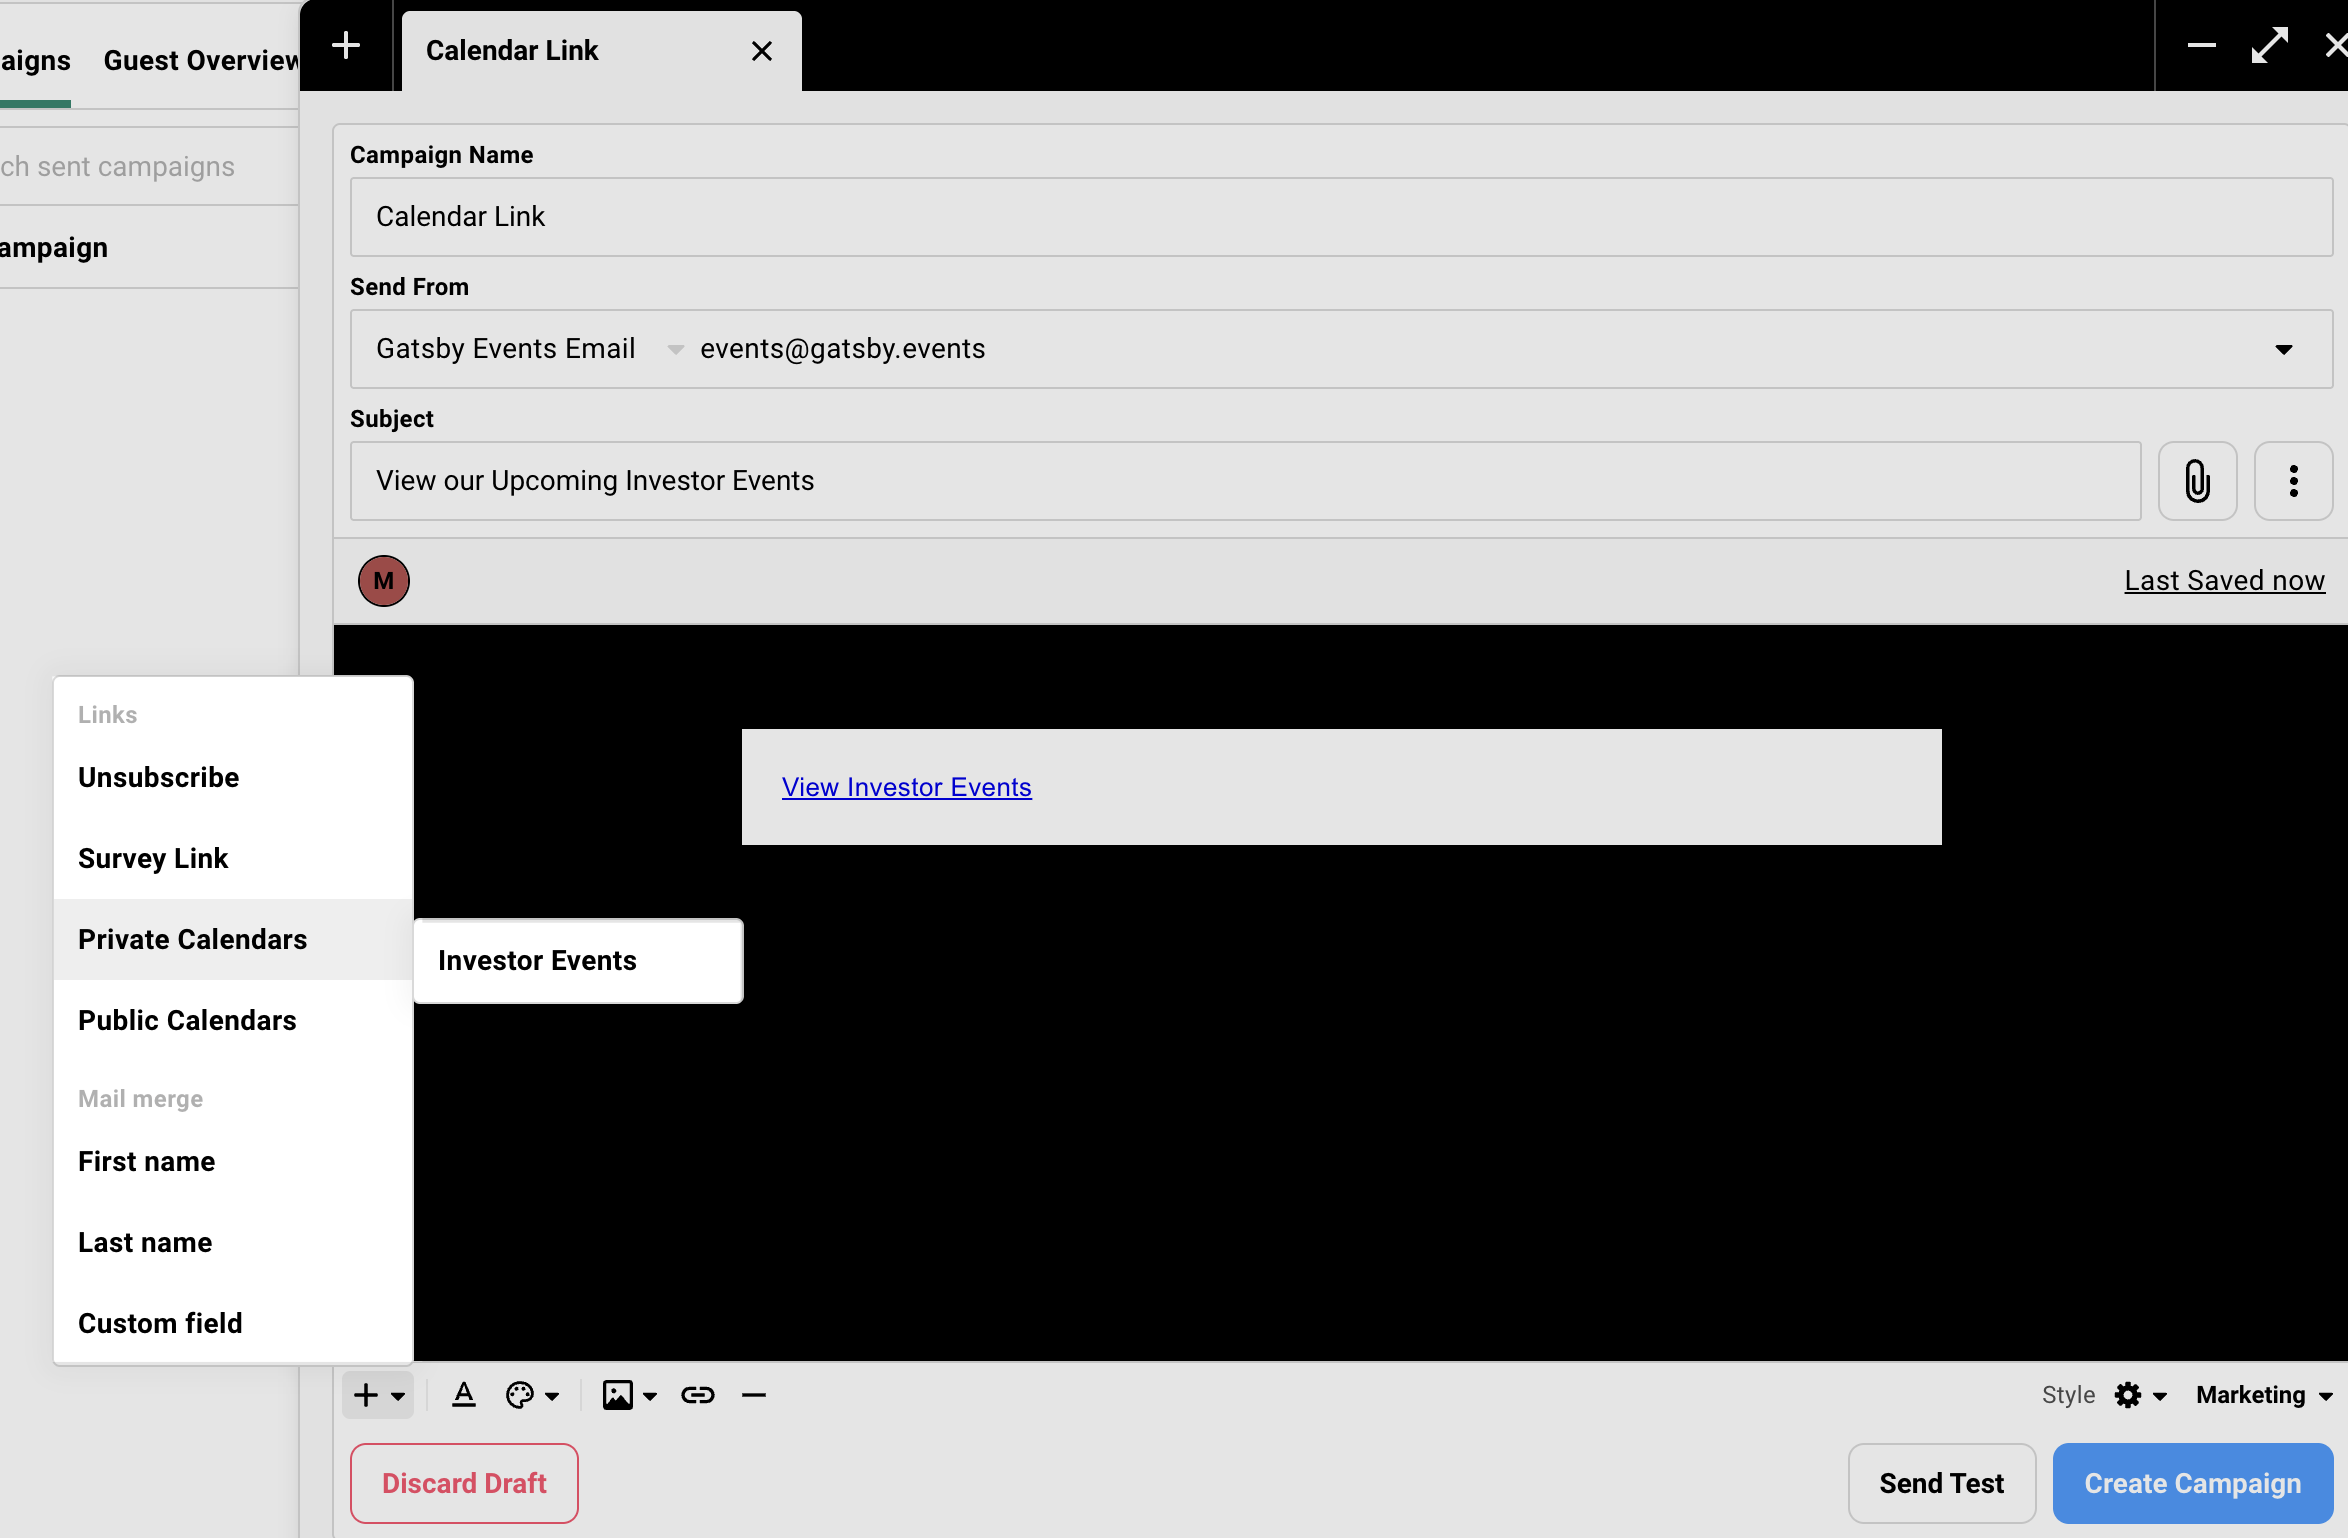
When a contact opens their link and clicks an event, their information is already filled in. They add themselves to the guest list without your team touching it.
The personalized link is tied to a contact record but is not technically enforced. A forwarded link opens and acts on behalf of the original contact. This works for an EA RSVPing for a manager. Include a note in your distribution email that the link is personal.
A few things to know
- No grid view, no month view, no iCal sync. Visitors see a chronological list.
- Branding is limited to your logo and event images. No font or color controls… yet!
- Analytics are calendar-level: total page views and total event clicks. Click the event clicks count to see a per-event breakdown.
Full Calendars Reference
Kiosk Mode
Turn an iPad into a self-service check-in station. Guests search their own name, see results as they type, confirm their badge, and print without anyone working the line. Walk-in registration is available too: a guest not on the list can complete your registration form at the kiosk, get added to the guest list, and receive a confirmation email if notification emails are configured.
Set it up in Event > On-Site tab. Kiosk mode requires account-level enablement. Contact your account manager to activate, or email:
A few details worth knowing:
- When two guests share a name, results show their company and position information so guests can self-select the right record.
- If your event has required survey questions, the kiosk surfaces them for guests who haven’t answered yet, including pre-registered guests with missing data.
- Exit kiosk mode by typing a secret phrase in the name search field. For a harder lock, use iOS Guided Access to prevent guests from leaving the app entirely. Guided Access is an Apple feature you configure on the device before the event.
Badge Designer
The badge designer has moved from the iOS app to desktop. You get a drag-and-drop canvas where you control every element: which fields appear, placement, text size, and font weight.
Any guest data field can go on a badge: name, company, table assignment, dietary restrictions, custom fields, any single-select or multi-select data you’ve collected. A QR code element links to a static URL you define, the same for all guests on that template.
Templates are global across all events. There’s no way to scope a template to a specific event. A naming convention helps: prefix templates with the event name or series so your staff knows which to select at check-in. Templates sync to all check-in devices automatically once saved.
One important limitation: text does not wrap. Names or companies longer than the field width get cut off. Test templates with your longest names before the event and build an alternate for outliers.
If you’re currently using a Brother printer, your workflow doesn’t change. Recreate your badge design in the new desktop designer, save it, and it syncs to your devices. The Brother connects the same way it always did.
Zebra Printer Support
Gatsby now supports the Zebra ZD621 series with full Bluetooth. The ZD621 prints on foldable cardstock that hangs from a lanyard, not adhesive labels. Pre-print your branded background onto the cardstock before the event, then Gatsby prints guest information on top at check-in. Color branding comes from your pre-printed background; the Zebra prints guest data in black and white.
Pair the Zebra to your iOS check-in device over Bluetooth, same setup as the Brother. Gatsby has a recommended rental partner for ZD621 printers that ships to your venue, helps with cardstock design, and provides lanyards. Contact Gatsby for the referral.
Compatibility note: not all Zebra models work. Some have Bluetooth only for pushing printer settings, which isn’t enough to receive print jobs. You need a ZD621 series model with full Bluetooth.
Zebra support requires account-level enablement. Contact your account manager, or email:
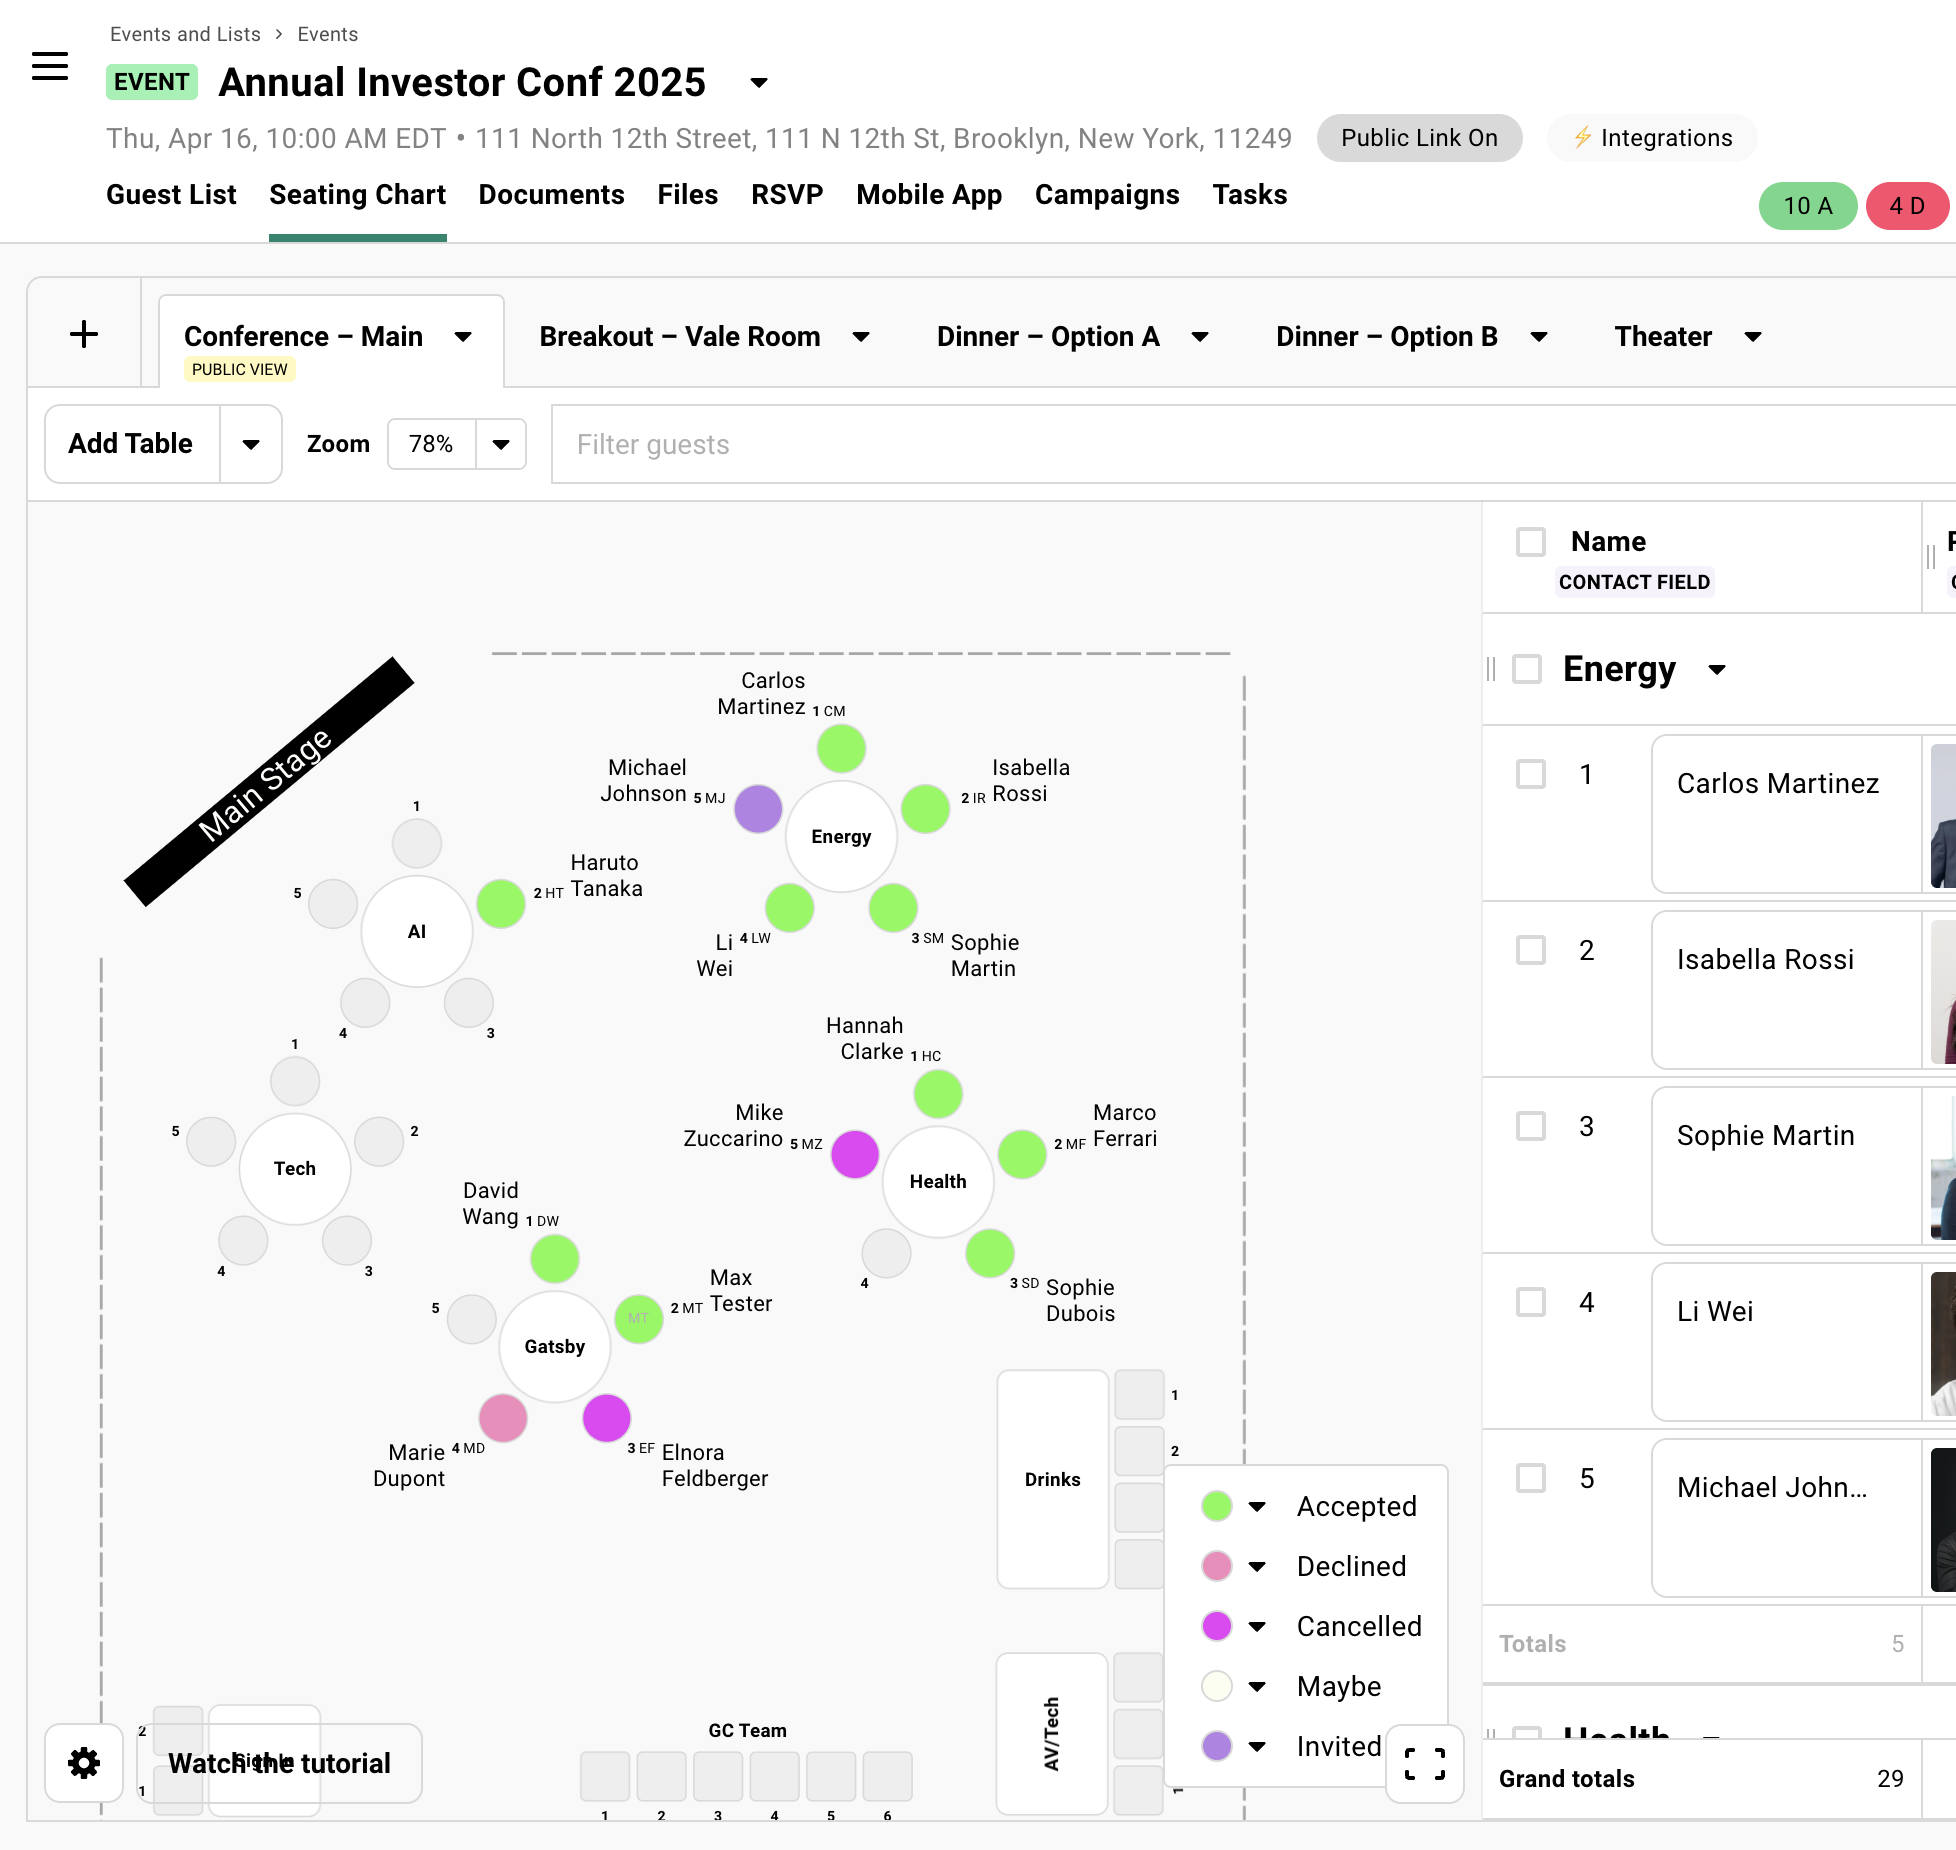
You can now color-code seats on your seating chart by any guest field. Pick RSVP status and declined or canceled guests show up across the whole layout immediately. Pick a custom field and you have a visual map of the room without opening a single filter.
Find the setting in Event > Seating Chart > gear icon (bottom left). Select a field, choose which values to highlight, assign colors, and the chart updates immediately. Color configuration saves per chart and carries through to view-only share links and PDF exports. See the Seating Charts docs for the full reference.
Details and limitations
- Only single-select and multi-select fields are eligible. Text and number fields aren’t available in the color picker.
- Built-in options are RSVP status and dietary restrictions. Custom fields like company stage or relationship tier need to exist in your account to appear as options.
- If a guest has multiple values in a multi-select field, their seat shows color stripes, one per value.
- You can only color by one field at a time. To view two fields simultaneously, duplicate the chart and configure each copy separately.
The same gear menu includes two additional display controls: adjustable font size for guest name labels and a toggle for vertical name rotation. Both apply globally to that chart and are independent across charts in the same event.
iOS App Improvements
Section titled “iOS App Improvements”- Check-in toast. Check-in now shows a notification with the guest’s name. Tap it to open their contact profile.
- QR scanner confirmation. The QR code scanner now shows a confirmation after a successful scan.
- Print setting. New setting to control whether scanning a QR code automatically closes the scanner and presents the print option when a printer is connected.
- All contacts page. You can now browse your full Gatsby contact list and view guest profiles from the app.