Overview
Apple Wallet Pass
Add a branded Apple Wallet Pass to your event emails. Guests tap to save event details and present the pass for fast check-in at the door.
Your guests already have their phone in hand. Why make them dig for a confirmation email?
Calendar invites confirm the date. Wallet passes handle everything else: branded event details your guests can pull up in seconds, and a scannable pass that speeds up check-in. One tap from the confirmation email. No app to download.
Design Once, Deliver Per Guest
Customize colors, images, and branding in one place. Each guest receives a personalized pass with their name, event details, and a unique QR code for check-in.
Always Current
Change the venue or move the date. Passes already in guests’ wallets update automatically via push notification. No resend required.
Colors and Branding
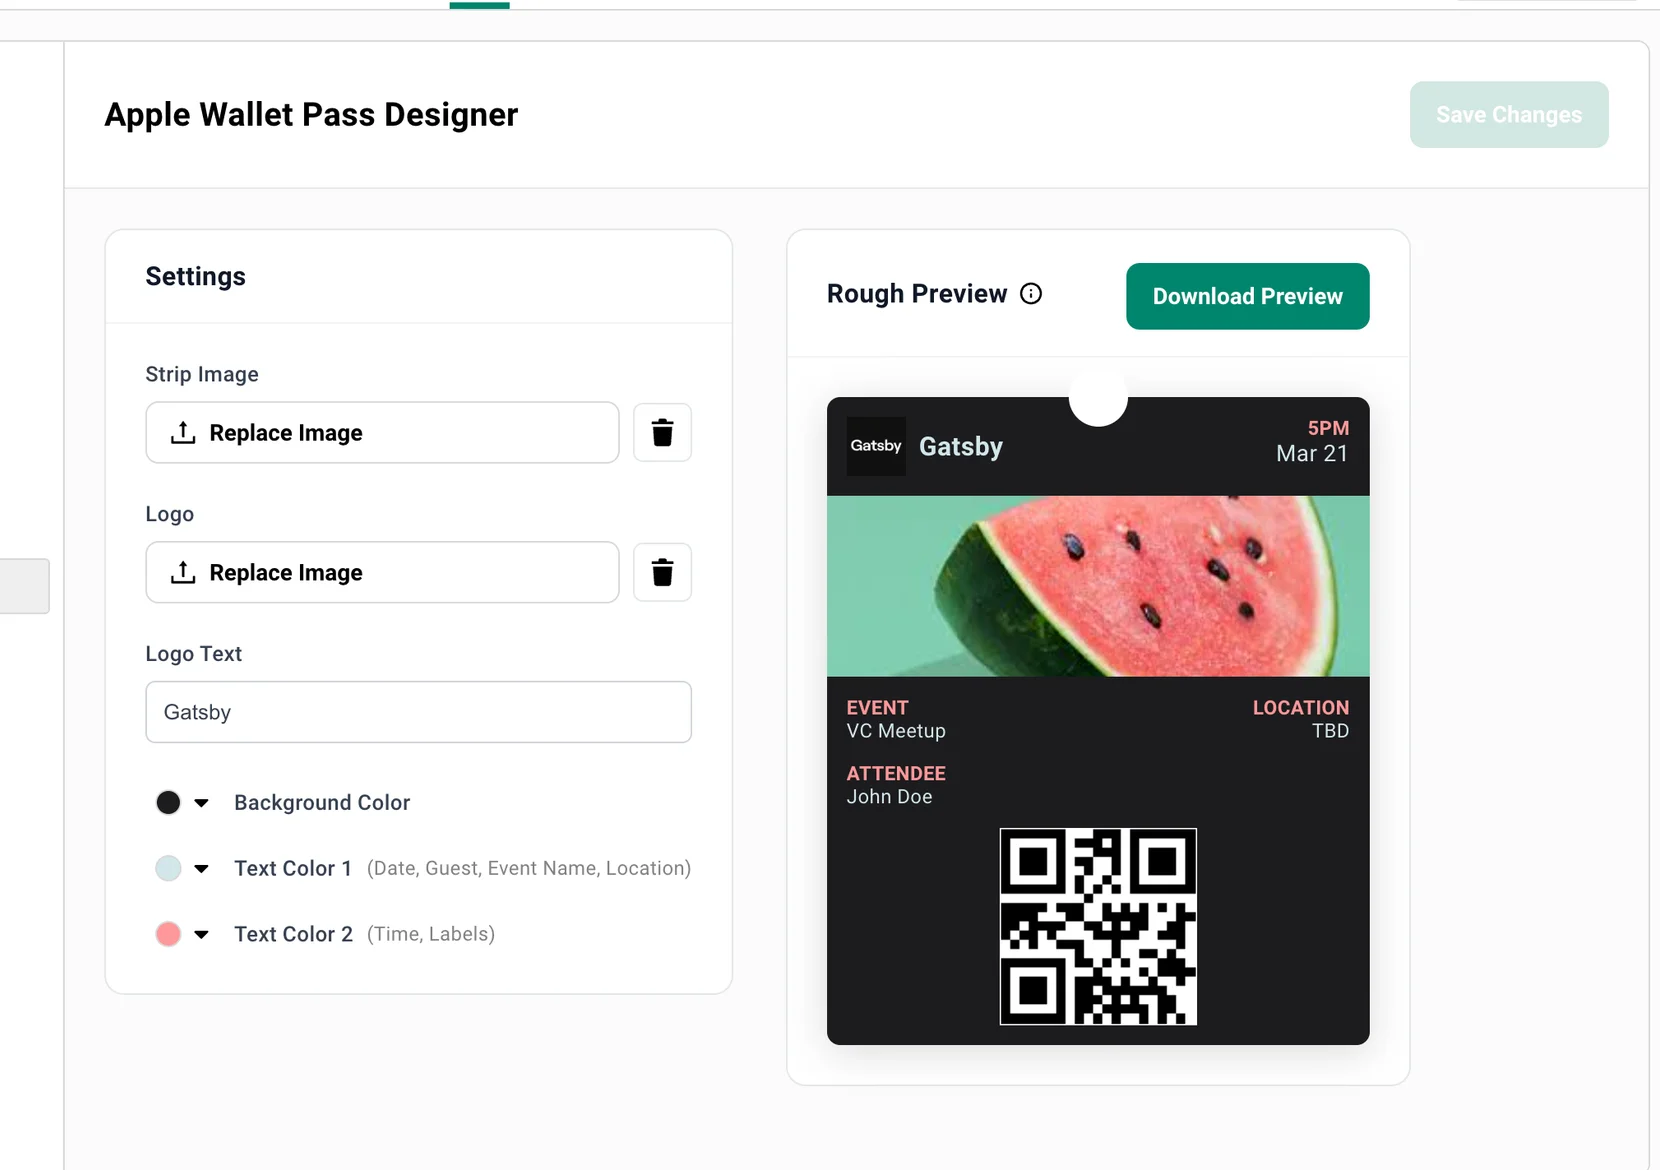
Section titled “Colors and Branding”Three color settings control the look of every pass for your event. Background Color sets the overall tone. Text Color 1 controls primary text — date, guest name, event name, and location. Text Color 2 handles secondary text like time and field labels.
Logo Text defaults to your organization name and appears at the top of the pass alongside your logo image.
How to customize pass colors and text
-
Open your event, select the RSVP tab, and click Apple Wallet Pass in the left sidebar.
-
Set your Background Color using the color picker. This is the dominant color of the pass.
-
Set Text Color 1 for primary text (date, guest name, event name, location).
-
Set Text Color 2 for secondary text (time, field labels).
-
Edit the Logo Text if you want something other than your organization name.
-
Click Save Changes to apply.
The Rough Preview on the right updates as you make changes, so you can see exactly how your pass will look before saving.
Pass Images
Section titled “Pass Images”Two images make your pass recognizable. The Strip Image is the banner displayed prominently on the pass — use it for event branding or a venue photo. The Logo is the small icon that appears at the top left alongside your logo text.
Upload from your device or choose from your event’s media library.
How to add pass images
-
In the Apple Wallet Pass Designer, find the Settings panel.
-
Click the upload button next to Strip Image to add your banner. This is the largest visual element on the pass.
-
Click the upload button next to Logo to add your icon.
-
Click Save Changes to apply.
Previewing Your Pass
Section titled “Previewing Your Pass”Before sending anything to guests, download a preview to see exactly what the pass looks like in Apple Wallet. The Rough Preview panel shows a live rendering as you adjust settings, and Download Preview generates a real .pkpass file you can open on your device to verify every detail — colors, images, layout, and the QR code your check-in team will scan.
How to preview your pass
-
Configure your colors, images, and logo text.
-
Click Download Preview.
-
Open the downloaded
.pkpassfile on a Mac or iPhone to see the pass in Apple Wallet.
The preview uses “John Doe” as the guest name. Real passes will display each guest’s actual name.
Attaching the Pass to Emails
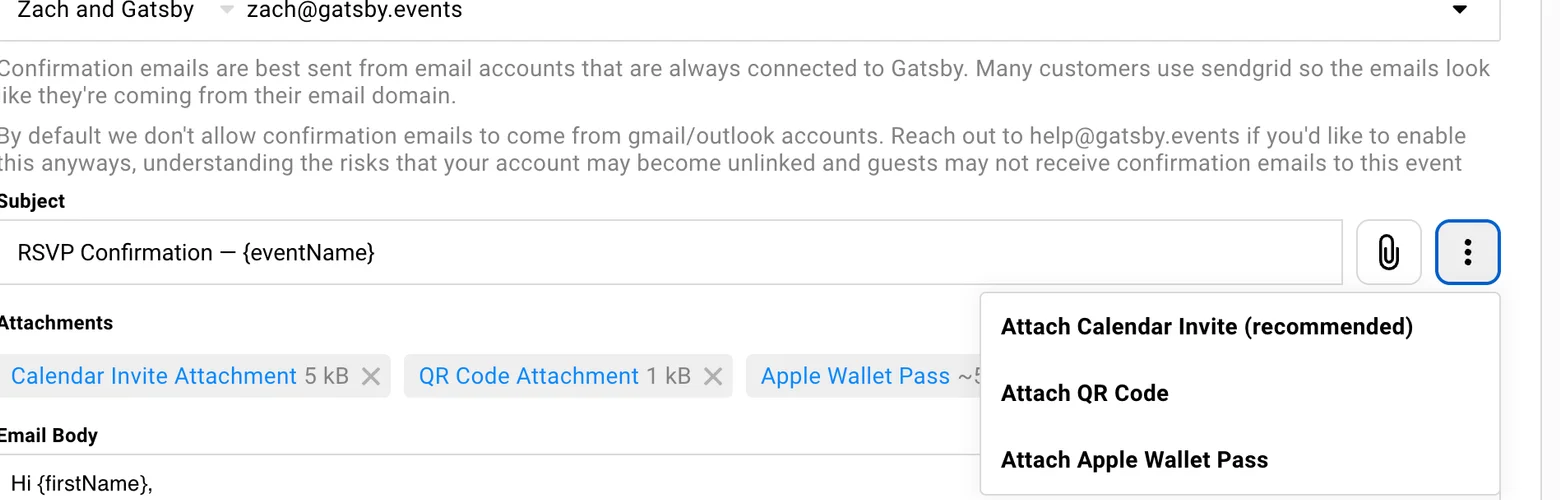
Section titled “Attaching the Pass to Emails”In your event’s Email Settings, each email type has a ”…” menu next to the subject line. This is where you attach the wallet pass. Once attached, every guest who receives that email gets a personalized pass with their name and a unique QR code for check-in.
The pass works with three email types: Confirmation (sent when a guest accepts), Waitlist (sent when a guest joins the waitlist), and Survey Update (sent when you push status changes).
How to attach the wallet pass to an email
-
Open your event, select the RSVP tab, and click Email Settings in the left sidebar.
-
Select the email type: Confirmation Email, Waitlist Email, or Survey Update Email.
-
Click the ”…” menu next to the subject line.
-
Select Attach Apple Wallet Pass.
-
The pass appears as an attachment below the subject line. Click Save.
To remove the attachment, click the X on the Apple Wallet Pass tag in the attachments area.
Attach the wallet pass to your Confirmation Email so guests receive it the moment they RSVP. They’ll have it in their wallet before they even close the browser.
What Guests See
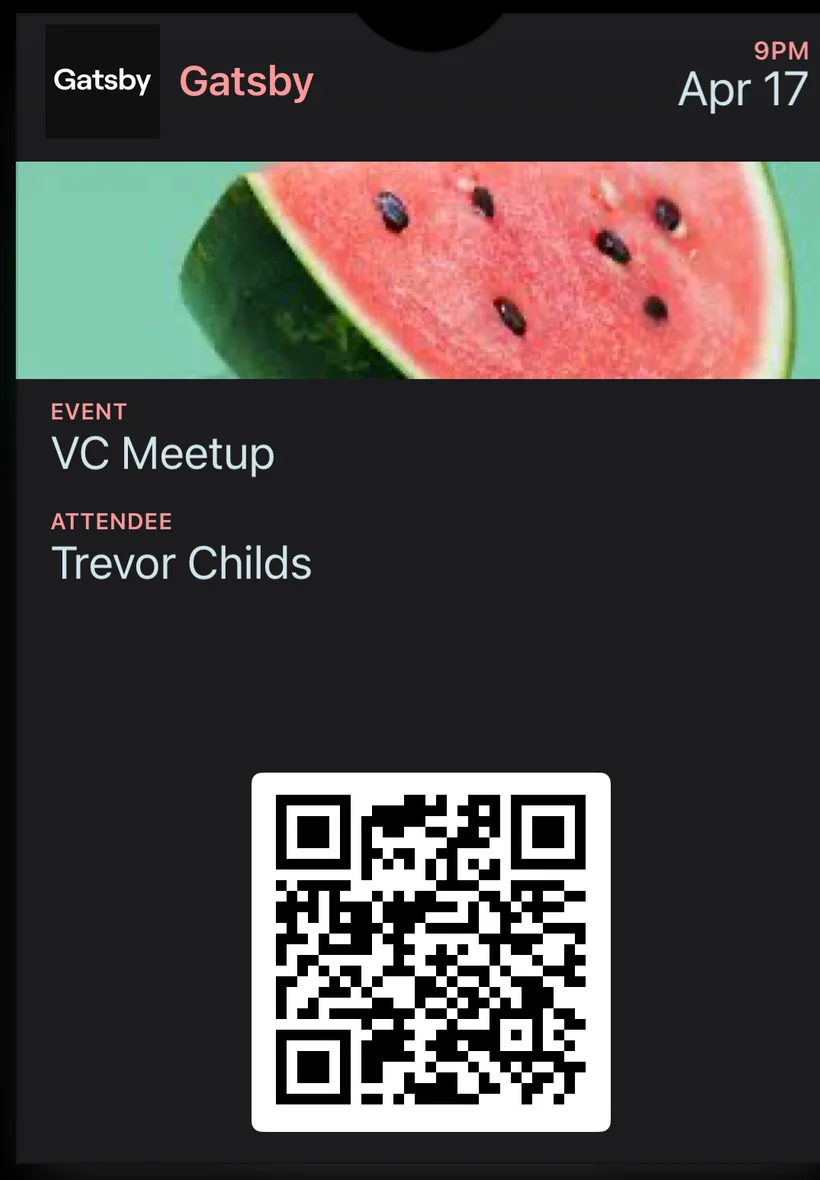
Section titled “What Guests See”Guests receive the email with the .pkpass file attached and an Add to Apple Wallet button. One tap saves the pass to their wallet. The pass displays your event name, date, time, location, the guest’s name, and a QR code for check-in — all styled with your custom colors and images.
No app to download. No account to create. The pass lives in Apple Wallet alongside boarding passes and payment cards.
Check-In with Wallet Passes
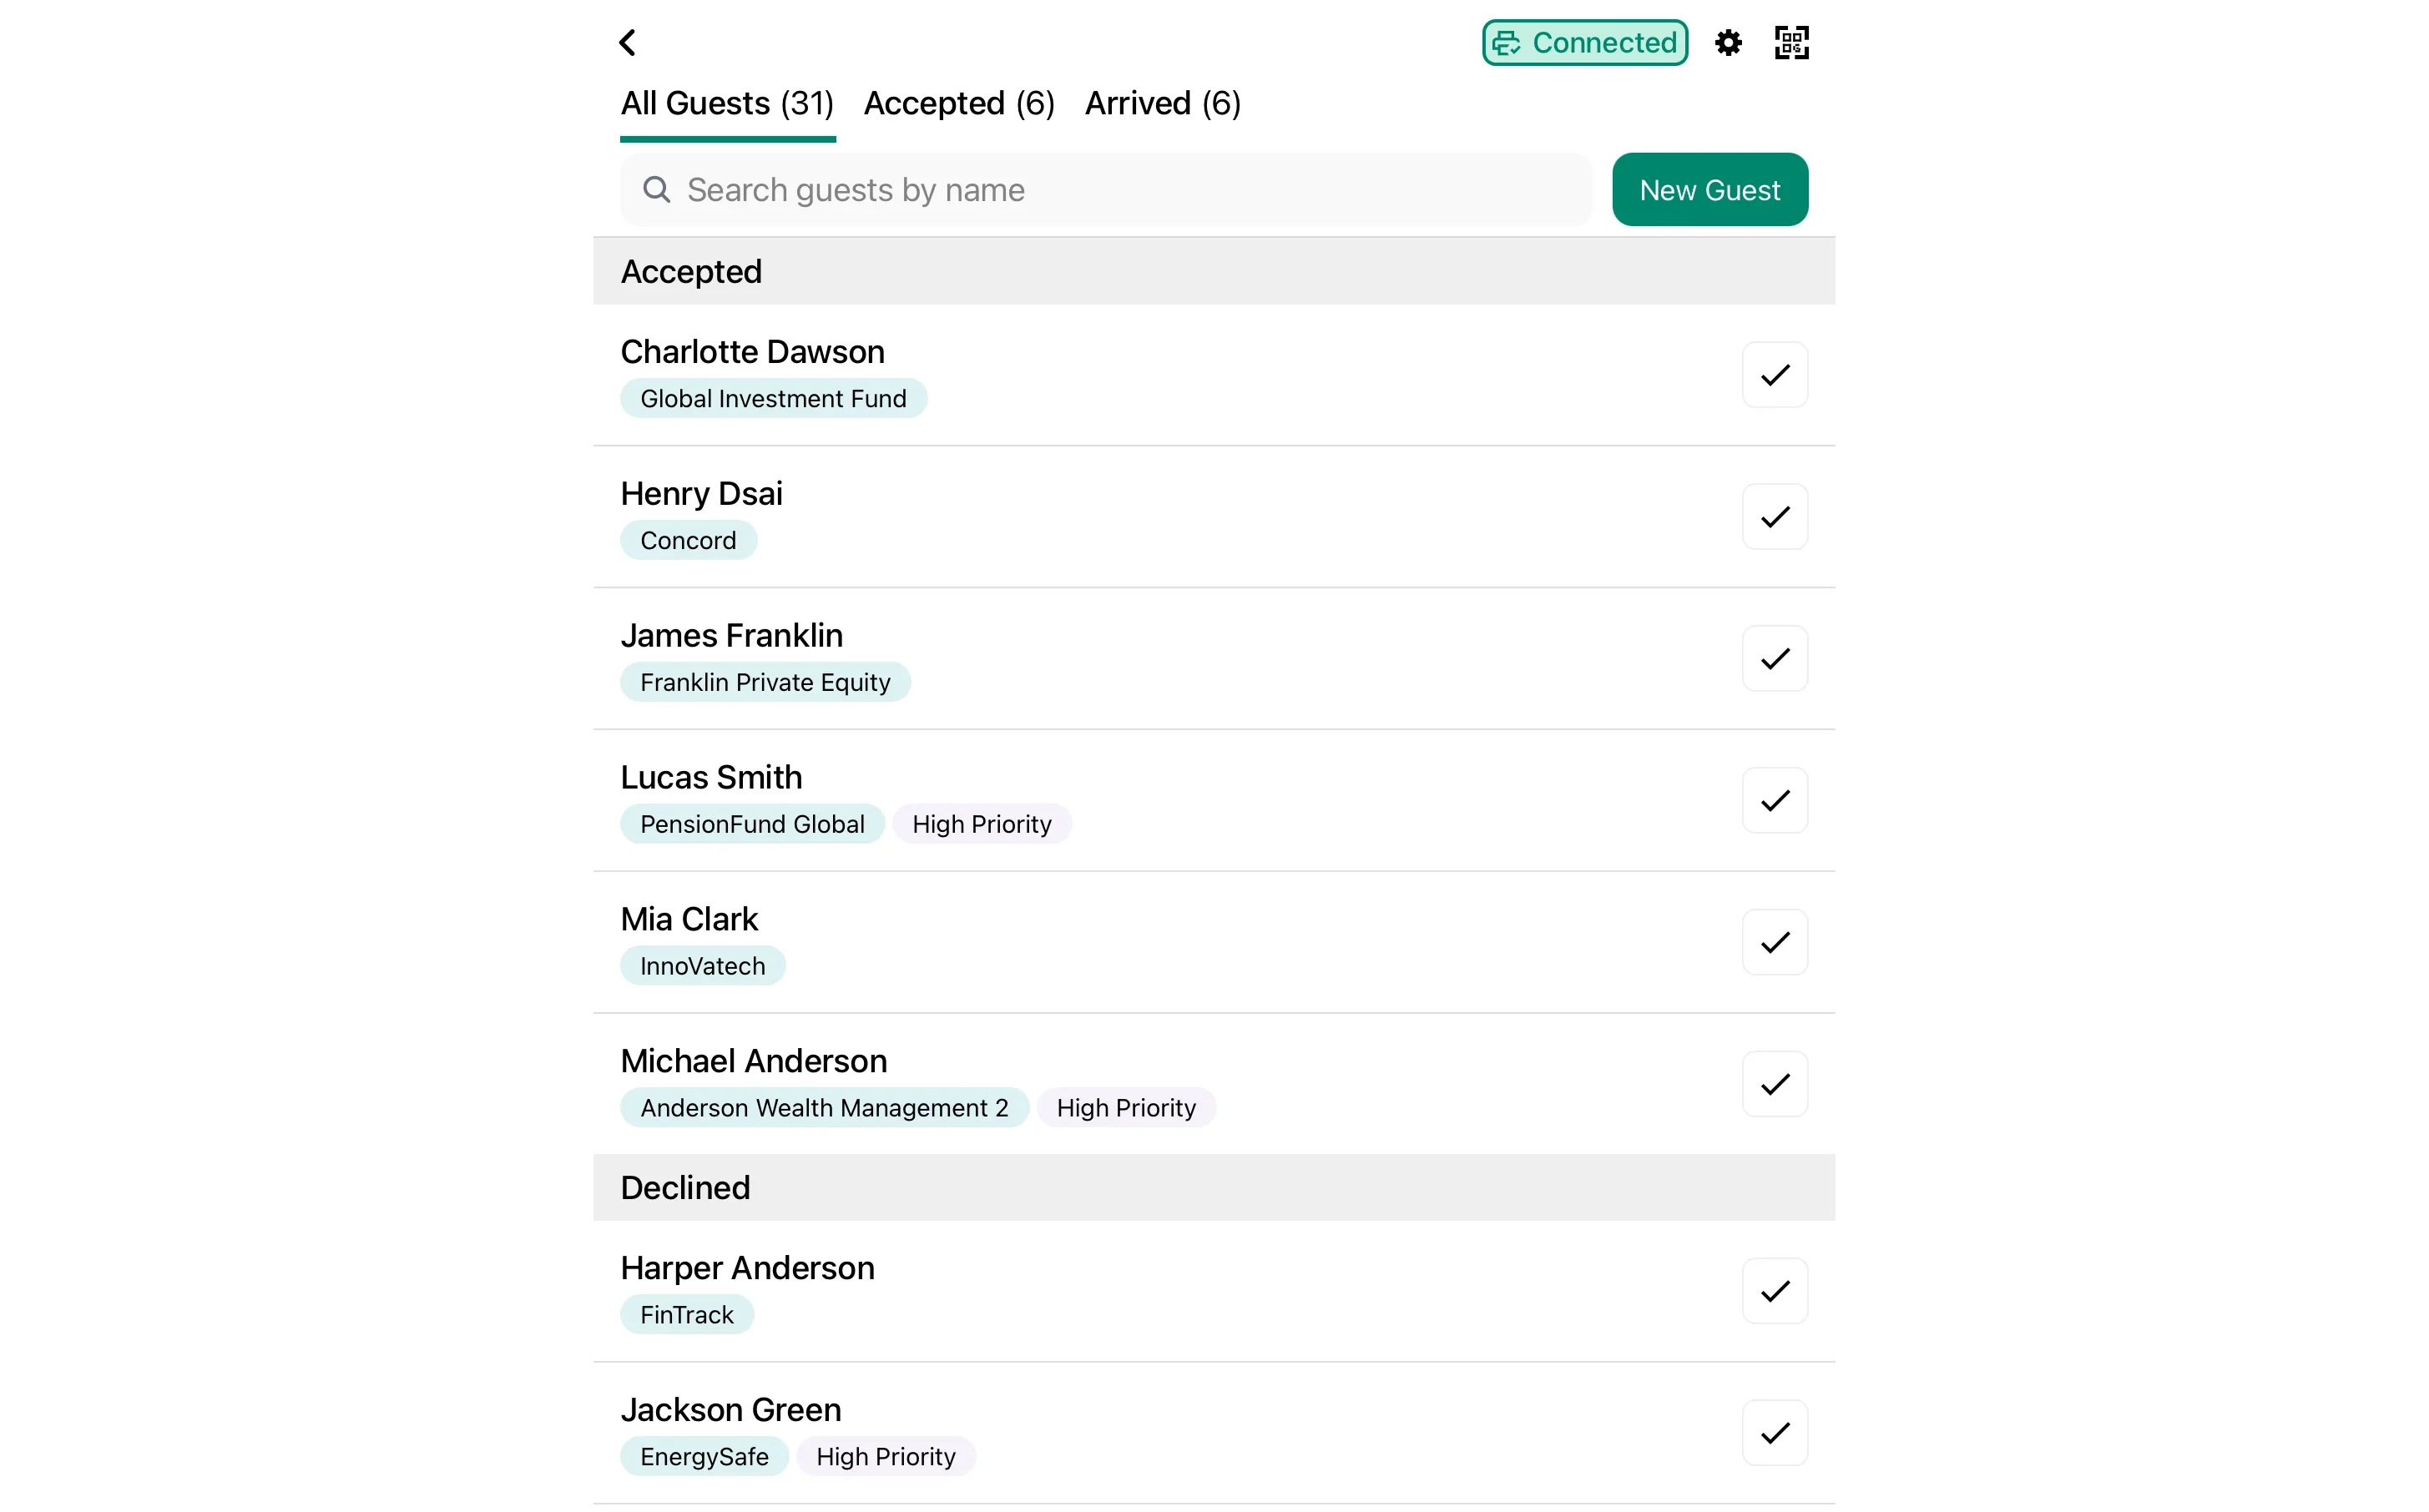
Section titled “Check-In with Wallet Passes”When a guest arrives, they pull up their wallet pass — the same way they’d show a boarding pass at the airport. Your check-in team uses Gatsby’s check-in tools to verify the guest and mark them as attended.
Each pass contains a unique QR code tied to that guest and event, so there’s no confusion about who’s who. Combined with Gatsby’s real-time sync, every device at every entrance sees the same attendance status.
Check-in methods that work with wallet passes
Gatsby Check-In Web App
Search by name or look up the guest when they present their pass. Mark as attended.
Gatsby iOS App
Use the app to search and check in guests. Scan QR codes or search by name.
Self Check-In Kiosk
Guests can check themselves in at an unattended kiosk.
All methods sync in real time. Check someone in at the front door and the bar station sees it instantly.
Automatic Pass Updates
Section titled “Automatic Pass Updates”Change the event date, move the venue, or update your wallet pass design after guests have already saved their passes. Gatsby sends a silent push notification to every device that has the pass, and Apple Wallet pulls the latest version automatically.
Your guests always see current information. No need to resend emails or ask them to re-download anything.
Common Questions
Section titled “Common Questions” Does this work with Android / Google Wallet?
Apple Wallet Pass currently supports iOS devices only. Android guests will still receive the confirmation email with all event details — they just won’t have the wallet pass functionality.
What if a guest removes the pass from their wallet?
They can re-add it by opening the original email and tapping the Add to Apple Wallet button again. Gatsby generates a fresh pass on demand.
Do I need to design a new pass for every event?
Yes, each event has its own wallet pass settings. But if you duplicate an event, the wallet pass design carries over with the rest of your event settings.
Can I attach the wallet pass to invitation campaigns?
Wallet pass attachment is available on Confirmation, Waitlist, and Survey Update emails in Email Settings. It’s not available on manual campaign sends. The best practice is to attach it to your Confirmation Email so guests receive the pass immediately after they RSVP.
What information appears on the pass?
The pass displays your event name, date, time, location, the guest’s name, and a unique QR code for check-in. It also shows your logo text (typically your organization name) and any custom images you’ve uploaded.
What happens if I change pass settings after guests have added it?
Their passes update automatically. Gatsby sends a silent push notification to every device that has the pass, and Apple Wallet pulls the latest version with your new colors, images, or event details.
Is there a limit to how many passes I can generate?
One pass is generated per guest per event. There’s no additional limit — if your event has 500 confirmed guests, Gatsby generates 500 unique passes.