This is the full developer documentation for Gatsby Events
# Gatsby | Event Management for Relationship-Driven Teams
> Invitations from your team's real inboxes. Branded RSVP pages. Seating charts, check-in, and guest profiles that carry forward across every event. Syncs to your CRM.
Email
## Invitations from your inbox.
Sent from real email accounts
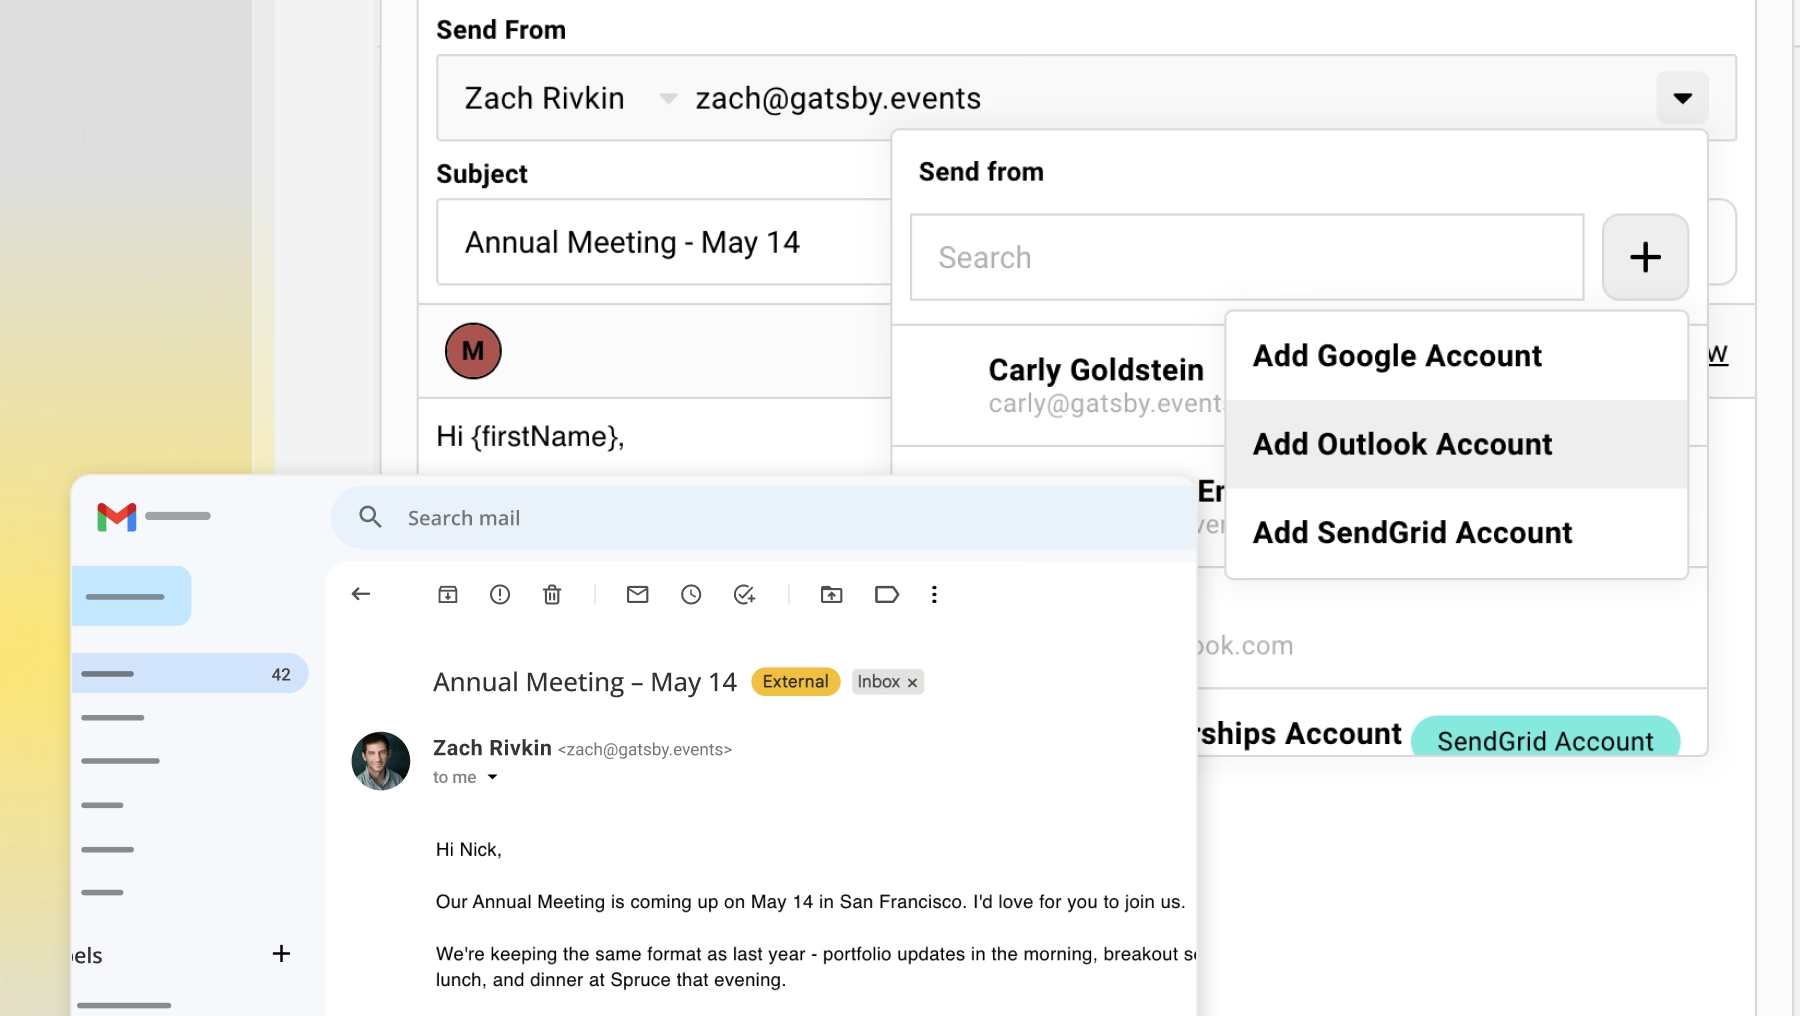
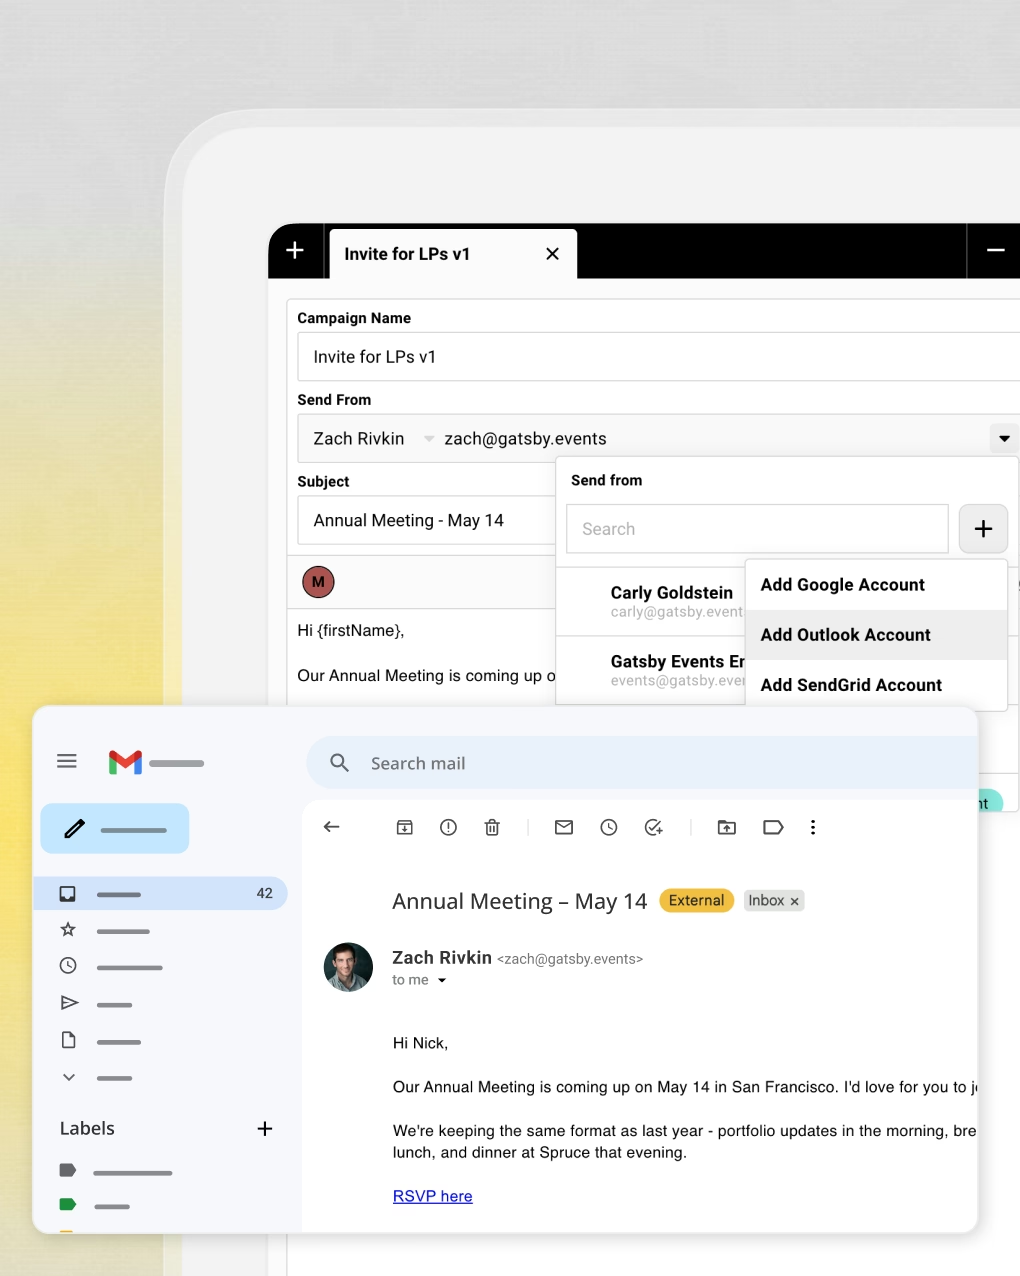
Every invitation goes out from your partner's Gmail or Outlook. The from address is someone your guest knows and trusts.
In their sent folder
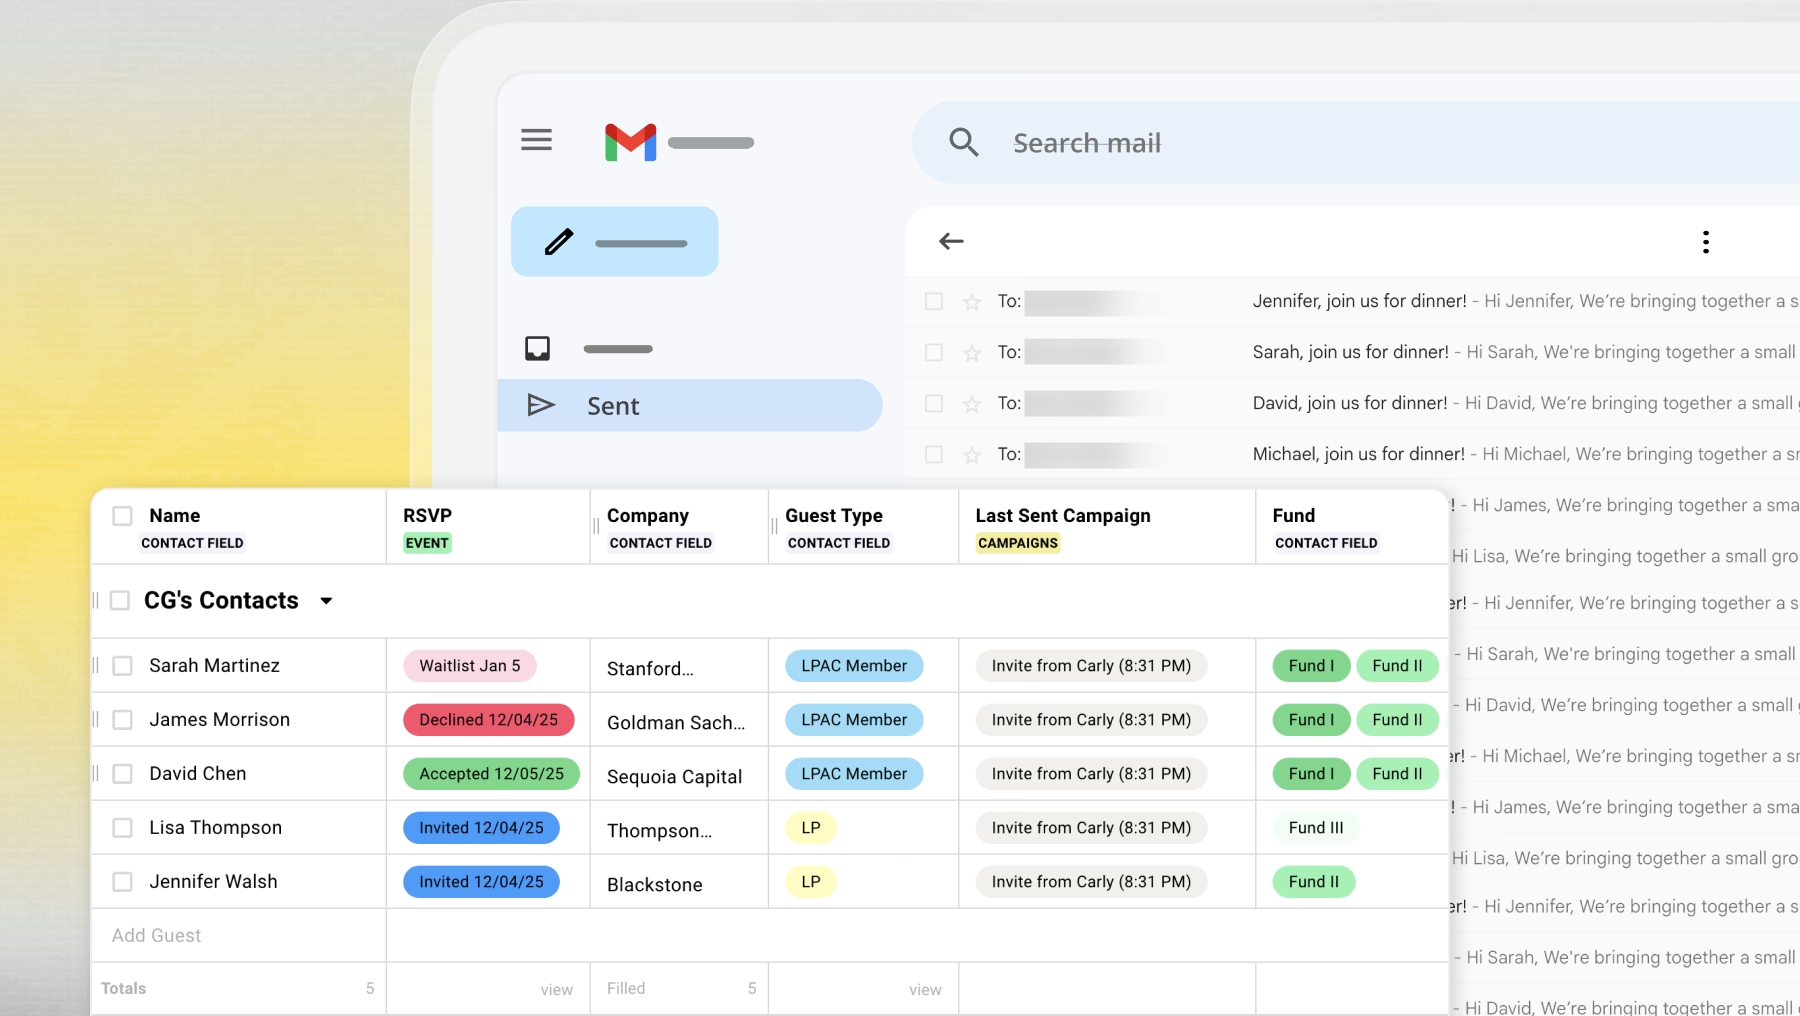
The invitation shows up in your partner's sent folder. Replies go to them directly. Gatsby sends through their actual email account.
Your team controls the timing
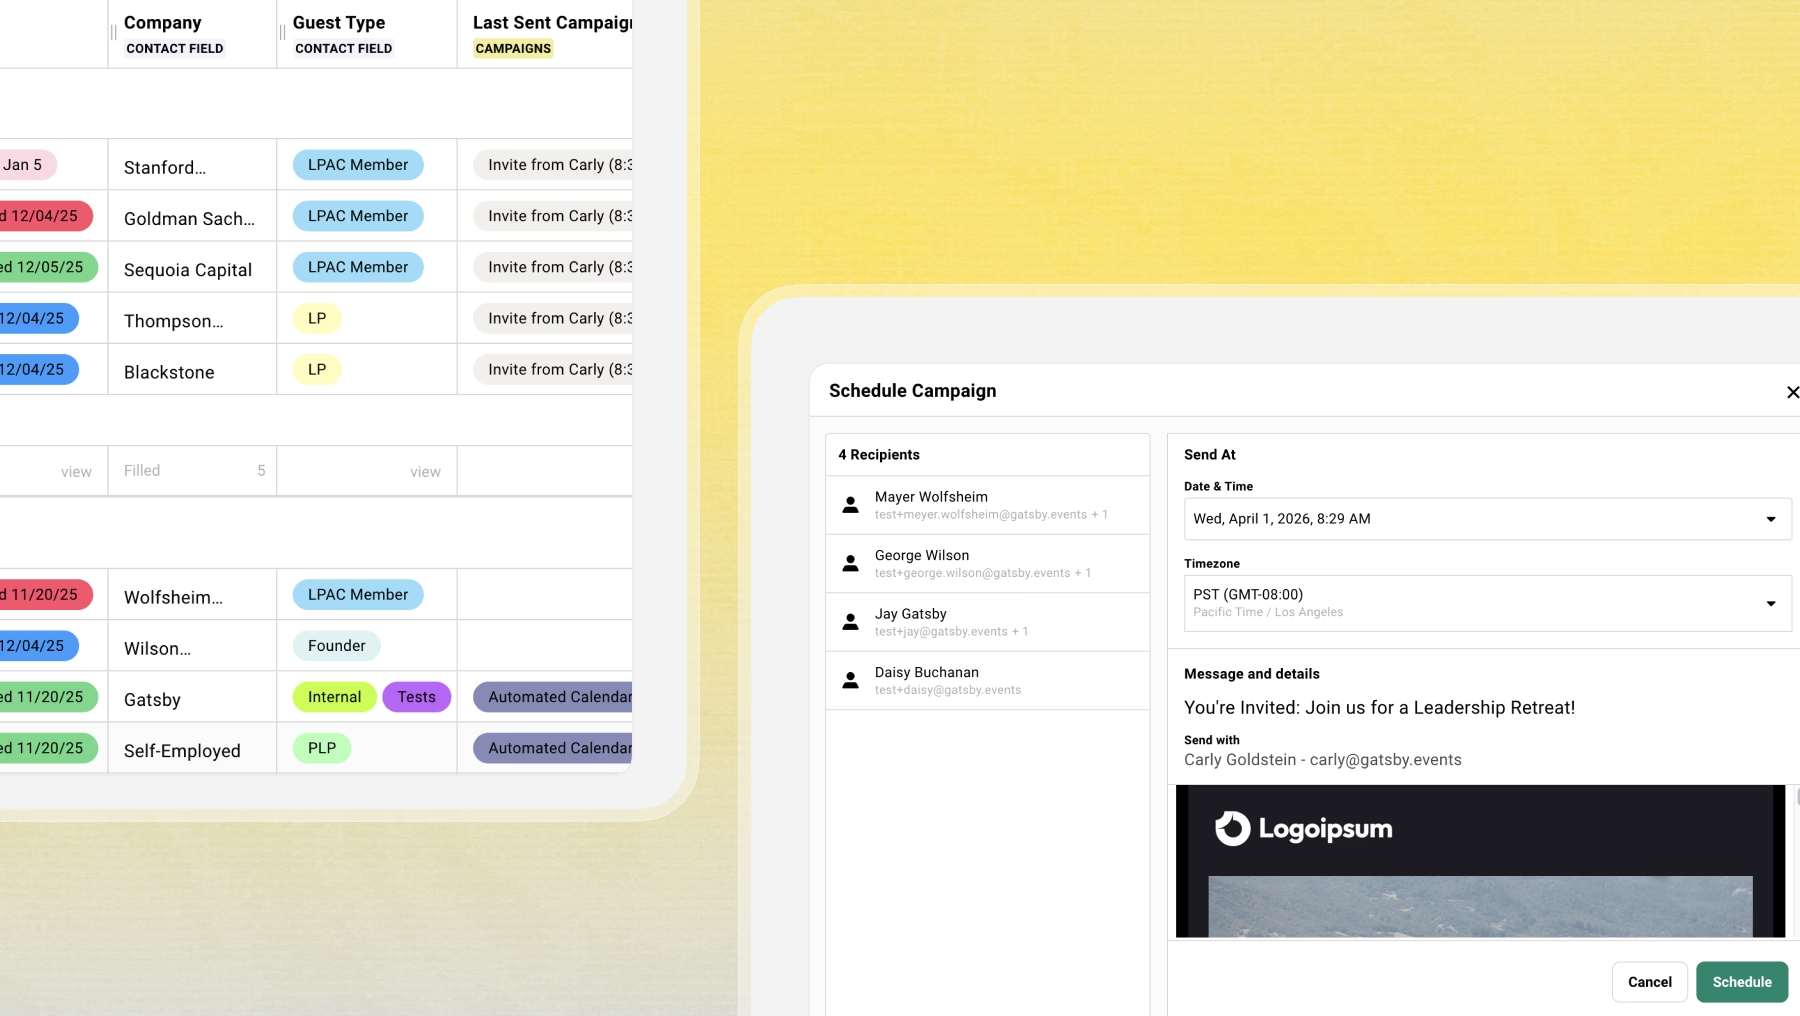
Your ops team queues invitations and schedules sends. The relationship owner's name is on every email. They never have to handle the actual send.
Guest Profiles
## Recognition, not just registration.
Profiles built for complex guests
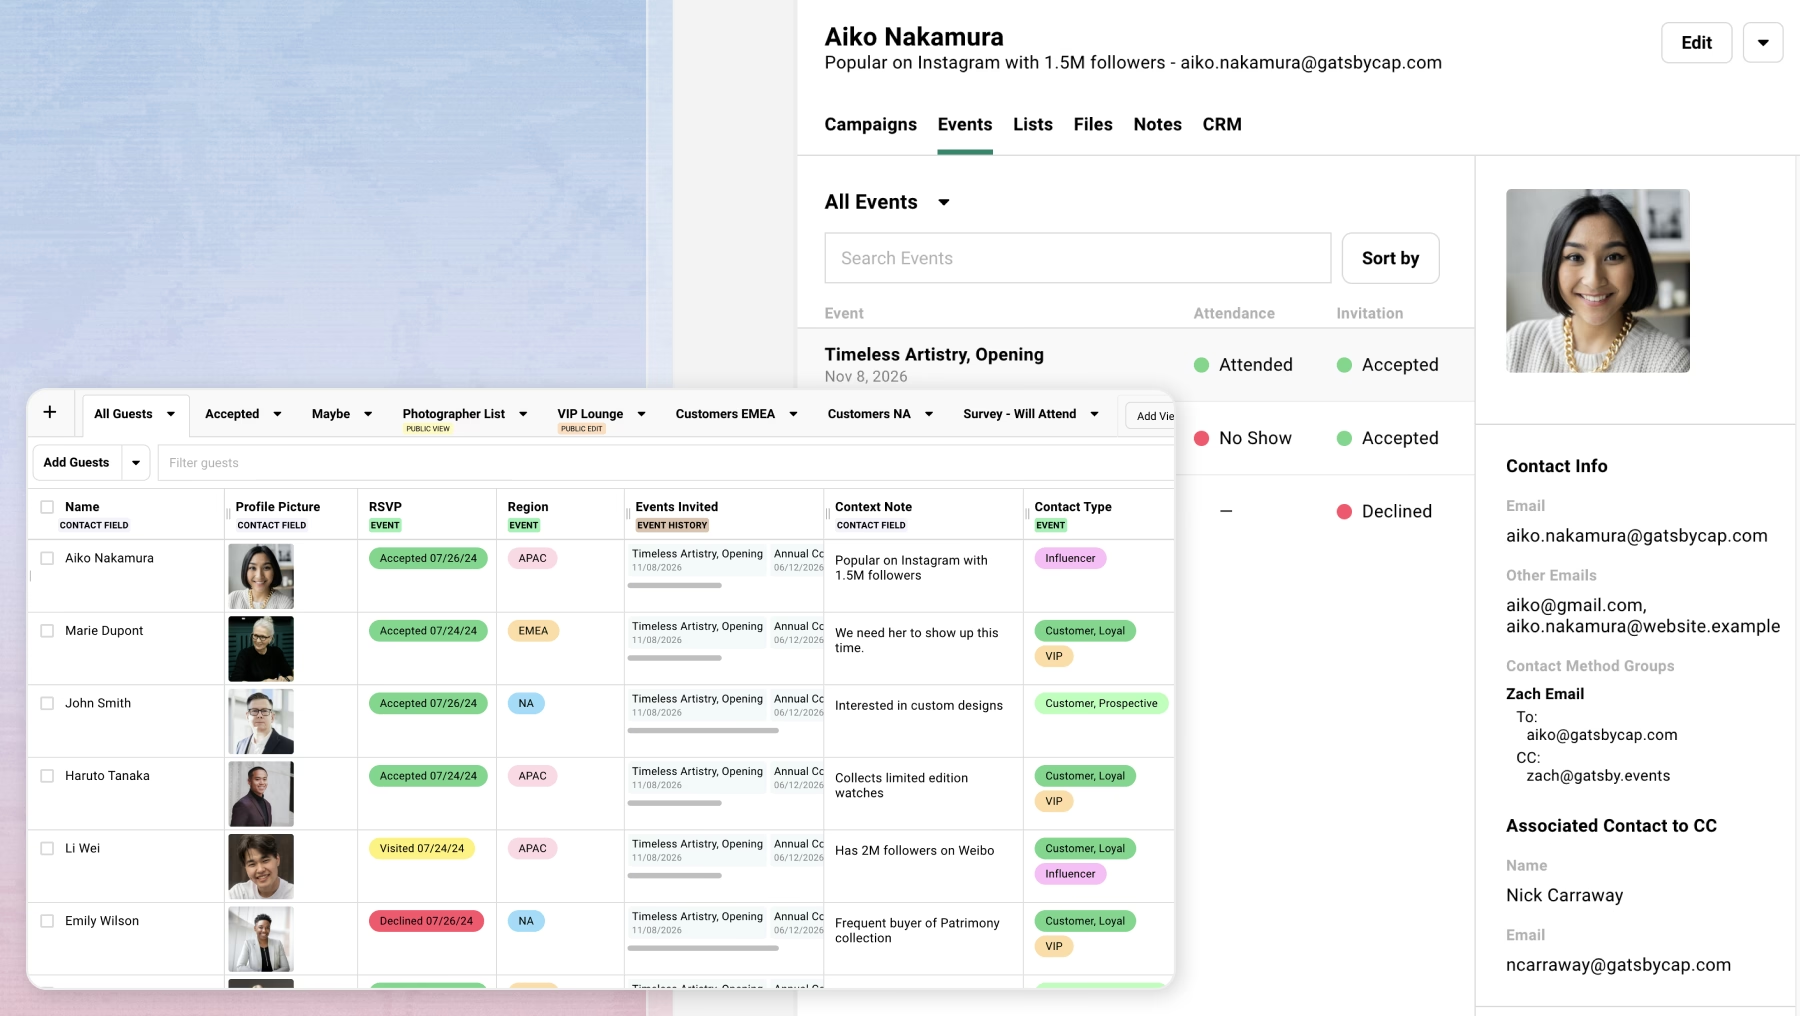
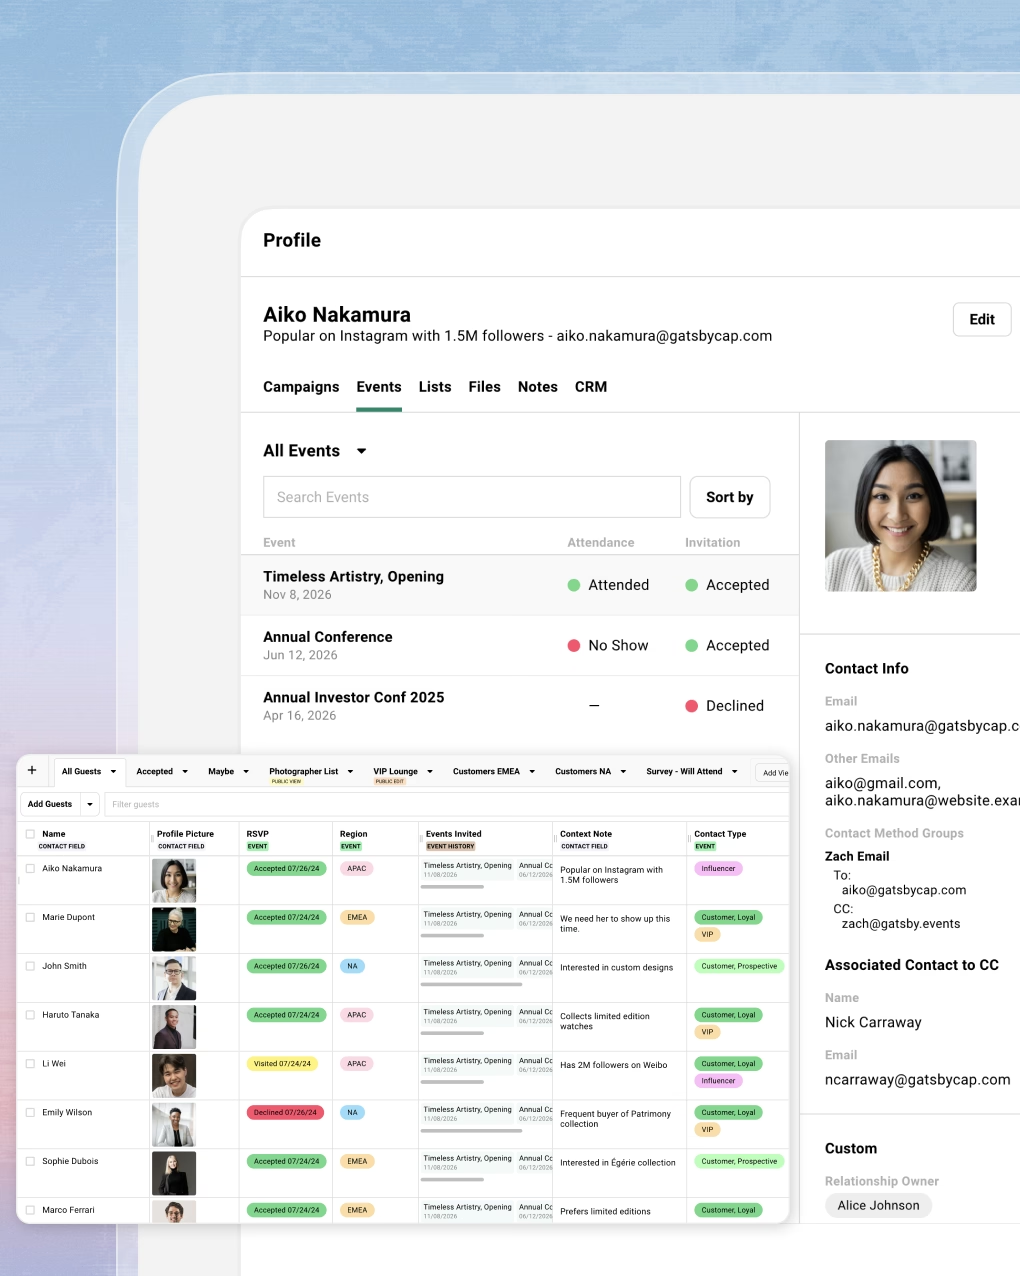
Multiple emails per contact. EAs who get CC'd on certain events. Event history that spans years. Your guests aren't simple records.
Links that know who they're for
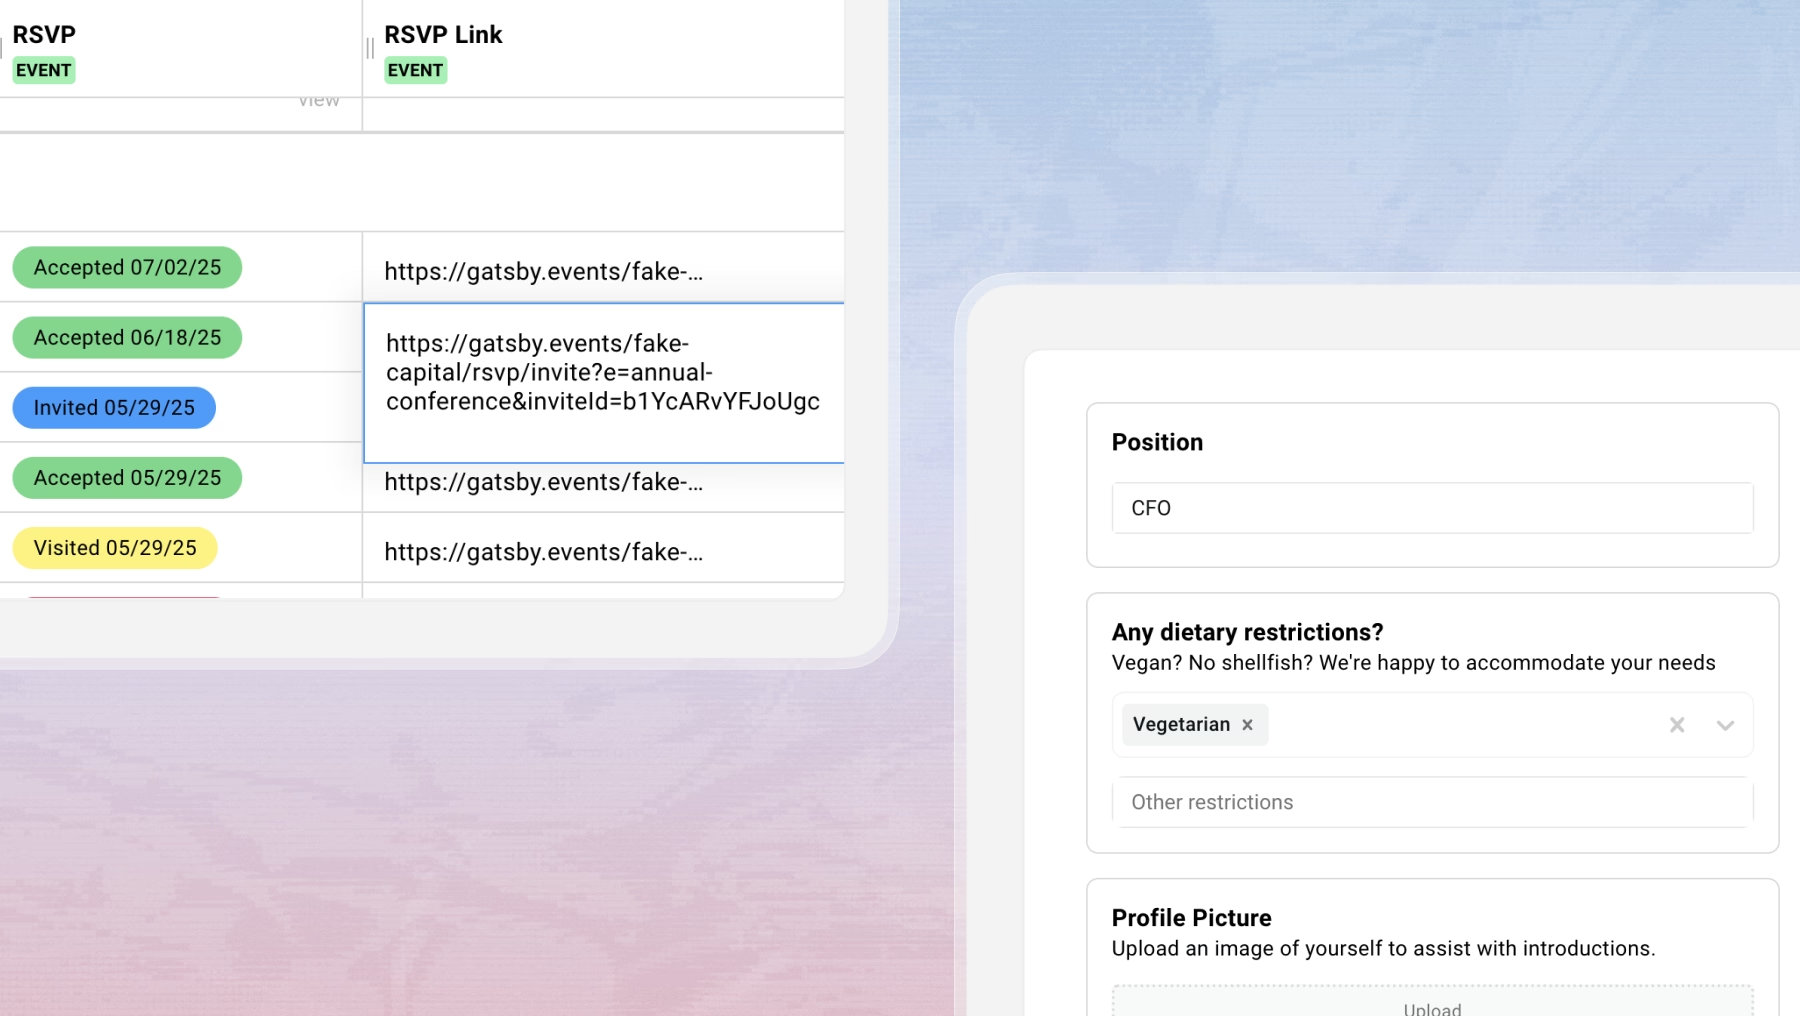
Information you've collected is already there. Guests confirm or update, not re-enter. No asking if they've attended before when you already know.
Forms that adapt to each guest
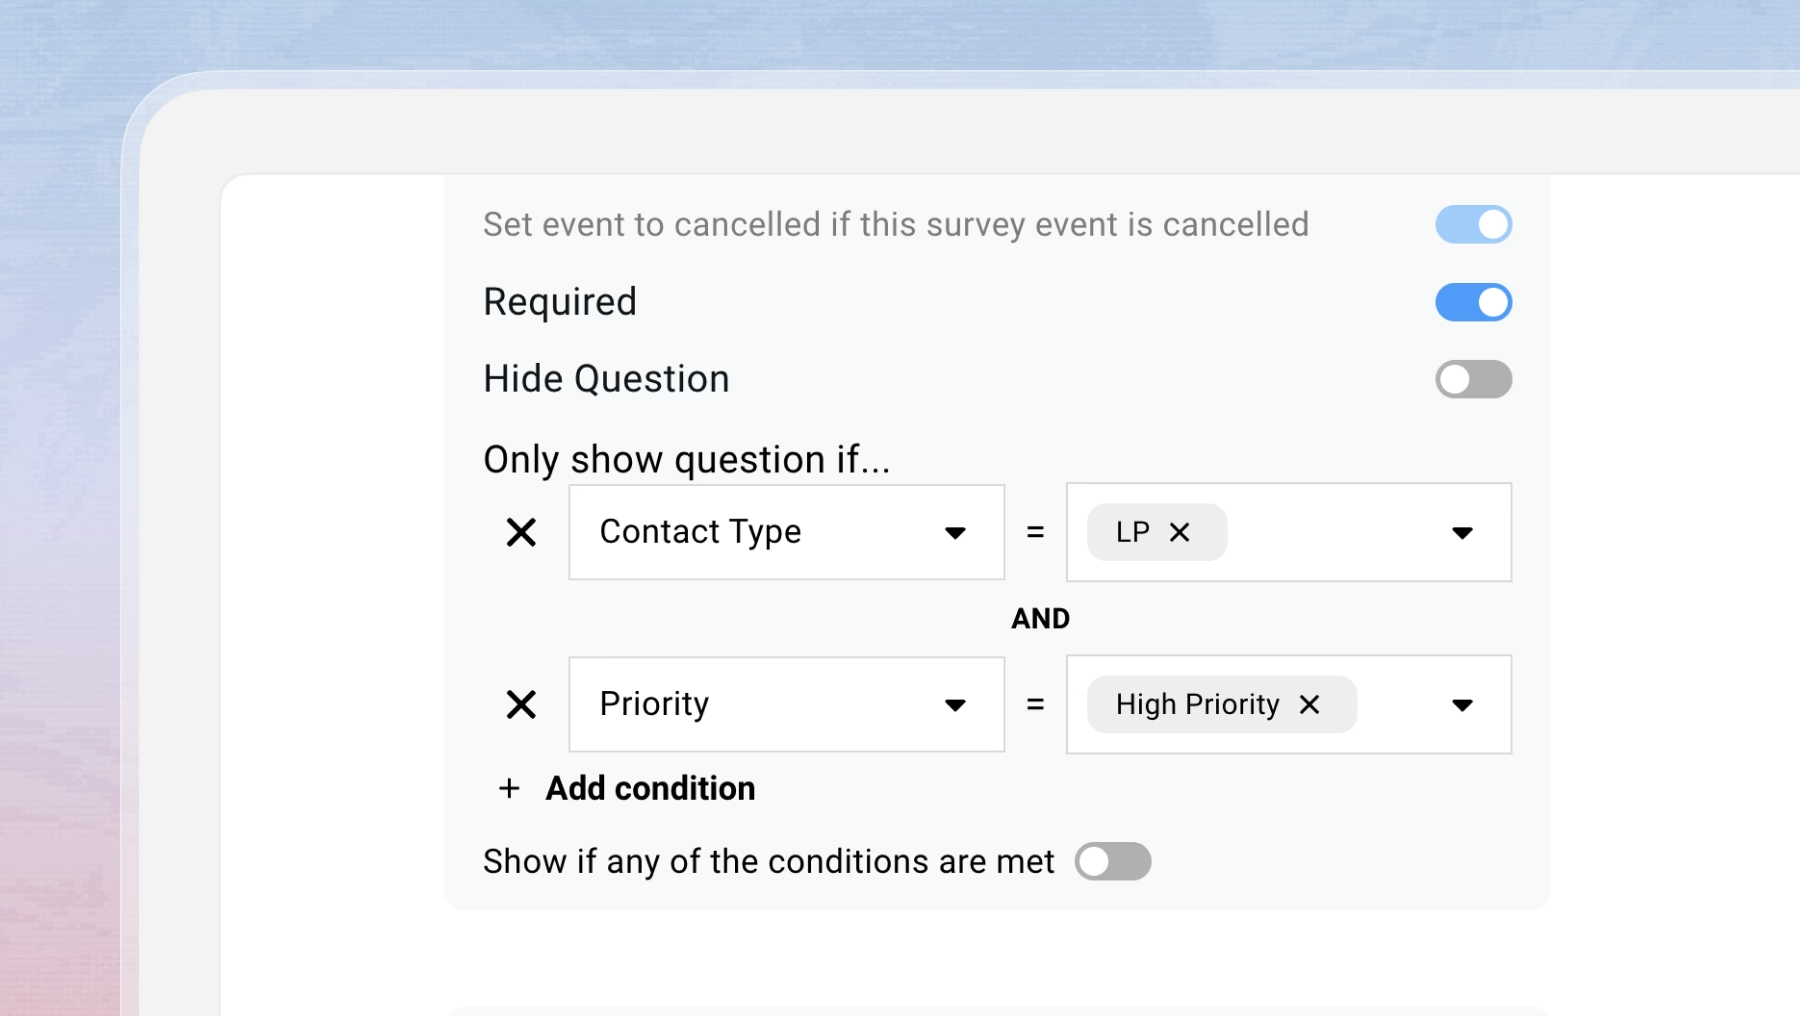
Show different questions to different guests. Skip fields you already have answers for. A first-time attendee and a returning LP see different forms.
Registration Portal
## Your event’s first impression shouldn’t be our logo.
Gatsby disappears
Your logo, fonts, colors, domain. The registration page looks like it came from your firm, not from software you subscribed to.
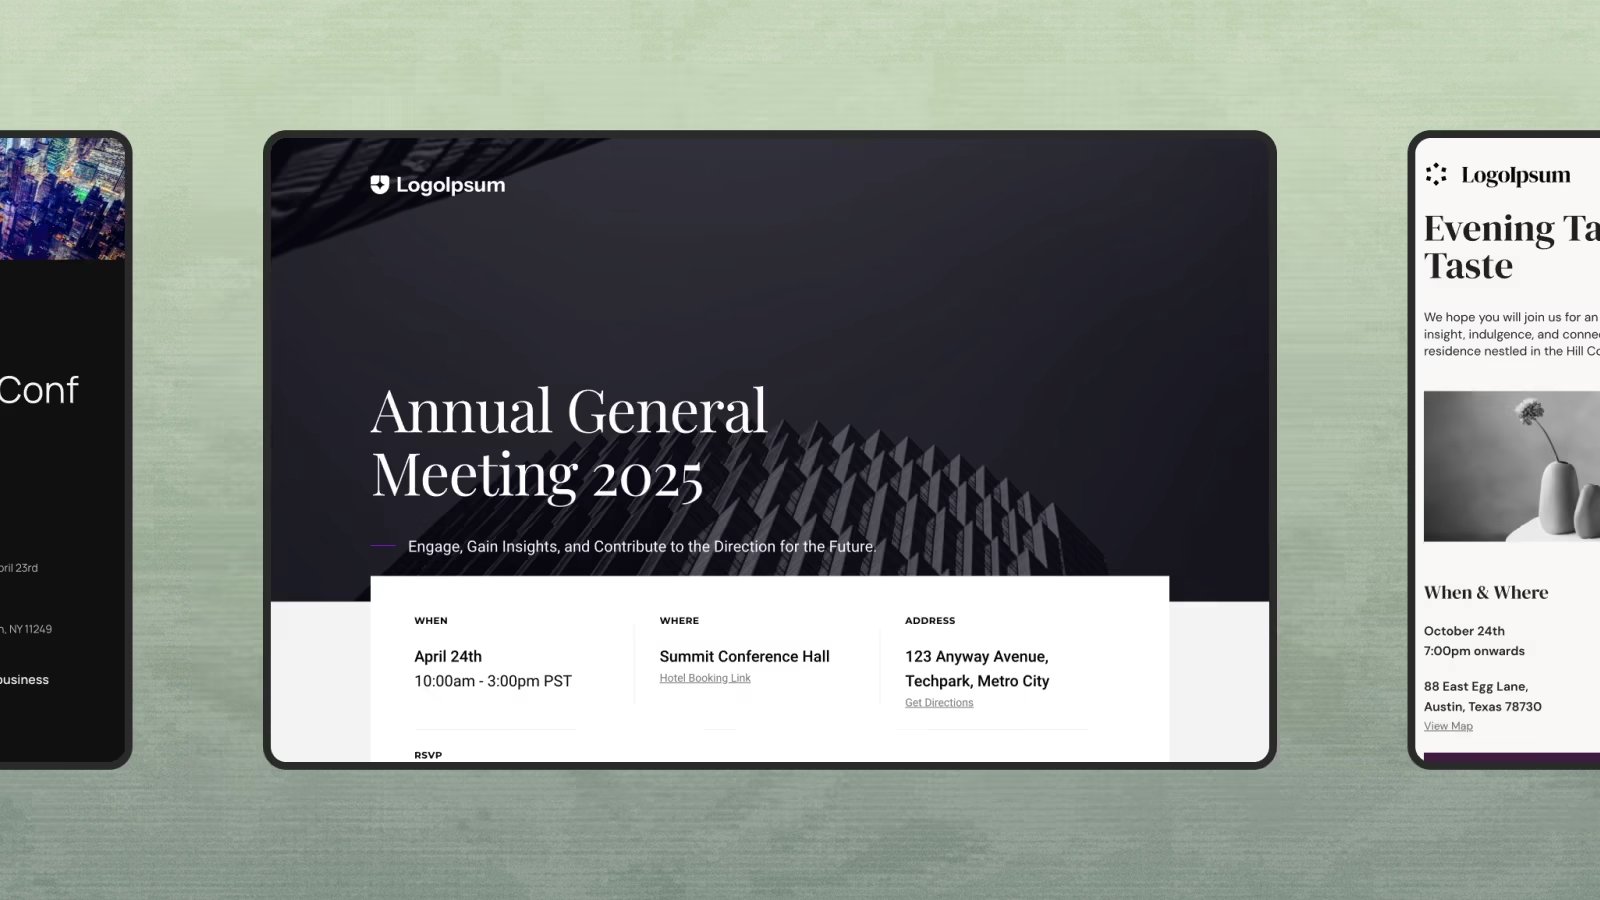
Built and updated by your ops team
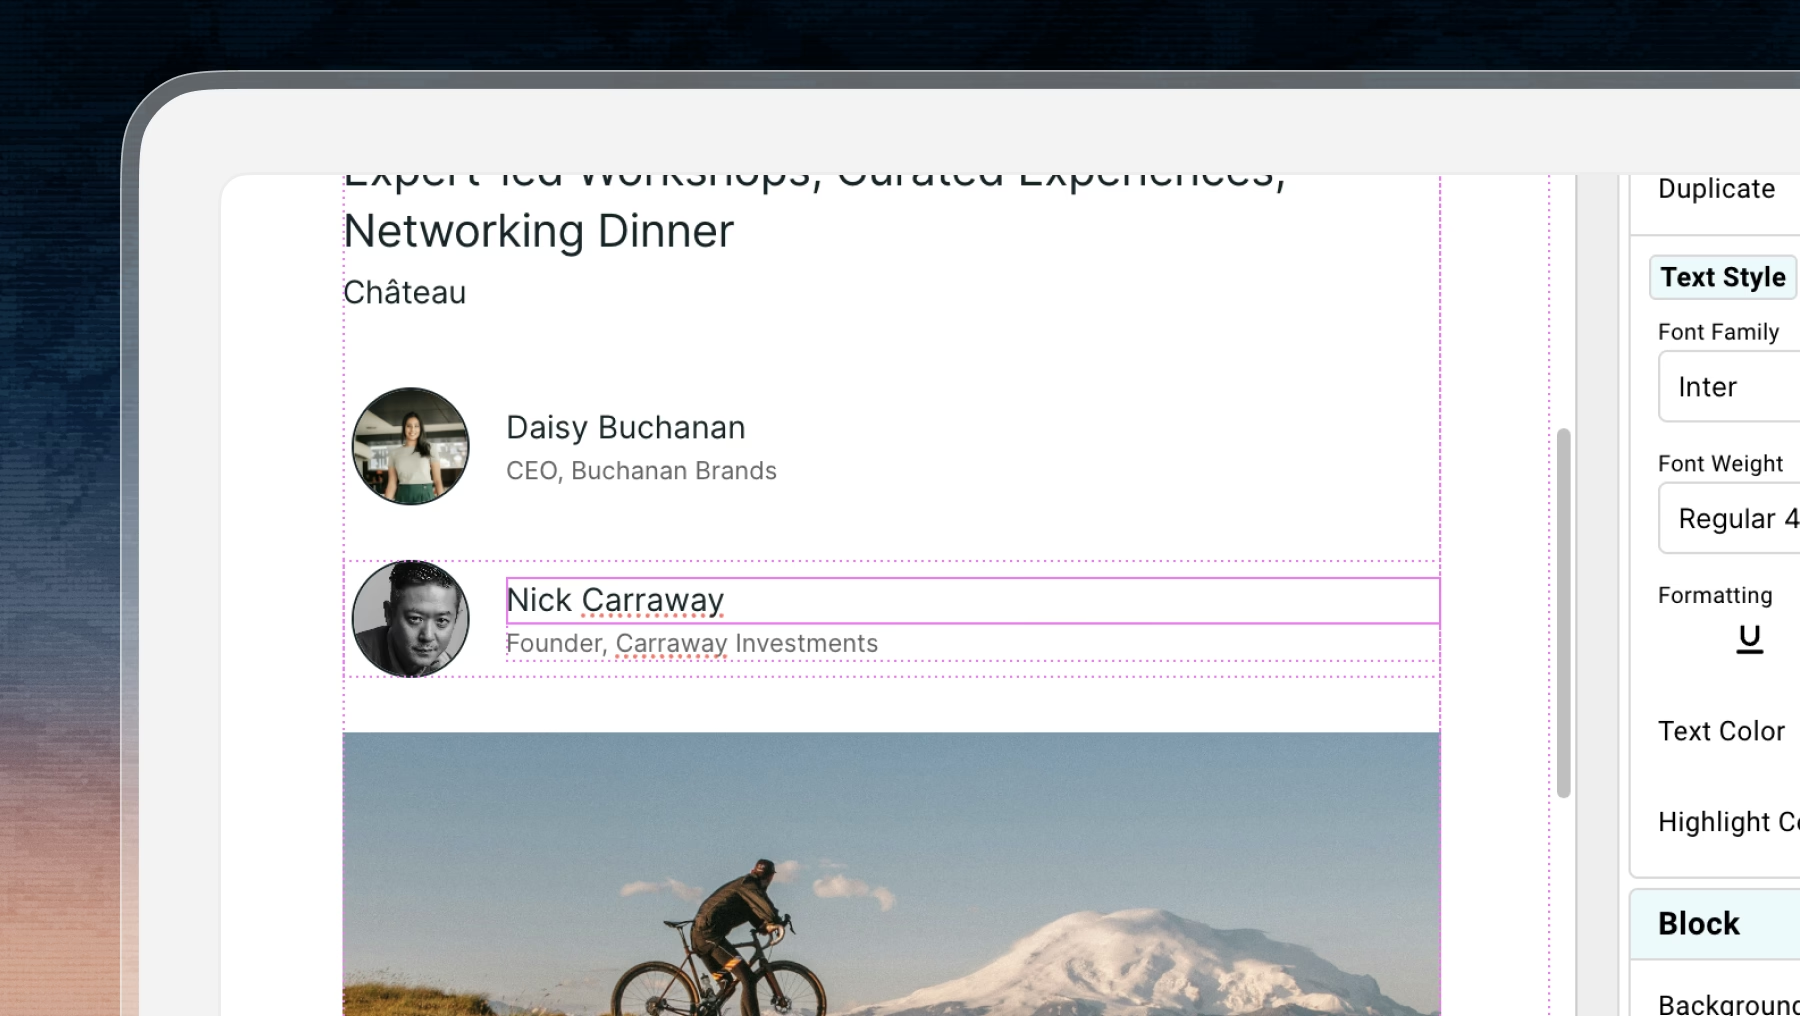
Your team creates polished landing pages directly. Agendas, parking details, speaker bios. Update anything, anytime.
Templates that stay on brand
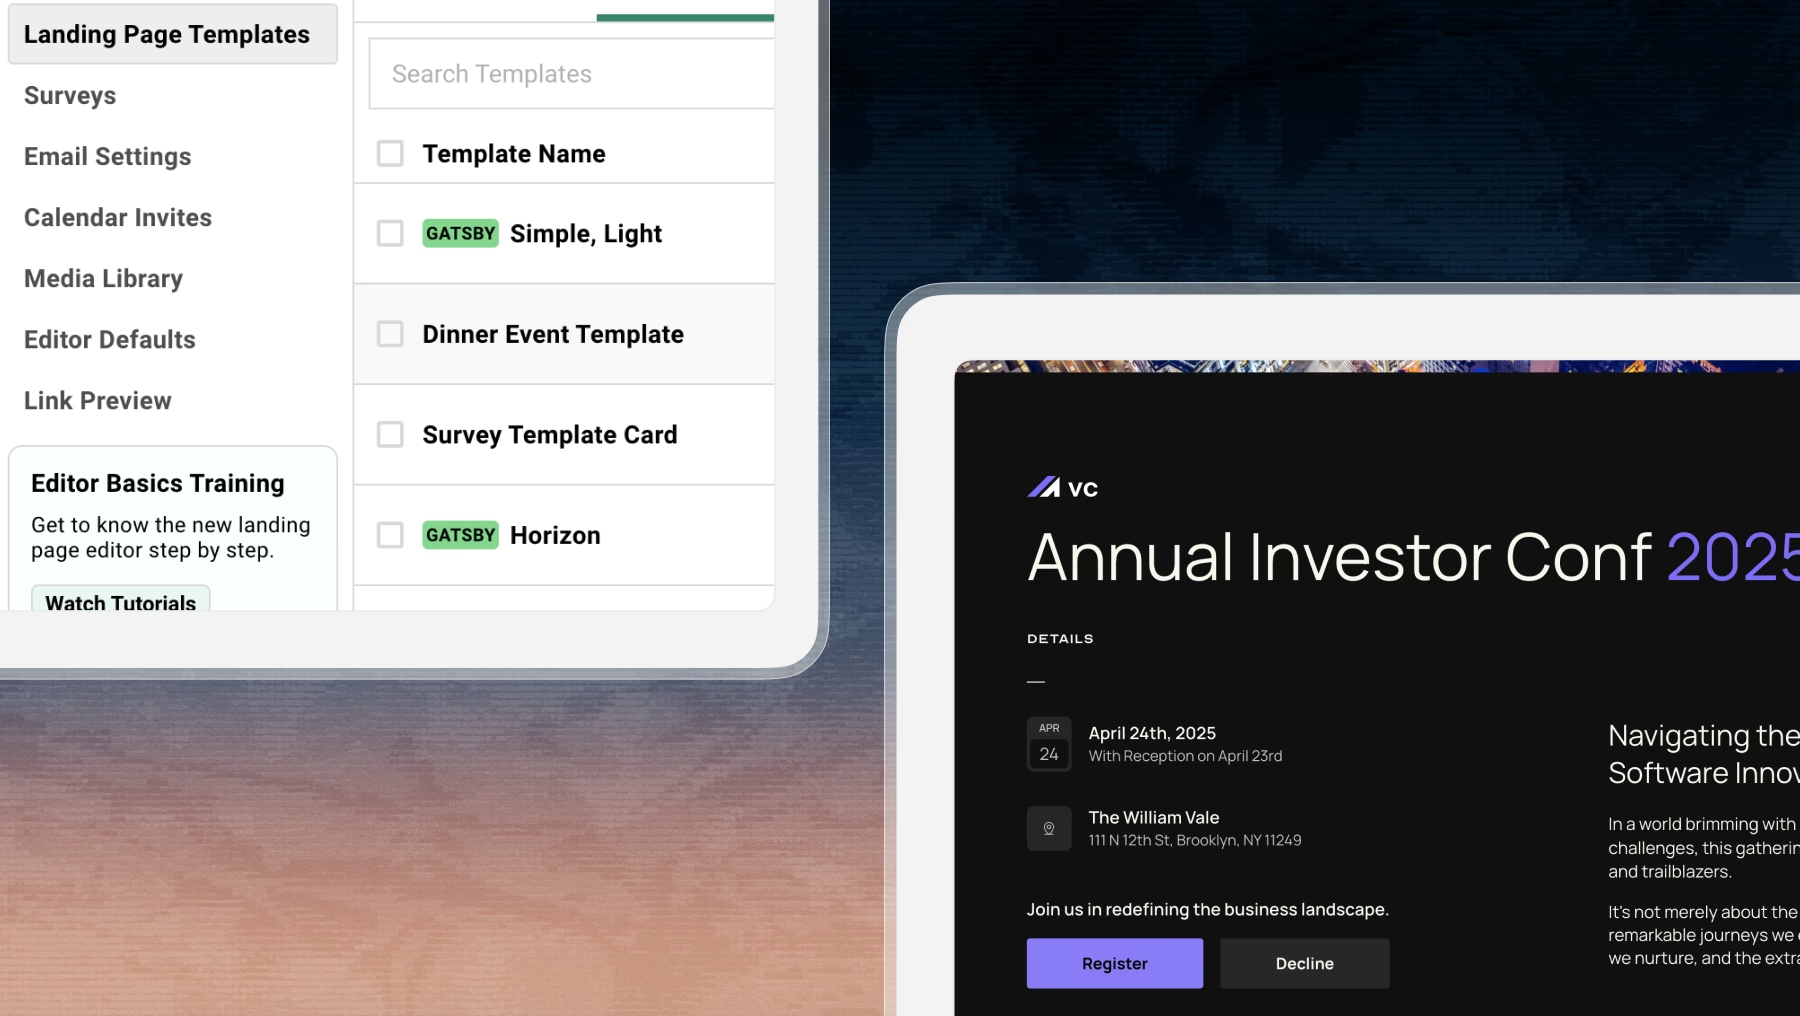
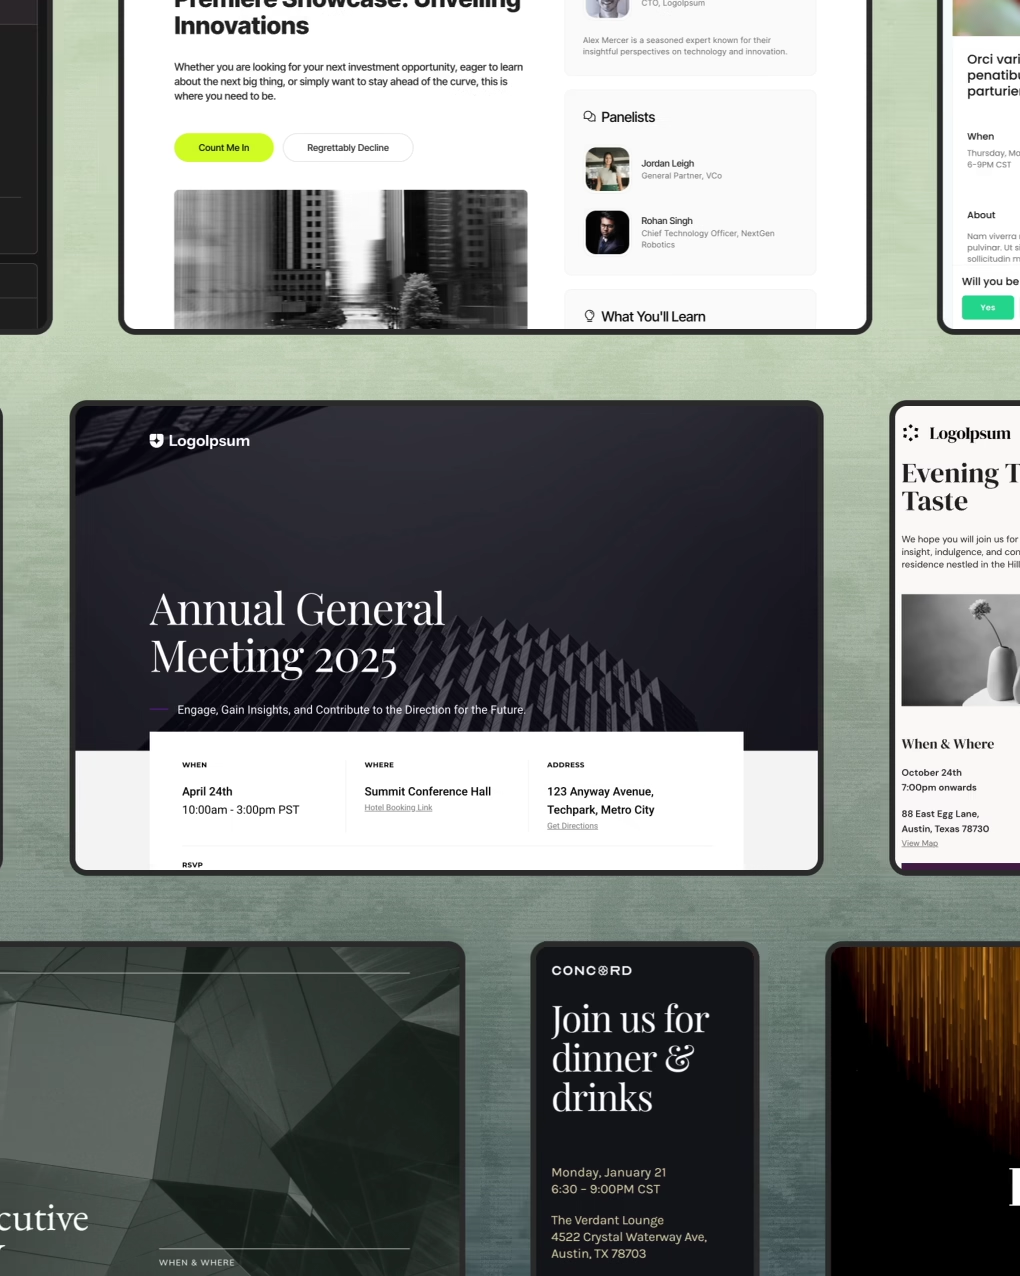
Save your setup and reuse it. Your annual meeting next year starts from this year's template, not a blank page.
# 404 Page Not Found
> That page has moved or the address is wrong.
## 404: Page Not Found
[Section titled “404: Page Not Found”](#404-page-not-found)
That page has moved or the address is wrong. If you know what you’re after, search at the top of the page.
### [Platform](/platform/)
[How each part of Gatsby works: contacts, events, registration, campaigns, check-in, and seating.](/platform/)
### [Playbooks](/playbooks/)
[Start-to-finish walkthroughs for real scenarios, from your first event to handling a venue change.](/playbooks/)
### [Examples](/examples/)
[Live registration pages for annual meetings, executive dinners, and advisory boards. See what your guests see.](/examples/)
Get support
# Quick Events | Beautiful Invitations for Every Event You Host
> Send a premium, mobile-first invitation in minutes. Keep every RSVP, guest profile, and privacy control in one system, from a dinner for ten to a summit for a thousand.
The Current Way
## You already host these events. You just host them somewhere else.
[Section titled “You already host these events. You just host them somewhere else.”](#you-already-host-these-events-you-just-host-them-somewhere-else)
The partner dinner for twelve. The portfolio happy hour. The LP salon on a Tuesday. Nobody opens the full event builder for those, because building a landing page and configuring a campaign for a dinner feels like filing paperwork to buy coffee.
So those events go to a consumer invite tool. It takes four minutes, the page looks fine, and the job gets done.
Then someone asks who came to the March dinner
The answer is in a different tool, under someone else’s login, and it never made it onto the guest’s profile in Gatsby. Six months later you are inviting an LP to a summit with no record that they already sat next to your managing partner at dinner.
And the invitation came from an address your guest does not recognize
A generic sender, a page with someone else’s branding at the bottom, and an unsubscribe footer on a note that was supposed to read like a personal invitation from a partner.
The Cost
## Every event you run elsewhere is a hole in your guest history.
[Section titled “Every event you run elsewhere is a hole in your guest history.”](#every-event-you-run-elsewhere-is-a-hole-in-your-guest-history)
Gatsby exists because relationship data compounds. A dietary restriction captured in March is still there in September. Attendance history sits on the contact record, so the person planning the next event knows who has already been in the room.
Splitting your small events into a second tool breaks that in four specific ways.
Guest context stops carrying forward
Preferences and notes you collected for the dinner live outside the profile you use for everything else. Your team re-collects information they already had.
Your privacy posture changes per tool
Guest lists that are confidential in Gatsby end up in a system with different sharing defaults, different access levels, and a different security review.
Reporting only covers half your events
You can report on the annual meeting and the summit. The twenty dinners that did the actual relationship work are missing from the number you take to your partners.
Nobody owns the second tool
It gets paid for on a personal card, the account belongs to whoever set it up, and when they leave the firm the guest lists leave with them.
The Solution
## Four steps, and the only decisions left are the ones you actually want to make.
[Section titled “Four steps, and the only decisions left are the ones you actually want to make.”](#four-steps-and-the-only-decisions-left-are-the-ones-you-actually-want-to-make)
Quick Events is a separate, deliberately narrow flow inside Gatsby. Details, Design, Guests, Invite. Required fields are the name, the date, the timezone, and the location. Everything else has a sensible default.
Layout, spacing, motion, and mobile behavior are handled. You pick a template, drop in your logo, and the typefaces on offer are the ones already tuned to that layout. Colors work the same way, with your own brand color available as a sixth option when a template’s palette isn’t yours.
Add a photograph of the room, the vineyard, or last year’s dinner and it runs across the top of both the guest page and the invitation. You drag it to frame the shot you want, and the same crop lands in every inbox, Outlook included.
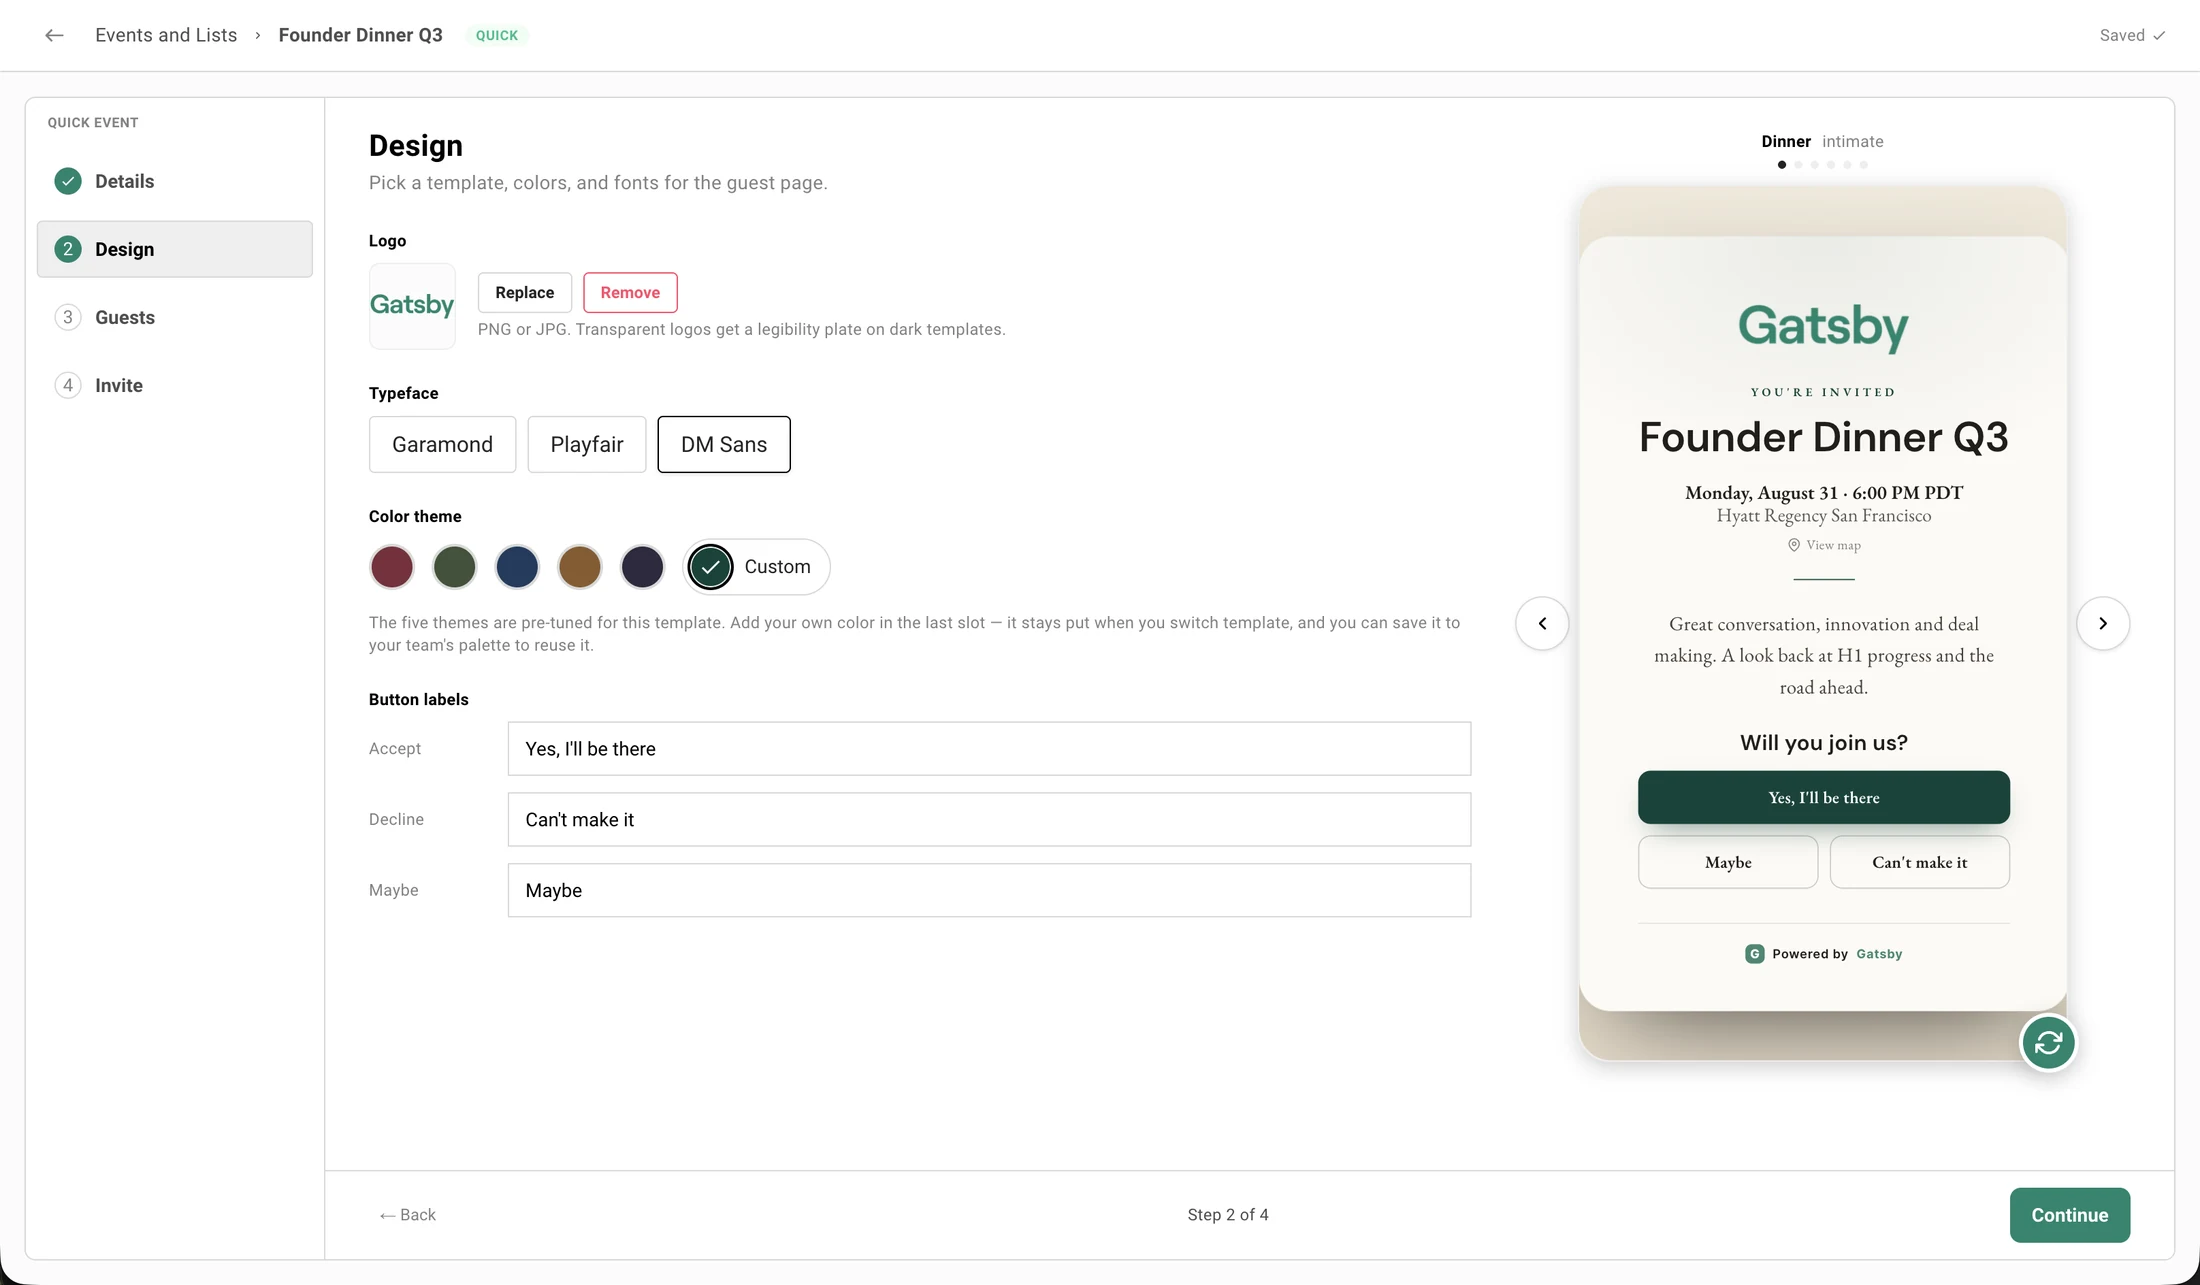
The guest page reads live event data. Change the name or the note and anyone who opens their link sees the change, with no publish step.
The invitation comes from your address
Send from a linked Google, Outlook, or SendGrid address, so the note arrives from the person whose relationship it is.
Every guest gets a private link
Personal RSVP links are unique to one person and not transferable. A public link exists if you want one, and it stays off until you turn it on.
Capacity, waitlist, and a deadline
Three toggles. Cap the room, divert the overflow to a waitlist, and close RSVPs on a date. Enforced on the server, not just in the browser.
You can see what failed to deliver
Delivered, opened, accepted, and failed. A bad mailbox is marked undeliverable so you fix the address instead of burning another send on it.
Follow up by answer, not by list
Write to the people who accepted, declined, said maybe, or never answered. Load a suggested note, edit it, send it as yourself or in the event’s branding.
Change the date without a fire drill
Move the venue or the time and Gatsby offers to tell the people already invited, with the old and new details side by side. Skipping the notice is a real option.
See it on your next dinner
Thirty minutes. We will build one with you, using your branding.
The Guest Experience
## Your guest gets an invitation, not a ticket confirmation.
Six templates, each with its own typeface set, palette, and arrival animation. Your photograph runs full width across the top, with your logo beneath it on a contrast plate if the template is dark, so it stays legible either way. It opens full width on a phone, because that is where it will be opened.
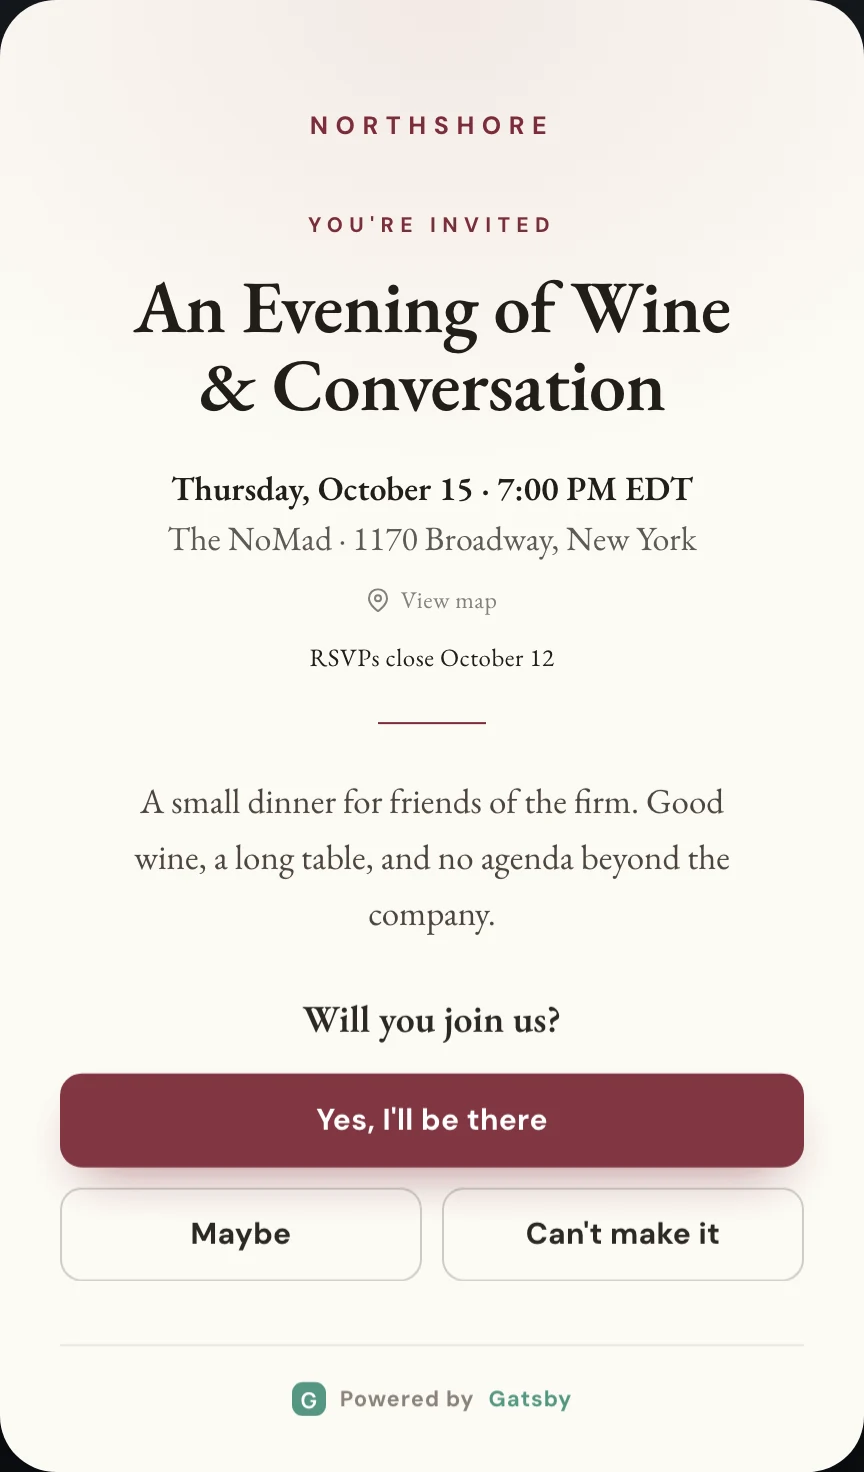
Dinner
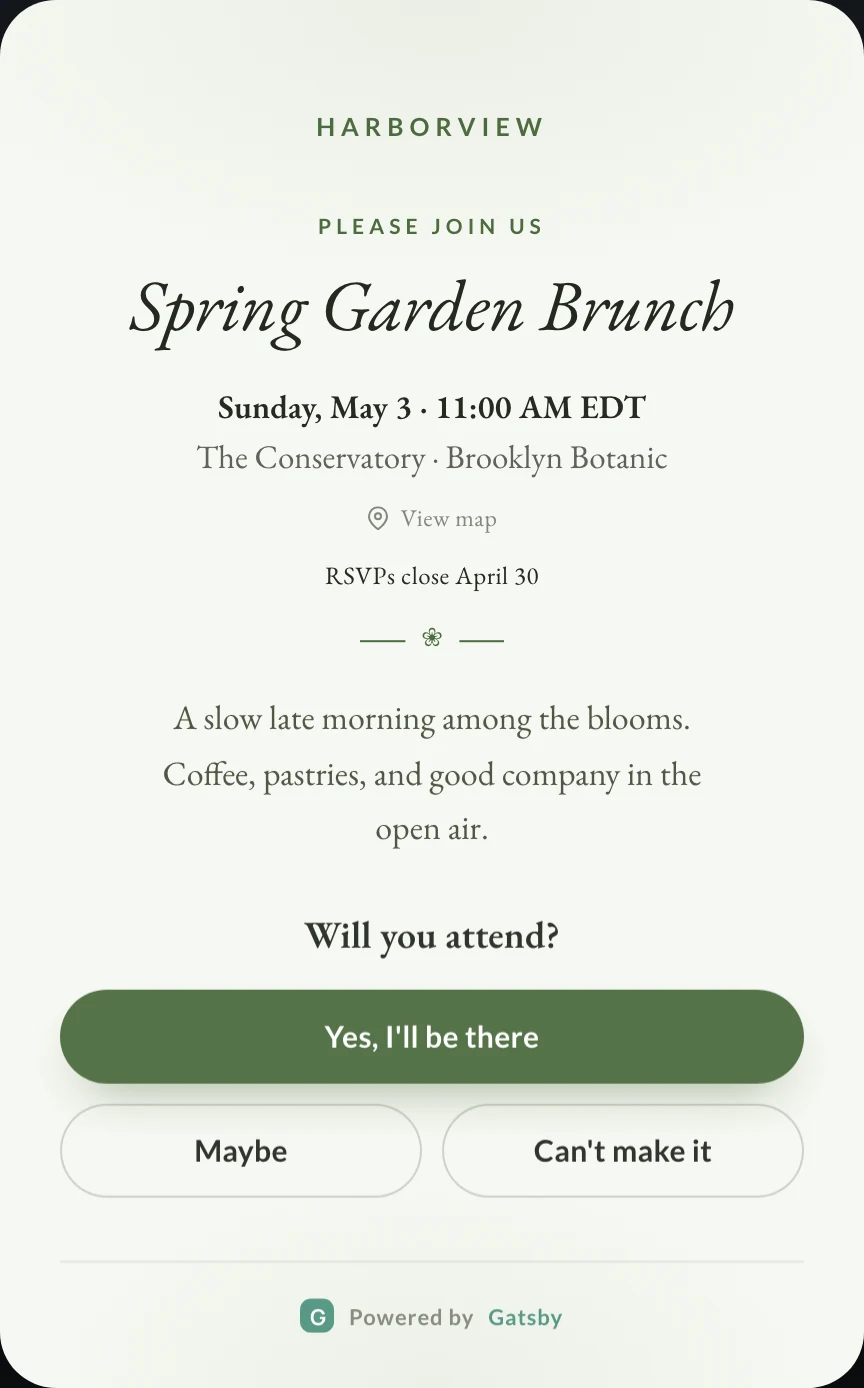
Garden
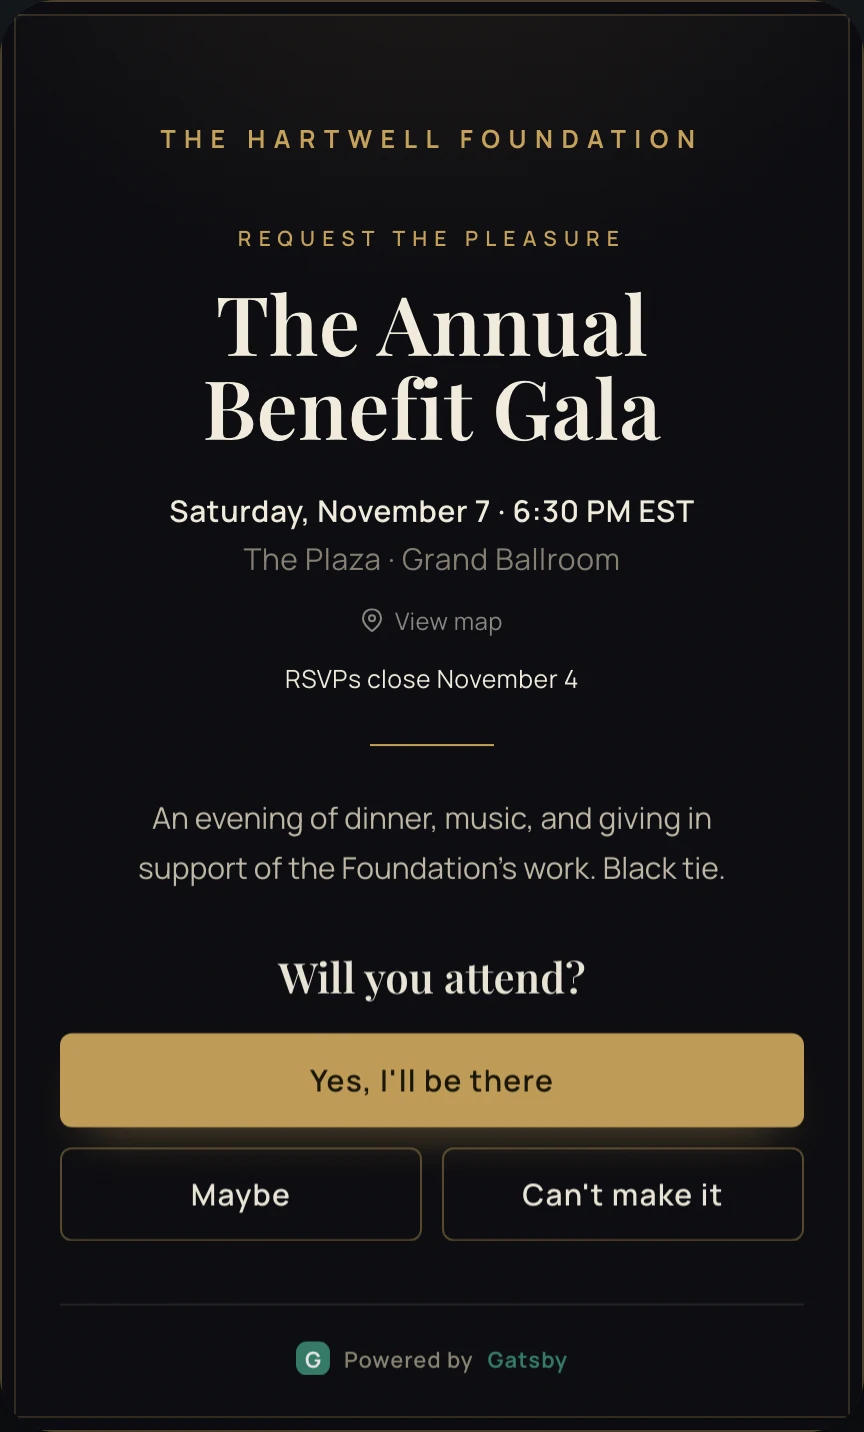
Gala
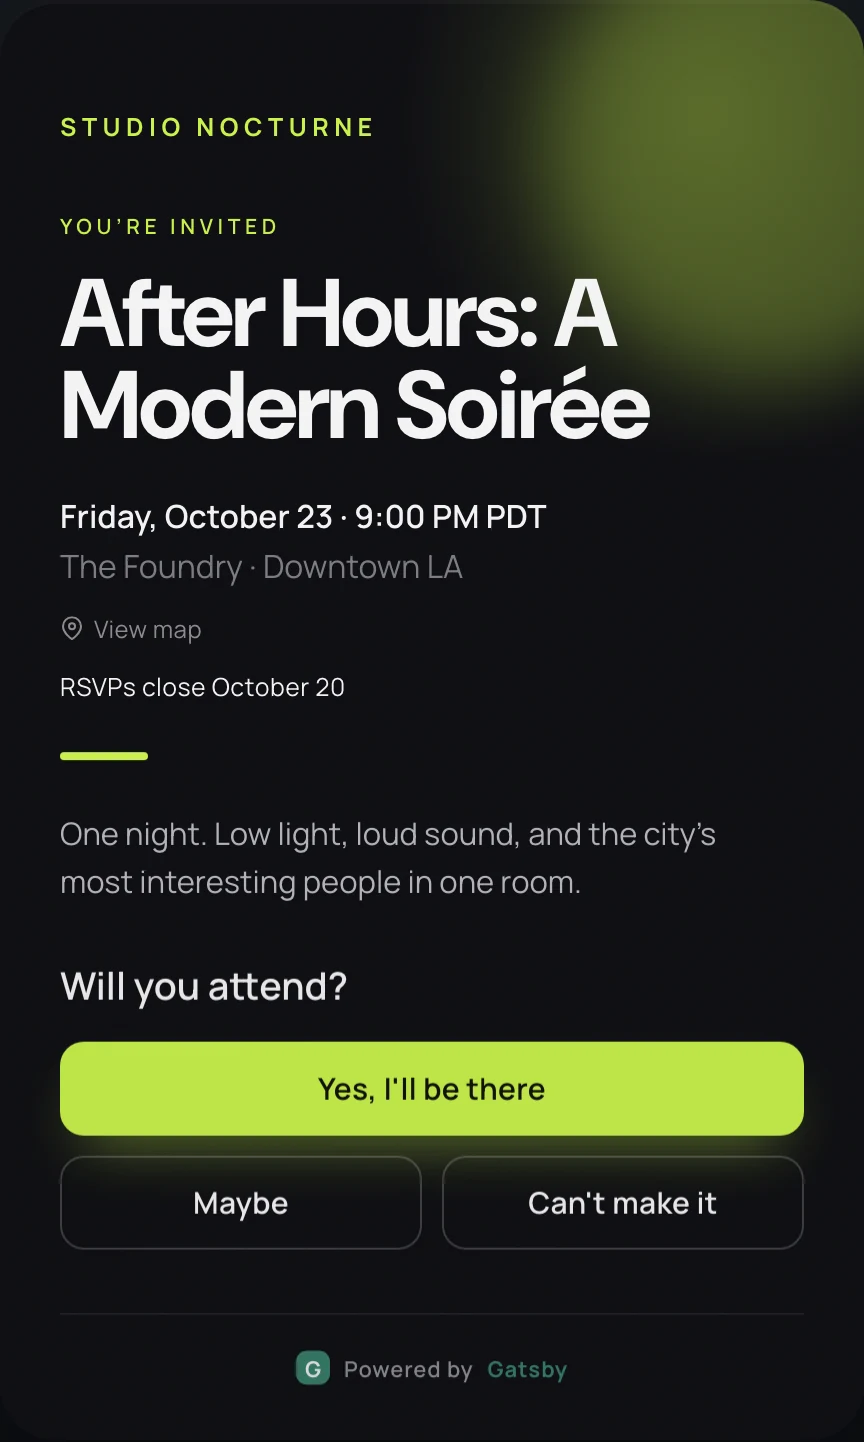
Soirée
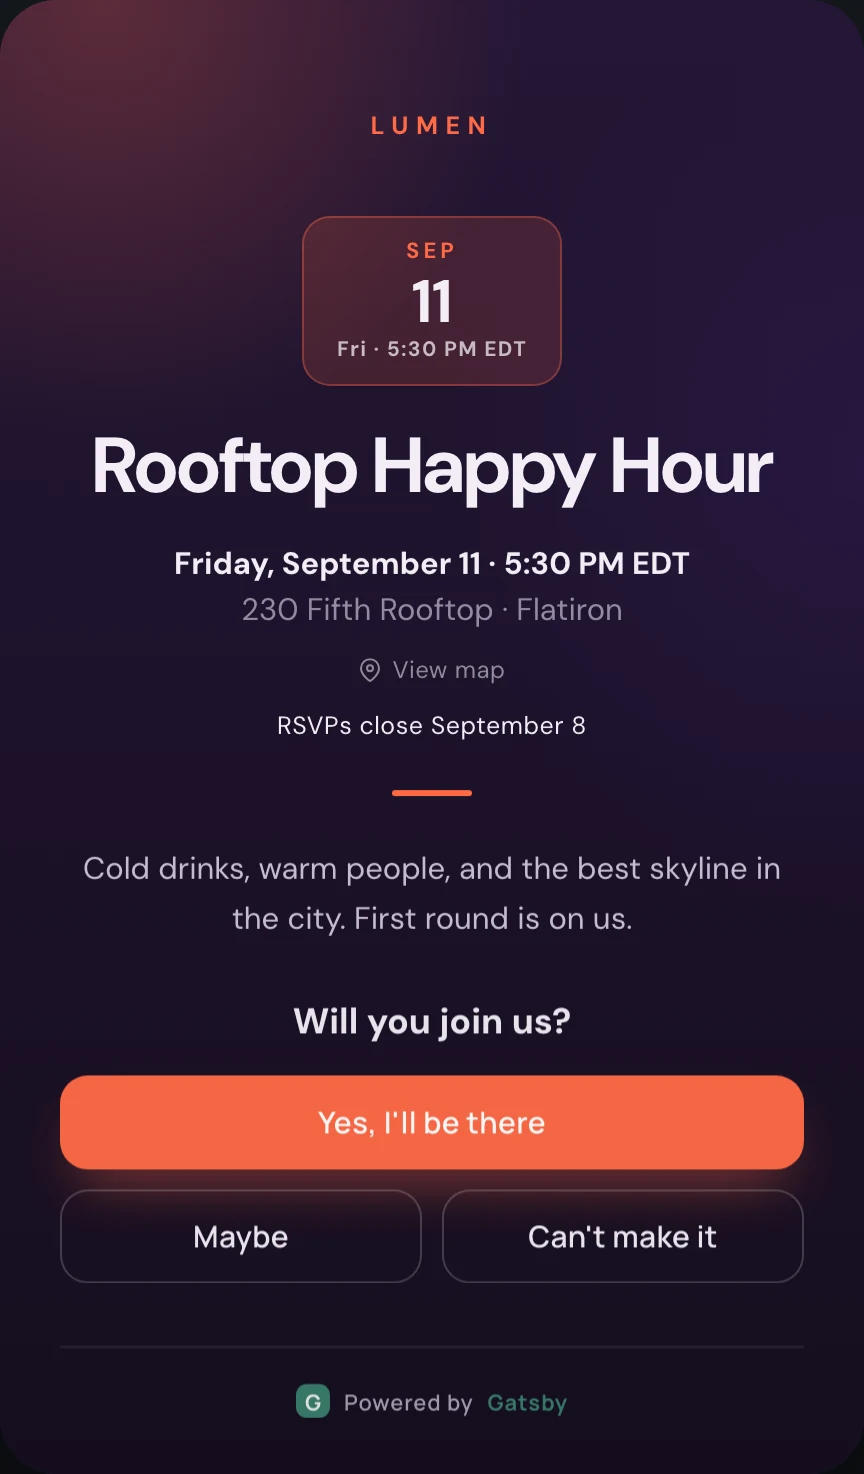
Happy Hour
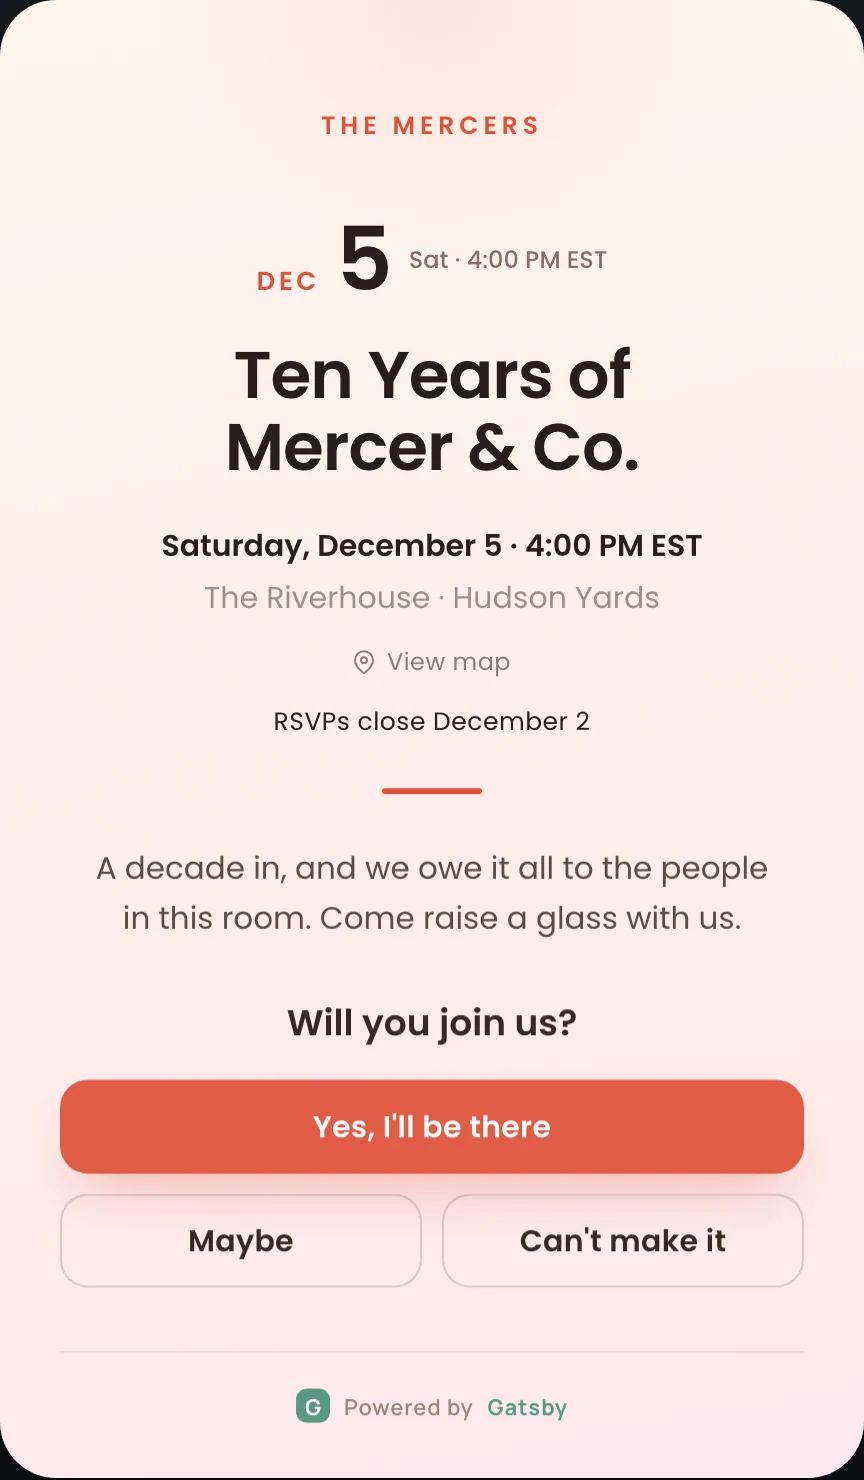
Celebration
### One tap to answer. Then a link that is theirs.
Accept, decline, or maybe, using whatever wording you chose. After they answer, the page hands them their own link so they can change their mind later without emailing your assistant.
When the room fills, the page says so with restraint. A quiet note that spots are limited, never a countdown clock or a live seat counter.
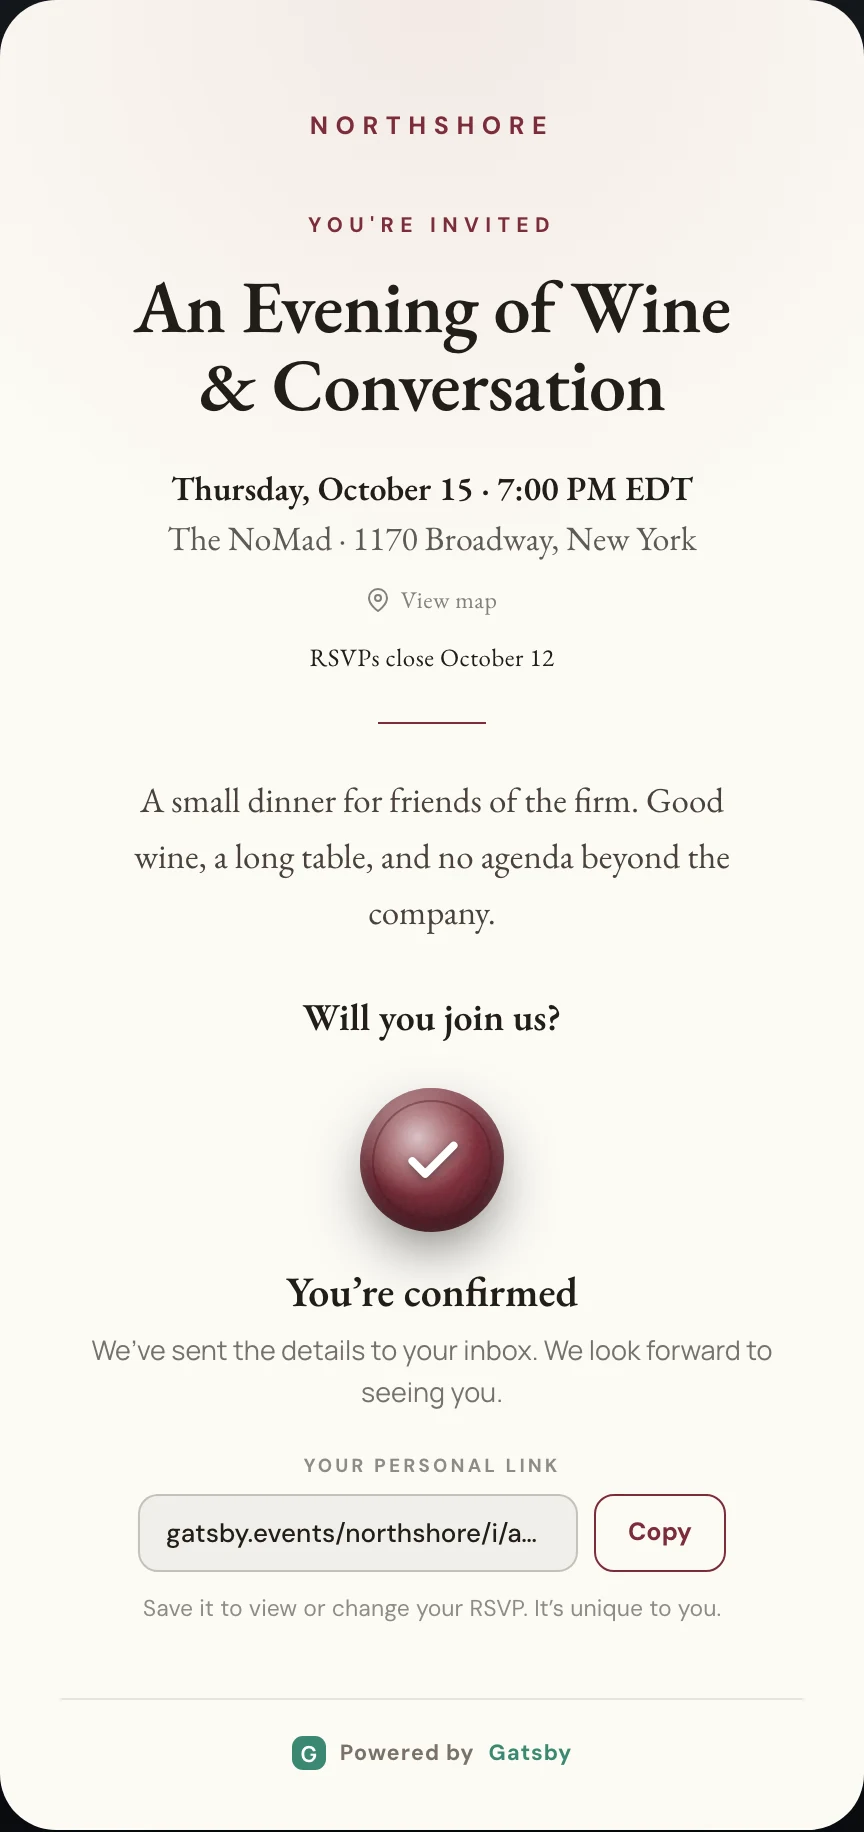
The Range
## The same system at ten guests and at a thousand.
[Section titled “The same system at ten guests and at a thousand.”](#the-same-system-at-ten-guests-and-at-a-thousand)
A quick event is a real Gatsby event underneath. It sits in the same list, on the same guest profiles, under the same permissions. When one outgrows the quick flow, the platform it is already sitting on is the one that handles the rest.
10
A partner dinner
Quick event. Four minutes, one premium invitation, no landing page to build.
100
A portfolio happy hour
Still a quick event. Add a capacity cap, a waitlist, and an RSVP deadline as toggles.
500
An LP meeting
A full Gatsby event. Registration forms, seating charts, name badges, and check-in at the door.
1,000+
An annual summit
Multi-session agendas, ticketing, the guest app, and CRM sync on the way back out.
Across all four, it is one contact database. The founder who came to the June dinner and the LP who spoke at the summit are profiles in the same system, with attendance history, preferences, and your team’s notes attached to each.
How We Compare
## Three honest options, and where each one runs out.
[Section titled “Three honest options, and where each one runs out.”](#three-honest-options-and-where-each-one-runs-out)
You are comparing us to something. Here is our read on the trade, including the cases where the other answer is the right one.
Lightweight invite tools
Where they work
Genuinely fast and often free. For a personal party, or a one-off where nobody needs the guest list afterwards, they are the right tool and we would not pretend otherwise.
Where they run out
No persistent guest profiles, so context never carries between events. Invitations come from the platform rather than your address, their branding sits on your page, and the guest list is not covered by your firm’s security review.
Enterprise event platforms
Where they work
Built for conferences and trade shows, and strong at them. Exhibitor management, session tracks, and badge scanning at scale are real strengths.
Where they run out
A dinner for twelve is not a small conference. The setup cost per event is high enough that your team quietly stops using it for the small ones, which is how the second tool appears in the first place.
Gatsby
Where we work
Invite-only events for relationship-driven teams, at any size, on one guest database. Quick Events covers the small end in minutes; the full platform handles seating, badges, check-in, and ticketing at the large end.
Where we run out
We are not the cheapest way to invite people to one party, and we are not built for open ticket sales to strangers. If your events are public and transactional, another tool fits better.
In Your Account
## Quick events sit in the same list as everything else.
[Section titled “Quick events sit in the same list as everything else.”](#quick-events-sit-in-the-same-list-as-everything-else)
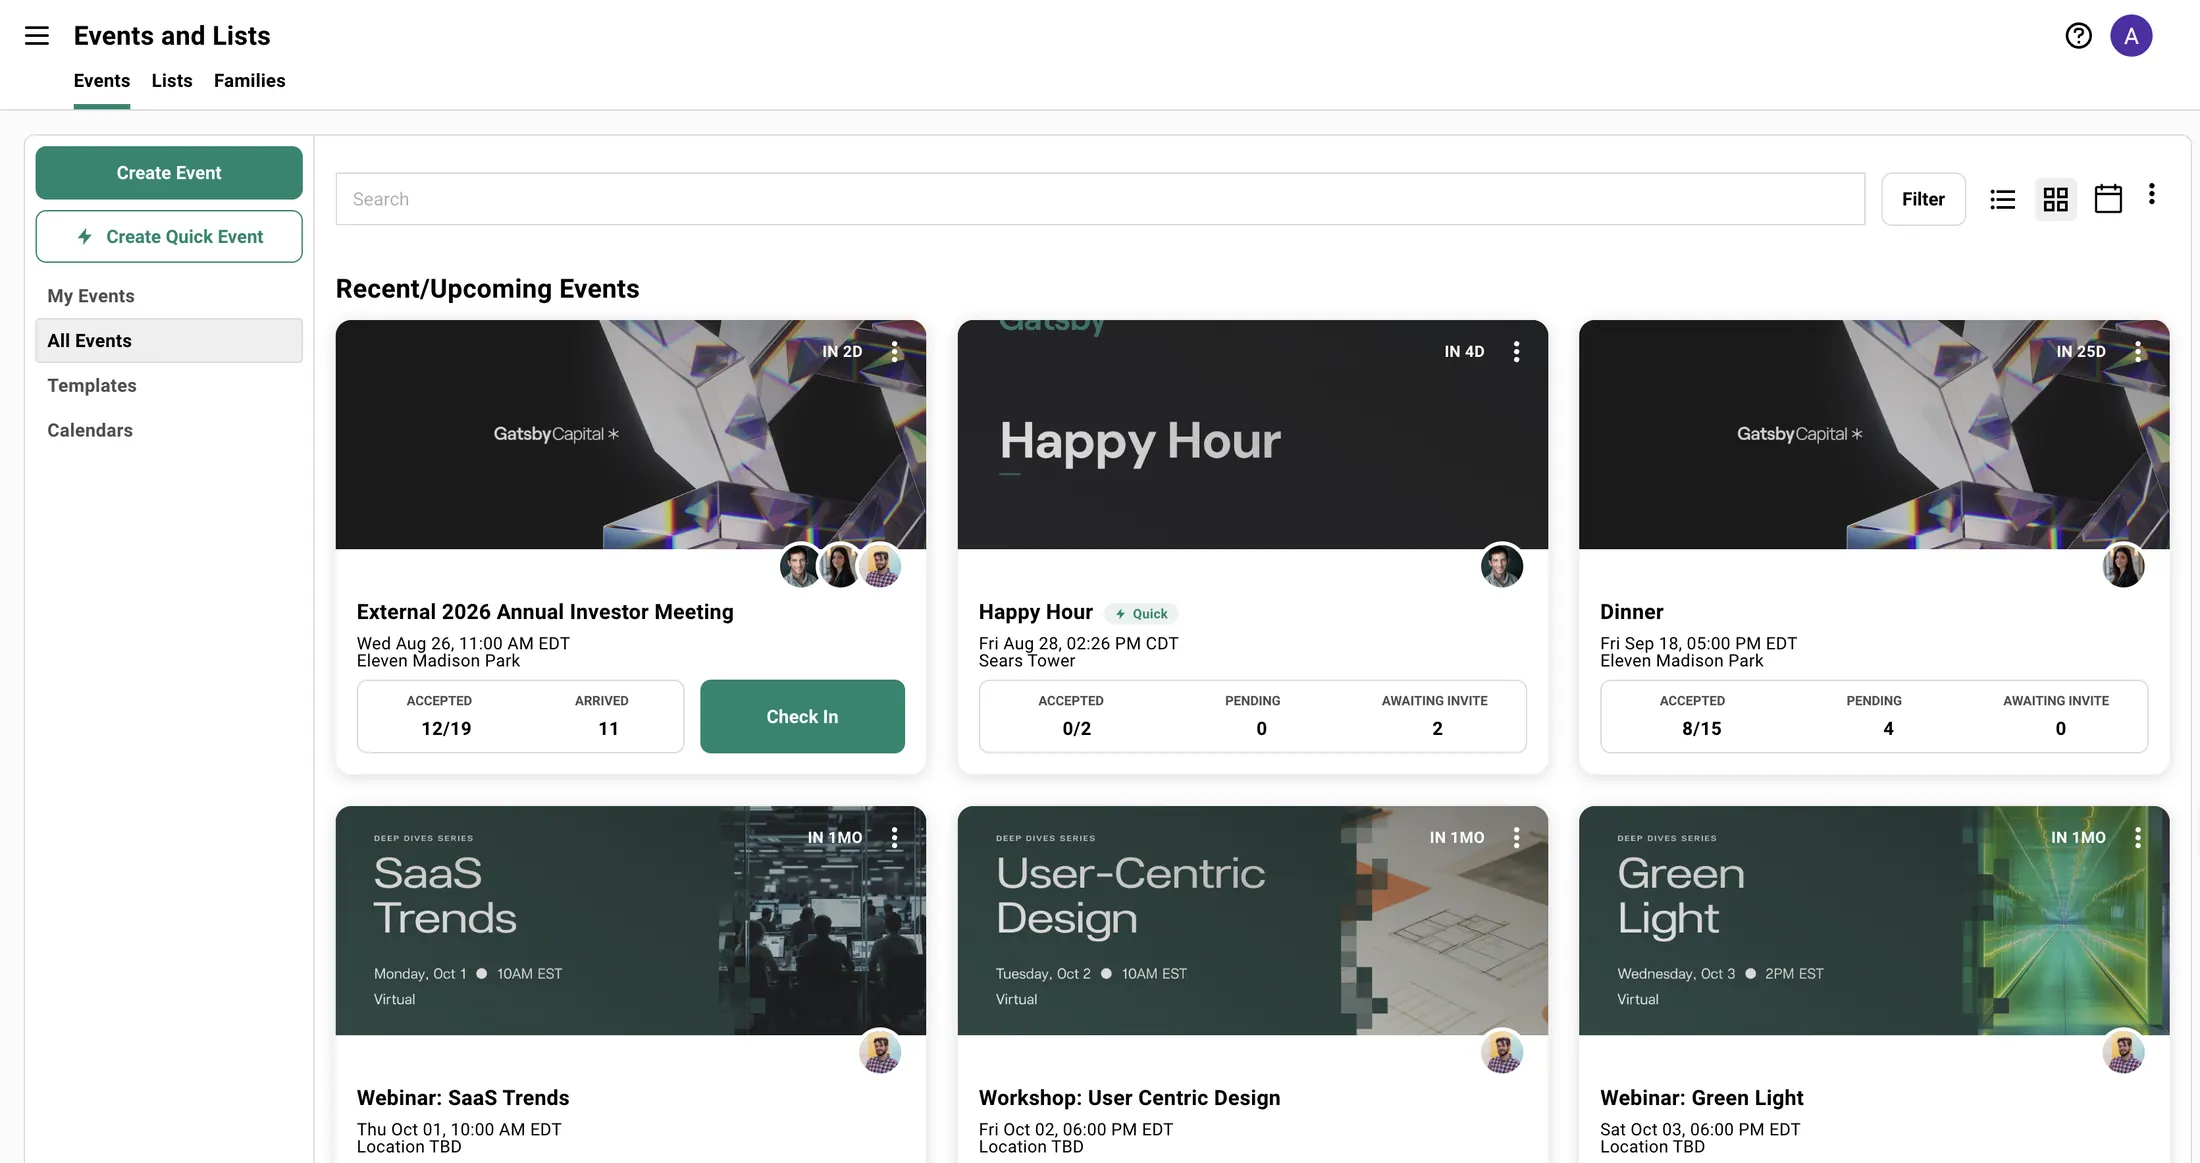
They carry a Quick marker so you can tell them apart, and they use the same RSVP vocabulary, the same contact records, and the same team permissions as the rest of your events. Admins can set a house design once so every quick event your team creates starts on brand.
Track Record
## Firms who already run their events this way.
[Section titled “Firms who already run their events this way.”](#firms-who-already-run-their-events-this-way)
General Catalyst, IVP, and Lightspeed run their events on Gatsby. Their guest lists are often twenty to fifty people, where being known by name is the baseline expectation rather than a nice touch.
6,500+
invite-only events hosted in the past year
3M+
invitations and follow-ups sent through the platform
SOC 2
Type II certified, with SSO and enforced two-factor
## Trusted by top teams












## Questions
[Section titled “Questions”](#questions)
How long does it actually take to send one?+
Four fields are required: the name, the start time, the timezone, and the location. Everything else has a default, including the design. Adding your guests is the part that takes the longest, and you can type them, pull them from your existing contacts, or paste a list.
Does the guest page look like us or like Gatsby?+
Your logo, your accent color, and your choice of typeface. A small “Powered by Gatsby” mark appears at the bottom of quick-event pages and cannot be removed. If you need a page with no third-party mark at all, use a full Gatsby event with a custom landing page and your own domain.
Can a quick event do seating, check-in, or ticketing?+
No. Quick Events covers invitations, RSVPs, capacity, waitlists, and follow-ups. Seating charts, name badges, door check-in, paid ticketing, and post-event surveys are full-event features. That is the deliberate trade for a flow with almost no decisions in it.
Do RSVPs from a quick event show up on the contact record?+
Yes, and this is the point. A quick event is a real event on your real guest profiles. Attendance, RSVP status, and anything you noted carry forward the same way they do for your largest events, and flow out to your CRM through the same integrations.
Who can see the guest list?+
The same people who can see it for any other event in your account. Admins have full access, Team Members see the events they are assigned to, and External Collaborators are limited to specific events. Personal RSVP links work for one named guest and are not transferable, and the public link stays off unless you switch it on.
When can we start using it?+
Today. Quick Events is live on every Gatsby account at no extra cost, so there is nothing to request and nothing to wait for.
## Stop running half your events somewhere else
Thirty minutes, no pressure. Bring your next dinner and we will build the invitation with you.
Talk to us
Running something larger first? [See how the full platform works](/platform/).
# Subscribe to The Shortlist Monthly
> Once a month, a newsletter for people who run curated, invite-only events from the Gatsby team.
Subscribe
One email a month, unsubscribe anytime. By subscribing you agree to our [privacy policy ](/privacy-policy).
You're in.
# Event Operations for Multi-Advisor RIA & IBD Firms | Gatsby
> One dashboard across all advisor events. Firm-controlled templates, verified attendance, compliance-ready exports, and CRM sync.
The Current Way
## After every client dinner, someone emails compliance a guest list
The advisor or their EA types up who attended, approximate cost, and any notes worth flagging. Format varies by advisor. Timing varies by advisor. The firm finds out what happened after it already happened.
This works until someone asks a question the emails can’t answer.
How many events did the firm run last quarter?
Which clients attended more than one?
Were any prospects invited by multiple advisors?
The answers are in someone’s inbox. Probably.
The Problem
## It’s not broken. It just doesn’t scale.
[Section titled “It’s not broken. It just doesn’t scale.”](#its-not-broken-it-just-doesnt-scale)
None of this is urgent. But it’s the friction that keeps the firm from pushing advisors to run more events.
No forward visibility
The firm doesn’t know which clients are being invited to what, whether top households are getting enough touchpoints, or whether two advisors booked the same prospect for different dinners two weeks apart.
Every advisor presents a different brand
One sends from firm email with a branded page. Another sends from personal Gmail with a PDF. A third has their EA call from a spreadsheet. Your client-facing experience is only as consistent as your least organized advisor.
Compliance assembled by hand
Every advisor reports in their own format, on their own schedule, with their own level of detail. If anyone needs a quarterly view, it gets built from inbox searches.
The Solution
## When the firm controls the process
[Section titled “When the firm controls the process”](#when-the-firm-controls-the-process)
Branded by default
Every advisor event starts from the same firm-approved template. Invitations go from the advisor’s own email, carrying the firm’s design and registration page.
Verified at the door
Check-in produces a timestamped attendance record. Compliance gets a standardized export — same format every time, regardless of which advisor ran the event.
Visible in real time
The firm admin sees what’s running across the practice without asking anyone. Not in a weekly email thread. In the dashboard, live.
The actual record
Not a list someone typed up the next morning. The record comes from actual check-ins — who walked in, when, verified by the system.
The Platform
## What Gatsby gives the firm
[Section titled “What Gatsby gives the firm”](#what-gatsby-gives-the-firm)
One dashboard, every advisor
Every event, guest list, and attendance record in one place. No chasing post-event emails.
Firm-controlled templates
Design the template once. Every advisor uses it. Brand standards enforced by the system, not a style guide.
Role-based access
Advisors see their own events. The firm admin sees everything. Simple as that.
Verified attendance
iPad or phone check-in. Guests tap or scan. The record compliance gets is the one generated at the door.
Automatic CRM sync
Attendance writes back to Salesforce or other CRMs automatically.
SOC 2 Type II certified
Client PII handled with enterprise security controls. Not in spreadsheet attachments forwarded between personal accounts.
Schedule a Conversation
We’ll walk through admin structure, template setup, and CRM integration for your tech stack. Thirty minutes.
For Advisors
## What advisors actually get
[Section titled “What advisors actually get”](#what-advisors-actually-get)
The firm adopts Gatsby. Advisors use it. Here’s why that’s straightforward.
Invitations come from them
Clients see an email from their advisor’s own Gmail or Outlook. Connect the account once, use it for every event.
Guest context carries forward
The dietary restriction from March is already there in September. So is attendance history and plus-one preferences.
Less friction, more events
Lower planning overhead means advisors run more dinners. More dinners means more client touchpoints and more referrals.
Track Record
## Who already runs events this way
[Section titled “Who already runs events this way”](#who-already-runs-events-this-way)
3M+
emails sent through the platform
6,500+
invite-only events hosted in the past year
SOC 2
Type II certified
## Trusted by top teams












Questions
## FAQs
[Section titled “FAQs”](#faqs)
How does role-based access work for multi-advisor firms?+
Admins see every event across the firm. Advisors see their own events and their own clients. An advisor planning a client dinner doesn’t see what other advisors are running, but the firm admin has full visibility across the practice.
What CRM integrations are available?+
Gatsby integrates directly with Salesforce (native, bidirectional) and connects to Wealthbox, Redtail, and any other CRM through Zapier and webhooks. Event attendance, RSVPs, and follow-up flags sync automatically.
How does Gatsby handle compliance and data security?+
Gatsby is SOC 2 Type II certified with regular security audits. Your client information stays yours. We support Google Workspace SSO, Okta, and enforced two-factor authentication.
Can we export event data for compliance reporting?+
Yes. Every event produces a standardized export: attendance records, timestamps, guest details. Same format regardless of which advisor ran the event. Export anytime in CSV or Excel.
How long does firm-wide onboarding take?+
Most firms are running events within two weeks. We handle template setup, CRM configuration, and advisor onboarding. The platform is straightforward enough that advisors pick it up after their first event.
## See what a firm-wide rollout looks like
We’ll walk through admin structure, template setup, and CRM integration for your tech stack. Thirty minutes.
Schedule a Conversation
# Event Operations for RIA Referral Growth | Gatsby
> Only 29% of satisfied RIA clients actively refer. The gap is emotional connection, not satisfaction. Event operations software that turns client dinners into referral engines.
## The referral problem isn’t satisfaction
[Section titled “The referral problem isn’t satisfaction”](#the-referral-problem-isnt-satisfaction)
The average RIA has client satisfaction above 90%. Yet Advisor Impact research found that **only 29% of clients actually provided a referral**, despite high satisfaction and strong intent to stay. The vast majority of your happy clients will never send you a single prospect.
The gap is emotional connection.
3x
Emotionally connected clients are three times as valuable and significantly more likely to refer
Harvard Business Review
2–3x
Top-performing advisory firms grow 2-3x faster than the median
Schwab / FA Insight
The pattern holds in advisory relationships: **clients who feel personally known don’t just stay longer. They refer.** Remembering their daughter got into law school. Knowing they switched from red wine to bourbon since the spring dinner. Noticing they brought their adult son to the market outlook for the first time.
Firms that close this gap share a common trait: they run client events well and often. Clients who attend **two or more touchpoints beyond regular reviews** are significantly more likely to refer (Fidelity RIA Benchmarking). Yet only a minority of advisors host regular client events, and among those who do, most still run them on spreadsheets and Outlook.
## It’s not whether you host events. It’s how you run them.
[Section titled “It’s not whether you host events. It’s how you run them.”](#its-not-whether-you-host-events-its-how-you-run-them)
Most firms that host events still organize them in ways that quietly undercut the personal connection they’re trying to create.
The invitation arrives from ****. The dietary restriction your team learned in March gets forgotten by September. Check-in is a clipboard at the door. The follow-up never happens because **nobody recorded who attended** or what was discussed. The client has a nice evening but doesn’t feel known.
Spreadsheets
Rebuilt from scratch every time. No attendance history, no preference tracking. When your ops person leaves, their knowledge leaves with them.
Mailchimp or Constant Contact
Polished email, marketing address, unsubscribe link at the bottom. No connection to their CRM record, no follow-up tracking afterward. Clients treat it like marketing because it is.
Your CRM’s events feature
Wealthbox and Redtail log that an event happened. They do nothing to help you run one. No invitations, no RSVPs, no seating, no check-in, no record of what came out of it.
## What actually closes the gap
[Section titled “What actually closes the gap”](#what-actually-closes-the-gap)
* **Invitations from the advisor, not from marketing.** Gatsby connects to the advisor’s Gmail or Outlook. The invitation goes from the person who manages their retirement, not from a marketing alias. Clients open these differently because the sender is someone they trust.
* **Guest knowledge that compounds.** Dietary restrictions, plus-one history, attendance records, conversation notes. **Stored once, carried forward to every future event automatically.** Your team stops re-collecting information they already had. The client feels remembered because they are remembered.
* **Event data that flows back to the CRM.** Attendance, follow-up flags, new contacts from plus-ones. Written back to Salesforce, Wealthbox, or your CRM automatically. Before a quarterly review, the advisor opens the client record and sees every event, every guest they brought, every note that was flagged.
* **Seating and check-in that actually work.** Clients RSVP through a branded page. Seating is drag-and-drop. Check-in runs on an iPad. No clipboards, no printed spreadsheets with last-minute pen edits, no guessing who showed up.
Thirty minutes, no pressure.
We’ll show you the workflow for your next client event.
## The math on one dinner
[Section titled “The math on one dinner”](#the-math-on-one-dinner)
Referral
$1,000–1,500
acquisition cost per referred client
One dinner. Two referrals who become clients.
$130,000+
in lifetime revenue
Paid marketing
$5,000–10,000+
acquisition cost per client
Same clients, 5-10x the cost to find them.
The dinner cost $8,000. The question isn’t whether you can afford to invest in how you run events. It’s how many referrals you’ve already missed by running them on spreadsheets and generic email tools.
## Who runs events this way
[Section titled “Who runs events this way”](#who-runs-events-this-way)
Gatsby is the event platform for General Catalyst, IVP, and Lightspeed Venture Partners. VC firms host intimate, invite-only dinners where **knowing every guest and remembering details** from the last three interactions is the baseline. The operational requirements are identical to an RIA appreciation dinner.
3M+
emails sent through the platform
6,500+
invite-only events hosted in the past year
SOC 2
Type II certified
## Trusted by top teams












## FAQs
[Section titled “FAQs”](#faqs)
Will my clients feel like they're getting a mass invitation?+
Every guest receives a personal RSVP link tied to their name. The invitation arrives from the advisor’s actual Gmail or Outlook address, not a bulk sender. There’s no unsubscribe footer, no campaign header. It reads like a personal email because it is one.
How do clients experience the registration page?+
The RSVP page displays your firm’s name and logo. Gatsby doesn’t appear anywhere your clients can see. Guests confirm their details, add a plus-one, and note dietary preferences on a clean, branded form. From the client’s perspective, the page looks like something your firm built.
How does Gatsby handle compliance and data security?+
Gatsby is SOC 2 Type II certified. We run regular security audits and never share or sell your data. Your client information stays yours. We support Google Workspace SSO, Okta, and enforced two-factor authentication.
Does Gatsby integrate with our CRM?+
Yes. Gatsby integrates directly with Salesforce and Wealthbox, and connects to any other CRM through Zapier and webhooks. Event attendance, RSVPs, and follow-up flags sync automatically so the data lives where the rest of your relationship data lives.
Can we export our data?+
Always. Export contacts, event history, and engagement data anytime in CSV or Excel. No lock-in.
## See how it works for your firm
Thirty minutes, no pressure. We’ll walk through the workflow for your next client event.
Talk to us
# Gatsby for RIA Firms | Event Operations Software
> Event operations software built for relationship-driven advisory firms. Persistent client profiles, advisor-sent invitations, and full event lifecycle in one system.
## Your clients’ heirs don’t know you yet
[Section titled “Your clients’ heirs don’t know you yet”](#your-clients-heirs-dont-know-you-yet)
Client events are where multigenerational relationships start. The appreciation dinner where you remember a spouse switched from vegetarian to vegan since September. The market outlook seminar where a client brings their adult children for the first time.
54%
of new advisory clients come through referrals from clients, friends, and family
Cerulli, U.S. Advisor Metrics 2025
95%
of RIA firms cite enhancing the client experience as a top priority
Schwab, 2025 RIA Benchmarking Study
Those referrals start in rooms you organized, over meals you planned. Most firms still run those events with spreadsheets and Outlook.
## How most firms handle events today
[Section titled “How most firms handle events today”](#how-most-firms-handle-events-today)
Spreadsheets and Outlook
You rebuild the invite list from memory before every event. When Sarah in ops leaves, her notebook of client preferences leaves with her.
Mailchimp or Constant Contact
Invitations arrive from `marketing@yourfirm.com`, not from the advisor. Clients treat marketing emails differently than a note from someone they trust with their retirement.
Your CRM’s event tools
Most CRMs log that an event happened. No registration page, no seating, no check-in. The record is in the right place — the work to produce the event still happens somewhere else.
Cvent or Eventbrite
Built for conferences and trade shows. A 30-person appreciation dinner is not a conference. No persistent client profiles across events. Expensive for what you actually use.
## What Gatsby does differently
[Section titled “What Gatsby does differently”](#what-gatsby-does-differently)
Gatsby is event operations software built for relationship-driven firms. Your guest context carries forward, your invitations come from real people, and registration through check-in runs in one system.
* **Clients recognize the sender.** The invitation arrives from the advisor’s actual Gmail or Outlook address. Not `marketing@yourfirm.com`. No bulk sender footer, no unsubscribe link. It reads like a note from someone who knows them, because it is.
* **What you learned at the March dinner is there for September.** Dietary restrictions, attendance history, plus-one preferences, and your team’s notes all carry forward. No one re-enters information you already have.
* **Clients RSVP through a page that looks like your firm.** Each guest gets a personal link. You see RSVPs update in real time, assign seating with drag-and-drop, and check guests in on an iPad at the door. No clipboards. No printed spreadsheets with last-minute pen edits.
* **Event data flows back to your CRM.** Gatsby syncs with Salesforce, Wealthbox, or any CRM through Zapier and webhooks. When an advisor opens a client record before a quarterly review, they see every event that client attended, who they brought, and what follow-up was flagged.
Thirty minutes, no pressure.
We’ll show you the workflow for your next client event.
## Who already runs events this way
[Section titled “Who already runs events this way”](#who-already-runs-events-this-way)
General Catalyst, IVP, and Lightspeed Venture Partners run their events on Gatsby. Their events are typically invite-only, sometimes only 20 to 50 guests, where knowing each person by name is the baseline expectation. What they ordered last time, who they brought, how the seating worked: Gatsby carries that context between events.
The operational model is the same as an RIA appreciation dinner. Small list, high stakes, and a relationship that depends on getting the details right.
3M+
emails sent through the platform
6,500+
invite-only events hosted in the past year
SOC 2
Type II certified
**81% of high-net-worth practices** cite family events as their most effective wealth transfer strategy. The firms investing in event operations now are building the relationships that keep assets in-house when the next generation inherits.
## Trusted by top teams












## FAQs
[Section titled “FAQs”](#faqs)
Will my clients feel like they're getting a mass invitation?+
Every guest receives a personal RSVP link tied to their name. The invitation arrives from the advisor’s actual Gmail or Outlook address, not a bulk sender. There’s no unsubscribe footer, no campaign header. It doesn’t read like a mass invitation because it isn’t one.
How do clients experience the registration page?+
The RSVP page displays your firm’s name and logo. Gatsby doesn’t appear anywhere your clients can see it. Guests confirm their details, add a plus-one, and note dietary preferences on a clean, branded form. From the client’s perspective, the page looks like something your firm built.
How does Gatsby handle compliance and data security?+
Gatsby is SOC 2 Type II certified. We run regular security audits and never share or sell your data. Your client information stays yours. We support Google Workspace SSO, Okta, and enforced two-factor authentication.
Does Gatsby integrate with our CRM?+
Yes. Gatsby integrates directly with Salesforce and Wealthbox, and connects to any other CRM through Zapier and webhooks. Event attendance, RSVPs, and follow-up flags sync automatically so the data lives where the rest of your relationship data lives.
Can we export our data?+
Always. Export contacts, event history, and engagement data anytime in CSV or Excel. No lock-in.
## See how it works for your firm
Thirty minutes, no pressure. We’ll show you the workflow for your next client event.
Talk to us
# Community & Team Event Examples
> Pre-built setups for internal team events and customer community gatherings.
Team offsites and user summits. Multi-day retreats for your internal team. Annual gatherings for customers, prospects, and partners.
These events have complicated logistics. Travel arrangements. Dietary restrictions. Activity signups. Plus-one policies. Registration tickets. The data lives in too many places and the details matter.
## Community & Team
1. [](/examples/community-events/team-offsite)
### [Team Offsite](/examples/community-events/team-offsite)
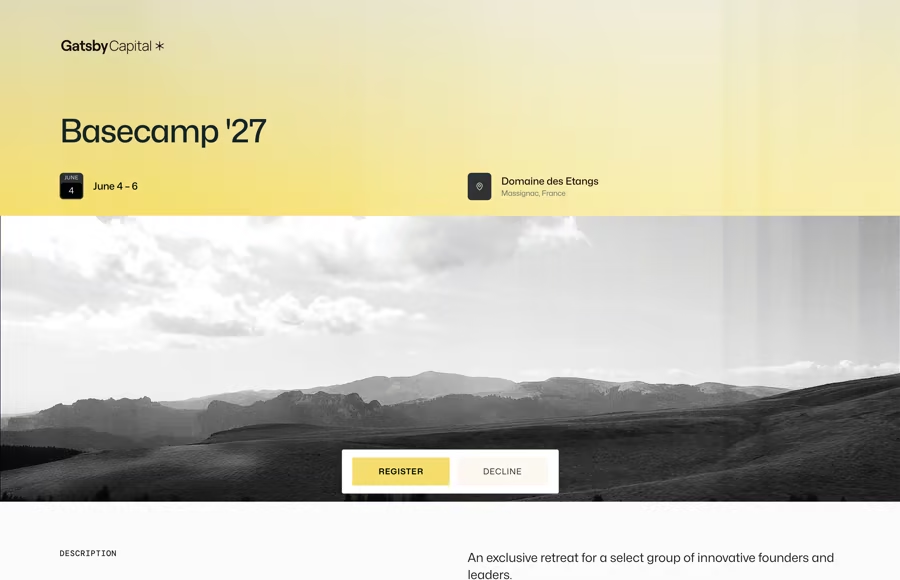
[Multi-day, logistics-heavy, activity selection](/examples/community-events/team-offsite)
2. [](/examples/community-events/user-summit)
### [User Summit](/examples/community-events/user-summit)
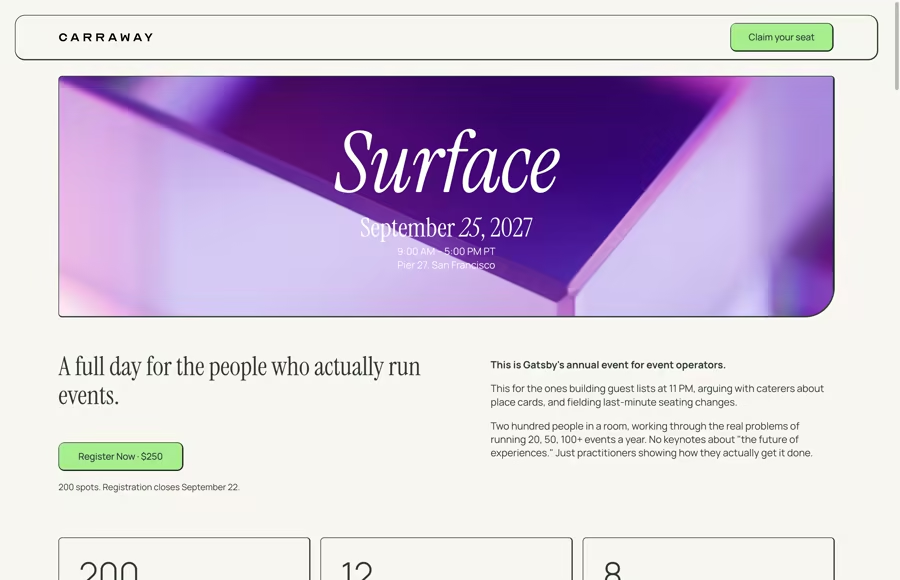
[Ticketed registration with group checkout and promo codes](/examples/community-events/user-summit)
## Who runs these
[Section titled “Who runs these”](#who-runs-these)
People Operations teams organizing company offsites. Internal events teams managing all-hands and team retreats. Customer Marketing running user conferences. Product teams hosting customer summits and partner events.
## What makes them different
[Section titled “What makes them different”](#what-makes-them-different)
Registration collects more than names. Dietary restrictions, travel details, shirt sizes, activity preferences. You’re coordinating logistics for dozens or hundreds of people across multiple days. Plus-ones need their own registration. Tickets let you track who paid versus who got comped.
Your team already knows most of these people. You’re not vetting strangers. You’re managing operational complexity for a defined group.
## Other Event Types
[Section titled “Other Event Types”](#other-event-types)
Strategic Events
1. [](/examples/strategic-events/annual-general-meeting)
### [Annual Meeting (AGM)](/examples/strategic-events/annual-general-meeting)
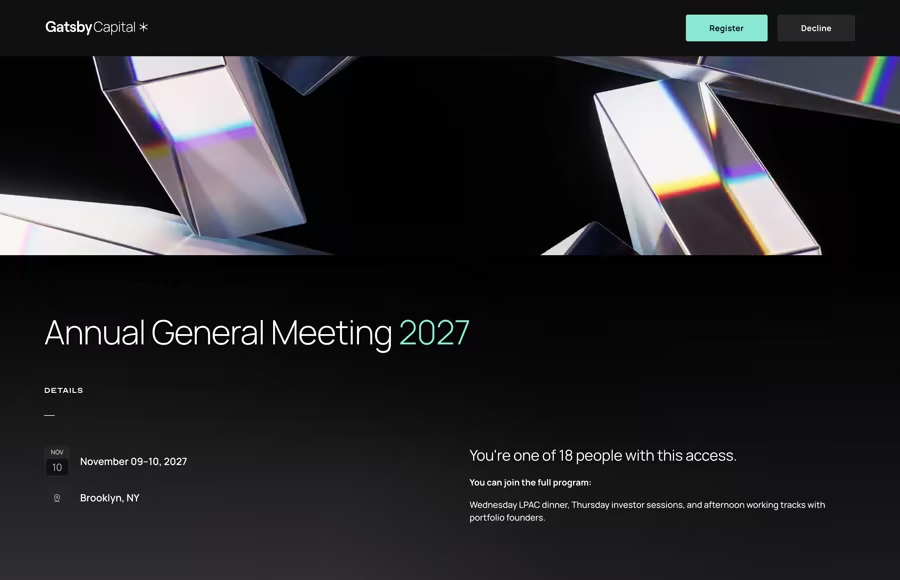
[Compliance-conscious, document sharing, formal program](/examples/strategic-events/annual-general-meeting)
2. [](/examples/strategic-events/executive-dinner)
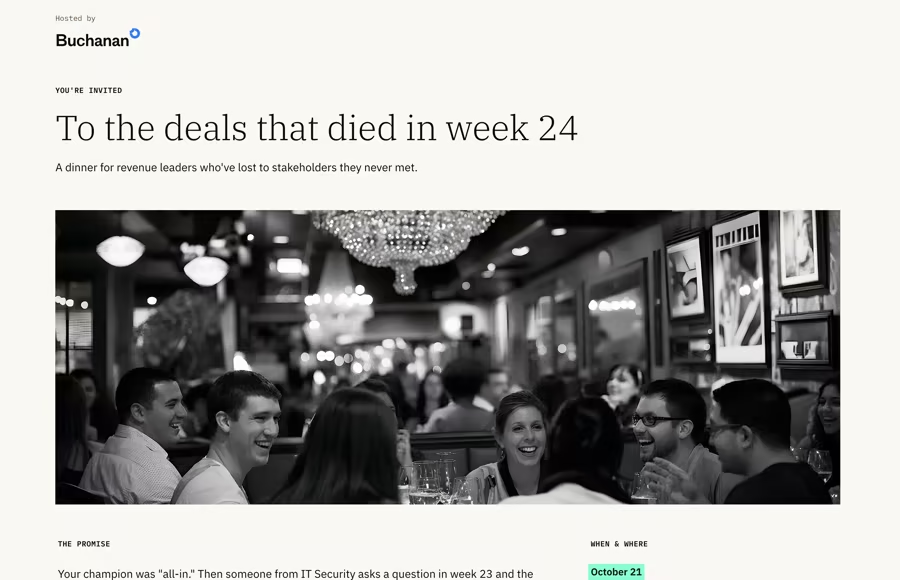
### [Executive Dinner](/examples/strategic-events/executive-dinner)
[Three RSVP options, briefing opt-in, and no-pitch expectations](/examples/strategic-events/executive-dinner)
3. [](/examples/strategic-events/private-forum)
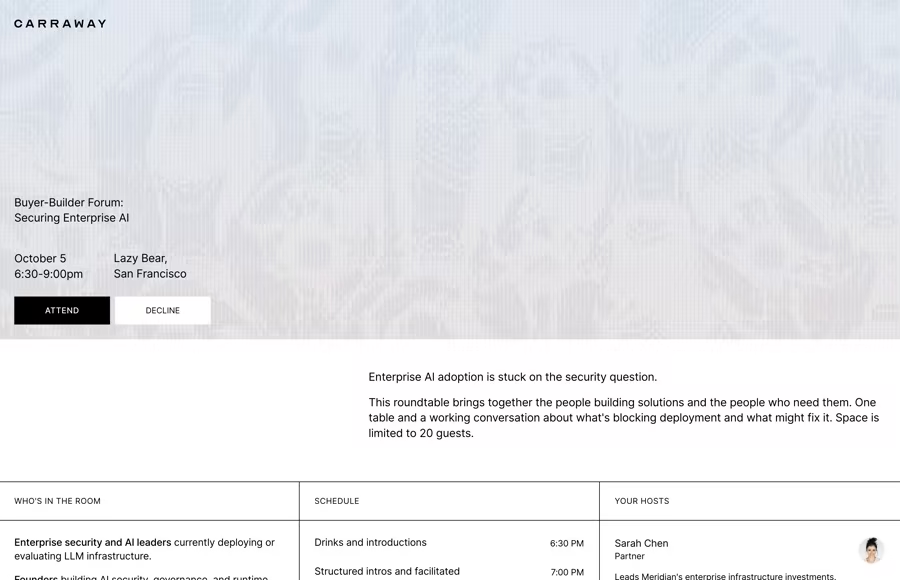
### [Private Forum](/examples/strategic-events/private-forum)
[Advisory council, private check-in](/examples/strategic-events/private-forum)
Curated Access
1. [](/examples/curated-events/speaker-series)
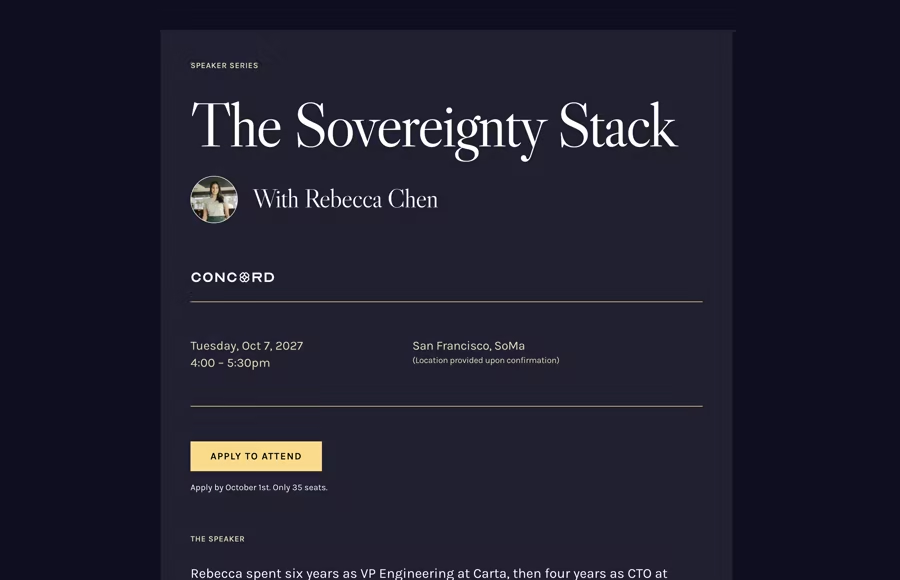
### [Speaker Series](/examples/curated-events/speaker-series)
[Apply to attend](/examples/curated-events/speaker-series)
2. [](/examples/curated-events/waitlisted-social)
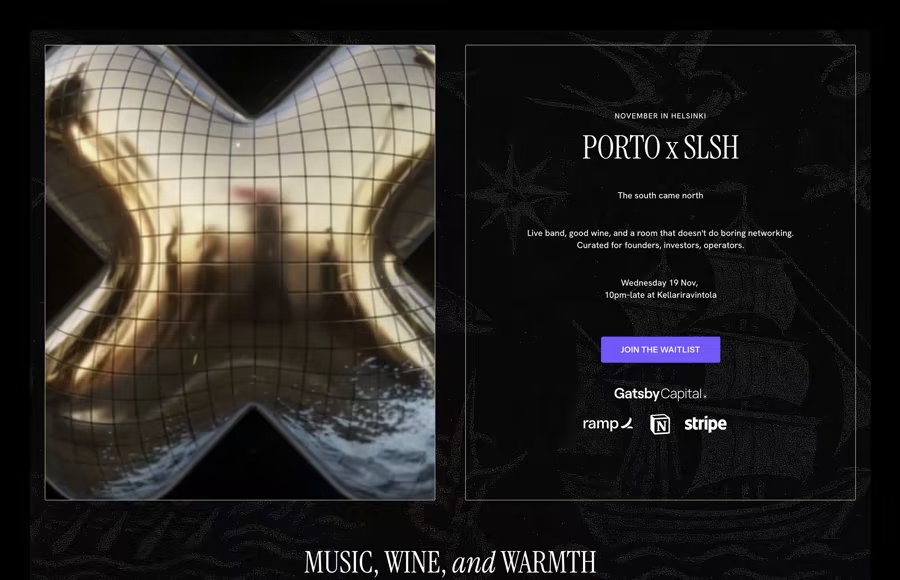
### [Waitlist Social](/examples/curated-events/waitlisted-social)
[Curated access social event](/examples/curated-events/waitlisted-social)
## Want to run events like these?
30 minutes. We’ll talk about your event and show you how to set it up.
Book a demoGet support
# Team Offsite
> See how two-stage registration works for multi-day retreats. Capture interest early with a lightweight form, then follow up with activity selection, travel details, and accommodation preferences.
[Try registration ](https://gatsby.events/showcase/rsvp/register?e=team-offsite-example-event)
This demo uses a public link so anyone can try it. In practice, each guest gets a unique link tied to their profile.
[](https://gatsby.events/showcase/rsvp/register?e=team-offsite-example-event)
## How it works
[Section titled “How it works”](#how-it-works)
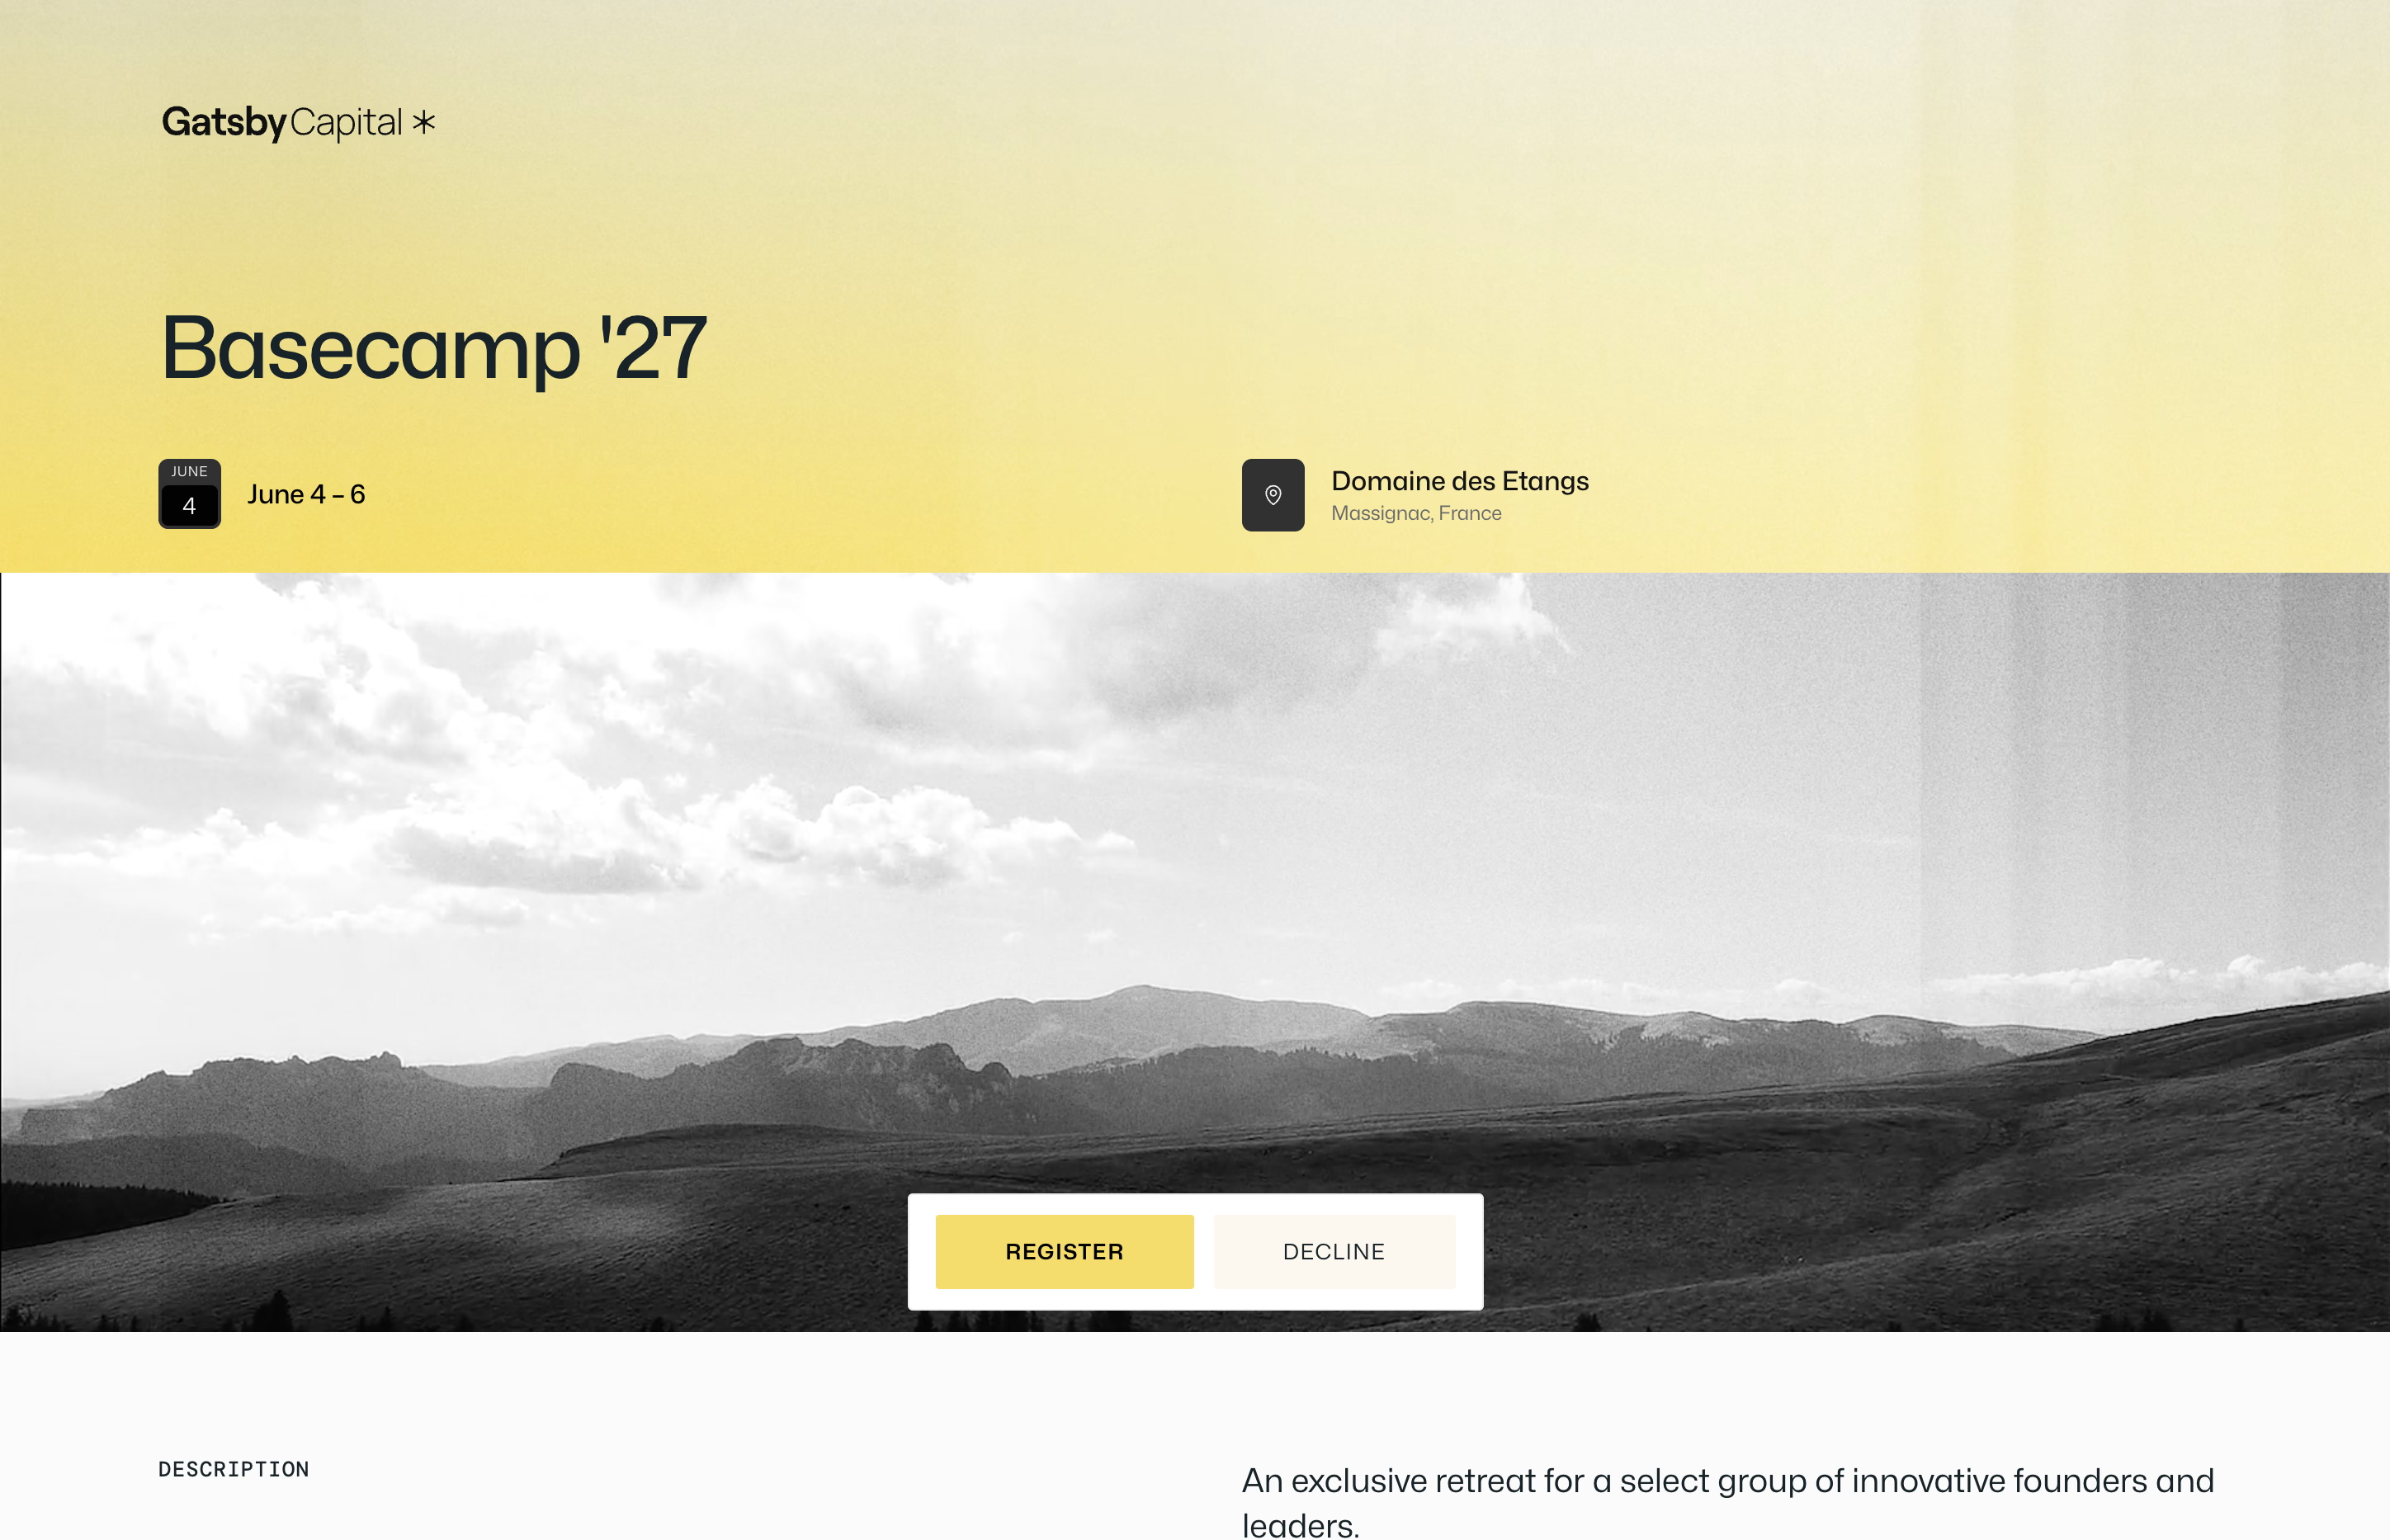
This demo shows how to get busy people to commit early to a multi-day retreat. Capture interest first. Collect logistics later.
**Two-stage registration**
Stage one is lightweight. Name, company, and a yes. No flight details, no activity preferences, no dietary restrictions yet. You get on their calendar before they have a reason to procrastinate.
***
**Visual schedule at a glance**
A vertical timeline walks through each day of the retreat with images and keynote highlights. Enough to build excitement. Not enough to overwhelm. The full agenda comes later.
***
**Venue and logistics preview**
Accommodations and airport transportation are called out early. That answers the two questions everyone asks first: where am I sleeping and how do I get there. Flights are the guest’s responsibility, and that’s clear upfront.
***
**Follow-up survey in confirmation**
After registering, the confirmation email includes a link to a longer form. Activity selection, dietary restrictions, travel details, accommodation preferences. You collect what you need on your timeline, not theirs.
***
**Activity selection with constraints**
The follow-up form handles activity slots, capacity limits, and scheduling conflicts. If the afternoon hike is full or conflicts with a morning session, guests see that before they choose.
[Try registration ](https://gatsby.events/showcase/rsvp/register?e=team-offsite-example-event)
This demo uses a public link so anyone can try it.
In practice, each guest gets **a unique link** tied to their profile.
Registration skips name and email since Gatsby already knows who they are. Previous answers like dietary restrictions from past events appear prefilled. The link is non-transferable, so you know exactly who’s confirmed.
## Planning a retreat or offsite?
30 minutes. We’ll walk through your event and build the registration flow together. No prep needed.
Book a demoGet support
## Explore other examples
[Section titled “Explore other examples”](#explore-other-examples)
1. [](/examples/strategic-events/annual-general-meeting)
### [Annual Meeting (AGM)](/examples/strategic-events/annual-general-meeting)
[Compliance-conscious, document sharing, formal program](/examples/strategic-events/annual-general-meeting)
2. [](/examples/strategic-events/executive-dinner)
### [Executive Dinner](/examples/strategic-events/executive-dinner)
[Three RSVP options, briefing opt-in, and no-pitch expectations](/examples/strategic-events/executive-dinner)
3. [](/examples/strategic-events/private-forum)
### [Private Forum](/examples/strategic-events/private-forum)
[Advisory council, private check-in](/examples/strategic-events/private-forum)
4. [](/examples/curated-events/speaker-series)
### [Speaker Series](/examples/curated-events/speaker-series)
[Apply to attend](/examples/curated-events/speaker-series)
5. [](/examples/curated-events/waitlisted-social)
### [Waitlist Social](/examples/curated-events/waitlisted-social)
[Curated access social event](/examples/curated-events/waitlisted-social)
6. [](/examples/community-events/team-offsite)
### [Team Offsite](/examples/community-events/team-offsite)
[Multi-day, logistics-heavy, activity selection](/examples/community-events/team-offsite)
# User Summit
> See how ticketed registration works for large open events with group registrations, add-on sessions, promo codes, and a full checkout flow.
[Try registration ](https://gatsby.events/showcase/rsvp/register?e=surface-2027-example-event)
This demo uses open registration so anyone can try the full ticketed checkout. For your known guests, you can send personal links with their information already auto-filled.
[](https://gatsby.events/showcase/rsvp/register?e=surface-2027-example-event)
## How it works
[Section titled “How it works”](#how-it-works)
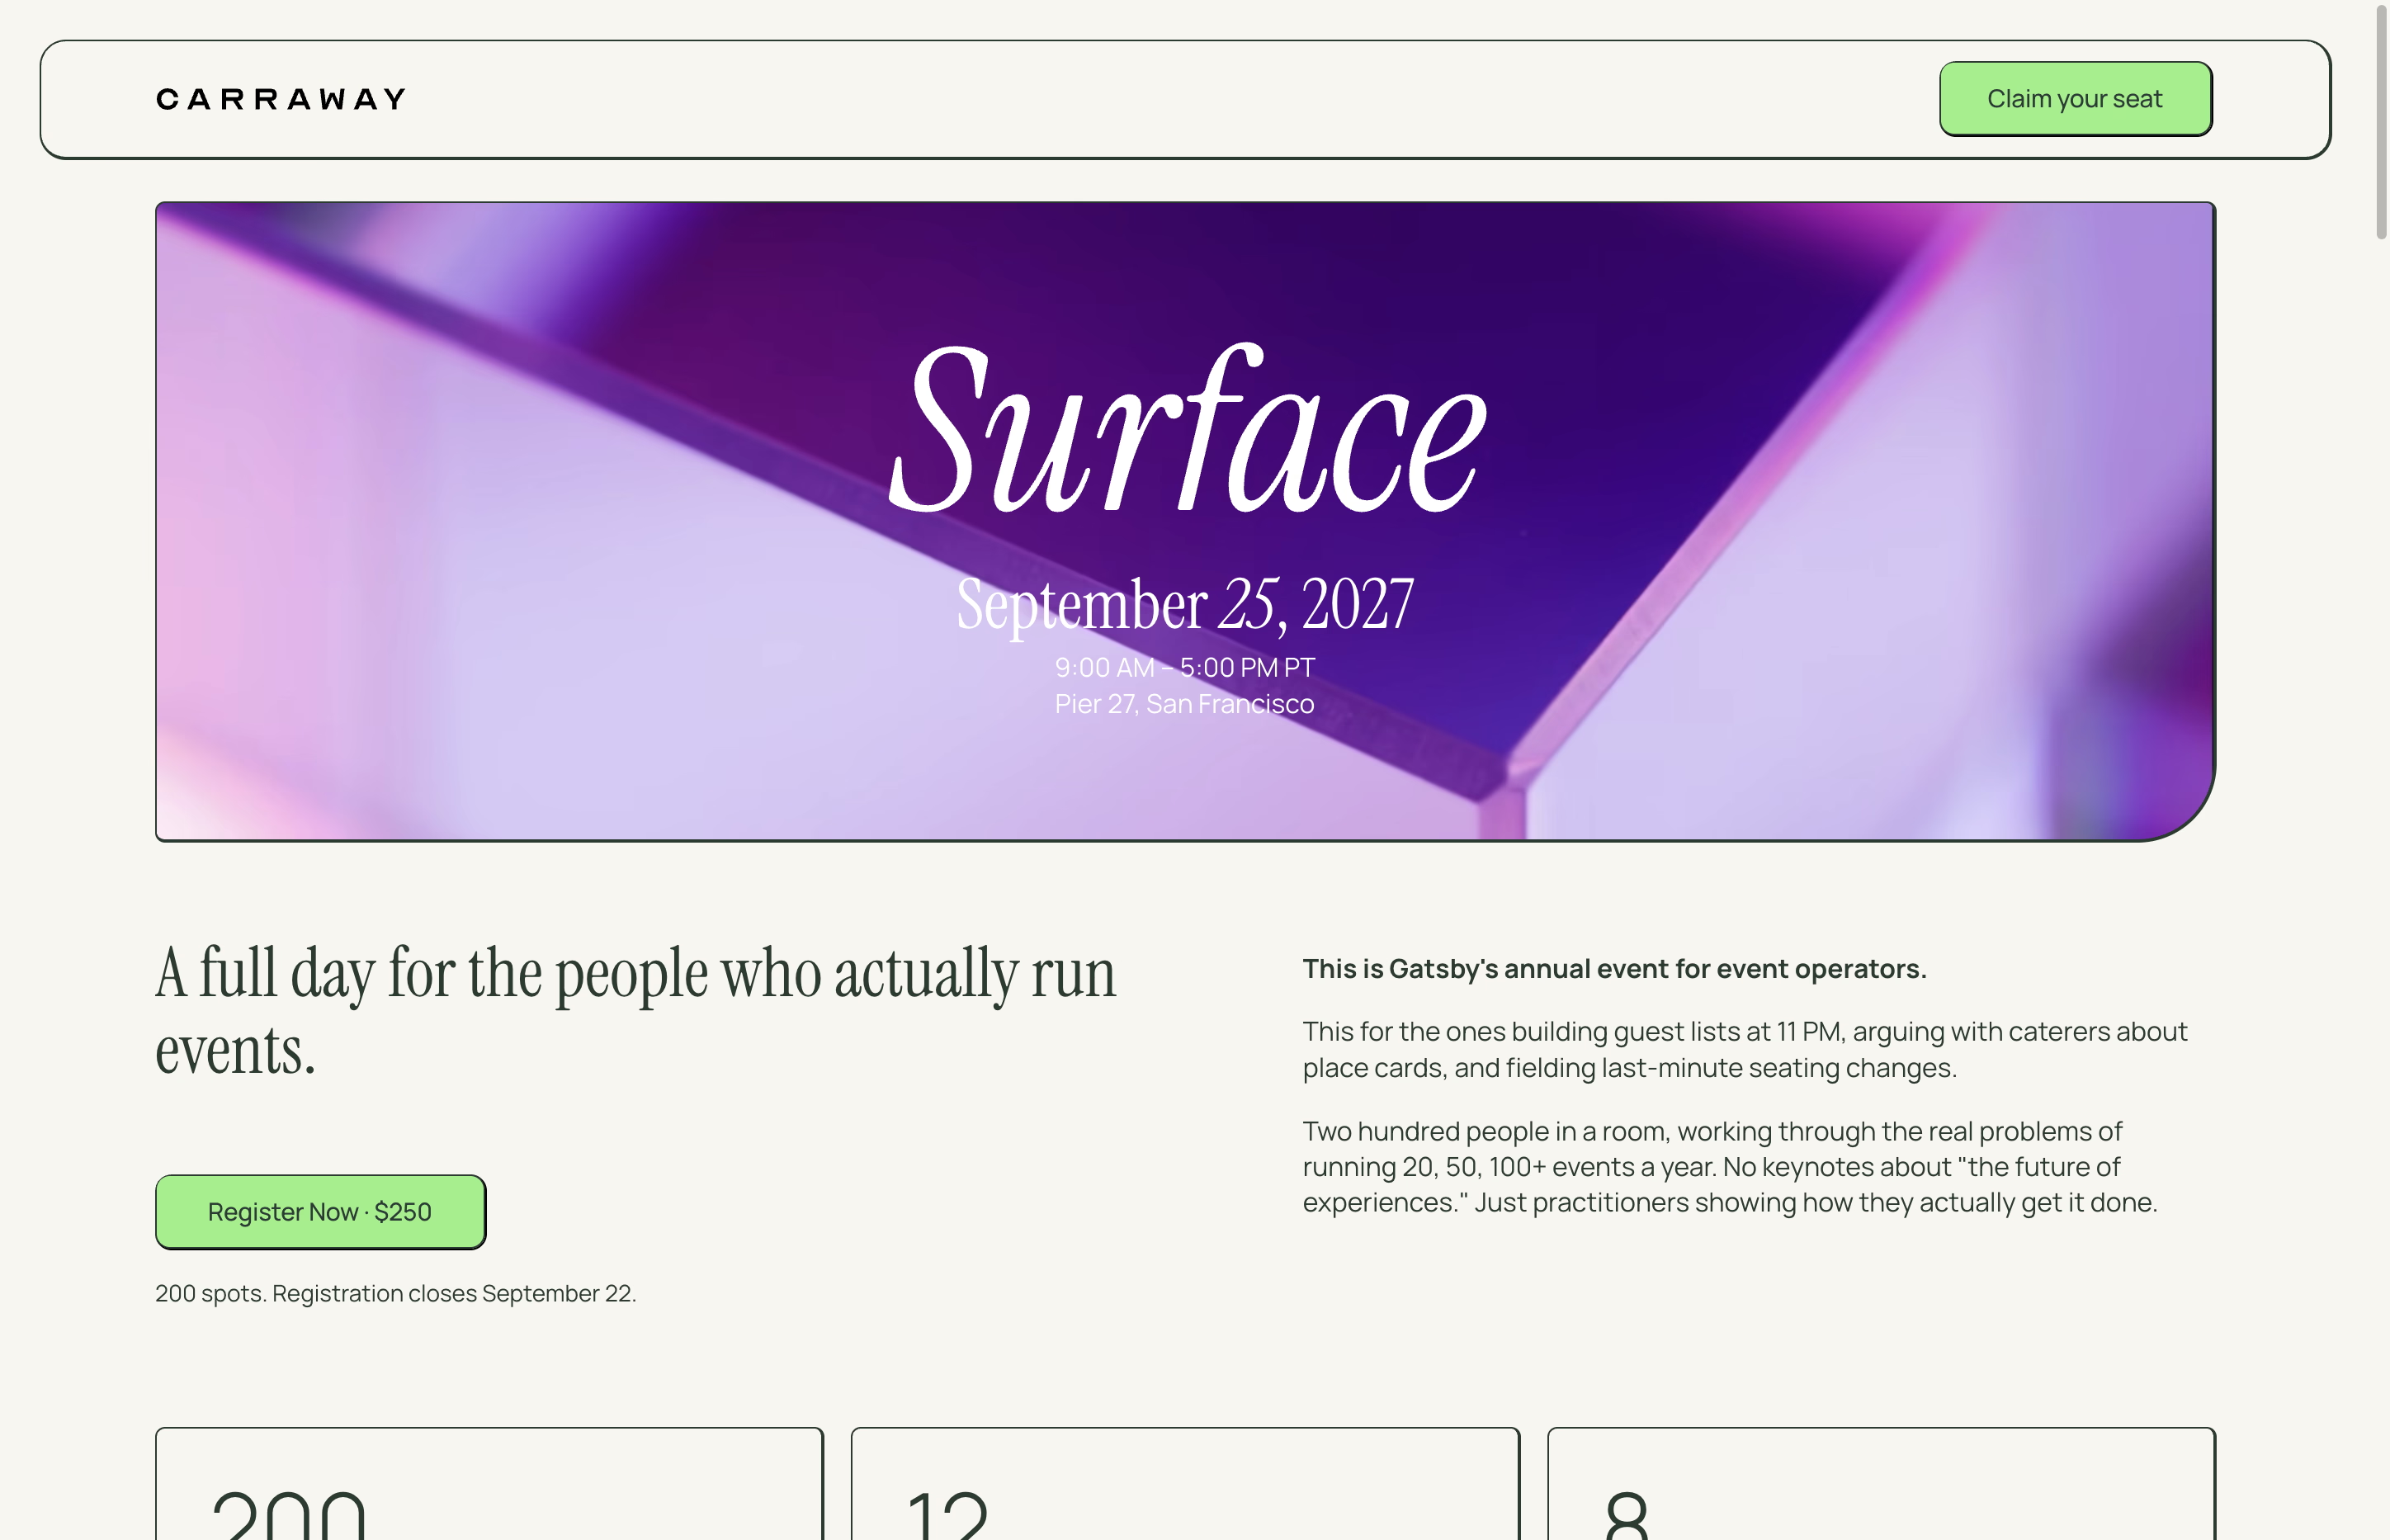
User summits, customer conferences, partner days. These are your biggest events. Hundreds of attendees, ticketed registration, and a checkout flow that needs to handle groups, add-ons, and promo codes without falling apart.
**Group registration with running totals**
Register yourself and add colleagues in the same flow. Each person added updates the subtotal in real time. No separate transactions, no confusion about who paid for whom.
***
**Add-on sessions**
Optional add-ons like a VIP dinner or workshop appear alongside the main ticket. Guests choose what they want, and the total adjusts. One checkout for everything.
***
**Full checkout experience**
The registration ends with a real checkout screen. Itemized summary, payment collection, confirmation. Guests see exactly what they’re paying for before they submit.
***
**Conversion-optimized landing page**
Sticky navigation, animated hero, venue map, FAQ section. The registration page doubles as a promotional landing page that does the selling before guests hit the form.
[Try registration ](https://gatsby.events/showcase/rsvp/register?e=surface-2027-example-event)
This is Gatsby’s only ticketed registration example. It shows the same platform that powers intimate dinners and private forums can also handle large, open events with real checkout flows.
For your VIPs and known guests, send personal links with promo codes embedded. They skip the public form, see their name prefilled, and get the complimentary rate without hunting for a code.
## Want to run a summit like this?
30 minutes. We’ll walk through your event, set up ticketing tiers, and show you how group registration and promo codes work.
Book a demoGet support
## Explore other examples
[Section titled “Explore other examples”](#explore-other-examples)
1. [](/examples/strategic-events/annual-general-meeting)
### [Annual Meeting (AGM)](/examples/strategic-events/annual-general-meeting)
[Compliance-conscious, document sharing, formal program](/examples/strategic-events/annual-general-meeting)
2. [](/examples/strategic-events/executive-dinner)
### [Executive Dinner](/examples/strategic-events/executive-dinner)
[Three RSVP options, briefing opt-in, and no-pitch expectations](/examples/strategic-events/executive-dinner)
3. [](/examples/strategic-events/private-forum)
### [Private Forum](/examples/strategic-events/private-forum)
[Advisory council, private check-in](/examples/strategic-events/private-forum)
4. [](/examples/curated-events/speaker-series)
### [Speaker Series](/examples/curated-events/speaker-series)
[Apply to attend](/examples/curated-events/speaker-series)
5. [](/examples/curated-events/waitlisted-social)
### [Waitlist Social](/examples/curated-events/waitlisted-social)
[Curated access social event](/examples/curated-events/waitlisted-social)
6. [](/examples/community-events/team-offsite)
### [Team Offsite](/examples/community-events/team-offsite)
[Multi-day, logistics-heavy, activity selection](/examples/community-events/team-offsite)
# Curated Event Examples
> Pre-built setups for high-touch dinners and VIP receptions.
Small, intentional gatherings where every invite matters. Executive dinners, speaker series, advisory board meetings, portfolio roundtables.
These events are selective by design. Limited seats. Waitlists. You’re curating who’s in the room because the conversation depends on it.
## Curated Access
1. [](/examples/curated-events/speaker-series)
### [Speaker Series](/examples/curated-events/speaker-series)
[Apply to attend](/examples/curated-events/speaker-series)
2. [](/examples/curated-events/waitlisted-social)
### [Waitlist Social](/examples/curated-events/waitlisted-social)
[Curated access social event](/examples/curated-events/waitlisted-social)
## Who runs these
[Section titled “Who runs these”](#who-runs-these)
Investor Relations teams at VC and PE firms. Portfolio Platform teams. University research centers hosting invite-only symposiums. Membership organizations running member dinners.
## What makes them different
[Section titled “What makes them different”](#what-makes-them-different)
You control exactly who registers. Waitlists let you fill seats from the right people without opening the floodgates. Approval workflows mean you review every registration before confirming. Guest profiles tell you who’s attended before, what firm they’re from, what they care about.
Registration closes when you say so. Not when a venue fills.
## Other Event Types
[Section titled “Other Event Types”](#other-event-types)
Strategic Events
1. [](/examples/strategic-events/annual-general-meeting)
### [Annual Meeting (AGM)](/examples/strategic-events/annual-general-meeting)
[Compliance-conscious, document sharing, formal program](/examples/strategic-events/annual-general-meeting)
2. [](/examples/strategic-events/executive-dinner)
### [Executive Dinner](/examples/strategic-events/executive-dinner)
[Three RSVP options, briefing opt-in, and no-pitch expectations](/examples/strategic-events/executive-dinner)
3. [](/examples/strategic-events/private-forum)
### [Private Forum](/examples/strategic-events/private-forum)
[Advisory council, private check-in](/examples/strategic-events/private-forum)
Community & Team
1. [](/examples/community-events/team-offsite)
### [Team Offsite](/examples/community-events/team-offsite)
[Multi-day, logistics-heavy, activity selection](/examples/community-events/team-offsite)
2. [](/examples/community-events/user-summit)
### [User Summit](/examples/community-events/user-summit)
[Ticketed registration with group checkout and promo codes](/examples/community-events/user-summit)
## Want to run events like these?
30 minutes. We’ll talk about your event and show you how to set it up.
Book a demoGet support
# Speaker Series
> See how an apply-to-attend speaker series works with waitlists, social proof, and smart data collection.
[Try registration ](https://gatsby.events/showcase/rsvp/register?e=speaker-series-example-event)
[](https://gatsby.events/showcase/rsvp/register?e=speaker-series-example-event)
## How it works
[Section titled “How it works”](#how-it-works)
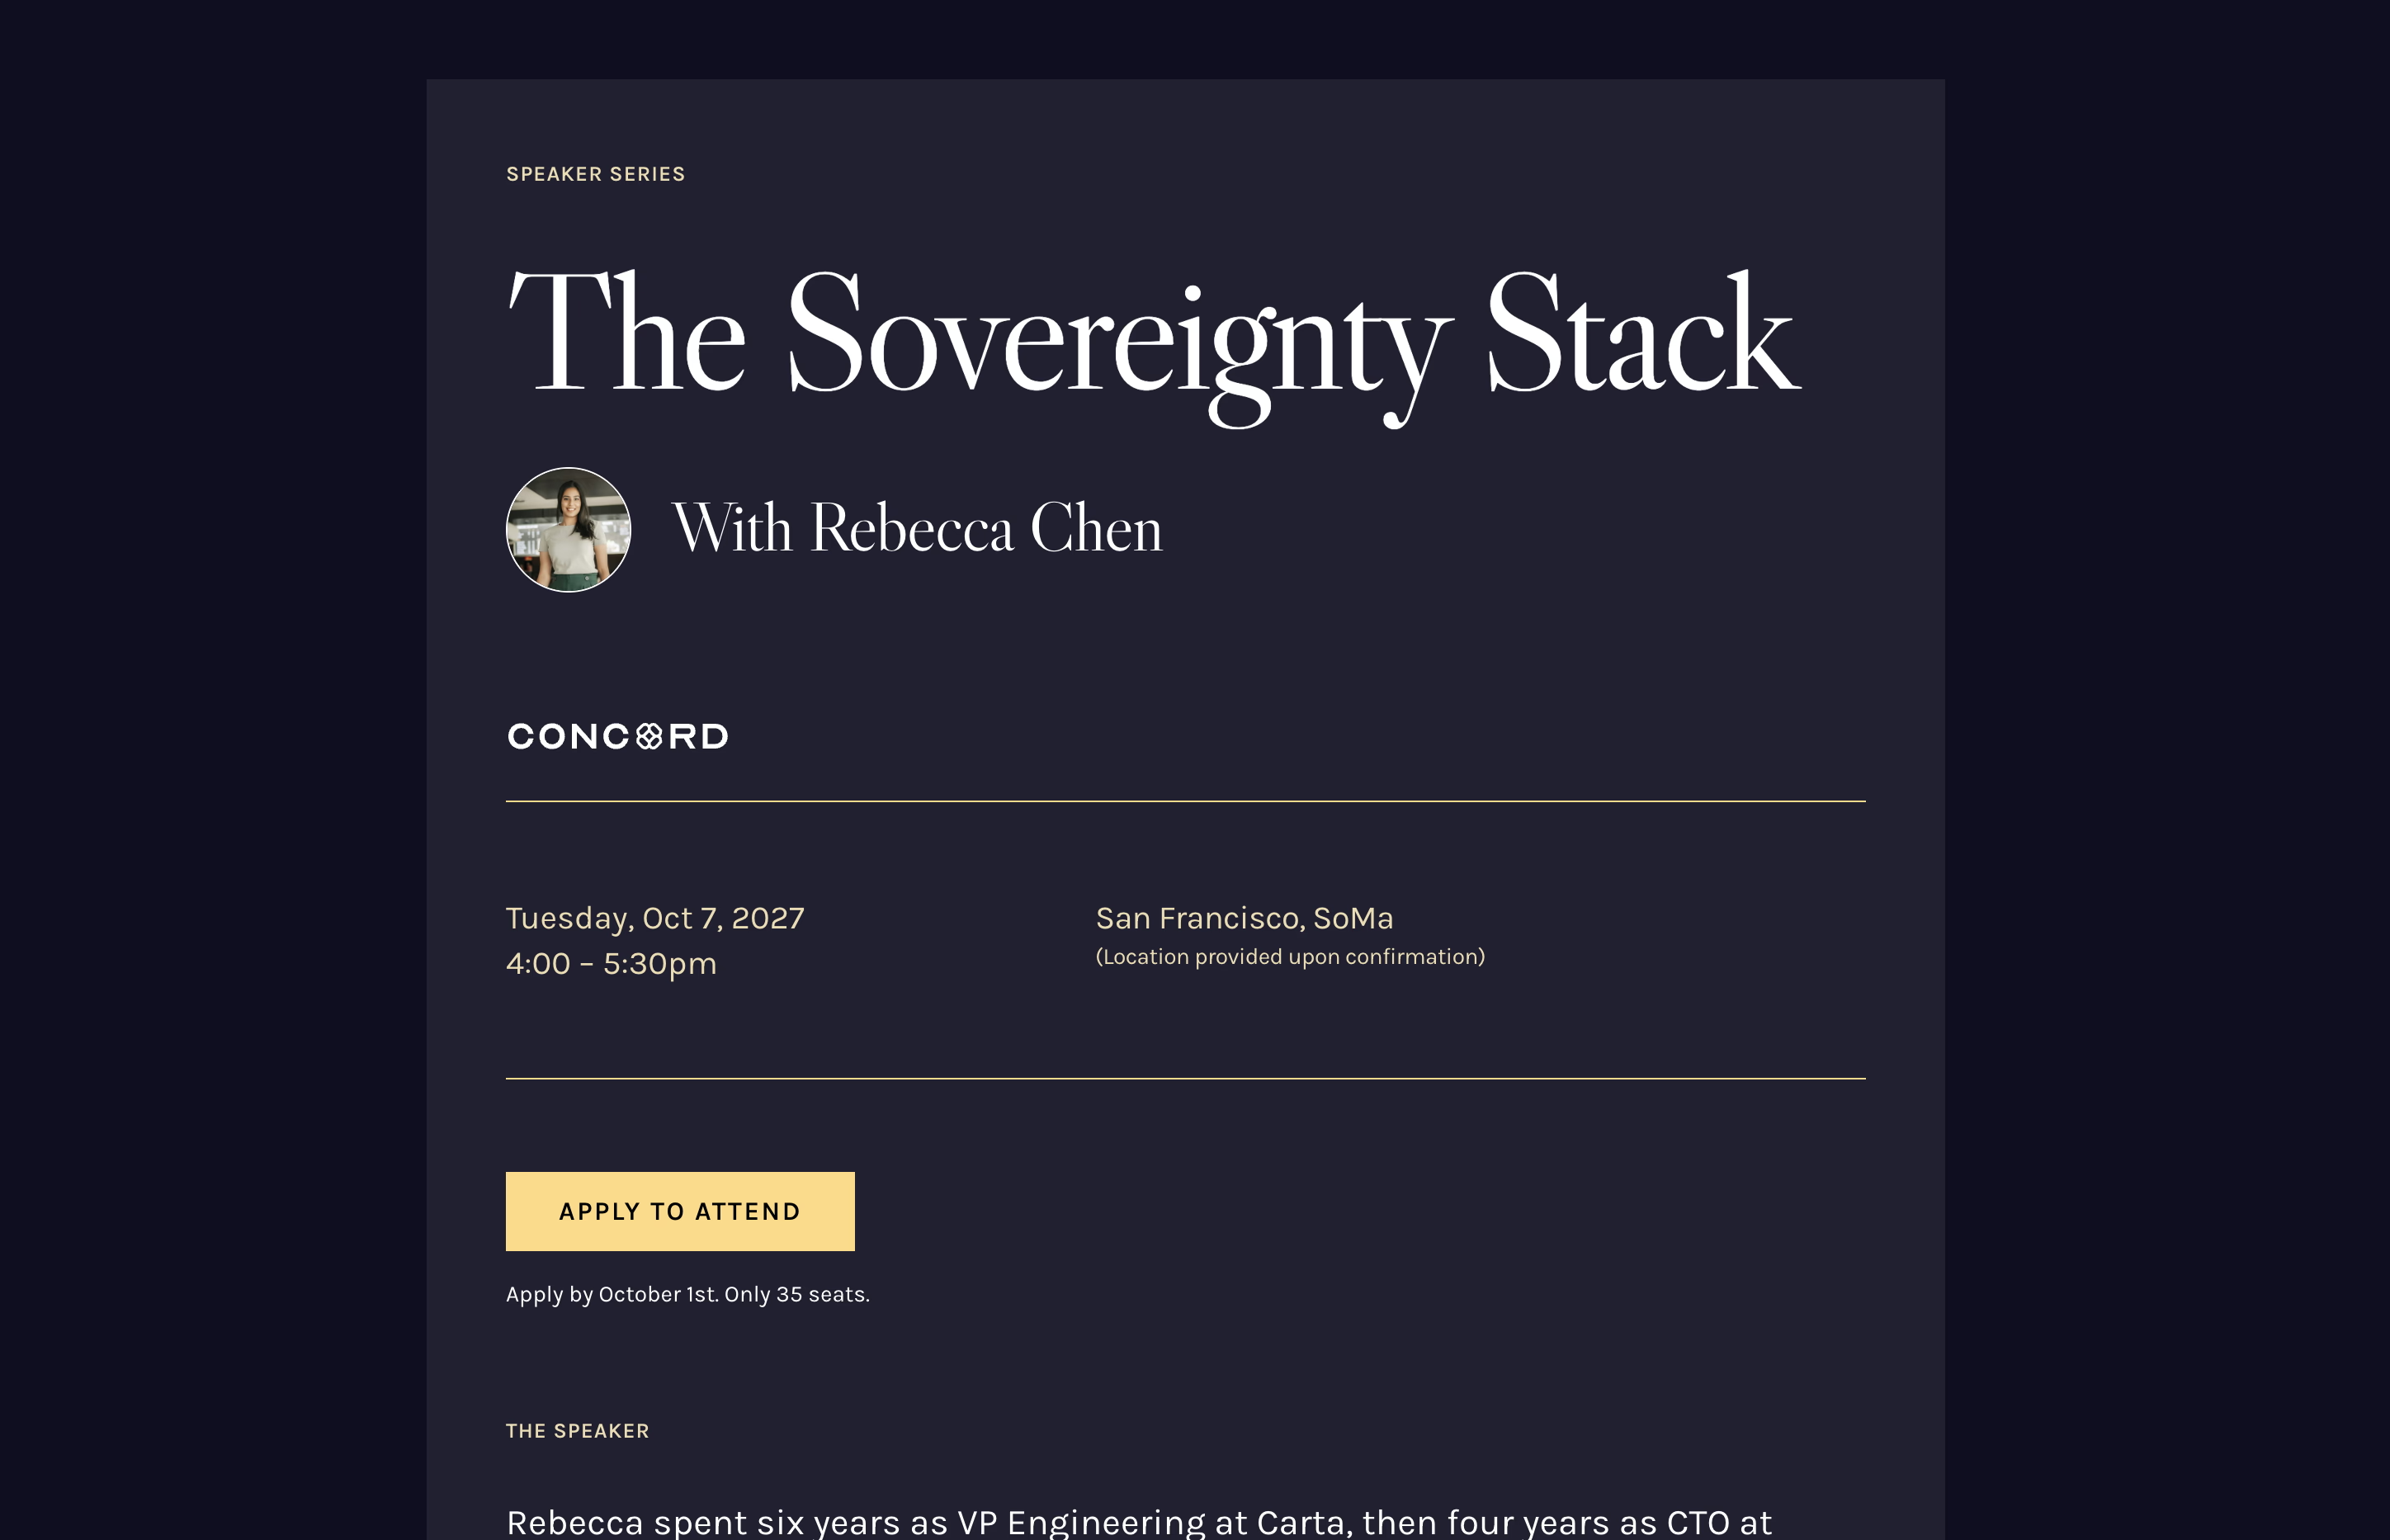
When you click through, you’ll see an apply-to-attend landing page designed to attract the right people and collect strategic information.
**Waitlist every application**
Guests click “Apply to Attend” and you review each one. It’s not about space. It’s about getting the right people in the room.
***
**Show who’s already confirmed**
Display names and company logos from early invites. Real social proof that important people are coming.
***
**Strategic data collection**
Collect LinkedIn profiles, company stage, industry insights. Build better breakout groups and learn about your market while you plan the event.
***
**Confirm applications manually**
Applicants see “Application received” and get an email. You approve them when you’re ready.
## Beyond registration
[Section titled “Beyond registration”](#beyond-registration)
Once applications close, Gatsby helps you run the event and follow up.
**Let your team help vet**
Share a filtered view of applicants with your speaker or team. They can leave notes on who to approve without seeing your whole event.
***
**Use seating charts for breakouts**
Assign attendees to discussion groups instead of tables. Print badges showing each person’s group so they know where to go.
***
**Watermark PDFs automatically**
Share slides or materials after the event. Each PDF gets watermarked with the recipient’s name so you know where leaks come from.
[Try registration ](https://gatsby.events/showcase/rsvp/register?e=speaker-series-example-event)
This example uses a public application link. For people you already know, send private links instead.
Each guest gets a unique URL with a simple Yes/No. Their info appears prefilled from past events, and since links can’t be forwarded, your curated room stays intact.
## Want to run your own speaker series?
30 minutes. We’ll walk through your event and show you exactly how to set this up.
Book a demoGet support
## Explore other examples
[Section titled “Explore other examples”](#explore-other-examples)
1. [](/examples/strategic-events/annual-general-meeting)
### [Annual Meeting (AGM)](/examples/strategic-events/annual-general-meeting)
[Compliance-conscious, document sharing, formal program](/examples/strategic-events/annual-general-meeting)
2. [](/examples/strategic-events/executive-dinner)
### [Executive Dinner](/examples/strategic-events/executive-dinner)
[Three RSVP options, briefing opt-in, and no-pitch expectations](/examples/strategic-events/executive-dinner)
3. [](/examples/strategic-events/private-forum)
### [Private Forum](/examples/strategic-events/private-forum)
[Advisory council, private check-in](/examples/strategic-events/private-forum)
4. [](/examples/curated-events/speaker-series)
### [Speaker Series](/examples/curated-events/speaker-series)
[Apply to attend](/examples/curated-events/speaker-series)
5. [](/examples/curated-events/waitlisted-social)
### [Waitlist Social](/examples/curated-events/waitlisted-social)
[Curated access social event](/examples/curated-events/waitlisted-social)
6. [](/examples/community-events/team-offsite)
### [Team Offsite](/examples/community-events/team-offsite)
[Multi-day, logistics-heavy, activity selection](/examples/community-events/team-offsite)
# Waitlist Social
> Try a waitlist-first conference after-party registration flow with LinkedIn screening, nominated guests, and QR code check-in.
[Try registration ](https://gatsby.events/showcase/rsvp/register?e=waitlist-social-example-event)
[](https://gatsby.events/showcase/rsvp/register?e=waitlist-social-example-event)
## How it works
[Section titled “How it works”](#how-it-works)
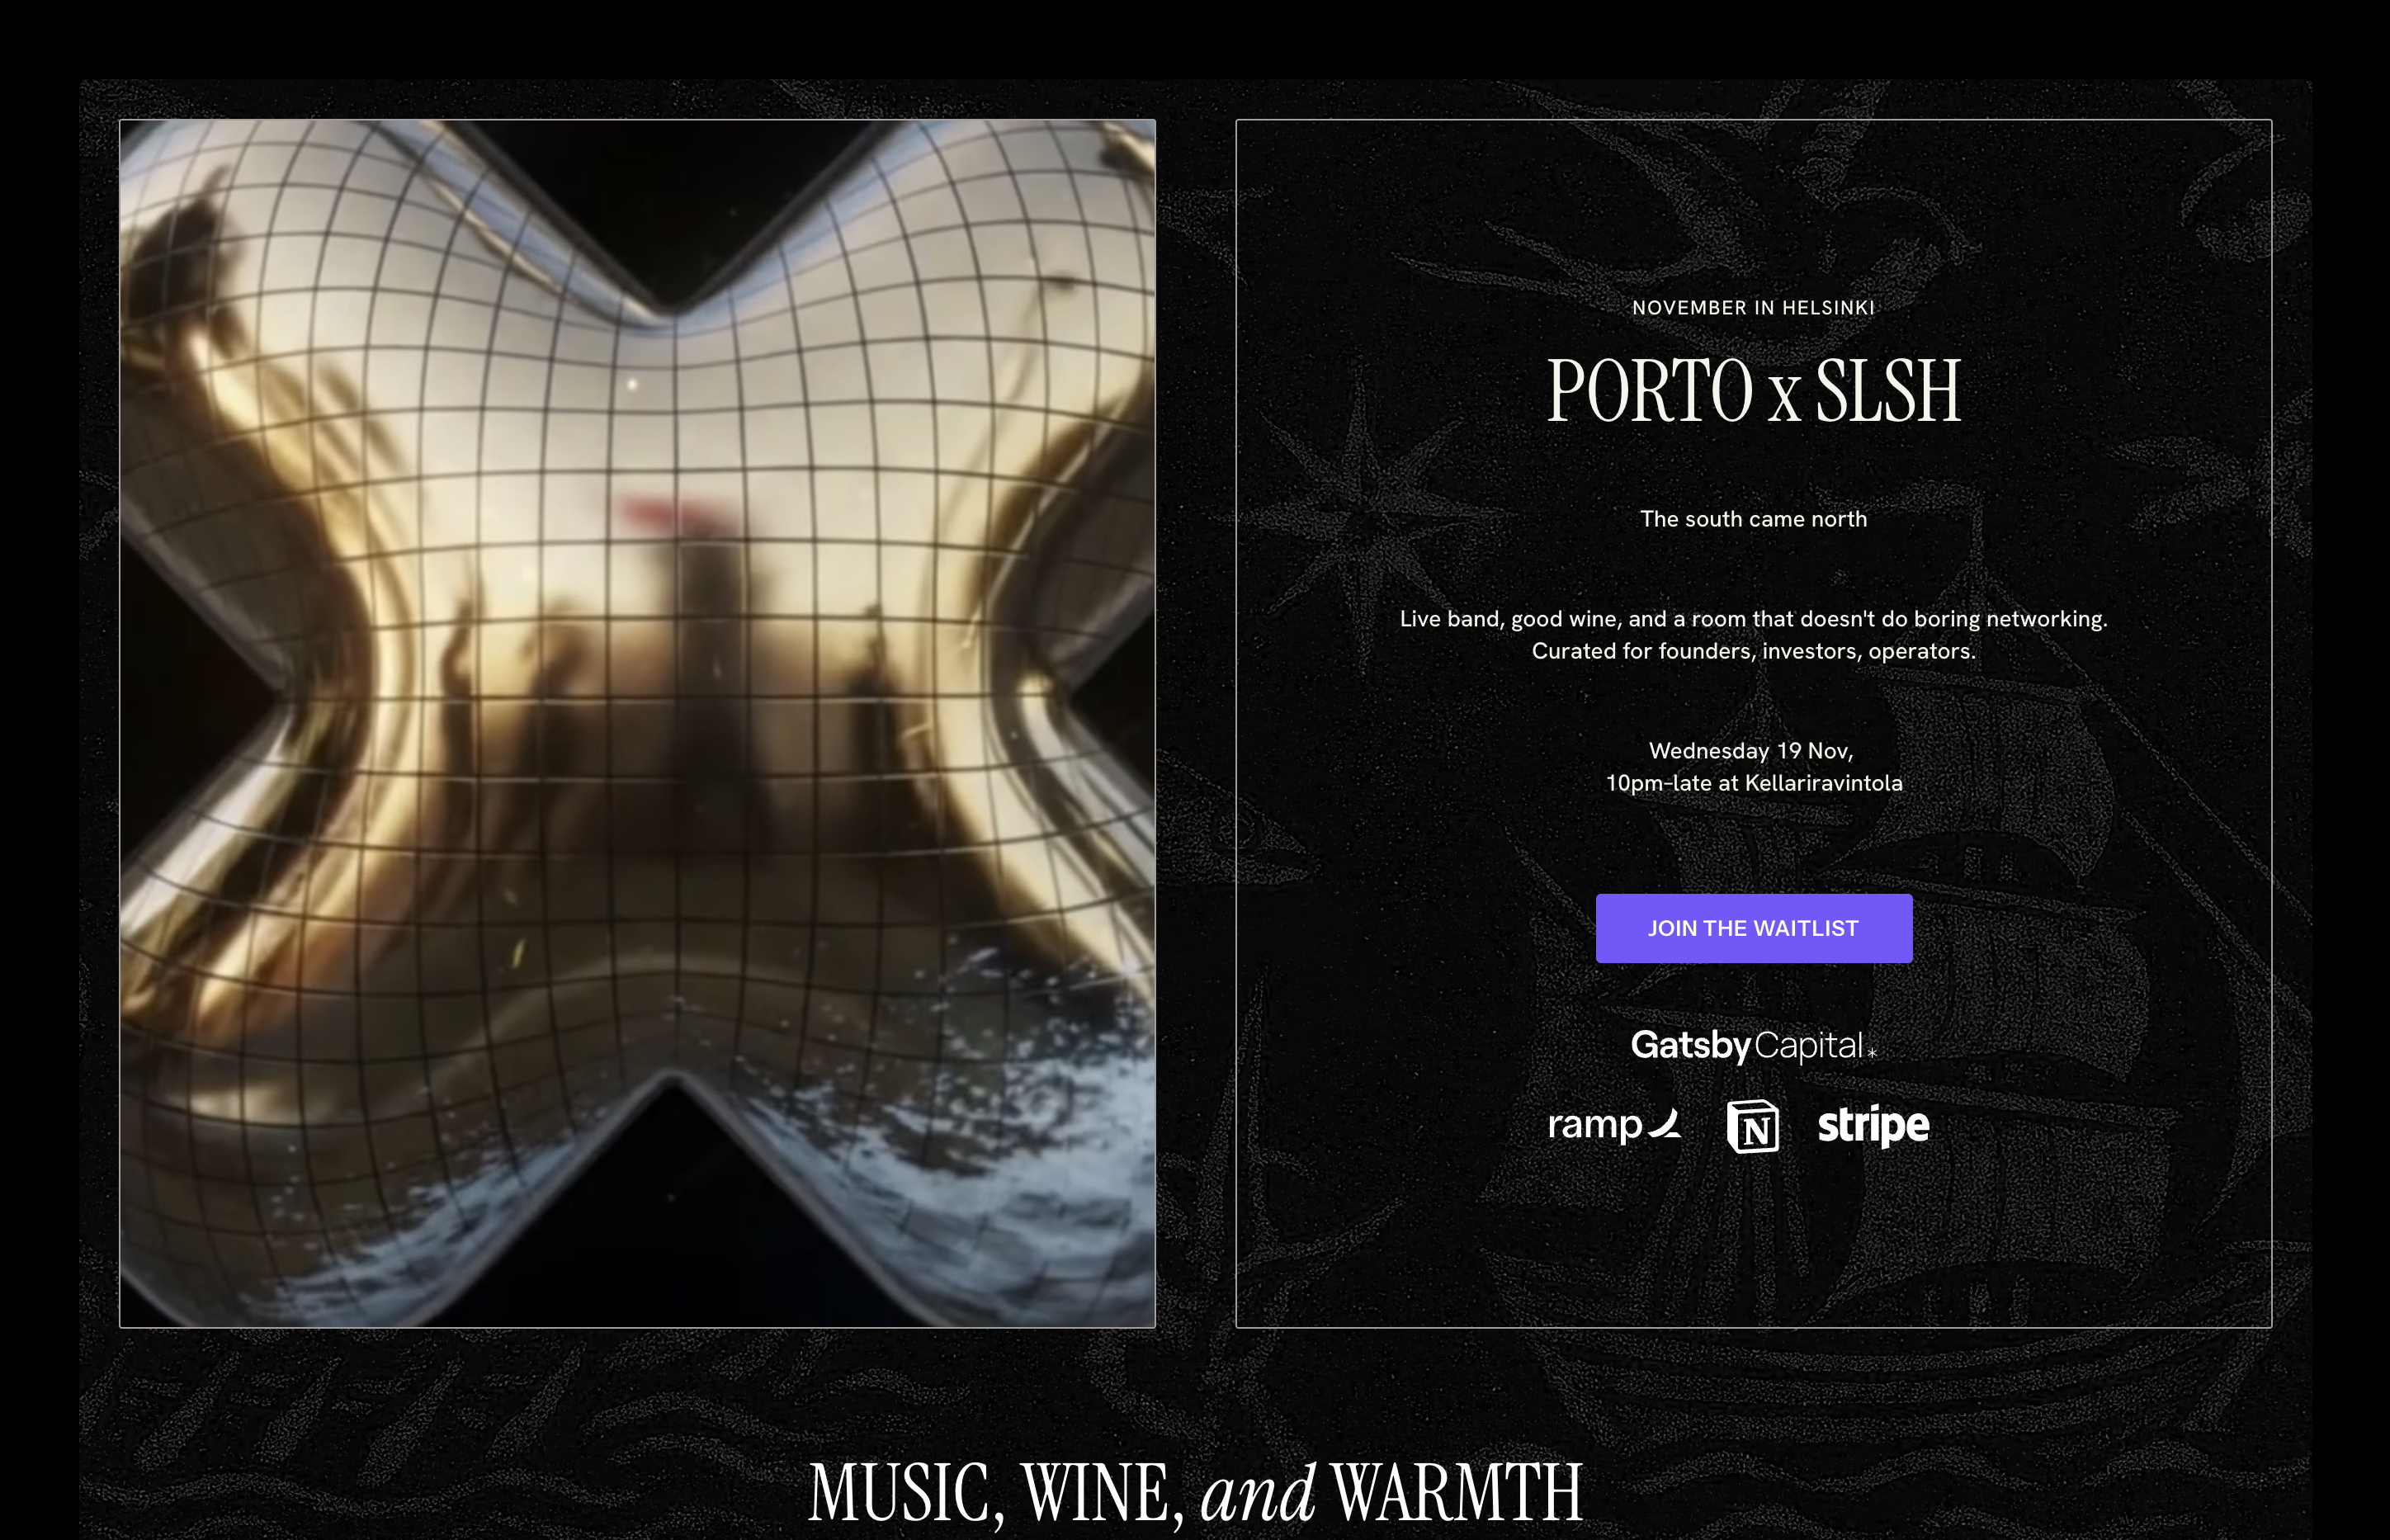
Late-night conference week party with a live band, good wine, and a room full of founders, investors, and operators. Thousands can apply, but you only let about 300 in, so registration starts on a waitlist.
**Waitlist by default**
New signups land in Waitlist, so you can approve in waves once you see who actually raised their hand.
***
**Calendar hold for momentum**
The waitlist email can include a calendar invite so people save the night, even before they are approved.
***
**A short form that still screens**
Require a LinkedIn URL, ask for company and role, and collect a profile photo so your door team and hosts can recognize people, while keeping the waiver text on the landing page and a single checkbox on the form.
***
**Nominations instead of a generic +1**
Guests can nominate founders or investors they vouch for, and each nomination becomes a separate guest tied back to the inviter.
***
**Collaborative vetting and a faster door**
Share a real-time guest list view with your team (optional editable Notes column), import enrichment as custom fields, then send QR codes two hours before doors so check-in is a quick scan with the guest photo on screen.
[Try registration ](https://gatsby.events/showcase/rsvp/register?e=waitlist-social-example-event)
This demo uses a public link so anyone can try it. In practice, you usually send each guest a personal RSVP link that knows who they are, pre-fills what you already have, and can skip the name and email step.
If someone forwards their link, it still points back to their profile, which matters when you are checking QR codes and photos at the door.
## Want to run a waitlist social like this?
30 minutes. We’ll talk about your event and show you how to set up the waitlist, approvals, emails, and check-in.
Book a demoGet support
## Explore other examples
[Section titled “Explore other examples”](#explore-other-examples)
1. [](/examples/strategic-events/annual-general-meeting)
### [Annual Meeting (AGM)](/examples/strategic-events/annual-general-meeting)
[Compliance-conscious, document sharing, formal program](/examples/strategic-events/annual-general-meeting)
2. [](/examples/strategic-events/executive-dinner)
### [Executive Dinner](/examples/strategic-events/executive-dinner)
[Three RSVP options, briefing opt-in, and no-pitch expectations](/examples/strategic-events/executive-dinner)
3. [](/examples/strategic-events/private-forum)
### [Private Forum](/examples/strategic-events/private-forum)
[Advisory council, private check-in](/examples/strategic-events/private-forum)
4. [](/examples/curated-events/speaker-series)
### [Speaker Series](/examples/curated-events/speaker-series)
[Apply to attend](/examples/curated-events/speaker-series)
5. [](/examples/curated-events/waitlisted-social)
### [Waitlist Social](/examples/curated-events/waitlisted-social)
[Curated access social event](/examples/curated-events/waitlisted-social)
6. [](/examples/community-events/team-offsite)
### [Team Offsite](/examples/community-events/team-offsite)
[Multi-day, logistics-heavy, activity selection](/examples/community-events/team-offsite)
# Strategic Event Examples
> Pre-built setups for annual conferences, general meetings, and awards galas.
Annual meetings, general assemblies, leadership summits. Flagship events that define your year. You run one or two of these. Everyone in your network expects an invitation.
These events have weight. Board members fly in. LPs expect polish. Portfolio founders clear their calendars. The logistics match the stakes.
## Strategic Events
1. [](/examples/strategic-events/annual-general-meeting)
### [Annual Meeting (AGM)](/examples/strategic-events/annual-general-meeting)
[Compliance-conscious, document sharing, formal program](/examples/strategic-events/annual-general-meeting)
2. [](/examples/strategic-events/executive-dinner)
### [Executive Dinner](/examples/strategic-events/executive-dinner)
[Three RSVP options, briefing opt-in, and no-pitch expectations](/examples/strategic-events/executive-dinner)
3. [](/examples/strategic-events/private-forum)
### [Private Forum](/examples/strategic-events/private-forum)
[Advisory council, private check-in](/examples/strategic-events/private-forum)
## Who runs these
[Section titled “Who runs these”](#who-runs-these)
VC and PE firms running annual LP meetings or portfolio summits. Universities hosting research showcases. Associations bringing members together once a year. Companies running user conferences or customer events.
## What makes them different
[Section titled “What makes them different”](#what-makes-them-different)
Multiple tracks and breakout sessions. Badge printing for 100+ guests. Seating charts for formal dinners that close out the summit. Post-event surveys to dozens or hundreds of people. Sponsor coordination and exhibitor check-in.
Your guest list builds over months. People register early, change their minds, update plus-ones. You need a system that tracks all of it without spreadsheets falling apart.
## Other Event Types
[Section titled “Other Event Types”](#other-event-types)
Curated Access
1. [](/examples/curated-events/speaker-series)
### [Speaker Series](/examples/curated-events/speaker-series)
[Apply to attend](/examples/curated-events/speaker-series)
2. [](/examples/curated-events/waitlisted-social)
### [Waitlist Social](/examples/curated-events/waitlisted-social)
[Curated access social event](/examples/curated-events/waitlisted-social)
Community & Team
1. [](/examples/community-events/team-offsite)
### [Team Offsite](/examples/community-events/team-offsite)
[Multi-day, logistics-heavy, activity selection](/examples/community-events/team-offsite)
2. [](/examples/community-events/user-summit)
### [User Summit](/examples/community-events/user-summit)
[Ticketed registration with group checkout and promo codes](/examples/community-events/user-summit)
## Want to run events like these?
30 minutes. We’ll talk about your event and show you how to set it up.
Book a demoGet support
# Annual Meeting (AGM)
> A multi-day meeting where different people see different agendas. Perfect for investor AGMs, member summits, or any event where access depends on who you are.
[Try registration ](https://gatsby.events/showcase/rsvp/register?e=annual-general-meeting-2027\&ref=cta-top)
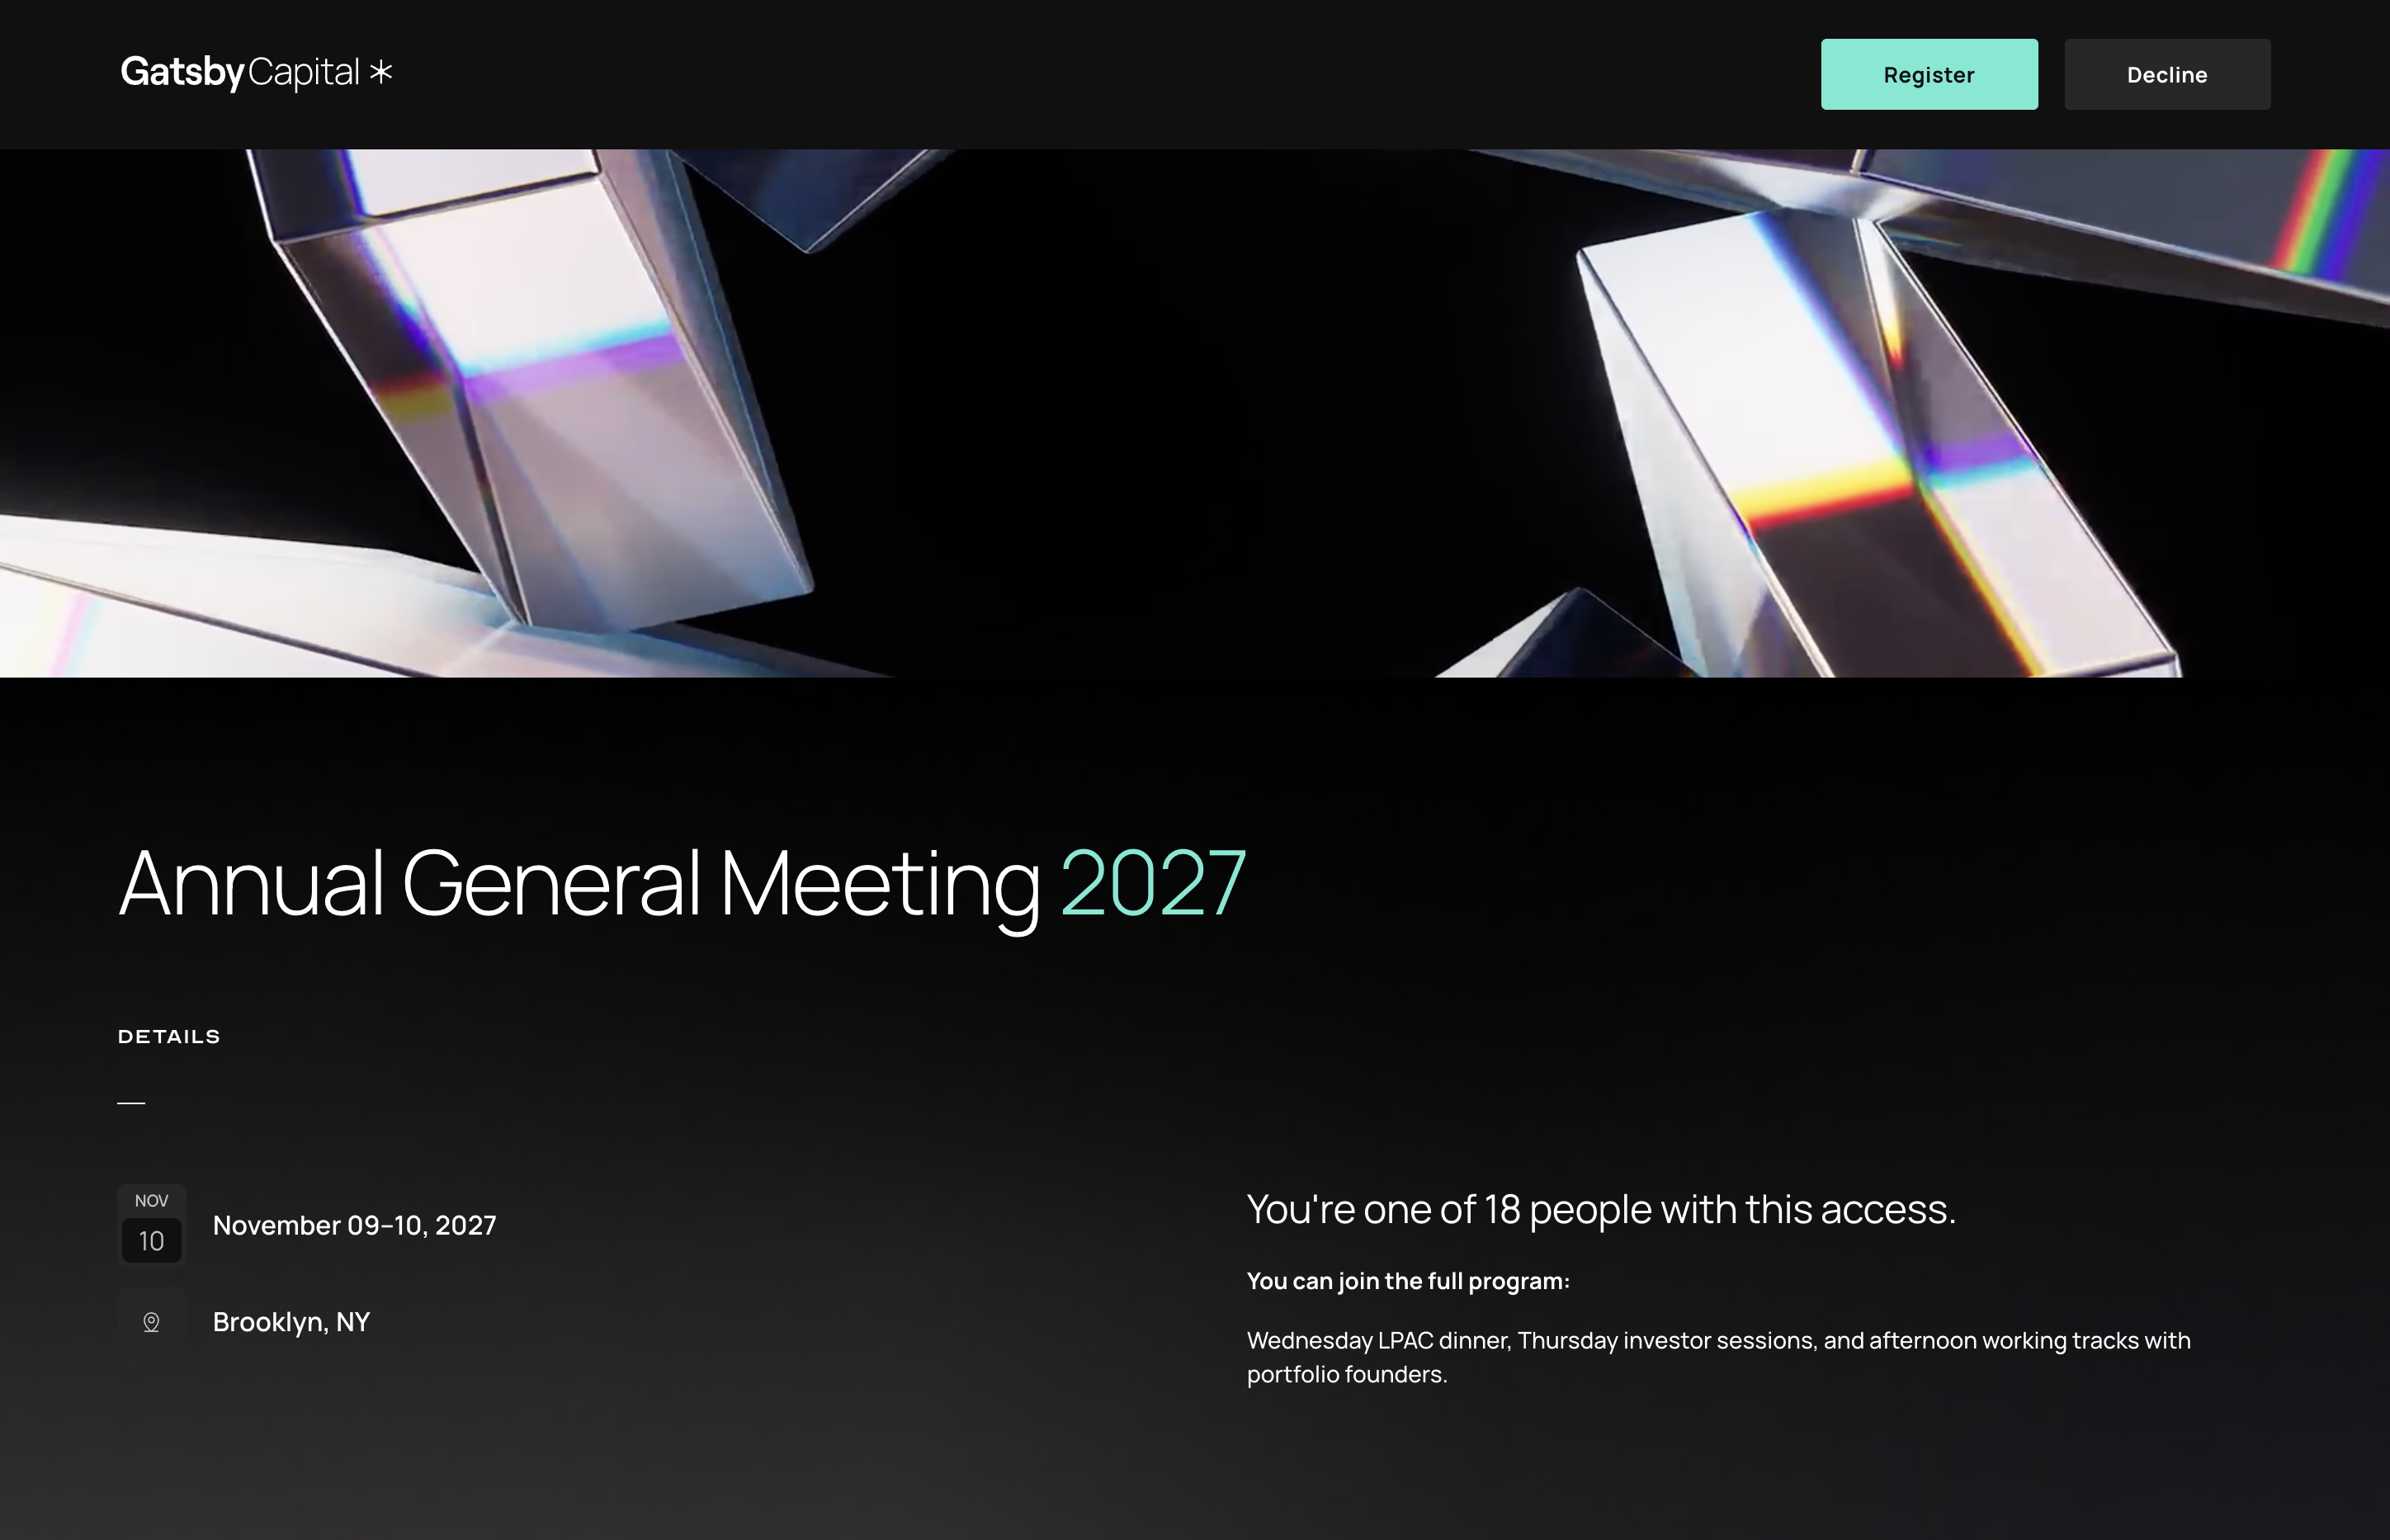
This demo uses a public link. For your actual AGM, each LP gets a personal link. Their info is pre-filled. The link can’t be forwarded.
[](https://gatsby.events/showcase/rsvp/register?e=annual-general-meeting-2027\&ref=image-banner)
## How it works
[Section titled “How it works”](#how-it-works)
This demo shows how to manage complex multi-day events where guests select their own sessions.
**Multi-event registration**
One page. Multiple sub-events. Each with its own calendar invite and attendance tracking.
***
**Strategic seating prep**
Registration captures the details you need for strategic seating, then pushes them to the seating chart tool.
***
**Tiered access**
Different guests see different sessions and options based on their access level.
***
**Invitation transfer**
Declining guests can suggest a replacement. You get the name and email for manual approval.
[Try registration ](https://gatsby.events/showcase/rsvp/register?e=annual-general-meeting-2027\&ref=cta-page)
This demo uses a public link, but private events can send guests a personal link that already knows them.
No re-entering names or emails. What they can register for depends on their guest type. And if you stored their dietary restrictions from a previous event, those are prefilled.
## Want to run an event like this?
30 minutes. We’ll talk about your event and show you how to set it up.
Book a demoGet support
## Explore other examples
[Section titled “Explore other examples”](#explore-other-examples)
1. [](/examples/strategic-events/annual-general-meeting)
### [Annual Meeting (AGM)](/examples/strategic-events/annual-general-meeting)
[Compliance-conscious, document sharing, formal program](/examples/strategic-events/annual-general-meeting)
2. [](/examples/strategic-events/executive-dinner)
### [Executive Dinner](/examples/strategic-events/executive-dinner)
[Three RSVP options, briefing opt-in, and no-pitch expectations](/examples/strategic-events/executive-dinner)
3. [](/examples/strategic-events/private-forum)
### [Private Forum](/examples/strategic-events/private-forum)
[Advisory council, private check-in](/examples/strategic-events/private-forum)
4. [](/examples/curated-events/speaker-series)
### [Speaker Series](/examples/curated-events/speaker-series)
[Apply to attend](/examples/curated-events/speaker-series)
5. [](/examples/curated-events/waitlisted-social)
### [Waitlist Social](/examples/curated-events/waitlisted-social)
[Curated access social event](/examples/curated-events/waitlisted-social)
6. [](/examples/community-events/team-offsite)
### [Team Offsite](/examples/community-events/team-offsite)
[Multi-day, logistics-heavy, activity selection](/examples/community-events/team-offsite)
# Executive Dinner
> See how registration works for intimate executive dinners with three RSVP options, briefing opt-in, and clear no-pitch expectations.
[Try registration ](https://gatsby.events/showcase/rsvp/register?e=executive-dinner-example-event)
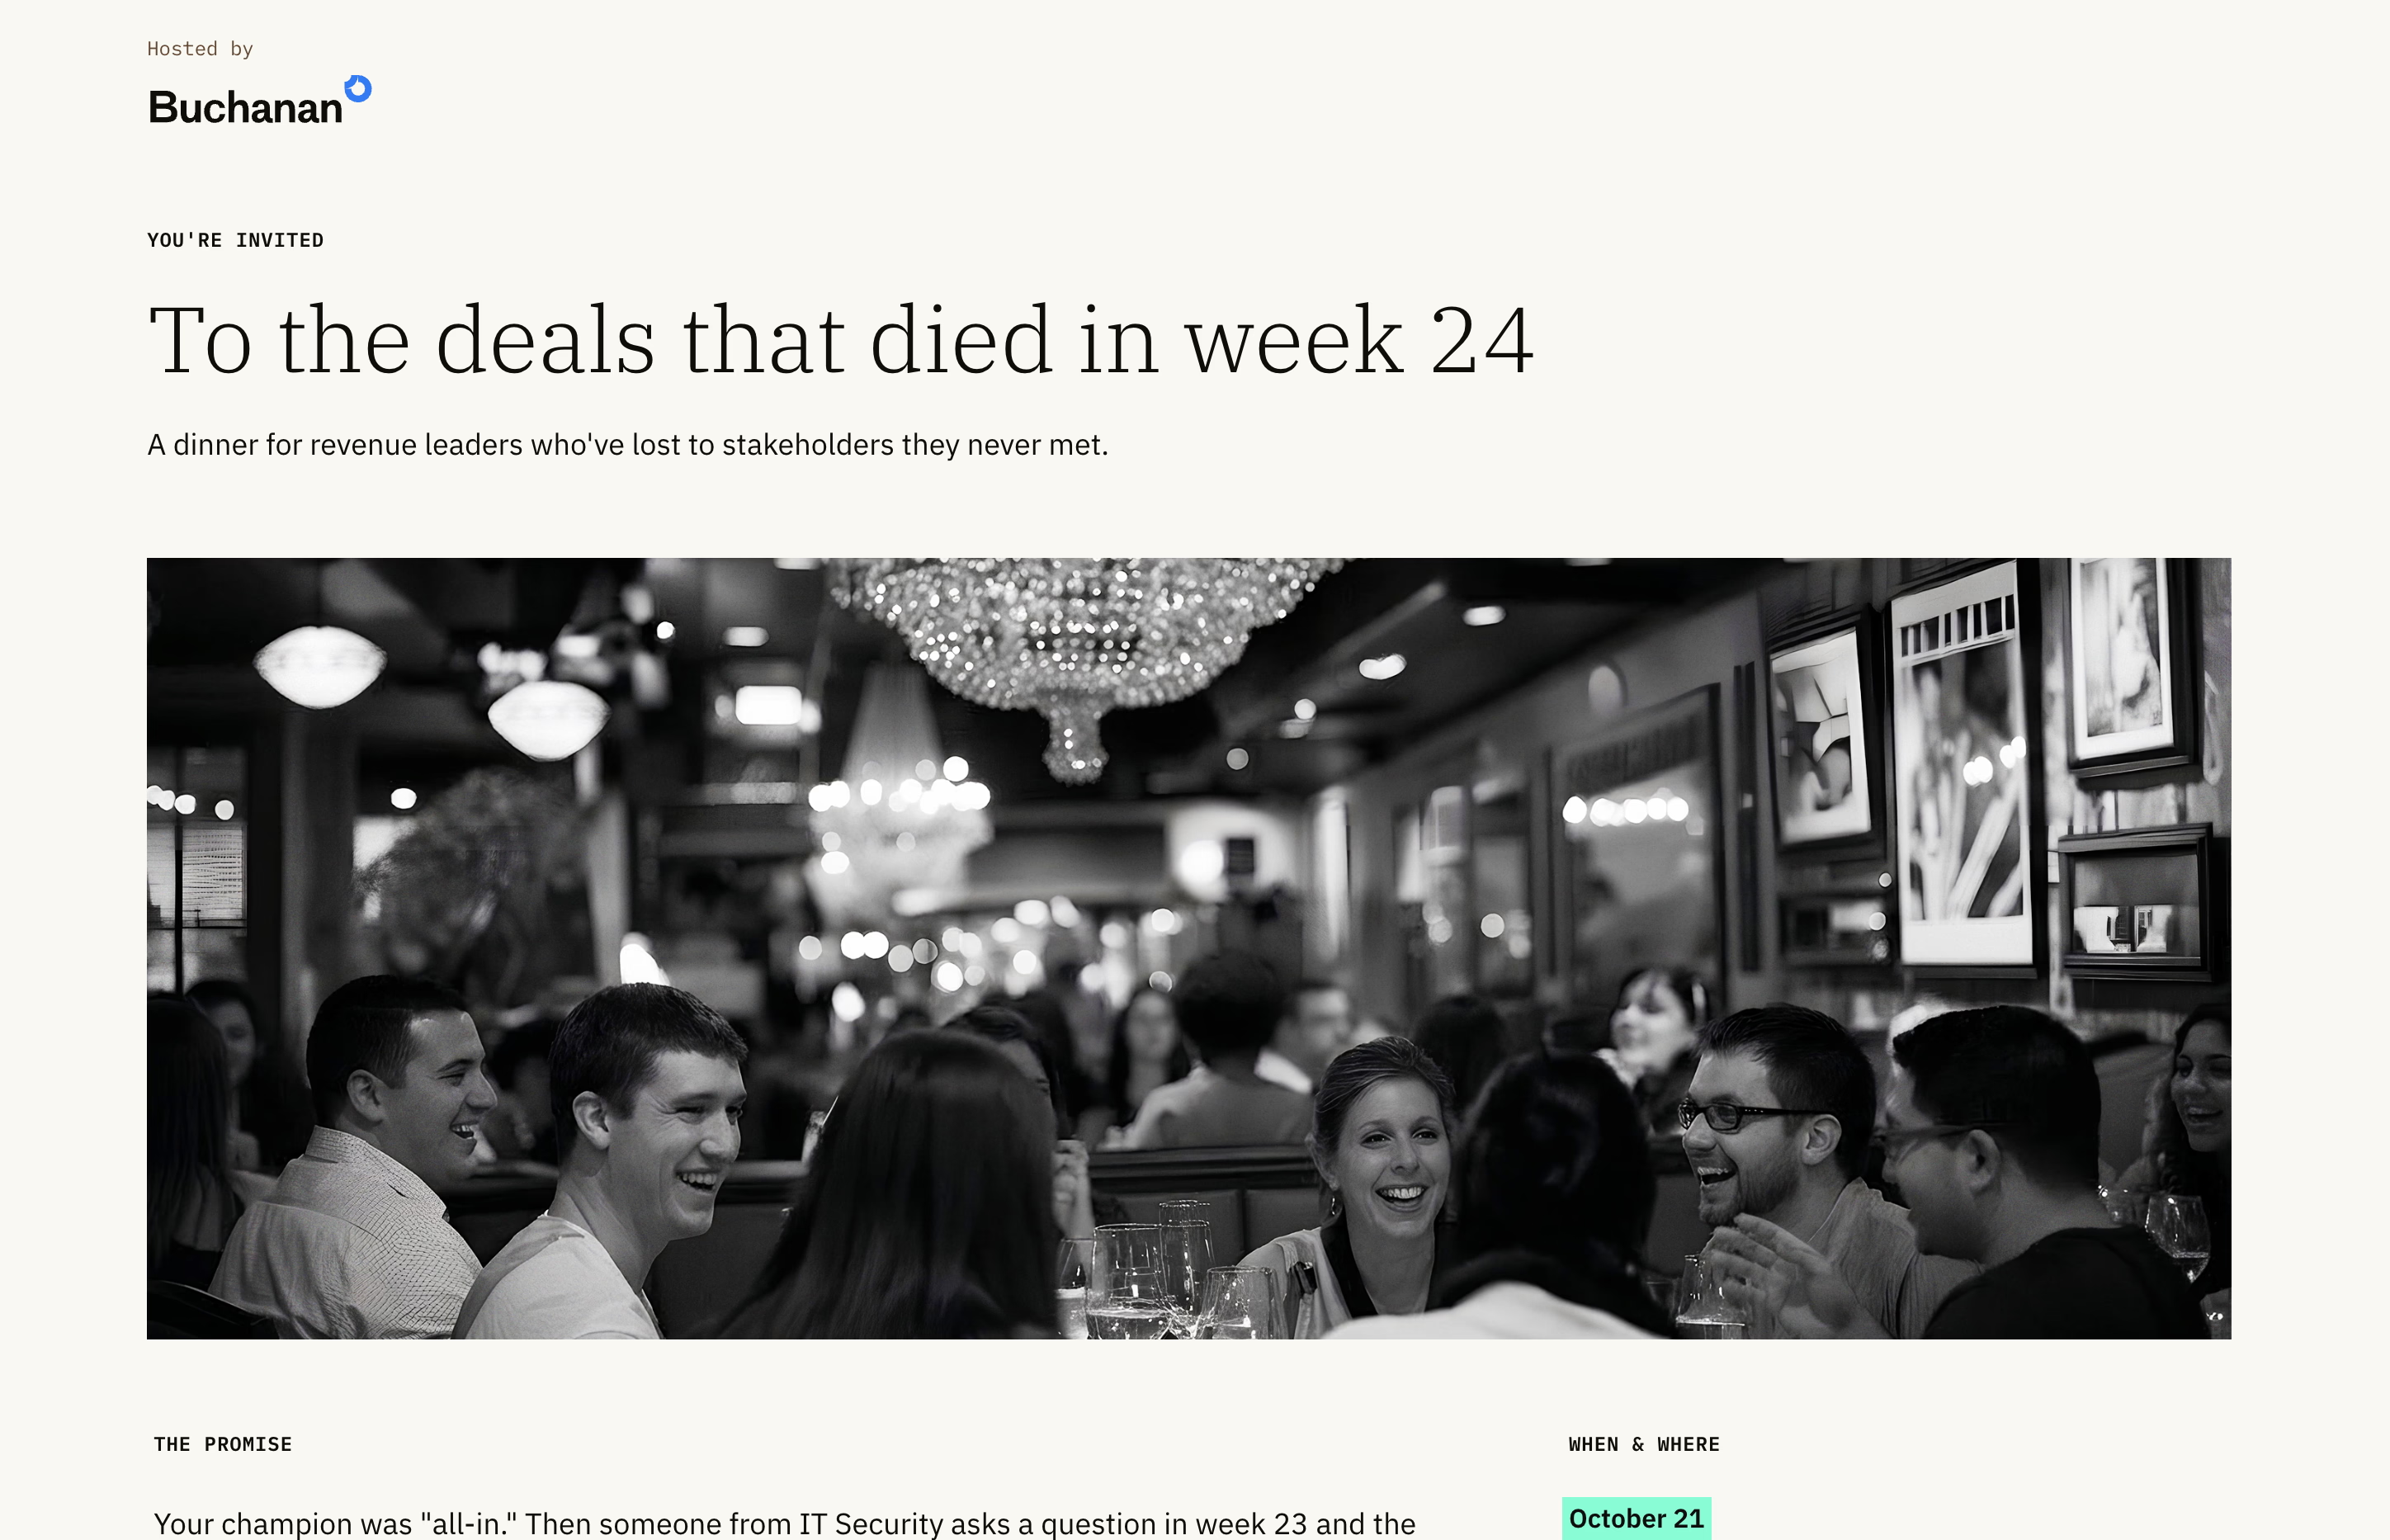
This example uses a public link, so it asks for your name and email. With real events, each guest gets a personal link with their details prefilled. They just review and confirm.
[](https://gatsby.events/showcase/rsvp/register?e=executive-dinner-example-event)
## How it works
[Section titled “How it works”](#how-it-works)
This registration flow is built for dinners where every seat counts and you’re still building the guest list.
**Three RSVP options**
Guests can accept, decline, or tell you they’re not sure yet. The “maybe” option keeps fence-sitters in your orbit instead of ghosting, and you get a clear list of who to follow up with.
***
**Calendar invite for maybes**
When someone picks “not sure yet,” they still get a confirmation email with a calendar invite. The event stays on their radar while you work the phones.
***
**Briefing opt-in**
After accepting, guests choose whether to appear in the attendee brief you’ll send before the dinner. Most say yes, which quietly raises their commitment level.
***
**No-pitch expectations**
“Chatham House rule” and “no slides, no demos” language sets the tone early. Guests know this is a conversation, not a sales pitch.
[Try registration ](https://gatsby.events/showcase/rsvp/register?e=executive-dinner-example-event)
The best deals happen over dinner, not demos. These small, curated gatherings get your prospects sitting next to your customers, with no slides and no pressure.
## Want to run an event like this?
30 minutes. We’ll talk about your event and show you how to set it up.
Book a demoGet support
## Explore other examples
[Section titled “Explore other examples”](#explore-other-examples)
1. [](/examples/strategic-events/annual-general-meeting)
### [Annual Meeting (AGM)](/examples/strategic-events/annual-general-meeting)
[Compliance-conscious, document sharing, formal program](/examples/strategic-events/annual-general-meeting)
2. [](/examples/strategic-events/executive-dinner)
### [Executive Dinner](/examples/strategic-events/executive-dinner)
[Three RSVP options, briefing opt-in, and no-pitch expectations](/examples/strategic-events/executive-dinner)
3. [](/examples/strategic-events/private-forum)
### [Private Forum](/examples/strategic-events/private-forum)
[Advisory council, private check-in](/examples/strategic-events/private-forum)
4. [](/examples/curated-events/speaker-series)
### [Speaker Series](/examples/curated-events/speaker-series)
[Apply to attend](/examples/curated-events/speaker-series)
5. [](/examples/curated-events/waitlisted-social)
### [Waitlist Social](/examples/curated-events/waitlisted-social)
[Curated access social event](/examples/curated-events/waitlisted-social)
6. [](/examples/community-events/team-offsite)
### [Team Offsite](/examples/community-events/team-offsite)
[Multi-day, logistics-heavy, activity selection](/examples/community-events/team-offsite)
# Private Forum
> A closed-door working session where enterprise buyers meet founders building solutions to their problems. VC firms run these to support portfolio companies. B2B teams use them as customer advisory boards. Twenty people, facilitated discussion, strategic seating.
[Try registration ](https://gatsby.events/showcase/rsvp/register?e=builder-buyer-forum-example-event)
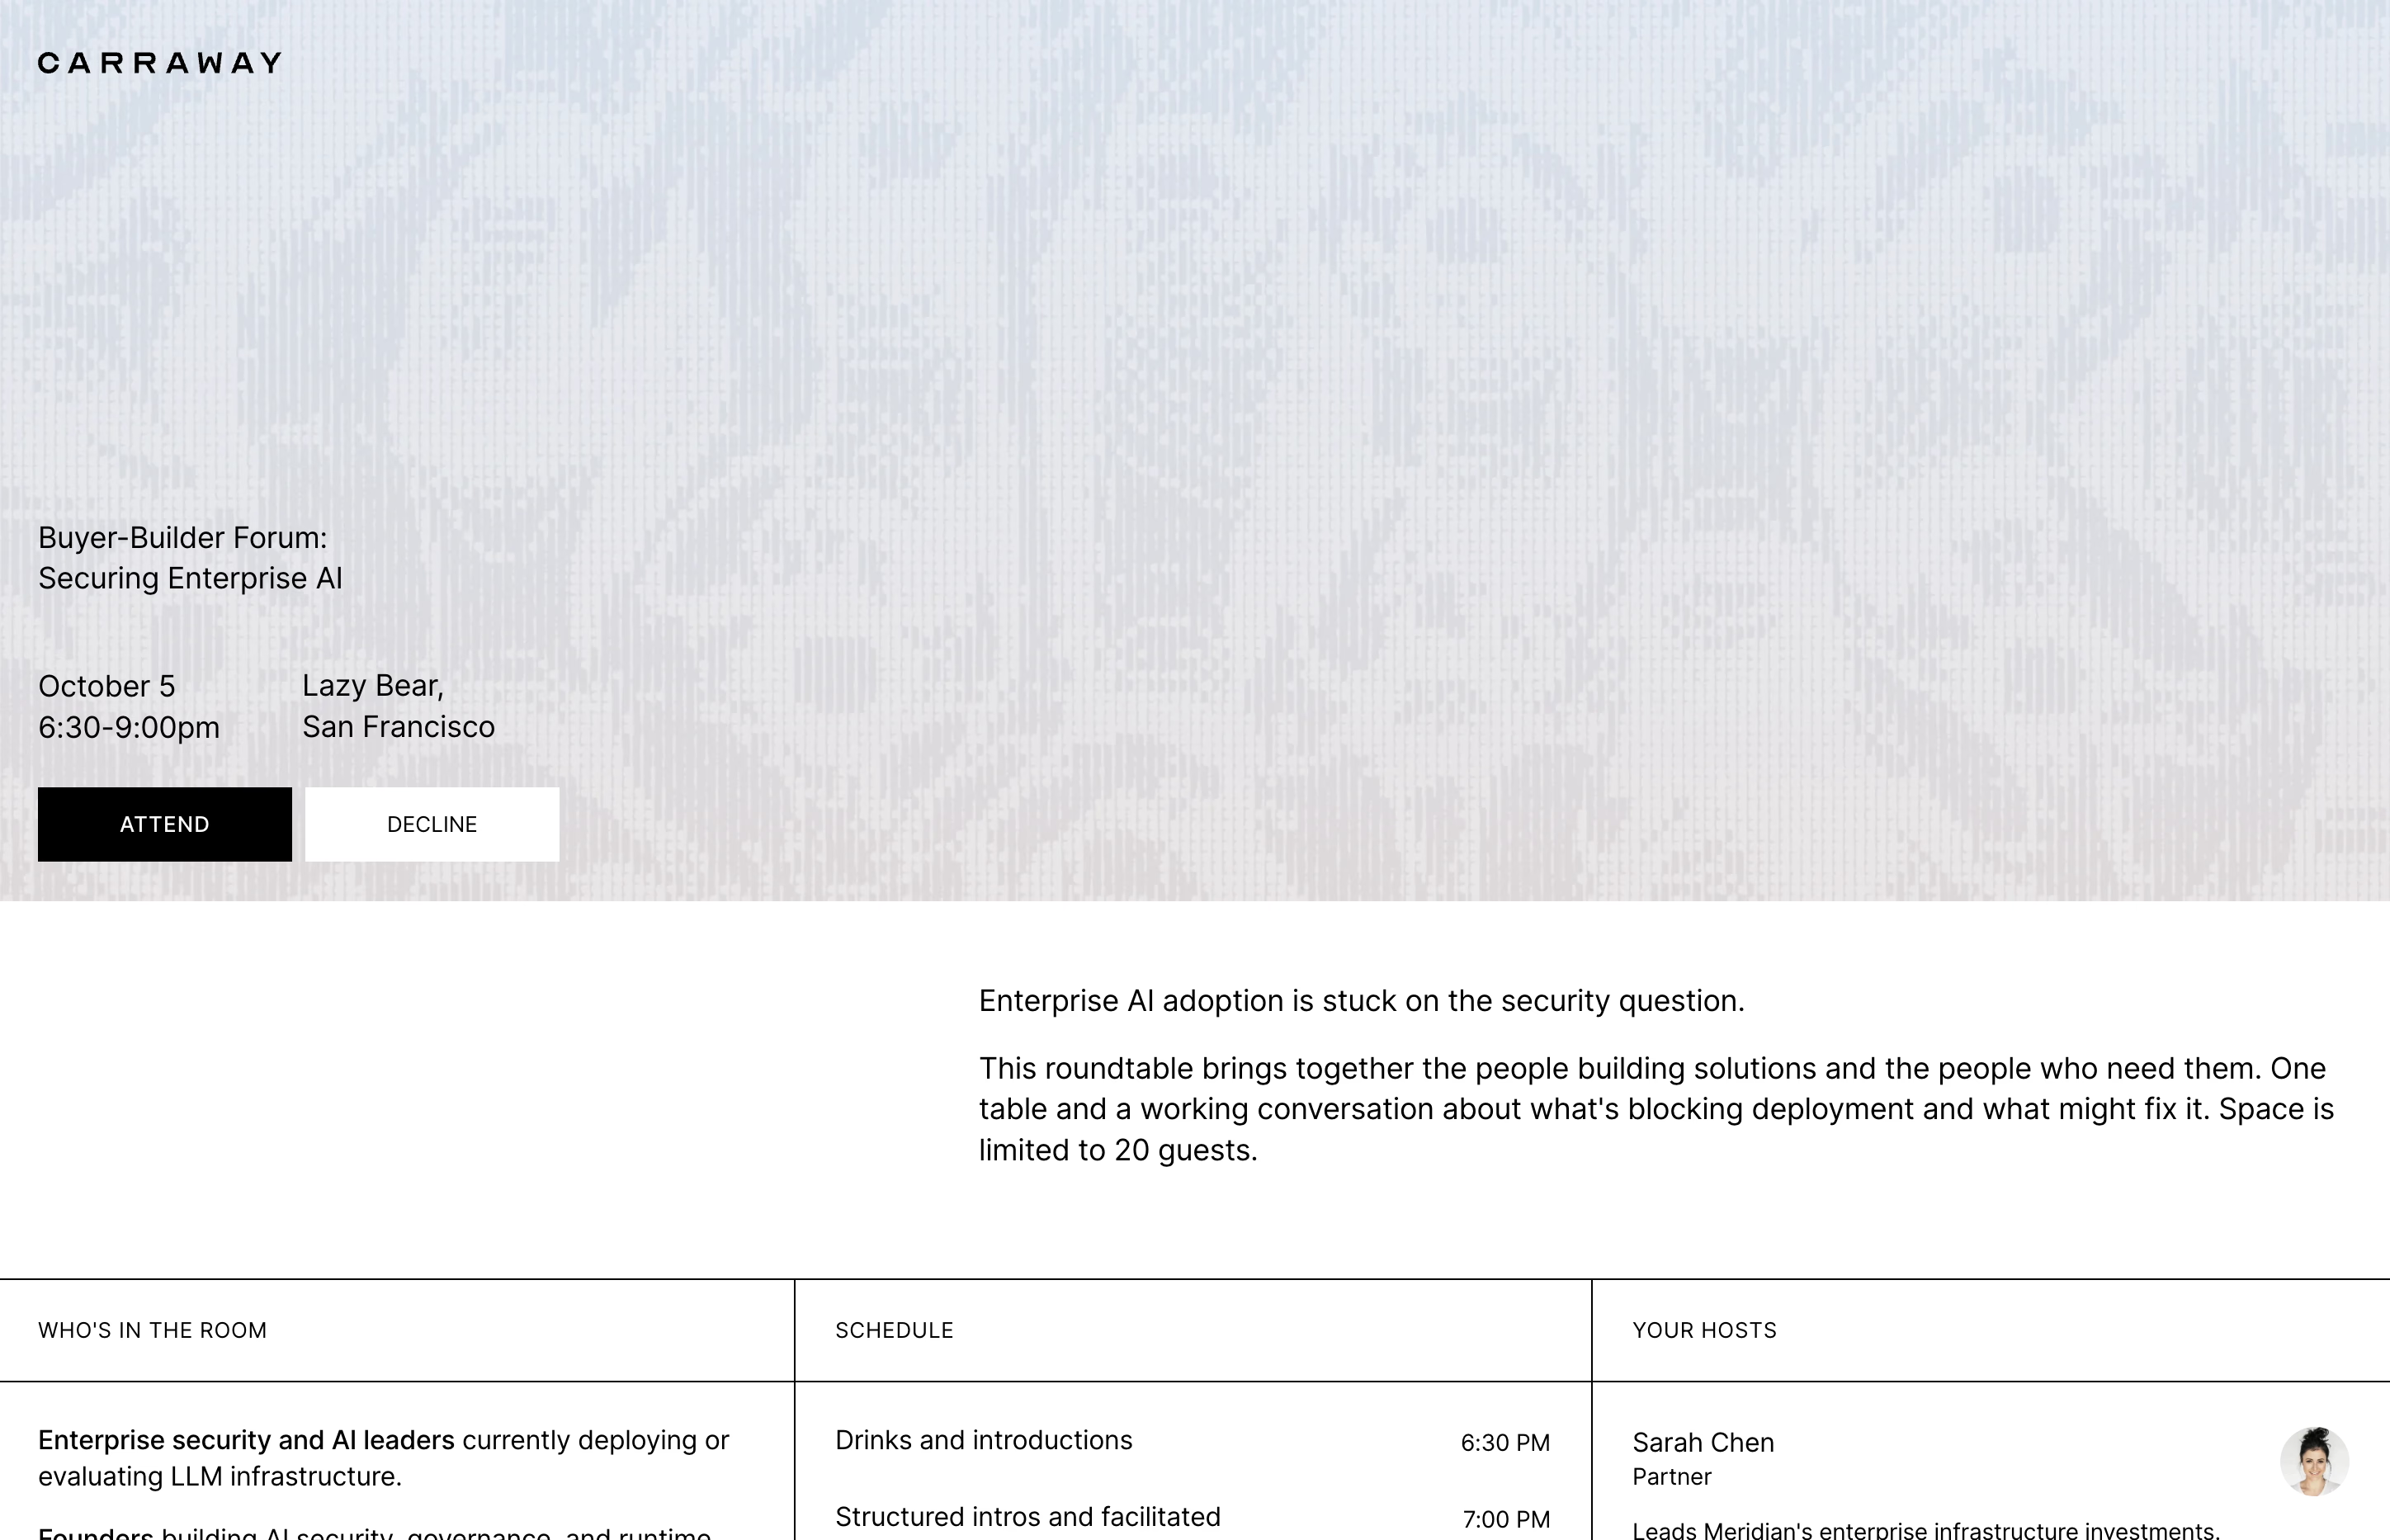
This demo uses a public link so anyone can try it. In practice, each guest gets a unique link tied to their profile.
[](https://gatsby.events/showcase/rsvp/register?e=builder-buyer-forum-example-event)
## How it works
[Section titled “How it works”](#how-it-works)
This demo shows how a private forum registration handles two guest types and turns their answers into strategic seating.
**Conditional questions**
Buyers answer buyer questions. Builders answer builder questions. We explain you’re asking because answers shape the discussion and seating, so it doesn’t feel like busywork.
***
**Decline reasons**
When someone can’t make it, they select why: scheduling conflict, travel budget, or not the right fit. You see patterns and know how to follow up.
***
**Room preview**
Confirmed guests see who’s actually in the room: names, companies, titles, sometimes their discussion topics. They arrive prepared.
***
**Seating flow**
Every answer feeds directly into the seating chart. You place people based on interests, deployment stage, or who needs to meet whom.
[Try registration ](https://gatsby.events/showcase/rsvp/register?e=builder-buyer-forum-example-event)
This demo uses a public link so anyone can try it.
In practice, each guest gets **a unique link** tied to their profile.
Registration skips name and email since Gatsby already knows who they are. Previous answers like dietary restrictions from past events appear prefilled. The link is non-transferable, which keeps your curated room intact.
## Want to run a forum like this?
We’ll spend 30 minutes walking through your guest list and building the actual registration flow. No prep needed.
Book a demoGet support
## Explore other examples
[Section titled “Explore other examples”](#explore-other-examples)
1. [](/examples/strategic-events/annual-general-meeting)
### [Annual Meeting (AGM)](/examples/strategic-events/annual-general-meeting)
[Compliance-conscious, document sharing, formal program](/examples/strategic-events/annual-general-meeting)
2. [](/examples/strategic-events/executive-dinner)
### [Executive Dinner](/examples/strategic-events/executive-dinner)
[Three RSVP options, briefing opt-in, and no-pitch expectations](/examples/strategic-events/executive-dinner)
3. [](/examples/strategic-events/private-forum)
### [Private Forum](/examples/strategic-events/private-forum)
[Advisory council, private check-in](/examples/strategic-events/private-forum)
4. [](/examples/curated-events/speaker-series)
### [Speaker Series](/examples/curated-events/speaker-series)
[Apply to attend](/examples/curated-events/speaker-series)
5. [](/examples/curated-events/waitlisted-social)
### [Waitlist Social](/examples/curated-events/waitlisted-social)
[Curated access social event](/examples/curated-events/waitlisted-social)
6. [](/examples/community-events/team-offsite)
### [Team Offsite](/examples/community-events/team-offsite)
[Multi-day, logistics-heavy, activity selection](/examples/community-events/team-offsite)
# Custom Domain
> Replace gatsby.events in your registration URLs with your own domain. Guests see events.yourcompany.com in the address bar instead of a third-party platform.
Your Domain
Your URL, your brand.
Registration links show events.yourcompany.com instead of gatsby.events.
Higher Click Rates
Branded links get opened.
An LP clicking an invite from your firm expects your domain. A third-party URL raises questions.
Full Coverage
Every guest-facing URL.
Registration links, landing pages, and RSVP confirmations all use your domain.
## How It Works
[Section titled “How It Works”](#how-it-works)
Every registration link, landing page, and RSVP URL in Gatsby normally uses `gatsby.events/yourcompany`. With a custom domain, those URLs use your subdomain instead: `events.yourcompany.com/`.
Your guests never see Gatsby in the address bar. The link in your email invitation matches your company. The landing page URL matches your company. The confirmation page matches your company.
You pick the subdomain. `events.`, `rsvp.`, `register.`, whatever fits. Gatsby routes everything through it.
## Setting Up Your Domain
[Section titled “Setting Up Your Domain”](#setting-up-your-domain)
Setup is split between you and Gatsby. You configure DNS records. Gatsby activates the domain on the backend.
Your Part: DNS Configuration+
You’ll add records through your domain registrar or DNS provider (Cloudflare, GoDaddy, Route 53, etc.).
1. Pick your subdomain (`events.company.com`, `rsvp.company.com`, etc.).
2. Add a CNAME record pointing your subdomain to Gatsby’s servers.
3. Add TXT records for SSL certificate verification.
4. Let Gatsby know the records are in place.
Gatsby provides the exact record values during setup. Your IT team or domain admin handles the actual DNS changes. The records themselves are standard CNAME and TXT entries, nothing unusual.
Gatsby's Part: Backend Activation+
Once your DNS records propagate, Gatsby completes setup:
* Domain routing configuration
* SSL certificate provisioning
* Activation and verification
This is manual work on Gatsby’s side. Expect some coordination time after your DNS records are live.
Handoff Checklist+
Have this on hand when you loop in your IT team or domain admin:
* **Hostname** — the exact subdomain or domain you’re pointing at Gatsby
* **Record type and value** — the CNAME and TXT entries Gatsby supplies during setup
* **Conflicting-record check** — confirm no existing CNAME, A, or TXT record already occupies that hostname
* **Validation state** — ask your Gatsby contact how to confirm DNS has propagated correctly
* **Certificate issuance** — SSL provisioning happens automatically after DNS validates
## Choosing Your Domain
[Section titled “Choosing Your Domain”](#choosing-your-domain)
Most teams use a subdomain under their existing website. Some register a standalone domain for major events.
Subdomain (Most Common)+
A subdomain sits under your main domain. Your website stays untouched.
**Examples:**
* events.company.com
* rsvp.yourfirm.com
* register.acmecapital.com
IT teams prefer this approach. It doesn’t touch production infrastructure, it’s a single CNAME record, and it works across all your events indefinitely.
Standalone Domain+
A dedicated domain used exclusively for a specific event or event series.
**Examples:**
* annualsummit.com
* investorweek.io
This makes sense for large standalone events with their own branding: annual conferences, multi-day summits, flagship galas. You register the domain, point it at Gatsby, and the event gets its own identity.
Requires slightly more DNS configuration than a subdomain since you’re pointing an entire domain.
## Common Questions
[Section titled “Common Questions”](#common-questions)
Do I need technical expertise?+
You need access to your domain’s DNS settings. Most firms have an IT team or domain admin who handles this.
Gatsby provides the exact records to add. The process is copy-paste: take the values Gatsby gives you, enter them in your DNS provider. No deep DNS knowledge required.
How long does setup take?+
DNS changes typically propagate within a few hours, though some providers take up to 48 hours. After propagation, Gatsby activates the domain on the backend. Most setups are fully live within a couple of business days.
Can I use different domains for different events?+
No. One custom domain will be applied to all events in your organization.
What happens to existing links?+
Talk to your Gatsby account team before switching domains so you understand how in-progress events and existing `gatsby.events` links are affected for your specific setup.
Is this a paid feature?+
Yes. Custom domains are a paid add-on. Contact your Gatsby account team via Slack or email to enable it for your org.
What about other branding options?+
Custom domains pair well with two other options: removing the “Powered by Gatsby” footer (toggle in Team Settings) and custom fonts on landing pages (contact support with the font files and proof of license; see [Landing Pages](/platform/registration/landing-pages/)). Together, these give guests a fully branded experience with no visible Gatsby branding.
# Email Configuration
> Connect your Gmail or Outlook account so event invitations come from your actual email address. Emails land in your sent folder, replies hit your inbox, and guests see a name they recognize.
Why it matters
## If it looks automated. It lands in spam, and the relationship is over before the event starts.
Gatsby sends from your actual email account. The invite comes from you, lives in your sent folder, and replies go to your inbox.
Your options
### Gmail or Outlook
Connect your account in two clicks. Best for relationship-driven events under 500 recipients.
### SendGrid
One connection the whole team shares. DNS-level setup for high volume, custom addresses, and branded notification emails.
## Sending From Your Own Account
[Section titled “Sending From Your Own Account”](#sending-from-your-own-account)
Connect your Gmail or Outlook to send invitations from your actual address. Recipients see your name. Emails appear in your sent folder. Replies arrive in your inbox. Your IT team’s spam filters trust it because it comes from your domain.
An LP dinner invitation from “Sarah Chen” lands differently than one from “.” That’s the whole point.
Connect Gmail+
1. Navigate to **Team Settings** from your Gatsby dashboard.
2. Click the **Linked Services** tab.
3. Select **Google** under **Each person signs in**, then choose how it connects.
**Connect — send only** grants sending and nothing else. **Connect — send + bounce tracking** adds two things: Gatsby reads incoming bounce, out-of-office and auto-reply messages so bad addresses get suppressed across all your events, and it can add events to your calendar when you RSVP from Gatsby.
Both run the same Google sign-in, and you can start with send only.
4. Select your account in the popup and accept permissions.
Your Gmail address is now available as a sender option in campaigns.
Connect Outlook+
Works with personal Outlook.com accounts and corporate Office 365. Your Microsoft account must be cloud-hosted. Gatsby uses the Microsoft Graph API, which on-prem Exchange servers do not support.
1. Navigate to **Team Settings** from your Gatsby dashboard.
2. Click the **Linked Services** tab.
3. Select **Outlook** under **Each person signs in**, then click **Link an Outlook Account**.
4. Enter your credentials when prompted.
Your Outlook address is now available as a sender option.
The address has to be a full Microsoft mailbox with its own seat (license). An alias or shared inbox won’t connect. Use a SendGrid address for those.
**If Microsoft shows a permission or approval error when you connect,** your organization requires an admin to approve Gatsby before anyone can connect. That approval happens on the Microsoft side, by whoever administers your Microsoft 365 account, usually IT. It isn’t a Gatsby role, and Gatsby support can’t grant it for you. Once your Microsoft admin approves Gatsby, connect again.
If you reset your Microsoft password, reconnect your Outlook account afterward. Sending from it stops until you do.
Connections don’t last forever. Google and Microsoft both expire the authorization periodically, and when that happens Gatsby prompts the account owner to sign in again — only they can do it, the same as the initial connection. Expect to re-authorize every so often rather than once. If a send fails, check **Team Settings » Linked Services** for a status update.
Automatic emails (confirmations, waitlist notices, reminders) require SendGrid precisely because it never expires.
Invite a teammate to connect their account+
You don’t have to wait for a colleague to set up their own account. If you can manage linked email settings, you can send them an invite and let them connect in about 30 seconds, without ever seeing or handling their password.
1. Go to **Team Settings » Linked Services** and click **Invite a teammate** from either the Google or Outlook section. You can also start this from a campaign: click the **+** on the send-from dropdown and choose **Invite a teammate to connect Gmail** or **Invite a teammate to connect Outlook**.
2. Pick the team member or External Collaborator you want to invite. They have to exist on your account first — the picker only lists people already added under **Team Members**. If the colleague you want isn’t in the list, add them as a team member first, then come back here.
3. Set how the account connects. Gmail offers **Send Only** or **Send + Bounce Tracking**; Outlook connects with send access only. Then set how their name appears in the **From:** line and pick which teammates can send campaigns as them.
4. Review and send. They receive an email, sign in with Google or Microsoft, and approve the permission.
Once they accept, their account appears in **Linked Services** and becomes available as a sender for the team. They can revoke access anytime from their own settings.
What Happens After You Connect+
Once connected, any team member can select your address when composing a campaign. Emails appear in your sent folder. Replies come to your inbox unless the sender sets a different reply-to address.
You can revoke access anytime from **Team Settings » Linked Services**.
Connecting a sender is separate from resolving addresses that have bounced or been blocked. See **Team Settings » Bounce Management** to review and clear those.
Sending Limits+
Two different kinds of limits apply. Google and Microsoft set their own provider-side sending caps for Gmail and Office 365 accounts, and those caps vary by plan and can change without notice. A Google account can send about 2,000 to 2,500 emails a day. Microsoft’s cap depends on your organization’s Microsoft agreement.
Separately, Gatsby staggers sends from connected accounts to avoid looking like a mass emailer: about one email every 8 to 10 seconds. 100 emails takes about 15 minutes. A send to a couple of thousand people takes several hours, and for Google senders a smaller send started at the same time waits behind it.
We recommend batches of about 500 per day from any one connected account. For personal, relationship-driven events, these limits rarely matter. A dinner invitation going to 80 people is well under the threshold. If you’re sending to more than about 500 people at once, use SendGrid.
Gatsby is SOC 2 Type II certified. **Send only** grants permission to send and nothing else, and it is the only option Outlook offers. **Send + bounce tracking** also reads incoming bounce, out-of-office and auto-reply messages, and reads and updates your Google Calendar.
Gatsby never reads your regular conversations. Only failure notifications, auto-replies and mailer-daemon errors are processed.
[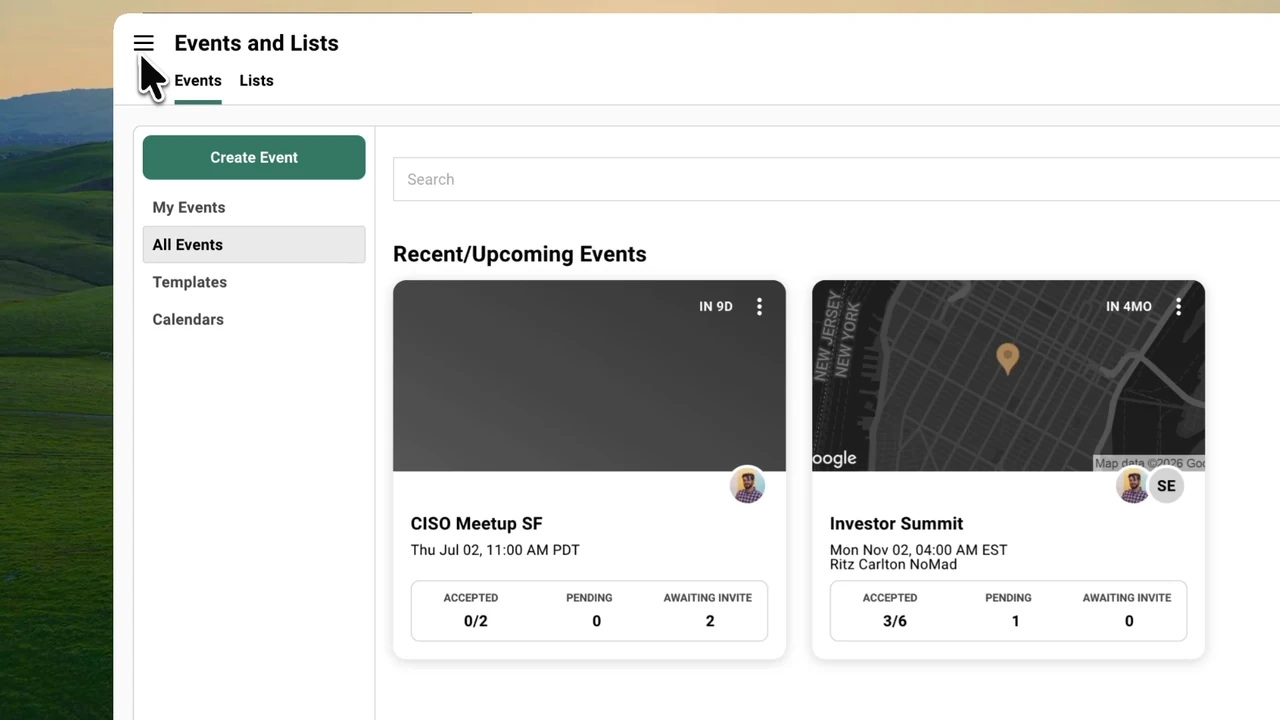](/legacy/gmail-outlook-and-sendgrid-integration-2026.mp4)
## SendGrid for High-Volume Sending
[Section titled “SendGrid for High-Volume Sending”](#sendgrid-for-high-volume-sending)
Gmail and Outlook work for most events. But if you’re sending thousands of invitations, running multiple events per week, or need notification emails from your domain, you’ll hit their limits. SendGrid removes the ceiling.
### Setting Up SendGrid
[Section titled “Setting Up SendGrid”](#setting-up-sendgrid)
SendGrid works differently from Gmail and Outlook. Those are per person: each teammate signs into their own mailbox, and the connection belongs to them. SendGrid is one connection for the whole org. Nobody signs into it, and there is no personal SendGrid account to hand someone.
What you manage is a list of sending addresses. Each one is an address your email can come from, and all of them send through the same connection. The person an address belongs to never has to touch Gatsby.
SendGrid requires DNS configuration. Your IT team adds records to your domain so Gatsby can send authenticated email on your behalf.
Setup Process+
1. Contact Gatsby support. We provide SPF, DKIM, and DMARC records for your IT team.
2. Your IT team adds those records to your domain’s DNS.
3. Verify completion with Gatsby support.
4. In **Team Settings » Linked Services**, select **SendGrid**. It sits under **One for the whole team**, below the **Each person signs in** group that holds Google and Outlook.
5. Click **Add address**. Enter the name recipients will see, then the part of the address before the @, and pick the domain beside it.
The domain list holds the domains Gatsby has verified for you, so you can only build an address that will actually send. One verified domain shows next to the field instead of a list.
That address is now available for campaigns.
Who Can Send From Each Address+
Your address list has an **Address** column and a **Who can send** column. The second one shows who on your team is allowed to send campaigns from each address.
1. Click the three dots on the address row and choose **Edit Who Can Send**.
2. Check anyone who should be able to pick that address when they write a campaign. Everyone listed is already on your team.
3. Click **Save**.
Two things behave on their own. If the address is a teammate’s own login email, that person is always included and cannot be unchecked, because the address is theirs. And if nobody can send from an address, the row reads **No one yet** and that address shows up in nobody’s send-from dropdown.
The same menu holds **Edit Display Name**, which changes the name recipients see, and **Remove Address**, which takes the address off the list. **Remove Address** is red because it is the one entry there that removes something instead of opening an editor.
If you have no **Who can send** column, your org doesn’t restrict addresses this way. Everyone on your team can send from every address on the list, and the row menu has no **Edit Who Can Send** entry.
What SendGrid Gets You+
* **No Google or Microsoft caps.** Send thousands without the per-account daily limits or the pacing that applies to Gmail and Outlook senders.
* **Custom addresses.** Use or . The inbox doesn’t need to exist.
* **Notification emails from your domain.** RSVP confirmations, waitlist notices, and event updates come from your brand instead of Gatsby’s.
* **Deliverability tracking.** Monitor opens, bounces, and delivery issues.
Who Needs SendGrid+
Most teams start with Gmail or Outlook and add SendGrid when volume grows. You need it if you:
* Send to more than about 500 people at a time
* Want shared addresses like that nobody logs into
* Need automatic notification emails (confirmations, waitlist, updates) from your domain
If you’re running an annual conference for 2,000 people, you need SendGrid. If you’re hosting a dinner for 40, Gmail works fine.
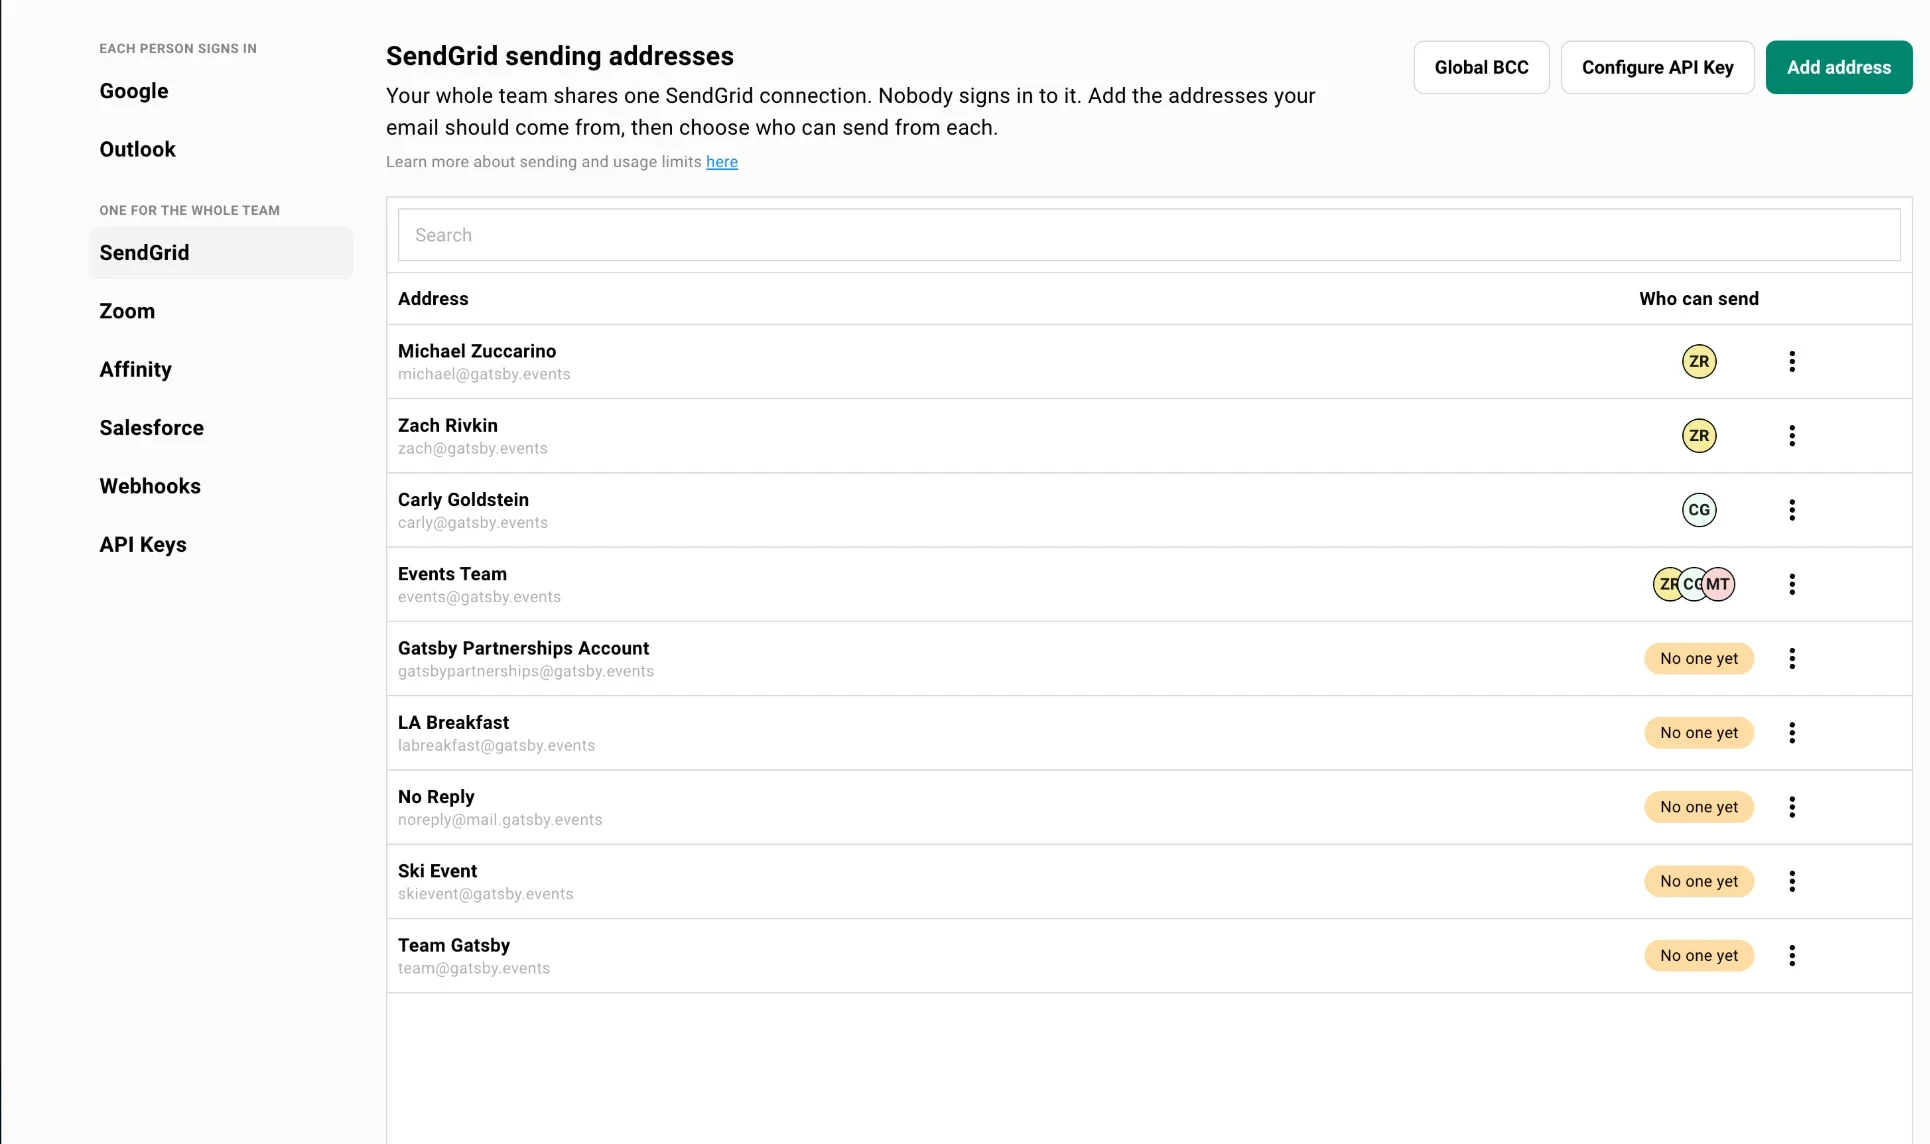
### External Collaborators
[Section titled “External Collaborators”](#external-collaborators)
External Collaborators don’t see Team Settings. They connect their email from within a campaign.
Open any campaign in an event you’ve been invited to, click the **+** icon next to the “Send From” dropdown, and connect Gmail or Outlook directly. You can only send as yourself. You cannot access other team members’ accounts.
A team member can also invite you to connect. You’ll receive an email with a link to sign in with Google or Microsoft and approve sending on your behalf, no Team Settings access required.
Reconnecting an outside sender who has been disconnected.+
Google and Microsoft expire their authorization periodically, so a partner, GP, or co-host sending through Gatsby will eventually show as disconnected and their sends will stop. There is no way to make the connection permanent — that expiry is set by Google and Microsoft, not by Gatsby.
What you can avoid is the coordination: don’t send an outside sender to Team Settings or back through a campaign. If you can access **Team Settings » Linked Services**, click the **Invite a teammate to connect their inbox** option from either Google/Outlook. They click through and approve in about 30 seconds without needing access to anything else in your account.
External Collaborators only see events they’ve been specifically invited to. They cannot send from other team members’ addresses or access the full Team Settings.
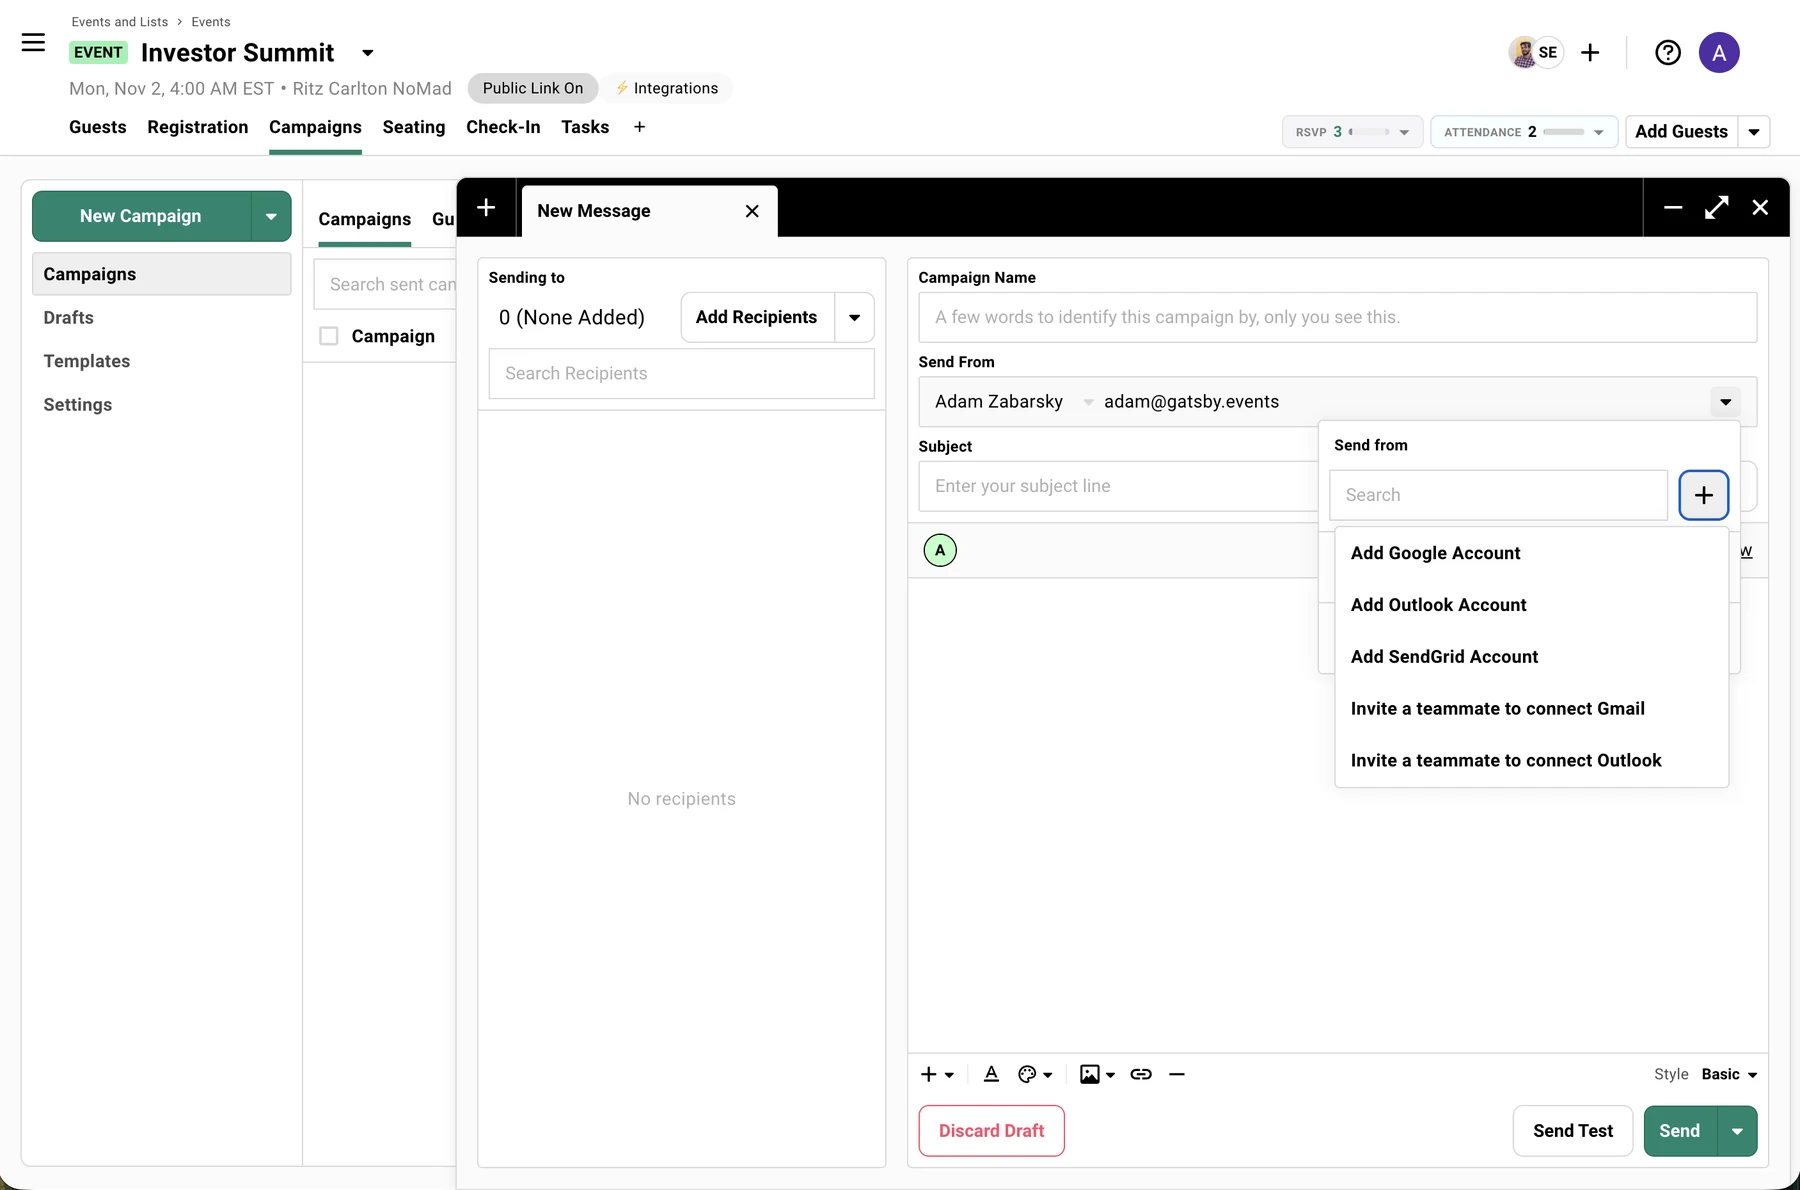
## Common Questions
[Section titled “Common Questions”](#common-questions)
Will sent emails appear in my sent folder?+
Yes, for Gmail and Outlook. Emails appear in your sent folder automatically. For SendGrid, no. There’s no personal inbox to write to.
Can multiple people send from the same connected account?+
Yes. Once someone connects their email, any team member can select that address as the sender. Your coordinator can send dinner invitations from the Partner’s email without the Partner touching Gatsby.
How do I connect a specific person's account to SendGrid?+
You don’t. There is one SendGrid connection for the org and nobody signs into it, so there is no individual account to connect. Add the address you want their email to come from, then open **Edit Who Can Send** on that row and check their name.
What's the difference between Gmail/Outlook and SendGrid?+
Gmail and Outlook connect your personal account. Simple setup, daily limits, emails in your sent folder. SendGrid removes limits and adds custom addresses, but requires DNS configuration by your IT team.
What are notification emails?+
Automatic emails triggered by guest actions: RSVP confirmations, waitlist notices, event updates. These require SendGrid to send from your domain instead of Gatsby’s.
Can I connect my email later?+
Yes. Go to **Team Settings > Linked Services** anytime. Add more accounts as your team grows.
Can I get a teammate connected without doing it myself?+
Yes. From **Team Settings » Linked Services** (or the **+** on a campaign’s send-from dropdown), click **Invite a teammate**. Pick the person, set their options, and send. They sign in with Google or Microsoft and approve in about 30 seconds, and their account shows up as a sender for the team. You never see their password.
Does Outlook require cloud hosting?+
Yes. Gatsby uses the Microsoft Graph API. On-prem Exchange servers are not supported. Your Outlook must be hosted through Office 365 or Outlook.com.
Who approves Gatsby when Microsoft asks for admin approval?+
Your Microsoft 365 administrator, usually your IT team. Many organizations require an admin to approve a new app before staff can connect it, and that approval lives in your Microsoft account, not in Gatsby. No Gatsby role (Admin or Super Admin) can grant it, and Gatsby support can’t either. Ask IT to approve Gatsby, then connect again from **Team Settings » Linked Services**.
# Plan & Billing
> Add a payment method, turn paid add-ons on and off, and read your invoice history, from Team Settings, without a call to your account manager.
What this is
## Your plan, your card, and everything you’ve been charged for.
Most of what Gatsby does is covered by your contract, and nothing here changes that. Plan & Billing is where the pieces you buy separately live. You add a payment method once, switch an add-on on, and Gatsby bills it each quarter without a purchase order.
What’s on the tab
### Your plan
Your contracted Gatsby plan, managed by your account team.
### Add-ons
Optional paid features. Purchase, manage, or cancel each one.
### Payment method, history, and contracts
The card or bank account we charge, every invoice we’ve raised, and your signed paperwork.
## Finding it
[Section titled “Finding it”](#finding-it)
**Team Settings → Plan & Billing.**
Super Admins and Admins see the tab. Team Members and External Collaborators don’t. If you need something changed and can’t see the tab, ask an Admin on your team, or email [](mailto:help@gatsby.events).
## Adding a payment method
[Section titled “Adding a payment method”](#adding-a-payment-method)
Nothing can be purchased until there’s a way to charge it, so this is the first step.
Adding a card or bank account+
1. Open **Team Settings → Plan & Billing**.
2. In the **Payment method** card, click **+ Add payment method**.
3. Enter a card or US bank account (ACH). Bank accounts are verified by your bank before they can be charged.
4. Save.
Payment details are entered directly with Stripe, Gatsby’s payment processor. Card and account numbers never touch Gatsby’s servers, and nobody at Gatsby can read them.
Once saved, the card shows as a single line: brand, last four digits, expiry, and a **Default** marker.
More than one method+
You can keep several on file. One is the **default**, and that’s the one Gatsby charges. Switch it at any time.
Removing one+
Remove any method that isn’t needed. Gatsby refuses to remove the last remaining method while a charge is outstanding on an add-on, and tells you so. Otherwise a failed first payment would leave nothing to retry against.
## Add-ons
[Section titled “Add-ons”](#add-ons)
An add-on is a paid Gatsby feature that isn’t part of the base platform. It has its own price, its own switch, and its own line on your invoice.
Turning one on+
1. Find the add-on in the **Add-ons** list and click **Purchase**.
2. Read the summary. **Due today** is the activation charge, if the add-on has one. **Then, every quarter** is the ongoing rate and the date of the first invoice. Underneath, a line names the card the charge will go to.
3. Click the confirm button. It names the add-on, so there’s no ambiguity about what you’re turning on.
The add-on switches on once the activation charge is settled. Amounts come from your organization’s own pricing, so a negotiated rate shows the negotiated number instead of a list price, and an add-on with no activation fee shows **Due today $0**.
Once it’s on, the row reads **Active** and the button becomes **Manage**. Opening that shows the same figures for a running add-on: the annual fee and its renewal date, the usage rate, how many people have counted this quarter and roughly what that comes to, and which card gets charged.
How add-ons are billed+
Two parts, and the summary shows both:
**An annual add-on fee**, charged when you first switch the add-on on and again on that date each year. The add-on row shows the next renewal date. Not every add-on has one.
**A usage rate**, charged quarterly, and counted per person rather than per message. Someone you text ten times, or send twelve newsletter campaigns to, counts once for the year. The add-on row carries the rate, the running count for this quarter, and the date of the next charge.
Charges go to your default payment method automatically. Each one produces an invoice you can open from Billing history.
Rates that step down as you grow+
Some add-ons price in bands, and the rate falls as the count rises. Newsletters is the current example: the first 250 subscribers are included, the next band is $0.40 a subscriber up to 5,000, and everything above 5,000 is $0.20.
The bands are **graduated**, which is the part worth being clear about. Each rate applies only to the subscribers inside its own band. Passing 5,000 does not reprice the 5,000 below it, and it never makes your bill jump. Growing your list moves the new subscribers into the cheaper band and leaves everything underneath exactly where it was.
Worked through: an org that sends to 6,000 people over a year pays nothing for the first 250, $0.40 each for the 4,750 after that, and $0.20 each for the 1,000 above 5,000.
The count runs on the calendar year, so the free 250 and your position in the bands both start over on 1 January. That’s a separate date from the add-on fee’s renewal, which falls on the date you first turned the add-on on.
Your quarterly count and its running total are both on the add-on’s **Manage** screen, so you can check the arithmetic against your own numbers at any point in the quarter.
Awaiting payment+
An add-on you’ve turned on but whose activation charge hasn’t cleared yet reads **Awaiting payment**. Its paid features aren’t available in that window. It switches on by itself the moment the payment lands.
If it’s stuck there longer than you’d expect, email [](mailto:help@gatsby.events).
An add-on with an option inside it+
Newsletters has one, and it’s the only place this shape appears today.
Newsletters send from your own domain either way. What you choose is whose SendGrid account carries them. Use your own and you pay SendGrid directly. Use Gatsby’s and there’s nothing for you to set up, at **$500 a year** on top of the Newsletters fee.
It shows as its own line on the **Manage** screen with its own **Cancel Gatsby SendGrid account** action, and its own row in Billing history, so you can drop it without touching Newsletters itself. Which sending path you’re on is chosen in **Team Settings → Newsletters**, not here. See [Newsletter Settings](/platform/newsletters/newsletter-settings/).
Pilot access+
Some organizations may get early access to an add-on at no charge. The row reads **Pilot access, No charge**, and usage is recorded but never billed. Everything about the feature works normally.
Cancelling one+
Click **Manage** on the add-on, then **Cancel add-on**. The paid features switch off.
Cancelling stops the next annual fee. The one you’ve already paid buys the whole year, so cancelling mid-year doesn’t produce a refund, and turning the add-on back on inside that same year doesn’t charge the fee again.
If a payment fails+
Gatsby retries the charge a few times over roughly three weeks and emails your Admins each time. If it still hasn’t cleared at the end of that, the add-on’s paid features switch off and the account falls back to what’s included for free. Nothing is deleted, and paying the outstanding invoice restores it.
### The add-ons on offer
[Section titled “The add-ons on offer”](#the-add-ons-on-offer)
**SMS Campaigns** unlocks writing and sending your own texts and customizing SMS reminders. Charged per recipient, once per person per year.
**Newsletters** unlocks recurring marketing newsletters with their own subscribers, sending infrastructure, and reporting. Charged per subscriber, once per person per calendar year, invoiced quarterly, in the bands above. Sending on Gatsby’s SendGrid account is an optional $500 a year. Activation needs a US billing and postal address. See [Newsletters](/platform/newsletters/overview/).
The free SMS Auto-Reminder is *not* an add-on. Every organization has it, and it keeps working whatever happens to your billing. See [SMS Campaigns](/platform/email-campaigns/sms-campaigns/).
## Billing history and contracts
[Section titled “Billing history and contracts”](#billing-history-and-contracts)
Reading your invoices+
**Billing history** is one row per charge: when it was created, what it was for, when it’s scheduled, when it was billed, its status, the amount, and a link to the invoice. Open the invoice to see the full document, hosted by Stripe. That’s the version to send to your finance team.
Contracts+
Signed agreements between your organization and Gatsby, in one place. Each shows whether it was uploaded by Gatsby or by someone on your team. Admins can add their own countersigned copies with **Upload contract**. PDFs only.
## Common Questions
[Section titled “Common Questions”](#common-questions)
Is this how I pay for Gatsby itself?+
No. Your Gatsby plan is contracted and invoiced the way it always has been. Plan & Billing covers add-ons, the features you buy on top of the platform, and shows your plan for reference.
How do I change the card or payment method for my Gatsby plan?+
Plan billing isn’t self-serve. It’s handled for you by Gatsby’s team. Email [](mailto:help@gatsby.events) and we’ll send you a link to update the payment method on file for your plan.
The payment methods on the Plan & Billing tab are for add-ons. Changing them doesn’t change how your plan is billed.
Can a Team Member add a payment method?+
No. Payment methods and add-ons are Admin and Super Admin only. Team Members who hit a paid feature see a pointer to their Admins or to Gatsby support instead of a purchase screen.
What counts as a billable subscriber?+
A person you sent a newsletter to, counted once for the calendar year. Not everyone on the list, and not once per campaign: someone who received all twelve campaigns counts once, and so does someone who got one in January and another in September. The count is org-wide, so a person subscribed to three of your newsletters is still one billable subscriber.
Adding subscribers costs nothing until a campaign goes to them, and test sends don’t count at all.
The **Manage** screen shows the running count and an approximate charge for the quarter in progress, next to the date it invoices.
Where do the billing emails go?+
To your organization’s Admins. If your finance team needs them, either add that person as an Admin or forward the invoice from Billing history.
Can I pay by invoice instead of a card on file?+
Some organizations are set up to be invoiced outside the app. If yours is, the add-on won’t ask for a payment method. Talk to your account manager or [](mailto:help@gatsby.events) about arranging it.
Does this affect ticket sales and payouts?+
No, those are separate. Ticketing money flows from your guests to you through your connected Stripe account, and lives under **Ticket Sales and Payouts**. Plan & Billing is your organization paying Gatsby.
# Security & SSO
> Gatsby is SOC 2 Type II certified with enterprise SSO through Okta, Google SSO, magic link login, and enforceable two-factor authentication across your organization.
SOC 2 Type II Certified
Independently audited, annually renewed.
Send the report to your security team instead of answering 50 questions yourself.
Okta SSO
Centralized access through your identity provider.
Provision and deprovision users from Okta. No separate account management.
Enforceable 2FA
Require two-factor across your organization.
Or let individual team members enable it for their own accounts.
## SOC 2 Type II Certification
[Section titled “SOC 2 Type II Certification”](#soc-2-type-ii-certification)
An independent auditor evaluates Gatsby’s security controls annually. This is a sustained review, not a self-assessment or a point-in-time snapshot, and it covers five trust principles: security, availability, processing integrity, confidentiality, and privacy.
For most enterprise procurement workflows, SOC 2 Type II is the baseline audit standard.
What the Certification Covers+
**Security**
Data protected against unauthorized access through encryption and access controls.
***
**Availability**
Redundant infrastructure and disaster recovery for reliable uptime.
***
**Processing Integrity**
Guest data, RSVPs, and event information processed accurately.
***
**Confidentiality**
Guest lists and private event details protected from unauthorized disclosure.
***
**Privacy**
Personal information handled in compliance with privacy laws and policies.
Requesting the Report+
Contact Gatsby directly through Slack or email. We provide the report for your security review or compliance documentation under NDA.
## Authentication
[Section titled “Authentication”](#authentication)
Gatsby supports Okta for enterprise SSO, Google for teams in Google Workspace, magic links for passwordless login, and standard username/password with optional 2FA.
### Okta SSO
[Section titled “Okta SSO”](#okta-sso)
Okta SSO is a limited-release feature. Gatsby must enable it for your org before you can configure it — contact us to get started.
Centralize Gatsby access through your Okta tenant. Users sign in once. Offboarding happens automatically when you remove someone from Okta.
What's Supported+
* **SP-initiated SSO:** Start from the Gatsby login page, authenticate through Okta
* **IdP-initiated SSO:** Start from your Okta app dashboard, land directly in Gatsby
* **Automatic provisioning:** Users added in Okta gain Gatsby access
* **Automatic deprovisioning:** Users removed in Okta lose Gatsby access. Sessions persist up to 12 hours after deprovisioning — plan offboarding workflows around this window.
Requirements+
Before you begin, confirm you have:
* Access to an Okta tenant
* Okta administrator privileges
* Admin access to your Gatsby organization
* Okta enabled on your team account in Gatsby (contact us)
Setup Steps+
1. In Okta, navigate to Applications and click **Browse App Catalog**.
2. Search for “Gatsby” and click **Add Integration**.
3. Complete General Settings for your organization.
4. In Gatsby, open **Team Settings** and find the Okta Configuration section.
5. From Okta’s Sign On tab, copy the **Client ID** and **Client Secret** into the corresponding Gatsby fields.
6. For the Issuer URL, click the dropdown in Okta’s top right corner and copy the Authorization Server URL.
7. Click **Save** to complete configuration.
How Users Sign In+
Once configured, users can sign in three ways:
***
**From Okta**
Click the Gatsby app tile in your Okta dashboard.
***
**From Gatsby Login Page**
Click “Login with Okta” on the standard Gatsby login page.
***
**Direct Okta Login**
Navigate directly to gatsby.events/oktaLogin for Okta-only authentication.
New User Provisioning+
Users in your Okta directory don’t need to be pre-created in Gatsby. When someone logs in via Okta for the first time:
* Gatsby automatically creates their account
* They are assigned the **Team Member** role by default
* No invitation email is sent — the Okta login itself serves as onboarding
You do not need to manually create accounts for users in your Okta directory before enabling the integration.
Enforcing Okta for Your Organization+
When you enable Okta enforcement, all other login methods are blocked for your team members. Password login, Google SSO, and magic links stop working. This is a hard cutover, not a gradual rollout.
**External Collaborators are exempt.** Users with the External Collaborator role are not subject to Okta enforcement. Vendors, co-hosts, and external guests continue signing in via other methods. This is by design — you shouldn’t need to provision every outside contact through Okta.
**Multi-org users.** Enforcement is per-org and role-based — a user’s role in your organization determines whether they must use Okta, regardless of their roles in other Gatsby organizations. Users who belong to multiple Gatsby organizations should confirm their role assignments before you enable enforcement. If you’re unsure, contact us.
**Enabling enforcement does not immediately invalidate existing sessions.** Users who are already logged in remain logged in until their session expires — up to 12 hours for Okta sessions, longer for other session types. After expiry, they will be required to authenticate via Okta.
Contact us to enable enforcement for your organization.
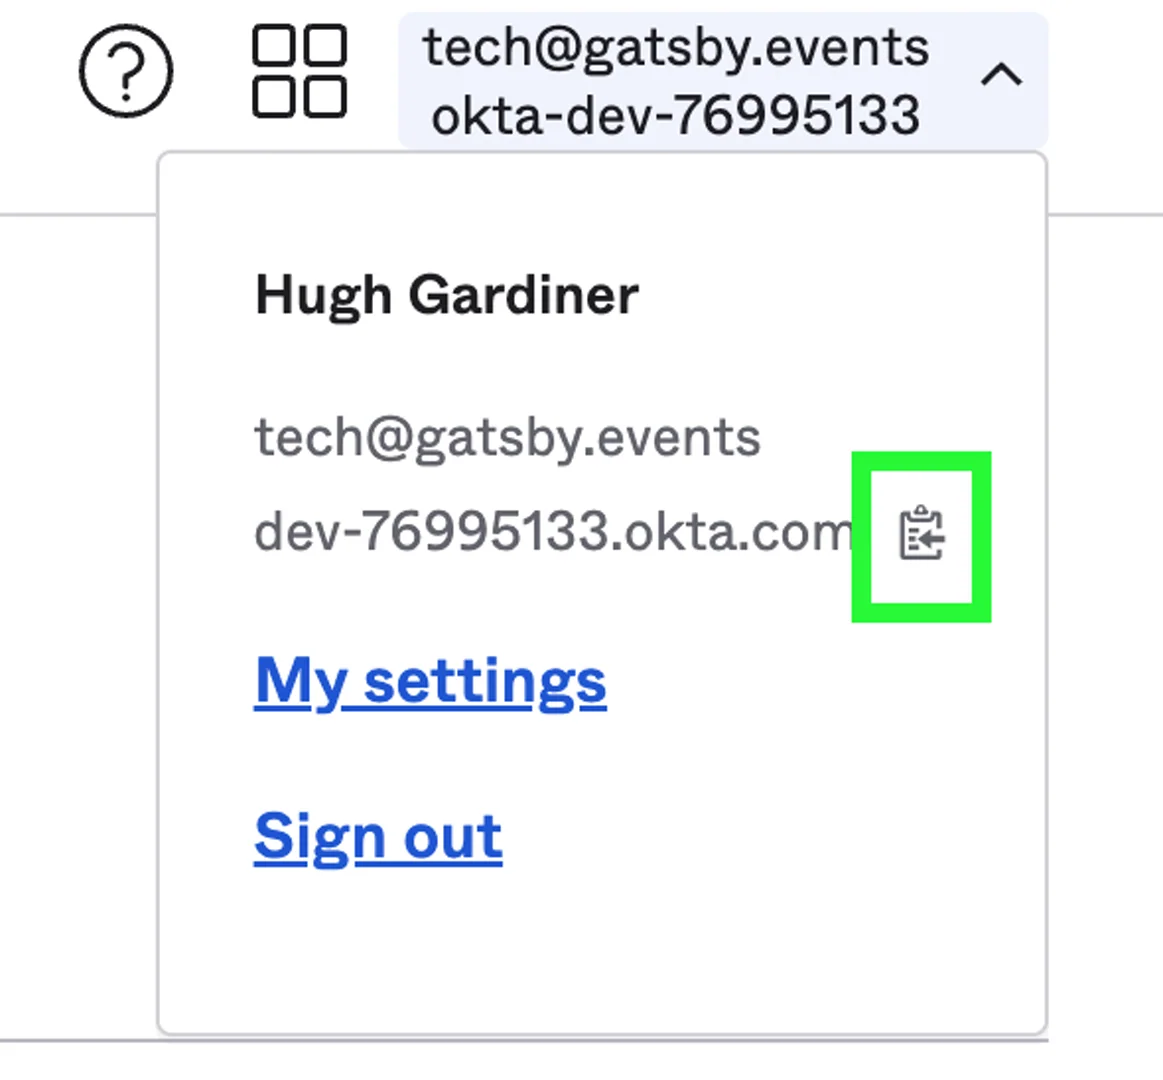
### Google SSO and Magic Links
[Section titled “Google SSO and Magic Links”](#google-sso-and-magic-links)
For teams without enterprise SSO requirements, Gatsby offers Google SSO and passwordless magic link login.
Google SSO+
* Click **Login with Google** on the Gatsby login page
* Select your Google account
* Optionally grant email sending permissions during sign-in
* Your Google account handles authentication security
Magic Link+
* Click the magic link sign-in option on the login page
* Enter your email address
* Check your inbox for a secure sign-in link
* Click to sign in without a password
Standard Login+
Username and password authentication at gatsby.events/login.
Can be combined with two-factor authentication for additional security.
Require Google Login Only+
Admins can restrict sign-in to Google SSO only, alongside the magic-link and 2FA controls in **Team Settings » General**. When enabled, password login and magic links stop working for your team members, and they must sign in with a Google account.
This is a separate setting from Okta enforcement. If your org enables both, confirm with Gatsby support which takes precedence for a given team member, since the two controls are not designed to be layered without guidance.
[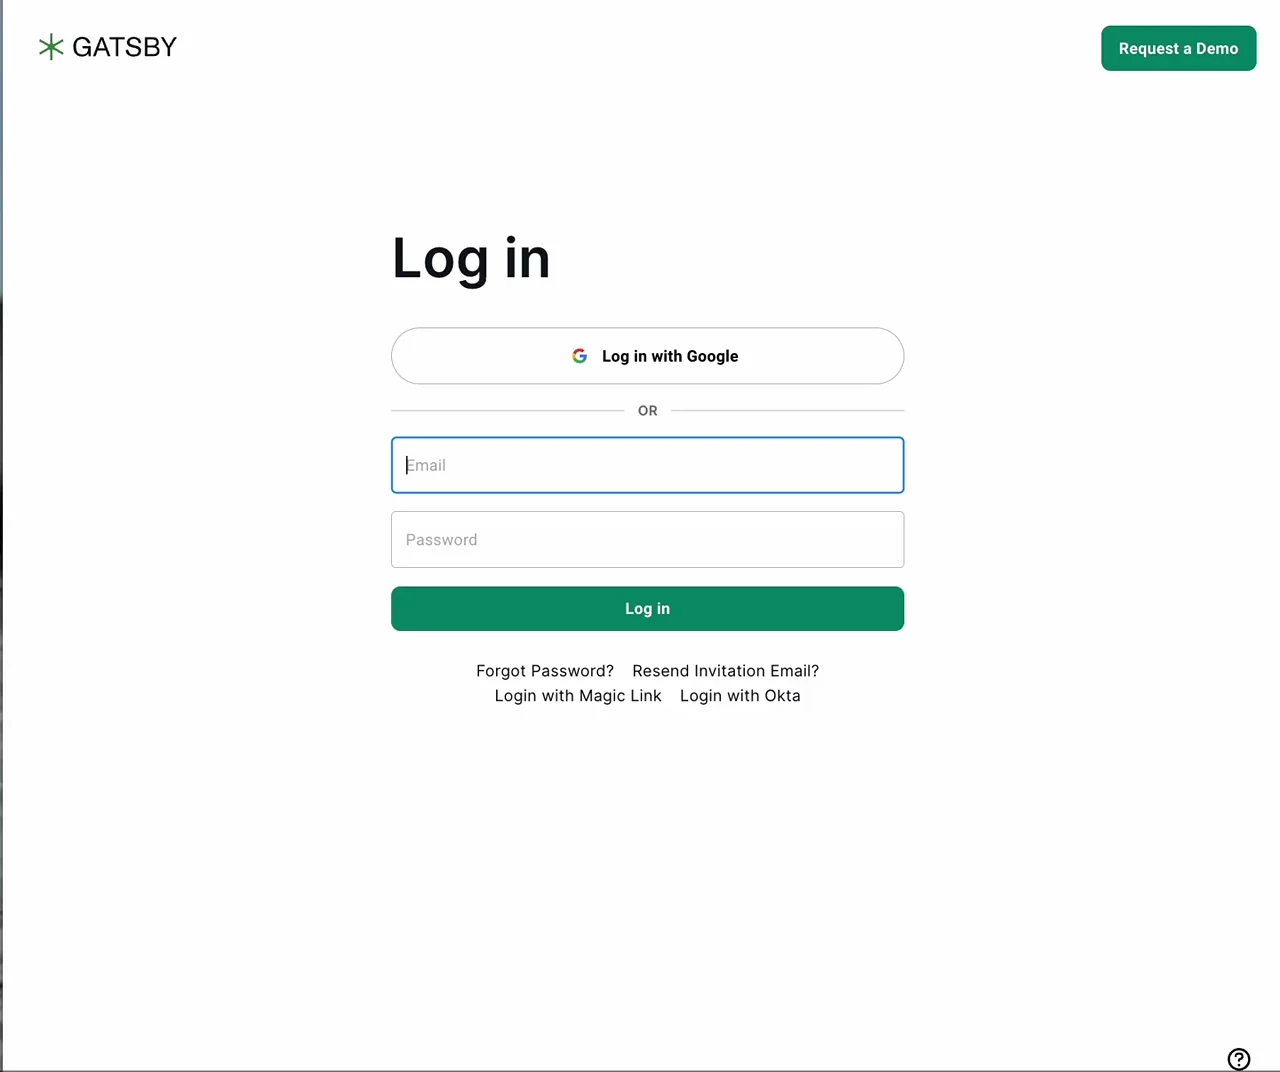](/legacy/login-options-01.mp4)
### Two-Factor Authentication
[Section titled “Two-Factor Authentication”](#two-factor-authentication)
Add a second verification step to username/password logins. You can enable 2FA for yourself or require it across your organization.
Your codes come from an authenticator app on your phone. Gatsby doesn’t send them by text or email, so there’s nothing to wait for after you enter your password.
Set Up 2FA for Your Account+
1. Click your initials in the top right corner.
2. Select **Settings**.
3. Open the **Account Security** tab.
4. Click **Configure 2FA**.
5. Scan the QR code with your authenticator app (Google Authenticator, Authy, 1Password, or similar).
6. Enter the code from your authenticator to verify setup.
If you don’t see an Account Security tab, your account signs in through Google or Okta. Those logins are secured by your identity provider and don’t use Gatsby’s 2FA.
Require 2FA for Your Organization+
Admins can enforce 2FA for all team members.
1. Navigate to **Team Settings**.
2. Toggle **Require Two Factor Authentication** to on.
3. All team members will be prompted to set up 2FA on their next login.
When 2FA Doesn't Apply+
Gatsby’s 2FA covers username/password logins only.
* **Google logins** use Google’s own security (including their 2FA if enabled)
* **Okta logins** use Okta’s security policies
* **Magic link logins** verify identity through email access
[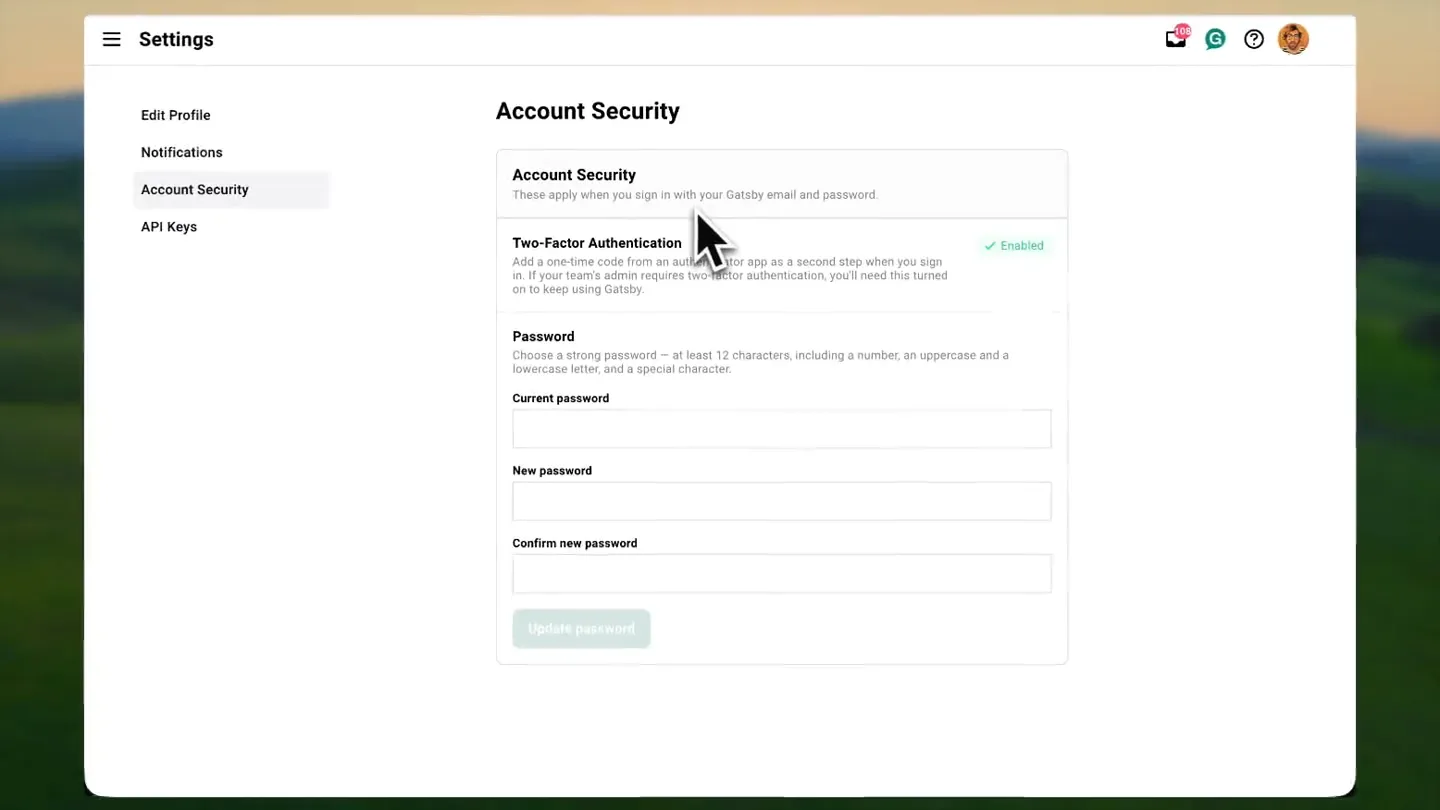](/legacy/two-factor-authentication-2fa-01.mp4)
## Reporting a Security Issue
[Section titled “Reporting a Security Issue”](#reporting-a-security-issue)
Found a vulnerability in Gatsby, or noticed something that looks wrong with your account?
**Email us at: **
## Common Questions
[Section titled “Common Questions”](#common-questions)
Is Okta your only enterprise SSO option?+
Currently, yes. Google SSO is available for teams using Google Workspace. If you have specific SSO requirements, contact us to discuss options.
Does Okta SSO cost extra?+
No. The Okta integration does not carry an additional cost. Contact us to have it enabled for your account.
Can I require everyone on my team to use Okta?+
Yes. When enforcement is enabled, all other login methods are blocked for your team members. Password login, Google SSO, and magic links stop working. External Collaborators are exempt and continue signing in via other methods. Contact us to enable enforcement for your account.
I never got my 2FA code. Where is it?+
Nothing was sent. Your code lives in the authenticator app you scanned the QR code with during setup, and it changes every 30 seconds. Open the app, find the Gatsby entry, and type in the six digits showing at that moment.
Gatsby doesn’t send 2FA codes by text or email.
What happens if I lose access to my authenticator?+
Ask an admin in your Gatsby organization to reset it for you. From the **Team Members** page, they hover over your status in the **Two Factor Enabled** column, click the arrow that appears, and choose **Reset 2FA**. That clears the authenticator pairing on your account. If there’s no admin available to you, contact Gatsby support and we can help you regain access.
Do you have a security questionnaire we can use?+
Contact us directly. We provide our SOC 2 report and answer specific questions for your security review process.
# Team & Permissions
> Control who sees what across your events. Assign Super Admins, Admins, Team Members, or External Collaborators and fine-tune what each role can do.
Four Permission Levels
Super Admins, Admins, Team Members, External Collaborators.
Each tier controls what someone can see, edit, and manage across your org.
Granular Controls
Super Admins decide what other roles can do.
Toggle whether Admins and Team Members can add team members or edit linked email settings.
Read-Only Views
No login required.
Share live guest list links with caterers, executives, or anyone who needs to see but not edit.
## Permission Levels
[Section titled “Permission Levels”](#permission-levels)
You’re co-hosting a dinner with another firm. They need to manage their half of the guest list. But they should never see your LP database or your other events.
Your head of IT needs to control who’s on the account. Your head of Events needs access to everything but shouldn’t be managing team membership. Your EA works across all events. Your managing partner just wants to glance at who’s confirmed for Thursday.
Four different needs. Gatsby handles each with a different permission tier.
Super Admin+
Everything an Admin can do, plus control over team-level permissions. Super Admins decide what other roles are allowed to do.
**What Super Admins can do:**
* Everything Admins can do (full platform access)
* Add and remove team members, including other Super Admins
* Access the **Super Admin Settings** tab in Team Settings
* Toggle whether Admins, Team Members, and External Collaborators can add/remove team members
* Toggle whether other roles can edit linked email account settings
* Override permissions for individual team members directly from the Team Members table
* View per-user permission status columns on the Team Members page
**Best for:** IT leads, account owners, anyone who needs to control what other roles can do.
Admin+
Full access to everything. All events, all contacts, all settings. No access requests needed.
**What Admins can do:**
* Access any event or contact without requesting permission
* Manage org-level settings, security, email permissions, and integrations
* Add and remove team members (unless restricted by a Super Admin)
* Edit linked email account settings (unless restricted by a Super Admin)
* Change other users’ permission levels (except Super Admins)
**What Admins cannot do:**
* Access the Super Admin Settings tab
* Create or demote Super Admins
* See the per-user permission columns on the Team Members page
**Best for:** Event leads, ops managers, platform owners who don’t need to manage team-level permission policies.
Team Member+
Can see all events but must request access to edit them. Full access to the contact database. Can create new events.
**What Team Members can do:**
* View all events in the org
* Request access to edit specific events
* Access the full contact database
* Create new events and lists
**Best for:** Regional teams, marketing coordinators, EAs who work across multiple events.
External Collaborator+
Only sees events they’re specifically assigned to. Cannot see your contact database, cannot see other events, and doesn’t know they exist.
**What External Collaborators can do:**
* View and edit their assigned events
* Add guests to assigned events (controlled by Super Admin Settings — see below)
* Edit landing pages and email templates
* Create and send campaigns (from their own email only)
* Work on seating charts
**What they cannot do:**
* See your contact database
* View other events in your org
* Create new events
* Remove guests from guest lists
* Send emails as other team members
* Send texts
By default, External Collaborators can create new contacts and upload CSVs inside their assigned events, but cannot search your Contacts or restore archived guests. Super Admins can broaden or restrict this — see [Super Admin Settings](#super-admin-settings).
**Best for:** Co-hosts, vendors, design agencies, partners.
### Two capabilities with tighter rules
[Section titled “Two capabilities with tighter rules”](#two-capabilities-with-tighter-rules)
Most of what a role can do follows from the four roles above. Two things are gated more tightly, on purpose.
Sending SMS+
Super Admins, Admins, and Team Members can send texts. **External Collaborators cannot** — they don’t see the SMS option in the channel picker, and the server refuses the send if they reach it another way. They can still send email campaigns.
Stricter than email, deliberately: every text costs money to send, and a bad send risks your ability to text at all. See [SMS Campaigns](/platform/email-campaigns/sms-campaigns/).
Payment methods and paid add-ons+
**Plan & Billing is Super Admin and Admin only.** Other roles don’t see the tab and can’t add a payment method, purchase an add-on, or cancel one. See [Plan & Billing](/platform/account-settings/plan-billing/).
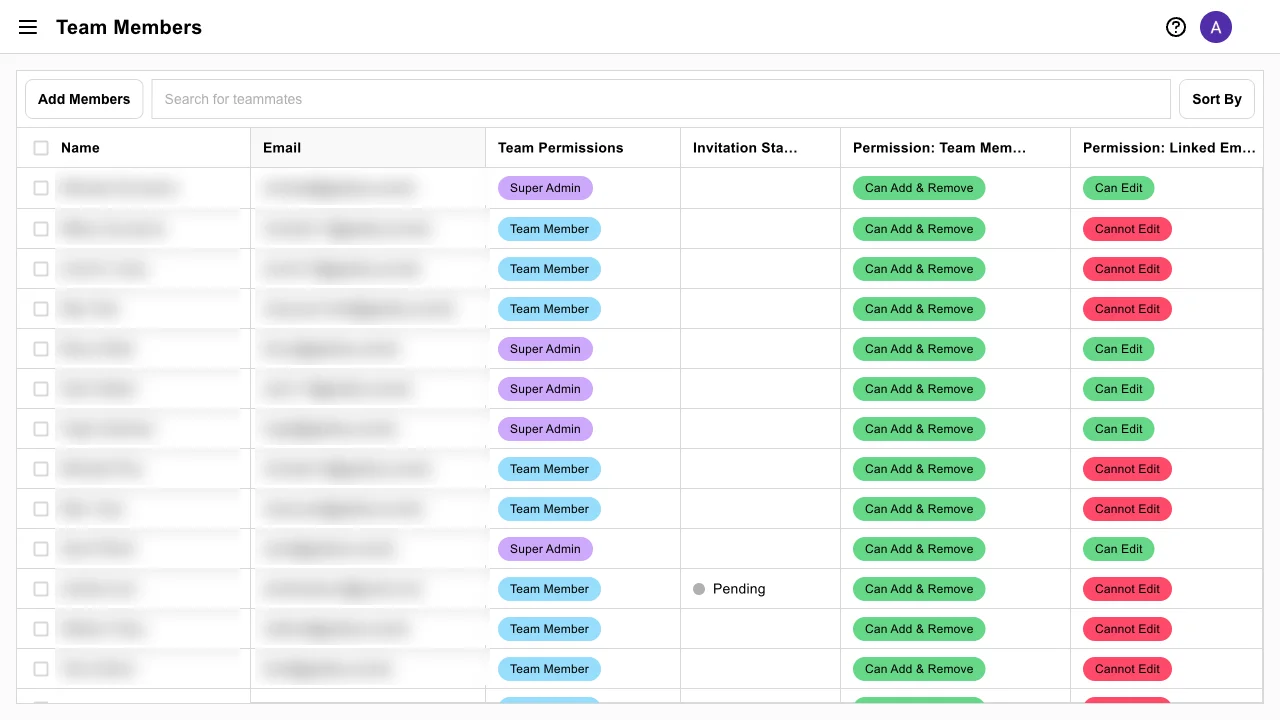
## Org Roles vs. Event Roles
[Section titled “Org Roles vs. Event Roles”](#org-roles-vs-event-roles)
The four permission levels above are org-wide — they set what someone can see and do across your entire account. Separately, individual events can carry their own per-event permissions that layer on top of a person’s org-wide level. There is no functional difference between an event organizer and an event collaborator. The organizer role is helpful for your team to know who the lead is on the event .
An Admin or Super Admin already has full access to every event regardless of event role. Event roles matter most for Team Members, who otherwise must request access to edit a given event — assigning an event role is how that access gets granted.
## Not Everyone Needs a Login
[Section titled “Not Everyone Needs a Login”](#not-everyone-needs-a-login)
Your managing partner wants to see who’s coming to Thursday’s dinner. Your caterer needs the dietary restrictions list. Your CFO wants to review the guest list before invitations go out.
None of them need to edit your event. Give them a read-only guest list view instead.
Views are shared links. No login, no password, no risk of accidental changes. They always show the current state of the list, updated in real time.
You control what’s visible. Show names and dietary needs to the caterer, hide email addresses entirely. Enable CSV export if they need to pull data into their own system.
**Use read-only views for:**
* Executives who want oversight without involvement
* Vendors who need specific data (catering, A/V, printing)
* Partners where full External Collaborator access is more than they need
* Anyone who just needs to see, not edit
Setting Up a Guest List View+
1. Open your event’s guest list.
2. Configure a view with the columns you want visible. Hide emails if needed.
3. Click **Enable Public Link** and copy the public link.
4. Send the link to whoever needs access.
They’ll see current data, updated in real time, with no login required.
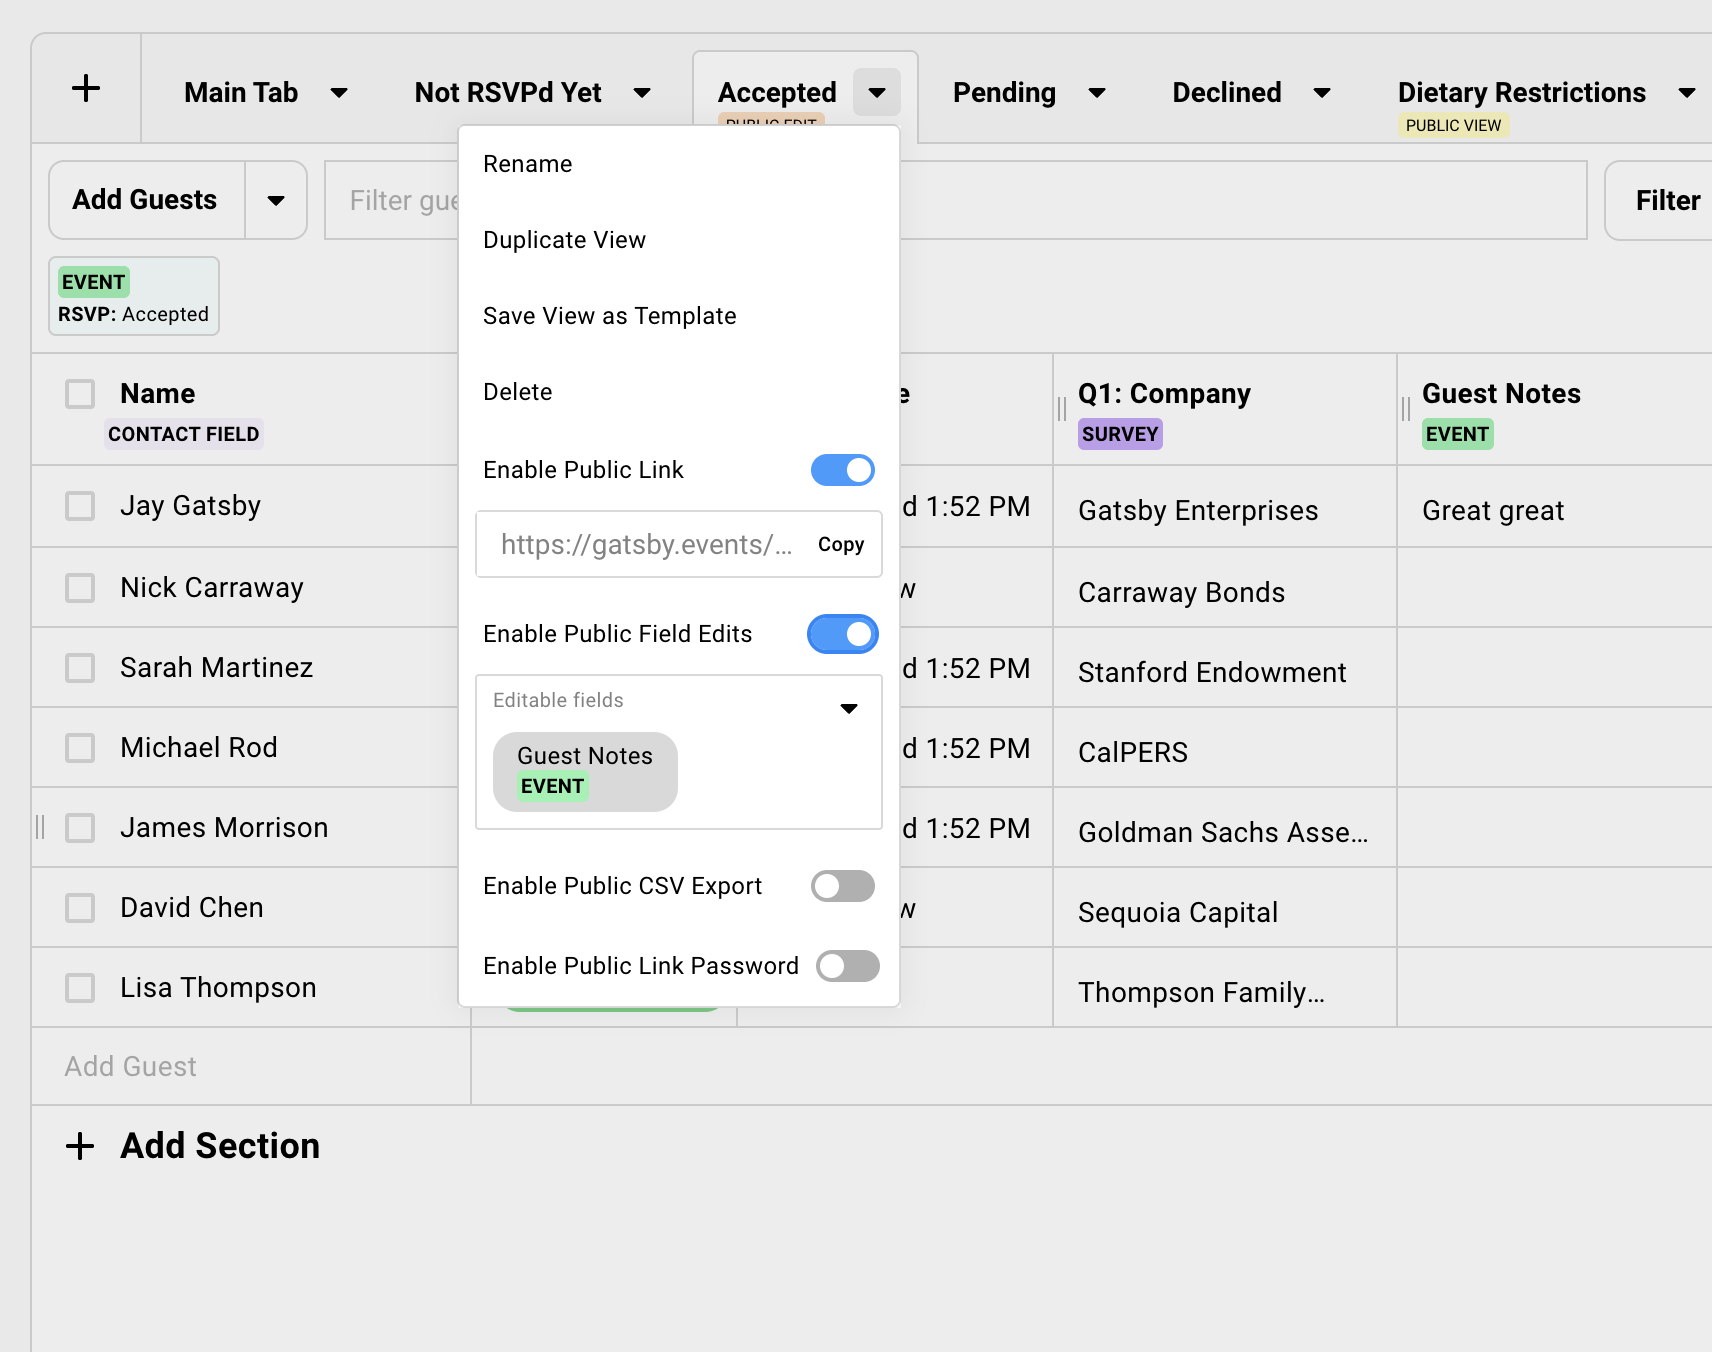
## External Collaborators in Practice
[Section titled “External Collaborators in Practice”](#external-collaborators-in-practice)
External Collaborators have event-level access without org-wide visibility. They work inside the events you assign them to, and nothing else exists to them. This makes them the right fit for any situation where someone outside your organization needs to actively work on an event.
### Common Workflows
[Section titled “Common Workflows”](#common-workflows)
Co-hosted Events with Partner Firms+
Invite your co-host’s event lead as an External Collaborator. They upload their contacts, see the combined guest list, and help manage registration.
Your other events and contacts stay invisible to them.
Design Agencies Working on Templates+
Create a sandbox event with no real contacts. Add your designer as an External Collaborator.
They build landing pages and email templates directly in Gatsby without accessing your production events or data.
Chapter Leads in Membership Organizations+
Each regional chapter lead gets External Collaborator access to their city’s events. They manage their local community without seeing national membership data or other chapters’ events.
HQ admins maintain full visibility across everything.
Partner Contact Uploads via Parent-Child Events+
Create a child event under your main event. Add your partner as an External Collaborator on the child only.
They upload their contacts there. Those contacts automatically sync to the parent event. The partner never sees your full guest list or other child events.
[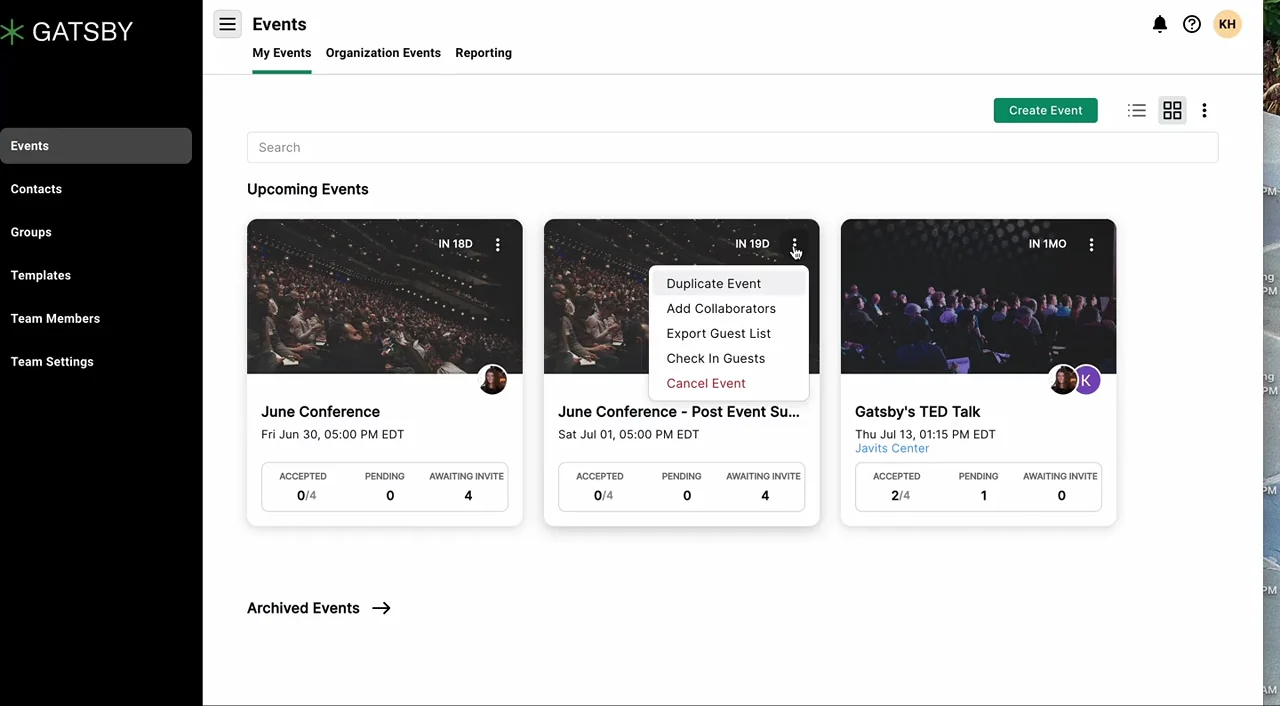](/legacy/add-team-members-collaborators-01.mp4)
### A Note on Data Security
[Section titled “A Note on Data Security”](#a-note-on-data-security)
External Collaborators can send emails to everyone in their assigned events. There’s no way to fully prevent email addresses from being captured if someone wanted to.
This role requires a baseline of trust. For partners where email exposure is a concern, use read-only guest list views instead. Emails can be hidden, and no login is required.
## Super Admin Settings
[Section titled “Super Admin Settings”](#super-admin-settings)
Super Admins have a dedicated **Super Admin Settings** tab inside Team Settings. This is where you control what other permission levels are allowed to do — without changing their role.
What You Can Control+
The Super Admin Settings tab shows a section for each role — **Admin**, **Team Member**, and **External Collaborator** — with toggles that control role-level capabilities:
* **Can add other Team Members to team** — Controls whether users with this role can add or remove team members.
* **Can edit Linked Email Account settings** — Controls whether users with this role can modify connected email account configurations and invite teammates to connect their accounts.
For External Collaborators, the “Can add other Team Members” toggle is locked off and cannot be enabled. External Collaborators should never manage team membership.
The External Collaborator section also includes an **Add people to events** picker that controls how External Collaborators can add guests inside the events they’re assigned to:
* **Full access** — External Collaborators can search your Contacts, create new contacts, upload CSVs, restore archived guests, and add sections.
* **Create only** *(default)* — External Collaborators can create new contacts, upload CSVs, and add sections. They cannot search your Contacts or restore archived guests.
* **None** — External Collaborators can only add new sections. They cannot create contacts, upload CSVs, search Contacts, or restore archived guests.
Existing accounts are set to **Create only** by default, which matches the behavior most teams already had. The Add Guests button in the event navbar, the guest list toolbar, and the inline add-row cell all update automatically to match the level you select. The same restrictions are enforced on the backend, so the level cannot be bypassed by API.
How Changes Apply+
When you change a toggle and save, a confirmation dialog explains that the change will apply to **all existing users** with that permission level.
For example, toggling “Can add other Team Members” to off for Admins means every Admin on your account immediately loses the ability to add or remove team members. Only Super Admins retain that ability.
Per-User Overrides+
Super Admins can also override permission settings for individual team members directly from the **Team Members** page.
Two additional columns are visible only to Super Admins:
* **Permission: Team Members** — Shows “Can Add & Remove” (green) or “Cannot Add & Remove” (red)
* **Permission: Edit Linked Email Settings** — Shows “Can Edit Linked Emails” (green) or “Cannot Edit Linked Emails” (red)
Click any value in these columns to change it for that specific person. This lets you grant or restrict individual team members independently from the role-level defaults you set in Super Admin Settings.
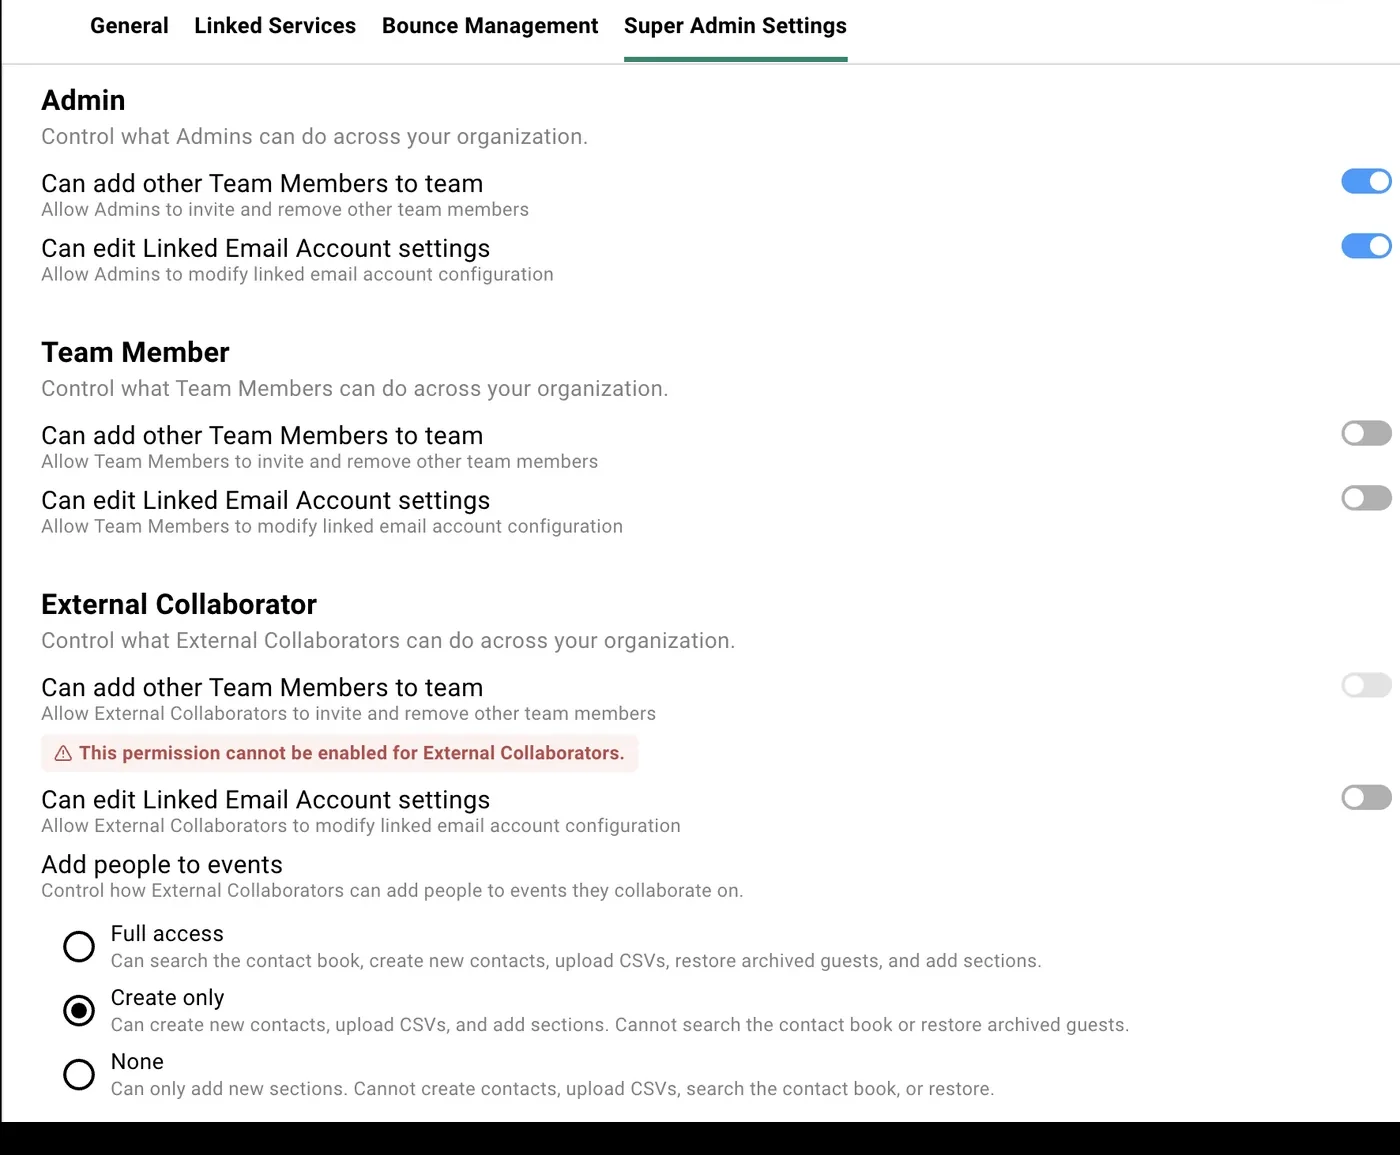
## Adding Team Members
[Section titled “Adding Team Members”](#adding-team-members)
Add team members and External Collaborators from the Team Members page in your account settings.
Adding a New Team Member+
1. Navigate to **Team Members** from your main dashboard.
2. Click **Add Member**.
3. Enter their email address and name.
4. Choose their permission level: **Team Member**, **External Collaborator**, **Admin**, or **Super Admin**.
5. They’ll receive an email invitation to join your org.
Only Super Admins can assign the Super Admin role when adding new members. Admins can add Team Members, External Collaborators, and other Admins.
When a New Team Member Can't Get In+
If someone you’ve added can’t find their invitation or can’t sign in, there’s no need to remove and re-add them. Two ways in from the Gatsby login screen:
* **Resend the invite.** The login screen has an option to resend your team invite.
* **Reset the password.** Going through the forgot-password flow also gets a newly added team member into the account.
Changing a Team Member's Role+
From the Team Members page, find the person and use the dropdown under **Team Permissions** to change their role.
* **Admins** can promote Team Members to Admin or change roles among non-Super Admin levels.
* **Super Admins** can assign or remove any role, including Super Admin.
* Admins cannot demote or modify Super Admins.
Adding External Collaborators from an Event+
You can also add External Collaborators directly from an event.
Open the event, click the three-dot menu or the **+** button, and select **Add Collaborators**. This adds them to your org as an External Collaborator with access to that event.
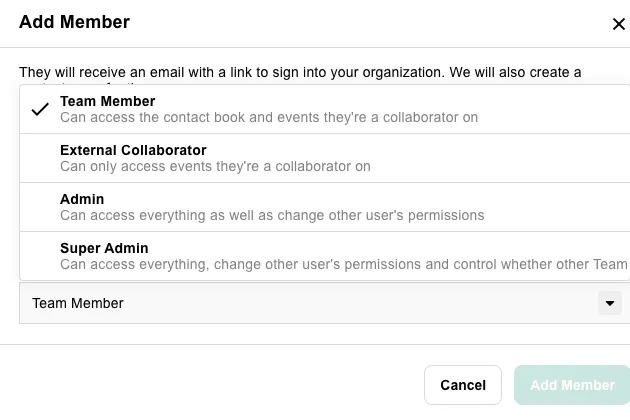
## Common Questions
[Section titled “Common Questions”](#common-questions)
What's the difference between Super Admin and Admin?+
Both have full access to events, contacts, and settings. The difference is governance.
Super Admins can access the **Super Admin Settings** tab to control what other roles are allowed to do — like whether Admins can add team members or edit linked email settings. Admins cannot see or change these controls.
Super Admins can also create other Super Admins and see per-user permission columns on the Team Members page. Admins cannot.
Can an Admin demote a Super Admin?+
No. Only Super Admins can change another Super Admin’s role. Admins cannot modify Super Admin users.
What happens if I restrict Admins from adding team members?+
If a Super Admin toggles “Can add other Team Members to team” to off for the Admin role, all Admins will lose the ability to add or remove team members. The **Add Members** button and remove controls will be hidden for them. Only Super Admins will retain those abilities.
All other Admin capabilities — accessing events, contacts, settings, integrations — remain unchanged.
Can External Collaborators send emails?+
Yes. They can send campaigns from their own connected email account to guests in their assigned events. They cannot send as other team members.
Can External Collaborators add or upload contacts to events?+
It depends on the **Add people to events** setting under Super Admin Settings → External Collaborator.
* **Full access** lets them search your Contacts, create new contacts, upload CSVs, restore archived guests, and add sections.
* **Create only** (the default) lets them create new contacts, upload CSVs, and add sections, but they cannot search your Contacts or restore archived guests.
* **None** restricts them to adding new sections only.
Pick the level that matches how much access your outside collaborators need. If you want a partner to bring their own list to your event without ever seeing your contact database, **Create only** is the right setting.
Why can't I edit some fields on a guest profile?+
Some edits to guest profiles are managed at the team level, so they aren’t available to every user on the account. External Collaborators are the most limited. If you need a change you can’t make yourself, ask an Admin or Super Admin on your team.
Why can't I see notification settings?+
Notification settings are hidden from External Collaborators. If you’re working on another organization’s account as an External Collaborator and want your notifications changed or turned off, contact Gatsby support.
Can I hide email addresses from External Collaborators?+
Not fully. External Collaborators can see and email guests within their events.
If you need to share guest data without exposing emails, use a read-only guest list view with the email column hidden.
Can I control who sends from which email address?+
Yes. Contact support to enable strict sending permissions.
Once enabled, Admins control which team members can send from which connected email accounts. Team Members only send from addresses they’ve been explicitly granted. External Collaborators can only send as themselves.
**Granting yourself or a teammate access to a connected account.** With strict sending permissions on, a new joiner will hit an error when they try to send a test or create a campaign until they’re on the allow list for the account they’re sending from. Any admin on the team can fix this without contacting support:
1. Go to **Team Settings » Linked Services**.
2. Click the three-dots menu next to the account you want to send from.
3. Add the person to the allow list.
4. Have them refresh their Gatsby browser tabs and try again.
**Use case:** The Partner’s EA sends dinner invitations from the Partner’s address while other team members cannot.
How should small teams set up permissions?+
Small, trusted teams often make everyone an Admin or Super Admin. No access requests, everyone works on any event.
As your team grows, designate one or two Super Admins to manage team-level policies, keep most internal staff as Admins or Team Members, and add External Collaborators for outside partners.
Can Gatsby support change my permission level for me?+
No. We stay out of changing permissions on customer accounts, for the same security reasons you’d expect. Permission changes are made by your own team: any **Admin** or **Super Admin** on your account can do it from the **Team Members** page in seconds, and that’s always the fastest route.
The exception is an account with no active Admin or Super Admin left. Someone left the firm without handing over. In that case, contact us and we’ll walk you through the approval process, which requires a written request from a C-level executive at your organisation before we can make any change.
How do I give someone view-only access?+
Use a guest list view instead of adding them as a team member. From **Guests » view menu** (dropdown icon), configure a view with the columns you want visible, click **Enable Public Link**, and send them the link. No login needed.
# Askby
> Ask a question in plain English and get an answer from Gatsby's help documentation without leaving the product. Askby lives in your top navigation, cites the articles it drew from, and gets sharper every time you tell it whether an answer helped.
Why it matters
## Help that comes to you, right where the work is.
Invites go out in an hour and you want to double-check how the RSVP buttons behave on your landing page. Ask Askby and the answer is there in seconds, in a panel beside the thing you’re working on.
We invested heavily in making that answer a good one: a retrieval system across Gatsby’s entire help library, wired into the product so what you get back is accurate, specific, and cited — at the moment you need it most.
How it works
### Ask from any page
Click the Askby icon in your top navigation. A panel opens over whatever you’re doing and stays open while you keep working.
### Answers you can check
Askby answers in a couple of sentences and links the help articles it drew from, so you can go deeper when the short version isn’t enough.
**Askby works alongside all your usual support channels.** It’s simply always there — answering in seconds, at any hour, so a question with a documented answer never waits for someone’s working day to start. Nothing about how you reach a person changes, and when Askby can’t help, it points you to the people who can.
## Where to find it
[Section titled “Where to find it”](#where-to-find-it)
Askby has a dedicated icon in the top navigation, immediately left of the **?**, on every page. It’s also the first item in the **?** menu, above Help Center.
The panel opens as a sidecar over the page you’re on. Minimize it to a bar in the corner, expand it to full screen, or leave it open and keep navigating — your conversation survives the move.
### Asking a question
[Section titled “Asking a question”](#asking-a-question)
1. **Open Askby** from the navigation icon or the **?** menu.
2. **Pick a suggested question or type your own.** A fresh panel offers three common questions as chips, with a refresh control to cycle to a different set. Clicking one sends it as if you’d typed it.
3. **Press Enter to send.** Askby shows a thinking indicator, then the full answer at once.
4. **Follow the links, or keep going.** Ask a follow-up in the same conversation and Askby keeps the earlier context.
What comes back in an answer+
**A short answer.** Two or three sentences in plain language, formatted with bold, lists, and inline code where that makes it clearer. Askby is written to answer, not to pad.
***
**Learn more.** The help articles the answer came from, listed under the answer as clickable links. They open without throwing you out of Gatsby, and they’re how you verify what Askby told you.
***
**Links that take you where you need to go.** When the answer involves a specific screen — the Plan & Billing tab in Team Settings, say — that becomes a real link into your own account, with the panel still open behind it.
***
**A copy button.** Copies the answer, formatting and numbering intact, for pasting into notes, an email, or a Slack message to a colleague.
What Askby can't do+
Two hard limits, and it’s worth knowing them before you ask.
**Askby can’t see your account.** “How many people RSVP’d to Thursday’s dinner?” is not a question it can answer. It reads Gatsby’s help documentation, not your data. That’s a deliberate boundary, not a gap we forgot.
**Askby can’t do things for you.** It won’t edit your landing page, add a guest, or change a setting. It will tell you exactly where to go and what to click.
When something goes wrong+
If Askby is unavailable or can’t answer, you get a plain message saying so, a **Try again** button, and a route to a human. Your question isn’t lost.
Nothing about a failed answer is your fault, and the copy won’t imply it is. If it keeps failing, the support team is one email away:
Email copied to clipboard
## Askby gets better with your feedback
[Section titled “Askby gets better with your feedback”](#askby-gets-better-with-your-feedback)
Every answer carries a thumbs up and a thumbs down. That vote is the single highest-signal thing you can give us.
It tells the team maintaining Askby’s knowledge base which answers landed and which ones missed — and when one misses, the fix is usually a help article that needs to be clearer, more specific, or written for the first time. Those articles are the same library Askby answers from, so improving them improves every future answer, for everyone.
The questions themselves matter too. What people ask Askby is the clearest map we have of where Gatsby is confusing, and it feeds directly into what gets documented next.
### The feedback loop, concretely
[Section titled “The feedback loop, concretely”](#the-feedback-loop-concretely)
What happens when you vote on an answer+
A thumbs up or thumbs down is recorded against that specific answer and handed to the team that maintains Askby’s knowledge base. It isn’t a satisfaction score sitting in a dashboard nobody reads — low-rated questions are reviewed against the documentation that produced them.
You can change your vote. One vote per answer.
Should I add detail when the answer was wrong?+
Vote first — it’s one click and it registers. If the answer was wrong in a way that matters, or the documentation is missing something your team needs, tell us through any of your usual support channels, or email us directly:
Email copied to clipboard
A specific “Askby told me X, but the actual behavior is Y” is worth a great deal to us.
Does my organization's data train anything?+
No. Askby answers from Gatsby’s published help documentation. It has no access to your contacts, guest lists, events, or campaigns, so none of that can end up in an answer — to you or to anyone else.
What we keep is the conversation itself: your questions and Askby’s answers, for 12 months, so you can reopen them and so we can find the gaps in our own documentation.
### Coming back to a conversation
[Section titled “Coming back to a conversation”](#coming-back-to-a-conversation)
Askby keeps your recent conversations, newest first, behind the history control in the panel header. Open one to read it again or pick up where you left off. The list loads older conversations as you scroll.
Conversations are kept for 12 months. **New conversation** in the header clears the panel and starts fresh without touching your history.
Your history is yours — teammates don’t see your conversations, and you don’t see theirs.
### Daily limits
[Section titled “Daily limits”](#daily-limits)
Askby answers up to **30 questions per person per day** and **200 per organization per day**. These exist so no single account can run away with the bill. They are set high enough that ordinary use never reaches them — 30 questions in one day is a very heavy day.
How you'll know you're near a limit+
A small counter appears under the composer when you have 10 questions or fewer left today, and darkens at three or fewer. Above 10, there’s nothing to see.
If you do hit a limit, the panel says which one — yours or your organization’s — and roughly when it resets. Limits reset once a day.
I hit the limit and I need an answer now+
Askby’s limits don’t touch any of your other support channels — Message us in the **?** menu works as usual, and so does email:
Email copied to clipboard
Hitting a cap never cuts you off from a human.
### Controlling Askby for your organization
[Section titled “Controlling Askby for your organization”](#controlling-askby-for-your-organization)
Both controls live in **Team Settings → Super Admin Settings**, in the **Askby** section. Super Admins only — Admins don’t see that tab.
Enable Askby+
Turns Askby on or off for everyone in your organization. When it’s off, the navigation icon, the **?** menu entry, and the panel are all hidden.
This is the switch for firms with an internal AI policy that needs to be honored before the assistant is available to staff.
Can External Collaborators use Askby+
**Off by default.** External Collaborators — the outside people you invite onto specific events — have no access to Askby unless a Super Admin turns it on.
If Enable Askby is off, this toggle is greyed out, because there’s nothing for it to permit.
## Common Questions
[Section titled “Common Questions”](#common-questions)
Is Askby included in my plan?+
Yes. Askby is part of Gatsby at no additional cost, and there’s no per-question charge.
I don't see the Askby icon in my navigation.+
Two things turn it off. A Super Admin may have switched Askby off in **Super Admin Settings → Askby**. Or you’re signed in as an External Collaborator, who don’t get Askby unless a Super Admin enables it.
Can Askby tell me about my own event?+
No. Askby answers questions about how Gatsby works, not questions about your data. It can’t see your contacts, guests, events, or campaigns — so it can’t tell you who RSVP’d, and it can’t tell anyone else either.
Can Askby make a change for me?+
Not today. It answers questions and points you to the right screen. Doing the work for you is a direction we’re building toward, deliberately, rather than something we quietly bolted on.
Does the panel close when I navigate to another page?+
No. The panel is designed to stay open while you move around Gatsby, so you can follow an answer’s instructions with the answer still on screen.
Is this the same Askby we've seen elsewhere?+
Yes — the same assistant and the same knowledge base. Askby already answers behind the support inbox, and in shared Slack channels for the teams that have one:
Email copied to clipboard
Putting it inside the product means you don’t have to switch tools to ask.
How long are my conversations kept?+
12 months. After that, the message text is removed.
Askby gave me a wrong answer. What should I do?+
Thumbs it down — that’s the fastest way to get it fixed, and it routes straight to the people who maintain Askby’s documentation.
If the correct answer matters right now, any of your usual support channels will get you a human, email included:
Email copied to clipboard
# Contact Profiles
> Every contact builds a history. See their event attendance, communication records, and custom fields in one place, accessible from any event.
Why it matters
## Your CRM tracks deals. Who tracks the dinner where you met them?
Event history ends up split across spreadsheets, inboxes, and whatever someone wrote down that night. The relationship context you need is rarely where you look for it.
How it works
### Complete History
Every event, email, and RSVP in one profile, accessible from anywhere.
### Custom Fields
Track what doesn’t belong in a deal system: dietary restrictions, seating notes, guest preferences. The details that change how a room feels.
## Viewing Contact Profiles
[Section titled “Viewing Contact Profiles”](#viewing-contact-profiles)
You invited someone to dinner last quarter. Did they come? Your CRM tracks deals, not dinners. Your inbox has fifty threads with their name and no attendance record. The old spreadsheet has a column for everything except who actually showed.
The relationship history lives in fragments across five systems.
Gatsby puts it all in one place. Click any guest name anywhere in the platform and a drawer slides out from the right: contact details at the top, activity tabs below. Every interaction with this person, accessible from any event.
Opening a Contact Profile+
Click any guest name on a guest list, in search results, or within any event view. The profile drawer opens from the right side of your screen.
The drawer shows:
* **Profile picture and basic info** at the top
* **Context notes** displayed prominently below the picture
* **Activity tabs** for detailed history
* **Edit button** to update any field
Activity Tabs+
Tabs organize everything you know about a contact. Each shows history across all events, not just the current one.
***
**Campaigns**
Every email sent to this contact across all events. See which campaigns reached them. Check if someone already followed up about a survey issue. Useful when multiple team members work the same relationship.
***
**Events**
Complete RSVP and attendance history. Filter by upcoming, past, or your events specifically.
Patterns emerge here: the person who always accepts but never shows, the one who consistently declines but still expects an invitation. That’s worth knowing before you send another invite.
***
**Lists**
Which contact lists include this person. View their status on each list. Remove them from lists directly from this panel.
***
**Files**
Attach documents to contacts: guest briefings, headshots, or reference materials your team needs before meetings.
***
**Newsletters**
Present when your organization has the Newsletters add-on. Which newsletters this person subscribes to, when they subscribed, and every campaign they’ve received with whether they opened it. Unsubscribe them from one newsletter or from all of them here. See [Newsletter Subscribers](/platform/newsletters/subscribers/).
***
**Notes**
Context notes about the person. Interactions at events. Relationship background. The details that matter for high-touch relationships but do not belong in a CRM.
***
**CRM**
Sync status for Salesforce and Affinity integrations.
Editing a Contact Profile Directly+
Click any guest name to open their profile drawer, then click **Edit** in the top right corner. Update any field — name, company, dietary restrictions, custom fields, tags — and save.
Use this for one-off changes when you have new information about a single contact. If a board member’s dietary restriction just changed, edit it here and it carries through to every future event automatically.
For bulk updates across many contacts, use CSV import instead. You can update any contact field by exporting your list, filling in the new values, and reimporting.
Some profile edits are managed at the team level, so not every user on your account can make every change. External Collaborators are the most limited. If a field won’t let you edit it, ask an Admin on your team. See [Team & Permissions](/platform/account-settings/team-permissions/).
Merging Duplicate Contacts+
When the same person exists as two contacts, usually under two different email addresses, merge them into one profile.
1. Open a guest list that shows both contacts. The list Gatsby builds with **Create list of duplicate contacts** (the dropdown next to **Add Contact** in Contacts) works well for this.
2. Select the contacts you want to merge.
3. In the green action bar, click **More Options » Merge Contacts**.
Event history merges automatically. You don’t need to add both contacts to the same event first to keep their history: the merged profile carries the event history from both.
Similar names aren’t always the same person, so check each pair before you merge.
Contact Information Fields+
Standard fields Gatsby provides out of the box. Click Edit to reveal all available fields.
***
**Basic Details**
* **Name:** First and last name
* **Email:** Primary email address
* **Phone:** Contact number. Where a number is on file, the profile also shows the contact’s **SMS consent** — Opted in, Opted out (with its source), No preference, or Unsupported for a number outside the US. It’s read-only; only the guest can change their own consent. See [SMS Consent & Compliance](/platform/email-campaigns/sms-consent/).
* **Profile picture:** Upload or let guests add their own via survey
* **Company:** Organization name
* **Position:** Job title or role
***
**Context Notes**
A dedicated field that displays prominently below guest’s name. Ideal for team context that should be visible at a glance.
***
**Additional Details**
* **Nickname:** How they prefer to be addressed
* **Birthday:** For personalized outreach
* **Address fields:** Street, city, state, country, postal code
* **Dietary restrictions:** Allergies and preferences that carry across events
***
**Links and Profiles**
* **Personal website:** Blog or portfolio
* **Company website:** Organization homepage
* **LinkedIn:** Professional profile URL
***
**Tags**
Persistent labels for grouping contacts. Searchable and filterable across events.
***
**Other Emails (Deduplication)**
Add alternate email addresses to prevent duplicates: old work emails, personal addresses. Gatsby dedupes against these but does not send to them.
When someone registers with a different email, Gatsby matches them to the existing profile instead of creating a duplicate.
***
**Unsubscribe**
Manually unsubscribe contacts from all Gatsby communications. Useful when someone replies asking to be removed. Their contact profile remains in your database but they will not receive future campaigns.
[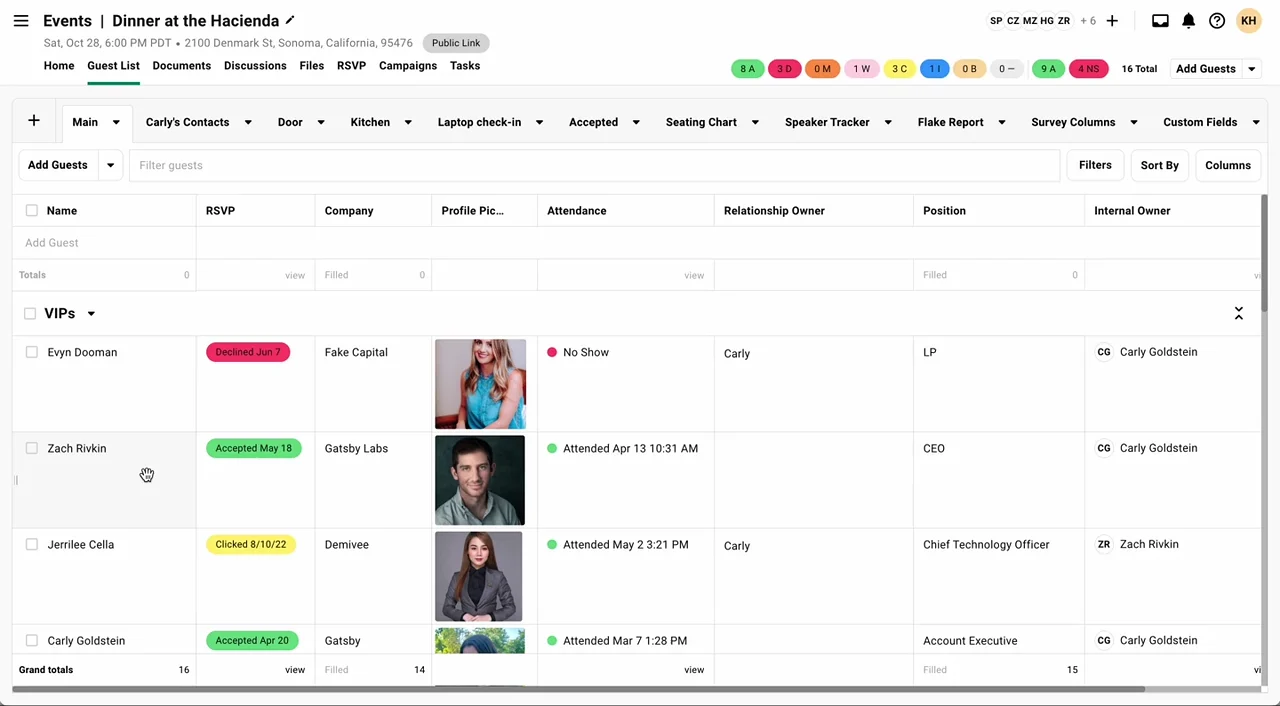](/legacy/contact-profile-01.mp4)
## Ways to Get in Touch with Your Guests
[Section titled “Ways to Get in Touch with Your Guests”](#ways-to-get-in-touch-with-your-guests)
You know to CC Sarah for Thomas. But do you remember every time? Does your colleague?
**Contact Method Groups** let you save different recipient combinations. **Associated Contacts** auto-CC the same person on everything.
### Contact Method Groups
[Section titled “Contact Method Groups”](#contact-method-groups)
Fund communications need the wealth manager CCd. Holiday party invites don’t. Some contacts want correspondence at their personal email, not their work address. There’s no single rule that works for every send.
Contact Method Groups let you create named groups with different To and CC combinations. Select which group to use when sending campaigns.
Contact Method Groups are per-send: you pick one from the recipient list when a particular campaign needs a particular CC arrangement. If instead you want to be copied on **every** email to someone, including confirmations that fire automatically after they RSVP, that is **Associated Contacts**, set once on the contact profile under **Associated Contact to CC**.
Creating a Contact Method Group+
1. Open the contact profile.
2. Find the **Contact Method Group** section.
3. Click **Add Another Group**.
4. Name it descriptively: “Work Only,” “Personal + Spouse,” “Executive + Wealth Manager.”
5. Add the email addresses for To and CC fields.
6. Click **Save**.
Using Contact Method Groups in Campaigns+
When viewing campaign recipients, a dropdown appears next to each contact name. Select which group to use for that send.
Leave it on the default to use their primary email. Select a named group to use that combination instead.
Setting a Default Group+
Mark any group as the default. Gatsby uses that group instead of the primary email unless you manually select a different option.
Useful when you almost always want to use a specific combination but occasionally need to override it.
Importing Contact Method Groups+
For a handful of contacts, create the groups on each profile. For a batch, 60 invitations where each one needs a different CC list, build them from a CSV instead.
1. **Prep your CSV.** One row per contact, with a column for the contact’s primary email, a column for the To address(es), and a column for the CC address(es). Separate multiple addresses in the same cell with semicolons.
2. **Upload it.** Open the event, list, or Contacts page, click the **Add Guests** or **Add Contacts** dropdown, and choose **Upload CSV**.
3. **Map the columns.** Map the primary email to **Primary Email**, then map the To and CC columns to two new **Custom Text Fields**.
4. **Create the groups.** Once the import finishes, select the guests on the list, then choose **More Options » Create Contact Method Groups**. During this process, you select which fields represent the To and CC email addresses for the Contact Method Group.
The groups appear on each guest’s profile and become selectable from the recipient list in any campaign. Leave the new groups unset as the default so a one-off CC arrangement doesn’t apply to future sends.
Contact Method Groups do NOT carry through to confirmation emails. Use Associated Contacts when someone should always be CCd, including on automatic confirmations.
[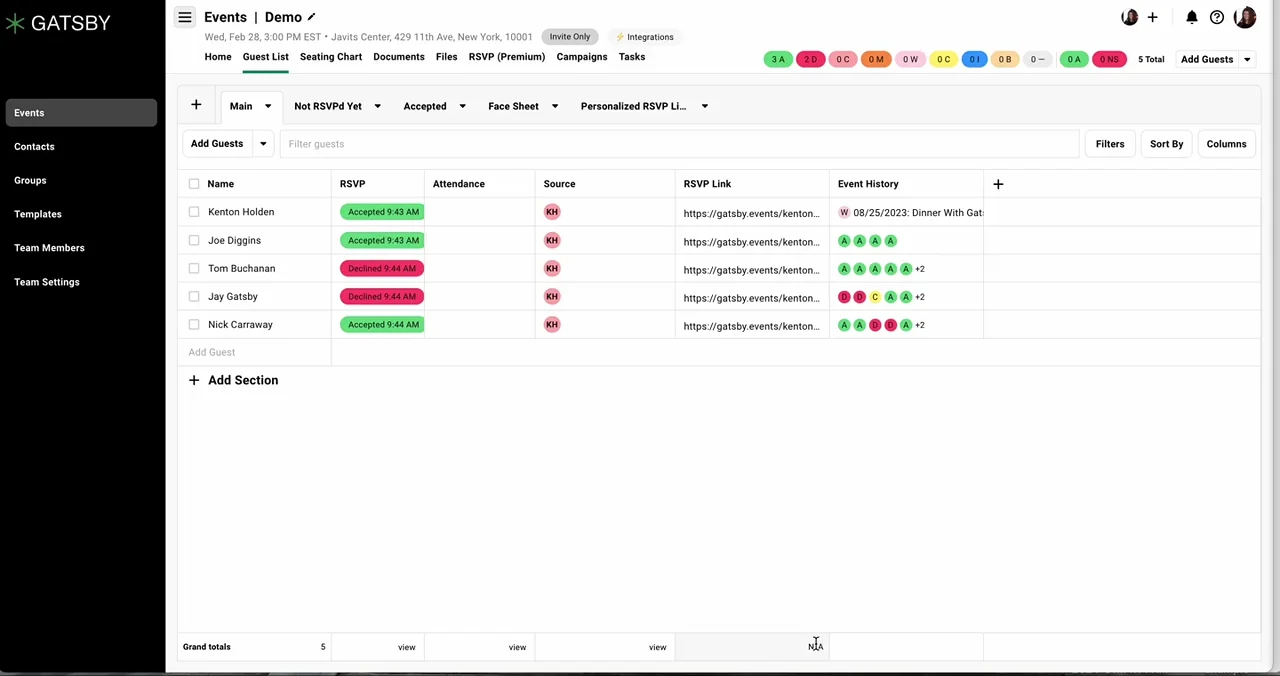](/legacy/associated-contacts-alternative-emails-02.mp4)
Create a contact method group with multiple email addresses
[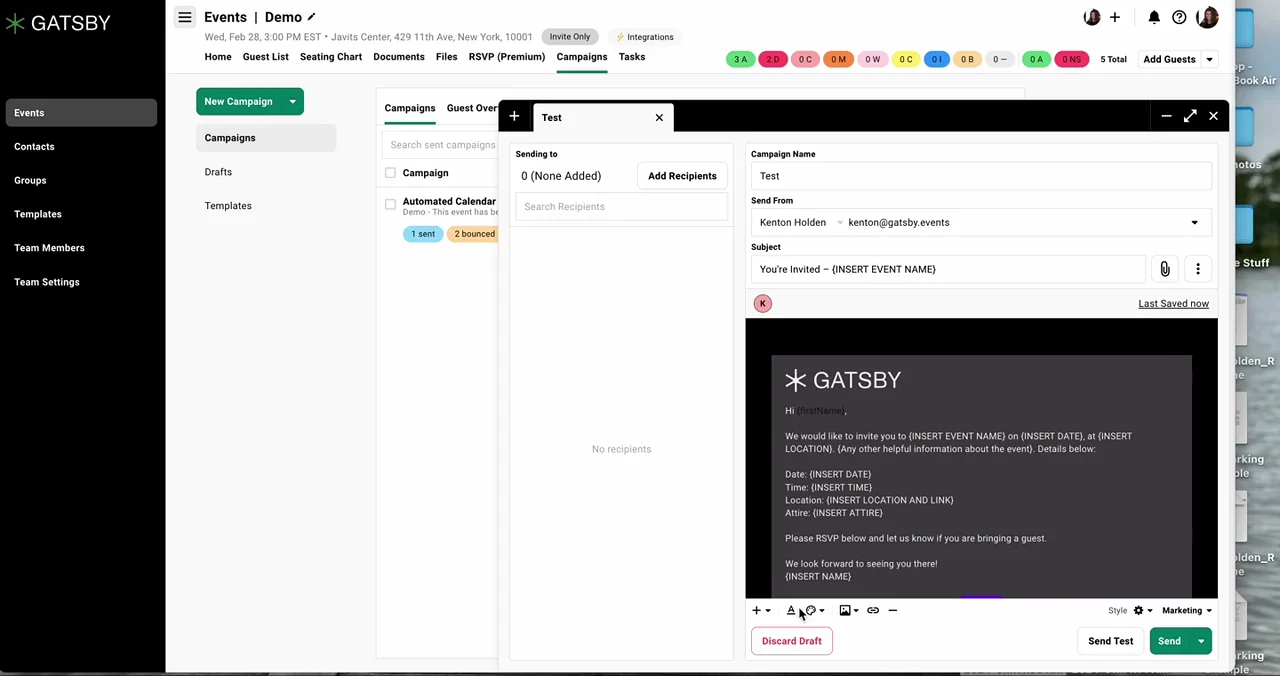](/legacy/associated-contacts-alternative-emails-03.mp4)
Select which contact method group to use when sending a campaign
### Associated Contacts
[Section titled “Associated Contacts”](#associated-contacts)
Associate an EA or assistant with an executive and every email to that executive automatically includes the associated contact. Confirmation emails after RSVP do the same. Configure it once and it applies to every future send.
How to Add an Associated Contact+
1. Open the contact profile by clicking their name.
2. Click **Edit** in the top right corner.
3. Find the **Associated Contact to CC** field.
4. Search for and select the person to auto-CC.
Note: the person to be CC’d must exist as a contact in Gatsby
5. Click **Save**.
Every email to this contact now includes the associated person automatically.
You can import to this field using the CSV import option on a guest list.
Associated Contacts work for confirmation emails too. When the executive RSVPs, their EA gets the confirmation with calendar invite automatically.
[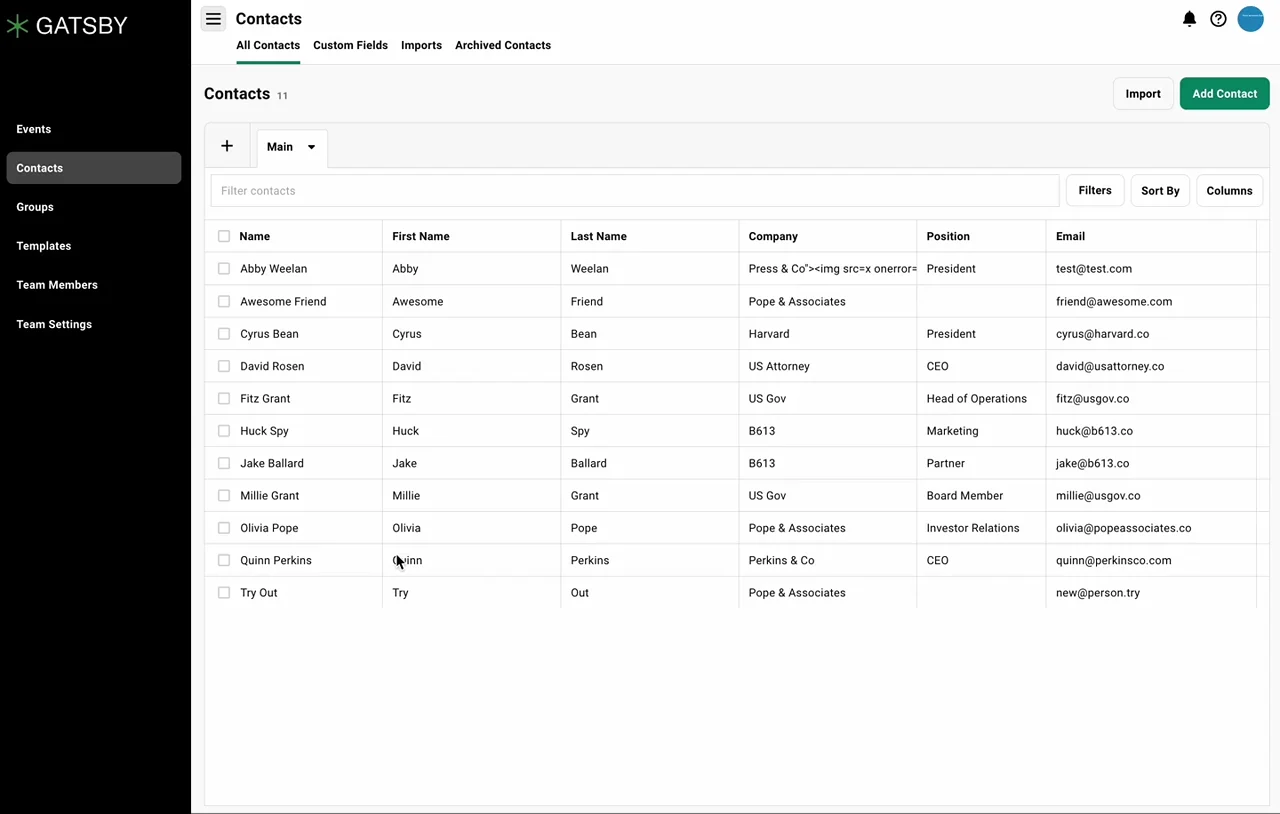](/legacy/associated-contacts-alternative-emails-01.mp4)
Add an associated contact to automatically CC on all communications
## Custom Fields
[Section titled “Custom Fields”](#custom-fields)
Your CRM tracks deals, not dinner attendance. It doesn’t know who attended your 2022 Builder dinner, which LPs prefer vegetarian, or how to segment by investment focus.
Custom fields extend contact profiles with data specific to your business. Filter and segment guests across events with the context that actually matters for how you run them.
### Custom Field Types
[Section titled “Custom Field Types”](#custom-field-types)
Three field types serve different purposes.
Text Fields+
Free-form text entry. Good for biographies, notes, or unique strings that do not need categorization.
Not filterable. Use when you need to store information but do not need to segment by it.
Multi-Select Fields+
Dropdown with predefined options. Filterable and sortable on guest lists.
Use for guest tier, investment focus, relationship owner, event attendance tracking, or anything you want to segment by. Add options as you need them.
Number Fields+
Numeric values that roll up in guest list totals. Use for allocation amounts, ticket counts, or anything you want to sum across guests.
### Managing Custom Fields
[Section titled “Managing Custom Fields”](#managing-custom-fields)
Custom fields are created in Contacts, under the **Custom Fields** tab. Once created, they appear on all contact profiles.
Creating Custom Fields+
1. Go to **Contacts** in the main navigation.
2. Click the **Custom Fields** tab.
3. Click **Add Field**.
4. Choose the field type: Text, Multi-select, or Number.
5. Name the field descriptively.
6. For multi-select, add the options you need.
7. Click **Create Field**.
The field now appears on all contact profiles and as an available column on guest lists.
Editing and Archiving Fields+
Return to the **Custom Fields** tab in Contacts. Click any field to rename it or update options.
Archive fields you no longer need. Archived fields hide from profiles but data is preserved.
Creating Fields During Import+
You can also create custom fields during CSV import. Map a column to “Create new field” and Gatsby creates it automatically with values from your spreadsheet. These behave identically to fields created directly in Custom Fields. They show up there afterward.
[](/legacy/contact-profile-02.mp4)
Create custom fields to track what matters to your business
## Contacts
[Section titled “Contacts”](#contacts)
You need to find a contact but don’t remember which event they attended. Searching event by event wastes time.
Contacts is your central database. All contacts across all events and lists in one searchable view, organized into four sections: **All Contacts**, **Custom Fields**, **Imports**, and **Deleted Contacts**.
### Contacts Overview
[Section titled “Contacts Overview”](#contacts-overview)
**All Contacts** lists everyone in your database regardless of which events they attended. Search by name to find anyone instantly.
All Contacts: Views and Filtering+
Create views with filters, columns, and sections. Same functionality as guest lists but limited to contact-level data. Event-specific data like RSVP status lives on guest lists.
Filter by custom fields to find segments. “Show me all contacts tagged VIP with Investment Focus containing Growth Equity.”
Custom Fields+
Create, rename, and archive the structured fields that appear on every contact profile. See [Managing Custom Fields](#managing-custom-fields) above.
Imports+
See all CSV imports your team has performed, across every event, list, and the Contacts database itself. View what was imported, to which event, and when. Download original files if you need to reference them.
Deleted Contacts+
Contacts is the only place to permanently delete contacts from Gatsby.
Removing someone from a guest list only removes them from that event. Their contact profile remains in your database. Deleting a contact from Contacts moves them to **Deleted Contacts**, where they can be restored.
## Common Questions
[Section titled “Common Questions”](#common-questions)
How is this different from using a CRM for event contacts?+
CRMs track deals and company relationships. Gatsby tracks event relationships: who attended which dinners, who RSVPs yes but never shows, who needs vegetarian options.
The two work together. Gatsby syncs with Salesforce and Affinity so attendance data flows to your CRM. But the event-specific intelligence lives in Gatsby where you can act on it.
Can I import existing contacts with custom fields?+
Yes. Create your custom fields first, then import a CSV with columns mapped to those fields. Or create fields during import by mapping columns to “Create new field.”
Can I add multiple associated contacts to auto-CC?+
Currently, each contact supports one associated contact for auto-CC. For more complex scenarios, use Contact Method Groups where you can include multiple CC addresses per group.
What happens to contact data when I delete someone from an event?+
Removing someone from a guest list removes them from that event only. Their contact profile stays in your database with all history intact. They remain on other events and lists.
To delete the contact entirely, use Contacts.
How do I add custom field data to existing contacts?+
Three options: edit profiles individually, import a CSV with email addresses and the custom field values, or use survey questions that save responses directly to contact profiles so guests fill in their own data.
Why didn't registering through the public link update a guest's contact profile?+
By design. When someone registers through a public link with an email address that already belongs to a contact, Gatsby doesn’t update that contact’s record, even if their first and last name fields are blank. Anyone can open a public link and type in any email address, so a public link is never allowed to change an existing guest’s profile.
**To collect updated details anyway**, gather them as a registration answer and apply them yourself with a CSV import:
1. Add a short text question to the registration form, for example “Preferred name for name badge.”
2. Once responses are in, set up a guest list view with the **Email** column and that question’s column visible.
3. Select the guests, then **Export**.
4. Re-import the file through **Add Guests » Upload CSV**, mapping **Email** to the email column and the answer column to the contact field you want to update. Choose the spreadsheet value when the importer shows conflicts.
See [Importing and Exporting Contacts](/platform/contacts/import-export/).
# Importing and Exporting Contacts
> Bring your spreadsheet data into Gatsby and export it when you need to. The CSV importer matches emails to prevent duplicates and lets you enrich contacts over time.
Why it matters
## Your contacts live in spreadsheets, CRMs, and badge scanners. How do you merge without multiplying?
Import the same contact twice and versions conflict. Manual matching eats hours you don’t have.
How it works
### Email-Based Matching
Email is your unique ID. Matching emails update records instead of creating copies.
### Export Live Data
Download filtered views. Share lists with partners without platform access.
## The CSV Import Tool
[Section titled “The CSV Import Tool”](#the-csv-import-tool)
Most CSV importers are a one-time onboarding step. Gatsby’s works differently because email is your unique identifier. If an email already exists, Gatsby updates that contact instead of creating a duplicate.
That means you can keep importing. Add a column of dietary restrictions from one spreadsheet, company titles from another, attendance history from a third. Each import enriches what you already have without overwriting it.
### Importing Contacts
[Section titled “Importing Contacts”](#importing-contacts)
You can import a CSV from three places, and it matters which one you pick:
* **Into an event or list** — new contacts join both that guest list and your central Contacts database.
* **Into Contacts directly** — adds contacts to your database without attaching them to any event.
* **Reviewing what was already imported** — go to **Contacts » Imports** to see every CSV import your team has run, what it touched, and when.
Open any event, list, or your Contacts page. Click the **Add Guests** or **Add Contacts** dropdown. Select **Upload CSV**.
Drag your file or click to browse. You can download an example file for formatting guidance.
How to Import a CSV+
1. Navigate to an event, list, or your Contacts page.
2. Click the **Add Guests** or **Add Contacts** dropdown.
3. Select **Upload CSV**.
4. Drag your file or click to browse.
5. Map your columns to Gatsby fields.
6. Resolve any duplicates or errors.
7. Confirm and complete the import.
New contacts appear on your guest list. Imported columns are automatically enabled in the view.
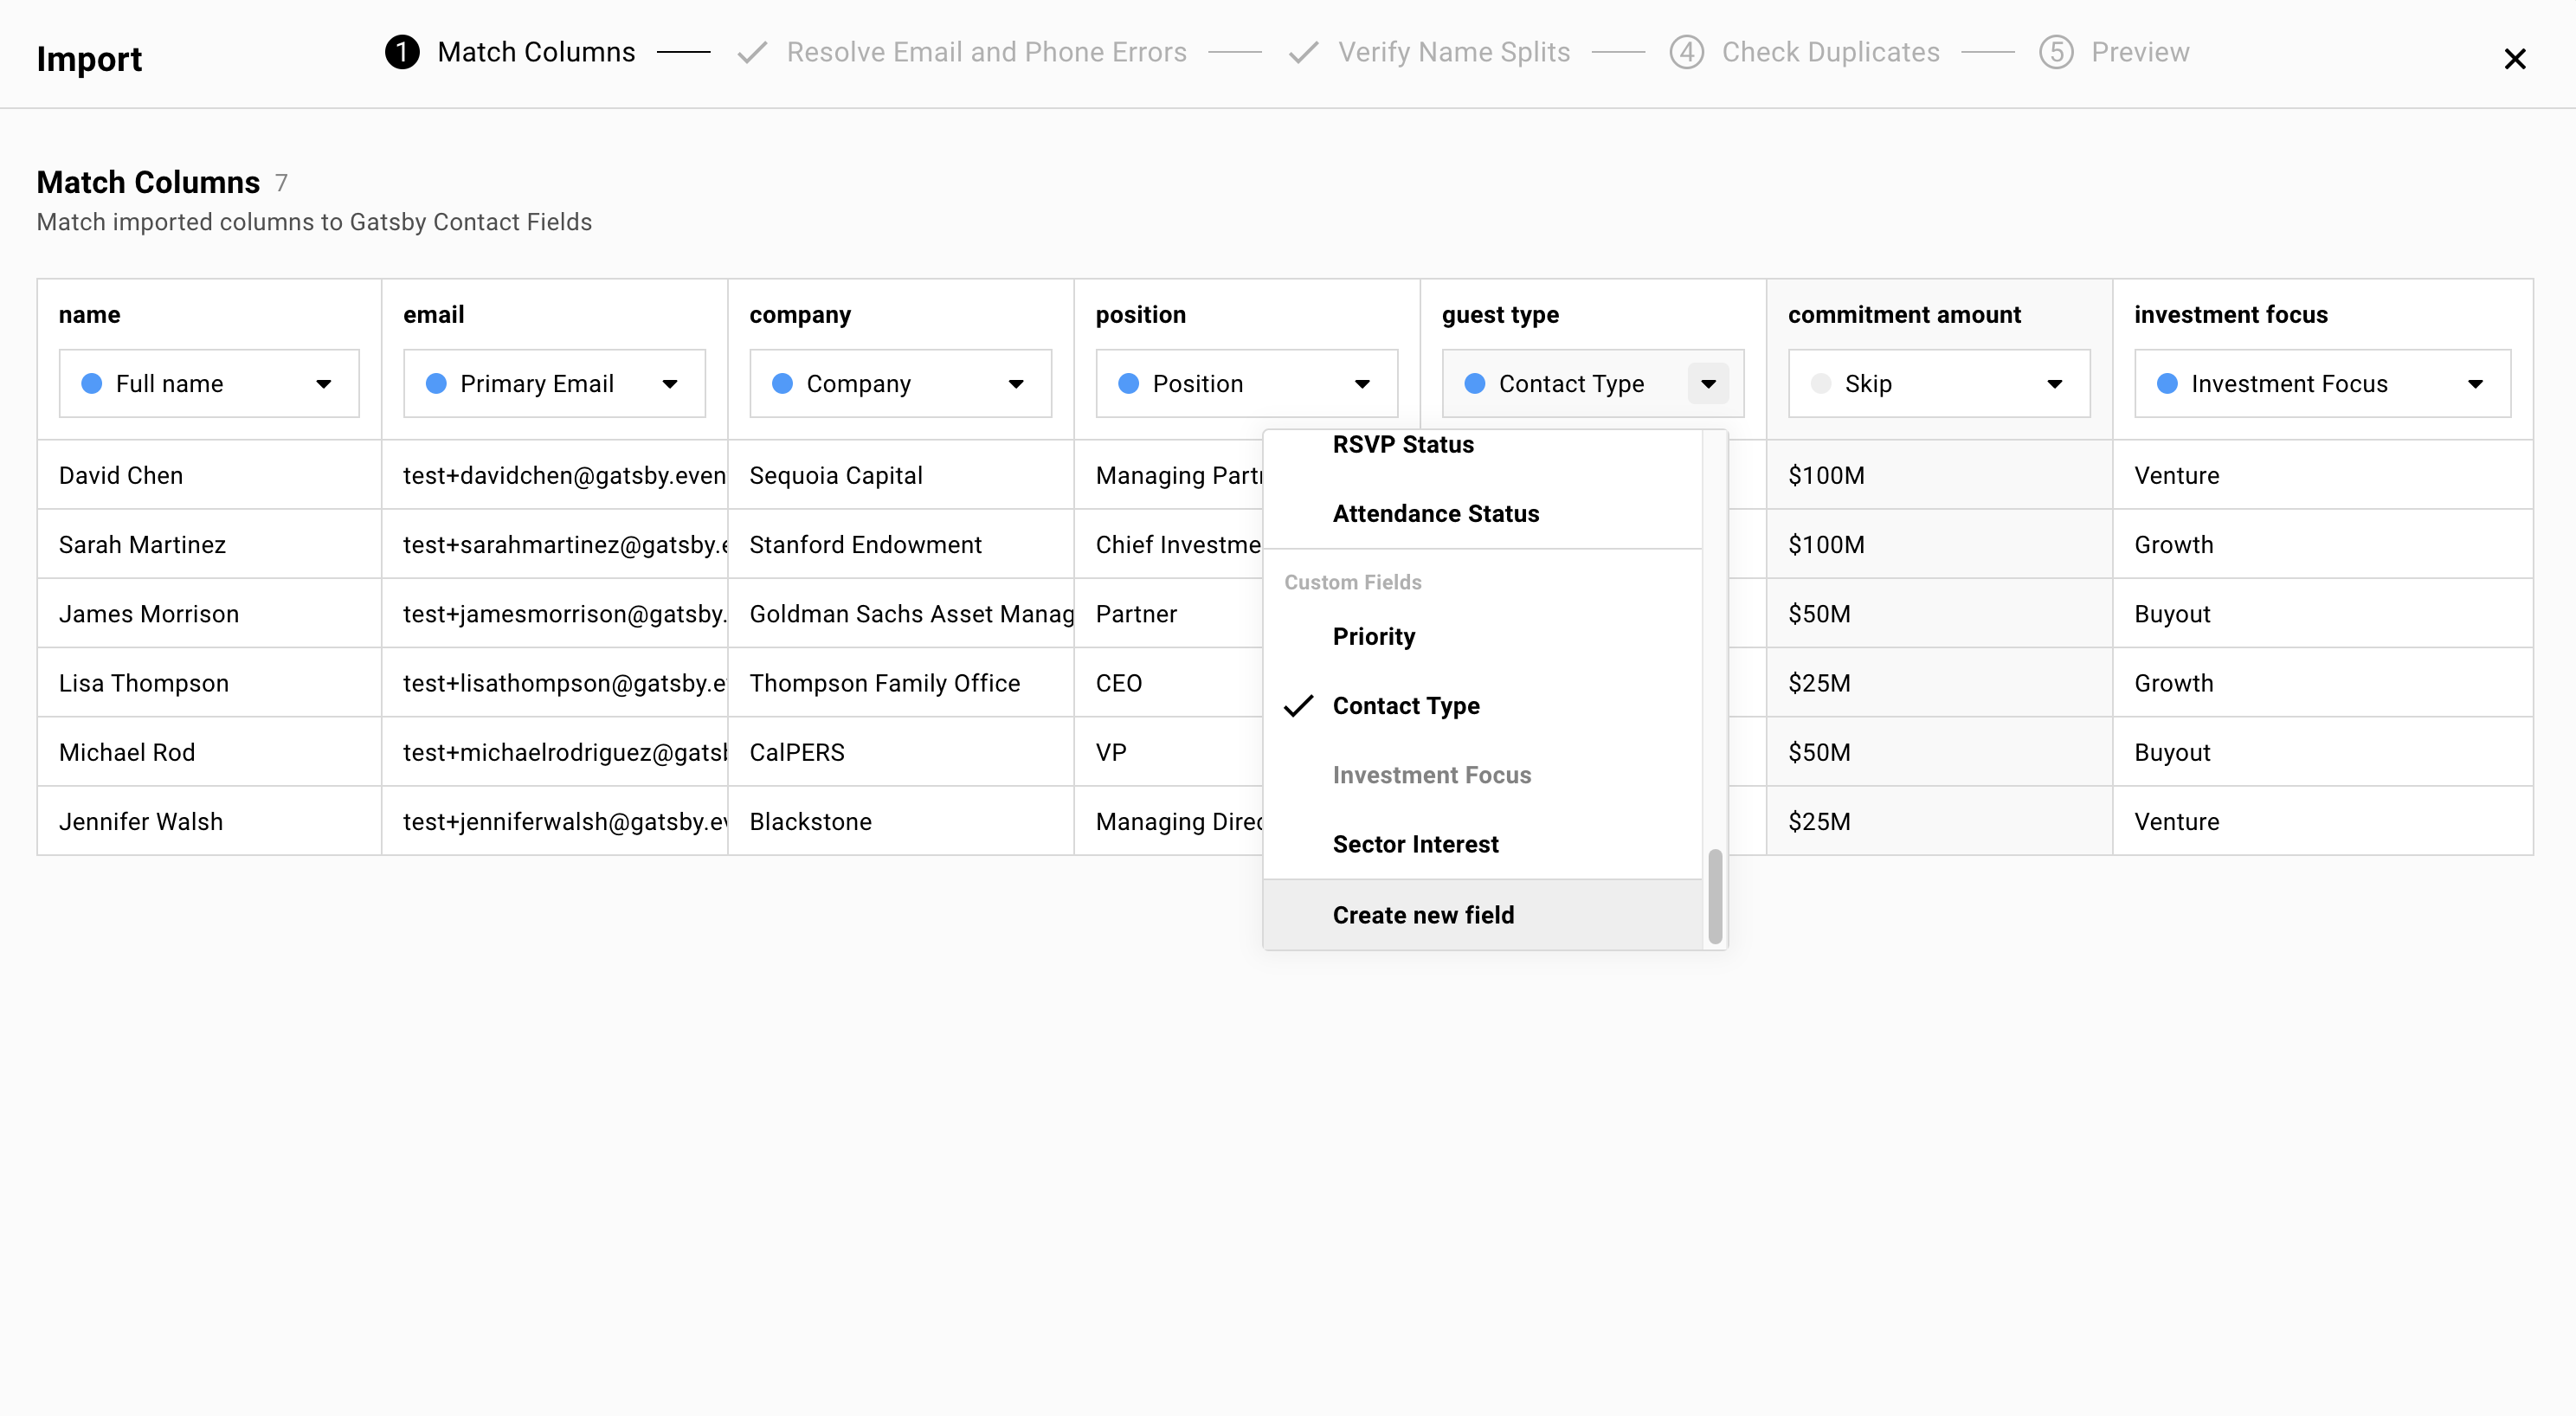
### Field Mapping
[Section titled “Field Mapping”](#field-mapping)
Gatsby auto-guesses mappings based on your column headers. You can override any mapping via dropdown. Skip columns you do not want to import.
Standard Contact Fields+
Map to core contact fields that follow guests across events.
***
**Name**
First name and last name as separate columns, or a single full name column. Gatsby splits or combines automatically.
***
**Email**
Primary email address plus alternates. CC email for assistants who should receive copies.
***
**Phone**
Mobile or office numbers.
***
**Birthday**
Date format detected automatically.
***
**Addresses**
Mailing addresses for invitations or gifts.
***
**LinkedIn URL**
Profile link for reference.
***
**Company Website**
Useful for account-based outreach.
***
**Context Notes**
Free-form notes about the contact.
Event-Specific Fields+
When importing historical event data, map RSVP status and attendance columns.
***
**RSVP Status**
The tool prompts you to define what values like “Yes” or “Confirmed” mean. Map them to Gatsby’s status options: Accepted, Declined, Maybe, Waitlist.
***
**Attendance**
Same approach. Define what “Attended” or “No Show” means in your spreadsheet.
Plus-Ones Allowed+
Import individual plus-one limits per guest. Useful when different guests have different allowances.
Custom Fields+
Map to existing custom fields or create new ones on the fly.
***
**Text fields**
Free-form text values.
***
**Number fields**
Numeric values only.
***
**Multi-select fields**
Gatsby auto-creates options from your spreadsheet values. If your column contains “VIP, Speaker, Board Member,” those become selectable options.
### Name Handling
[Section titled “Name Handling”](#name-handling)
When three names appear (like “Mary Anne Smith”), the importer asks whether the middle portion belongs to the first or last name. A verification step lets you confirm name splits before the import completes.
### Error Detection
[Section titled “Error Detection”](#error-detection)
The importer catches formatting problems before they reach your database: invalid emails, missing addresses, phone numbers that don’t parse.
Fix issues directly in the tool. No need to go back to your spreadsheet and start over.
## Handling Duplicates
[Section titled “Handling Duplicates”](#handling-duplicates)
Your spreadsheet says “Michael Rod, VP of Sales.” Gatsby has “Michael Rodriguez, Director of Sales.” Same person. Different data. Which wins?
The importer shows conflicting fields side by side: your spreadsheet value on the left, Gatsby’s on the right. You choose per field.
### Duplicate Resolution
[Section titled “Duplicate Resolution”](#duplicate-resolution)
When emails match, Gatsby detects the overlap. You decide what happens to conflicting data.
Keep the Gatsby value. Overwrite with the spreadsheet. Or merge for multi-select fields.
If you trust your spreadsheet data, you can apply it globally across all conflicts.
Merge Option for Multi-Select Fields+
Some fields accumulate over time, like tags and interest areas.
The merge option adds new values to existing ones rather than replacing. Your contact tagged “VIP” in Gatsby gains the “Speaker” tag from your spreadsheet. They end up with both.
### Import Preview and Confirmation
[Section titled “Import Preview and Confirmation”](#import-preview-and-confirmation)
The preview screen shows every contact that will be created or updated, along with any skipped columns. A confirmation summary tells you exactly how many new contacts and how many updates you’re about to make.
After import, new contacts appear on your guest list and imported columns are automatically enabled in the view.
## Exporting Contacts
[Section titled “Exporting Contacts”](#exporting-contacts)
Export lets you share data without giving away platform access. Download visible columns from any view. Send filtered lists to caterers, venues, or partners.
### How to Export
[Section titled “How to Export”](#how-to-export)
Select contacts from your Guests tab or Contacts page. The green action bar appears. Click **More Options**, then **Export to CSV**.
Choose your format. Open in Excel or your preferred spreadsheet tool.
Export Format Options+
Three formats available.
***
**Standard CSV**
Comma-separated values. Works with most spreadsheet applications.
***
**Semicolon CSV**
For European locales that use comma as the decimal separator.
***
**Excel-Optimized**
Handles encoding for special characters and international names.
What Gets Exported+
You get what you see.
***
**Visible columns only**
Enable additional columns in the Columns drawer before exporting to include them.
***
**Section assignments**
Included automatically so you can see how contacts were organized.
***
**Filters apply**
If your view is filtered to Accepted guests only, the export contains Accepted guests only.
***
**File upload responses**
File Upload survey question responses export as downloadable URLs, not just filenames. This is how you get every headshot, photo, or document guests uploaded during RSVP out in one go: enable the file or image column on your guest list, select all guests, export, and each row carries the attendee’s name alongside a link to their file. Each link is valid for two hours after export, then it stops working. Re-export to get a fresh set of links.
When you start an export with a file or image column enabled, Gatsby shows a confirmation window that explains the time limit before the CSV downloads.
To save the actual files, paste the CSV into ChatGPT, Claude, or Gemini and ask it to download every file into a folder.
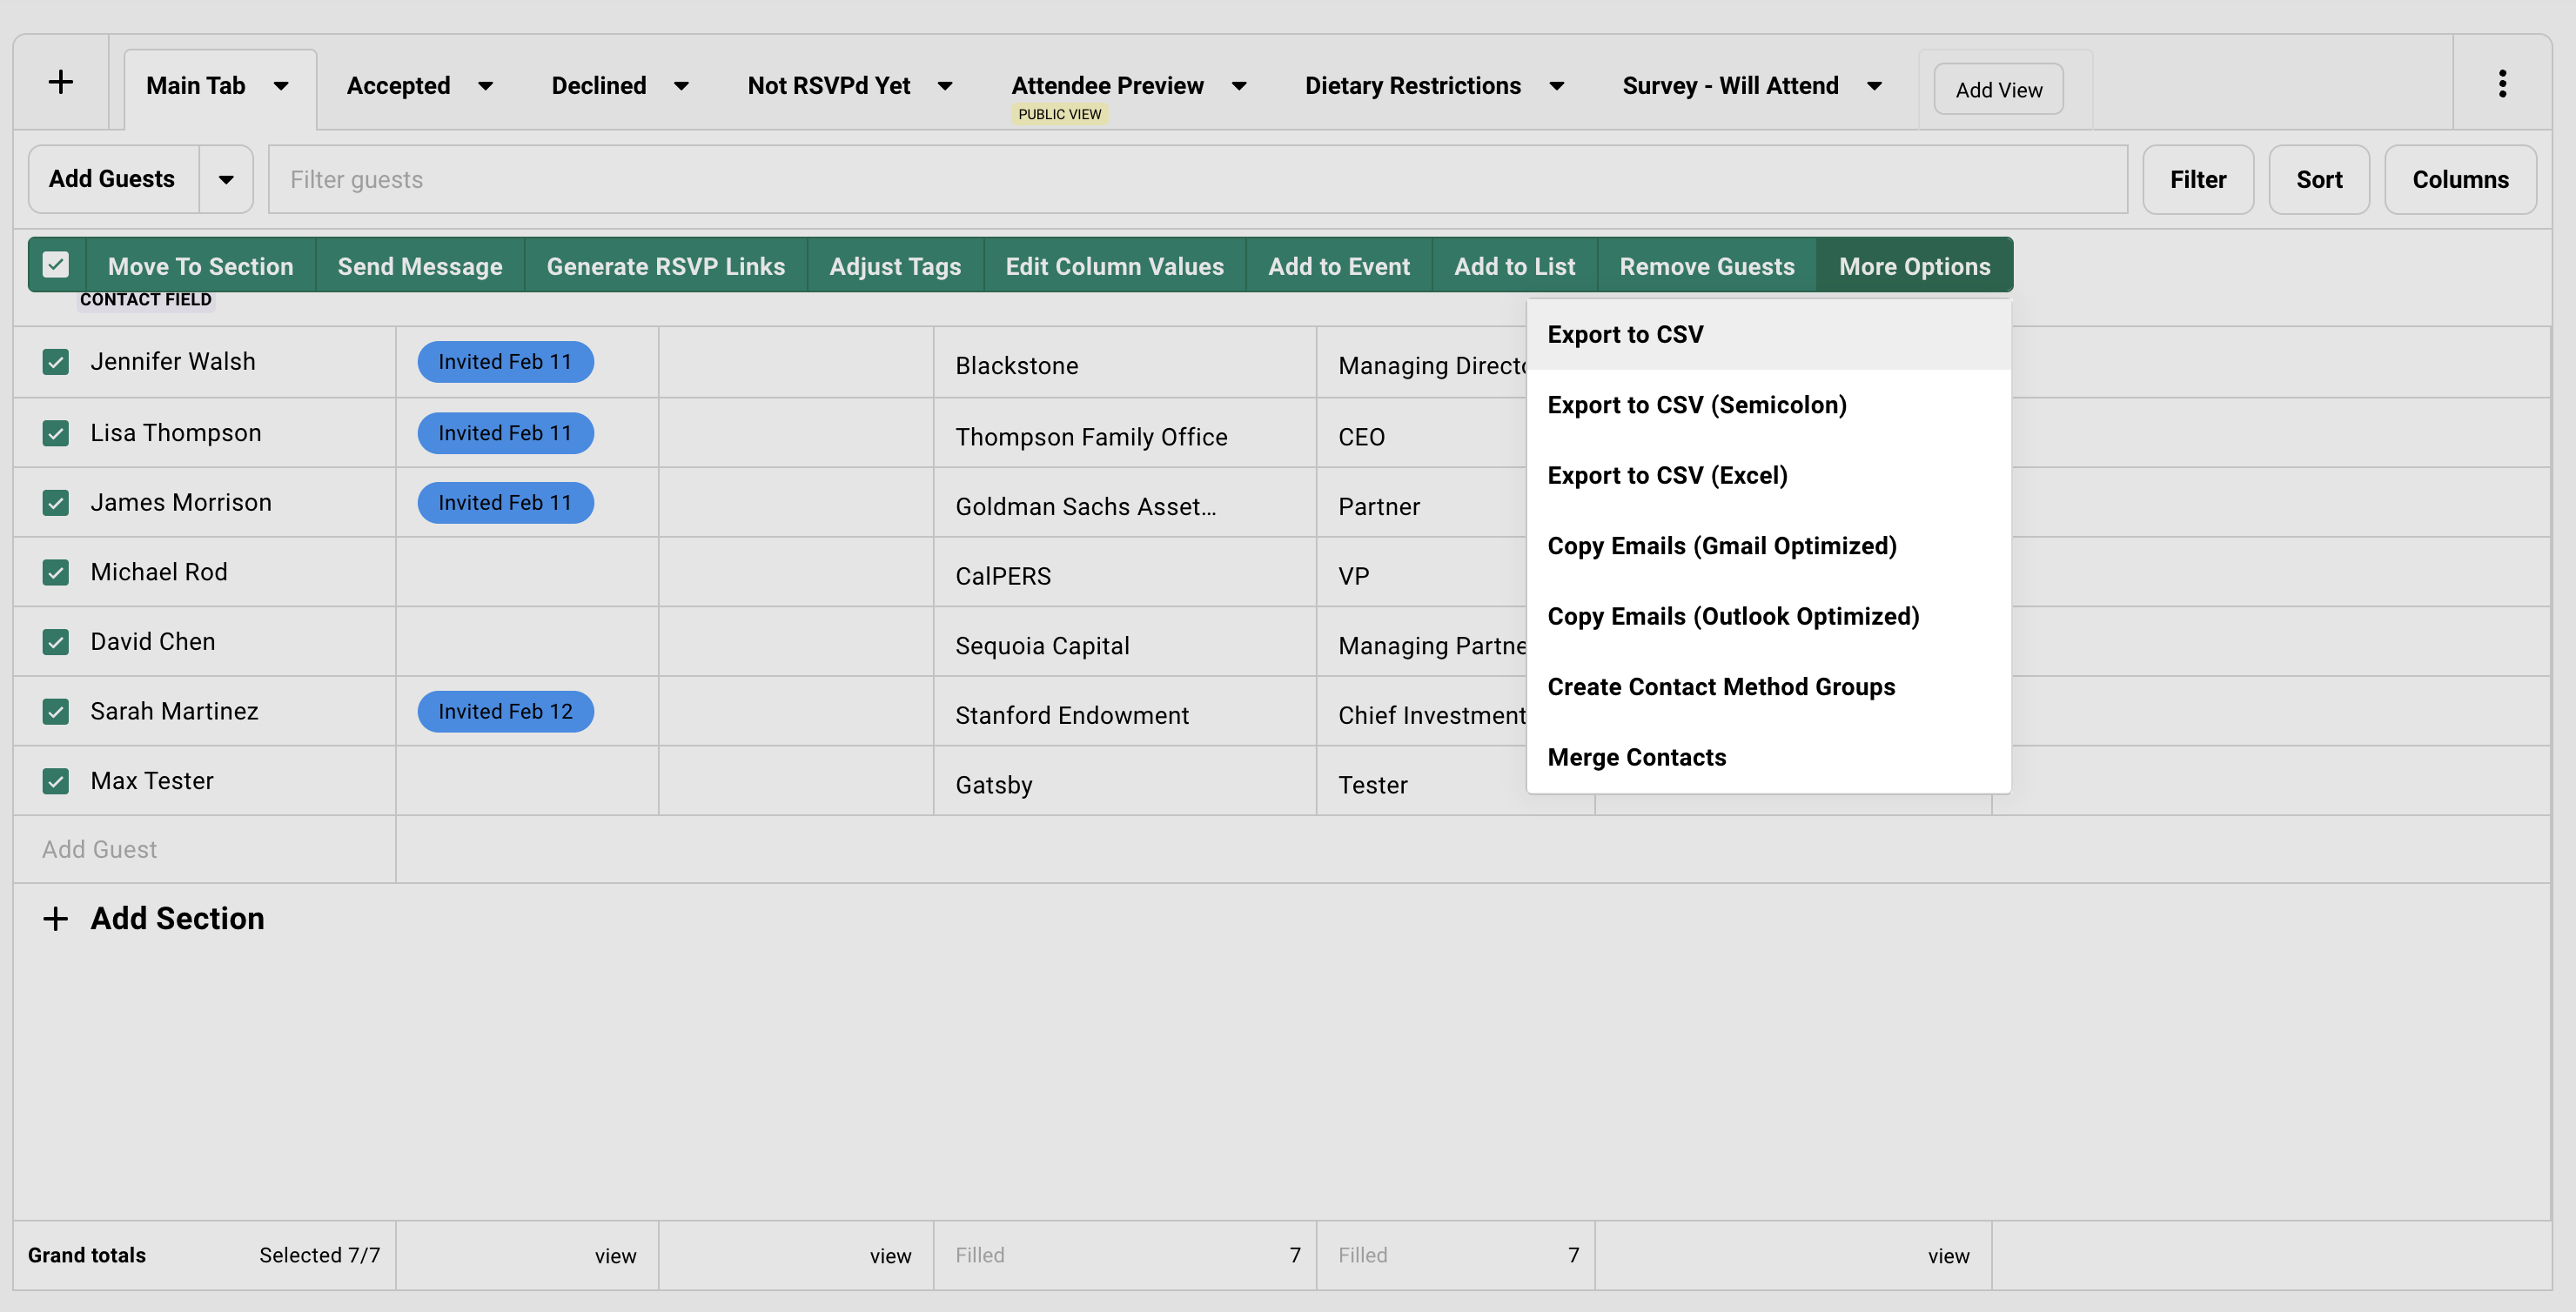
### Working Non-Destructively
[Section titled “Working Non-Destructively”](#working-non-destructively)
Changes in Gatsby are live. Update a contact note here, and it changes everywhere that contact appears.
Sometimes you need a sandbox.
You can export your guest list and work on scenarios in your spreadsheet: plan seating, curate your invite list, run “what if” exercises. When you’re ready, import only the changes you want to keep.
Your live data stays untouched until you decide.
## Common Questions
[Section titled “Common Questions”](#common-questions)
Can I import data from my CRM?+
Yes. Export from your CRM as CSV, then import into Gatsby. Email matching prevents duplicates if contacts already exist.
Will importing contacts expose them to other team members?+
Contacts are shared across your organization. Team members with contact access can see imported contacts. Use external collaborator permissions if you need event-specific restrictions.
What happens if I import the same spreadsheet twice?+
Contacts with matching emails are updated, not duplicated. New columns are added to existing records. This is how you enrich contacts over time.
Can I undo an import?+
Go to Contacts and open the Imports tab to see recent imports. Select affected contacts, add them to a “Contacts to Delete” list, then archive from that list.
How do I add tags during import?+
Tags cannot be mapped during CSV upload. Import contacts first, then select them and use Adjust Tags from the action bar.
Where can I upload CSVs?+
Events, Lists, or directly to your contact database via the Contacts page. All three locations use the same importer.
What data is included in an event export?+
**Guest list export:** Select contacts » More Options » Export to CSV. Exports visible columns with active filters applied.
**Available formats:**
* Standard CSV (comma-separated)
* Semicolon CSV (for European locales)
* Excel-optimized (handles special characters)
**What exports:**
* Guest information (names, companies, emails)
* RSVP status, attendance
* Custom fields and survey responses
* File Upload survey responses as downloadable URLs (valid for 2 hours after export)
* Campaign engagement data
* Event history
Use exports for offline work, vendor sharing, or importing to other systems.
# Organizing Contacts
> Three tools for structuring your contact database. Custom fields for attributes that matter over time. Tags for quick labels. Lists for stable groups. Choose the right one and your database stays useful.
Why it matters
## Three ways to organize contacts.
Custom fields filter cleanly and persist across events. Lists are manual groups you reuse. Tags for quick classification.
How it works
### Custom Fields
Structured attributes that filter in guest lists and drive survey logic. Can be renamed.
### Lists
Stable groups like Board Members or newsletter subscribers. Add entire list to events in one click.
## When to Use What
[Section titled “When to Use What”](#when-to-use-what)
Custom fields, tags, and lists each solve different problems.
### Custom Fields
[Section titled “Custom Fields”](#custom-fields)
Structured attributes that persist on the contact across all events. They filter in guest lists, drive survey question logic, and can be renamed when your terminology changes.
Create them in **Contacts » Custom Fields** — this is the canonical path. Fields can also come into existence two other ways, and both land in the same place: mapping a CSV column to “Create new field” during import, or building a custom registration question with “Save Responses to Contact Book” enabled. However a field is created, it shows up in **Custom Fields** afterward and behaves identically.
**Common examples:**
* **Guest Type:** LP, Portfolio CEO, Service Provider, Board Member
* **Relationship Owner:** Which partner owns the relationship
* **Region:** SF, NYC, London, APAC
* **Member Tier:** Gold, Silver, Bronze
Creating a Custom Field+
1. Go to **Contacts** in the main navigation.
2. Click **Custom Fields** in the toolbar.
3. Click **Create New**.
4. Choose the field type: Text, Number, or Multi-select.
5. Name your field and configure options.
Use Multi-select for filtering values later. You can’t filter by Text or Number fields.
Using Custom Fields in Guest Lists+
Custom fields appear as available columns in any guest list.
***
**Adding the column:**
Open the Columns drawer. Click Add Fields. Find your custom field under Contact Fields.
***
**Filtering by value:**
Click Filter. Choose your custom field. Select the values you want to see.
***
Now you can build a guest list of “All Bay Area LPs” without manual selection. The filter does the work.
Using Custom Fields in Survey Logic+
Survey questions can show or hide based on a contact’s custom field values.
Example: Ask LPs about fund performance. Ask portfolio CEOs about hiring needs. Same registration form, different questions.
See [Forms & Surveys](/platform/registration/registration-forms/) for setup details.
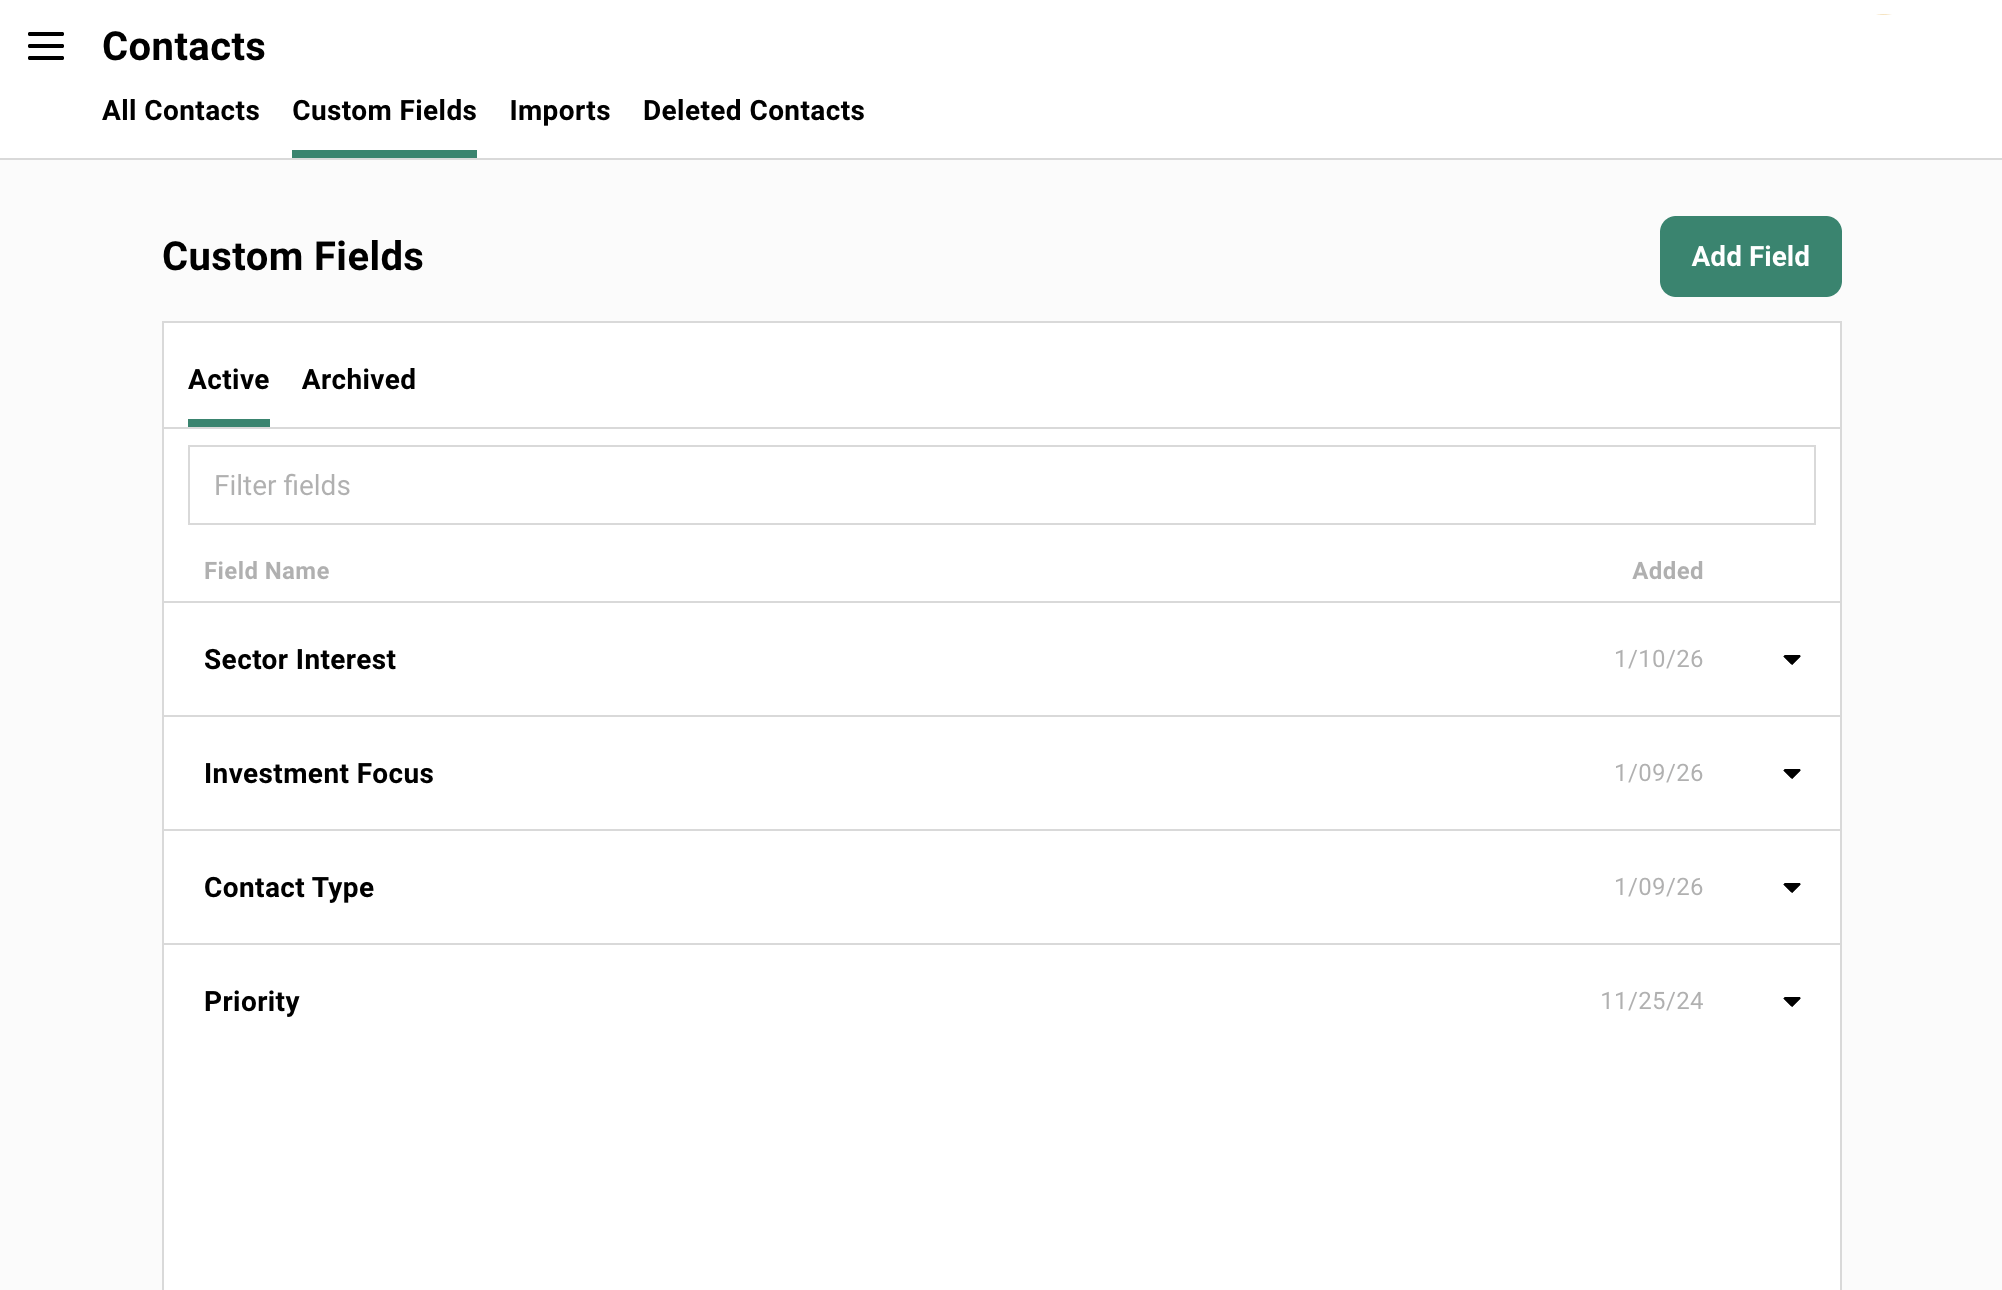
### Tags
[Section titled “Tags”](#tags)
Quick labels you attach from anywhere: a contact profile, a guest list, or a bulk selection. They persist across events and work well for temporary, behavioral, or project-specific labels.
One constraint worth knowing upfront: **tags cannot be renamed or merged.** Once created, they stick as-is.
If you think you might rename it later, use a custom field instead.
**Good tag examples:**
* **Good Speaker:** Behavioral observation
* **Attended March Dinner:** Event-specific
* **Special Handling:** Temporary flag
* **Needs Hotel Booking:** Project-specific
Adding Tags+
**From a contact profile:**
Open the contact. Click the Tags field. Type to add or select existing tags.
***
**From a guest list (bulk):**
Select multiple guests. Click **Adjust Tags** in the action bar. Add or remove tags for everyone at once.
Filtering by Tags+
**In guest lists:** Click Filter. Choose Tags. Select the tags you want to see.
**In the Contacts tool:** Same approach. Filter by tags to find everyone with that label.
Tags are also available as a column “Tagged With”. Add them to see which guests have specific tags at a glance.
Why Tags Cannot Be Renamed+
This is a technical constraint, not a design choice. Once a tag exists, it cannot be changed. So use tags for things you won’t need to rename.
**Will work:**
* “Attended March 2024 Dinner” (date is fixed)
* “Good Speaker” (observation, not category)
* “VIP” (stable meaning)
**Will cause problems:**
* “Q1 Prospects” (next quarter you’ll want “Q2 Prospects”)
* “SF Region” (what if you rename to “Bay Area”?)
* “Tier 1” (membership tiers should be custom fields)
### Lists
[Section titled “Lists”](#lists)
Stable groups with ongoing value. Being on the list itself is meaningful. Think of them as events without dates.
You can send campaigns directly to a list or add the entire group to an event in one click. When you have a set of people you’ll communicate with repeatedly, a list is the right tool.
**Common examples:**
* **Board Members:** Governance communications
* **Fund II LPs:** Investor updates
* **2026 Active Members:** Annual membership tracking
* **Newsletter Subscribers:** Ongoing content distribution
Creating a List+
1. Go to **Events & Lists** in the main navigation.
2. Click **Create** and select **List**.
3. Name your list and add an optional description.
4. Add contacts using the same methods as events: search, from other events, by tag, or CSV upload.
Adding Contacts to a List+
**From the list itself:**
Click Add Guests. Search for contacts, pull from events, or filter by tags.
***
**From a guest list (bulk):**
Select guests. Click **Add to List** in the action bar. Choose your destination list.
***
**From a contact profile:**
Open the contact. Their list memberships appear in the profile. Add them to additional lists from there.
Adding a List to an Event+
You can pull an entire list into an event at once.
Click **Add Guests**. Select the **From Lists** tab. Choose your list. Everyone on that list becomes a guest at your event. “Bay Area LPs” becomes your San Francisco dinner guest list in one click.
Sending Campaigns to Lists+
Lists work just like events for email campaigns. Create a campaign, select recipients, send.
This makes lists ideal for ongoing communications like newsletters, quarterly updates, or membership announcements.
See [Campaigns](/platform/email-campaigns/campaigns/) for details.
When a List Should Be Part of a Family+
A single list works until you need to see membership roll up across multiple lists or events. Something like a membership program with several tiers, or a quarterly dinner series where you want one view of everyone who’s ever attended.
Link lists (or events) into a parent-child **Family** and membership syncs upward automatically: add someone to a child, they appear on the parent, with no manual copying. This is one-directional. Removing someone from a child doesn’t remove them from the parent.
See [Families](/platform/events-lists/families/) for how to set up the hierarchy.
## Contact Views
[Section titled “Contact Views”](#contact-views)
Lists are curated. You manually add and remove people.
But sometimes, you need a view that updates automatically as contacts get tagged or fields change.
### Filtered Views in Contacts
[Section titled “Filtered Views in Contacts”](#filtered-views-in-contacts)
The Contacts tool has its own view system. Different from events and lists.
Each tab is a saved view. Configure columns and filters. The view updates automatically as contact data changes.
**Good for:**
* Reporting on contact segments
* Monitoring contacts with specific attributes
* Finding contacts that match dynamic criteria
***
**The difference from lists:**
* **Views are reactive.** Contacts appear and disappear based on filter criteria.
* **Lists are curated.** You add and remove contacts manually.
Use views when membership should update automatically. Use lists when you want control over exactly who’s included.
Creating a Contact View+
1. Go to **Contacts** in the main navigation.
2. Click the **+** tab to add a new view.
3. Set your filters. `Region = SF` or `Guest Type = LP`. Whatever criteria matter.
4. Configure columns to show the data you need.
5. Name your view. It saves automatically.
Now you have a persistent view that always shows contacts matching those criteria. New contacts that match? They appear. Existing contacts that no longer match? They disappear.
View vs List+
| Scenario | Use This |
| ------------------------------------------- | ---------------------- |
| ”Everyone tagged Board Member” | View (reactive) |
| “People we’re inviting to the board dinner” | List (curated) |
| “All SF-based contacts” | View (reactive) |
| “Our newsletter subscribers” | List (curated, opt-in) |
| “Contacts who attended 3+ events” | View (reactive) |
| “2026 Advisory Committee” | List (curated) |
The question: Should membership update automatically based on data? View. Should you control exactly who’s in? List.
## Getting Started
[Section titled “Getting Started”](#getting-started)
Start with one custom field that matters. Usually **Guest Type** or **Relationship Owner**. Create it and populate it during your next import.
Create one list for your most important ongoing group. Your board, your core LPs, whatever group you communicate with repeatedly.
Use tags sparingly. Reserve them for project-specific needs and behavioral observations.
You don’t need to organize everything perfectly upfront. Your structure grows as you run more events. A few intentional choices now save real time six months from now.
## Common Questions
[Section titled “Common Questions”](#common-questions)
How does contact organization in Gatsby differ from my CRM?+
Your CRM tracks deals and company relationships. Gatsby tracks event engagement.
Custom fields in Gatsby are for event-relevant attributes: dietary restrictions, member tiers, relationship owners for invitation decisions. Your CRM fields are for pipeline stages and revenue.
They complement each other. Gatsby syncs attendance data to your CRM. Your CRM provides context Gatsby doesn’t need to duplicate.
Can I rename a tag after I've used it?+
No. Tags cannot be renamed or merged. This is a technical constraint.
If you need to rename something, you have two options:
1. Create a new tag. Manually re-tag contacts. Delete the old one.
2. Use a custom field instead. Fields can be renamed.
For anything you might rename later, use a custom field from the start.
Can I convert tags to custom fields?+
Not directly. You would need to:
1. Create the custom field.
2. Filter contacts by the tag.
3. Bulk update the custom field value.
4. Remove the tag if desired.
This is manual but straightforward. Filter by tag, select all, edit column values, set the custom field.
What happens to list membership when I delete a contact?+
The contact is removed from all lists. If you restore the contact from the trash, you’ll need to re-add them to lists manually.
Can I see which lists a contact belongs to from their profile?+
Yes. Open the contact profile. Their list memberships appear in the profile details. You can add them to additional lists from there.
# Apple Wallet Pass
> Add a branded Apple Wallet Pass to your event emails. Guests tap to save event details and present the pass for fast check-in at the door.
Why it matters
## Your guests already have their phone in hand. Why make them dig for a confirmation email?
Calendar invites confirm the date. Wallet passes handle everything else: branded event details your guests can pull up in seconds, and a scannable pass that speeds up check-in. One tap from the confirmation email. No app to download.
How it works
### Design Once, Deliver Per Guest
Customize colors, images, and branding in one place. Each guest receives a personalized pass with their name, event details, and a unique QR code for check-in.
### Always Current
Change the venue or move the date. Passes already in guests’ wallets update automatically via push notification. No resend required.
## Designing Your Pass
[Section titled “Designing Your Pass”](#designing-your-pass)
Your Apple Wallet pass carries your brand into your guest’s pocket. Open your event, select the **Registration** tab, and click **Apple Wallet Pass** in the left sidebar to open the Apple Wallet Pass Designer.
### Colors and Branding
[Section titled “Colors and Branding”](#colors-and-branding)
Three color settings control the look of every pass for your event. **Background Color** sets the overall tone. **Text Color 1** controls primary text — date, guest name, event name, and location. **Text Color 2** handles secondary text like time and field labels.
**Logo Text** defaults to your organization name and appears at the top of the pass alongside your logo image.
How to customize pass colors and text+
1. Open your event, select the **Registration** tab, and click **Apple Wallet Pass** in the left sidebar.
2. Set your **Background Color** using the color picker. This is the dominant color of the pass.
3. Set **Text Color 1** for primary text (date, guest name, event name, location).
4. Set **Text Color 2** for secondary text (time, field labels).
5. Edit the **Logo Text** if you want something other than your organization name.
6. Click **Save Changes** to apply.
The Rough Preview on the right updates as you make changes, so you can see exactly how your pass will look before saving.
### Pass Images
[Section titled “Pass Images”](#pass-images)
Two images make your pass recognizable. The **Strip Image** is the banner displayed prominently on the pass — use it for event branding or a venue photo. The **Logo** is the small icon that appears at the top left alongside your logo text.
Upload from your device or choose from your event’s media library.
How to add pass images+
1. In the Apple Wallet Pass Designer, find the **Settings** panel.
2. Click the upload button next to **Strip Image** to add your banner. This is the largest visual element on the pass.
3. Click the upload button next to **Logo** to add your icon.
4. Click **Save Changes** to apply.
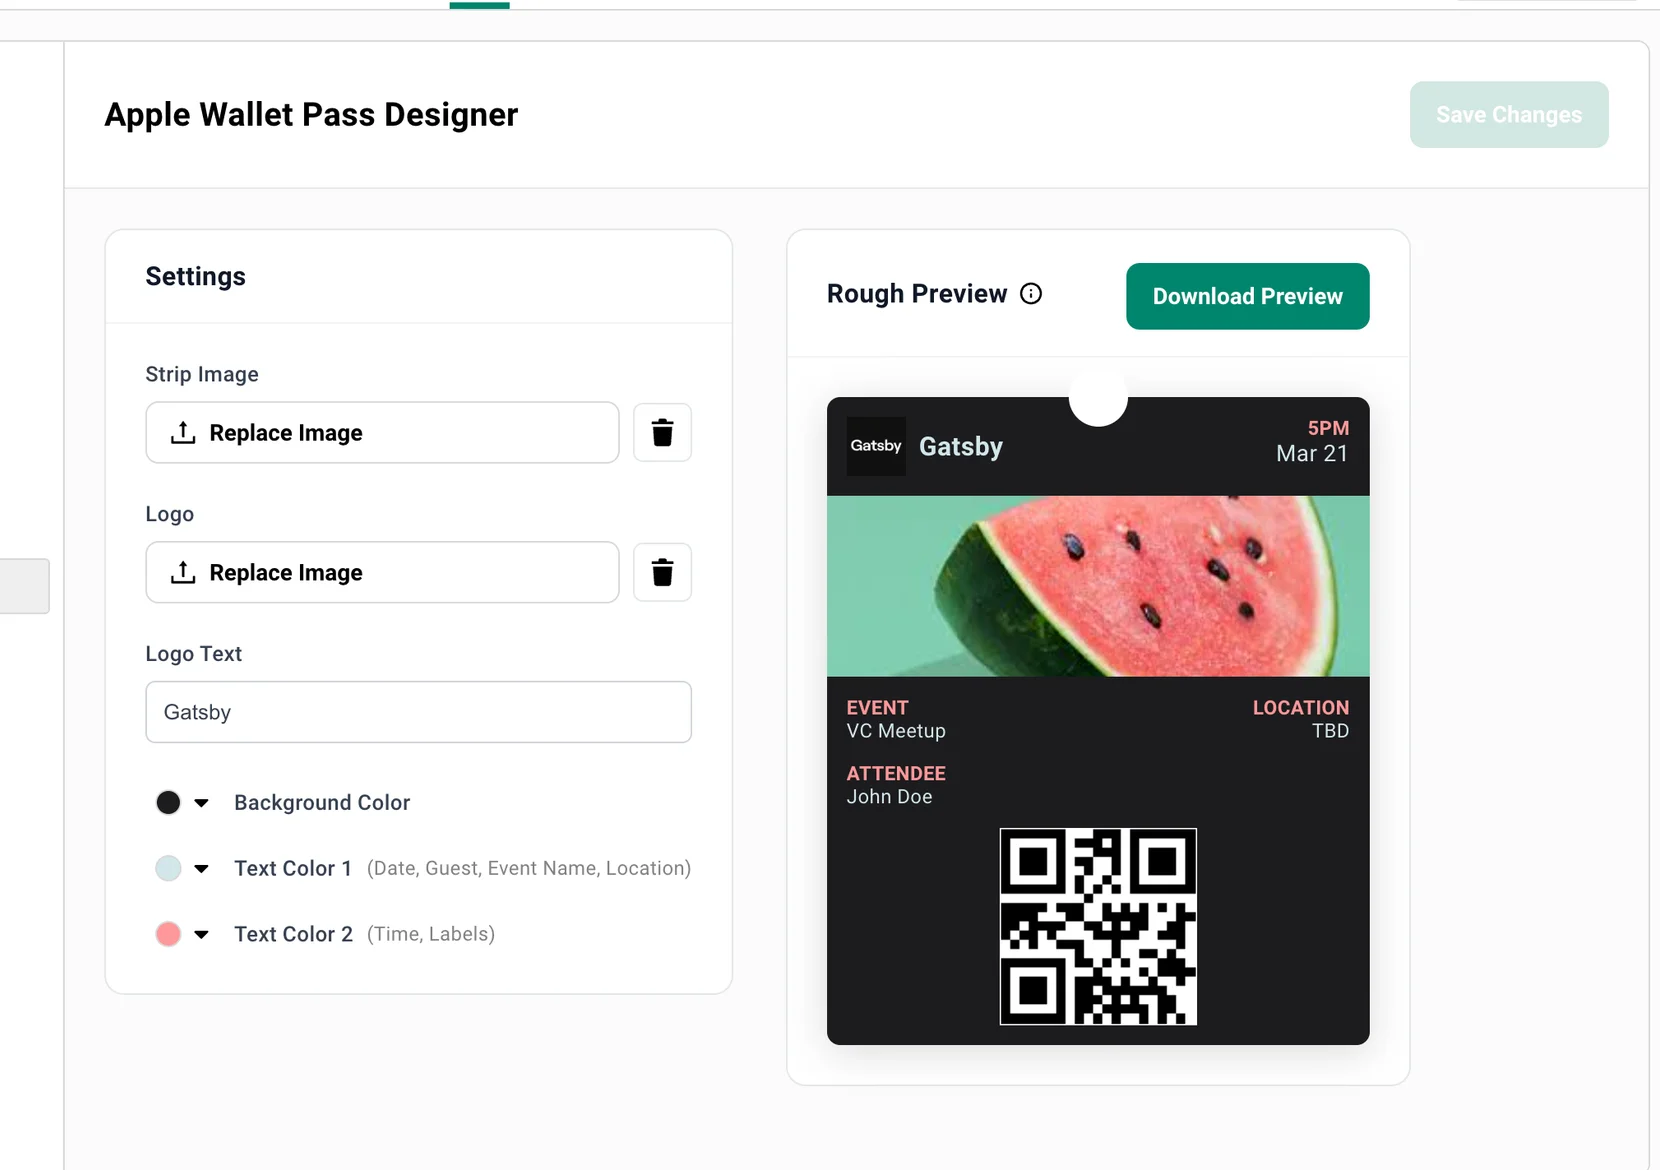
### Previewing Your Pass
[Section titled “Previewing Your Pass”](#previewing-your-pass)
Before sending anything to guests, download a preview to see exactly what the pass looks like in Apple Wallet. The **Rough Preview** panel shows a live rendering as you adjust settings, and **Download Preview** generates a real `.pkpass` file you can open on your device to verify every detail — colors, images, layout, and the QR code your check-in team will scan.
How to preview your pass+
1. Configure your colors, images, and logo text.
2. Click **Download Preview**.
3. Open the downloaded `.pkpass` file on a Mac or iPhone to see the pass in Apple Wallet.
The preview uses “John Doe” as the guest name. Real passes will display each guest’s actual name.
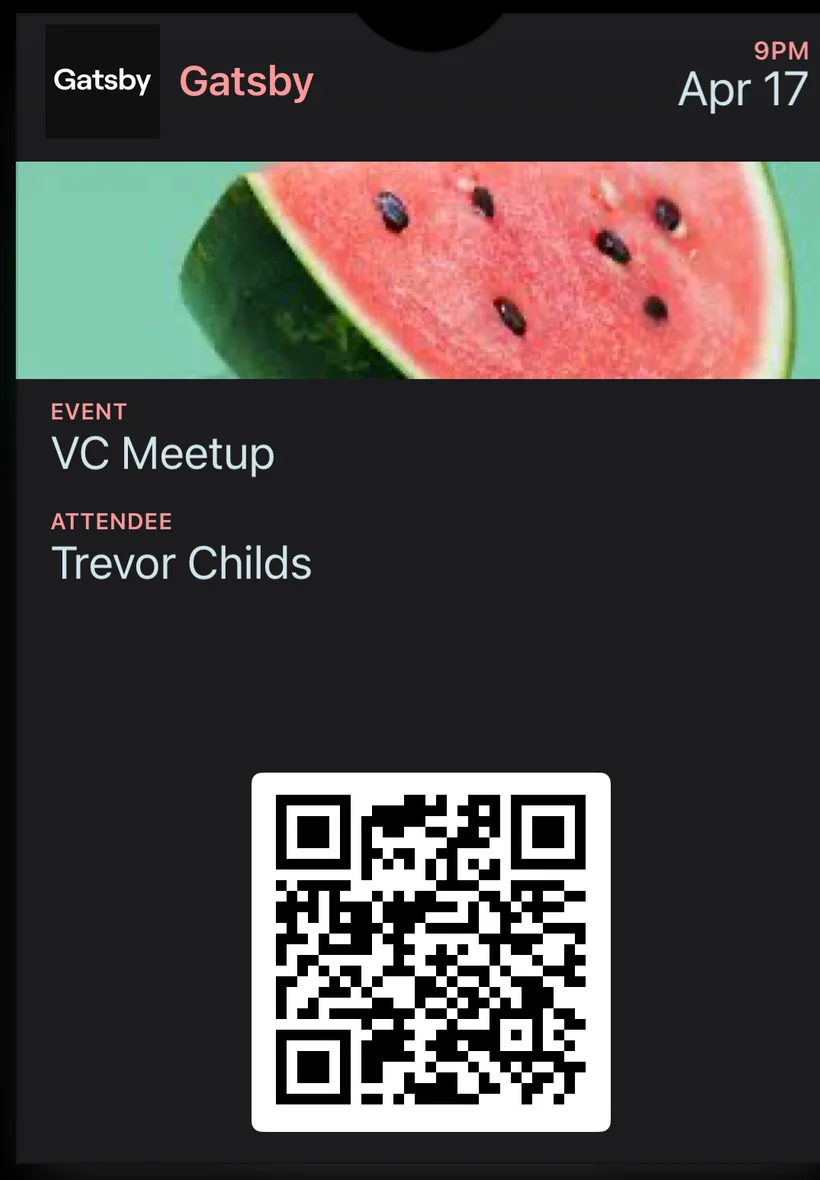
## Delivering Passes to Guests
[Section titled “Delivering Passes to Guests”](#delivering-passes-to-guests)
Apple Wallet passes are delivered as email attachments. Attach them to your confirmation, waitlist, or update emails so guests receive the pass at the moment they need it — right after they register.
### Attaching the Pass to Emails
[Section titled “Attaching the Pass to Emails”](#attaching-the-pass-to-emails)
In your event’s **Confirmation Emails**, each email type has a **”…”** menu next to the subject line. This is where you attach the wallet pass. Once attached, every guest who receives that email gets a personalized pass with their name and a unique QR code for check-in.
The pass works with three email types: **Accepted** (sent when a guest accepts), **Waitlist** (sent when a guest joins the waitlist), and **Survey Update** (sent when you push status changes).
How to attach the wallet pass to an email+
1. Open your event, select the **Registration** tab, and click **Confirmation Emails** in the left sidebar.
2. Select the email type: **Confirmation Email**, **Waitlist Email**, or **Survey Update Email**.
3. Click the **”…”** menu next to the subject line.
4. Select **Attach Apple Wallet Pass**.
5. The pass appears as an attachment below the subject line. Click **Save**.
To remove the attachment, click the **X** on the Apple Wallet Pass tag in the attachments area.
Attach the wallet pass to your Confirmation Email so guests receive it the moment they RSVP. They’ll have it in their wallet before they even close the browser.
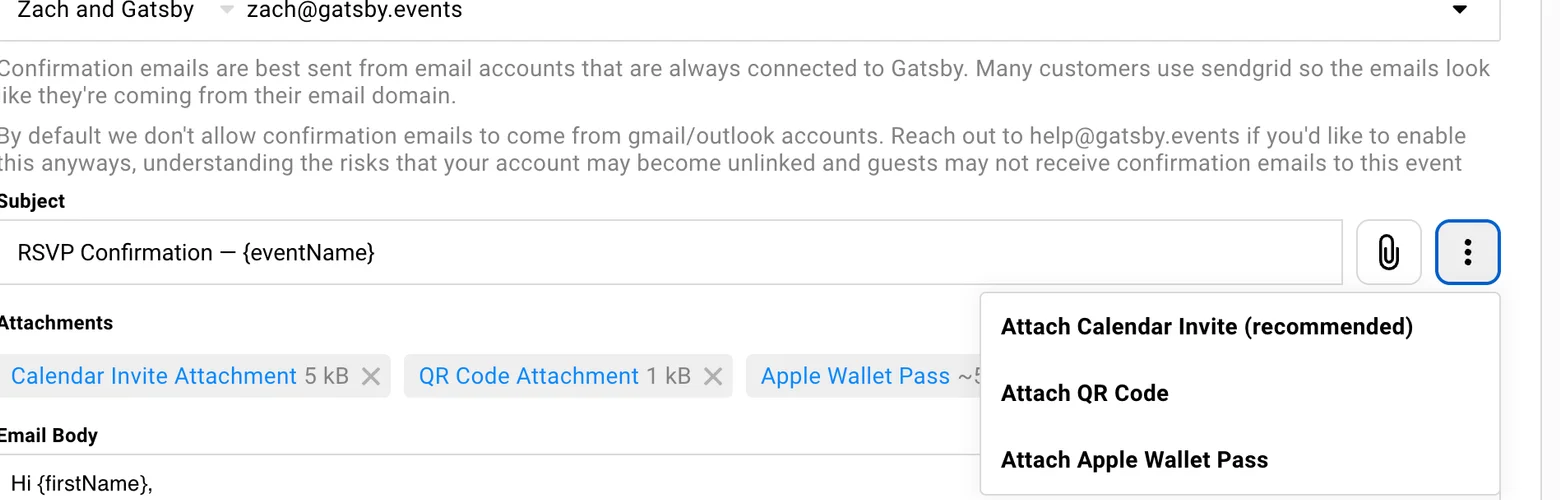
### What Guests See
[Section titled “What Guests See”](#what-guests-see)
Guests receive the email with the `.pkpass` file attached and an **Add to Apple Wallet** button. One tap saves the pass to their wallet. The pass displays your event name, date, time, location, the guest’s name, and a QR code for check-in — all styled with your custom colors and images.
No app to download. No account to create. The pass lives in Apple Wallet alongside boarding passes and payment cards.

## At the Event
[Section titled “At the Event”](#at-the-event)
The Apple Wallet pass is more than a keepsake. It’s a check-in tool. Guests present their pass at the door and your team scans or verifies it using any of Gatsby’s check-in methods.
### Check-In with Apple Wallet Passes
[Section titled “Check-In with Apple Wallet Passes”](#check-in-with-apple-wallet-passes)
When a guest arrives, they pull up their Apple Wallet pass — the same way they’d show a boarding pass at the airport. Your check-in team uses Gatsby’s check-in tools to verify the guest and mark them as attended.
Each pass contains a unique QR code tied to that guest and event, so there’s no confusion about who’s who. Combined with Gatsby’s real-time sync, every device at every entrance sees the same attendance status.
Check-in methods that work with Apple Wallet passes+
**Gatsby Check-In Web App**
Search by name or look up the guest when they present their pass. Mark as attended.
***
**Gatsby iOS App**
Use the app to search and check in guests. Scan QR codes or search by name.
***
**Self Check-In Kiosk**
Guests can check themselves in at an unattended kiosk.
***
All methods sync in real time. Check someone in at the front door and the bar station sees it instantly.
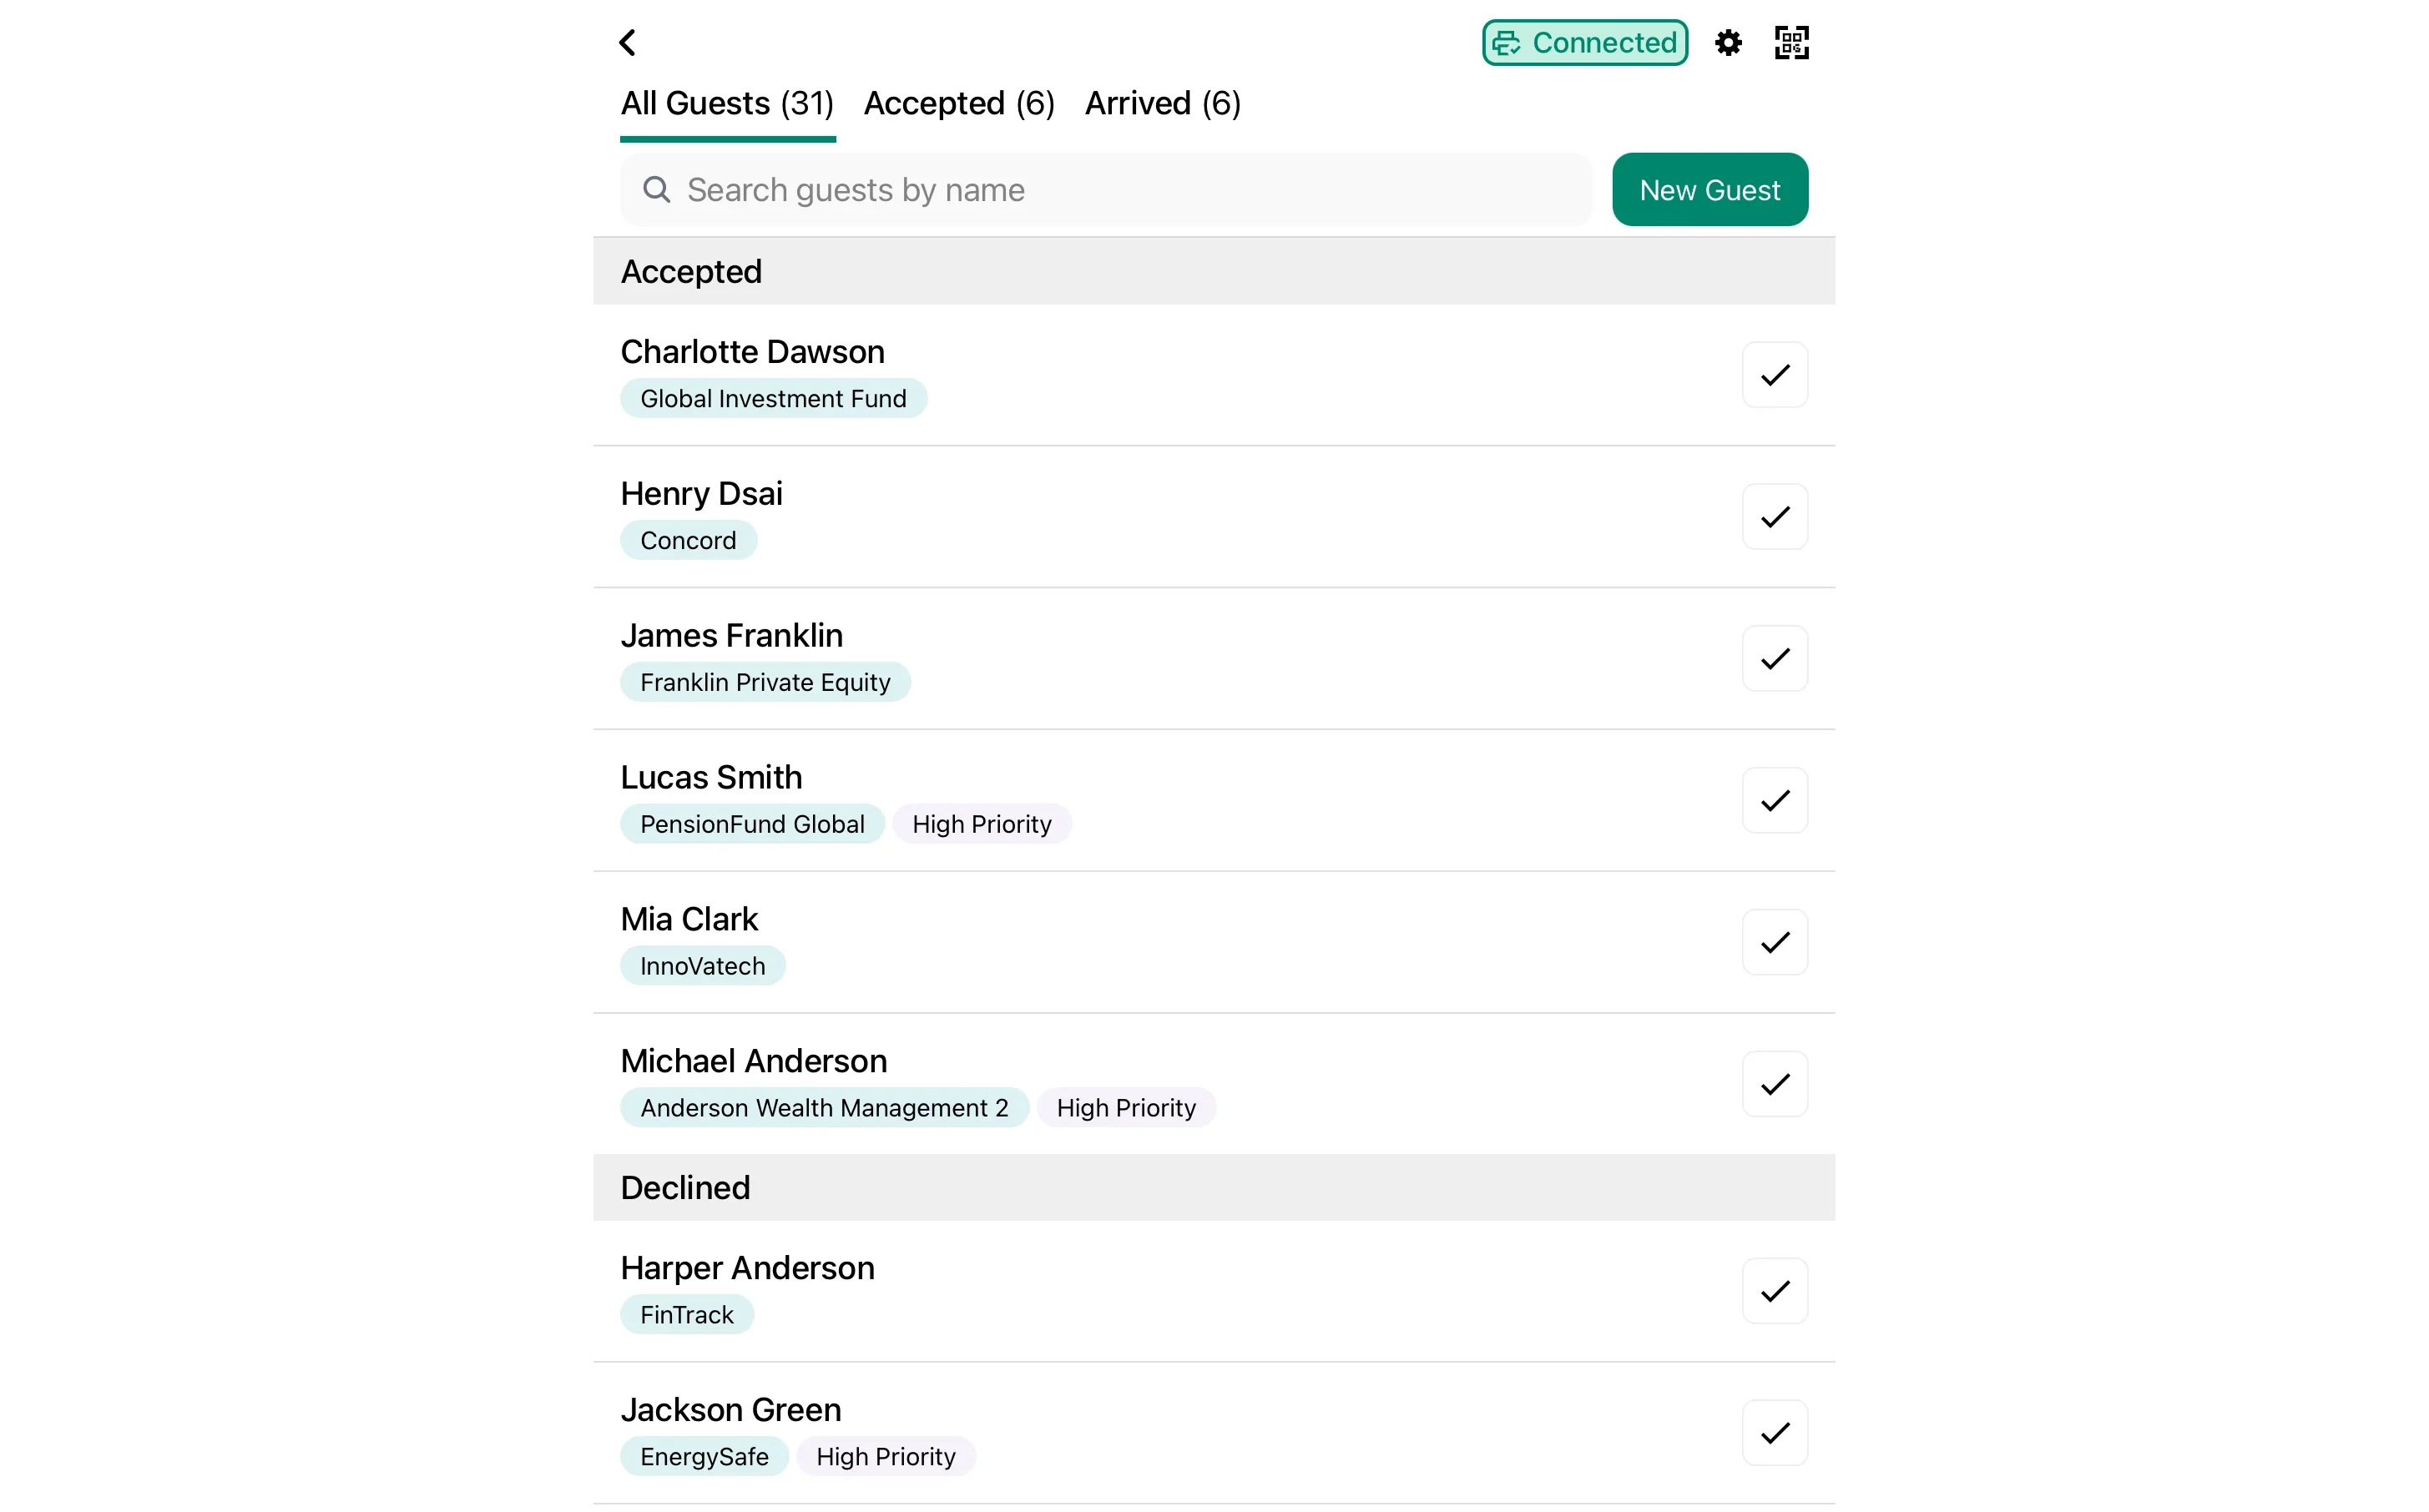
### Automatic Pass Updates
[Section titled “Automatic Pass Updates”](#automatic-pass-updates)
Change the event date, move the venue, or update your Apple Wallet pass design after guests have already saved their passes. Gatsby sends a silent push notification to every device that has the pass, and Apple Wallet pulls the latest version automatically.
Your guests always see current information. No need to resend emails or ask them to re-download anything.

## Common Questions
[Section titled “Common Questions”](#common-questions)
Does this work with Android / Google Wallet?+
Apple Wallet Pass currently supports iOS devices only. Android guests will still receive the confirmation email with all event details — they just won’t have the wallet pass functionality.
For mixed-device guest lists, attach a QR code to the same confirmation email (see [Confirmation Emails](/platform/email-campaigns/confirmation-emails/)) so every guest has a scannable check-in option.
What if a guest removes the pass from their wallet?+
They can re-add it by opening the original email and tapping the **Add to Apple Wallet** button again. Gatsby generates a fresh pass on demand.
Do I need to design a new pass for every event?+
Yes, each event has its own Apple Wallet pass settings. But if you duplicate an event, the pass design carries over with the rest of your event settings.
Can I attach the wallet pass to invitation campaigns?+
Apple Wallet pass attachment is available on Accepted, Waitlist, and Survey Update emails in Confirmation Emails. It’s not available on manual campaign sends. The best practice is to attach it to your Accepted Email so guests receive the pass immediately after they RSVP.
What information appears on the pass?+
The pass displays your event name, date, time, location, the guest’s name, and a unique QR code for check-in. It also shows your logo text (typically your organization name) and any custom images you’ve uploaded.
What happens if I change pass settings after guests have added it?+
Their passes update automatically. Gatsby sends a silent push notification to every device that has the pass, and Apple Wallet pulls the latest version with your new colors, images, or event details.
Is there a limit to how many passes I can generate?+
One pass is generated per guest per event. There’s no additional limit — if your event has 500 confirmed guests, Gatsby generates 500 unique passes.
# Badge Printing
> Print professional name badges on-site as guests arrive. Handle walk-ins, last-minute changes, and no-shows without handwritten nametags or pre-printed tubs.
Why it matters
## Walk-ins arrive with no badges. Pre-prints have the wrong names. How do you avoid the Sharpie moment?
Pre-printed badges lock you into a guest list two days before the event. Then cancellations happen. Walk-ins show up. Partners send substitutes instead.
How Gatsby helps
### Print Badges On-Site
Walk-in arrives? Print their badge in seconds. Same quality as everyone else. No handwritten nametags.
### Two Printer Options
Brother thermal for fast, affordable badges. Zebra ribbon for premium card stock that looks conference-grade.
## Why Print On-Site
[Section titled “Why Print On-Site”](#why-print-on-site)
You pre-print 200 badges two days before the event. Day-of, twelve people cancel, three walk-ins show up, and a partner sends their CFO instead of attending themselves.
Now you are sorting through tubs looking for badges that do not exist. The walk-in guest watches you reach for a Sharpie.
On-site badge printing responds to reality. The guest list changed? The badges reflect it. Walk-in at the door? Ten seconds and they have the same badge as everyone else.
Gatsby badge printing works through the organizer app on iPhone or iPad. Connect a Bluetooth printer, open your event, check someone in, print. Works alongside check-in or in kiosk mode for self-service.
What makes this different+
Pre-printing locks you into a guest list that is always wrong by event day. Someone cancels. Someone else shows up unexpectedly. A guest brings a colleague you did not expect.
On-site printing means your badges match reality. Every guest, including walk-ins, gets the same professional badge. No sorting through tubs. No handwritten backup names.
The cost comparison+
Renting on-site badge printing equipment for a conference typically runs $10,000 to $20,000. Dedicated tech staff. CSV exports into their system. Data reconciliation after.
Badge design and Brother thermal printing are included in your subscription. Bring your printer, connect via Bluetooth, done. The same guest list you already have. No export. No reconciliation. Zebra ribbon printing is a limited-release option — see below.
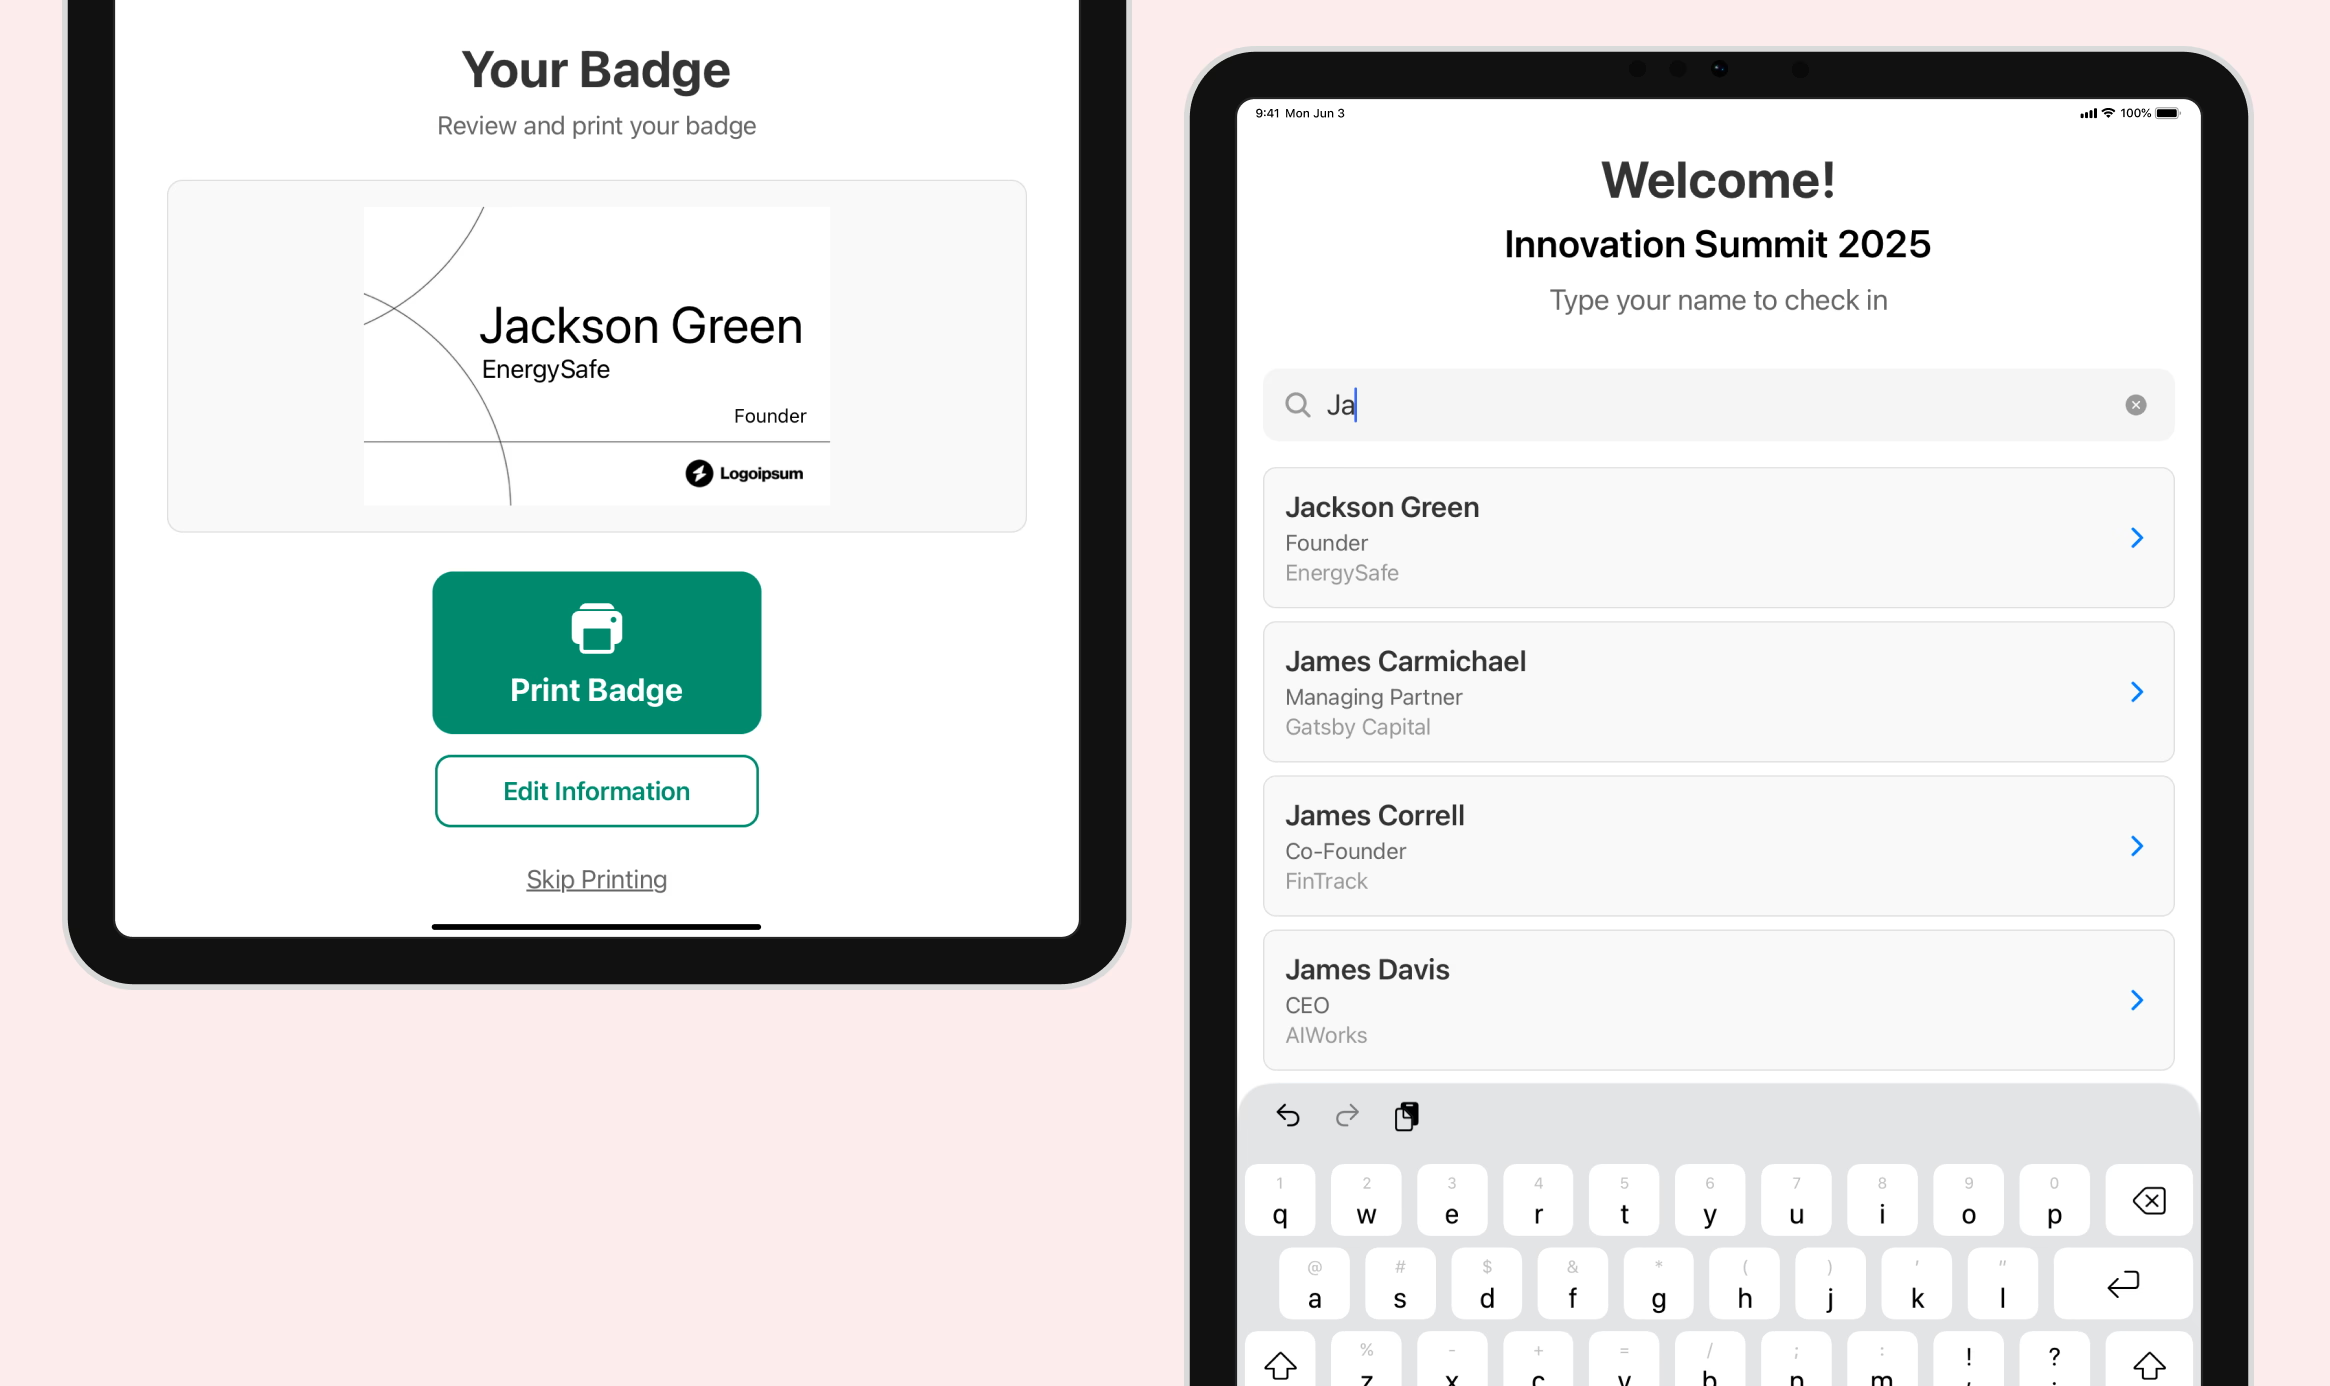
## Printer Options
[Section titled “Printer Options”](#printer-options)
Your badge is a first impression. For some events, a clean thermal label is perfect. For others, you need something that looks like it cost money. Gatsby supports both approaches.
### Brother Thermal Printers
[Section titled “Brother Thermal Printers”](#brother-thermal-printers)
The Brother QL-820NWB prints black-and-white labels. Fast, affordable, ubiquitous. Good for most events where a clean, readable badge is the goal.
What it prints+
Sticky-back labels in black and white. Professional typography, not handwritten.
You can include:
* **Guest name:** First, last, or both
* **Company:** Organization name
* **Custom fields:** Any data you collect or import
When to use it+
Executive dinners, roadshows, internal meetings. Events where the badge needs to look professional but does not need to be a keepsake.
The badge says “we planned this.” It does not say “we spent thousands on badge printing.”
Equipment needed+
* **Printer:** Brother QL-820NWB thermal printer (only supported Brother model)
* **Labels:** Brother DK2205 continuous labels recommended
* **Device:** iPhone or iPad with Gatsby organizer app
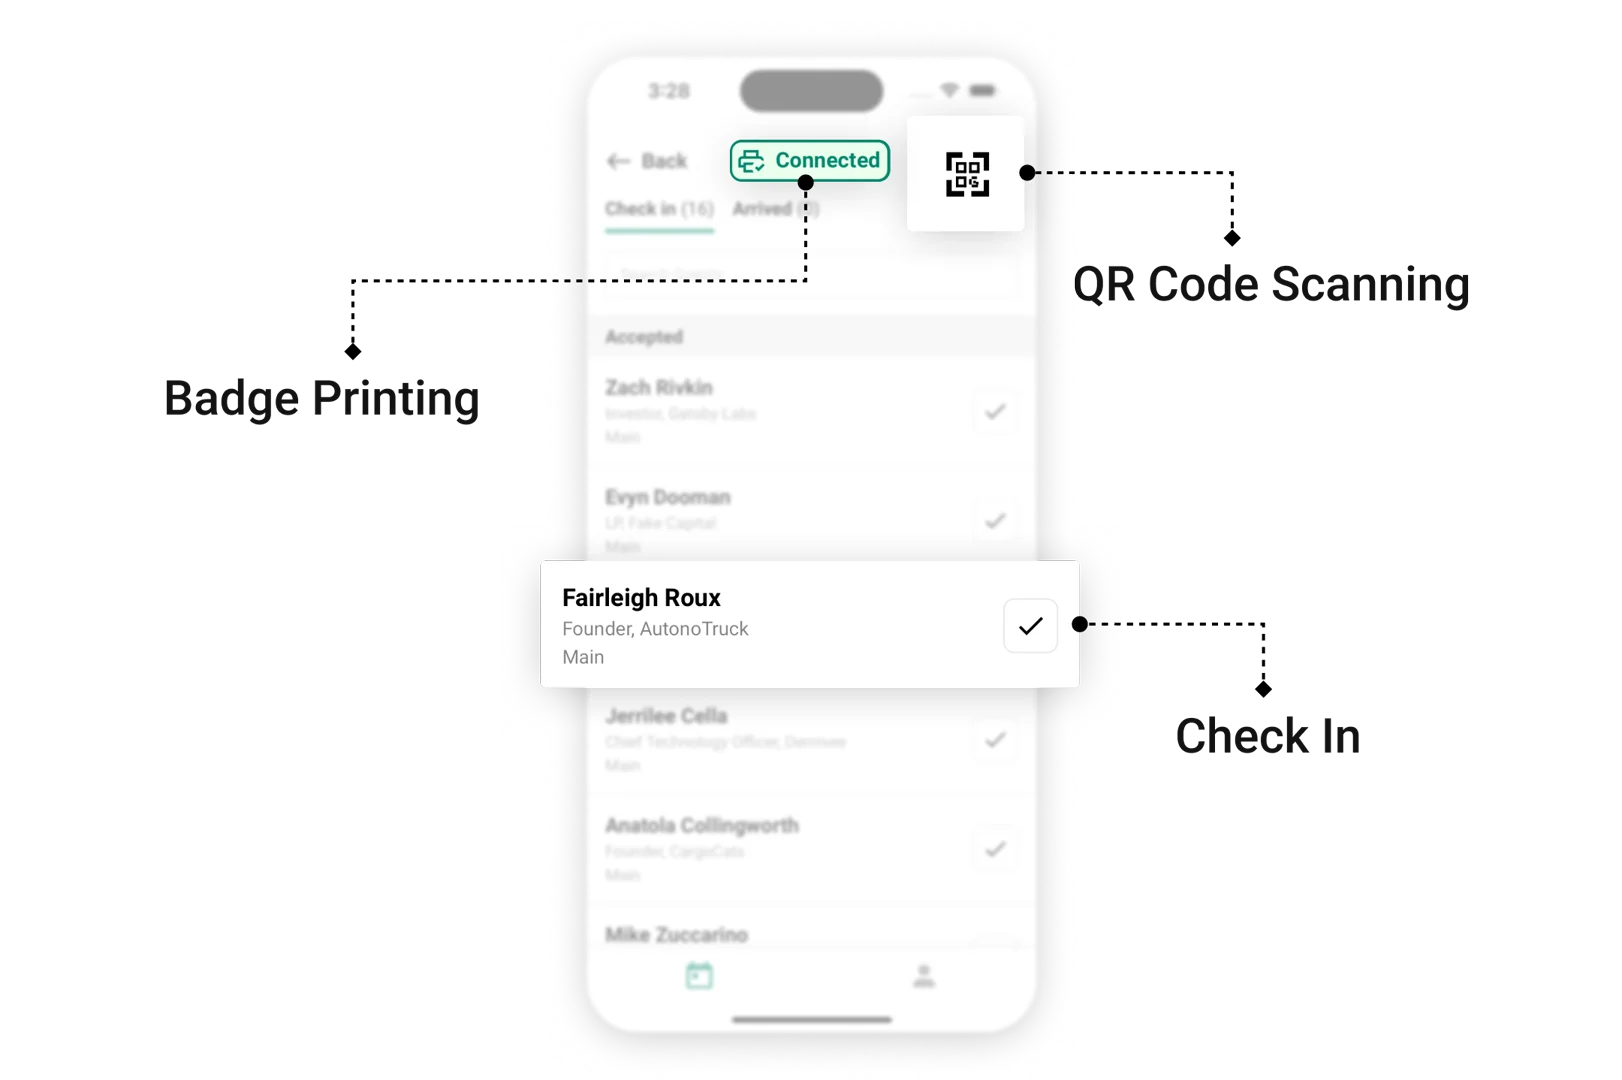
### Zebra Ribbon Printers
[Section titled “Zebra Ribbon Printers”](#zebra-ribbon-printers)
Zebra printers use ribbon technology to print on pre-designed card stock. The result looks like a conference badge from a Fortune 500 company.
What it prints+
Full card-stock badges with your pre-printed color design. Zebra prints guest details on top of your branded background. Clips into a lanyard holder.
The guest gets a badge that looks designed. Not printed on the spot.
When to use it+
Conferences, investor summits, branded experiences. Events where the badge is a branding moment.
Guests photograph these and post them. The badge becomes part of the event experience.
How pre-printing works+
Design your badge background with colors, logos, and branding. Print blanks on card stock before the event.
On event day, the Zebra printer adds guest-specific information on top. Full name, company, session assignments. Premium result without on-site color printing.
Equipment needed+
* **Printer:** Zebra ZD621 series (recommended)
* **Card stock:** Pre-printed with your design
* **Device:** iPhone or iPad with Gatsby organizer app
Some Zebra models advertise Bluetooth but only use Bluetooth Low Energy for transmitting settings. BLE is not enough to send badge data. The ZD621 series has full Bluetooth.
Rental options+
You can rent Zebra printers. Vendors ship to your venue and handle the pre-printed stock.
Contact Gatsby for vendor recommendations. Get at least two printers for backup and multiple check-in lanes.
Zebra printer support needs to be enabled on your account before you can use it.
Email us to request access:
Email copied to clipboard
## Kiosk Mode
[Section titled “Kiosk Mode”](#kiosk-mode)
With kiosk mode, guests check themselves in at an unattended iPad. They scan a QR code from their confirmation email or search by name, confirm their information, tap Check In, and the badge prints.
No staff required at the station. Works best when guests arrive prepared with their QR code. For high-volume arrivals where that is not guaranteed, concierge check-in gives you more control.
Locking down the device+
Use iOS Guided Access to lock the iPad into the Gatsby app. Guests cannot close the app, switch to another app, or access device settings.
Go to **Settings » Accessibility » Guided Access** on the iPad. Enable it and set a passcode. Once kiosk mode is running, triple-click the iPad side button to activate Guided Access.
Walk-in registration+
Turn on walk-in registration in kiosk settings. A guest not on the list searches for their name, finds nothing, and registers on the spot. Their badge prints the same as every other guest’s.
Guest edits before printing+
Before the badge prints, guests can edit their display name and company. Useful when someone goes by a nickname or a colleague is substituting for the registered guest.
Edits appear on the badge only. They do not save back to the contact record in Gatsby.
Enabling kiosk mode+
Kiosk mode is available to every organization. No request needed. Open an event in the Gatsby Organizer App and kiosk mode appears alongside regular check-in.
## Setting Up Your Printer
[Section titled “Setting Up Your Printer”](#setting-up-your-printer)
Badge printing happens in the Gatsby organizer app. Connect your printer once, then print for any event.
Download the app+
The Gatsby organizer app is iOS only. Download from the App Store. Log in with your Gatsby account.
The same app handles check-in, badge printing, and QR code scanning.
Connect via Bluetooth+
1. Turn on your printer.
2. Enable Bluetooth on the printer. Consult your printer manual for Brother or Zebra instructions.
3. On your iPhone or iPad, go to **Settings > Bluetooth**.
4. Pair with the printer when it appears.
Connect in the app+
1. Open the Gatsby app.
2. Go to **Settings** (gear icon) > **Printers** > **Connect New Printer**.
3. Select your printer from the list.
4. Give it a name you will recognize.
Previously connected printers appear here for easy reconnection.
Printer settings for Brother+
On the Brother QL-820NWB, configure two settings to keep the printer ready throughout your event.
**Automatic Reconnection:** Enable under the Bluetooth menu. The printer reconnects if the connection drops.
**Auto Power Off:** Disable under the Settings menu. The printer stays on between badges.
Test before the event+
In the app, go to **Settings > Printers** and enable **Test Printer**. This lets you preview and print test badges without checking in real guests.
Verify layout and alignment before guests arrive. Much easier to fix paper alignment the day before than with a line forming.
## Designing Badge Templates
[Section titled “Designing Badge Templates”](#designing-badge-templates)
Not every event needs the same badge. Your investor dinner might use first name only. Your conference might need full name, company, and session assignments.
The badge designer is in any event under the **On-Site tab**. Desktop only. Templates sync across all your events automatically, so design once and every event has access.
What you can include+
Three types of elements go on a badge.
**Text fields** pull from any field on the guest record. First name, last name, company, title, table assignment from your seating chart, or any custom field you have created.
**Static images** are fixed design elements that appear the same on every badge. Logos, co-branding, visual accents.
**QR codes** link to a URL you specify. Common uses: event agenda, venue map, or post-event survey.
Layout and sizing+
Set badge dimensions to match your stock: 4x6 fold-over, 4x3 standard, or a custom size. Upload a background image to fill the badge area. Black-and-white images only; export at 300 DPI for sharp thermal output. Grid snapping and rulers are available for precise element placement.
Gatsby provides starter templates you can copy and customize, or build from scratch.
Typography+
Each text field has its own size, weight, and alignment. Font size runs from 12px to 48px. Choose normal or bold. Align left or center.
Text fields do not auto-size. Set first name to 48px and a guest named Christopher checks in, the name gets clipped. Keep first and last name as separate fields and test your layout with your longest guest names before the event.
Simple vs. ornate+
Templates can be minimal or detailed. Design for your event.
**Minimal:** First name in large type. Perfect for intimate dinners where everyone knows everyone.
**Detailed:** Full name, company, title, table number, and QR code. Right for large conferences where networking is the point.
Setting default templates+
In the app Settings, set a default badge template. This template prints automatically unless you select a different one during check-in.
Good for consistency across your team. Everyone prints the same badge format.
Switching templates during check-in+
When printing a badge, swipe to select different templates.
Useful when you realize mid-event that you need a different layout. Started printing names only but now need company? Switch templates. No restart required.
Beyond name badges+
Some teams use badge printing for non-obvious purposes.
**Golf tournaments:** Print starting hole and foursome assignments. Use seating chart data for groupings.
**Conferences:** Print session schedules. Custom fields for track assignments.
If the data exists in Gatsby, it can print on a badge.
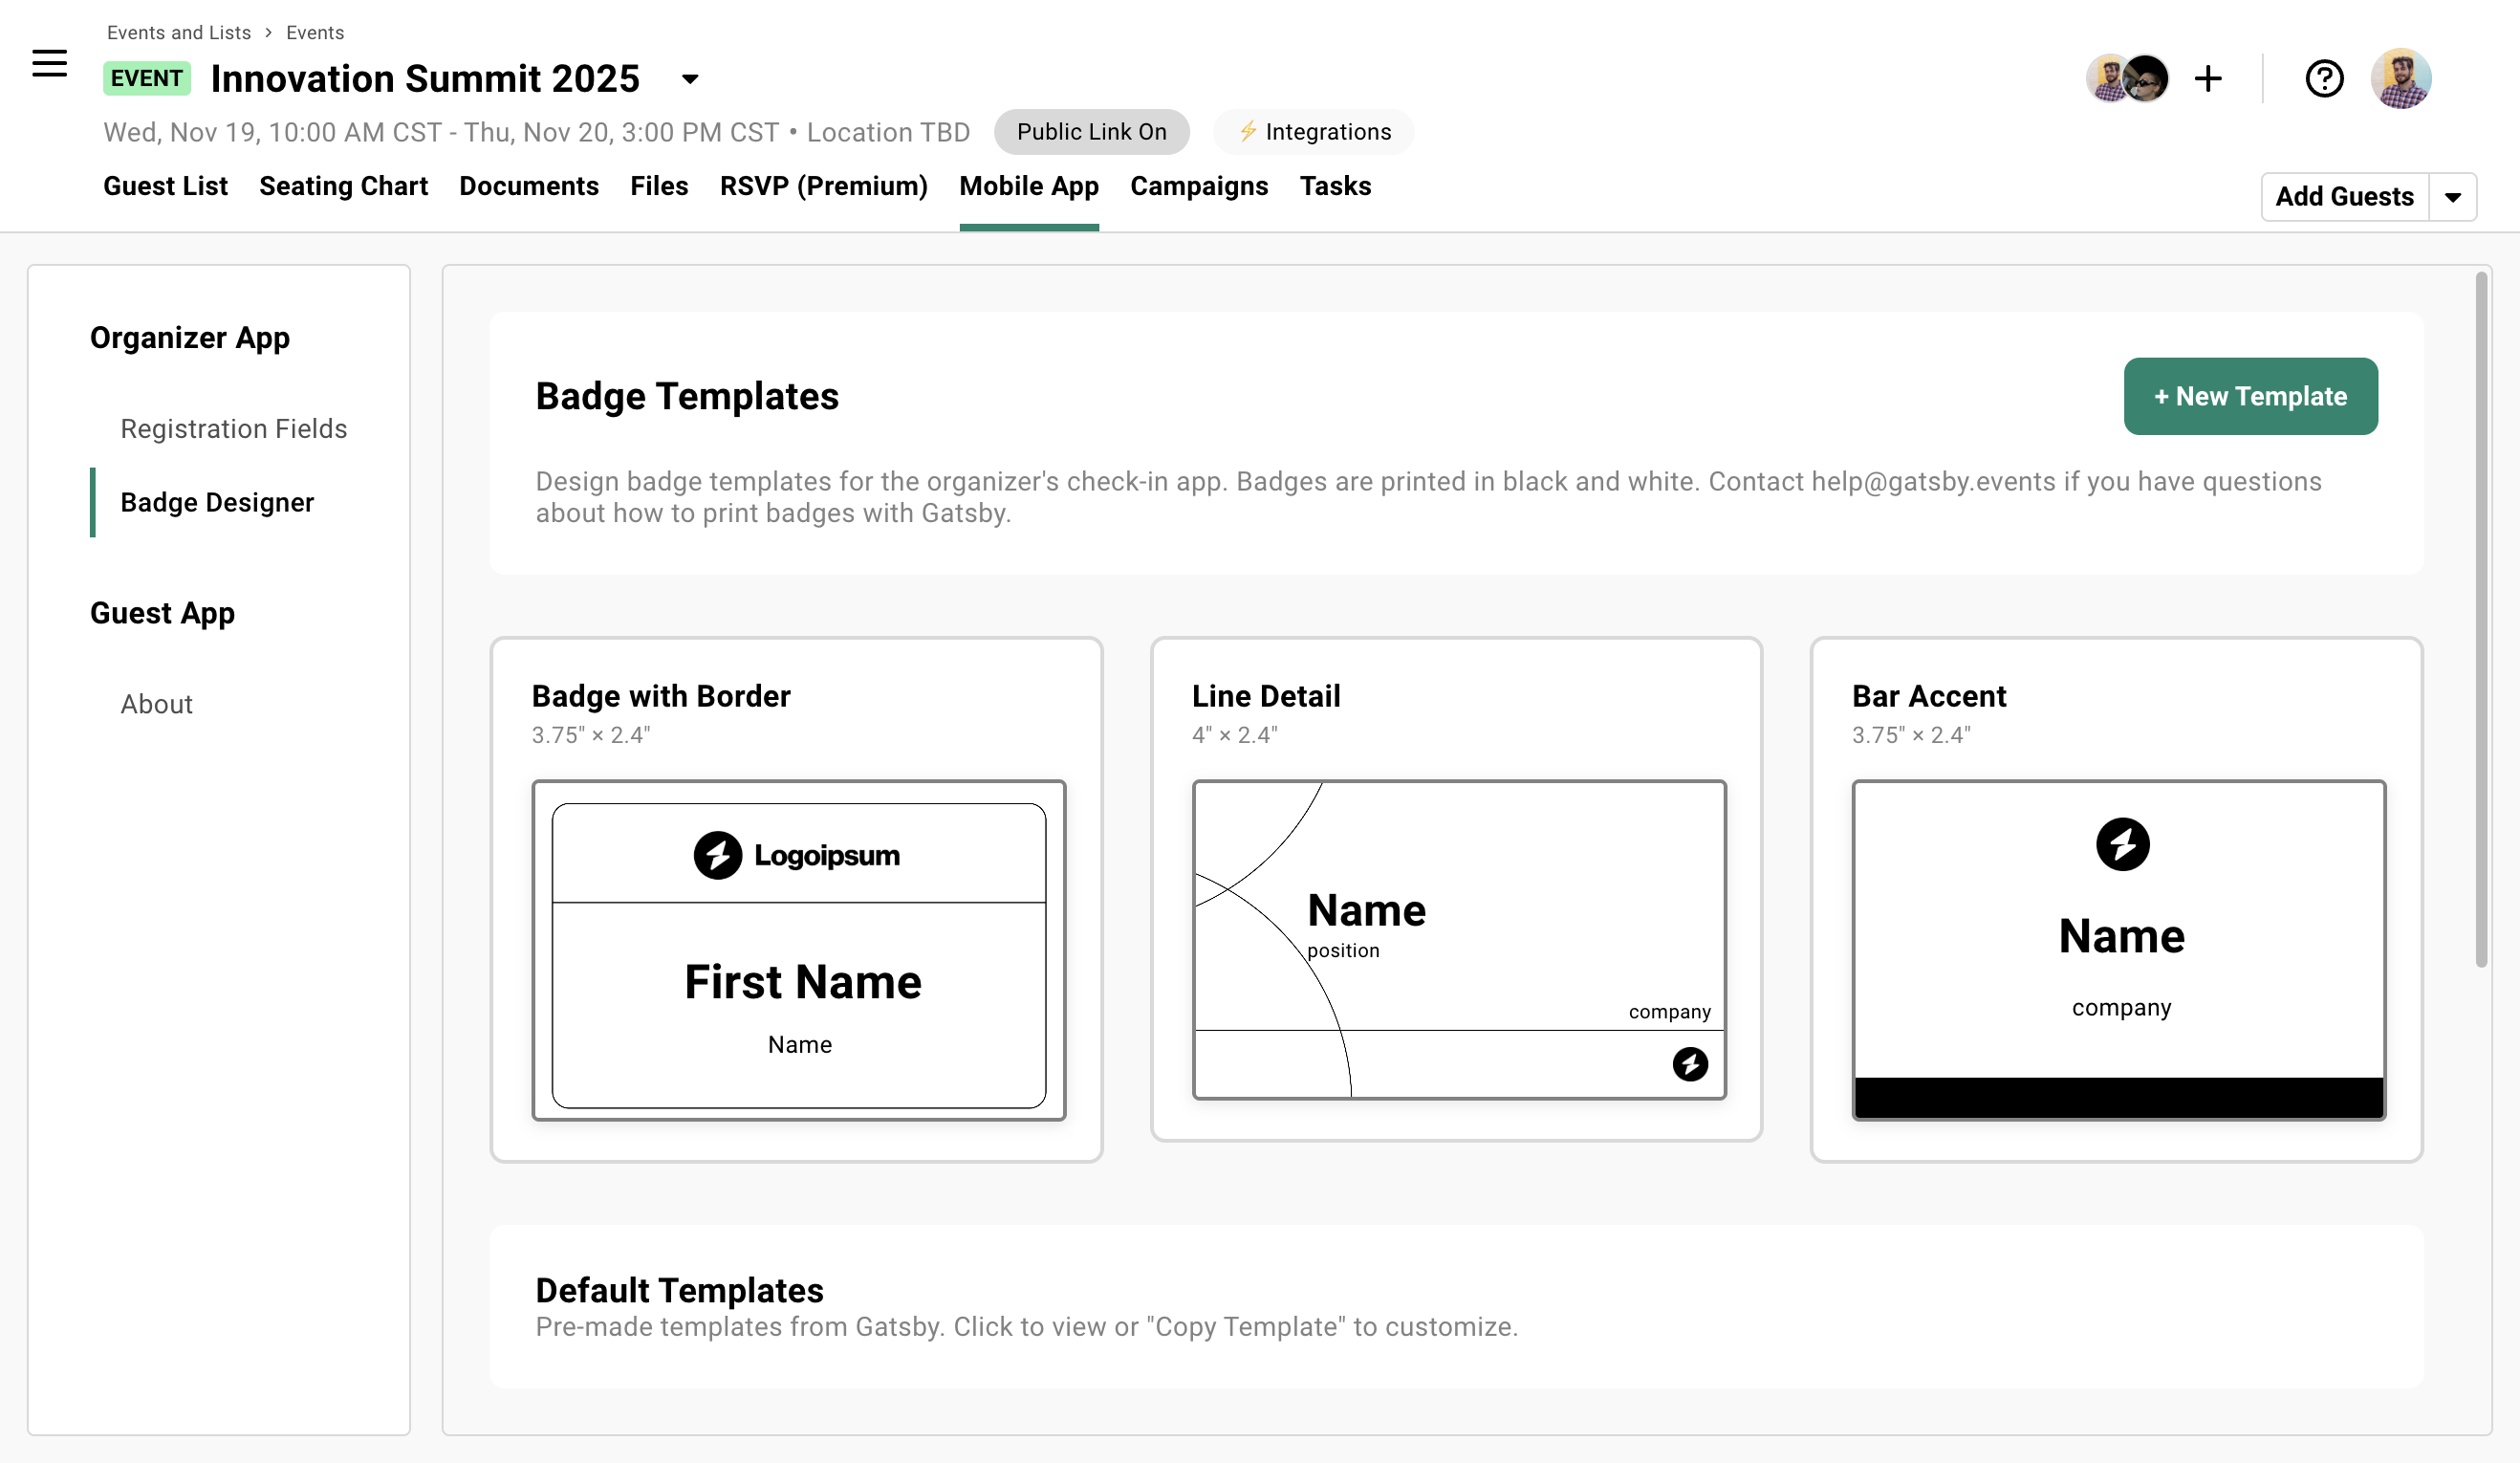
## Printing During Check-In
[Section titled “Printing During Check-In”](#printing-during-check-in)
Badge printing integrates with check-in. When a printer is connected, the print option appears automatically after you check someone in.
Concierge check-in flow+
1. Open your event in the app.
2. Tap **Go to Check In**.
3. Search for the guest or scroll the list.
4. Tap to check them in.
5. The badge preview appears. Swipe to change templates if needed.
6. Tap **Print**.
Badge ejects. Hand it to the guest. Next person.
Kiosk mode flow+
In kiosk mode, guests check themselves in without staff. They scan a QR code or search by name, confirm their details, and the badge prints. The screen resets for the next person.
For setup, device lockdown, and walk-in registration, see the Kiosk Mode section above.
Walk-in badges+
Walk-in guest arrives. No registration. No problem.
1. Add them in the app. Or have them self-register via QR code.
2. Check them in.
3. Print their badge.
Same process as registered guests. Same quality badge. No Sharpie required.
Help desk setup+
For larger events, set up a laptop at a help desk station. Staff can edit guest details in the full Gatsby web interface, fix registration issues, and direct guests to a badge printer.
Separates problem-solving from the check-in flow. The line keeps moving while edge cases get handled.
## Event Day Setup Recommendations
[Section titled “Event Day Setup Recommendations”](#event-day-setup-recommendations)
A few decisions make badge printing run smoothly. Plan your setup before guests arrive.
How many printers+
At least two. One as backup, or both active for parallel check-in lanes.
For events over 200 guests, consider three or more. The math is simple: more printers mean shorter lines.
Check-in lanes+
Multiple lanes prevent bottlenecks. Each lane needs a device (iPad) and a printer. Staff can check in guests simultaneously.
For large events, consider alphabetical splits. A through M at one station. N through Z at another.
Help desk station+
Set up a laptop with access to the full Gatsby web interface. This is where you handle exceptions: wrong names, missing guests, registration edits.
Keep the check-in line moving by routing problems to the help desk.
Internet required+
The Gatsby app needs internet to sync. Confirm WiFi at your venue. Test it before the event. There is no offline mode for badge printing.
If venue WiFi is unreliable, consider a mobile hotspot as backup.
Test everything+
Day before or morning of, run through the full flow.
1. Connect printer.
2. Print test badge.
3. Verify alignment and quality.
4. Replace supplies if needed.
Five minutes of testing prevents twenty minutes of troubleshooting with guests waiting.
## Common Questions
[Section titled “Common Questions”](#common-questions)
What printers are supported?+
Brother QL-820NWB for thermal labels. Zebra printers with full Bluetooth support for ribbon printing on card stock.
Other models may work but are not officially supported.
Is there an Android app?+
No. Badge printing requires the iOS Gatsby organizer app on iPhone or iPad.
Can I use badge printing without check-in?+
Badge printing is part of the check-in flow. You print a badge when you check someone in. The two go together.
This is intentional. It ensures your badge count matches your attendance count.
What if I run out of labels mid-event?+
Swap in a new roll. The printer should resume where it left off.
Brother DK2205 continuous labels are widely available. Keep extras on hand. Running out is preventable.
Can I print badges for all guests at once?+
No. Badges print one at a time as guests check in.
This is intentional. It avoids the pre-printing problem. No badges for no-shows. No sorting through tubs. No wasted materials.
What happens if my printer disconnects?+
Go to app **Settings > Printers**. Your previously connected printer should appear. Tap to reconnect.
If it does not appear, re-pair via Bluetooth in your device settings. Then reconnect in the app.
Can I rent Zebra printers?+
Yes. Rental companies ship to your venue and can handle pre-printed stock production.
Contact Gatsby for vendor recommendations.
Does kiosk mode require special setup?+
No account setup is required for kiosk mode itself — it’s available to every organization. Zebra printer support is limited release and does need to be enabled on your account; email us to request access:
Email copied to clipboard
On the device, use iOS Guided Access to lock the iPad into the app. See the Kiosk Mode section for setup steps.
# Event Check-In
> Track arrivals in real time from any device. Handle walk-ins without breaking flow. Keep your guest list and CRM in sync the moment someone walks through the door.
## How Check-In Works
[Section titled “How Check-In Works”](#how-check-in-works)
You rent a badge scanner for your conference. Guest data sits trapped on the device until you mail it back or download a CSV days later. By the time your sales team gets the attendance list, the hot lead who walked in Tuesday already forgot your name.
Gatsby check-in syncs the moment you tap. Attendance status updates on your guest list immediately. If you have CRM integrations, that data flows through too.
Check-in is built into every event. Works from desktop (web browser) or the Gatsby Organizer App. All devices see the same real-time data. Guests marked as Attended show the date/time in the Attendance column on your guest list.
Configuring the experience and operating it live happen in two different places:
| Task | Where |
| ------------------------------------------------------ | ---------------- |
| Set up Kiosk Mode, Registration Fields, Badge Designer | **On-Site** tab |
| Check guests in, scan QR codes, add walk-ins | **Check-In** tab |
Where to Find Check-In+
A green **Check In** button appears on your event tile 7 days before the event.
Need it earlier? Click the three-dot menu on any event and select **Check In Guests**. Same tool, same place. Works on both desktop and mobile app.
What You See+
Everyone on your guest list appears. Including declined and waitlist guests.
Event planners know the truth: people who decline sometimes show up at the door anyway. Search by name, tap the checkbox, done.
What Gets Recorded+
When you check someone in, they’re marked as Attended with a timestamp.
This appears in the Attendance column on your guest list. Exportable. Flows to connected CRMs like Salesforce, Affinity, and Altvia.
## Checking Guests In
[Section titled “Checking Guests In”](#checking-guests-in)
Three ways to check guests in. Gatsby Organizer App for flexibility. Web for laptops at the registration table. QR codes for high-volume events.
### Check In via Gatsby Organizer App
[Section titled “Check In via Gatsby Organizer App”](#check-in-via-gatsby-organizer-app)
Download the Gatsby Organizer App (iOS only). Log in and select your event.
Steps to Check In+
1. Download the Gatsby Organizer App from the App Store.
2. Log in with your Gatsby credentials.
3. Select your event.
4. Tap **Go to Check In**.
5. Search for a guest or scroll the list.
6. Tap the checkbox next to their name.
7. Confirm the check-in.
If a badge printer is connected, the print option appears automatically.
Show Guest Details+
Tap the gear icon to display additional information under each guest name.
Options include:
* **Company:** Their organization
* **Seating Chart Assignment:** Which table they’re at
* **Custom Fields:** VIP status, speaker designation, guest type
* **Tags:** Any tags you’ve applied
* **Notes:** Context for your check-in team
Your team sees what they need without opening each profile.
Profile pictures aren’t one of the gear-icon display options, so they don’t appear inline in the list, but they are there. Tap a guest to open their profile inside check-in and their photo shows alongside their details. If putting faces to names at the door matters, ask guests to upload a photo during registration (add the “Profile pic” question to your survey) or add one to the contact profile, and your check-in team can pull it up per guest.
View Arrivals and Undo+
Switch to the **Arrived** tab to see who has checked in.
Made a mistake? Tap a guest and select **Undo Check-In**. Their attendance status clears.
Internet Required+
The Gatsby Organizer App needs an internet connection to sync. Make sure you have WiFi at your venue.
Use different Gatsby login accounts on different devices. Do not share a single login across all check-in iPads.

### Check In via Web
[Section titled “Check In via Web”](#check-in-via-web)
No app required. Access check-in from any browser on your laptop or tablet.
Steps to Check In+
1. From your Events dashboard, find your event.
2. Click the green **Check In** button (appears 7 days before the event).
3. Or click the three-dot menu and select **Check In Guests**, or open the in-event **Check-In** tab (reveal it via the **+** menu if it’s hidden).
4. Click the checkbox next to each guest as they arrive.
When to Use Web vs. App+
**Web works well for:**
* Staffed registration tables with laptops
* Venues with unreliable mobile signal but strong WiFi
* Teams who prefer keyboard navigation
**App is better for:**
* Moving around the venue
* Scanning QR codes
* Printing badges on the spot
[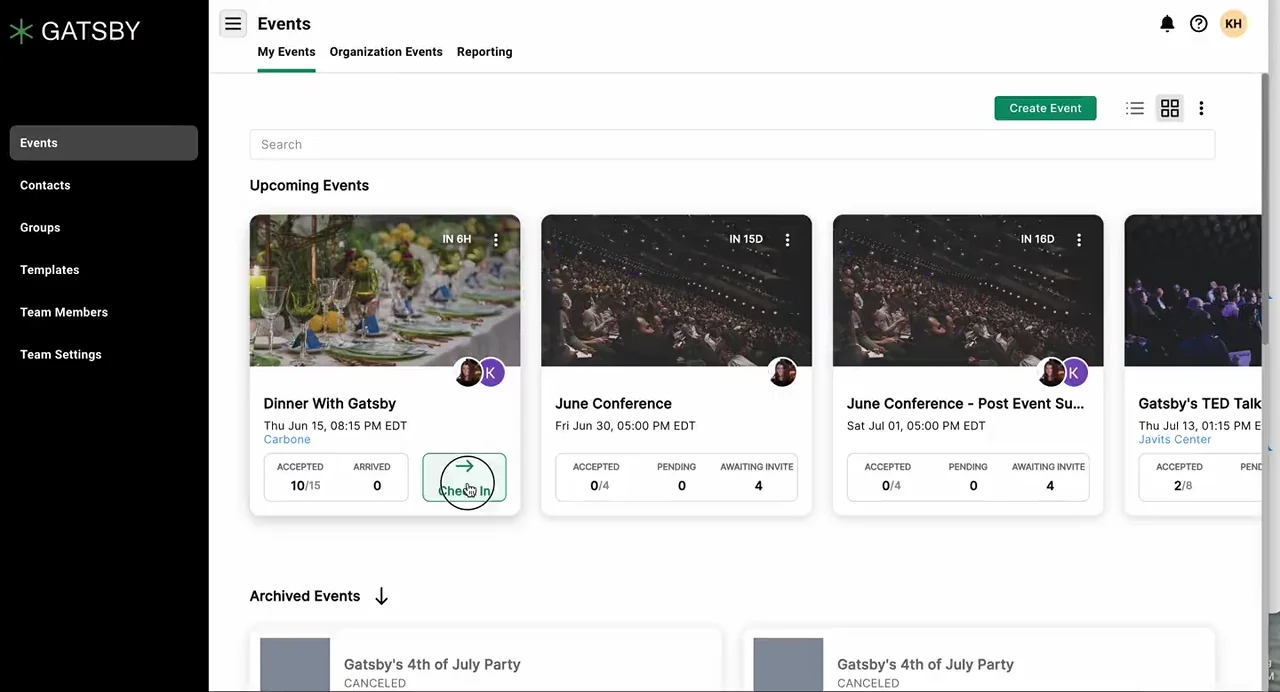](/legacy/check-in-01.mp4)
### Scanning QR Codes
[Section titled “Scanning QR Codes”](#scanning-qr-codes)
QR codes speed up check-in for high-volume events. Guests scan their code, you confirm, done.
How Guests Get QR Codes+
Each guest has a unique QR code generated automatically.
Two ways to deliver it:
* **Confirmation email:** Go to **Registration » Confirmation Emails**, select the Accepted email, and enable **Attach QR Code** (three-dots menu). Guests receive it the moment they register. See [Confirmation Emails](/platform/email-campaigns/confirmation-emails/) for details.
* **Campaign:** If you didn’t include QR codes in the confirmation email, send them in a pre-event campaign. Open a draft, click the three-dots menu next to the subject line, and select **Attach QR Code**. Each guest gets their own unique code as a file attachment.
Steps to Scan+
1. In the Gatsby Organizer App, open check-in for your event.
2. Tap the QR code icon in the top right.
3. Point your camera at the guest’s code.
4. Confirm check-in.
Registration QR Code for Walk-Ins+
If your event has a public link enabled, you can display a QR code that takes guests to your registration page.
Useful for walk-ins. They scan with their own phone, fill out the form, and appear on your guest list. You check them in once they’re registered.
[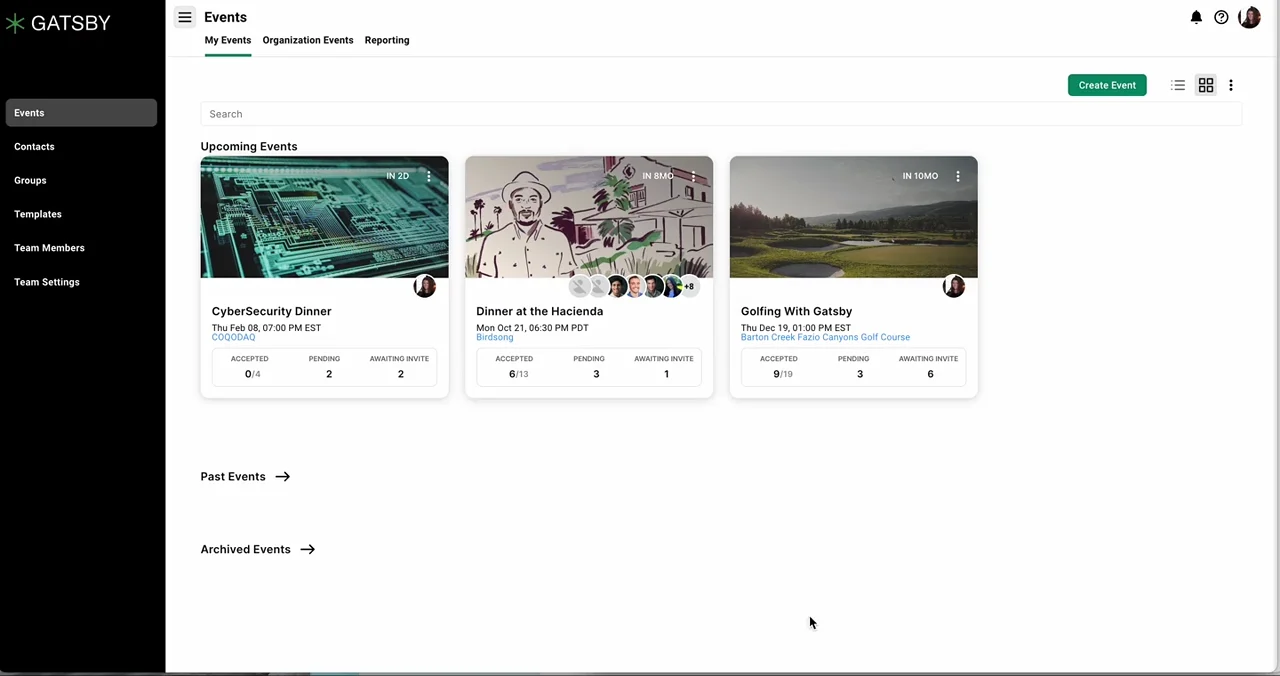](/legacy/qr-codes-04.mp4)
## Handling Walk-Ins
[Section titled “Handling Walk-Ins”](#handling-walk-ins)
A partner walks in with two clients who never registered. You’re standing there with an iPad. Either you capture their information gracefully, or you hand them a Sharpie to scrawl their name on a sticker.
Their data dies on that sticker. Never makes it to your CRM.
Gatsby lets you add new guests on the spot. Ten seconds. Clean capture. Record exists before they finish their handshake.
### Adding Walk-In Guests
[Section titled “Adding Walk-In Guests”](#adding-walk-in-guests)
Both the web and mobile check-in tools have a **New Guest** or **Create** button.
Steps to Add a Walk-In+
1. Tap or click **New Guest** (or the create button).
2. Enter first name, last name, and email.
3. Add company and any notes.
4. Save.
The guest is added to your event and contact database immediately. Check them in or let them register themselves.
Self-Registration Option+
Don’t want to spend time entering their details? Show them the registration QR code.
They scan it, fill out the form on their phone, and appear on your guest list. Then you check them in.
Faster for you. Better data quality since they type their own info.
Take a Photo+
The Gatsby Organizer App lets you capture a photo during walk-in creation.
Useful for badge printing. Also helpful for remembering who someone is when you’re reviewing contacts later.
### Linking Walk-Ins to Primary Guests
[Section titled “Linking Walk-Ins to Primary Guests”](#linking-walk-ins-to-primary-guests)
When a walk-in arrives with an existing guest, you can link them together.
How Linking Works+
During walk-in creation, select a primary guest from your existing list. The walk-in appears connected to that guest.
Useful for tracking plus-ones or companions. You know exactly who brought whom.
Add +1 During Check-In+
Faster method: check in the primary guest first. Then use the **Add +1** option to quickly create their companion.
This links them automatically. No separate walk-in creation and linking required.
## Kiosk Mode for Self-Service
[Section titled “Kiosk Mode for Self-Service”](#kiosk-mode-for-self-service)
You have 200 guests arriving in 30 minutes. Your team cannot tap through that many one-by-one without a line backing up to the street.
Kiosk mode lets guests check themselves in. Set up an iPad at your entrance. Guests type their name, answer any registration questions, print their badge, and walk in. No staff bottleneck.
Kiosk mode is enabled in the Gatsby Organizer App. Works best with a dedicated iPad at your entrance. Combine with Guided Access to lock the iPad to the app.
Enable Kiosk Mode+
1. Open the Gatsby Organizer App.
2. Select your event.
3. Below **Go to Check In**, toggle on **Kiosk Mode**.
4. Set your default badge template first if you’re printing badges.
Guest Flow+
What guests experience:
1. Type their name (or scan their QR code).
2. Select their profile from results.
3. Answer any registration questions.
4. Print badge or skip.
5. Screen resets for the next guest.
Walk-In Registration in Kiosk+
When someone searches and isn’t found, a **Walk-In Check-In** button appears (if you’ve enabled it).
They fill out their info, answer questions, print their badge. New contact created automatically.
Registration Questions+
Configure what kiosk mode collects.
1. On your event (desktop), go to the **On-Site** tab.
2. Find **Registration Fields**.
3. Add custom fields.
4. Set which are required.
Kiosk Settings+
Go to **App Settings** then **Kiosk Settings** to control:
* **Editable fields:** What guests can modify
* **Walk-in registration:** Enable or disable
* **Search sensitivity:** How strict name matching is
* **Auto-return timing:** How long after badge printing before the screen resets
Exiting Kiosk Mode+
Exiting requires a passphrase. Find it in Kiosk Settings.
You can also force quit the app. Test this before your event so you know the process.
Lock Down with Guided Access+
iOS Guided Access prevents guests from leaving the Gatsby Organizer App.
1. Go to iPad Settings.
2. Navigate to **Accessibility** then **Guided Access**.
3. Enable Guided Access.
4. Triple-click the side button to start.
Remember your passcode. You’ll need it to exit.
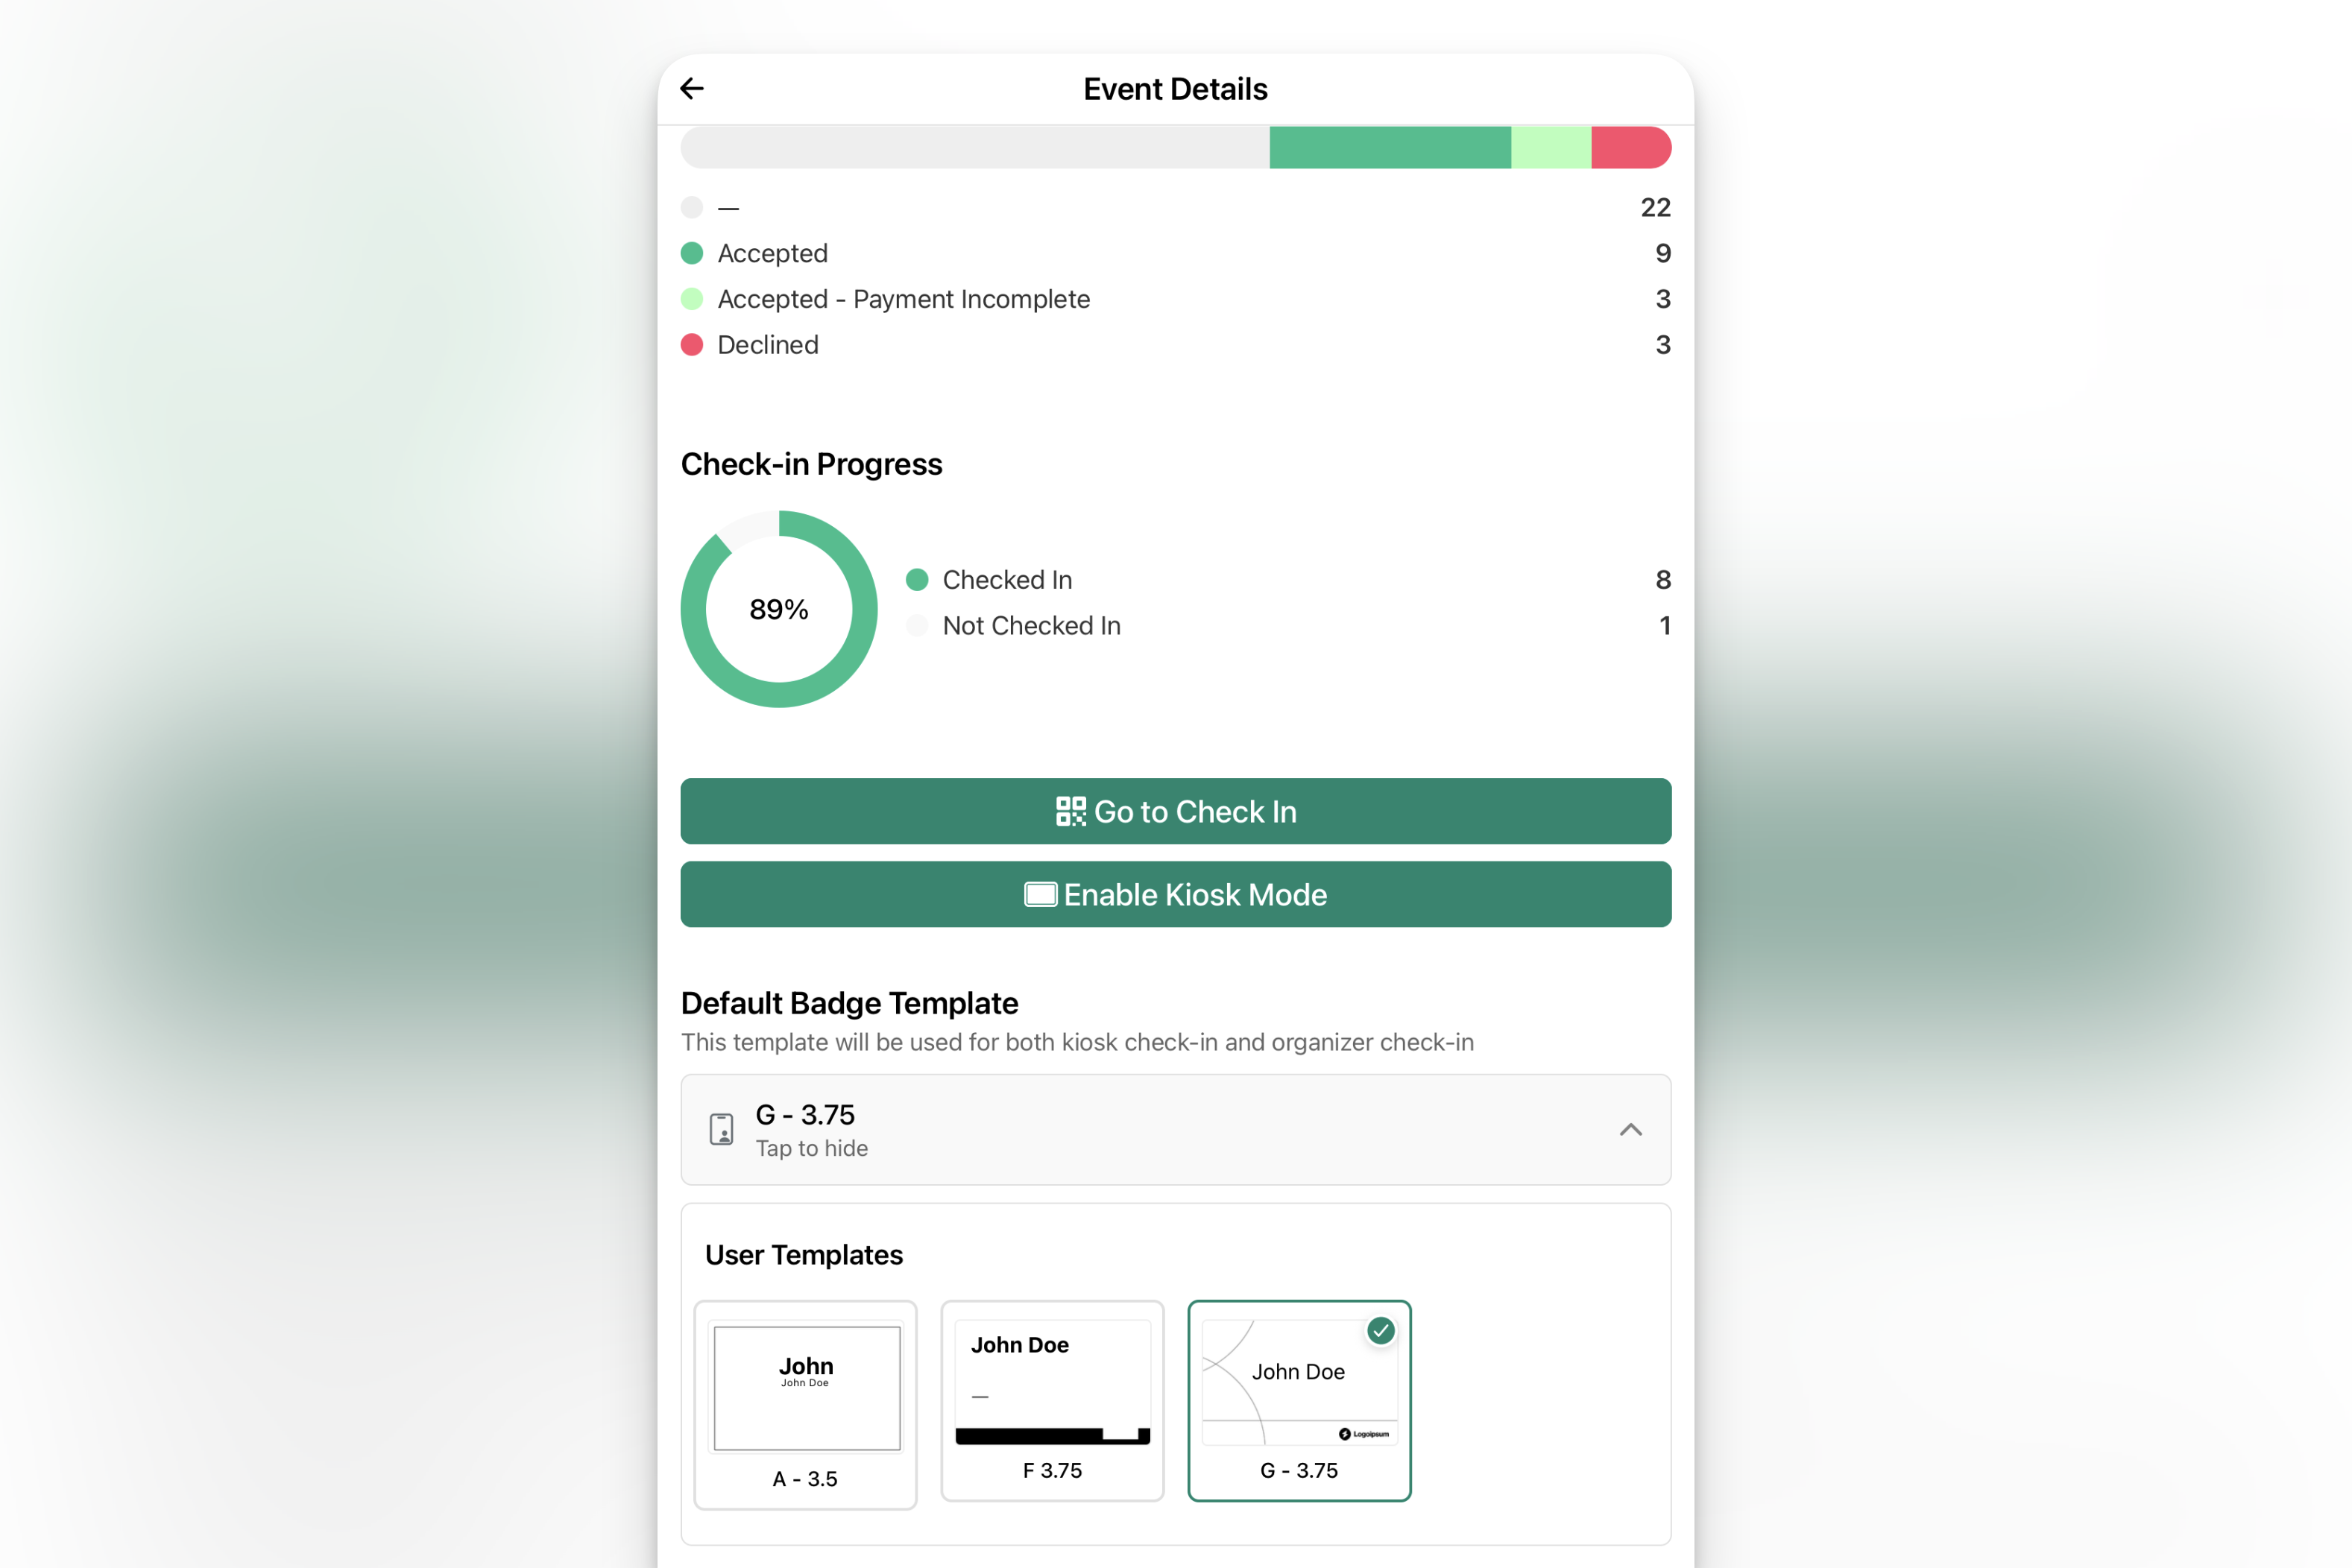
## Arrival Notifications
[Section titled “Arrival Notifications”](#arrival-notifications)
Get notified when important guests arrive. Set arrival notifications per guest. Anyone on your team with the app installed receives a push notification.
How to Set Notifications+
1. In check-in (web or app), find the guest.
2. Click or tap their name to open their profile.
3. Tap the bell icon.
4. Select which team members should be notified when this guest arrives.
Use Case+
Target account executive walks in. Your sales rep gets a push notification and can intercept them before they reach the coffee station.
Real-time intelligence. No more “wait, they were here?”
Who Can Receive Notifications+
Any collaborator on the event with the Gatsby Organizer App installed.
They must have push notifications enabled on their device.
## After Check-In
[Section titled “After Check-In”](#after-check-in)
What you can do with attendance data once guests have arrived.
View Attendance on Guest List+
The Attendance column shows who arrived and when.
Add this column to your guest list view. Filter by attendance status to see who showed up versus who didn’t.
Export Attendance Data+
Export your guest list with attendance included.
Use for post-event follow-ups, reconciliation, or reporting. The timestamp tells you exactly when each person arrived.
Leave Notes+
Click a checked-in guest to open their profile. Leave notes about the interaction.
Did they have a complaint? Make a connection worth following up on? Notes persist on their contact record. Available for the next event.
Mark No-Shows+
Gatsby doesn’t automatically mark guests as no-shows. After your event, you decide whether to mark guests who didn’t attend as no-shows or leave them as-is.
Depends on your data model. See post-event workflows in Playbooks for guidance.
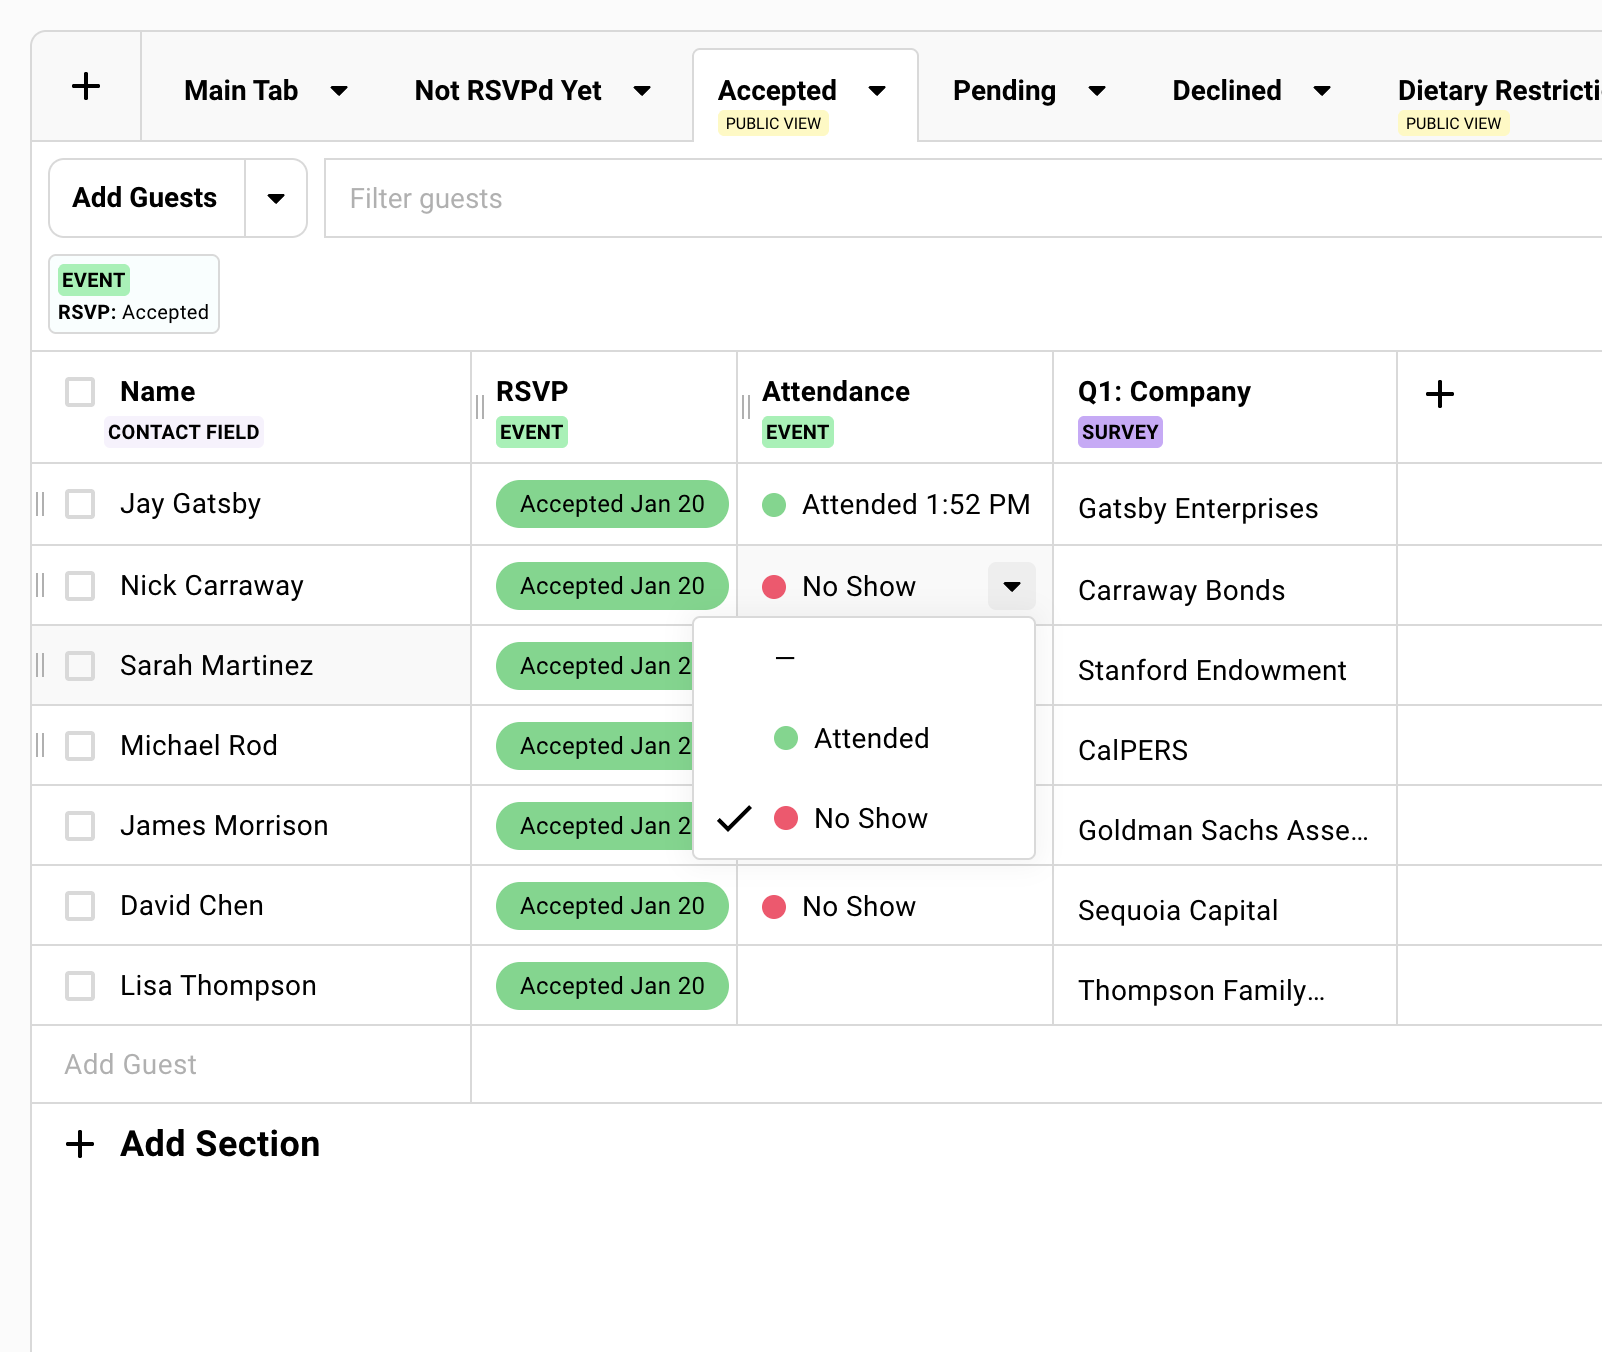
## Common Questions
[Section titled “Common Questions”](#common-questions)
Can I check in guests before the event date?+
Yes. Use the three-dot menu on your event tile and select **Check In Guests**. This works anytime.
The green Check In button only appears 7 days before the event. The three-dot menu works earlier.
Can multiple people check in guests simultaneously?+
Yes. Check-in syncs in real time across devices.
Two people on different iPads can check in guests at the same time. Just use different Gatsby login accounts on different devices.
Do I need the app to check in guests?+
No. Web check-in works from any browser.
The app adds QR scanning, badge printing, and kiosk mode. But basic check-in works without it.
What if someone shows up who declined?+
They’re still on your list. Declined guests appear in check-in.
Search for them and mark them as arrived. Happens more often than you’d expect.
Can I undo a check-in?+
Yes. Go to the Arrived tab, find the guest, and tap **Undo Check-In**.
Their attendance status clears immediately.
How do I track attendance for CRM integrations?+
Attendance status syncs to connected CRMs (Salesforce, Affinity, Altvia, and others).
Check-in happens, status updates, CRM record reflects it. No export required.
Is there an Android app?+
Yes. The Gatsby Organizer App is available on iOS only.
Can I add walk-ins at the door?+
Yes. Two methods:
**Method 1: Search and add**
1. Search for their name in check-in
2. If not found, click **+ Add New Guest**
3. Fill in their info, check them in
**Method 2: Kiosk mode walk-in registration**
* Enable in Kiosk Settings
* Guests register themselves
* Badge prints automatically
New contacts sync to your database immediately.
Can I use the same account to check-in guests on multiple devices?+
**Same account, multiple devices: No** (one device kicks the other out)
**Multiple accounts, multiple devices: Yes** (recommended setup)
Use different Gatsby team member logins on each iPad station. Check-in syncs in real-time across all devices.
Mobile app limitations+
**iOS app**
* Check-In with QR scanning
* Badge printing
* Basic guest list viewing
* Basic contact editing
* iPhone and iPad supported
**Android app**
* Not supported for event organizers
**Not in mobile app**
* Landing page editing
* Email campaign creation
* Seating chart design
# Guest App
> Give attendees a mobile experience during your event. Event details, attendee networking, push notifications, and real-time updates from a dedicated mobile app.
Why it matters
## Printed packets get tossed. Email threads get buried. How do you keep event information accessible?
Attendees need schedules, venue details, and real-time updates. But printed materials are disposable. Email chains get lost in inboxes.
How Gatsby helps
### Your Event, Their Pocket
Schedules, documents, venue info. One app. Always current. No paper packets that get tossed.
### Push Notifications That Land
Bus leaving in five minutes? Send updates that actually reach attendees instantly on their lock screen.
The Guest App is a limited-release, premium add-on. Gatsby enables it for your organization first; email us to request access:
Email copied to clipboard
## What the Guest App Does
[Section titled “What the Guest App Does”](#what-the-guest-app-does)
Printed event packets get tossed. Email chains get buried. Text messages feel unprofessional.
Your guests need event information accessible. But the tools you have feel either disposable or invasive.
The guest app puts your event in their pocket. Not a generic conference app. Your event, your content, your guest list.
Guests download the app (iOS and Android), create an account with their invited email address, and instantly see every event they are part of. From there, they access schedules, documents, other guests, and real-time updates from you.
What Guests Get Access To+
* **Event details and schedules:** Always current. Change something and everyone sees it.
* **Documents:** Agendas, menus, speaker bios, venue maps.
* **Guest directory:** See who else is coming. Photos, company info, bios, and connect with other guests.
* **Push notifications:** Real-time updates during the event.
* **QR code sharing:** Exchange contact info without business cards.
* **Self check-in:** Walk in and check yourself in. No line required.
How It Differs from Email or Printed Materials+
The app is live.
Change the breakout room? Everyone sees it instantly. Send a notification? It appears on their lock screen.
Printed materials are fixed the moment you print them. Email threads get lost. The app stays current.
The Digital Concierge Use Case+
For relationship-driven events, the guest app replaces the printed packet of bios and agendas.
Partners can check guest photos and company info before conversations. A quick glance before walking into a dinner. Discreet, professional, always available.
No more “who is that?” moments.
## Getting Guests Into the App
[Section titled “Getting Guests Into the App”](#getting-guests-into-the-app)
Here is the reality: guests need to take two steps before they can use the app. Download it. Create an account.
Neither happens automatically. Your communication strategy determines whether five guests use it or five hundred.
### Guest Setup Steps
[Section titled “Guest Setup Steps”](#guest-setup-steps)
Two steps for guests: download the app and create an account with the email you invited them with.
Step 1: Download the App+
Available on iOS (App Store) and Android (Google Play).
Search “Gatsby Guest” or use the direct links in your communications.
[](https://apps.apple.com/us/app/gatsby-guest/id6504500636)[](https://play.google.com/store/apps/details?id=com.gatsbyevents.gatsbyguest.app)
Step 2: Create an Account+
Guests register using the email address on your guest list. This is how the app knows which events to show them.
They can add additional email addresses to their account later if needed.
What Happens After Login+
Guests see all events they are invited to across any organizers using Gatsby.
One login. All their events.
The Email Address Requirement+
Guests must use the email address you invited them with. Different email? They will not see the event.
Remind them in your communications which email to use.
### Driving App Adoption
[Section titled “Driving App Adoption”](#driving-app-adoption)
App adoption requires intentional communication. Start early and repeat the message across channels.
Add to Confirmation Emails+
The moment someone RSVPs, include app download instructions.
They are engaged and ready to act. Capture that momentum.
Send a Dedicated Reminder+
3-5 days before the event, send an email focused on app setup.
Include direct download links for iOS and Android. Make it easy.
Use QR Codes On-Site+
Put app download QR codes on your registration site, in event signage, and at your check-in desk.
Walk-ins can join even if they missed the emails.
Communication Template+
Here is a sample email structure.
```plaintext
Subject: Your app for {eventName} is ready
Hi {firstName},
We've set up an app for {eventName} to keep all the event details at your fingertips.
Download it here:
- iPhone: https://apps.apple.com/us/app/gatsby-guest/id6504500636
- Android: https://play.google.com/store/apps/details?id=com.gatsbyevents.gatsbyguest.app
Sign up with this email address and you'll have instant access to the schedule, speaker information, venue details, and any real-time updates. You can also connect with other guests through the app.
Need help getting set up? Just reply to this email and we'll walk you through it.
```
## Configuring the App for Your Event
[Section titled “Configuring the App for Your Event”](#configuring-the-app-for-your-event)
The guest app is not one-size-fits-all. Some events need full networking features. Others want minimal distraction.
You control what guests see and what they can do.
The Guest App is a limited-release, premium add-on. Reach out to learn more and get it enabled for your organization:
Email copied to clipboard
### Where to Find the Settings
[Section titled “Where to Find the Settings”](#where-to-find-the-settings)
Everything below lives in one place: open your event, go to the **On-Site** tab, and look for the **Guest App** section in the left sidebar. You will see **App Screens**, **Settings**, and **Push Notifications**.
First, Gatsby enables Guest App capability for your event(s) — this is the limited-release step described above. Once that’s done, you (the organizer) configure it for each individual event. On an event where it has not been configured yet, that section shows a single **About** page instead: a summary of what the app does and who to contact to turn it on for that event.
The same **On-Site** tab also holds your **Organizer App** tools: Registration Fields, Badge Designer, and Media Library.
### App Screens
[Section titled “App Screens”](#app-screens)
App Screens are the content tabs guests see. Add documents, images, or external links. Control who sees what.
Content Types+
Choose **Add Screen**, then pick the type:
* **PDF Screen:** Agendas, menus, speaker bios, parking instructions.
* **Image Screen:** Venue maps, seating charts, schedules, floor plans.
* **Website Screen:** Polling tools, auction sites, feedback forms, sponsor pages.
What Each Screen Includes+
* **Title:** What guests see in the app’s Screens list.
* **Description:** Optional line of context under the title.
* **File** (PDF and image screens): Upload the document itself.
* **Link** (website screens): The URL, with a **Test Link** button to check it before guests do.
* **Only show screen if…:** Choose **Add condition** to control who sees this screen.
Conditional Visibility+
Show different content to different guests.
* **Custom field tags:** VIP-only content for tagged guests.
* **RSVP status:** Show content only to confirmed guests.
* **Survey question answers:** Content based on their selections.
Platinum sponsors see the VIP reception details. Everyone else does not.
Real-Time Updates+
Changed the breakout room location? Update the screen and everyone sees it instantly.
The app reflects current reality. Not whatever you printed yesterday.
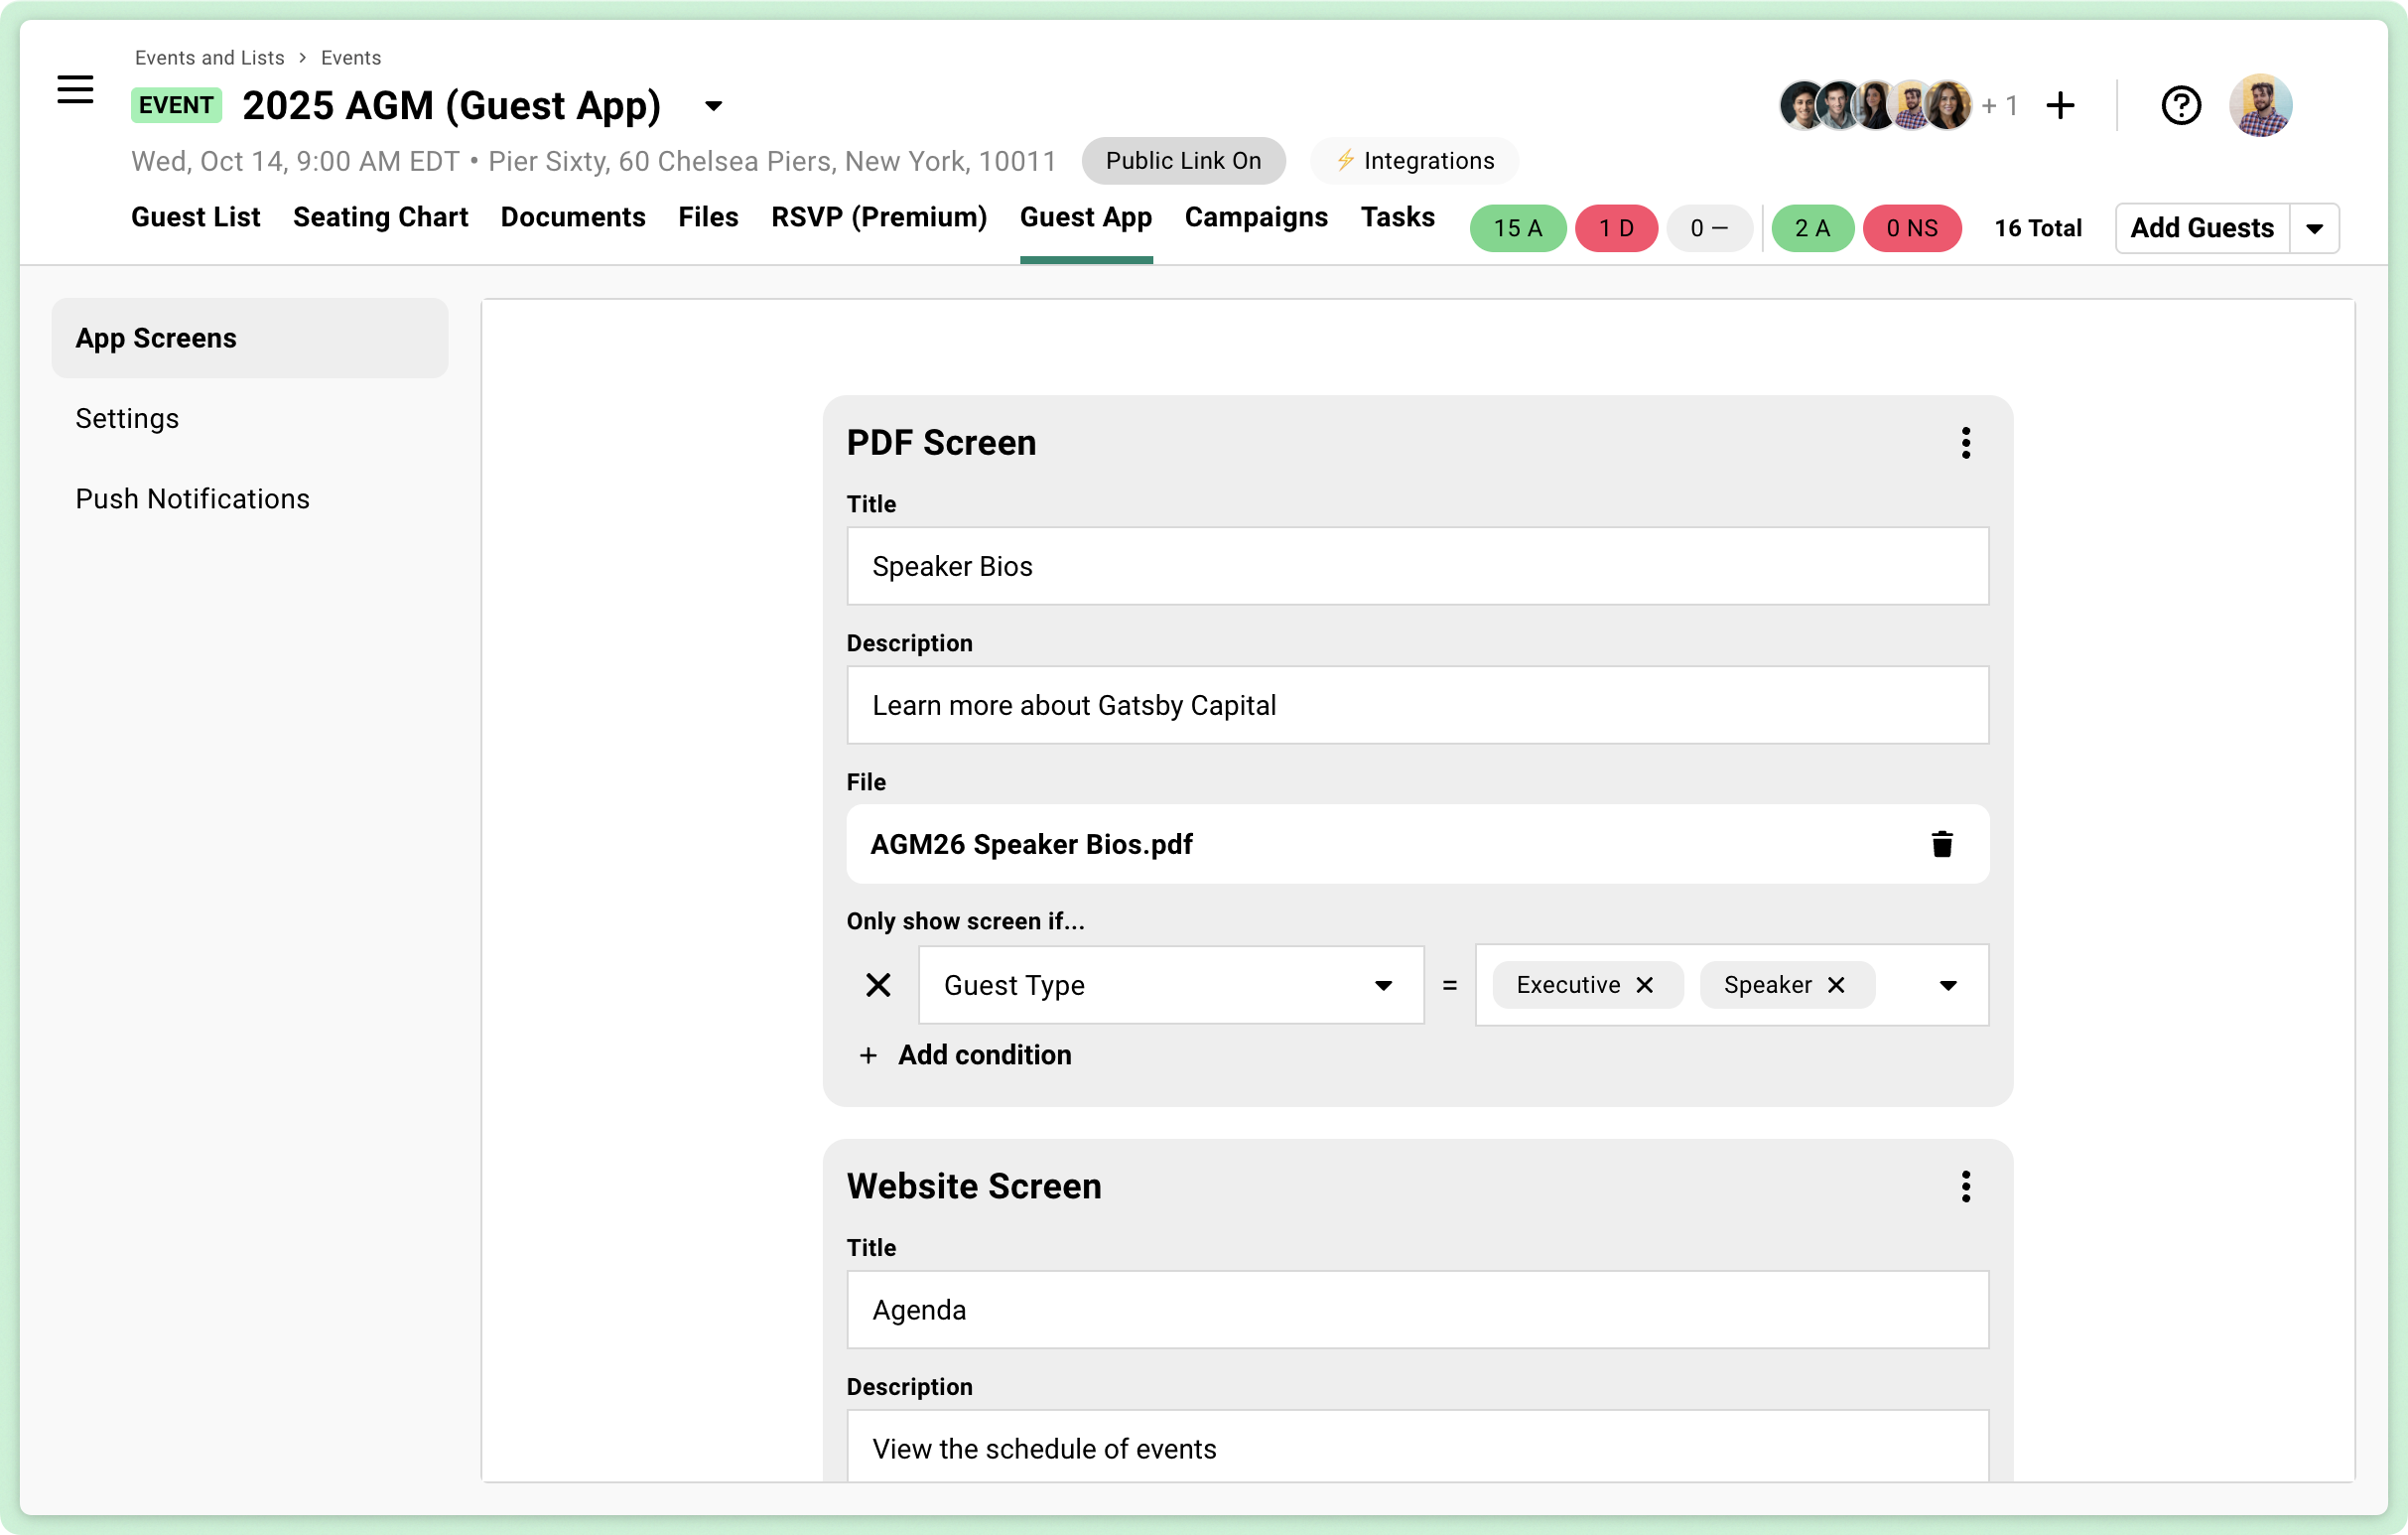
### App Settings
[Section titled “App Settings”](#app-settings)
Toggle features on or off depending on what your event needs. Display settings, check-in options, and networking controls.
Display Settings+
Five toggles under **Display**:
* **Show Date/Time:** Display the event schedule.
* **Show Location:** Display the venue address.
* **Show QR Code:** Guests show their QR code to check in.
* **Hide Home Page Link:** Turn on to remove the guest’s unique link to your RSVP page.
* **Disable Location Linking:** Turn on to show the address as plain text instead of opening the guest’s maps app.
The last two are worded as the thing they switch off, so leaving them off is what keeps the link and the maps handoff available.
Self Check-In+
Under **Check In**, turn on **Allow guests to check themselves in**.
No line. No staff required. Useful for casual arrivals or events without a formal check-in desk.
Guest Profiles+
Show guest information you have collected. Name, company, bio, custom fields. Anyone with access to the guest directory (see Guest List Visibility below) can see the fields you mark visible here — this isn’t limited to connection-request recipients.
Use **Visible Custom Fields** to pick which ones display. Guests can update their own profile via a survey form you create.
Guest List Visibility+
**Hide Guest List** turns the guest directory off entirely.
Left off, guests can see who else is coming. Essential for networking events. Optional for private gatherings.
Connection Requests+
Turn on **Enable Guest Connection Requests** to let guests request introductions to other guests. Two modes.
***
**Through organizer** (leave **Allow Connection Requests to be sent directly to guests** off)
You act as middleman. The request email comes to you. You decide whether to make the introduction.
***
**Direct to guest** (turn that same setting on)
Request goes straight to the other guest. They decide whether to respond.
***
Track all requests in the **Guest Connection Requests** column on your guest list.
Request Limits+
**Set maximum connection requests per guest** caps how many each guest can send.
Prevents one person from spamming the entire list.
Opt-Out Option+
Add names to **Opt Out of Networking** to keep specific guests off the networking list entirely.
Useful for VIPs who prefer privacy. They remain in the event. They just do not appear in the directory.
QR Code Sharing+
Beyond connection requests, guests generate personal QR codes other guests can scan.
Scanning shares LinkedIn profile, email address, or company website — only the fields the guest has added to their own profile, and only with the guest who scans the code directly.
The business card replacement. Perfect for those “let me get your card” moments when nobody carries business cards anymore.
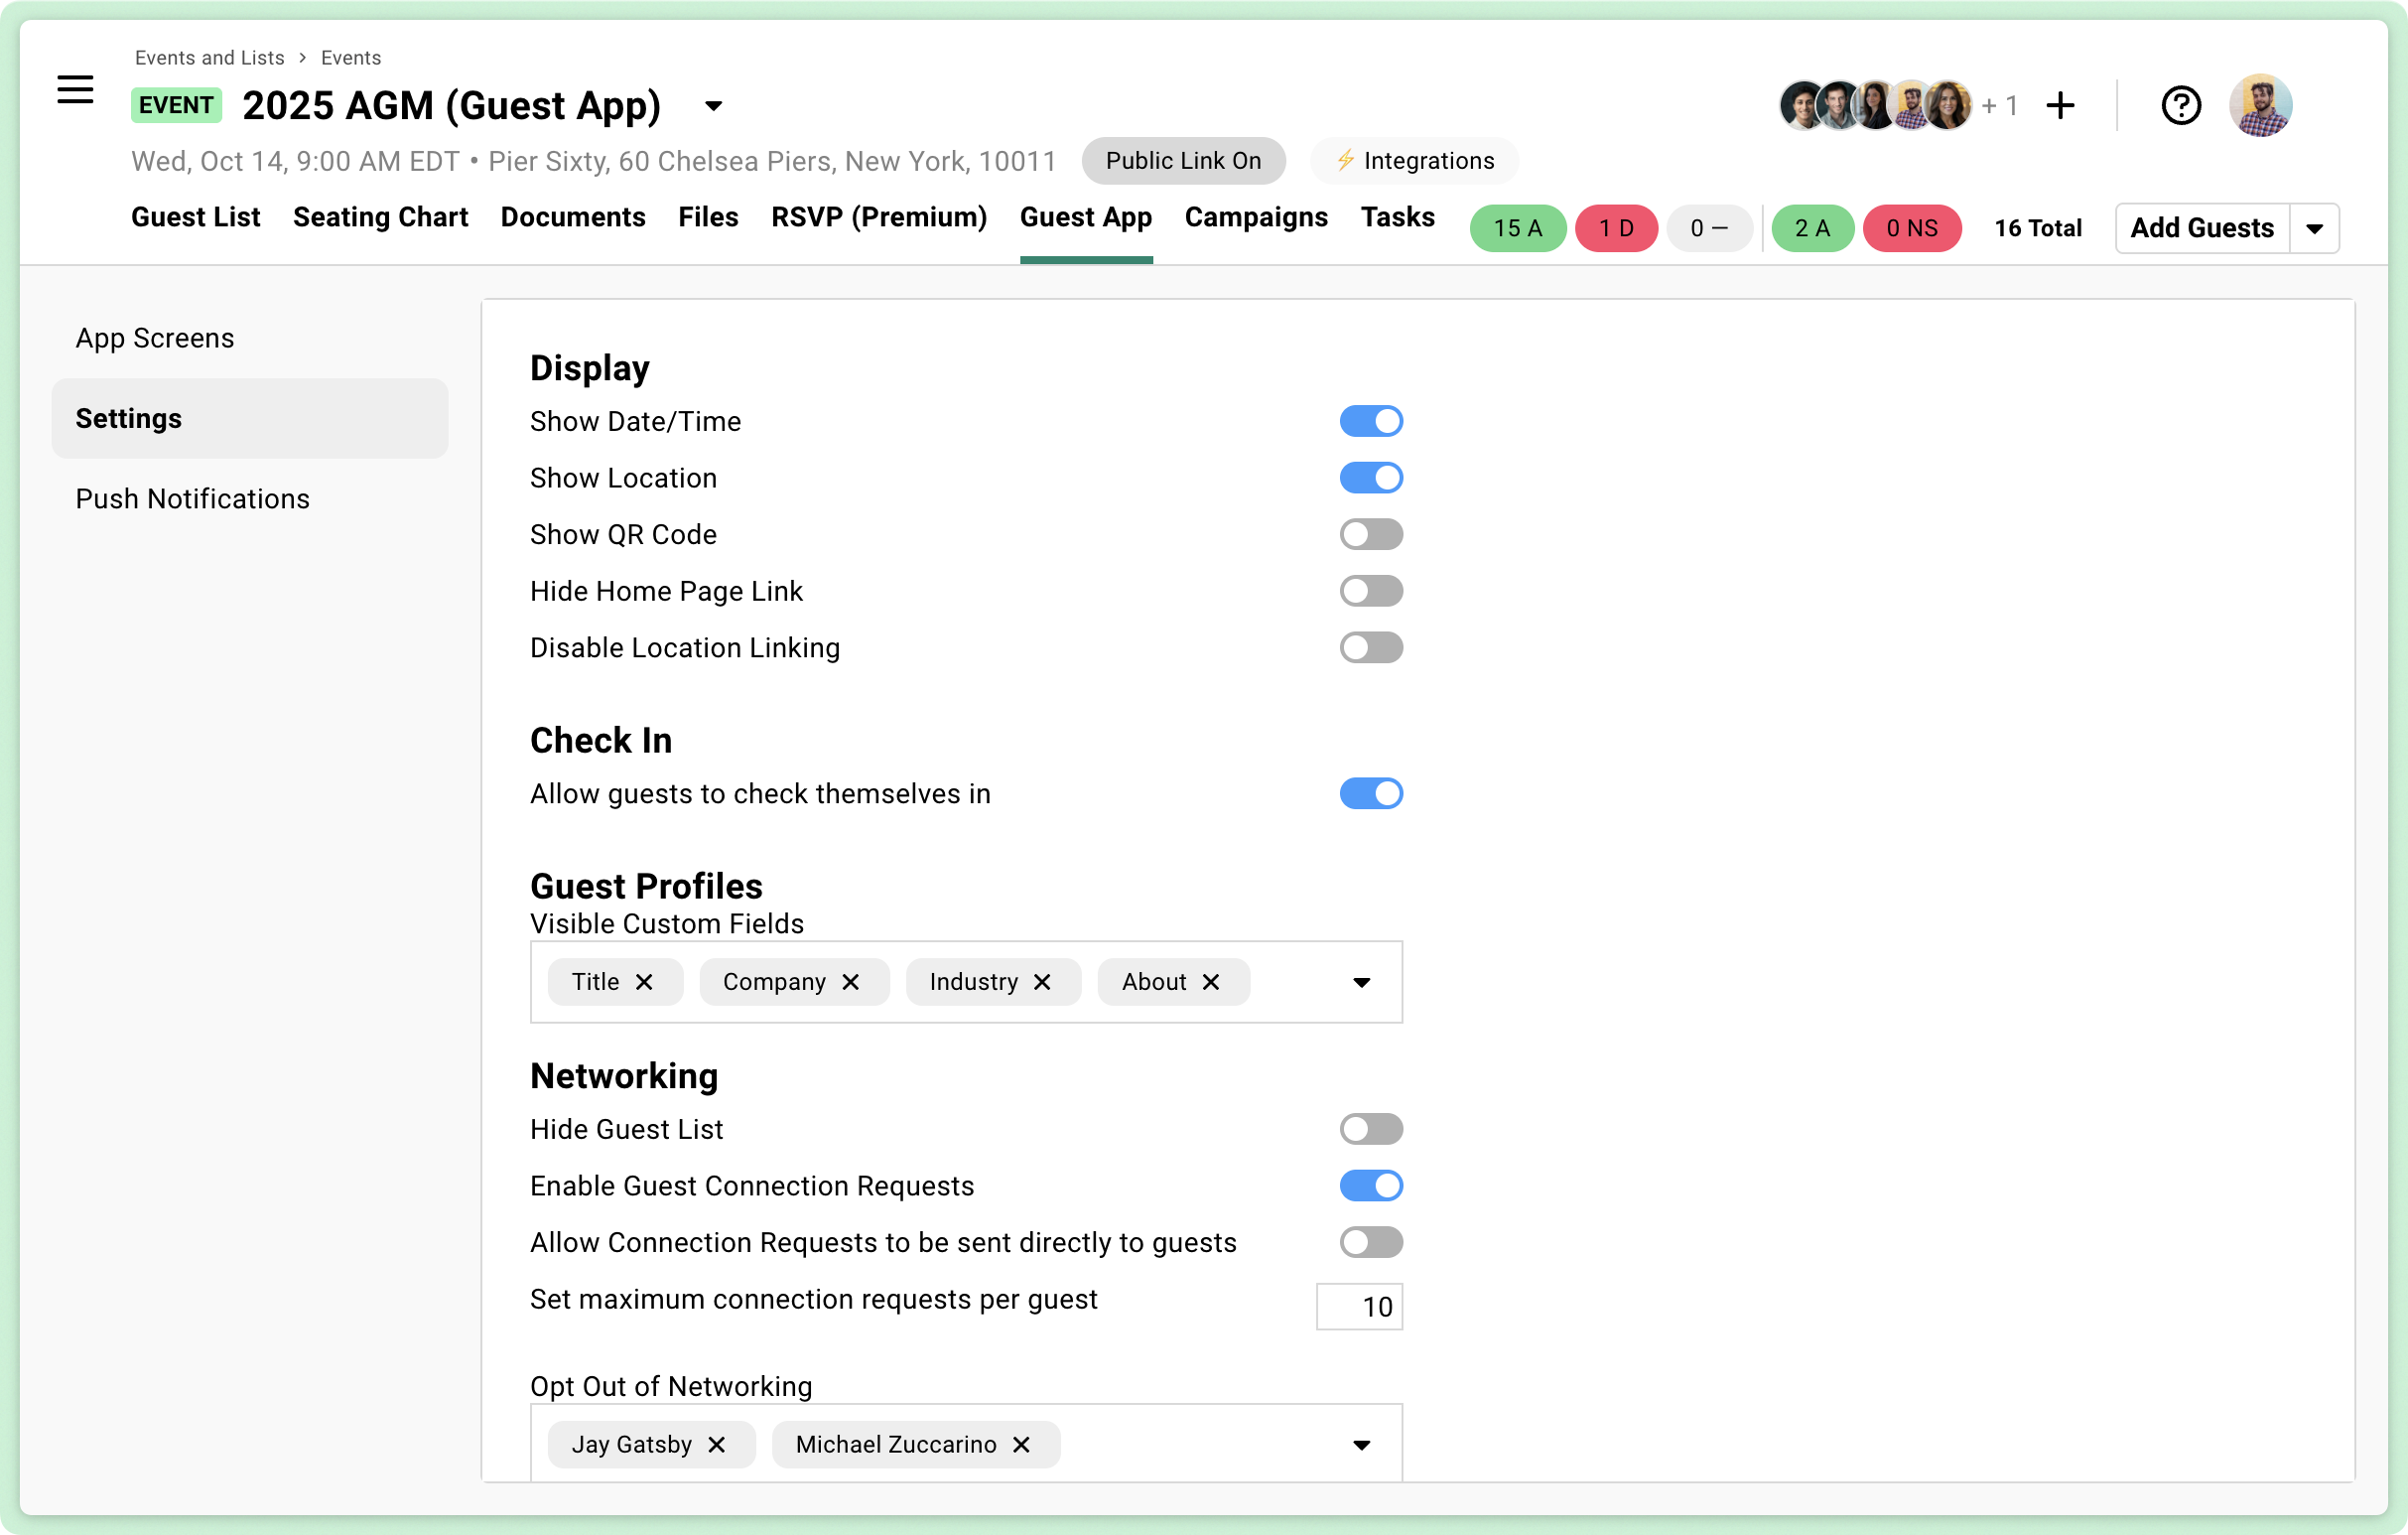
### Push Notifications
[Section titled “Push Notifications”](#push-notifications)
Send instant updates to guests during your event. Title, message, target audience. Track who viewed it.
Creating a Notification+
1. Add a title.
2. Write your message. Keep it short. Push notifications are glances, not essays.
3. Choose your audience. All guests by default, or exclude specific guests.
4. Send.
Targeting Specific Guests+
Send to all guests by default.
Exclude specific guests if the message does not apply to them. VIP dinner instructions? Exclude everyone not on the VIP list.
Tracking Engagement+
See who has viewed each notification.
Know whether your message landed.
When to Use Push Notifications+
Time-sensitive, actionable information.
* “Dinner service starting in Ballroom B.”
* “Keynote delayed 15 minutes.”
* “Silent auction closing in 10 minutes.”
* “Valet line is long, consider rideshare.”
* “New poll available.”
How Many Is Too Many+
3-5 notifications during an event is reasonable.
More than that and guests start ignoring them. Save push for what matters.
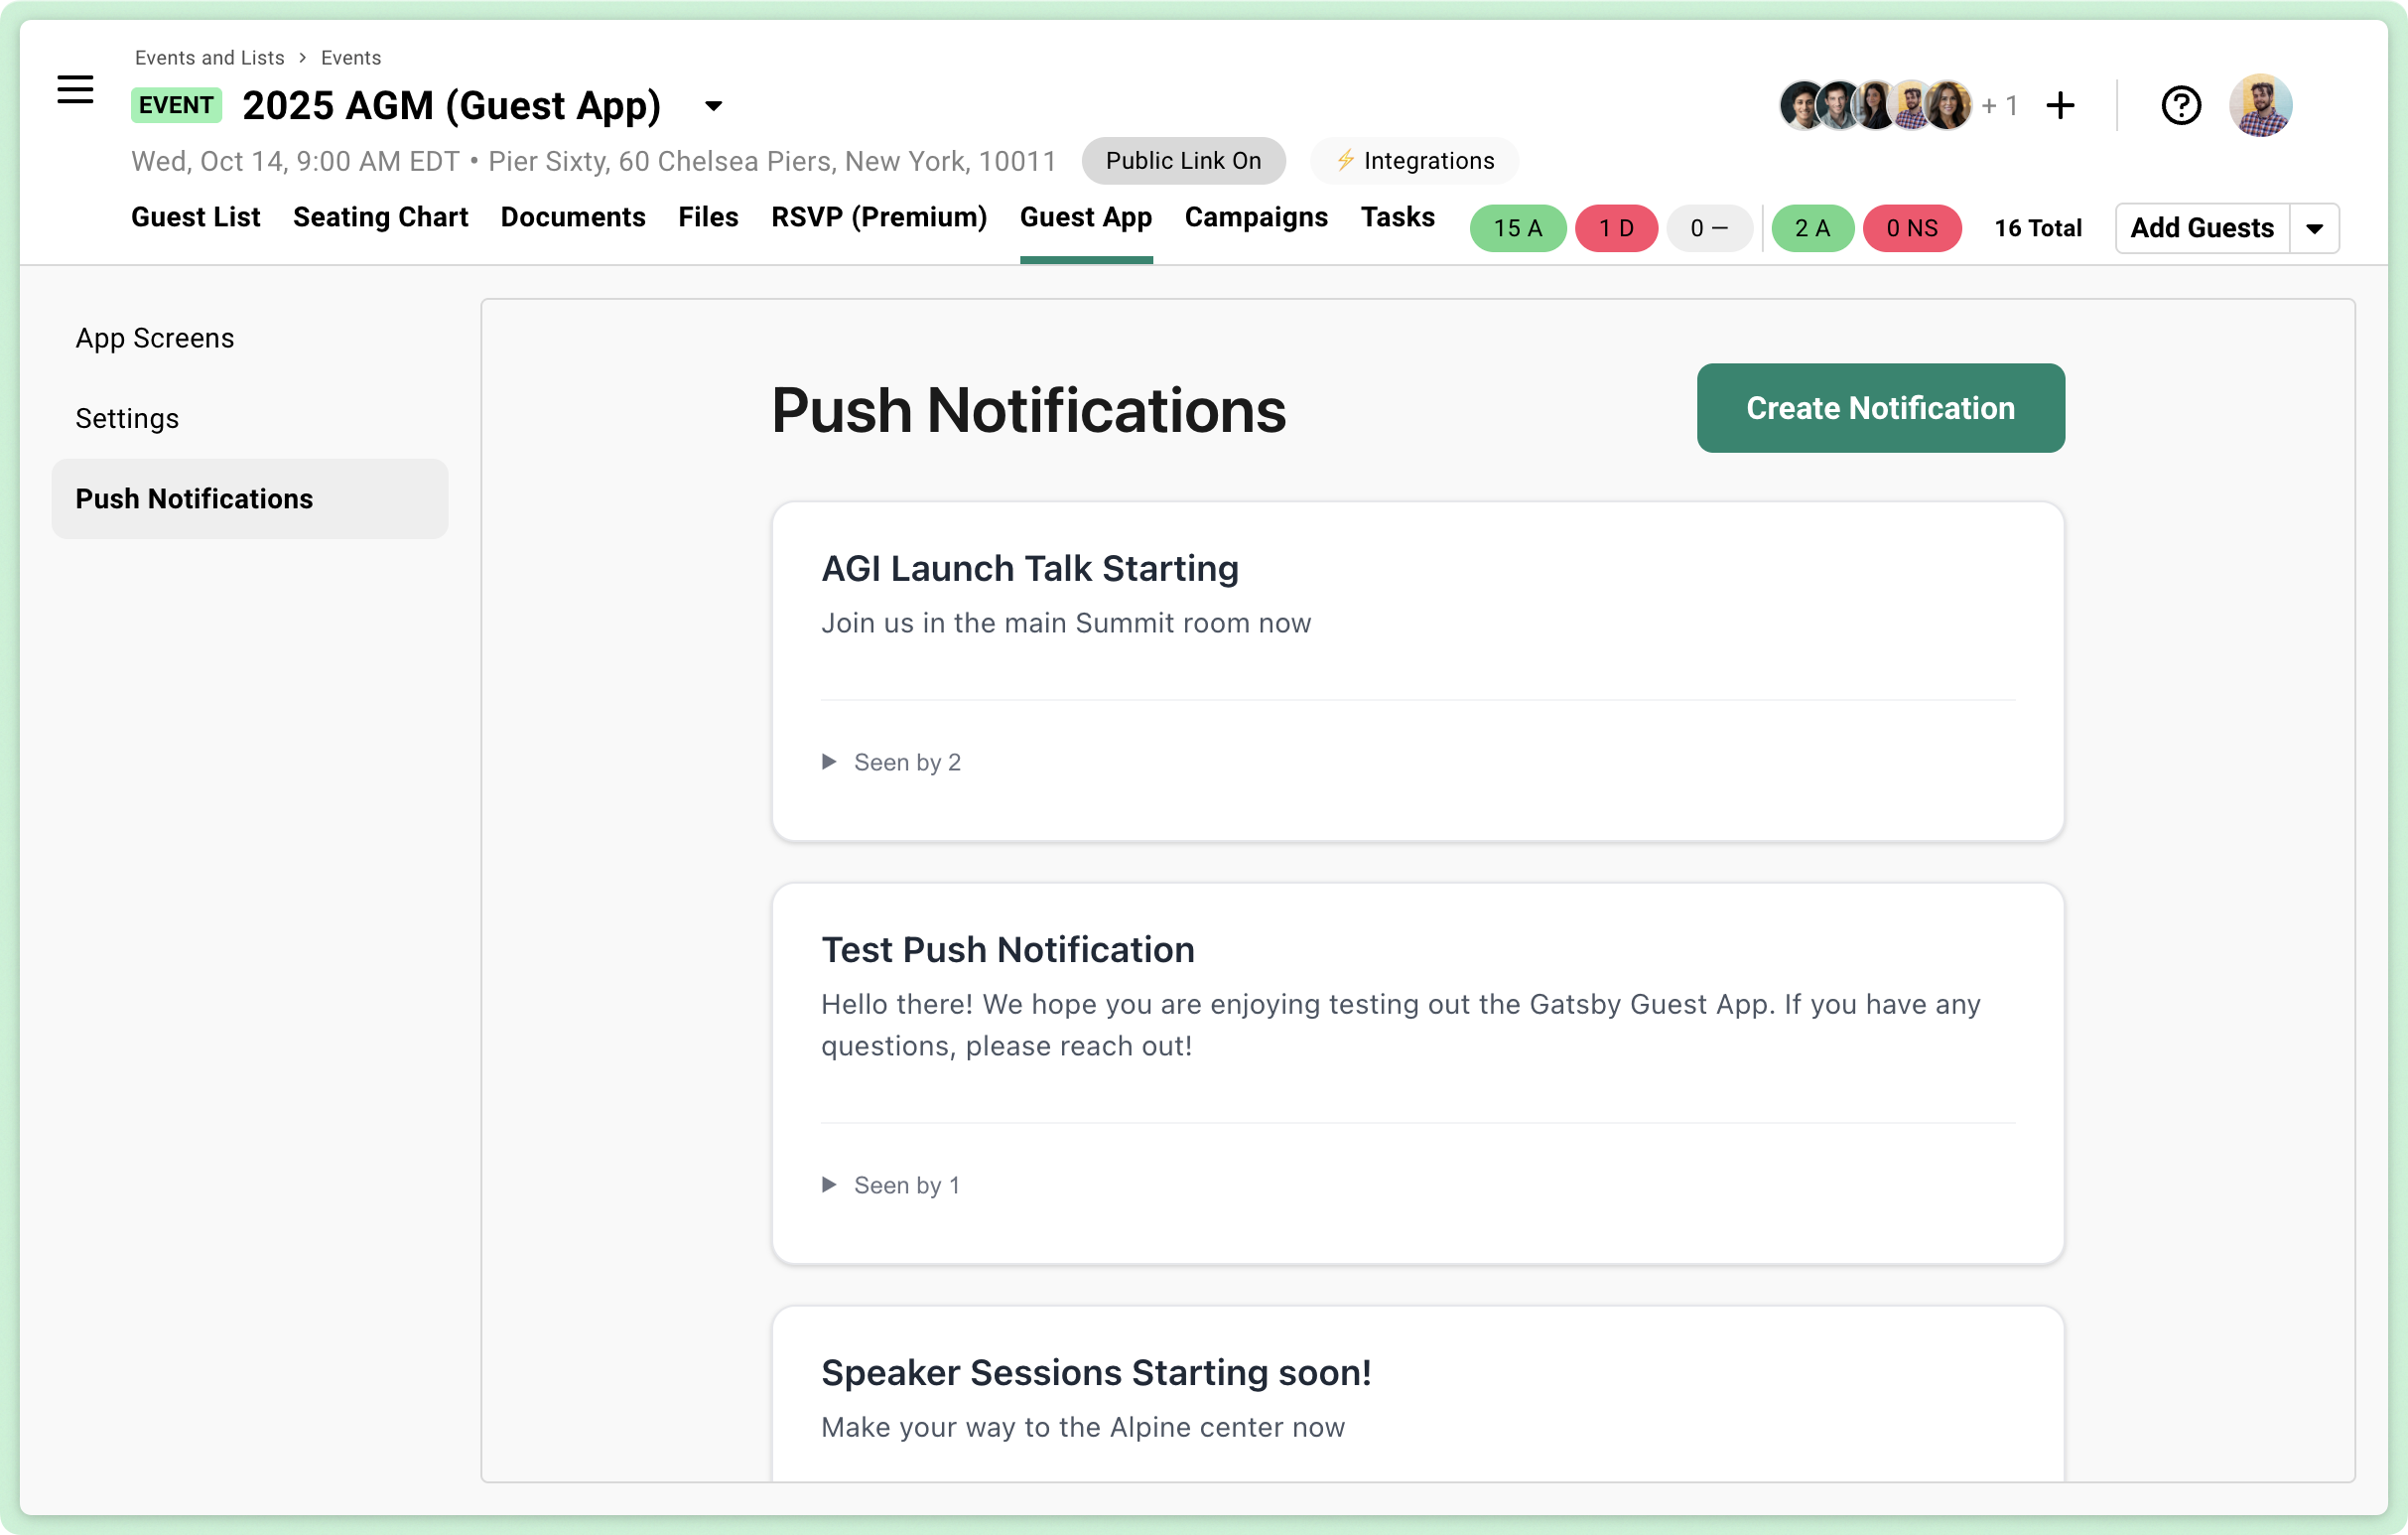
## Who Uses the Guest App (And How)
[Section titled “Who Uses the Guest App (And How)”](#who-uses-the-guest-app-and-how)
Different events need different app configurations. A B2B conference wants data on guest behavior. A private dinner wants limited guest information. A logistics-heavy event needs real-time broadcast capability.
Same app. Different priorities.
The guest app adapts to your event type. Here is how different teams use it.
Data-Driven Event Teams+
Use the app to track engagement.
Which breakout sessions are guests adding to their schedules? That is buying signal data. Push notifications drive traffic to key moments.
The app closes the visibility gap once guests walk in the door.
Relationship-Focused Firms+
Use the app as a digital briefing book.
The guest directory with photos and bios lets partners refresh their memory before conversations. No more “who is that?” moments.
Minimalist configuration. High-quality execution.
Curator and Membership Organizations+
Use the app for the guest directory and document storage.
Members see who else is in the room. Post-event, the app houses artifacts and documents from the gathering.
Privacy controls let high-net-worth members choose what contact info is visible.
Logistics-Heavy Events+
Use push notifications as a broadcast system.
“The bus to the testing site is leaving in 5 minutes.” Real-time coordination for tight timelines.
Essential when you need to move people quickly.
## Tips for Success
[Section titled “Tips for Success”](#tips-for-success)
A few practices separate smooth app rollouts from frustrated guests and underutilized tools.
Test Everything Yourself+
Add yourself as a guest. Download the app. Go through the full experience.
Find problems before your guests do.
Start Early+
Give guests 1-2 weeks to download and set up the app.
Last-minute instructions get ignored.
Train Your Team+
Make sure staff knows how QR code check-in works from the guest side.
They will field questions.
Provide On-Site Support+
Help desk station for guests who need app setup assistance at check-in.
Do not let app confusion slow down your entry flow.
Keep Content Current+
The power is in real-time updates. If your agenda changes, update it.
Stale content defeats the purpose.
## Common Questions
[Section titled “Common Questions”](#common-questions)
Is the Guest App included in my subscription?+
The Guest App is a limited-release, premium add-on. Gatsby enables it for your event(s), then you configure it for each event. Contact Gatsby to learn more and request access.
What if guests use a different email than what is on my list?+
Guests can add alternate email addresses to their account after initial setup. But they must start with the email you invited them with.
A guest sees an Okta sign-in screen instead of the event. What happened?+
They downloaded the wrong app. The black Gatsby app is the Gatsby Organizer App for event teams, and it opens to an organizer sign-in (including Okta). Guests need **Gatsby Guest**, the green app. Have them install Gatsby Guest from the App Store or Google Play, and sign up with the email address you invited them with.
Can I test the guest app before my event?+
Yes. Add yourself to the guest list, then download the app and create an account separate from your Gatsby organizer account.
What about guests without smartphones?+
The guest app is optional. Provide critical event info through other means (printed materials, signage, staff) for those without smartphones or those who prefer not to use the app.
Can guests access multiple events?+
Yes. Once logged in, guests see all events they are invited to across any organizers using Gatsby.
Is there an Android version?+
Yes. The guest app is available on both iOS (App Store) and Android (Google Play).
What if someone does not want to appear in the guest directory?+
Use the opt-out option in settings to remove specific guests from the networking list while keeping them in the event.
# Seating Charts
> Design seating arrangements for dinners, galas, and conferences. Drag-and-drop interface with strategic assignment tools, multiple chart versions, and real-time guest list sync.
Why it matters
## You finalize seating two weeks out. Then RSVPs change daily. How do you avoid midnight rebuilds?
Guest lists shift constantly before events. Cancellations happen. Late RSVPs arrive. In spreadsheets, every change means rebuilding from scratch.
How Gatsby helps
### Strategic Assignment
See dietary restrictions, company stage, and custom fields while you seat. Make informed decisions without spreadsheet lookups.
### Real-Time Sync
RSVPs change. Your chart updates automatically. No version drift. No midnight rebuilds from scratch.
## Building Your Layout
[Section titled “Building Your Layout”](#building-your-layout)
Navigate to the Seating tab within your event. Add tables, configure seat counts, and drag them into position.
Multiple team members can open the same chart at once — edits sync in real time, so whoever is looking at it sees the latest layout.
Adding Tables+
Click **Add Table** to open the configuration dialog.
***
**Table settings:**
* **Name or number:** Label your table for easy reference
* **Shape:** Rectangle or circle
* **Seat count:** Total seats at the table
* **Numbering direction:** Clockwise or counterclockwise
Rectangle tables let you specify seats per side. Circle tables distribute seats evenly around the perimeter.
Duplicating and Positioning+
Drag tables anywhere on the canvas. Position them to match your venue layout.
***
**To duplicate a table:**
Right-click and select **Duplicate Table**. The copy appears with the same configuration. Faster than creating each table from scratch.
Editing Occupied Tables+
Right-click any table to add a chair, even if guests are already seated there. That always works.
Changing a table’s shape or removing seats is different. Once guests are seated, Gatsby can’t edit the table’s shape or reduce its seat count — there’s no way to automatically decide where displaced guests should go.
***
**The workaround: duplicate, edit, then move guests over.**
1. Right-click the table and select **Duplicate Table**. The copy starts empty, regardless of how the original is seated.
2. Right-click the duplicate and select **Edit** to change its shape, seat count, or position — it’s unoccupied, so any change is allowed.
3. Move the seated guests from the original table onto the new one.
4. Once the original table is empty, right-click it and select **Delete Table** to remove it.
Removing Tables+
Right-click any table. Select **Delete Table**.
Seated guests return to the Unseated section automatically.
[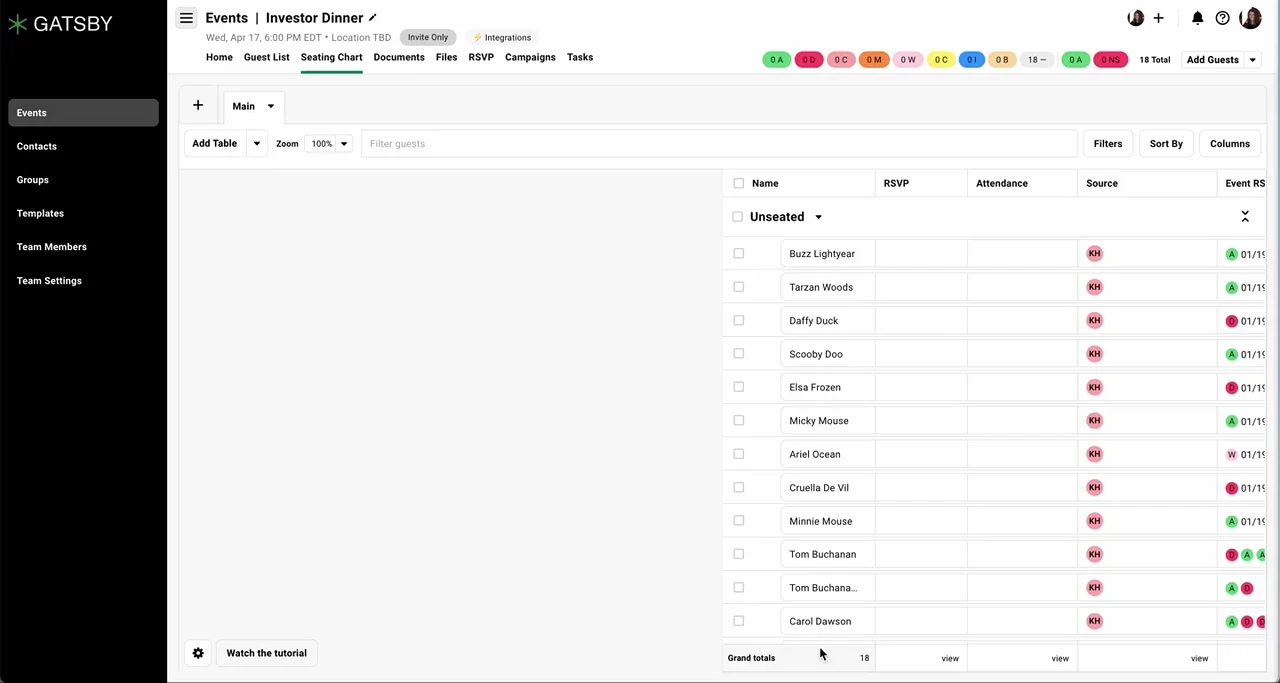](/legacy/seating-chart-01.mp4)
### Canvas Objects
[Section titled “Canvas Objects”](#canvas-objects)
Three object types go beyond standard tables. Each serves different layout and planning needs.
Text Objects+
Labels for your floor plan. Mark the stage, entrances, exits, AV equipment.
Click the dropdown arrow next to **Add Tables**. Select **Add Text**.
***
**Formatting options:**
* **Dashes:** Represent walls or boundaries
* **Rotation:** Angle text to any orientation
* **Highlighting:** Add background color for visibility
Your team and vendors see exactly where everything sits.
Rows of Seats+
Theater-style seating without tables. Use for staff positioning, AV stations, or check-in areas.
No table shape. Just numbered seats in a row. Drag guests to specific positions like any other seat.
[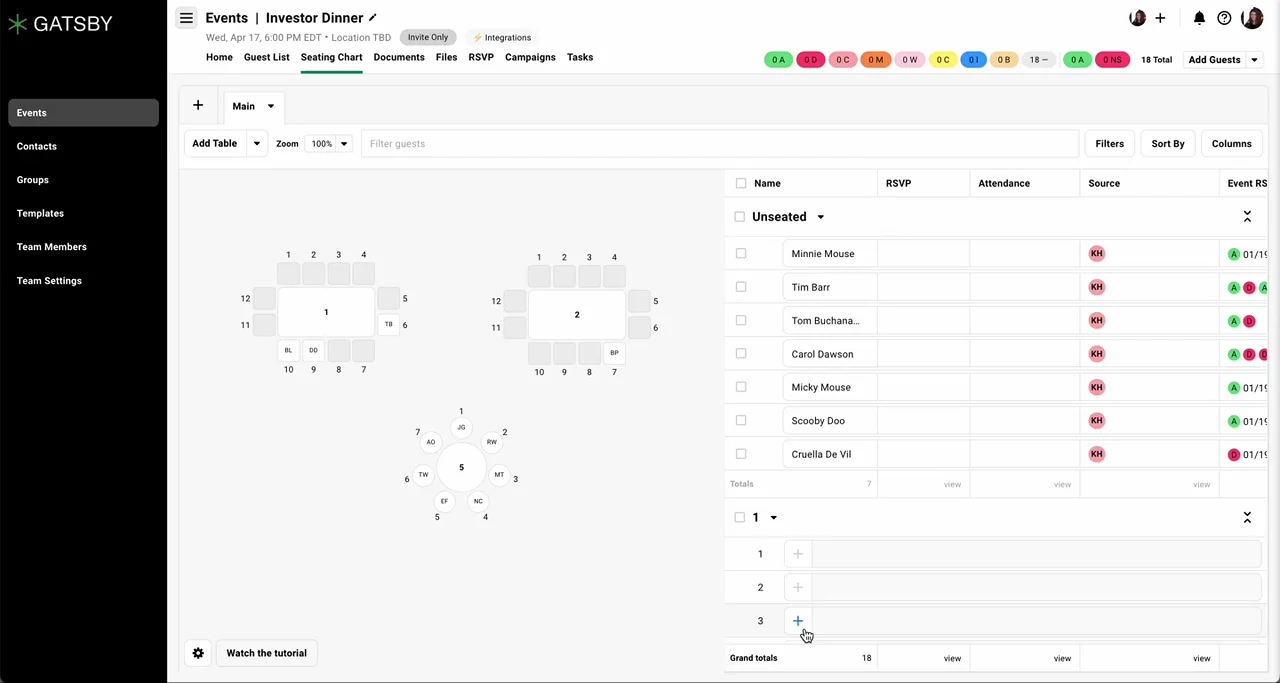](/legacy/seating-chart-05.mp4)
## Working with Guests
[Section titled “Working with Guests”](#working-with-guests)
You have a list of 80 guests and empty seats. Now what?
Your guest list appears on the right side of the screen. Assign guests one at a time or in bulk. Move them between seats. Unseat them when plans change.
### Assigning Guests to Seats
[Section titled “Assigning Guests to Seats”](#assigning-guests-to-seats)
Three ways to get guests into seats. Pick the method that fits your workflow.
Assignment Methods+
**Drag and drop**
Drag individual guest names directly to specific seats. Best for strategic placement where each decision matters.
***
**Bulk selection**
Select multiple guests using checkboxes. Click **Move Guests** from the green menu. Choose your target table. Gatsby fills available seats automatically.
***
**Seat-first**
Double-click an empty seat. Click the plus icon. Search and select your guest. Useful when you know the seat you want to fill but need to find the right person.
Moving and Unseating+
**Move between seats**
Double-click a seated guest. Drag them to their new location.
***
**Unseat individuals**
Double-click their seat. Select **Unseat**. They return to the Unseated section.
***
**Clear entire tables**
Right-click the table and select **Unseat Guests**. Or select guests from the right panel and choose **Unseat Guests** from the green menu.
[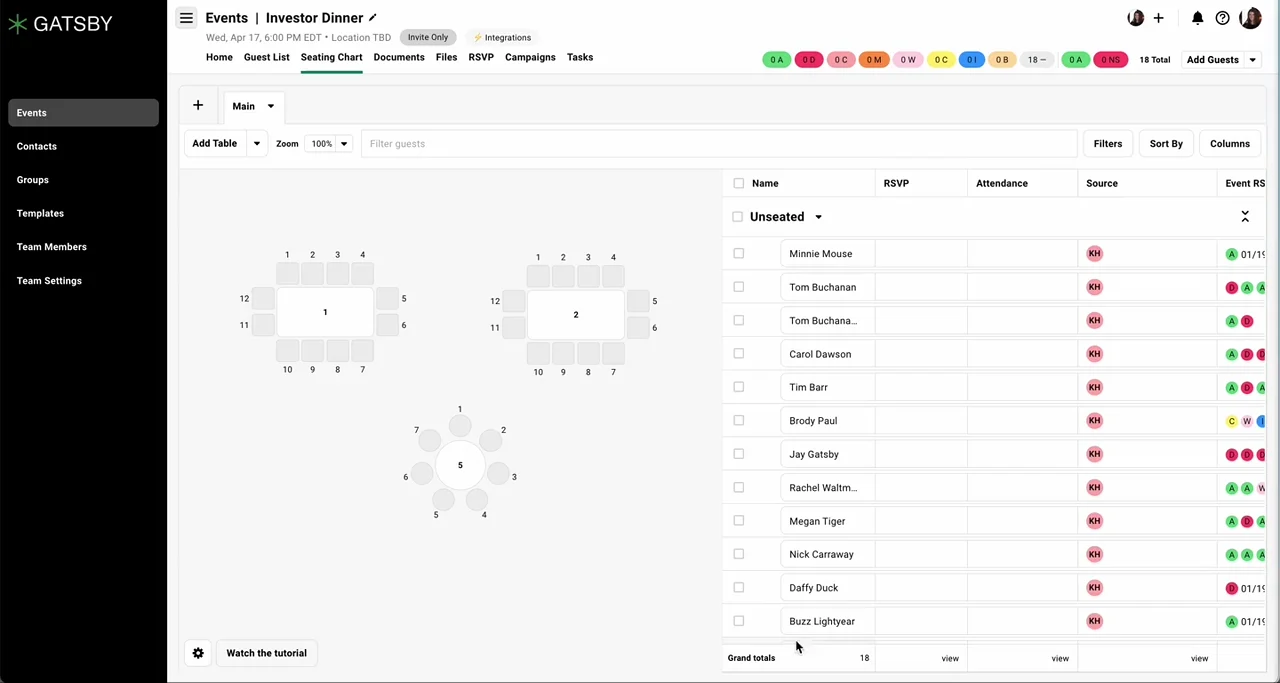](/legacy/seating-chart-02.mp4)
### Using Contact Data While Seating
[Section titled “Using Contact Data While Seating”](#using-contact-data-while-seating)
You know this founder would hit it off with that LP. But their names blur together. You end up guessing or cross-referencing a spreadsheet.
The guest list panel mirrors your full guest list capabilities. Add columns for context. Filter to relevant guests. Sort to group similar people together.
Adding Columns for Context+
Open the Columns drawer. Add any field available on your guest list.
***
**Useful columns for seating:**
* **Dietary restrictions:** Group for efficient plating
* **Company stage:** Seat similar founders together
* **Market segment:** Create natural conversation topics
* **Custom tags:** Whatever context matters for your event
See all relevant info while making seating decisions. No tab-switching. No spreadsheet lookup.
Filtering the Guest List+
Filter by RSVP status. Typically you want Accepted plus Maybe.
Filter by tags. Filter by custom fields. Work only with the guests who matter for this particular chart.
Strategic Seating Examples+
**Create connections**
Seat founders at similar company stages together. They’ll have more to talk about.
***
**Avoid conflicts**
Keep competing funds at different tables. Check company names before finalizing.
***
**Help your caterer**
Group by dietary restriction for efficient plating.
***
**Position your team**
Seat internal staff near the check-in station or at strategic tables throughout the room.
### Real-Time Sync with Guest List
[Section titled “Real-Time Sync with Guest List”](#real-time-sync-with-guest-list)
You finalize seating two weeks out. Then three cancel Thursday. Two more RSVP Friday. In Excel, you’re rebuilding at midnight.
In Gatsby, the chart stays current.
How Late RSVPs Appear+
Guest RSVPs on Friday. They appear in the Unseated section immediately.
Drag them to an open seat. Done.
No export. No import. No version drift.
Handling Cancellations+
Guest cancels. Their RSVP status changes.
If you’re filtering by Accepted, the canceled guest becomes invisible in your filtered view but remains seated. You can’t unseat what you can’t see.
**Solution:** Remove the RSVP filter temporarily. Unseat the guest. Reapply your filter.
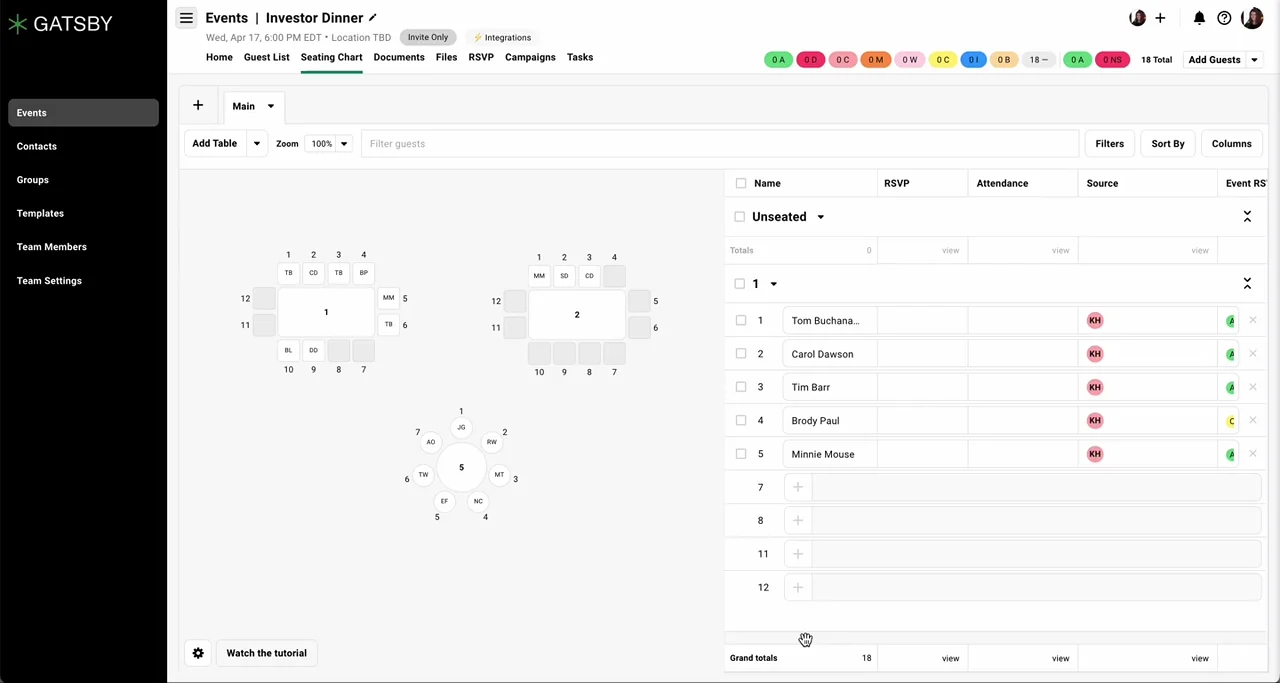
## Advanced Features
[Section titled “Advanced Features”](#advanced-features)
One chart rarely covers everything. Different rooms, different days, or testing layouts before committing.
### Multiple Seating Charts
[Section titled “Multiple Seating Charts”](#multiple-seating-charts)
Create multiple chart tabs within the same event. All charts share the same guest list and RSVP data. Changes to guest info appear across all charts automatically.
Creating Additional Charts+
Click the plus button in the top left corner. Name your chart.
Each tab operates independently but shares the same guest data. No manual updates. No version confusion.
When to Use Multiple Charts+
**Version testing**
Try five-tops versus eight-tops. Compare layouts before committing to a configuration.
***
**Different rooms**
Create a chart for each physical space. Room A, Room B, the outdoor terrace.
***
**Multi-day events**
Retreats and conferences often need different seating each day. Give each day its own chart.
[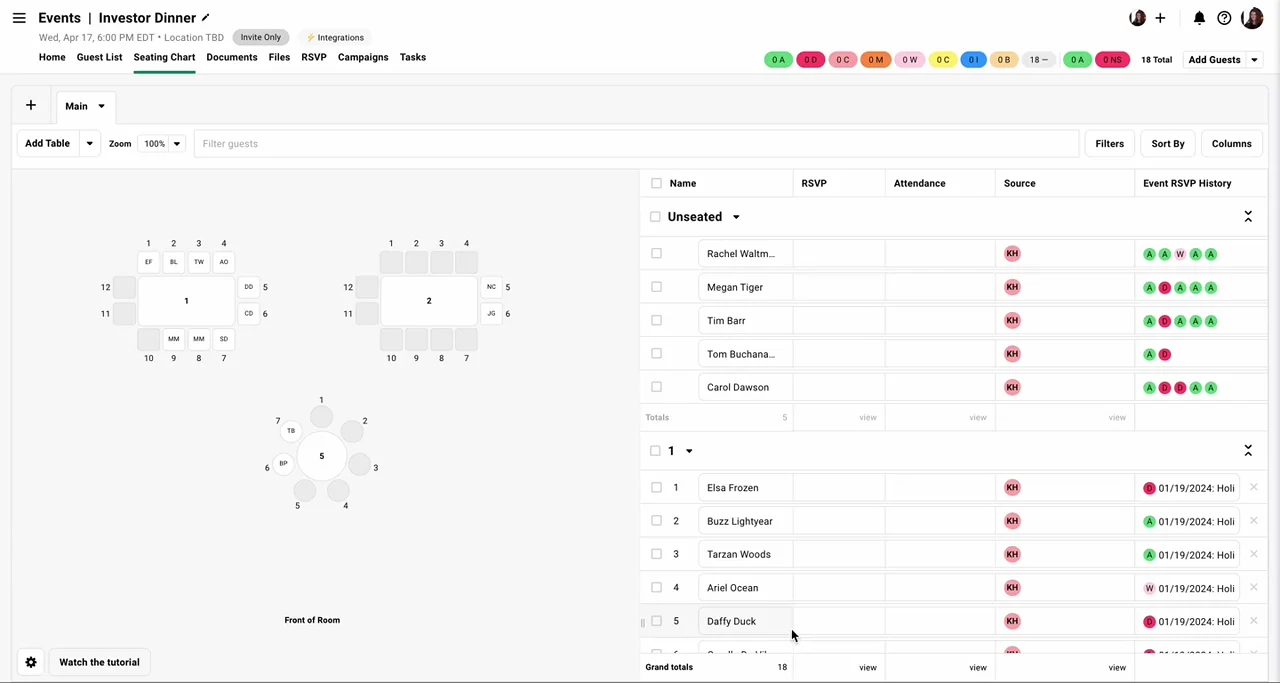](/legacy/seating-chart-07.mp4)
### Color Coding by Guest Data
[Section titled “Color Coding by Guest Data”](#color-coding-by-guest-data)
Assign colors to seat circles based on guest data. Pick a field, select which values to highlight, and each matching seat fills with the corresponding color. Guests who don’t match stay neutral gray. A legend labels what each color represents.
Applying Color Coding+
1. Open the settings panel (gear icon).
2. Select a field: RSVP status, dietary restrictions, or any single-select or multi-select field in the system.
3. Choose which values to highlight.
4. Each selected value gets a color, which you can customize.
***
**One field at a time.** To compare multiple perspectives, duplicate the seating chart and apply different color coding to each copy.
Multi-Value Display+
When a guest matches multiple values for the highlighted field, their seat circle splits to show all of them.
| Values | Display |
| ------ | ------------- |
| Two | Split in half |
| Three | Three bands |
| Four | Quadrants |
If an LP is invested in Fund I, Fund II, and Fund III, their seat shows three distinct color bands.
Past four or five values, the bands get thin and colors become harder to distinguish. Choosing high-contrast colors helps. All colors are fully customizable.
Compatible Fields+
Color coding works with any field that has a defined set of options:
* **Predefined guest fields:** RSVP Status, Dietary Restrictions, etc.
* **Custom contact fields:** Single-select or multi-select
* **Event-specific fields:** Single-select or multi-select
Does not work with text or number fields.
Practical Applications+
**Spot cancellations before the event.**
Color code by RSVP status and highlight “Canceled.” Every seat with a canceled guest lights up. You find the gaps without scanning the guest list line by line and still have time to reseat.
***
**Give your caterer a floor map.**
Color code by dietary restrictions. Servers see which seats need the vegan plate, which need gluten-free. Guests with multiple restrictions show as split seats so nothing gets missed. Export the PDF and send it to your venue contact the morning of.
***
**Check table balance.**
Color code by gender, fund, relationship owner, or any dimension you track. If a table is skewed in one direction, you see it instantly and rebalance before the event.
***
**Validate tier-based seating.**
Teams that classify guests by tier can color code to confirm highest-priority guests ended up at the right tables. Zoom out and you know immediately if something’s off.
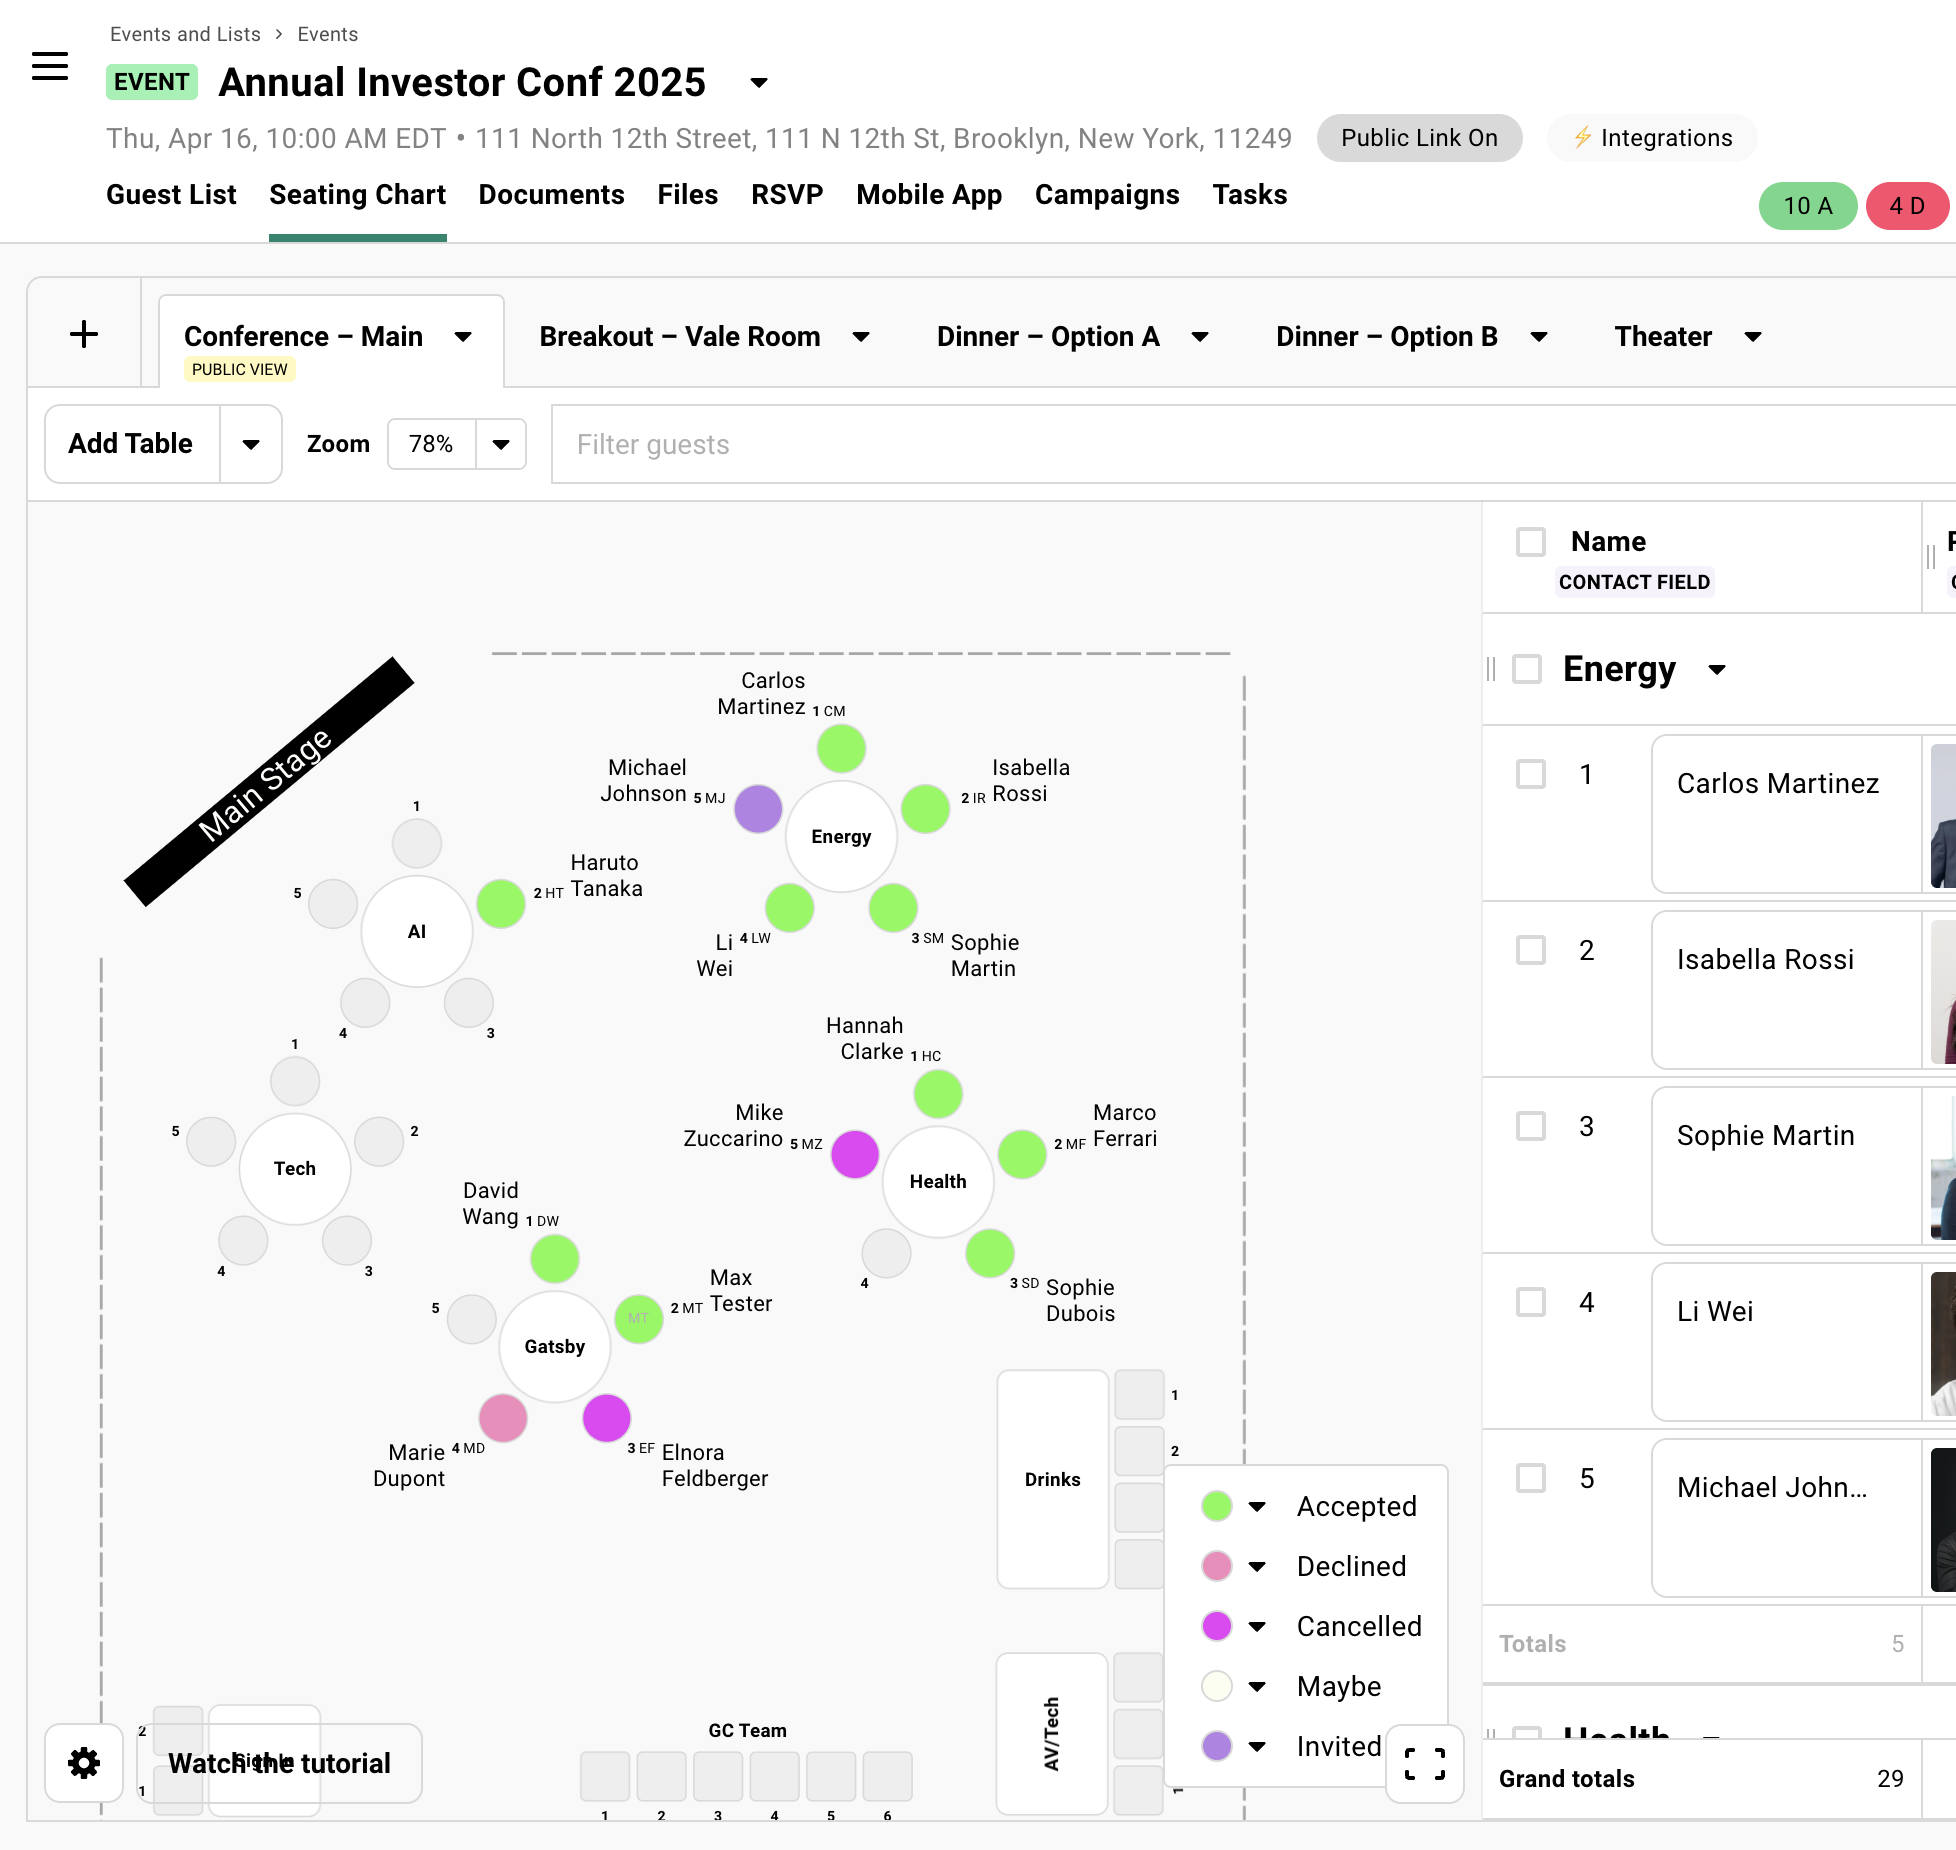
### Display Options
[Section titled “Display Options”](#display-options)
The gear icon in the bottom left corner controls visual settings.
Display Settings Reference+
| Setting | What It Does |
| ------------------------ | -------------------------------------------------------------------- |
| Color coding | Assign colors to seats based on guest data. |
| Show full names on seats | Display guest names directly on the canvas |
| Name size | Set display size for guest names with a number input |
| Vertical name rotation | Rotate all names vertically to reduce overlap at certain zoom levels |
| Show profile photos | Add visual recognition for assigned guests |
| Hide text objects | Clean up the view when labels are distracting |
| Show name cards on hover | See details without cluttering the canvas |
| Lock tables | Prevent accidental moves when working with text objects |
Name size and rotation are global settings. They apply to every name on the chart, not individual labels.
[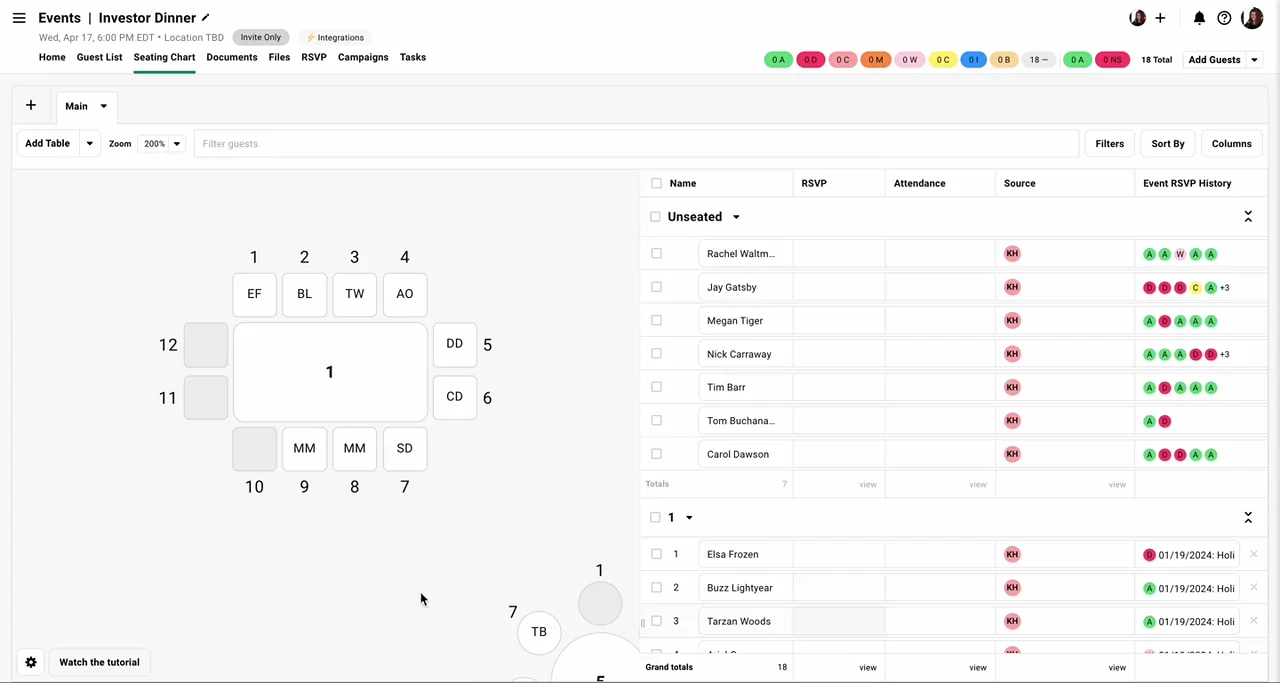](/legacy/seating-chart-06.mp4)
### Exporting and Sharing
[Section titled “Exporting and Sharing”](#exporting-and-sharing)
Two ways to get your seating chart to others. PDF for print. Public links for live access.
Downloading PDF+
Click the three-dot menu in the top right.
***
**Format options:**
* **Floor plan view:** Visual layout of the entire room
* **Table-by-table breakdown:** List format showing who sits where
* **Include guest list:** Add full guest details to the export
Hand your caterer a table breakdown. Give your check-in team a floor plan.
If color coding is active, the colors and legend appear in the PDF.
Enabling Public Links+
1. Click the dropdown arrow next to the tab name.
2. Select **Enable Public Link**.
3. Configure permissions as needed.
***
**Permission options:**
* **Enable field editing:** Let collaborators make changes
* **Password protection:** Require a password to view
No login required for viewers. Send the link to anyone who needs it.
Color coding and the legend reflect in the shared view automatically.
A public link is live, not a snapshot. If you or a collaborator move a guest or a table after sharing the link, anyone already viewing it sees the change too. Share it once you’re ready for viewers to see edits as they happen — or download a PDF instead if you need a fixed version for a specific moment.
When to Use Each+
**Use PDF for:**
* Caterers and kitchen staff
* Venue coordinators
* Printed briefing materials
* Anyone who needs a static snapshot
***
**Use public links for:**
* Co-hosts who need live updates
* Day-of team briefings where changes happen in real time
* Sponsors who want to see their table assignments
## Creative Use Cases
[Section titled “Creative Use Cases”](#creative-use-cases)
Seating charts sound like dinner tables. But what about retreat cabins, golf tee times, or hotel room blocks?
The seating chart is an assignment tool. It maps guests to slots. Any slots.
### Beyond Traditional Tables
[Section titled “Beyond Traditional Tables”](#beyond-traditional-tables)
Drag-drop assignment. Bulk operations. Contact data columns. PDF export. All of it works regardless of what the “table” actually represents.
Hotel Room Blocks+
Create “tables” representing room blocks. Assign guests to rooms.
Track who has accommodations. Export for hotel coordination. Update assignments when guests change plans.
Golf Tournaments+
Create 18 “tables” for starting holes. Assign foursomes to each.
Handle day-of changes as people arrive. Print starting positions on badges using the badge printing integration.
Retreat Cabins+
Create objects for each cabin. Assign guests.
See everyone at a glance. Share with retreat coordinators via public link. Update assignments when roommate preferences change.
Conference Breakout Rooms+
Track room assignments for breakout sessions.
Create a chart per session. Or create a chart per room showing who’s assigned to each throughout the day.
### Integration with Other Features
[Section titled “Integration with Other Features”](#integration-with-other-features)
Seating data flows to other parts of Gatsby. Table and seat assignments appear on badges and in guest list views.
Printing Seating on Badges+
Table and seat numbers can print on check-in badges.
Useful for assigned seating events. Also works for golf starting positions or any scenario where guests need to know their assignment.
See [Event Check-In](/platform/day-of-event/event-check-in/) for badge printing details.
Guest List Integration+
**Filter by table assignment**
On your main guest list, filter by seating chart assignment. Create views organized by table for day-of briefings.
***
**Add seating columns**
Add seating chart data as columns on your guest list. See table assignments without leaving the guest list view.
***
**Sort by table**
Sort your guest list by table number. Export with assignments included.
## Troubleshooting
[Section titled “Troubleshooting”](#troubleshooting)
Most seating chart issues stem from filters hiding guests.
Cannot Unseat a Canceled Guest+
Your filter shows only Accepted guests. A guest cancels. Their status changes to Canceled.
They disappear from your filtered view but remain seated. You can’t unseat what you can’t see.
**Fix:** Remove the RSVP filter temporarily. Unseat the guest. Reapply your filter.
Guest Not Showing in Unseated List+
Check your filters. The guest may have an RSVP status that your filter excludes.
Clear all filters to see everyone. Then reapply once you’ve found the missing guest.
## Common Questions
[Section titled “Common Questions”](#common-questions)
Can I have different seating charts for different sessions of the same event?+
Yes. Create a separate chart tab for each session. All tabs share the same guest list but maintain independent assignments.
Can I use the seating chart for things other than dinner tables?+
Absolutely. Teams use it for hotel room blocks, golf starting holes, retreat cabin assignments, and conference breakout rooms. Any scenario where you assign people to positions works with the same drag-and-drop interface.
How do I handle last-minute RSVPs on the day of the event?+
New RSVPs appear in the Unseated section automatically. Open the seating chart and drag them to an available seat. The change syncs immediately to anyone viewing a public link.
Can my caterer see dietary restrictions on the seating chart?+
Two options. Share a public link with dietary restriction columns visible in the guest list panel. Or color code the chart by dietary restrictions so each seat is visually marked, then export the PDF as a floor map for service staff.
Why can I not unseat a guest who canceled?+
Your filter is hiding them. When a guest cancels, their RSVP status changes. If you’re filtering to Accepted guests only, the canceled guest becomes invisible but stays seated. Remove the filter, unseat them, then reapply.
Can I share the seating chart?+
Yes. Two options. Download a PDF for printed materials. Or enable a public link for live, real-time access. No login required for viewers.
Can I color code by multiple fields at the same time?+
No. One field at a time. To compare different perspectives, duplicate the seating chart and apply different color coding to each copy. Duplicated charts are independent, so finalize your seating before creating copies.
What do split-color seats mean?+
The guest matches multiple values for the field you’re highlighting. Two values split the seat in half. Three show three bands. Four become quadrants. This comes up most often with fund assignments or multi-select custom fields.
Can I change a table's shape or seat count after guests are already seated?+
Adding a seat works anytime — right-click the table to add a chair, occupied or not.
Changing the shape or removing seats doesn’t, because Gatsby has no way to automatically decide where displaced guests should go. Duplicate the table instead (the copy starts empty), edit the duplicate freely, then move the seated guests onto it before deleting the original.
# Campaigns & Invites
> Email campaigns built for 150 carefully chosen recipients, not 50,000. Version history, mail merge, templates, CC/BCC for compliance, and emails that look like they came from Outlook.
## Where to Find Things
[Section titled “Where to Find Things”](#where-to-find-things)
The Campaigns tab on any event or list has four sections: **Campaigns** (everything you’ve sent, scheduled, or staged), **Drafts** (in-progress messages, not yet sent), **Templates** (saved starting points, global or event-specific), and **Settings** (sender defaults and tracking options for this event). Open any sent campaign to see its **Guest Overview** — the per-recipient send status covered below.
## The Campaign Editor
[Section titled “The Campaign Editor”](#the-campaign-editor)
Start a new campaign from the Campaigns tab in any event or list.
The Campaigns tab holds both channels. If your organization has the SMS add-on, starting a new campaign asks which one you want — Email or SMS — and each row in the list is labeled with the channel it went out on. Everything on this page is about email; [SMS Campaigns](/platform/email-campaigns/sms-campaigns/) covers the other side.
Campaigns here are correspondence about an event: the invitation, the confirmation, the reminder. Recurring marketing email is a separate area with its own subscribers, sender identity, and opt-out list. See [Newsletters](/platform/newsletters/overview/).
Starting a New Campaign+
1. Click **Create Campaign** from the Campaigns tab.
2. Give it an internal name for tracking.
3. Choose your sender from the dropdown.
4. Select your mode: **Draft** or **Campaign**.
**Draft mode** is faster. Recipients and content appear in the same window. Good for quick sends.
**Campaign mode** is safer. Content is locked separately from recipients, so no one accidentally changes the message while adding people.
Subject Line and Attachments+
Type your subject line in the field at the top.
Click the paperclip icon to add attachments: PDFs, images, documents.
For confidential materials, enable watermarking on PDFs. Each recipient’s copy shows their name.
Advanced Options (Three Dots Menu)+
Click the three dots menu for additional features.
***
**Version History**
View all previous versions. Restore if needed.
***
**Reply-To**
Set where replies go. Can be different from the sender address.
***
**CC/BCC Teammates**
Add team members to every email sent. Useful for compliance or keeping stakeholders informed.
The Reply-To and CC/BCC menus list your Team Members. To use an address that isn’t listed, add it as a team member (it never has to sign in), then refresh the page. See [Sender Settings](/platform/email-campaigns/sender-settings/).
***
**Preview Text**
The snippet that appears in inbox previews.
***
**Load Template**
Start from a saved template instead of blank.
***
**Attach Calendar File**
Add a .ics file to the email.
***
**Attach QR Code**
Attaches a guest-specific QR code image to the email. Each recipient gets their own unique QR as an attached image. It’s one that you can use to check them in at the door. This is an email attachment, not a merge tag; there’s nothing to add to the email body.
***
**Save as Template**
Save this campaign for future reuse.
[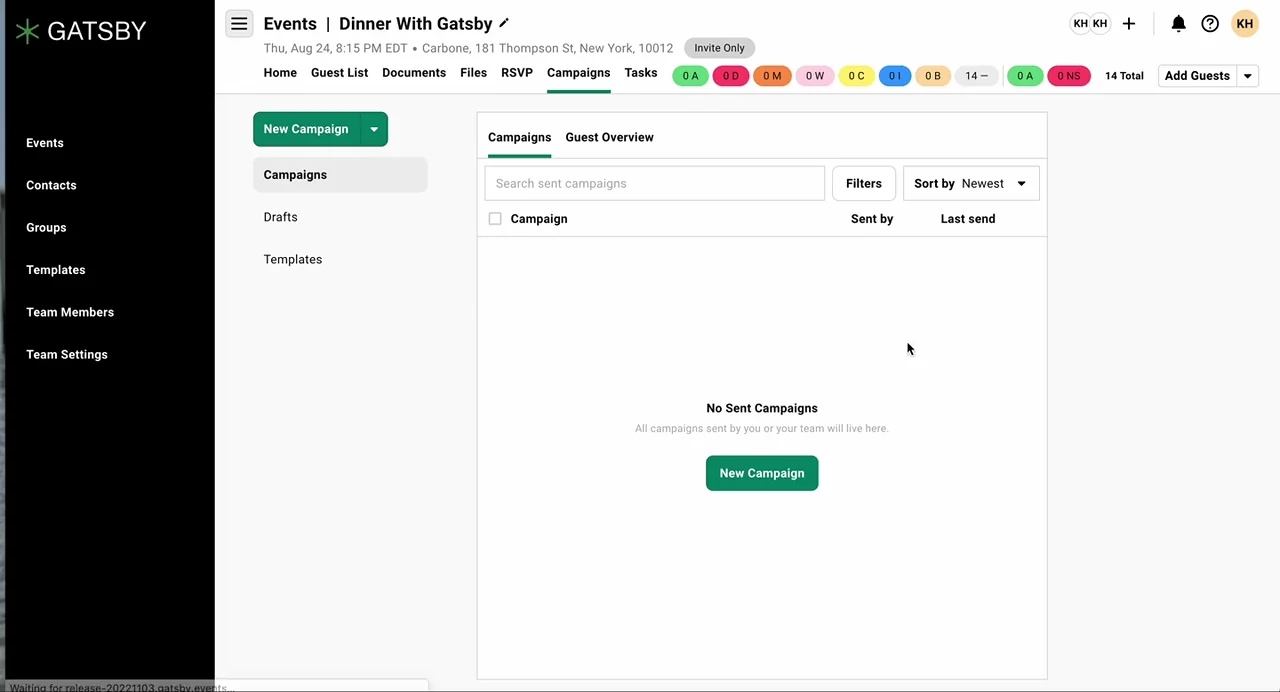](/legacy/sending-your-invite-01.mp4)
### Email Styles
[Section titled “Email Styles”](#email-styles)
Two modes in the bottom-right corner. Basic looks like a regular email. Marketing adds backgrounds and centered layouts.
Basic Style (Recommended)+
Left-aligned text, no background colors, minimal styling. Looks like it came from Gmail or Outlook.
A three-line email with an RSVP link outperforms a designed email for personal invitations. Your recipients get dozens of marketing emails a day. They open the ones that look like they’re from a real person.
Marketing Style+
Inset layout with background colors. Fixed width at 600px.
Better for newsletters or emails with multiple images where you want a polished, designed look. Options include margins, foreground color, and background color. The content sits in a centered container.
### Mail Merge and Personalization
[Section titled “Mail Merge and Personalization”](#mail-merge-and-personalization)
“Dear Member” doesn’t cut it when you know these people by name. But writing 150 individual emails isn’t realistic either.
Click the **+** icon in the bottom left to insert merge fields. Each email becomes unique for each recipient.
Name and Standard Fields+
The basics for personalized greetings.
* **First Name:** Their first name
* **Last Name:** Their last name
Start with “Hi \[First Name]” instead of “Dear Guest.”
RSVP Links+
Each guest gets a unique link. Their information pre-fills when they click. Non-transferable.
We recommend adding this line: “This is a non-transferable invite for \[First Name] \[Last Name].”
That sets expectations. If Thomas shares his link with Sarah, Sarah registers as Thomas. The explicit language prevents confusion.
For transferable invites, include the public link instead. Anyone can register. No pre-fill.
Custom Field Merge (Deep Personalization)+
Create a custom field called “Personal Notes.” Add details like “Hope to catch up on your son’s college search” or “Looking forward to discussing the Series B.”
The recipient sees “Hope to catch up on your son’s college search” and assumes you wrote that line just for them. You need the notes in your contact records first, but the payoff is an email that reads like you sat down and typed it.
Event Details+
Pull event information automatically.
* **Date:** The event date
* **Location:** The event address
* **Unsubscribe Link:** Not required, but follow local laws
* **Add to Calendar Link:** Usually unnecessary. See FAQ for why.
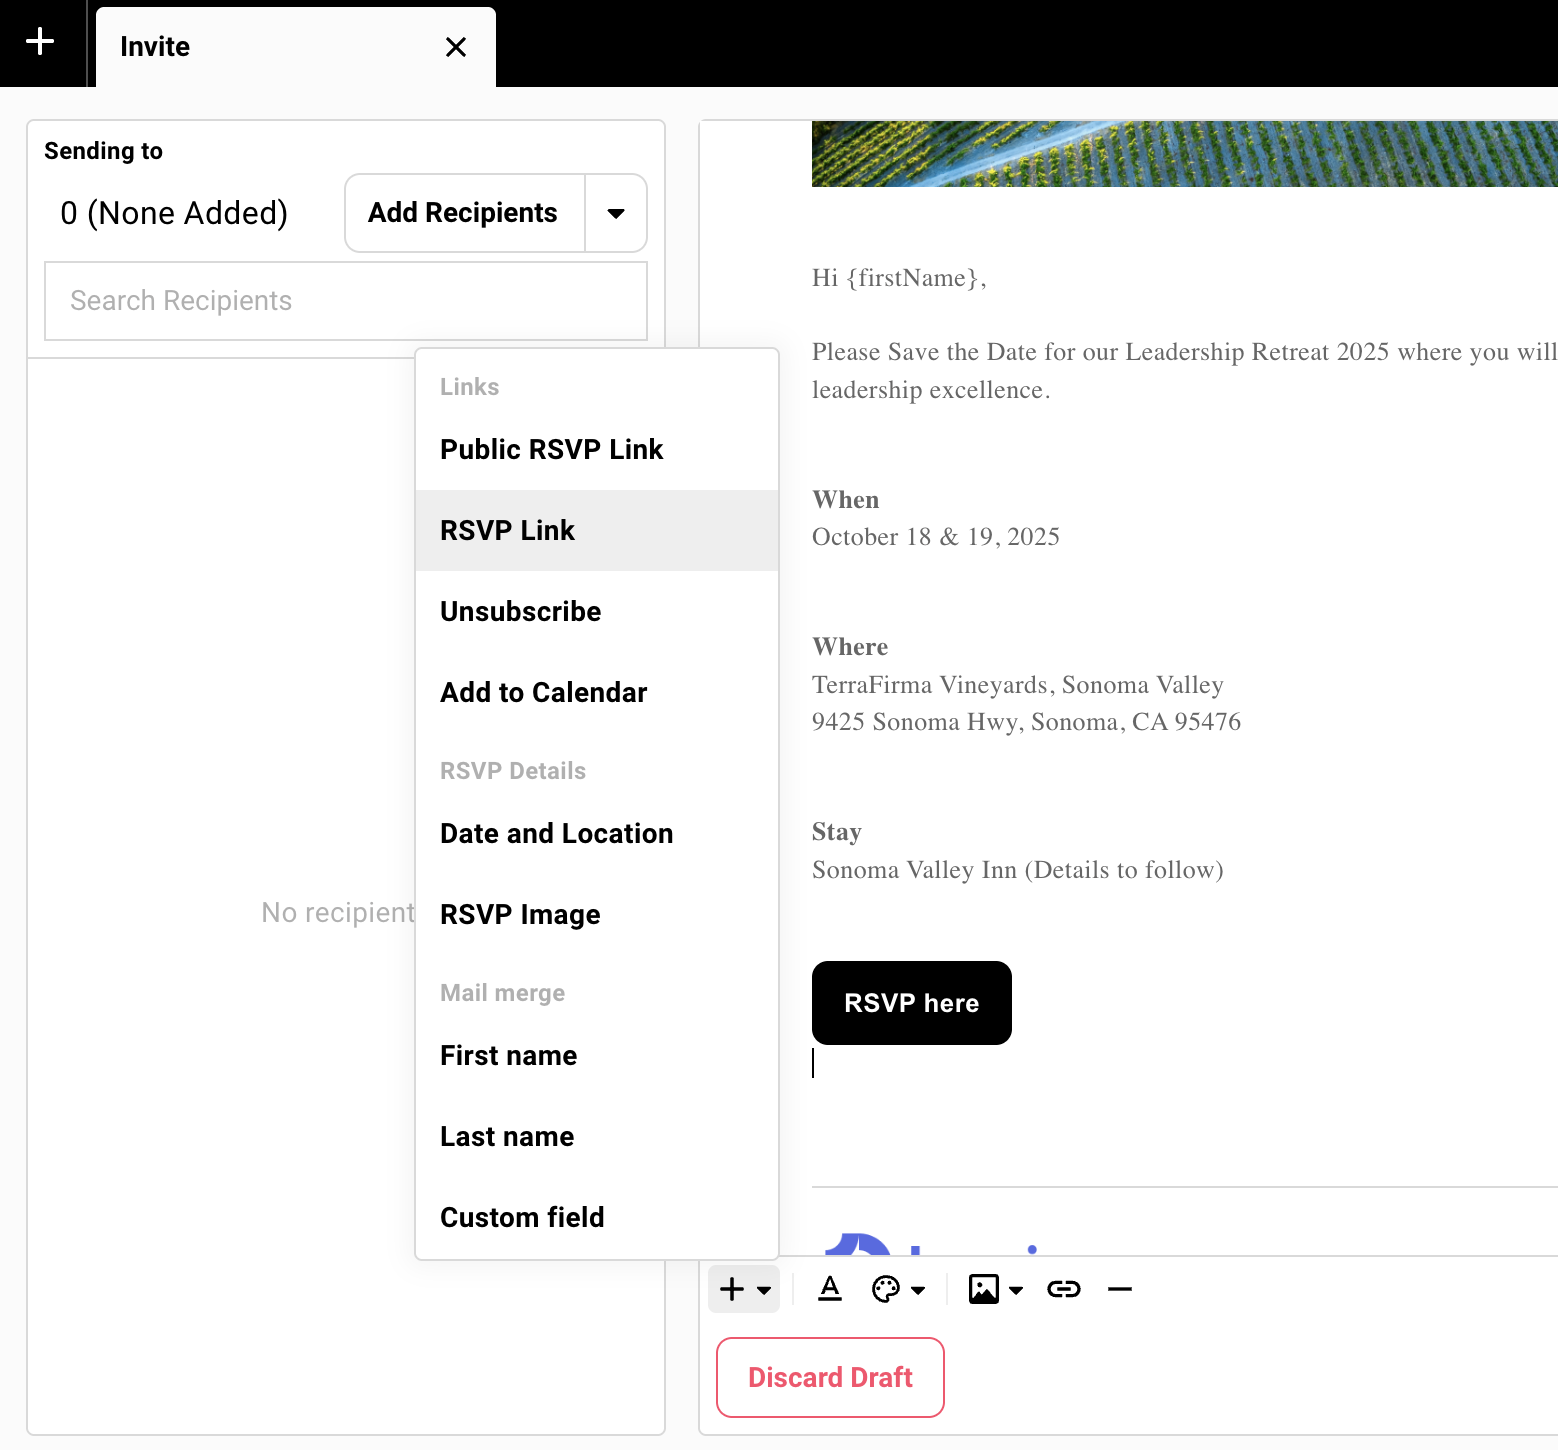
### Version History and Collaboration
[Section titled “Version History and Collaboration”](#version-history-and-collaboration)
Works like Google Docs. You see cursors with names showing where teammates are working.
Viewing and Restoring Versions+
Click **Last Saved X Ago** to open version history. Every previous version is listed.
Click **Restore This Version** to revert.
Example: the GP edits your draft and deletes the venue directions. Instead of trying to remember what was there, restore the previous version.
Real-Time Collaboration+
When multiple people are in the draft, you see their cursors. Each cursor shows the teammate’s name.
You know where colleagues are working before you start editing.
### Templates
[Section titled “Templates”](#templates)
With a template, you can load it, swaps the details, and send.
Global vs Campaign Templates+
**Global templates** are available across all events and lists. Quarterly meeting formats, thank-you emails, anything you reuse.
**Campaign templates** live only in the specific event where you created them. Event-specific messages that don’t need to travel.
Creating Templates+
**From an existing campaign:**
1. Open the campaign.
2. Click the three dots menu.
3. Select **Save as Template**.
4. Name it and choose Global or Campaign.
**From the templates page:**
1. Go to the Templates section.
2. Click **+** to create new.
3. Build your message.
4. Save.
Using Templates+
1. Start a new campaign.
2. Click the three dots menu.
3. Select **Load Template**.
4. Choose your template.
5. Customize the content.
Check the global template library for examples to start from.
[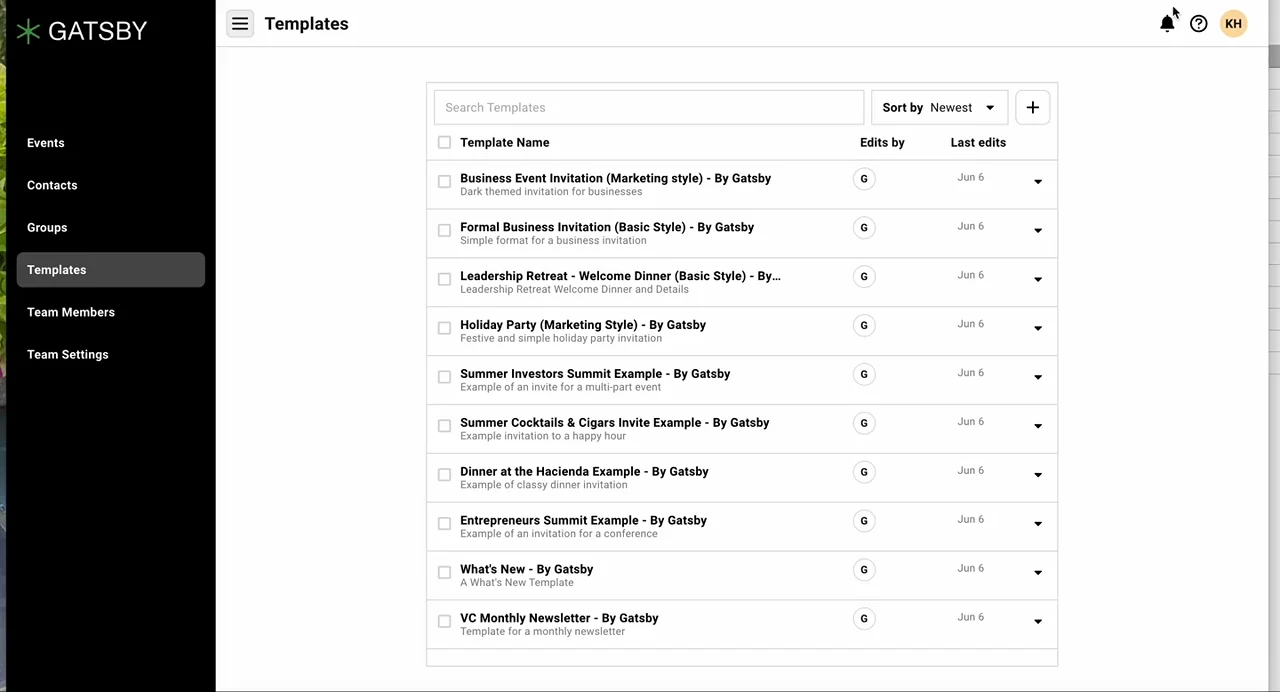](/legacy/creating-campaigns-templates-01.mp4)
## Sending to the Right People
[Section titled “Sending to the Right People”](#sending-to-the-right-people)
You’re sending a reminder to non-responders, but your team texts you that their client cancelled yesterday.
If that client gets a message like “Can’t wait to see you tomorrow!”, it’s a miscommunication and confusion.
### Adding Recipients
[Section titled “Adding Recipients”](#adding-recipients)
Two ways to add recipients. From the campaign, filter by RSVP status. From the guest list, select specific people.
From a Draft Campaign+
1. Click **Add Recipients** in the campaign.
2. Filter by status: All, Accepted, Declined, Maybe, or Pending.
3. Select individuals or add all.
Best for status-based sends. “Send to all accepted guests.”
From the Guest List+
1. Go to your guest list.
2. Select the guests you want.
3. Click **Send Message**.
4. Choose an existing campaign or start a new one.
Best for targeted sends by relationship owner, wave, or specific criteria.
Segmentation Strategies+
Use guest list sections to organize by relationship owner or send wave.
Filter by RSVP status, tags, or custom fields for targeted follow-ups.
Build views to stage follow-up campaigns. A “Q1 Follow-Up” view with pending guests from specific firms keeps your next send ready.
[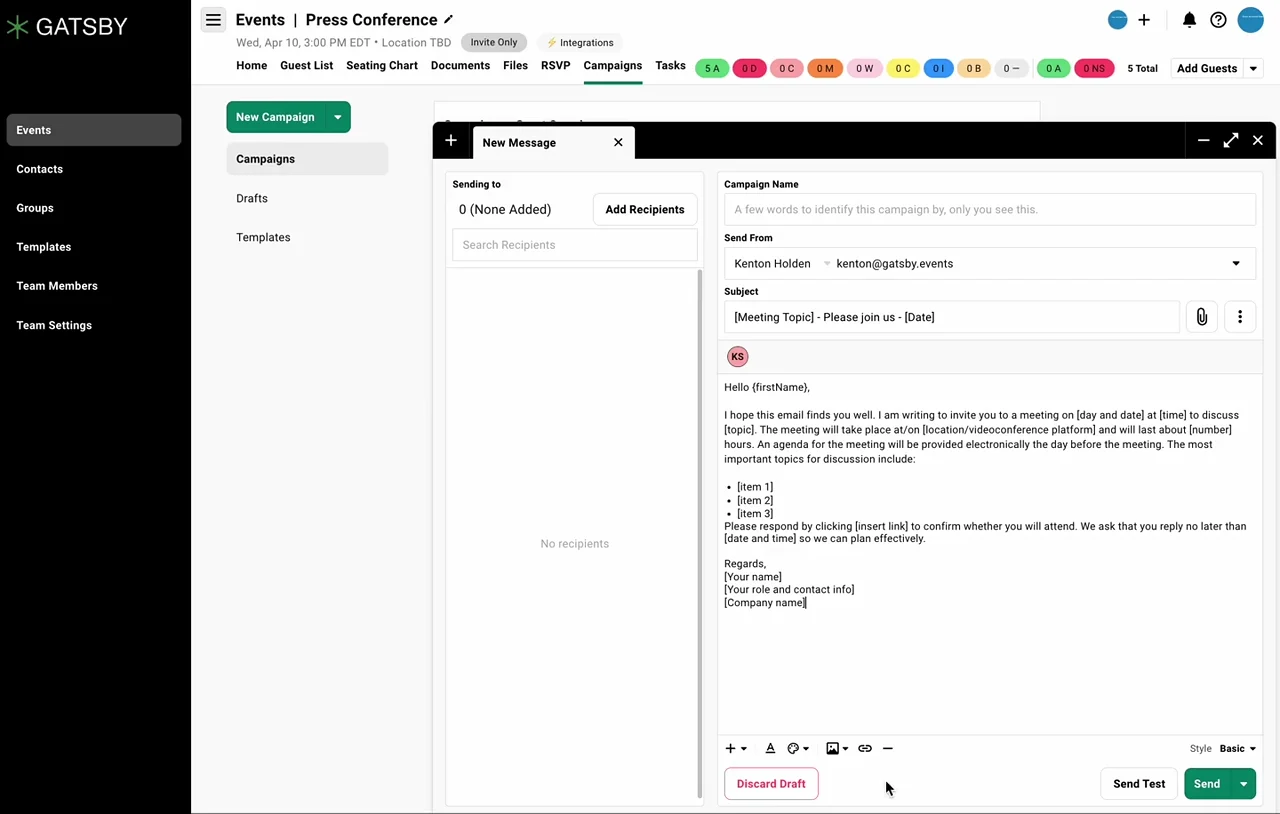](/legacy/adding-recipients-not-sent-to-01.mp4)
### Contact Method Groups
[Section titled “Contact Method Groups”](#contact-method-groups)
Send to multiple email addresses per contact or CC assistants automatically. Set it once on the contact profile and it applies to every campaign.
What Contact Method Groups Do+
Send to multiple emails for one contact. Auto-CC assistants or stakeholders on every email.
Example: Executive + EA. The executive receives the email. The EA is CC’d automatically.
Example: Principal + Associate. Both stay informed without forwarding.
Setting Up Contact Method Groups+
1. Open the contact profile.
2. Find the **Contact Method Group** section.
3. Click **Add Another Group**.
4. Name it descriptively. “With EA” or “Full Team.”
5. Add the primary email address.
6. Add CC emails.
7. Save.
Using in Campaigns+
When you add a recipient, click the dropdown arrow next to their name.
Select which contact method group to use.
Default sends to their primary email only. Select a group to include others.
Event-Level Settings+
Set a default contact method group for the entire event. Every send uses it unless you override per recipient.
You can also disable CC’ing associated contacts. Useful for newsletters where the EA doesn’t need a copy.
[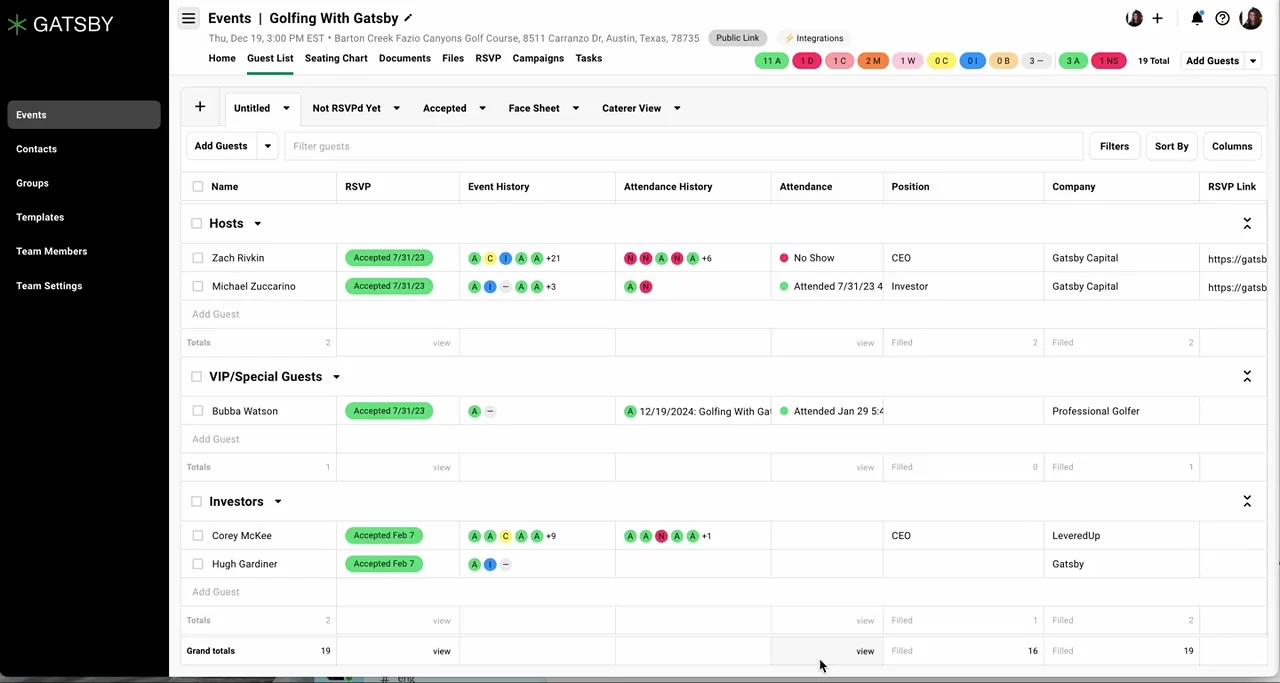](/legacy/adding-recipients-not-sent-to-06.mp4)
### Tracking Who Received What
[Section titled “Tracking Who Received What”](#tracking-who-received-what)
Every sent campaign shows exactly who received it, who didn’t, and what happened.
Campaign Status Tabs+
Click into any sent campaign to see the breakdown.
* **Sent:** Successfully delivered
* **Bounced:** Rejected by recipient’s server
* **Failed:** Something went wrong during send
* **Blocked:** Gatsby prevented send due to previous bounce
* **Not Sent To:** Guests who weren’t included
Status Definitions+
**Sent** means delivered to their server.
**Bounced** means rejected. Bad email address, full inbox, or server issues.
**Blocked** means Gatsby stopped the send, usually because that address bounced before. This protects your sender reputation.
**Opened** means the tracking pixel loaded. Not fully reliable. Some email clients block images, and financial services contacts often can’t load external images at all.
**Unsubscribed** means they clicked the unsubscribe link.
Clearing a Bounce+
Gatsby won’t email someone again after a bounce unless you clear it.
1. Go to the **Campaigns** tool and click into the sent campaign.
2. Open the **Bounced** tab.
3. Click the dropdown arrow next to the bounced guest.
4. Choose to edit their email address or clear the bounce and try again.
After clearing, the guest moves to the **Not Sent To** tab. From there, resend the campaign to them.
For an org-wide view of bounces and delivery problems across every event, go to **Team Settings » Bounce Management**. That’s the place to diagnose recurring failures instead of checking each campaign’s Bounced tab individually.
Clearing a Block+
A blocked guest is cleared from the **Blocked** tab, not the **Bounced** tab. Guests Gatsby refused to send to sit under Blocked, even when the original cause was a bounce.
1. Open the campaign where the guest is blocked.
2. Click into the **Blocked** tab.
3. Use the dropdown on the guest’s blocked status to clear the block.
Once cleared, send to them again from **Not Sent To**.
Not Sent To Feature+
See who didn’t receive a specific campaign. Late additions to the guest list, or people you skipped initially.
Click **Not Sent To**, select recipients, send the same message or create a new one. Good for catching up after adding guests.
Open Tracking+
Enable the tracking pixel in team settings. You’ll see who opened.
Not fully reliable. Blocked images mean no tracking data. Financial services and government contacts often can’t load external images at all. Treat open tracking as one data point, not proof.
Guest List Campaign Columns+
Add campaign fields to your guest list view. See every email sent to each guest.
Filter by campaign receipt status. “Show me everyone who didn’t receive the reminder.”
**Sent** and **Opened** are tracked separately. If you want to see who opened a specific campaign, add the **Opened** column in addition to the **Sent** column. They are not the same field.
## Testing Before You Send
[Section titled “Testing Before You Send”](#testing-before-you-send)
Once an email goes to real people, there’s no undo.
Quick test sends the email to you so you can check formatting. Final test sends it to you as a real guest, so you see the RSVP link, the auto-fill, and the confirmation email fire.
Quick Test (Design Review)+
Click **Send Test** next to the Send button. Goes to you or teammates.
RSVP links are replaced with test links. They work but don’t save any data, and registering through one doesn’t send a confirmation email. To see the confirmation email, use the final test below.
Check formatting, links, dark mode, and mobile.
Test links don’t save responses. Don’t let anyone forward test emails to real guests. They’d click, think they registered, and nothing would happen.
Final Test (Real Send)+
Add yourself and your team as guests on the guest list.
Send the actual campaign to yourselves as if you were real guests. You’ll see the auto-fill, the conditional logic, and the confirmation email fire.
Use **Not Sent To** afterward to send to everyone else.
Quick test shows the email. Final test shows the full registration journey.
The confirmation email sends automatically only once per guest. To run the final test again, remove yourself from the guest list and add yourself back. Restoring a removed guest, or resetting your RSVP status, doesn’t reset it.
When Things Go Wrong+
Found errors after the final test?
Duplicate the campaign. Fix the issues. Send to your test recipient again.
Once it’s right, use **Not Sent To** to send to the full list.
[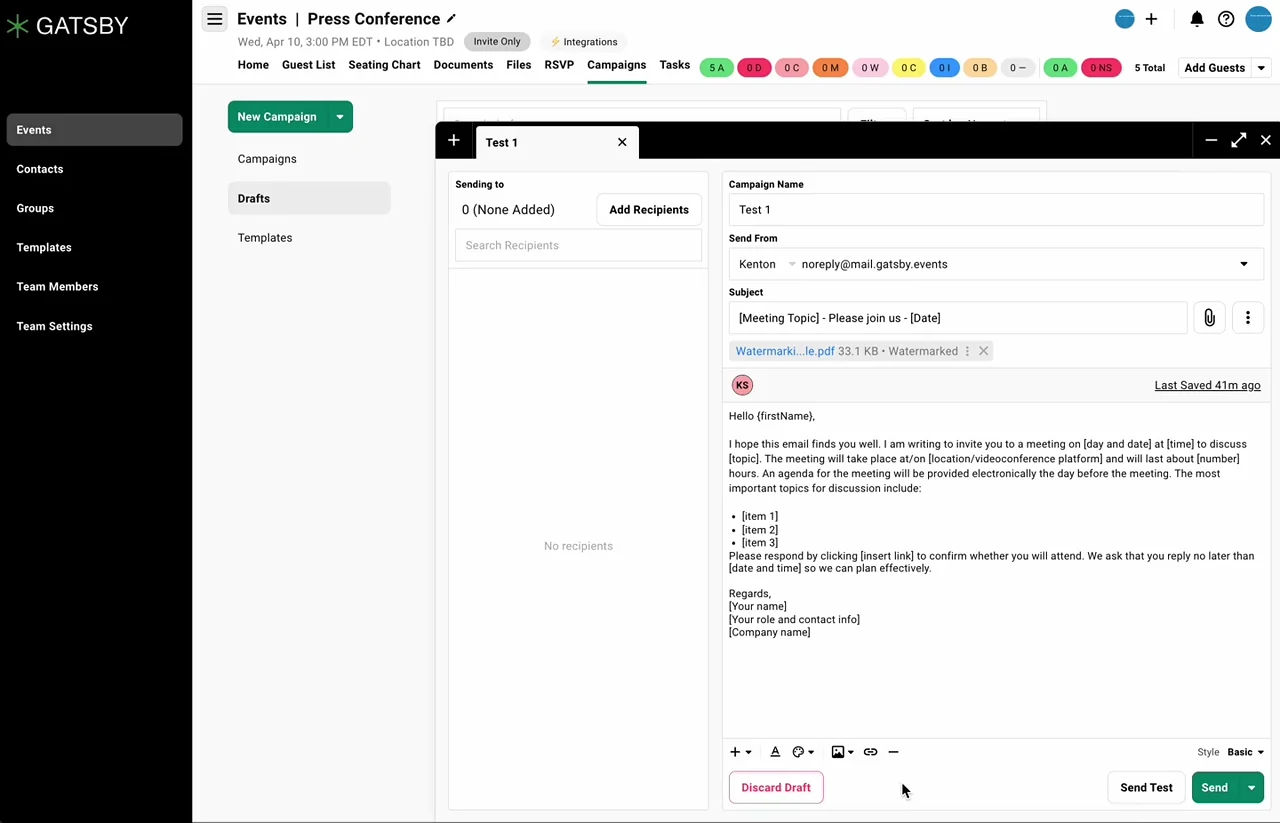](/legacy/testing-your-campaign-before-you-send-it-01.mp4)
## Scheduling and Timing
[Section titled “Scheduling and Timing”](#scheduling-and-timing)
Schedule campaigns for a specific date and time. The recipient list locks when you schedule.
Scheduling a Campaign+
1. Click the dropdown arrow next to the **Send** button.
2. Select **Schedule Campaign**.
3. Set the date and time.
4. Choose the time zone.
5. Confirm.
The recipient list locks when you schedule. No changes to who receives it after that point.
Best for initial invites. Not good for RSVP status basis where people might cancel or change their RSVP status.
Modifying Scheduled Campaigns+
1. Open the scheduled campaign.
2. Go to the **Scheduled** tab.
3. Select recipients to modify.
4. Click **Cancel Scheduling** or **Reschedule Campaign**.
Adding to Scheduled Campaigns+
1. Open the scheduled campaign.
2. Go to the **Not Sent To** tab.
3. Select the new recipients.
4. Click **Schedule Campaign** to add them to the existing schedule.
They’ll receive the email at the same scheduled time.
[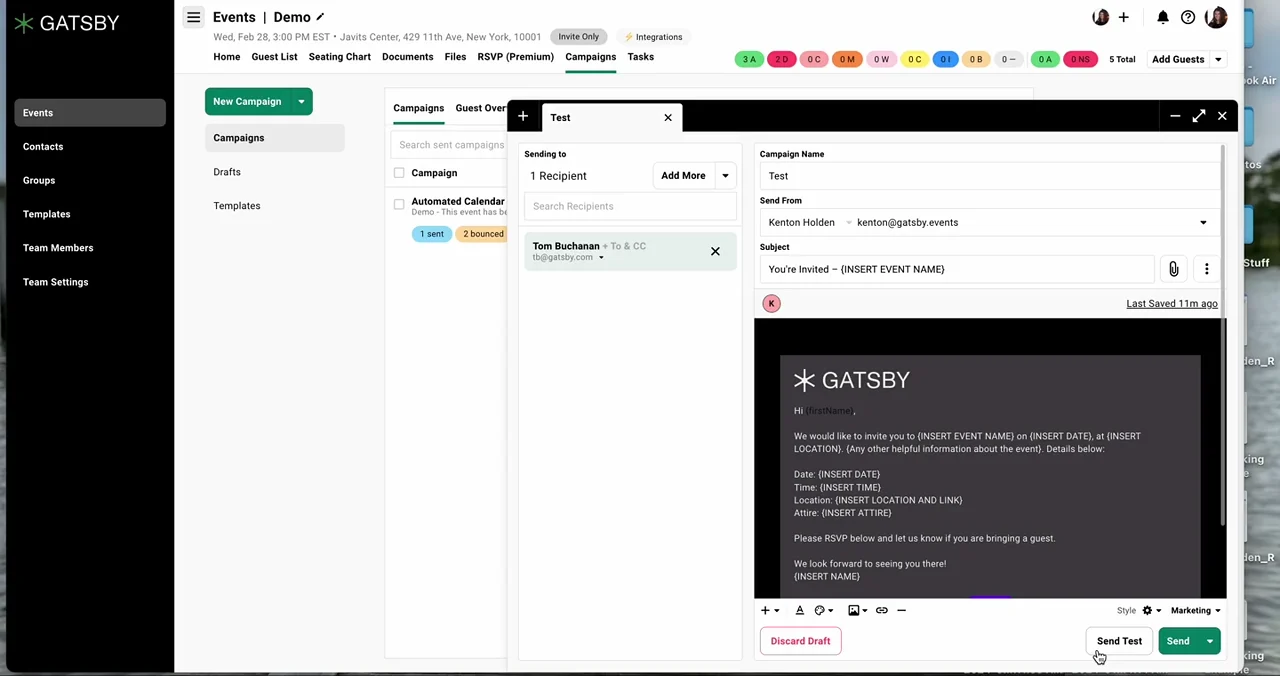](/legacy/scheduling-campaigns-01.mp4)
## Campaigns vs Confirmation Emails
[Section titled “Campaigns vs Confirmation Emails”](#campaigns-vs-confirmation-emails)
“Why didn’t my guests get calendar invites?”
Because calendar invites attach to confirmation emails, which fire automatically after registration. Campaigns are manual sends that go out before registration. Different tools, different timing.
| | Campaigns | Confirmation Emails |
| ------------------- | ---------------------------------- | --------------------------- |
| **Trigger** | Manual send | Automatic after RSVP |
| **Purpose** | Invitations, reminders, follow-ups | Registration acknowledgment |
| **Calendar invite** | Optional attachment | Primary delivery method |
| **Design** | Full control | Template-based |
When to Use Each+
**Use campaigns for:**
* Initial invitation with RSVP link
* Reminders to non-responders
* Follow-up information
* Newsletters and updates
**Use confirmation emails for:**
* Registration acknowledgment
* Calendar invite delivery
* Automatic thank-you messages
Cross-Reference+
Confirmation email settings live in the Registration section, not here.
That’s where you customize the message guests receive after they RSVP and where you attach the calendar invite.
## Unsubscribes
[Section titled “Unsubscribes”](#unsubscribes)
The `{unsubscribeLink}` merge tag gives recipients a way to opt out.
How to include an unsubscribe link+
In the campaign editor, click the **+** button at the bottom left to open the mail merge menu. Select **Unsubscribe Link** to insert `{unsubscribeLink}` into the email body.
At send time, Gatsby replaces that tag with a unique link for each recipient. Each link is tied to that specific contact.
What happens when someone clicks it+
The recipient lands on a page that unsubscribes them immediately. There is no confirmation step. The unsubscribe is recorded against their contact as soon as the page loads.
Scope: org-wide+
One unsubscribe blocks that person from all future campaign emails sent by your organization. Not just the event or list the email came from. Every campaign, across every event and list.
There is no per-event or per-list unsubscribe. When someone opts out, they are removed from all Gatsby campaign emails for your organization.
Resubscribing a contact+
Open the contact’s profile and toggle their unsubscribe status. Admins can resubscribe a contact at any time. The change takes effect immediately.
Manual unsubscribes+
If someone replies asking to be removed, you don’t need to wait for them to click a link. Open their contact profile and unsubscribe them directly using the “Unsubscribe from all email communications” toggle.
The result is identical to clicking the link: they are removed from all future campaign emails from your organization.
## Common Questions
[Section titled “Common Questions”](#common-questions)
Should I attach calendar files to invitation campaigns?+
Usually no.
Calendar invites auto-attach to confirmation emails after registration. Attaching them to invitations creates confusion: guests might end up with two calendar entries, or add the event to their calendar before confirming.
Exceptions: meetings without RSVP required, or calendar updates to already-confirmed guests.
Can I send RSVP links to multiple events in one email?+
It’s possible, with a workaround. Gatsby shows a merge warning when an email links to more than one event’s RSVP form, because that’s usually a mistake. If it’s intentional, you can ignore the warning and send, or link the second form through a link redirection service.
Often the cleaner setup is a single registration that covers both. Use a survey form to let guests choose which events they want to attend, or use a parent event with child events: guests register for the parent and select children via survey questions.
What if someone forwards their personal RSVP link?+
The person who clicks registers as the original recipient.
Sarah forwards her link to Thomas. Thomas clicks and registers as Sarah.
Include “This is a non-transferable invite for \[First Name] \[Last Name]” in your emails to set expectations. For transferable invites, include the public link too.
My contacts work in financial services and can't load images. Will tracking work?+
Open tracking won’t work for them. It relies on a tracking pixel, and no image loading means no tracking data.
You’ll still see Sent status confirming the email was delivered. Treat open tracking as one data point, not the full picture.
How do I CC the EA on every email to an executive?+
Set up a contact method group on the executive’s contact profile. Include the EA’s email as CC.
When you add the executive as a recipient, select that contact method group. Every email to them includes the EA automatically.
What file types can I attach? Are there size limits?+
Most common types work: PDFs, images, Word documents, presentations.
**Attachment limits**
* 24MB total per email
* Individual files under 10MB recommended
* PDFs can be watermarked
Can I mail merge event-specific data like table assignments?+
Currently only custom fields work with mail merge, not custom columns.
Workaround: export the event-level data, import it as a custom field on the contact, then mail merge.
How do I send an invite?+
Add the guest to the guest list. Create a campaign, include the `{rsvpLink}` merge tag, and send.
[Learn more](/platform/communications/sending-invites/).
How do I resend the same invite to more people?+
Use the **Not Sent To** tab in the original campaign to send the same email to new additions on your guest list.
How can I follow-up with guests who haven't RSVP'd?+
1. **Filter by Status**
Use guest list filters to find guests with “Invited” or “Clicked” RSVP status. These guests received an invitation but haven’t responded.
2. **Send Targeted Follow-Up**
Select those guests and create a reminder campaign with their RSVP link. Expect to send 2-3 follow-ups. Include a deadline to RSVP.
Email design modes: Basic vs Marketing+
**Basic Mode**
Looks like regular email from Outlook or Gmail. No background colors. Full width. Best for deliverability and personal invites.
**Marketing Mode**
600px centered design (or full-width). Background and foreground colors. Best for emails with images.
Switch between them with the dropdown in the campaign editor.
My email's formatting looks off after pasting text in+
Copying from a Google Doc or a Word document into the editor brings hidden formatting along with the text, and that’s the most likely cause of odd fonts, sizes, or spacing. Paste without formatting instead: **Cmd+Shift+V** on a Mac, **Ctrl+Shift+V** on Windows. Then apply styling in the editor.
How do I adjust spacing, or stop addresses turning into links?+
For spacing, try the line-height setting. Every email client renders spacing a little differently, so tuning it for one client can shift it in others. Check the result with **Send Test** in the clients your guests use.
Some email clients automatically turn street addresses into map links. To prevent that, insert a zero-width non-joiner character inside the address, for example between the street number and the street name. Recipients won’t see it, but the client no longer recognizes the text as an address.
How long does a large send take?+
It depends on the sender. Gmail and Outlook senders are paced at about one email every 8 to 10 seconds, so 100 emails takes about 15 minutes and a few thousand takes hours. SendGrid senders aren’t paced this way and go out much faster. For anything over about 500 recipients, send from SendGrid. See [Sender Settings](/platform/email-campaigns/sender-settings/) for the daily limits.
Can I undo sending an email?+
**No.**
Once sent, there’s no recall. If sent in error, follow up immediately with a correction.
**Prevention tips**
* Always send the email to yourself first as a guest on the guest list
* Double-check recipient selection
* Review subject line for typos
Can I see who opened my emails?+
Enable the tracking pixel in Team Settings under **Know when guests open your invites**. You’ll see “Opened” status in campaign reports when images load.
Email clients block tracking pixels, so real open rates are higher than reported. Click data is more reliable.
How do I send guests their QR code if I didn't attach it to the confirmation email?+
The QR code is an email attachment — a personalized image file each guest receives and presents at check-in. You add it via the three-dots menu, not via a merge tag in the body.
Common situation: you already sent the confirmation email and didn’t have QR codes enabled. Send a pre-event “know before you go” campaign and attach QR codes there instead.
1. Open your campaign draft (or create a new one).
2. Click the three-dots menu at the top of the editor, next to the subject line.
3. Select **Attach QR Code**.
Each guest receives their own unique check-in QR code as an attachment. The code is personalized — it only works for that specific guest.
# Confirmation Emails
> Automated emails that fire when guests register, join the waitlist, decline, are rejected, or update their information. Deliver calendar invites, confirm registrations, and keep the door open with non-attendees.
## How Confirmation Emails Work
[Section titled “How Confirmation Emails Work”](#how-confirmation-emails-work)
Five automated emails cover the guest lifecycle. Find them under **Registration » Confirmation Emails**.
Each guest action triggers the right email automatically.
Accepted Email+
Fires when a guest clicks Accept or Yes on your registration page.
The default includes their unique RSVP link and a calendar invite attachment. This is the primary mechanism for getting the event on their calendar.
**Why it matters:** Guests expect immediate confirmation. The calendar invite arrives while they’re still thinking about your event.
Waitlist Email+
Fires when a guest joins the waitlist. This happens when registration is in waitlist mode or they use a public link with waitlist enabled.
No calendar invite attached. Signals that they are in the queue but not yet confirmed.
**Why it matters:** Acknowledges their registration without promising a spot.
Decline Email+
Fires when a guest clicks Decline or No.
An opportunity to thank them, keep the relationship warm, and leave the door open for your next event. Optional to send.
**Why it matters:** A graceful decline email maintains the relationship.
Rejection Email+
Fires when you reject a guest’s registration — an organizer action, unlike the Decline email a guest triggers themselves.
No calendar invite attached. The default copy lets the guest know, politely, that you can’t accommodate their registration this time.
**Why it matters:** A clear, gracious rejection protects the relationship even when there’s no spot to offer.
Survey Update Email+
Fires when a guest returns to their registration and changes information: dietary restrictions, session selections, or cancellation.
Confirms their updates were saved.
**Why it matters:** Guests know their changes went through. You avoid confusion at the event.
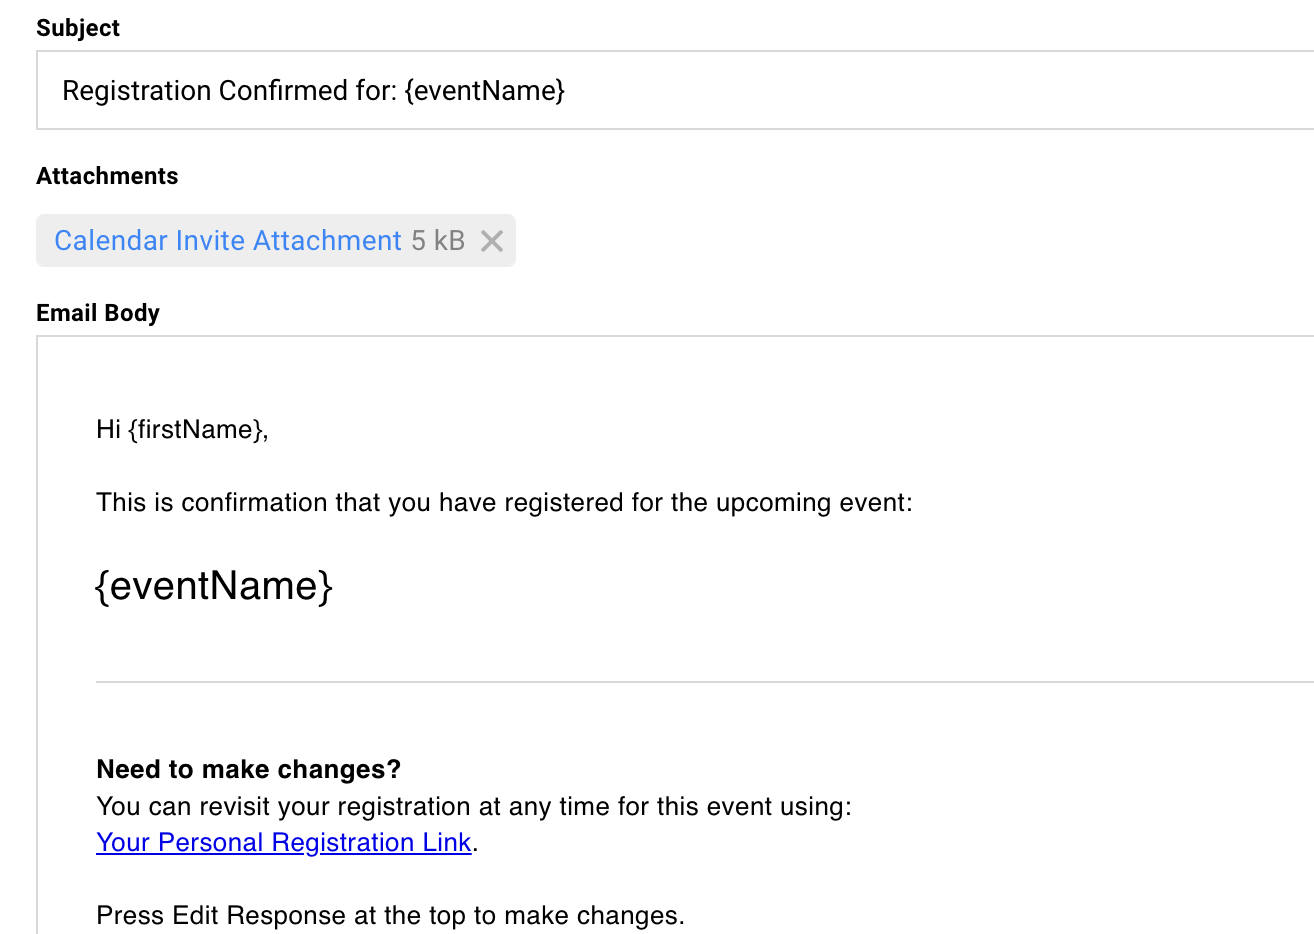
## Why Confirmation Emails Require SendGrid
[Section titled “Why Confirmation Emails Require SendGrid”](#why-confirmation-emails-require-sendgrid)
Google and Microsoft occasionally require you to log in again and re-authenticate. If that happens during your event, your confirmation emails stop sending.
Guests register and hear nothing. Calendar invites never arrive. You find out when guests don’t show up.
### Understanding the Requirement
[Section titled “Understanding the Requirement”](#understanding-the-requirement)
Confirmation emails must use SendGrid sending accounts, not connected Google or Microsoft accounts. This ensures reliable delivery throughout your event lifecycle.
Why Not Gmail or Outlook?+
Connected personal accounts require periodic re-authentication. If this happens during your event, automatic emails stop sending without warning.
SendGrid accounts stay connected permanently. No surprise outages. No missed confirmations.
Your Sender Options+
Use a shared address like for consistent branding across all events.
Or create a SendGrid sender that mimics a personal account () if you want confirmation emails to appear more personal.
Both work. Pick what fits your audience.
Make Sure the Inbox Exists+
Whatever address you use, ensure it can receive replies. Guests often respond to confirmation emails with questions.
If the inbox doesn’t exist, those replies bounce. That looks unprofessional.
### Setting Up a SendGrid Sender
[Section titled “Setting Up a SendGrid Sender”](#setting-up-a-sendgrid-sender)
If your team hasn’t configured SendGrid yet, you’ll need to set that up before confirmation emails can send.
Check Existing Senders+
Go to **Team Settings » Linked Services**. If you see SendGrid accounts listed, you’re ready.
Select one as the sender for your confirmation emails.
Need to Add SendGrid?+
Contact your admin or review the [Sender Settings](/platform/email-campaigns/sender-settings/) page.
SendGrid requires DNS configuration on your domain. Once configured, you can create any sending address using your domain.
## Editing Your Confirmation Emails
[Section titled “Editing Your Confirmation Emails”](#editing-your-confirmation-emails)
Navigate to Registration » Confirmation Emails. Click on any of the five tabs to edit that email.
Basic Editing+
Click into the email body. Edit like any document. Auto-saves as you work.
The template applies to all future registrations for this event.
If you’re bringing copy over from a Google Doc or Word document, paste without formatting (**Cmd+Shift+V** on a Mac, **Ctrl+Shift+V** on Windows). A normal paste carries hidden formatting that can throw off fonts and spacing.
Removing Attachments+
Click the X next to any attachment to remove it.
The calendar invite is just another attachment. Remove it if you don’t want it auto-delivered. Useful for multi-event registration scenarios where child events should send their own.
Disabling Confirmation Emails+
Toggle off any email you don’t want to send.
Common: disable the decline email if you don’t want to send anything when guests say no. Disable the Confirmation “Accepted” email if child events should send their own. (Only available if the event has “Child events” enabled).
Testing Your Emails+
Register as a guest using a test email address. Go through the actual flow to see what guests receive.
The email preview in the editor doesn’t show mail merge values filled in.
Create a test contact with an email you control. Register through your landing page. Check what arrives. This catches formatting issues and merge field problems.
## Set Defaults for Every Event
[Section titled “Set Defaults for Every Event”](#set-defaults-for-every-event)
Editing emails one event at a time gets repetitive. Set them once at the org level and every new event starts pre-filled.
Go to **Team Settings » General » Default Emails**. You’ll find the same five tabs you see inside an event — Confirmation, Waitlist, Decline, Rejection, and Survey Update. Edit the subject, body, sender, and attachments on each, and your changes save automatically.
What Gets Copied+
Whatever you set here copies into every new event the moment it’s created. All five email types carry their own default now, not just the Accepted email.
Existing Events Stay Untouched+
Defaults apply at event creation only. Changing a default never rewrites emails on events you’ve already built — edit those inside the event itself.
Per-Type Senders+
Each email type can have its own default sender. If you only set a sender on the Confirmation default, the other four inherit it. Set a sender on an individual type to override that fallback.
Override Inside Any Event+
Defaults are a starting point. Registration » Confirmation Emails inside an event still lets you edit every email for that event without touching your org defaults or other events.
### Attachments and Special Content
[Section titled “Attachments and Special Content”](#attachments-and-special-content)
Confirmation emails support attachments and auto-generated content. Most of this lives on the Accepted email.
Calendar Invite+
Attached by default. The .ics file that puts your event on guests’ calendars.
Remove by clicking the X next to the attachment. Reattach via the three-dots menu » Add Calendar Invite.
QR Code+
Auto-generated unique QR code for check-in, attachable via three-dots menu » Add QR Code.
Guests show this at the door. You scan with the iOS app to mark attendance.
For everyone else, attach a check-in QR code from a campaign instead — see [Campaigns](/platform/email-campaigns/campaigns/) — or use the Apple Wallet pass.
PDF Attachments+
Attach any file via the paperclip icon.
Common uses: parking instructions, pre-read documents, venue maps. Works for all confirmation email types.
## The Accepted Confirmation Email
[Section titled “The Accepted Confirmation Email”](#the-accepted-confirmation-email)
You send the invitation campaign. Guest clicks the link to register. And, now they need the calendar invite.
The Accepted Confirmation email handles this. It fires automatically when registration completes. The calendar invite is already attached.
Invitations go before commitment. Confirmations go after. Attach the calendar to the commitment.
Why Not Attach to the Invitation Campaign?+
Attaching a calendar invite to an invitation feels like calendar spamming. Guests haven’t committed yet.
The Accepted Confirmation email respects the sequence: invite, commit, then calendar.
The Default RSVP Link Inclusion+
Every Confirmation email includes the guest’s unique RSVP link.
Guests can return to update their registration, change their response, or cancel. They self-serve.
Waitlisted Guests Don't Get the Calendar+
By design.
If your event is capacity-limited or requires vetting, waitlisted guests receive the waitlist email. No calendar. No QR code.
Only when you move them to Accepted do they get an Accepted Confirmation email (with attachments).
Note: you can override this.
## Registration and confirmation aren’t always the same thing.
[Section titled “Registration and confirmation aren’t always the same thing.”](#registration-and-confirmation-arent-always-the-same-thing)
Some events can’t automatically confirm everyone who registers. Security clearances need verification. Capacity-limited dinners have more requests than seats. Applications need review.
The waitlist keeps acknowledgment and confirmation separate. Guests hear back immediately. You decide who gets through.
### Waitlist and Approval Workflows
[Section titled “Waitlist and Approval Workflows”](#waitlist-and-approval-workflows)
Some registrations aren’t automatic yeses. The waitlist email confirms receipt without confirming attendance. The calendar invite stays on hold until you move a guest to Accepted, at which point you’ll be asked if you want to send the Accepted Confirmation email (or, you can send a manual Campaign email instead).
The Vetting Queue Pattern+
Set registration mode to Waitlist. Every guest lands on the waitlist.
Review at your pace. Move approved guests to Accepted. They get the Accepted Confirmation email if you choose the option. See [Capacity and Waitlists](/platform/registration/capacity-waitlists/) for registration mode settings and capacity configuration.
Public Link with Waitlist+
Open registration through a public link with waitlist enabled. New registrations go to the waitlist. You control who gets confirmed.
Customize the Waitlist Email Language+
The default reads something like “If a spot opens up, you’ll be notified.” If you’re using waitlist as a vetting step, that’s the wrong message.
Change it: “Your registration is received. We’ll confirm your spot shortly.” Match the language to your actual workflow.
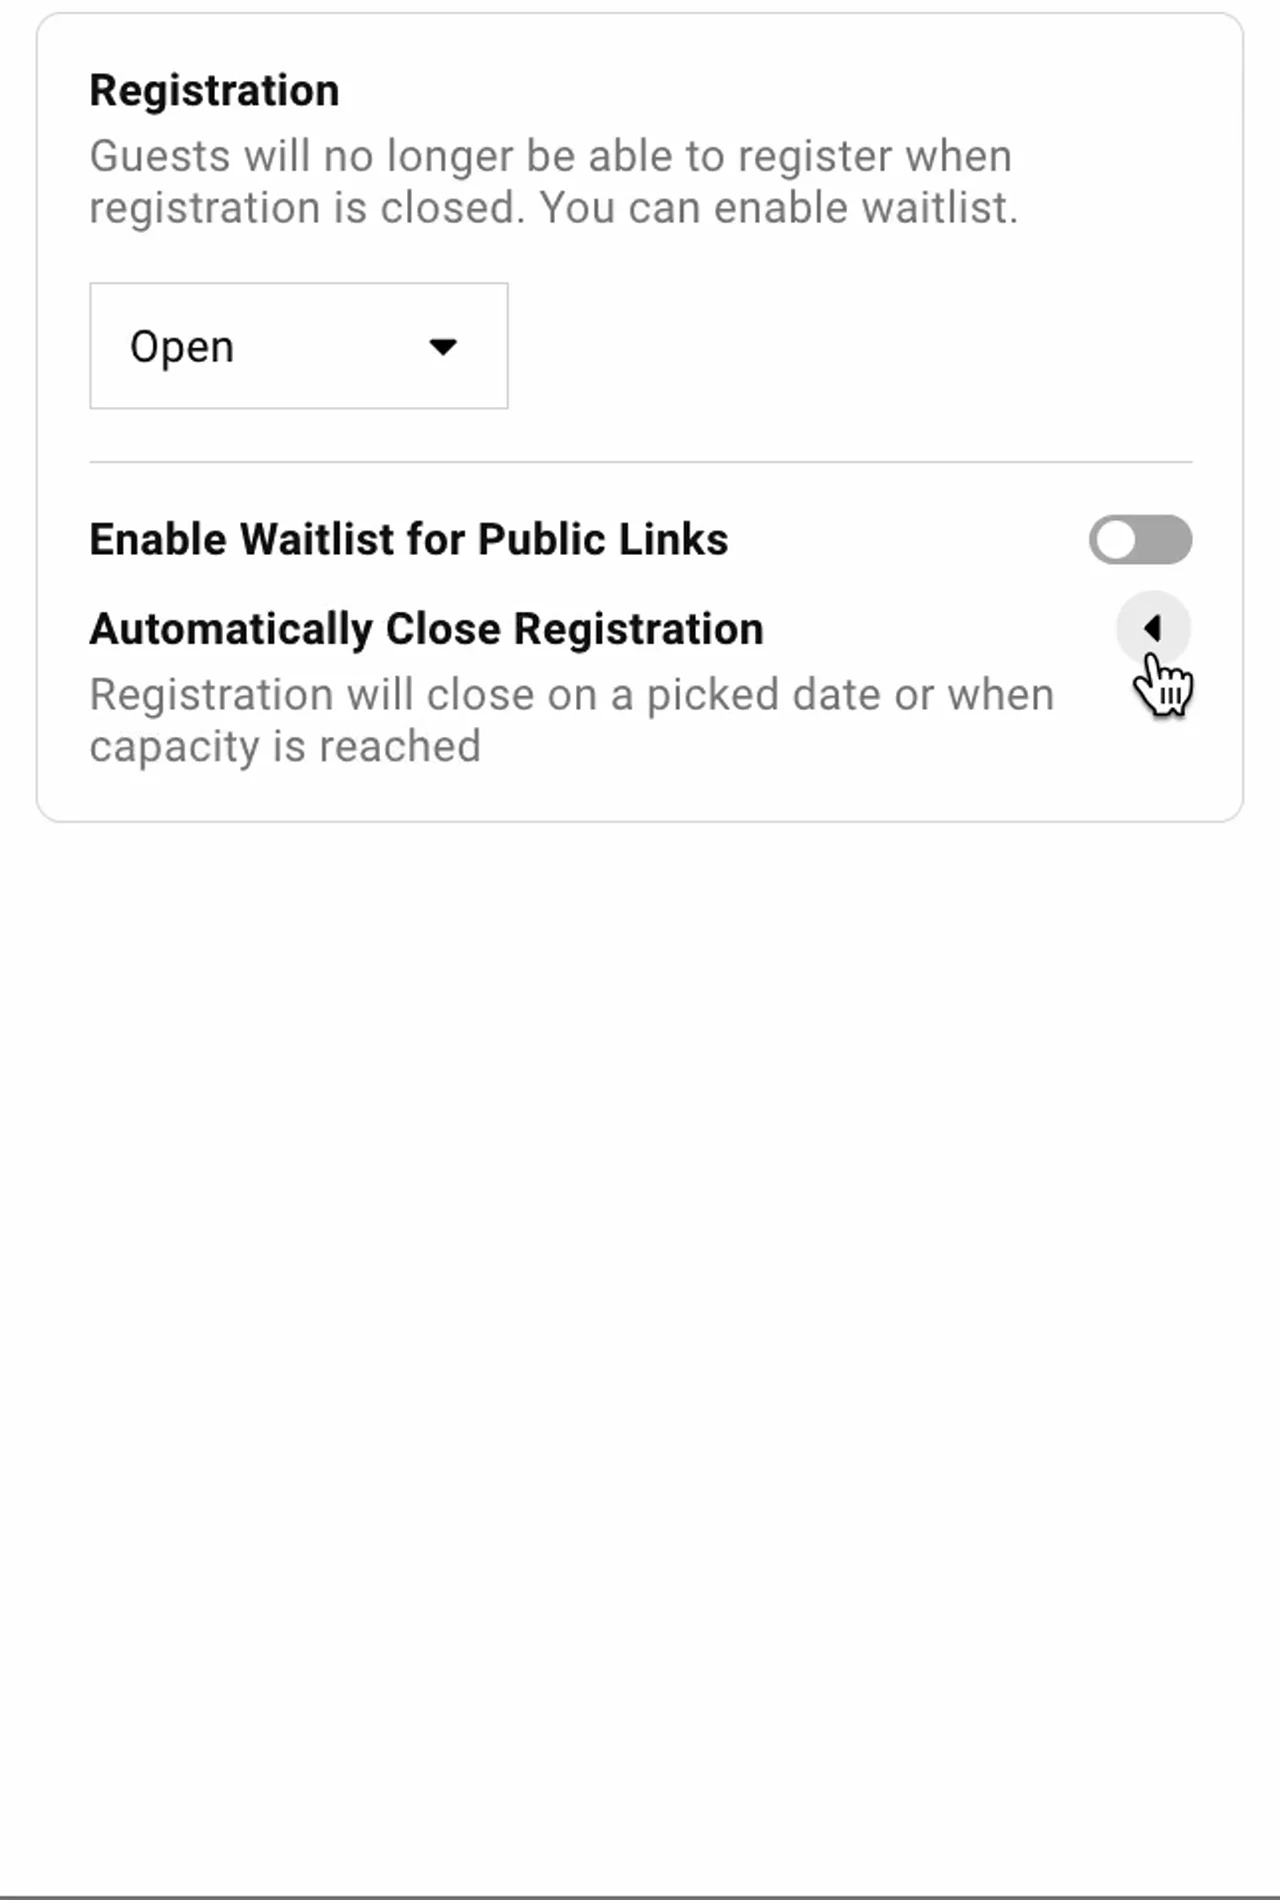
### Multi-Event and Advanced Scenarios
[Section titled “Multi-Event and Advanced Scenarios”](#multi-event-and-advanced-scenarios)
Multi-day events and parent-child structures sometimes need different confirmation behavior. Most of this comes down to knowing which event should own calendar delivery.
Hybrid Events (Virtual + In-Person)+
Gatsby does not support calendar invites with both a physical and virtual location on a single event. This is a platform limitation.
You can include a virtual meeting link the description field of the calendar invite.
Or, create two separate events — one with the physical venue, one with the virtual link. On the in-person event’s registration form, add a question asking whether the guest also wants to attend virtually. Guests who say yes can be registered on the virtual event as well, which sends them that event’s confirmation email with the virtual-location calendar invite.
In-person guests get a calendar invite with the venue. Virtual guests get a calendar invite with the meeting link. The guest experience stays clean even though two events are running behind the scenes.
Disabling the Accepted Confirmation Email Entirely+
Toggle off in Confirmation Emails (when “Allow event children” is enabled for the event). Useful when the parent event handles communication and child events manage calendar delivery and capacity tracking.
Disabling the Decline Email+
Common. Toggle off if you don’t want to send anything when guests decline. Their response is still recorded.
Survey Update Email for Cancellations+
When guests return to cancel, they receive the survey update email. Customize it to acknowledge the cancellation gracefully.
## Common Questions
[Section titled “Common Questions”](#common-questions)
Why do confirmation emails require SendGrid?+
Google and Microsoft accounts require periodic re-authentication. If this happens during your event, confirmation emails stop sending.
SendGrid accounts stay connected permanently, ensuring guests always receive their confirmations.
Can I send confirmation emails from a personal-looking address?+
Yes. Create a SendGrid sender with a personal display name and email ().
Make sure that inbox exists to receive replies.
How do I test confirmation emails?+
Add yourself as a guest. Go through the registration flow. You’ll receive the actual confirmation email.
The preview in the editor doesn’t show mail merge values populated.
What mail merge fields work in confirmation emails?+
Event name and guest name fields. Custom field data is not available in confirmation emails.
Custom field merge works in campaigns, not automated confirmations.
Can I send the calendar invite without the Confirmation email?+
Not directly. The calendar invite attaches to the Confirmation email. But, you can attach it to a Campaign email to send manually.
If you want to send calendar updates later, use the calendar update feature. See [Calendar Invites](/platform/registration/calendar-invites/) for details.
What happens if a guest registers multiple times?+
Duplicate registrations update the existing guest record.
They receive a Survey Update email confirming their information changed, not a new Accepted email.
Do guests receive emails when I manually change their status?+
Not automatically. When you manually change a guest’s RSVP status to Accepted on the guest list, a pop-up asks whether to send them the confirmation email. Choose it there, or send a campaign instead if you want a personal message.
Otherwise, confirmation emails fire automatically only when guests take action through the registration page.
Why didn't a guest get the confirmation email a second time?+
By design, Gatsby sends the automatic confirmation email to a guest on the guest list only once per event. Registering again, resetting their RSVP status to blank, or restoring them after removal doesn’t send it again.
To have it fire automatically again (for example, when you’re testing your own registration), remove the guest from the event and add them back. Restoring them doesn’t count; they have to be re-added.
Can I resend a confirmation email?+
Manually set the guest as “Accepted” on the guest list again. Select the option to send a confirmation email.
My Accepted email doesn't have the calendar invite attached+
Open **Registration » Confirmation Emails**, go to the Accepted email, and use the three-dots menu to add the calendar invite back. It may have been removed with the X next to the attachment.
If only guests who registered through the public link are missing it, check the public link’s **Add to Guest Calendar** setting. See [Calendar Invites](/platform/registration/calendar-invites/).
Can I set default templates for all my events?+
Yes. Go to **Team Settings » General » Default Emails** and edit the Confirmation, Waitlist, Decline, Rejection, and Survey Update tabs. Your defaults copy into every new event you create. Existing events keep the emails they already have.
# Campaign Reminders
> Schedule follow-up emails and texts that pick their recipients when they fire, so guests who already responded don't get nudged twice. Time them against the event date, filter them like a guest list, and manage every one from a single dashboard.
Why it matters
## Automate your event communication flow.
Set a reminder sequence once, two weeks before, the day before, the morning of, and Gatsby sends each message to the right people automatically. Filter recipients the same way you filter a guest list, so confirmed attendees see one message and pending invitees see another, without rebuilding a list every time.
How it works
### Recipients computed at send time
A reminder evaluates your filters when it fires, not when you schedule it. People who responded in the meantime drop off automatically.
### Timed against the event, not the calendar
Set a reminder for three days before the event and it follows the event when the date moves.
### Email or SMS
Reminders work on both channels. Every organization also gets one free automatic text reminder per event.
### One view across every event
The Campaign Reminders dashboard shows every scheduled send across every event your team is running.
[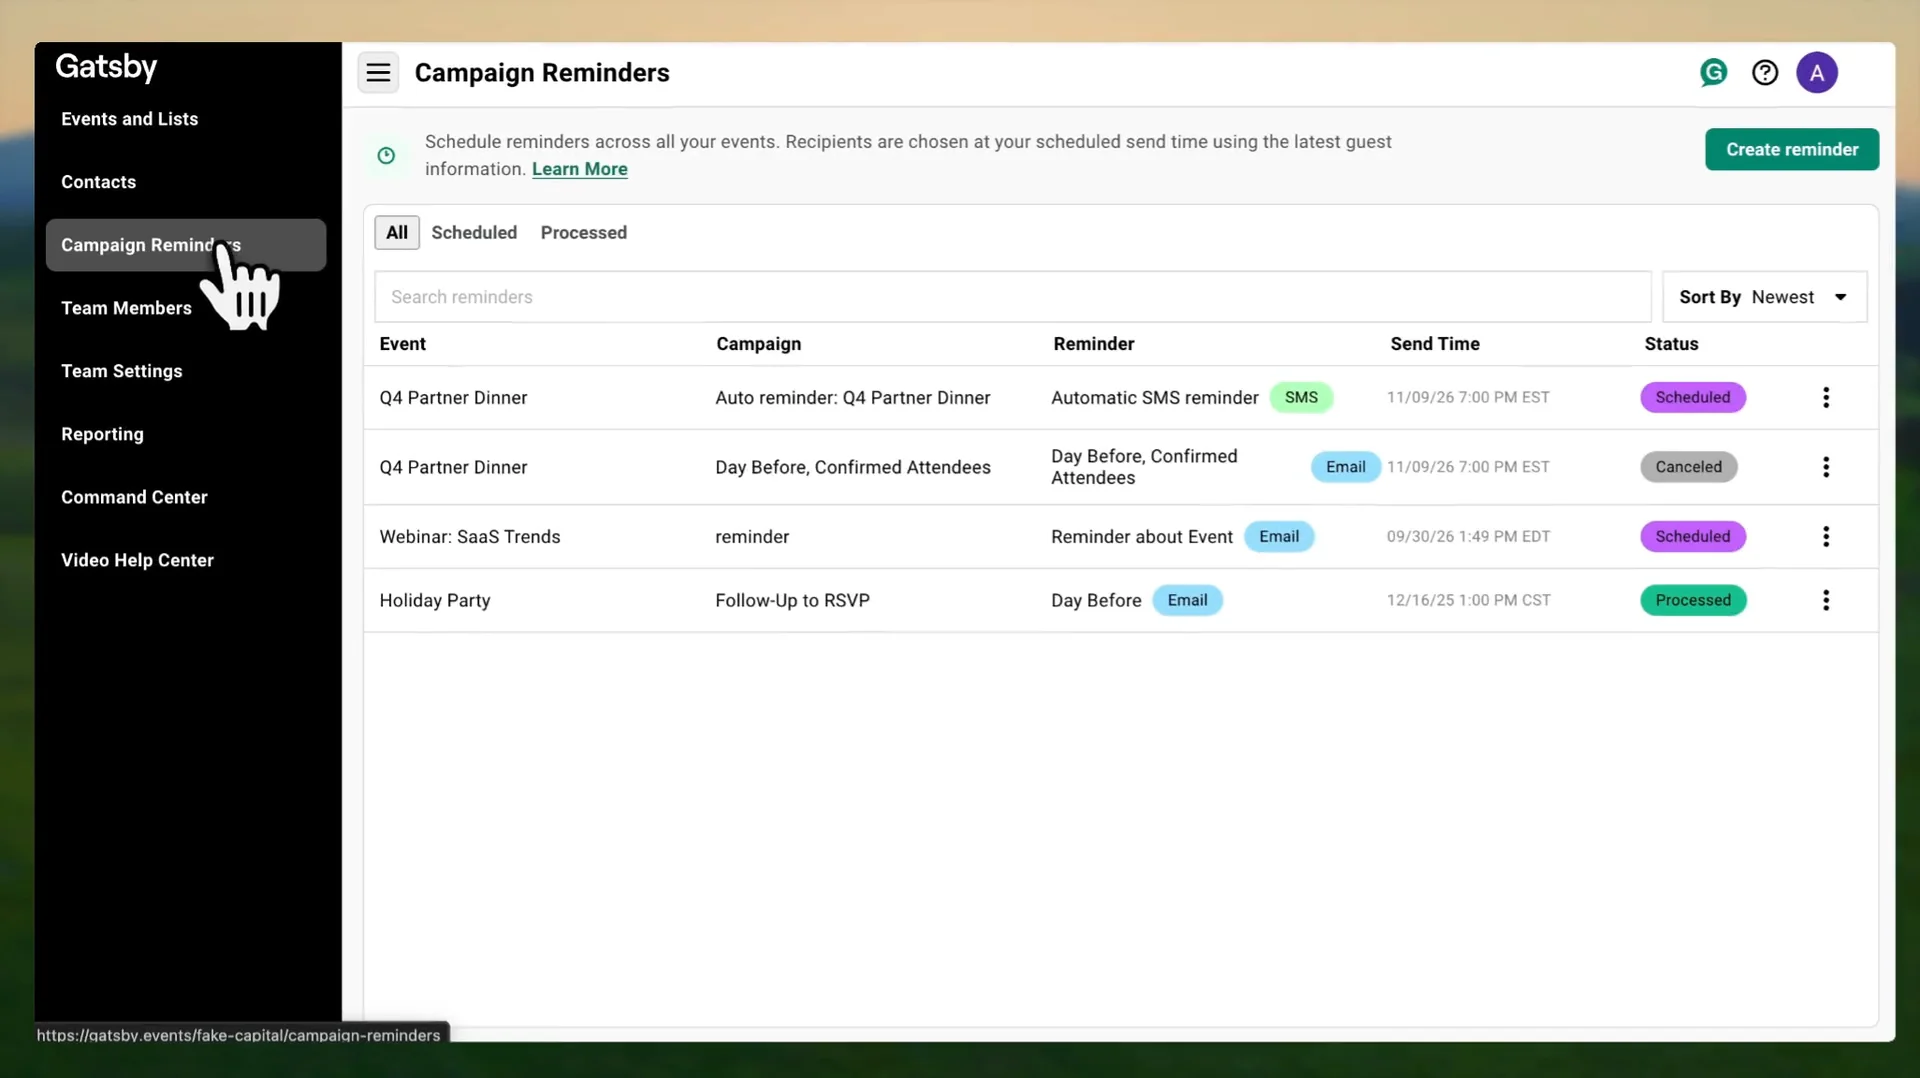](/videos/campaign-reminders-walkthrough.mp4)
A full walkthrough: start from the Campaign Reminders dashboard, pick the event, send it to accepted guests a week before the event, and see it scheduled in the event's Campaigns tab.
## The problem reminders solve
[Section titled “The problem reminders solve”](#the-problem-reminders-solve)
A regular scheduled campaign locks its recipient list the moment you hit schedule. That’s the right behavior for an initial invitation, where you want every selected guest to receive it.
It’s the wrong behavior for a follow-up. By the time the reminder fires, the people who needed a nudge a week ago have already RSVP’d, and the people who haven’t responded yet weren’t even on the list when you scheduled.
### Creating a Reminder
[Section titled “Creating a Reminder”](#creating-a-reminder)
There are two ways in. Attach a reminder to a campaign you’ve already sent, or write one from scratch in the composer. Either way you’re setting three things: who gets it, when it goes, and, for an attached reminder, which campaign’s message it borrows.
From a campaign you've already sent+
1. Open the campaign you want to follow up on. Reminders live under the **Reminders** tab on the right side of the campaign view.
2. Click **New Reminder**. The Create Reminder modal opens with a live preview on the right.
3. Name the reminder. This is internal, so something like *Day Before, Confirmed Attendees* or *T-7 Non-Responders* makes it easier to find later.
4. Set **Who gets it**, the guests who should receive it.
5. Set **When it sends**, either a fixed date and time or an offset before the event starts.
6. Click **Create Reminder**.
The reminder borrows the campaign’s message as-is. The preview shows exactly what will go out, so you can sanity-check it before saving. On an email campaign the **Send with** row names the sending service, **SendGrid**, **Gmail**, or **Outlook**. It’s a quick way to confirm the campaign is on SendGrid before you schedule.
From the composer, with its own message+
Use this when the follow-up should say something different from the invitation, and you don’t want to duplicate a campaign to get there.
1. Start a **New Campaign** and pick your channel.
2. In the chooser, pick **Schedule reminder** instead of **Draft** or **Campaign**.
3. Write the message.
4. Click **Create reminder**. The recipient picker is replaced by the reminder’s own filters, because a reminder’s audience is resolved when it fires, not now.
5. Set who and when in the modal, and create it.
The result appears in the Campaigns list as a row reading *Reminder · scheduled for \[date]*, and flips to *Reminder · sent \[date]* once it goes.
An email reminder needs a SendGrid sender. If your organization has none connected, the option is disabled with a tooltip, and in reminder mode the sender dropdown only offers SendGrid accounts. Drafts remember they’re reminders. Close the composer, reopen the draft, and you’re back in reminder mode with your settings intact. **Switch to regular campaign** backs out.
Sending the same reminder for every event? Set it up once, then open the composer’s three-dot menu and pick **Save as Template**. That saves the message, the timing, and the filters as a template your whole team can reuse. On the next event, **Load Template** from the same menu fills all three back in. The list only shows templates for the channel you’re writing in, so an SMS reminder sees SMS templates. If the new event lacks a field one of the filters relies on, like a survey question only the original event asked, that filter is dropped and you’re told.
Who gets it: filtering the recipients+
This is the same filter set you use on the guest list, not just RSVP status. Click **Add filter** and build the audience. The menu mirrors your guest list, grouped the same way:
* **Event.** RSVP, Attendance, Calendar Invite Status, Source, Referral Link, Is Plus One, Has Plus Ones
* **Contact field.** Company, Position, City, State, Tagged With, Dietary Restrictions, and any custom fields you’ve created
* **Sections.** The sections of your guest list
Events that collect survey answers or sell tickets show those filters too. At least one filter is required, and until you add one the panel says so.
A few guest-list filters aren’t offered here. Campaign status, seating, warnings, and anything that filters on a range or a date are all missing on purpose. A reminder resolves unattended days later, and those either can’t be re-run safely at that point or would quietly match nobody.
Whatever you pick is stored as a filter, not as a list of people, and re-run against the live guest list at the moment the reminder fires.
Older reminders created before this change keep their original RSVP-status filter and still work. Opening one from the Campaign Reminders dashboard shows a note instead of the filter editor. Open it from inside the event to edit the filters.
When it sends: a date, or an offset+
Two modes, chosen with the toggle above the field.
**On a date.** A fixed date and time. Use it when the moment matters more than the event does: a Monday-morning send, a specific embargo time.
***
**Before the event.** A number and a unit (days, hours, or minutes) *before the event starts*. The offset is what’s stored, so this reminder **follows the event**. Move the event and every relative reminder on it is rescheduled to the same distance from the new start time. Nothing to remember, nothing to redo.
***
The timezone picker sits under both modes, labeling the event’s own zone **EVENT** and yours **MY CURRENT** so you can’t schedule against the wrong one by accident. In **On a date** it decides when the reminder actually goes out. In **Before the event** the offset has already fixed that, so the picker only chooses which zone the resolved time is displayed in.
Either way Gatsby works out the result as you type and shows it in a card underneath: *Sends Mon, Sep 21, 7:00 PM EDT*, and below that how far it lands from the event, *1 day before the event starts*. That second line earns its place when you’ve picked a fixed date, because it tells you where your date actually falls relative to the event.
Reminders must be at least five minutes in the future.
Email or SMS+
A reminder takes the channel of the campaign it belongs to. A reminder on an SMS campaign is a text, and one on an email campaign is an email. From the composer, the channel is whichever one you picked when starting the draft.
SMS reminders you write yourself need the SMS add-on. The free SMS Auto-Reminder every organization gets is covered below. See [SMS Campaigns](/platform/email-campaigns/sms-campaigns/) for the difference.
What the reminder inherits from the campaign+
The reminder uses the campaign’s draft as-is. That means:
* Subject line, body, and any mail-merge fields
* All attachments from the draft
* The campaign’s sender (no separate sender configuration per reminder)
* The campaign’s BCC list
* QR code attachment (if the campaign has it enabled)
* Calendar file attachment (if the campaign has it enabled)
If you want a different message for the follow-up, write it in the composer as a standalone reminder. You can also edit the campaign’s draft before scheduling, or duplicate the campaign and schedule a reminder against the copy.
Email reminders require a SendGrid sender on the campaign. Campaigns using a connected Gmail or Outlook account can’t power a reminder, because those connections expire and would silently break scheduled sends. SMS reminders have no equivalent requirement.
On a Gmail or Outlook campaign you’ll still see the **Reminders** tab and any reminders already scheduled, but **New Reminder** is disabled. Hovering it shows *“Reminders are only available for SendGrid senders.”* To schedule one, switch the campaign’s sender to a SendGrid account. See [Email Configuration](/platform/account-settings/email-configuration/) for SendGrid setup.
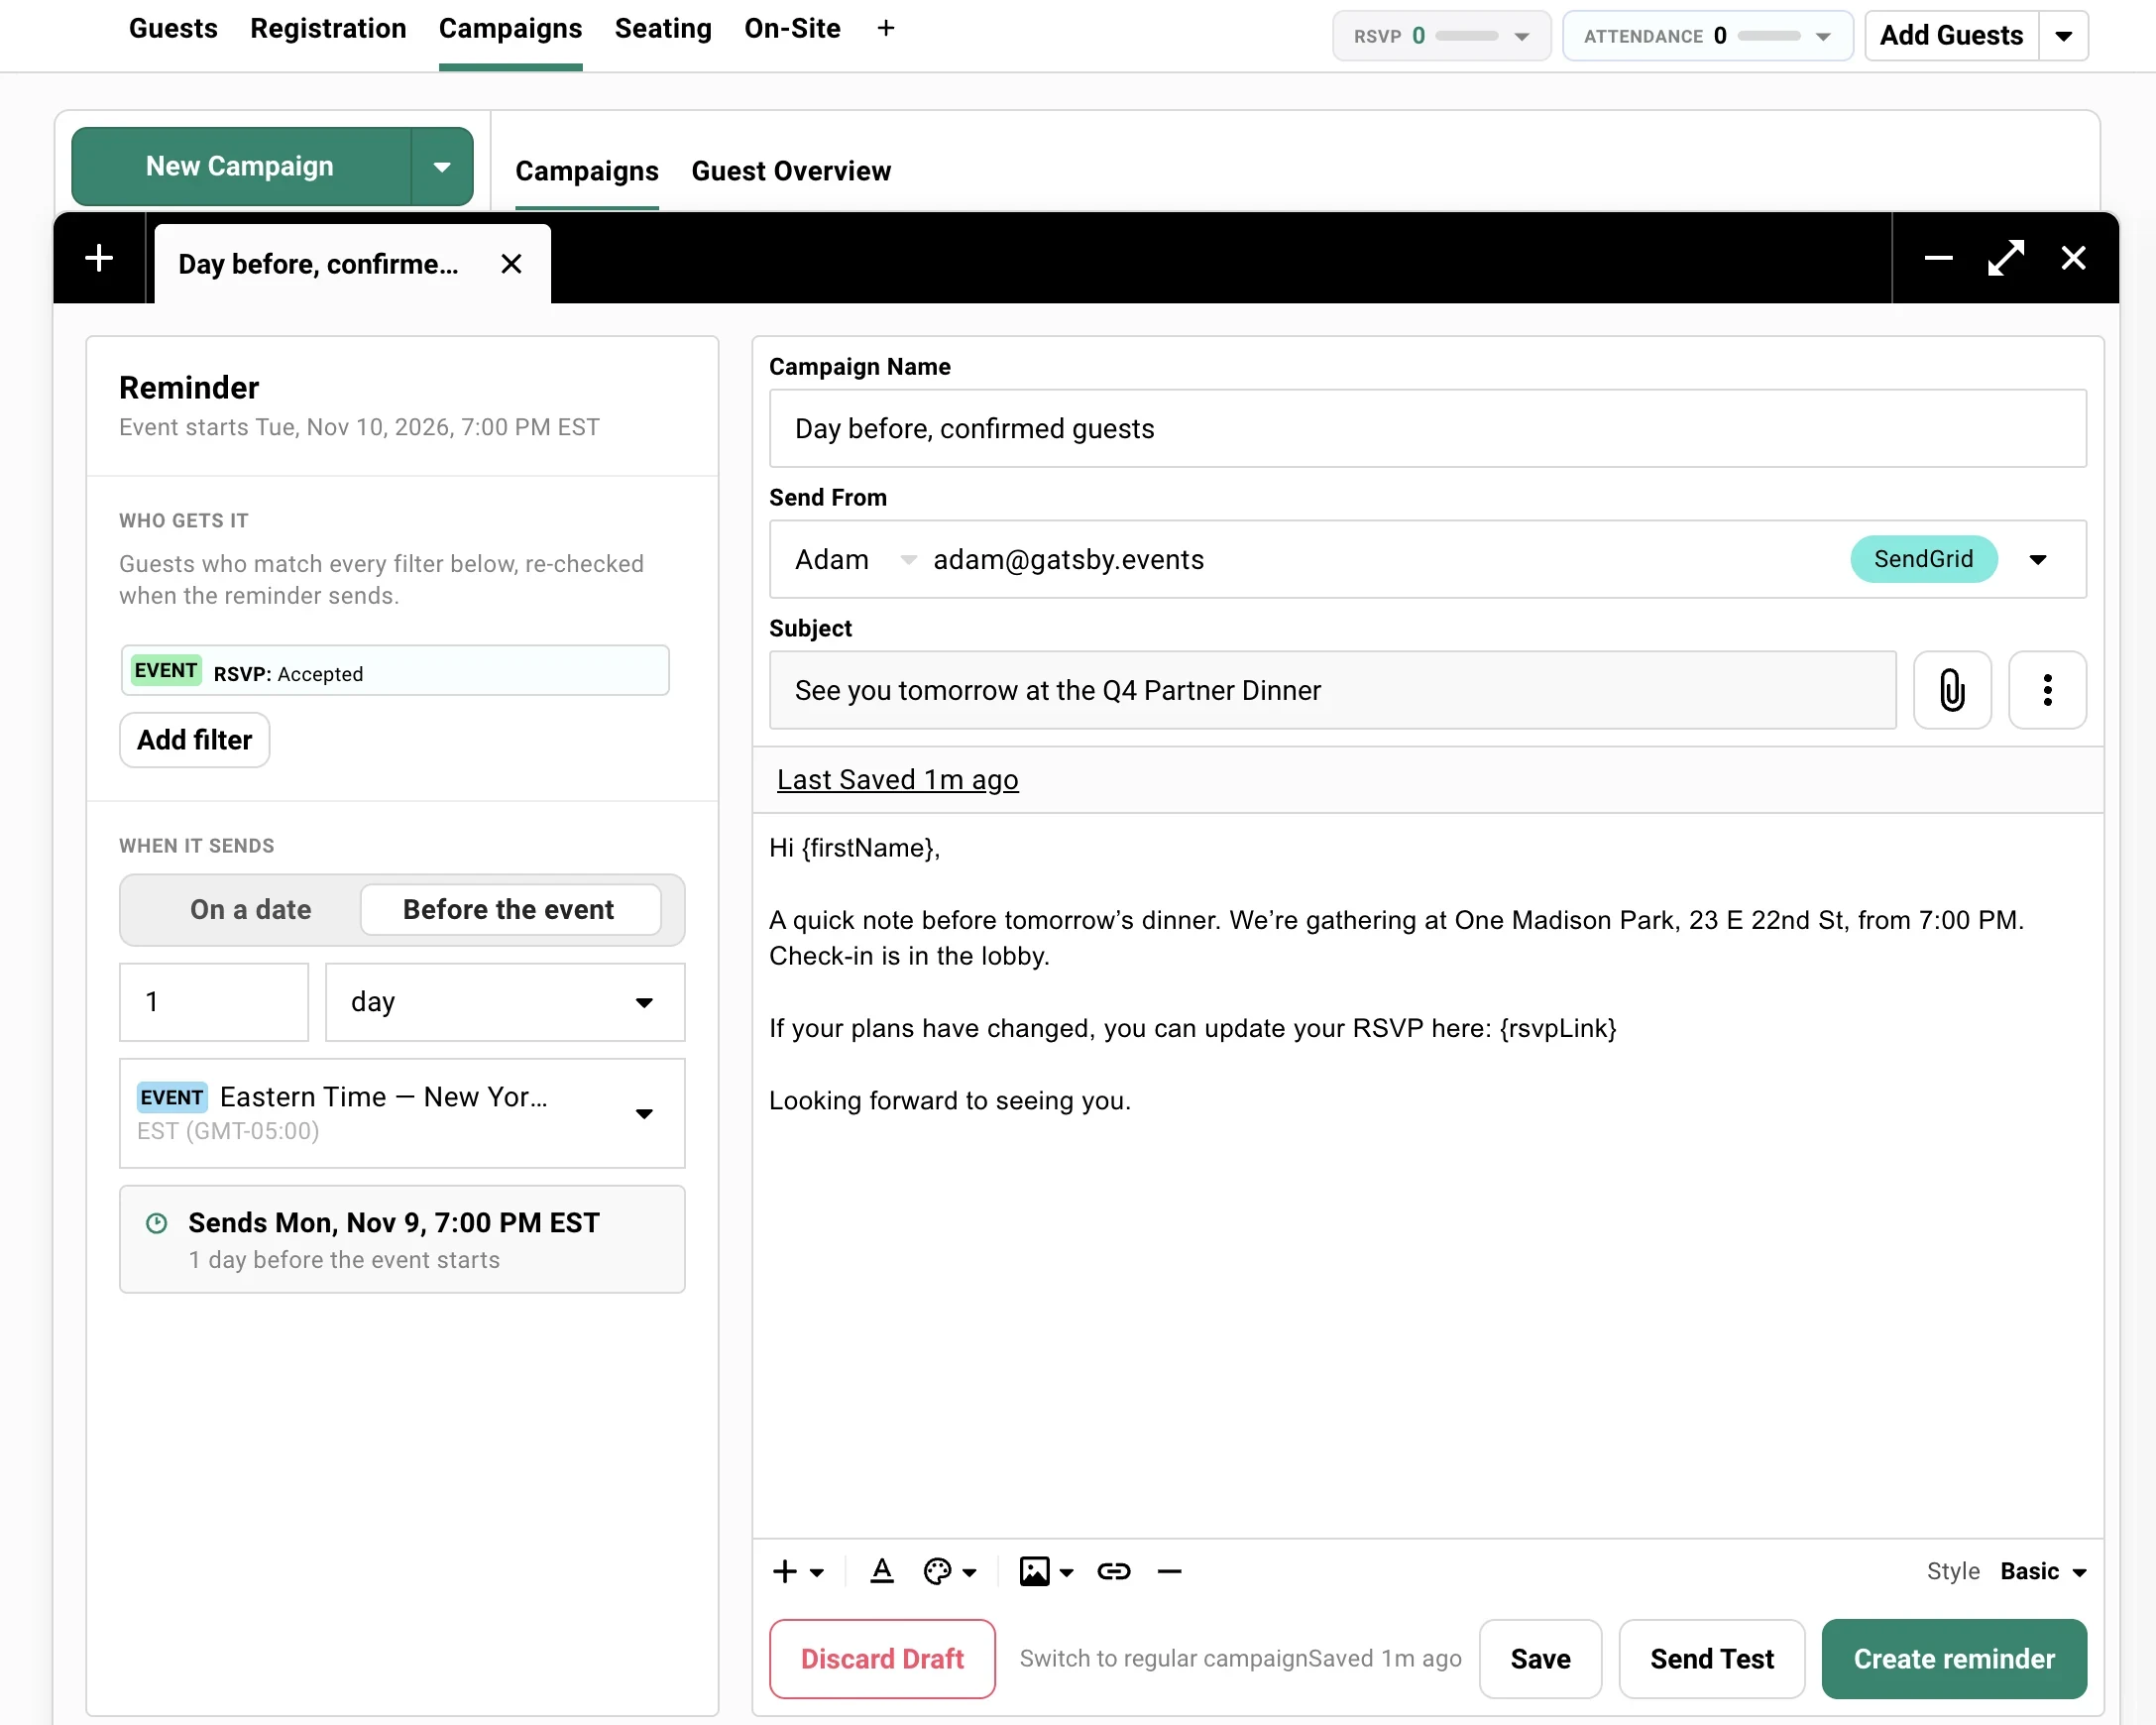
### Why filtering happens at send time
[Section titled “Why filtering happens at send time”](#why-filtering-happens-at-send-time)
This is the difference between a reminder and a regular scheduled campaign, and it’s the whole point of the feature.
When a reminder fires, Gatsby re-runs your filters against the live guest list. The recipient list is computed fresh. Guests who shifted out of the filter between scheduling and sending are not included. Guests who shifted in are.
A concrete example+
You’re hosting a CFO Breakfast in three weeks. You want to schedule two reminders against your invitation campaign:
1. **T-7, target Invited and Clicked.** Anyone who got the invite but hasn’t responded yet.
2. **T-1, target Accepted.** A friendly day-before confirmation with the address and parking notes.
When the T-7 reminder fires next week, anyone who accepted in the meantime drops off the recipient list automatically. They don’t get a “did you see our invite?” message after already saying yes.
When the T-1 reminder fires, it captures everyone who is *currently* Accepted, including the late RSVPs who said yes after T-7.
Combining filters+
Common RSVP combinations:
* **Invited + Clicked + Accepted (Survey Incomplete).** Opened or visited the landing page but never finished. The classic “still waiting on you” cohort. Include the Incomplete sub-status: a guest who clicked Accept but never completed a required survey question is not done RSVPing, and leaving them out means the group closest to converting never gets the nudge.
* **Accepted + Maybe.** Anyone planning to come, plus the fence-sitters.
* **Accepted** alone, for confirmations and day-of details.
Because the full guest-list filter set is available, the audience can be narrower than a status:
* **Accepted, and their ticket is still unpaid.** The payment nudge, to exactly the people who owe.
* **Accepted, and they answered “yes” to the dinner question.** The table-assignment note, to the guests it applies to.
* **Accepted, and not yet checked in.** A where-are-you text on the day, once check-in has started.
* **Plus-ones only.** Arrival instructions for the guests who never saw the original invitation.
Mail merge still works+
Every merge tag that works in the campaign works in the reminder, because the reminder uses the campaign’s draft: custom fields, first name, RSVP link, calendar link, and unsubscribe link.
If a recipient is missing a required custom field, that individual send fails and is recorded as Failed on the campaign. The rest of the reminder still goes out.
### The SMS Auto-Reminder
[Section titled “The SMS Auto-Reminder”](#the-sms-auto-reminder)
Separate from everything above, and free for every organization: a one-tap text reminder that goes to guests who accepted, 24 hours before the event starts.
How it differs from a reminder you build+
You don’t write it, schedule it, or filter it. You switch it on for an event under **Registration → SMS Auto-Reminder**, and Gatsby does the rest: fixed wording, fixed 24-hour timing, and guests who accepted and have a valid US mobile number.
It’s the safety net, not the tool. If you need a different message, different timing, or a different audience, that’s a custom SMS reminder and it needs the SMS add-on.
Where it appears here+
Turning it on adds a row to the event’s Campaigns tab and to the Campaign Reminders dashboard, alongside everything else. It carries an **Automatic** label and has no action menu, because it’s system-owned.
To change or cancel it, go back to **Registration → SMS Auto-Reminder** and use the toggle. Opening the campaign shows a banner saying the same.
[SMS Campaigns](/platform/email-campaigns/sms-campaigns/) has the full detail: the exact message, who receives it, and what happens when the event moves.
## Every reminder across every event, one screen
[Section titled “Every reminder across every event, one screen”](#every-reminder-across-every-event-one-screen)
When you’re running ten events, scheduled reminders sitting inside ten different campaigns are easy to lose track of. The Campaign Reminders dashboard puts every scheduled send across your whole organization on one page.
### The Campaign Reminders Dashboard
[Section titled “The Campaign Reminders Dashboard”](#the-campaign-reminders-dashboard)
Find it under **Campaign Reminders** in the left navigation. The dashboard lists every reminder across every active event in your organization, and says so at the top.
Creating one from here+
**Create reminder** sits at the top right. It doesn’t build the reminder on this screen. It asks **Choose an event**, you pick one from your upcoming events, and **Go to Campaigns** drops you on that event’s Campaigns tab to write it. The modal says as much: *You’ll create the reminder from the event’s Campaigns tab.*
The list shows upcoming events you have access to, with a **Session** or **Registration Hub** badge where the event has that role. Quick events aren’t listed.
The detour is the point. A reminder’s audience is a set of guest-list filters, and those only mean something inside an event, so the dashboard sends you where the guest list is.
What the dashboard shows+
A single table with one row per reminder, email and SMS together, each row labeled with its channel. Columns: Event, Campaign, Reminder, Send Time (in the reminder’s timezone), and Status.
The default tab is **All**. Toggle to **Scheduled** to see only what hasn’t fired yet, or **Processed** for history.
Search the **Reminder** field by name. Sort by Send Time, newest or oldest first.
Editing or canceling from the dashboard+
Click the three-dot menu on any **Scheduled** row.
**Cancel Reminder** works from here. **View/Edit in Event** takes you to the reminder’s campaign inside the event, which is where the filter editor lives. The dashboard has no guest list of its own to filter against.
Once a reminder is Processed the menu hides; you can’t edit a send that already happened. A scheduled reminder whose send time has slipped past is still cancelable, so nothing gets stranded.
SMS Auto-Reminders are view-only from here. Manage them under **Registration → SMS Auto-Reminder** on the event.
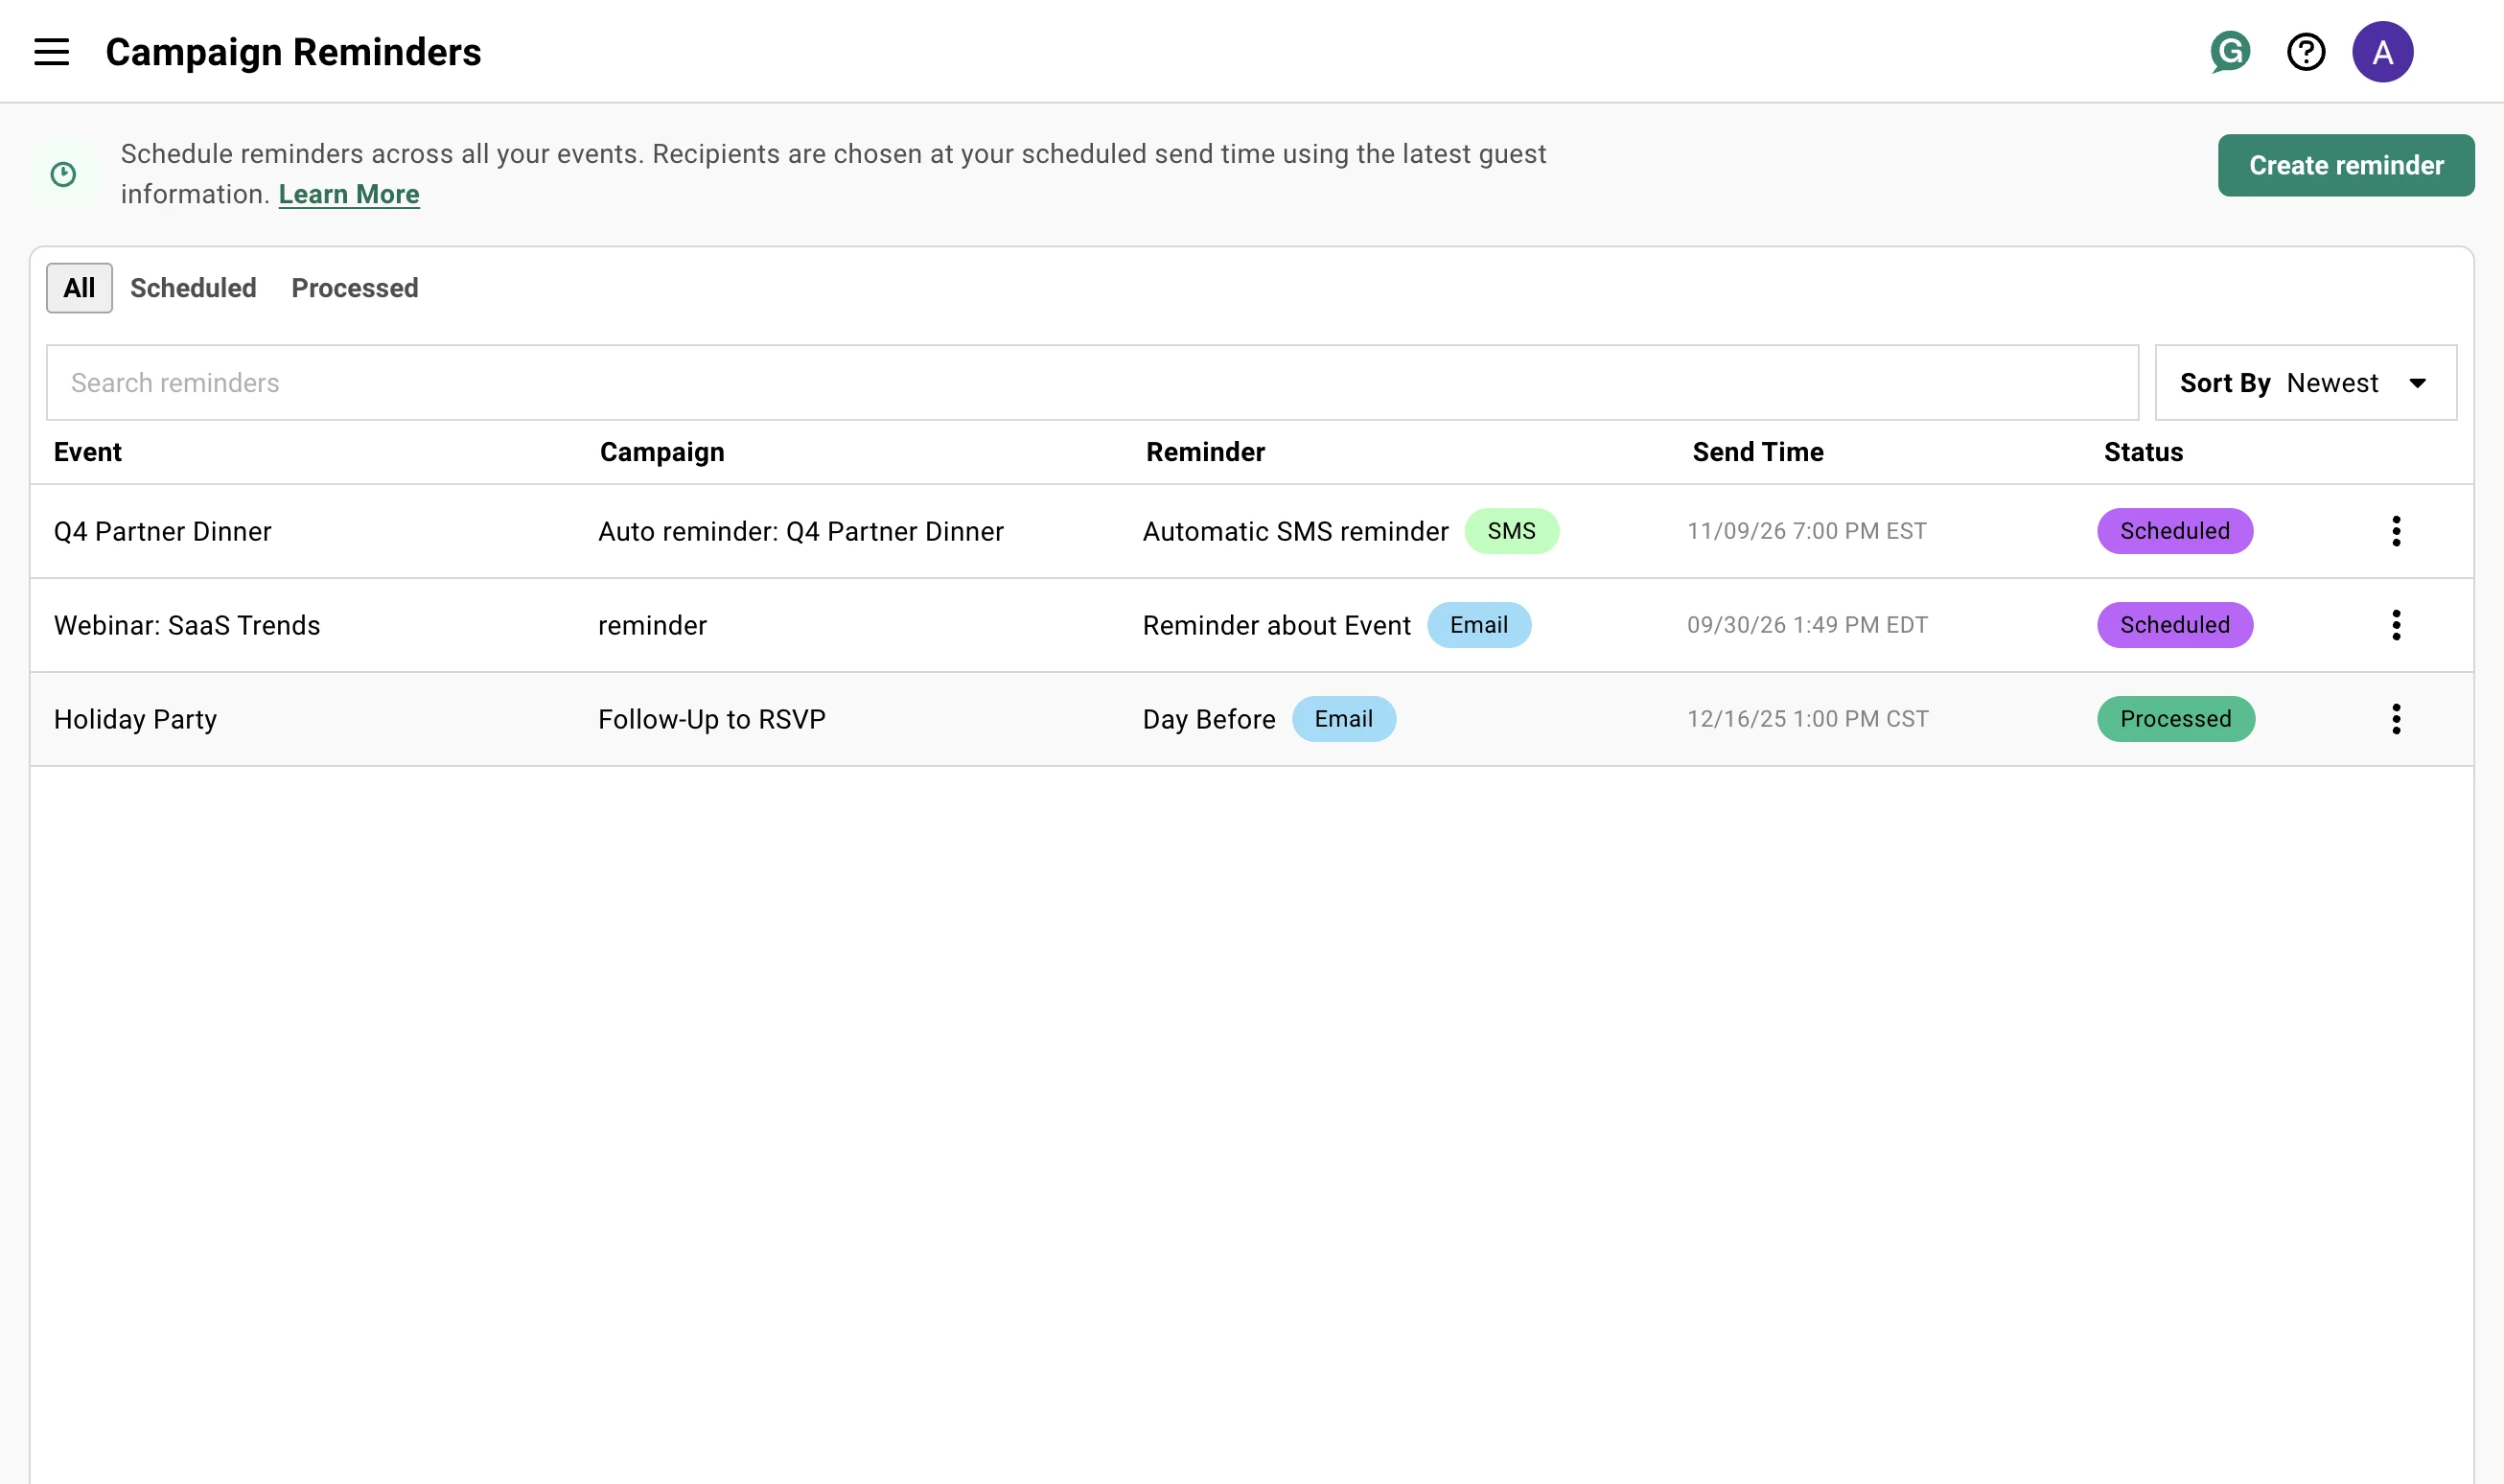
### Statuses, Editing, and Canceling
[Section titled “Statuses, Editing, and Canceling”](#statuses-editing-and-canceling)
Every reminder moves through a defined lifecycle. What you can do to it depends on where it is.
> The lifecycle:
>
> **Scheduled —> Processed**
>
> Or, if you intervene: **Scheduled —> Cancelled**
>
> If something goes wrong: **Scheduled —> Failed**
Status definitions+
**Scheduled**
Created and waiting for its send time. Editable. Cancelable.
***
**Processed**
The reminder fired. Emails are out the door. The row shows how many guests received it. No further actions available.
***
**Cancelled**
You canceled before send time. No emails went out. The row stays in the dashboard for the audit trail.
***
**Failed**
Something blocked the send, typically a configuration issue with the campaign’s draft or sender. The error reason is recorded on the reminder.
Editing a Scheduled reminder+
1. Open the reminder from inside the campaign. From the **Campaign Reminders** dashboard, use **View/Edit in Event** to get there.
2. Click **Edit Reminder** from the three-dot menu.
3. Change the name, the filters, the schedule mode, the offset or date, or the timezone. The same five-minute-minimum rule applies, so you can’t reschedule into the past or the immediate future.
4. Click **Update Reminder**.
You can’t change which campaign the reminder belongs to, or switch its channel. If you need a different message, cancel this reminder and create a new one against the right campaign.
An SMS Auto-Reminder can’t be edited at all. It’s managed from **Registration → SMS Auto-Reminder**.
Duplicating a reminder+
To send a second reminder much like one you already have, open its three-dot menu inside the campaign and click **Duplicate Reminder**. This works on a reminder in any status, including one that’s already gone out.
The Create Reminder modal opens with the same filters, schedule, and channel filled in. The name is left blank for you to fill, and a fixed send time is moved to the future so it can’t land in the past. Adjust what differs and create it.
The SMS Auto-Reminder is the one reminder you can’t duplicate.
Canceling a Scheduled reminder+
1. Open the three-dot menu on the reminder.
2. Click **Cancel Reminder**.
3. Confirm.
The reminder will not fire. The row stays in the dashboard with status Cancelled.
## Common Questions
[Section titled “Common Questions”](#common-questions)
When should I use a Reminder instead of scheduling a regular campaign?+
Use a reminder whenever the audience depends on RSVP status: any follow-up, nudge, day-before note, or post-event message to a status-defined group.
Use a regular scheduled campaign for initial invitations, where you want the recipient list locked at the moment you schedule.
The short version: if you’d describe the send as “to everyone who hasn’t responded yet” or “to confirmed attendees,” it should be a reminder.
Can I send more than one reminder from a single campaign?+
Yes, and this is the intended pattern. Stack a T-7 nudge to non-responders, a T-2 nudge to fence-sitters, and a day-of confirmation to Accepted guests, all against the same invitation campaign.
Each reminder is independent: its own name, filter, and send time.
I moved the event date. Do I have to redo my reminders?+
Not if you scheduled them as **Before the event**. Those store an offset, so they reschedule themselves to the same distance from the new start time, automatically, without you opening them.
Reminders scheduled **On a date** stay where you put them. That’s the point of the mode: a fixed moment is a fixed moment. If you moved the event, check them.
Can I use a different message for the reminder than the original invite?+
Yes. Start it from the composer rather than from a sent campaign. Pick **Schedule reminder** in the new-draft chooser, write whatever you want, and set the timing. You get a reminder with its own message and no duplicated campaign to keep track of.
Attaching a reminder to an existing campaign still borrows that campaign’s message as-is.
Can I send a reminder as a text instead of an email?+
Yes, with the SMS add-on. Reminders on an SMS campaign are texts, and the composer lets you start a standalone SMS reminder the same way it does an email one.
Without the add-on, every organization still gets the free SMS Auto-Reminder: one text, 24 hours before, to guests who accepted. See [SMS Campaigns](/platform/email-campaigns/sms-campaigns/).
What if a guest's RSVP status changes after I schedule the reminder?+
That’s the whole point. The recipient list is recomputed when the reminder fires, not when you schedule it.
If someone moves from Invited to Accepted between scheduling and firing, and your reminder targets Invited, they won’t get it. If they move the other way, from Accepted to Declined, and your reminder targets Accepted, they also won’t get it.
What happens if a guest is missing a custom field used in mail merge?+
That individual send fails. The guest is recorded with status **Failed** on the campaign, with the reason noted (missing custom field name).
The rest of the reminder still goes out to everyone else. The reminder itself is marked Processed once the run completes, with the failure count surfaced in the execution snapshot.
To avoid this, make sure every targeted contact has values for the custom fields your draft references, or remove the unused merge tags from the draft.
How far in advance can I schedule a reminder?+
There’s no maximum. Schedule a reminder months out if your event is months out.
The minimum is five minutes in the future. The same goes for edits, so you can’t reschedule a reminder to fire in the next five minutes.
Do reminders respect unsubscribes?+
Yes. The same org-wide email unsubscribe rules that apply to campaigns apply to email reminders. Anyone who unsubscribed from your organization’s emails will not receive one, whatever their RSVP status.
SMS reminders honor the SMS opt-out lists, which are separate. A guest who replied STOP or BLOCK is dropped at the moment the reminder fires. See [SMS Consent & Compliance](/platform/email-campaigns/sms-consent/).
Can I see who actually received a Processed reminder?+
Yes. Once a reminder is Processed, the campaign’s standard tracking tabs (Sent, Bounced, Failed, etc.) include the reminder’s sends. The reminder row itself records the count of successful sends at the time it ran.
Why do email reminders require SendGrid?+
Same reason confirmation emails do. Gmail and Outlook connections expire periodically and prompt you to log back in. If that happens between when you schedule a reminder and when it fires, the send fails silently and your guests never hear from you.
SendGrid connections don’t expire. A reminder scheduled six weeks out will fire reliably whether you’re at your desk or not. SMS reminders send through Gatsby’s own carrier connection, so they have no equivalent requirement.
If your campaign is sending from Gmail or Outlook, the **Reminders** tab still appears, but **New Reminder** is disabled, and hovering it shows *“Reminders are only available for SendGrid senders.”* Switch the campaign’s sender to a SendGrid account before scheduling a reminder. The [Email Configuration](/platform/account-settings/email-configuration/) page walks through SendGrid setup.
Where do I find a reminder I scheduled last week?+
Two places. Inside the campaign it belongs to, under the **Reminders** tab. Or across every event at once, under **Campaign Reminders** in the left navigation. Both show the same data.
# Sender Settings
> Send emails as executives and relationship owners without waiting for them to hit send. Authenticate from the person who matters while your team handles execution.
Why it matters
## The partner says send from my email. Then ignores your draft for three days. How do you send without waiting?
The relationship owner’s name gets emails opened. But relationship owners don’t do execution work.
How Gatsby helps
### Authorize Once, Execute Anytime
The partner grants permission. Your team controls timing. No bottleneck.
### Route Replies to the Right Person
Invites come from the executive. Responses go to the coordinator.
## Why This Matters
[Section titled “Why This Matters”](#why-this-matters)
The partner says “send from my email.” Then ignores your draft for three days. You follow up. He says “looks good.” Then ghosts on actually clicking send.
The event is tomorrow.
You send from marketing@ and it gets ignored. The relationship owner’s name matters. But relationship owners don’t do execution work.
Gatsby lets you authenticate as them while your team controls timing and operations. The partner authorizes once. Your team sends whenever the campaign is ready. No bottleneck.
The results: Higher open rates because recipients recognize the sender. No waiting on busy executives. The work gets done.
## Sending Options
[Section titled “Sending Options”](#sending-options)
Different sending needs require different infrastructure. An executive dinner for 40 people needs personal credibility. An annual conference with 3,000 attendees needs deliverability at scale. You need both options.
### Google and Microsoft Integration
[Section titled “Google and Microsoft Integration”](#google-and-microsoft-integration)
When your LP gets an invite from , they might open it. When they get an invite from Marcus, the partner they’ve known for 15 years, they definitely open it.
That’s the difference between a platform email and a real relationship.
Connect your Google or Microsoft account to send emails directly from your outbox. Recipients see your name, your email address, your signature. Emails show up in your Sent folder. You get the replies.
How It Works+
1. Go to **Team Settings » Linked Services**.
2. Select **Google** or **Outlook** under **Each person signs in**.
3. Pick how it connects.
Google offers **Connect — send only**, or **Connect — send + bounce tracking**, which also reads incoming bounce, out-of-office and auto-reply messages and updates your calendar. Outlook has one option, **Link an Outlook Account**, which connects with send access only.
4. Sign in and approve the permission.
That person now appears as a sender option for anyone on the team.
What the Sender Sees+
Emails appear in the sender’s Sent folder automatically. They have a record of every communication sent on their behalf.
They receive replies unless you set a different reply-to address. Out-of-office notifications and bounce reports come back to them regardless of reply-to settings. The sender always sees delivery issues.
Sending Limits+
Google and Microsoft cap how much one account can send per day. For a Google account the cap is about 2,000 to 2,500 emails a day. For Microsoft it depends on your organization’s Microsoft agreement. Both providers set these numbers, so treat them as approximate.
Gatsby also staggers sends from connected accounts so they don’t look like a mass mailing: about one email every 8 to 10 seconds. 100 emails takes about 15 minutes, and a send to a couple of thousand people takes several hours. For Google senders the pacing is shared across all of your in-progress sends, so a small send started while a large one is still going out waits behind it.
Our recommendation is to keep any one Gmail or Outlook sender to batches of about 500 per day. For anything bigger, send from a SendGrid address. SendGrid isn’t subject to the Google or Microsoft caps or this pacing, so large sends go out much faster.
For personal, relationship-driven events, none of this comes up. A dinner invitation going to 80 people is well under the threshold.
Best For+
* **Executive dinners** where the host’s name matters
* **Investor meetings** and LP communications
* **Partner-hosted events** at portfolio companies
* **Any send** where personal credibility outweighs volume
Gatsby is SOC 2 Type II certified. Outlook connects with send access only. Gmail offers the same, or send plus bounce tracking, which also reads incoming bounce, out-of-office and auto-reply messages. Gatsby never reads your regular conversations, and your emails are not accessible to your event operations team.
[](/legacy/gmail-outlook-and-sendgrid-integration-2026.mp4)
### SendGrid Sending
[Section titled “SendGrid Sending”](#sendgrid-sending)
For high-volume sends or custom sending addresses, connect through SendGrid. Requires DNS configuration but removes per-account sending limits.
How It Works+
1. Contact support for DNS instructions specific to your domain.
2. Add the DNS entries to your domain configuration.
3. Gatsby verifies the setup automatically.
4. Add the addresses your email should come from, on your authorized domain.
Once configured, send from any address at your domain without individual account connections. SendGrid is one connection the whole team shares, so nobody signs into it and no address belongs to a particular person’s login.
Creating Sending Addresses+
Go to **Team Settings » Linked Services » SendGrid** and click **Add address**. Enter the name recipients will see, then the part of the address before the @, and pick the domain beside it. Only domains Gatsby has verified for you appear in that list.
Adding an address that is already on the list does nothing. Gatsby says so and offers **Who Can Send** instead, which is usually what someone wants when they land there.
If the inbox exists, you receive replies. If it doesn’t exist, replies bounce. Common pattern: as an alias shared by the team.
Some addresses work perfectly as SendGrid senders but can’t be integrated as personal accounts. A shared mailbox that nobody logs into directly, for instance. SendGrid handles these cleanly.
Bring Your Own SendGrid Account+
You can connect your existing SendGrid account instead of using Gatsby’s shared infrastructure. Useful for teams with established sending reputation or specific compliance needs.
Global BCC for Compliance+
Set an address to receive a copy of every email sent through Gatsby. Required by some firms for record-keeping.
All outbound messages get copied to this address automatically. Nothing to configure per campaign.
Best For+
* **Large conferences** with thousands of attendees
* **Broad announcement campaigns** to your full database
* **Notification emails** like confirmations and waitlist messages
* **Any send** over 500 recipients

### Choosing the Right Method
[Section titled “Choosing the Right Method”](#choosing-the-right-method)
Both methods work. The choice depends on volume and who the sender is.
Use Google or Microsoft When+
* Send volume under about 500 per sender per day
* The sender’s personal identity matters
* You want emails in the sender’s Sent folder
* The executive wants visibility into what went out
**Examples:** Partner invitations to portfolio companies. Executive dinner RSVPs. Investor communications. Board meeting follow-ups.
Use SendGrid When+
* Send volume exceeds daily limits
* Using a shared address like events@ or info@
* You need branded notification emails (confirmation, waitlist, decline)
* Conference invitations going to thousands
**Examples:** Annual meeting invitations. Newsletter sends. Post-event surveys to all attendees.
Deliverability Considerations+
Smaller sends often perform better from Google or Microsoft. Personal accounts have established reputation with major email providers.
Large volume performs better from SendGrid. Warmed reputation, no throttling, proper infrastructure for scale.
Either way, content and recipient engagement history matter more than infrastructure. A well-written invitation from a recognized sender beats perfect technical setup every time.
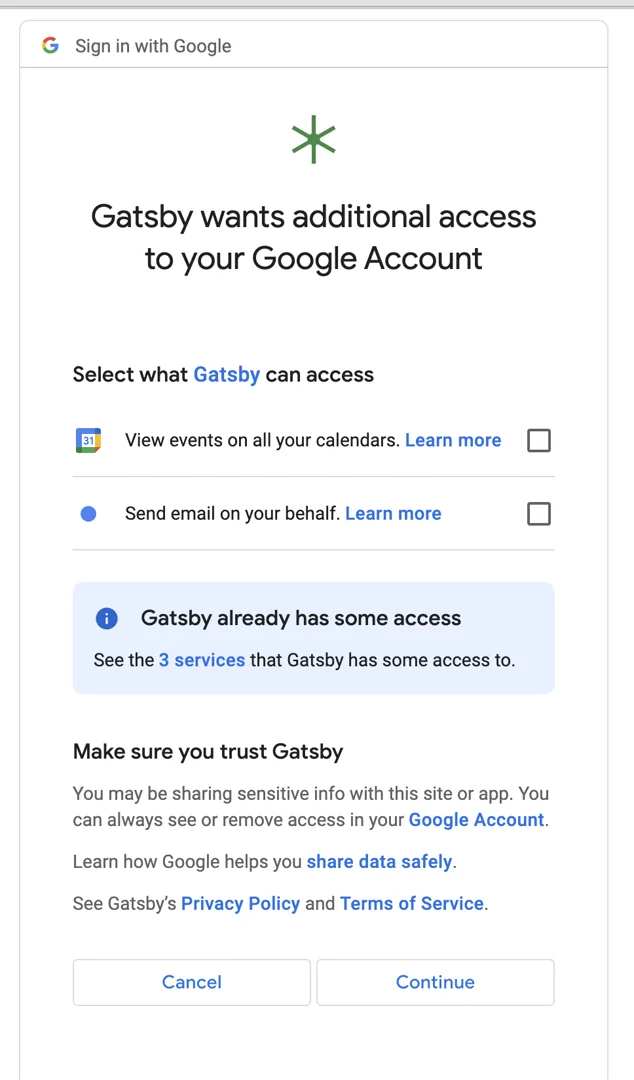
## Configuring the Sender
[Section titled “Configuring the Sender”](#configuring-the-sender)
Getting the infrastructure connected is step one. Configuring exactly how emails appear and where replies go is step two. Small details matter when you’re sending as the managing partner.
### Selecting the Sender
[Section titled “Selecting the Sender”](#selecting-the-sender)
Choose who appears as the sender when composing your campaign.
Choosing a Sender+
In any campaign, click the dropdown arrow on the left side of the send-from box.
You’ll see all team members who have connected their Google or Microsoft accounts. Plus any SendGrid addresses configured for your team.
Pick the right person for this particular send.
Adding a Sender from the Campaign+
Click the **+** icon on the send-from dropdown. Sign into Google or Microsoft directly, add a SendGrid account, or invite a teammate to connect their own — the menu offers **Invite a teammate to connect Gmail** and **Invite a teammate to connect Outlook**.
No need to leave the campaign composer. Connect, invite, and continue.
Delegated Sending Permissions+
By default, once someone connects Google or Microsoft, any team member can select them as a sender. See **Permission and Access** below.
Orgs that restrict senders per address work differently. There, each sender is limited to the people authorized on it, and nobody else sees it in the send-from dropdown. On the SendGrid list that shows as a **Who can send** column, and you set it from **Edit Who Can Send** on the address row. If you have no such column, your org doesn’t restrict senders this way.
External Collaborators+
Co-hosts and external partners can connect their own email through Google or Microsoft. They can only send as themselves.
They cannot send as you. You cannot send as them. Complete isolation.
This keeps collaborators siloed while enabling their branded sends for the events they’re involved with.
[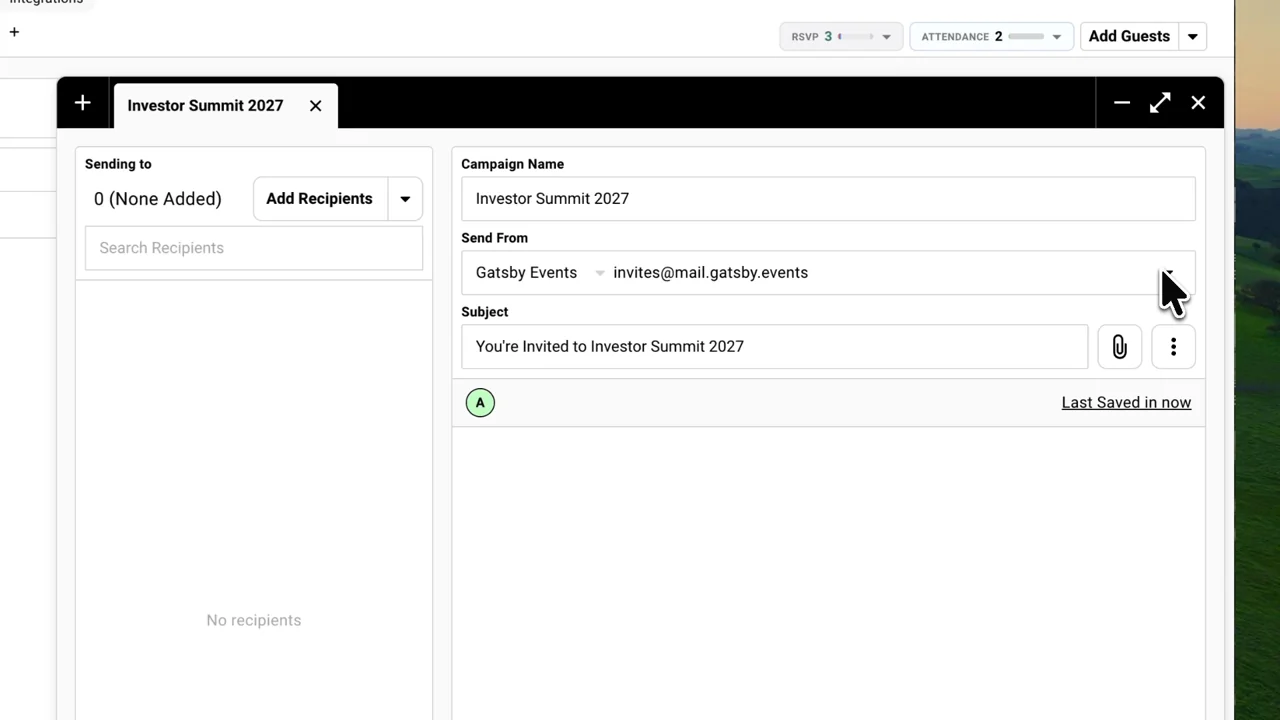](/legacy/send-from-reply-to-01.mp4)
### Display Names
[Section titled “Display Names”](#display-names)
Customize how the sender’s name appears in recipients’ inboxes.
Editing the Display Name+
1. Click the dropdown arrow next to the sender name (middle of the send-from box).
2. Click **Edit Display Name**.
3. Enter your preferred text.
4. Save.
Display names can only be edited on Gmail and SendGrid senders. Outlook senders always show the name Microsoft holds for the account, so if you need a custom name on an Outlook-connected address, send from a SendGrid address on the same domain instead.
**Examples:**
* “Marcus Chen”
* “Marcus Chen, Partner”
* “Marcus Chen | Keystone Ventures”
**Changing display names is not recommended.** Recipients’ email clients cache display names. Anyone who has received email from this address before will continue to see the old name. If you’ve already emailed guests from `events@yourfirm.com` as “Firm Events”, renaming it to a co-host name like “Firm x Partner” for one event will still show the old name to everyone who has heard from you before.
There’s no way to force a cache clear on their end.
Mid-relationship name changes also resemble spoofing, which can hurt deliverability. If you need a different name, use a different email address, keep one consistent display name across all sends, or accept that some recipients will see the cached version.
[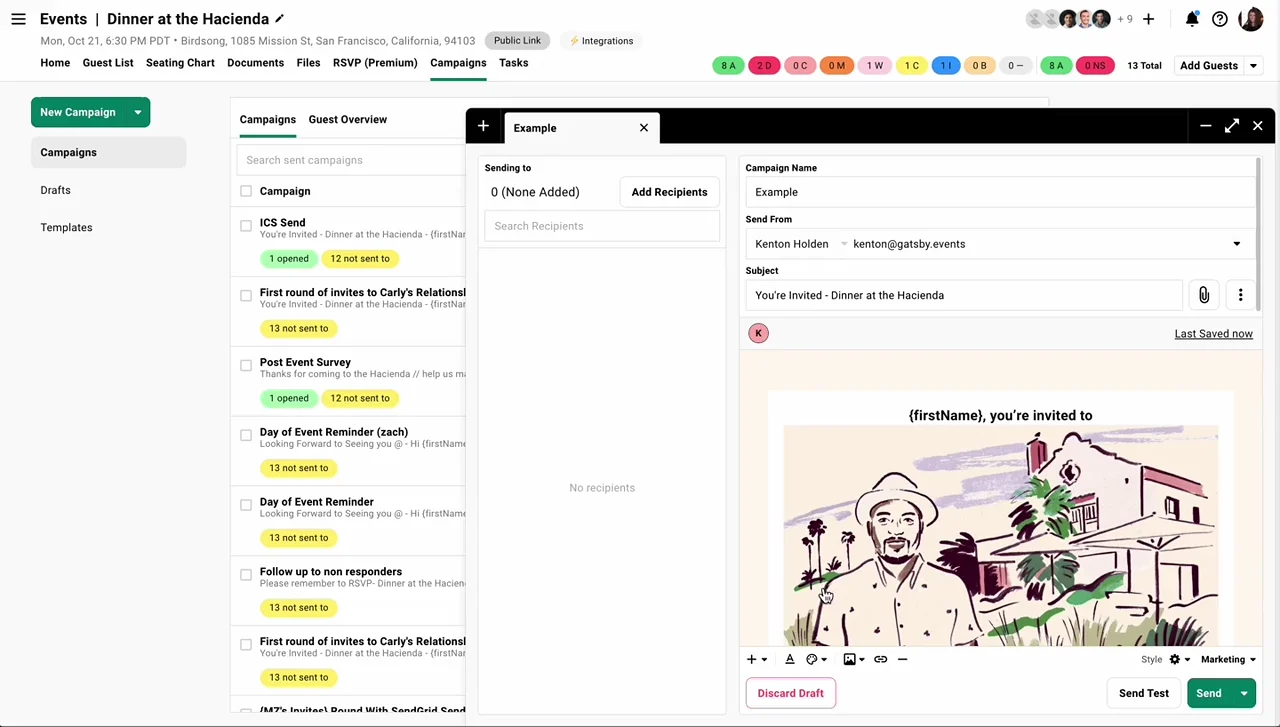](/legacy/send-from-reply-to-02.mp4)
### Reply-To Addresses
[Section titled “Reply-To Addresses”](#reply-to-addresses)
Route responses to someone other than the sender. The partner sends. The coordinator handles responses.
Setting a Reply-To+
1. Click the three dots to the left of the subject line.
2. Click **Set Reply To**.
3. Choose the person who should receive responses.
The Address I Want Isn't in the Reply-To or CC List+
The Reply-To and CC/BCC options list your Team Members. To use an address that isn’t there, such as a shared inbox, an alias, or an assistant, add it as a team member on the **Team Members** page. Nobody has to sign in or set a password for it.
Then refresh your browser tab. An open campaign doesn’t always pick up newly added team members until you reload, and the address should appear in the menu after that.
Why This Matters+
The invite comes from Sarah, Partner. Responses go to Elena, her coordinator.
Sarah’s inbox stays clean. Elena captures RSVPs and questions. Replies don’t get lost in an executive’s overflowing inbox.
This is how professional services firms actually work. The partner is the face. The coordinator is the operator.
What Still Goes to the Sender+
Out-of-office notifications always return to the original sender’s inbox. So do bounce reports and automatic system replies.
The sender sees delivery issues even when replies route elsewhere. This is email protocol, not a Gatsby setting.
Where Replies Actually Show Up+
Replies land in the sender’s or reply-to address’s own inbox — Gmail, Outlook, or whatever mailbox that address points to. Gatsby doesn’t surface those replies inside the product.
[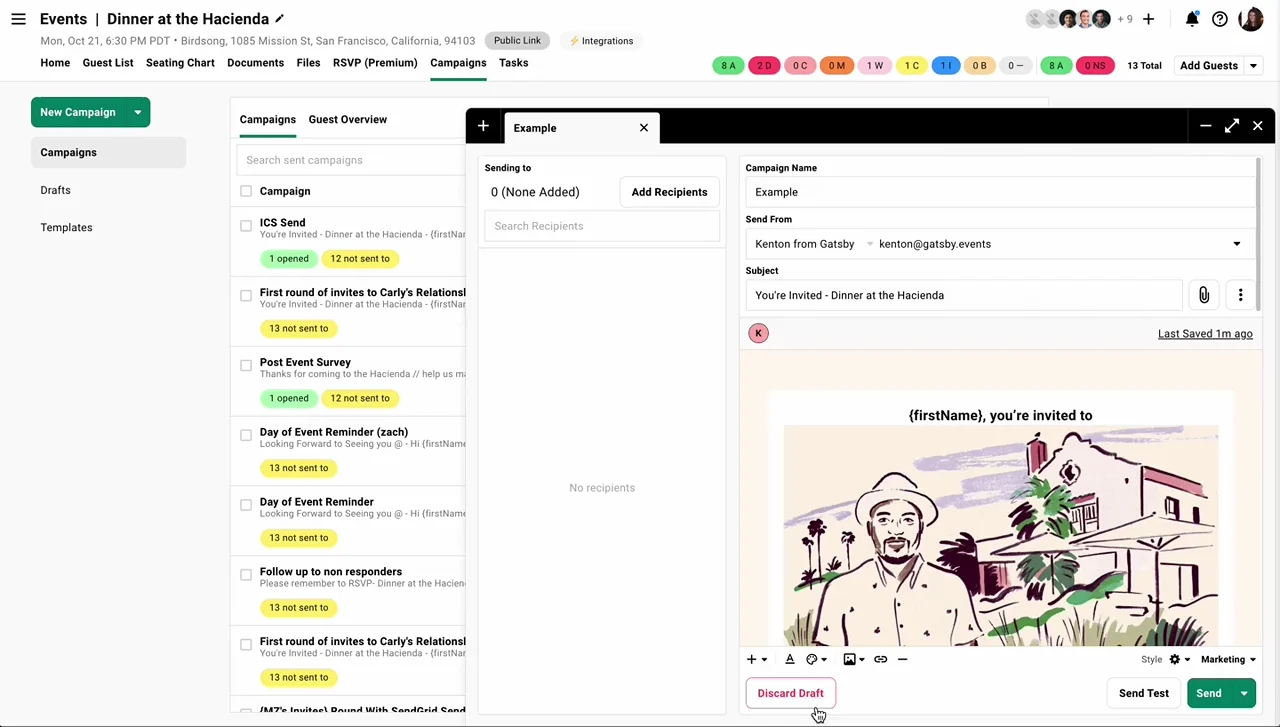](/legacy/send-from-reply-to-03.mp4)
## Permission and Access
[Section titled “Permission and Access”](#permission-and-access)
Sending as the managing partner is powerful. It requires explicit authorization. No one sends as someone else without permission.
Team members must authorize Gatsby to send on their behalf. This happens through **Team Settings » Linked Services**, or by accepting an invite a teammate sends them. Once authorized, any team member can select them as a sender.
How Permissions Work+
Each person controls their own authorization. When Marcus connects his Google account, he’s granting permission for the team to send as him.
He can revoke it at any time from Team Settings. It’s his account, his call.
SendGrid works the other way around. Nobody signs into it, so there is no personal authorization to give or take back. An admin decides who can send as each address from that address’s row.
Team Member Sender Access+
All team members see all connected senders. If five people have connected their accounts, everyone can send as any of those five.
This requires trust. You’re giving your team the ability to send email as the managing partner. Make sure that’s what you want.
Some orgs restrict this per sender instead. Where that’s on, a connected account or SendGrid address is limited to the people authorized on it, and nobody else sees it in the send-from dropdown. On the SendGrid list it shows as a **Who can send** column.
External Collaborator Restrictions+
Collaborators invited to a specific event can connect their email and send as themselves. That’s it.
They cannot see other senders. They cannot use your team’s connected accounts. They cannot send as your firm. Complete isolation.
Works well for co-hosts, sponsors, or external partners who need to send their own branded communications for a shared event.
Revoking Access+
Disconnect the account from **Team Settings > Linked Services** at any time. That person no longer appears as a sender option.
Useful when someone leaves the firm or changes roles. Clean up your sender list to avoid confusion.
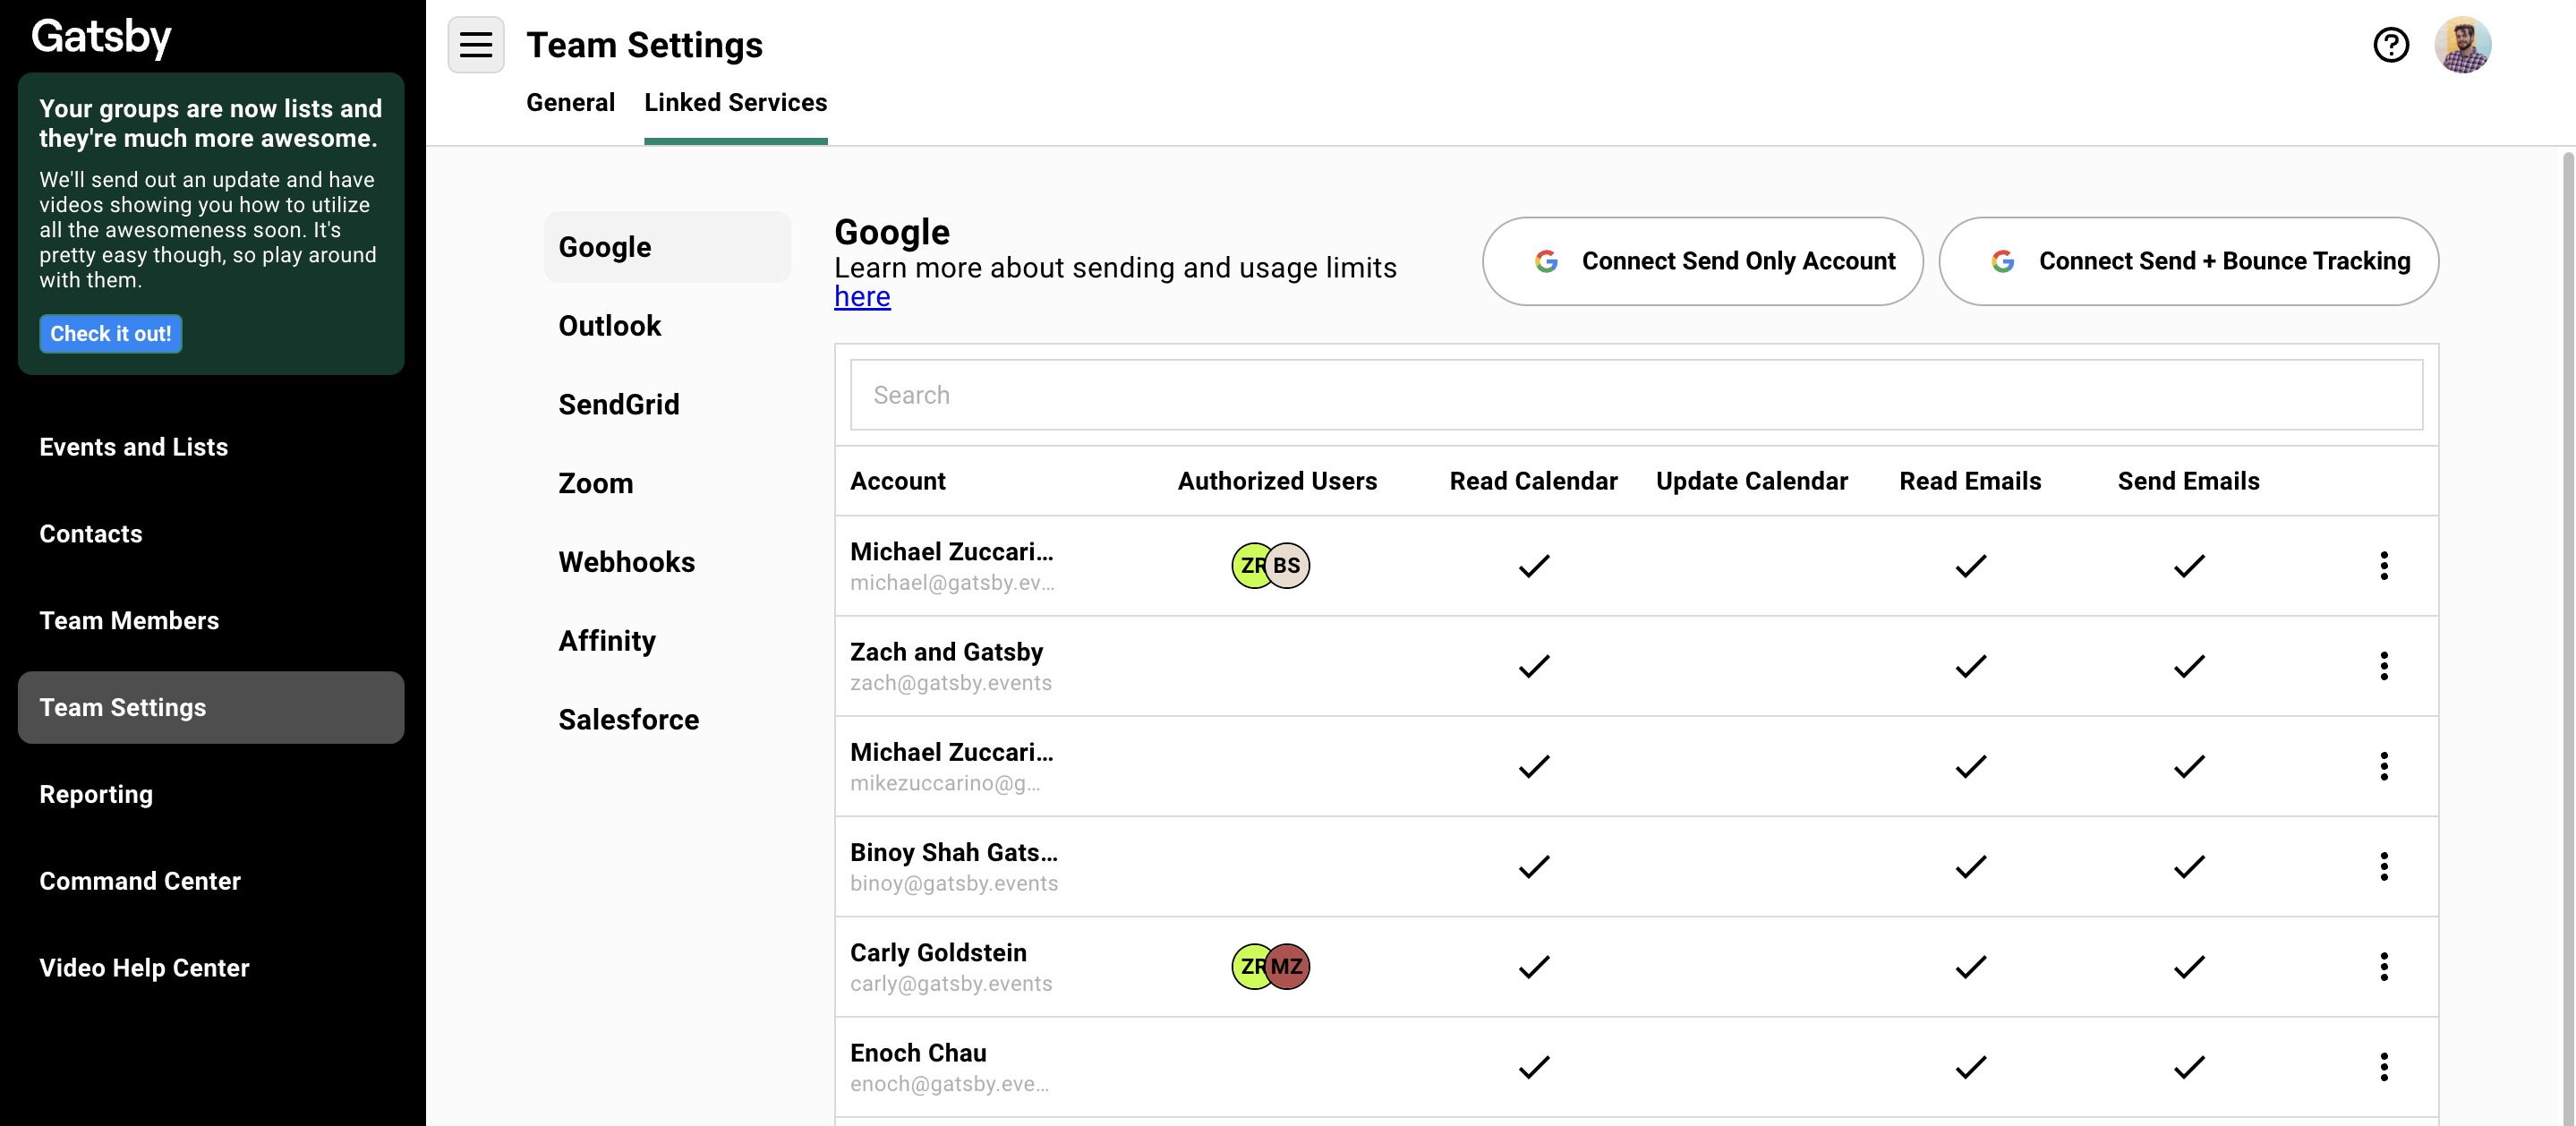
## Common Questions
[Section titled “Common Questions”](#common-questions)
Will the sender see emails in their sent folder?+
Yes, for Google and Microsoft. Emails appear in their outbox automatically. They have full visibility into what was sent on their behalf.
For SendGrid, no. There’s no personal inbox to write to. SendGrid emails come from your domain but don’t appear in anyone’s sent folder.
Can I send as someone who hasn't connected their account?+
**For Gmail and Outlook, no.** That person authorizes Gatsby through Google or Microsoft themselves, and you cannot send as them without it.
You can prompt them, though. Send an invite to connect from **Team Settings » Linked Services** or the **+** on the campaign send-from dropdown, and they authorize in about 30 seconds.
**For SendGrid, yes.** Nobody signs into SendGrid, so there is no personal authorization involved. Any address on your SendGrid list can be used by whoever is allowed to send from it, whether or not that person uses Gatsby. Access is set on the address row, not by the person.
What are the sending limits?+
Google caps one account at about 2,000 to 2,500 emails a day. Microsoft’s cap depends on your organization’s Microsoft agreement. On top of that, Gatsby paces Gmail and Outlook sends at about one email every 8 to 10 seconds, so 100 emails takes about 15 minutes and large sends take hours.
We recommend batches of about 500 per day from any one Gmail or Outlook sender. To send in batches, select a range on the guest list: click the first guest, hold Shift, scroll down, and click the last one, watching the selected count in the lower-left corner.
SendGrid isn’t subject to the Google or Microsoft caps. Use it for anything over about 500 recipients.
Can I set multiple reply-to addresses?+
Not currently. One reply-to address per campaign.
If you need multiple people to receive replies, use a shared inbox or distribution list as the reply-to address. Add that address as a team member first so it shows up in the Reply-To menu. It doesn’t need to sign in.
Is this compliant with our security policies?+
The integration uses OAuth, which is Google and Microsoft’s standard authorization protocol. Gatsby gets permission to send, not to read your inbox.
For strict compliance environments, the global BCC feature ensures your firm has a copy of every sent email.
Security teams often prefer this to staff downloading CSVs and uploading to unauthorized tools. Data stays inside your existing email infrastructure.
What happens if someone leaves the firm?+
Their connected account stops working when their Google or Microsoft credentials are revoked by your IT team.
Remove them from Team Settings to clean up your sender list. Old accounts cluttering the dropdown confuse your team.
Does this work for notification emails?+
Notification emails require SendGrid, not Google or Microsoft. You cannot send automatic system emails from a personal inbox.
Confirmation emails, waitlist notifications, and decline messages all need SendGrid configured. See the Notification Emails page for setup.
Can I send from someone else's email?+
For Gmail and Outlook, that person connects their own mailbox first in **Team Settings » Linked Services**. Once they have, you can pick them as the sender from the campaign dropdown.
For SendGrid, nobody connects anything. Add the address to your SendGrid list, then decide who can use it. If your list has a **Who can send** column, open the three dots on that row and choose **Edit Who Can Send**. If it has no such column, everyone on your team can already send from every address on the list.
International email delivery considerations+
**Different countries, different rules:**
* CAN-SPAM (US), GDPR (EU), CASL (Canada) have different opt-out requirements
* Some countries have stricter authentication requirements
* Delivery speeds vary by region
**Best practices:**
* Always include physical address in footer
* Honor unsubscribes immediately
Can I send from a shared Outlook inbox?+
No. The Outlook API does not support sending from shared inboxes.
If your team sends from a shared address (like ), use SendGrid instead. SendGrid handles shared and alias addresses cleanly. Guests won’t notice the difference, as the email still appears to come from that address.
For individual Outlook accounts (not shared inboxes), connecting that person’s account through Microsoft works normally.
Can I connect an alias or group address through Gmail or Outlook?+
No. Connecting through Google needs a full Gmail or Google Workspace account, not an alias or a group address. Connecting through Outlook needs a full Microsoft seat (license), so an alias on someone else’s mailbox won’t connect.
Aliases are fine to send from, though. Add the address as a SendGrid sender instead. Any address on your verified domain works there, and recipients see it exactly as written.
My team isn't receiving emails sent through SendGrid, but external guests are getting them fine.+
Your company’s email security tools may be filtering Gatsby’s SendGrid emails as impersonation attempts.
Tools like Proofpoint, Microsoft Defender, Mimecast, and Barracuda sometimes block emails sent on behalf of your domain from external services. This only affects internal recipients. Your external guests receive emails normally.
First, check **Team Settings » Bounce Management** and the sender’s reconnect status to rule out an authentication problem on the Gatsby side, and confirm SPF/DKIM/DMARC are configured for your sending domain. If those all look fine, ask your IT team to whitelist Gatsby’s sending domains or add an exception for emails from your Gatsby organization. Once you explain that a trusted tool is sending on your behalf, they’ll know what to do. If your IT team wants an IP address to allowlist, Gatsby support can provide the SendGrid sending IP. Add it after the DNS records are in place.
**To confirm:** Send a campaign to a mix of internal and external recipients. If externals receive it but internal team members don’t, IT filtering is the cause.
# SMS Campaigns
> Text your guests from Gatsby. Every event gets a free SMS Auto-Reminder, and a paid add-on adds ad-hoc SMS campaigns with mail merge, scheduling, and delivery tracking.
Why it matters
## A text gets read. An email gets filed.
The day before a dinner, an email lands in a folder your guest opens on Monday. A text lands on the lock screen. SMS is for the messages that only matter if they arrive now: the reminder, the room change, the last call for a headcount.
How it works
### The SMS Auto-Reminder is free
Switch it on per event. Guests who accepted get one text 24 hours before the start. No cost, no setup.
### The add-on unlocks everything else
Write your own texts, pick your own recipients, schedule them, and build custom SMS reminders.
### One tab, both channels
SMS campaigns live in the same Campaigns tab as email, with a channel label on every row.
## Free and paid, in one sentence each
[Section titled “Free and paid, in one sentence each”](#free-and-paid-in-one-sentence-each)
**Free, for every organization:** the SMS Auto-Reminder, one text 24 hours before an event, to guests who accepted. Fixed wording, fixed timing, switched on per event.
**Paid SMS add-on:** write and send your own texts to any guests you choose, schedule them, and build SMS reminders with your own copy, timing, and audience.
**Quick Events are the exception.** Neither one covers a quick event. Texting works on events you start with **New Event**, not **Create Quick Event**.
## The free SMS Auto-Reminder
[Section titled “The free SMS Auto-Reminder”](#the-free-sms-auto-reminder)
Nothing to buy and nothing to write. You turn it on for an event, and Gatsby texts the guests who said yes, 24 hours before the start. Anyone without a US mobile number on file, or who has opted out, is skipped.
Turning it on for an event+
1. Open the event and go to the **Registration** tab.
2. Pick **SMS Auto-Reminder** from the list on the left.
3. Read the preview. It shows the exact message, with your organization’s name, this event’s name, and its local start time.
4. Flip the toggle on.
The setting is per event and starts **off**. Before you turn it on, the page already tells you when it would go, as *Would send Sun, Sep 6 at 5:00 PM (PDT)*, so you can check the timing first. Flipping it on schedules the reminder immediately, the line changes to *Sends…*, and the reminder appears in the event’s Campaigns tab straight away.
The first time anyone in your organization authorizes a text, this toggle included, Gatsby asks you to confirm two things about your guest relationships. See [SMS Consent & Compliance](/platform/email-campaigns/sms-consent/).
What the reminder says+
The message is fixed. Editing it is what the paid add-on unlocks.
> **Meridian Capital (via Gatsby):**
>
> Reminder: Q1 Partner Dinner starts tomorrow at 6:00 PM. View details & RSVP: \[link]
>
> Reply STOP to opt out, HELP for help, BLOCK to mute this host.
Your organization’s name leads every message, because your guests have a relationship with you, not with Gatsby. The link is each guest’s personal RSVP link, filled in per recipient at send, so they can still change their answer from the text.
Someone receiving their first-ever Gatsby text gets a longer footer in place of that one: *Msg & data rates may apply. Reply STOP to opt out, HELP for help, BLOCK to mute this host.*
Who receives it+
Guests who meet all four conditions at the moment the reminder fires:
* RSVP status is **Accepted**
* A valid **US** phone number on file
* Not opted out of Gatsby texts entirely
* Not opted out of texts from your organization
The list is computed when the reminder sends, not when you turn the toggle on. Someone who accepts the morning of the send is included. Someone who declines is dropped.
If the event moves+
The reminder follows it. Change the event’s date and Gatsby reschedules the text to 24 hours before the new start time, and re-renders the message so the time it quotes is correct.
Turn the toggle off and the scheduled reminder is cancelled. Turn it back on and it’s rescheduled.
Events starting within 24 hours+
There’s nothing to schedule. If you switch the toggle on for an event that starts in less than 25 hours, Gatsby warns you that *this event starts in less than 25 hours, so the reminder may not be sent.*
For a same-day message on an event that’s already close, send an SMS campaign instead. Writing and sending your own texts takes the SMS add-on.
Where it shows up+
In the event’s **Campaigns** tab, as an ordinary row with an **Automatic** label and a **Scheduled** status. It also appears in the **Campaign Reminders** dashboard alongside your email reminders.
The row has no menu, because the reminder is system-owned. To change it, go back to **Registration → SMS Auto-Reminder**. Open the campaign itself and a banner says the same thing.
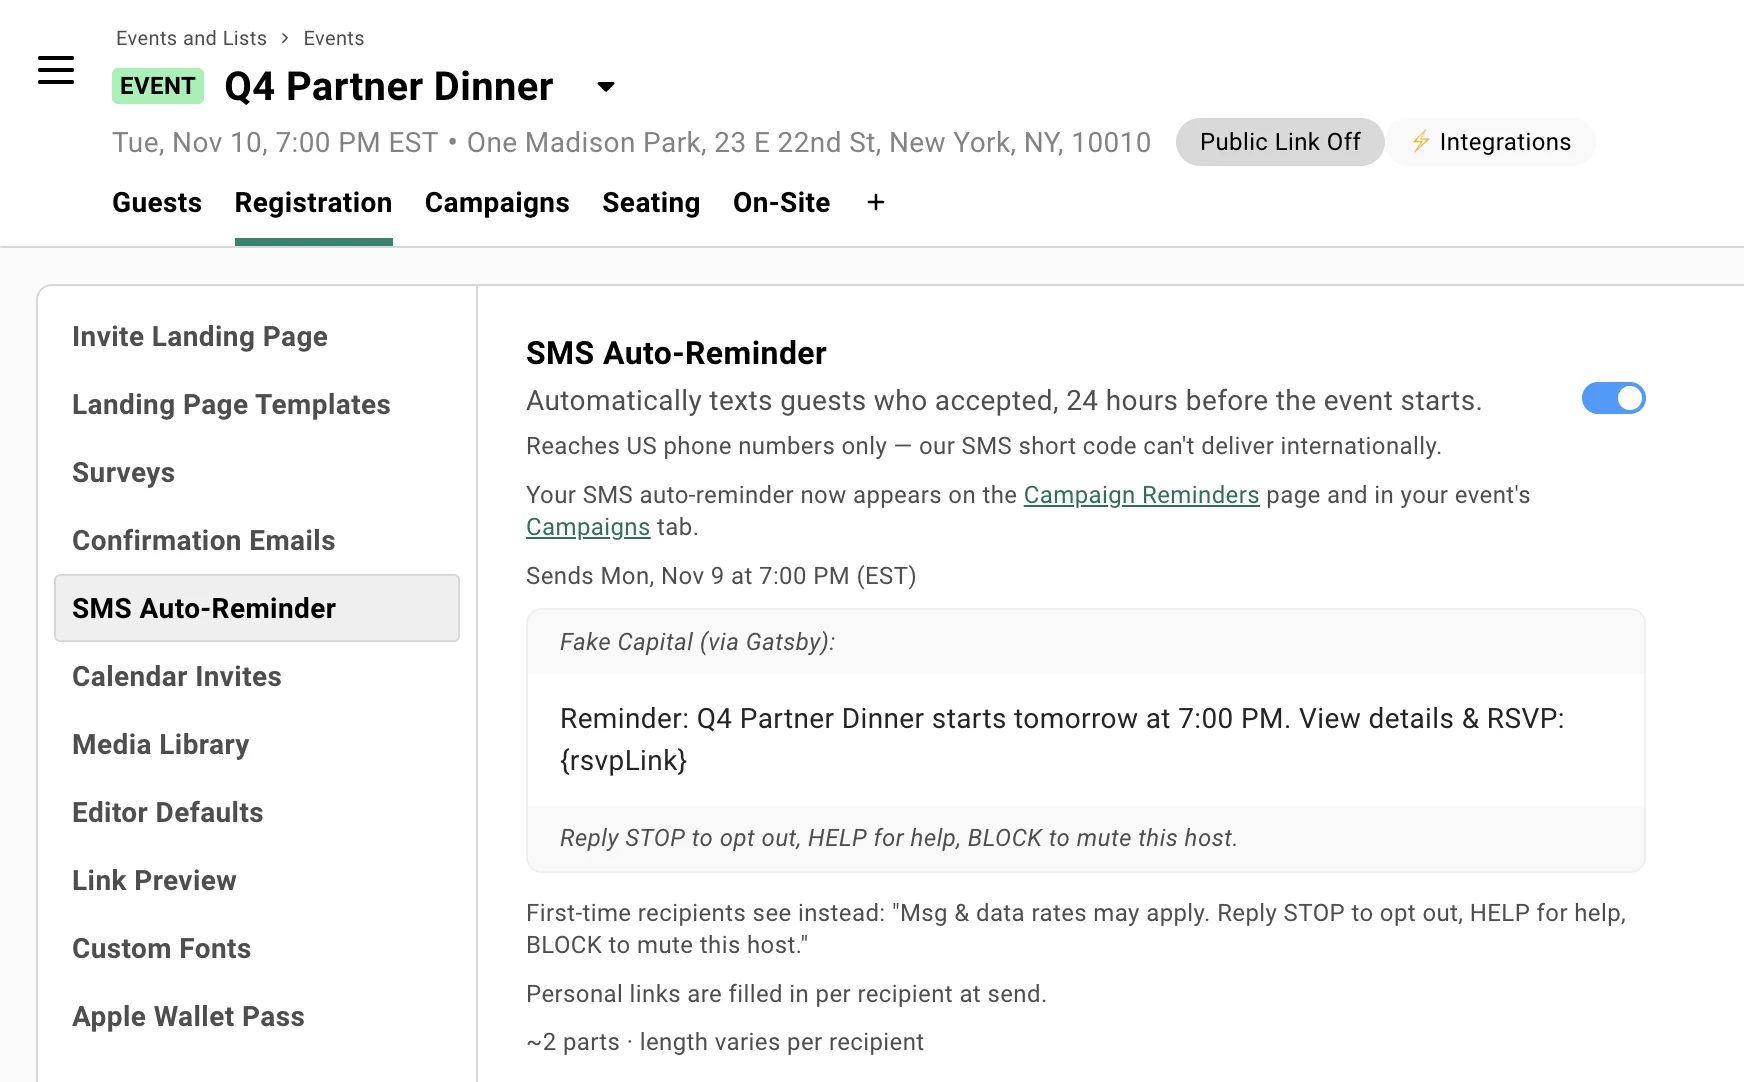
Registration → SMS Auto-Reminder, switched on. The send time sits above the preview, which shows the message exactly as a guest receives it, your organization's name first and the keyword footer last.
## Writing your own texts
[Section titled “Writing your own texts”](#writing-your-own-texts)
The paid SMS add-on turns the Campaigns tab into a two-channel tool. Everything below requires it.
**The SMS add-on is in limited release.** Gatsby is turning it on for a small group of pilot customers. If you’d like to be one of them, email [](mailto:help@gatsby.events). The free SMS Auto-Reminder above is available to every organization now.
### Creating an SMS campaign
[Section titled “Creating an SMS campaign”](#creating-an-sms-campaign)
Starting one+
1. Open the event’s **Campaigns** tab and click **New Campaign**.
2. Pick **SMS**, described as *Send a text message campaign*, in the channel picker.
3. Pick how you want to work: **Draft** (edit and add recipients before sending, the recommended default), **Campaign** (build the message and save it straight to Campaigns), or **Schedule reminder** (send it later to guests picked when it goes out).
4. Write your message. The composer tab is titled **New SMS Message** so you always know which channel you’re in.
5. Add recipients, then send now or schedule.
There’s no subject line, no formatting, and no attachments. SMS is plain text. The **Campaign Name** field at the top is internal. Only your team sees it.
What Gatsby adds to every message+
Your text is wrapped, automatically, in two lines you can’t remove:
* **Above it:** your organization’s name and the `(via Gatsby)` tag.
* **Below it:** the keyword footer, *Reply STOP to opt out, HELP for help, BLOCK to mute this host.*
The very first message a phone number ever receives from Gatsby gets a longer footer instead: *Msg & data rates may apply. Reply STOP to opt out, HELP for help, BLOCK to mute this host.* After that, the shorter one is used. In the composer, hover the info icon at the end of the footer to see it.
The composer shows your message inside a text bubble, with your organization’s name at the top and the footer at the bottom, so what you see is what sends.
Mail merge+
Three buttons above the message box insert the tags, plus a fourth when the event’s public link is on:
| Button | Tag | What it becomes |
| ----------------- | ------------------ | ----------------------------------------------- |
| **+ First Name** | `{firstName}` | The guest’s first name |
| **+ Last Name** | `{lastName}` | The guest’s last name |
| **+ RSVP Link** | `{rsvpLink}` | That guest’s personal RSVP link |
| **+ Public Link** | `{publicRsvpLink}` | The event’s public link, the same for everybody |
`{rsvpLink}` is personal. Each guest gets their own link, and clicking it takes them straight into their RSVP without signing in. Links are shortened to a `g.events` address so they don’t eat your character budget. The composer shows the tag itself; the real values are filled in per recipient at send.
**+ Public Link** only appears once you’ve switched **Public Link** on for the event yourself. Adding it to a message doesn’t open your event to public registration. See [Registration Links](/platform/registration/registration-links/).
SMS only understands the curly-brace form. The `#firstName` style used in email bodies is left as literal text.
Message length and the character counter+
The counter under the message reads something like *175 / 498 characters*. The second number is the room you have. Gatsby has already set aside space for your organization’s name and the longer first-time footer, so you’re only counting what you type. A long organization name means less room.
Go over and the counter turns red, and the composer tells you exactly how many characters to cut.
SMS takes plain text. Emoji and some special characters can’t be sent, and the composer asks you to remove them. Curly quotes, long dashes and ellipses are swapped for plain versions automatically, and a notice tells you what changed. Accented letters such as é, ü and ñ are fine.
With a merge tag in the message, the count starts with a `~`. Names and links vary in length, so the count is close but not exact.
Sending a test to yourself+
Click **Send Test** in the composer and Gatsby texts the message to your own phone, framed exactly as a guest would see it. If you don’t have a number on your profile, it asks for one. Test sends must go to a US number, and they’re never billed.
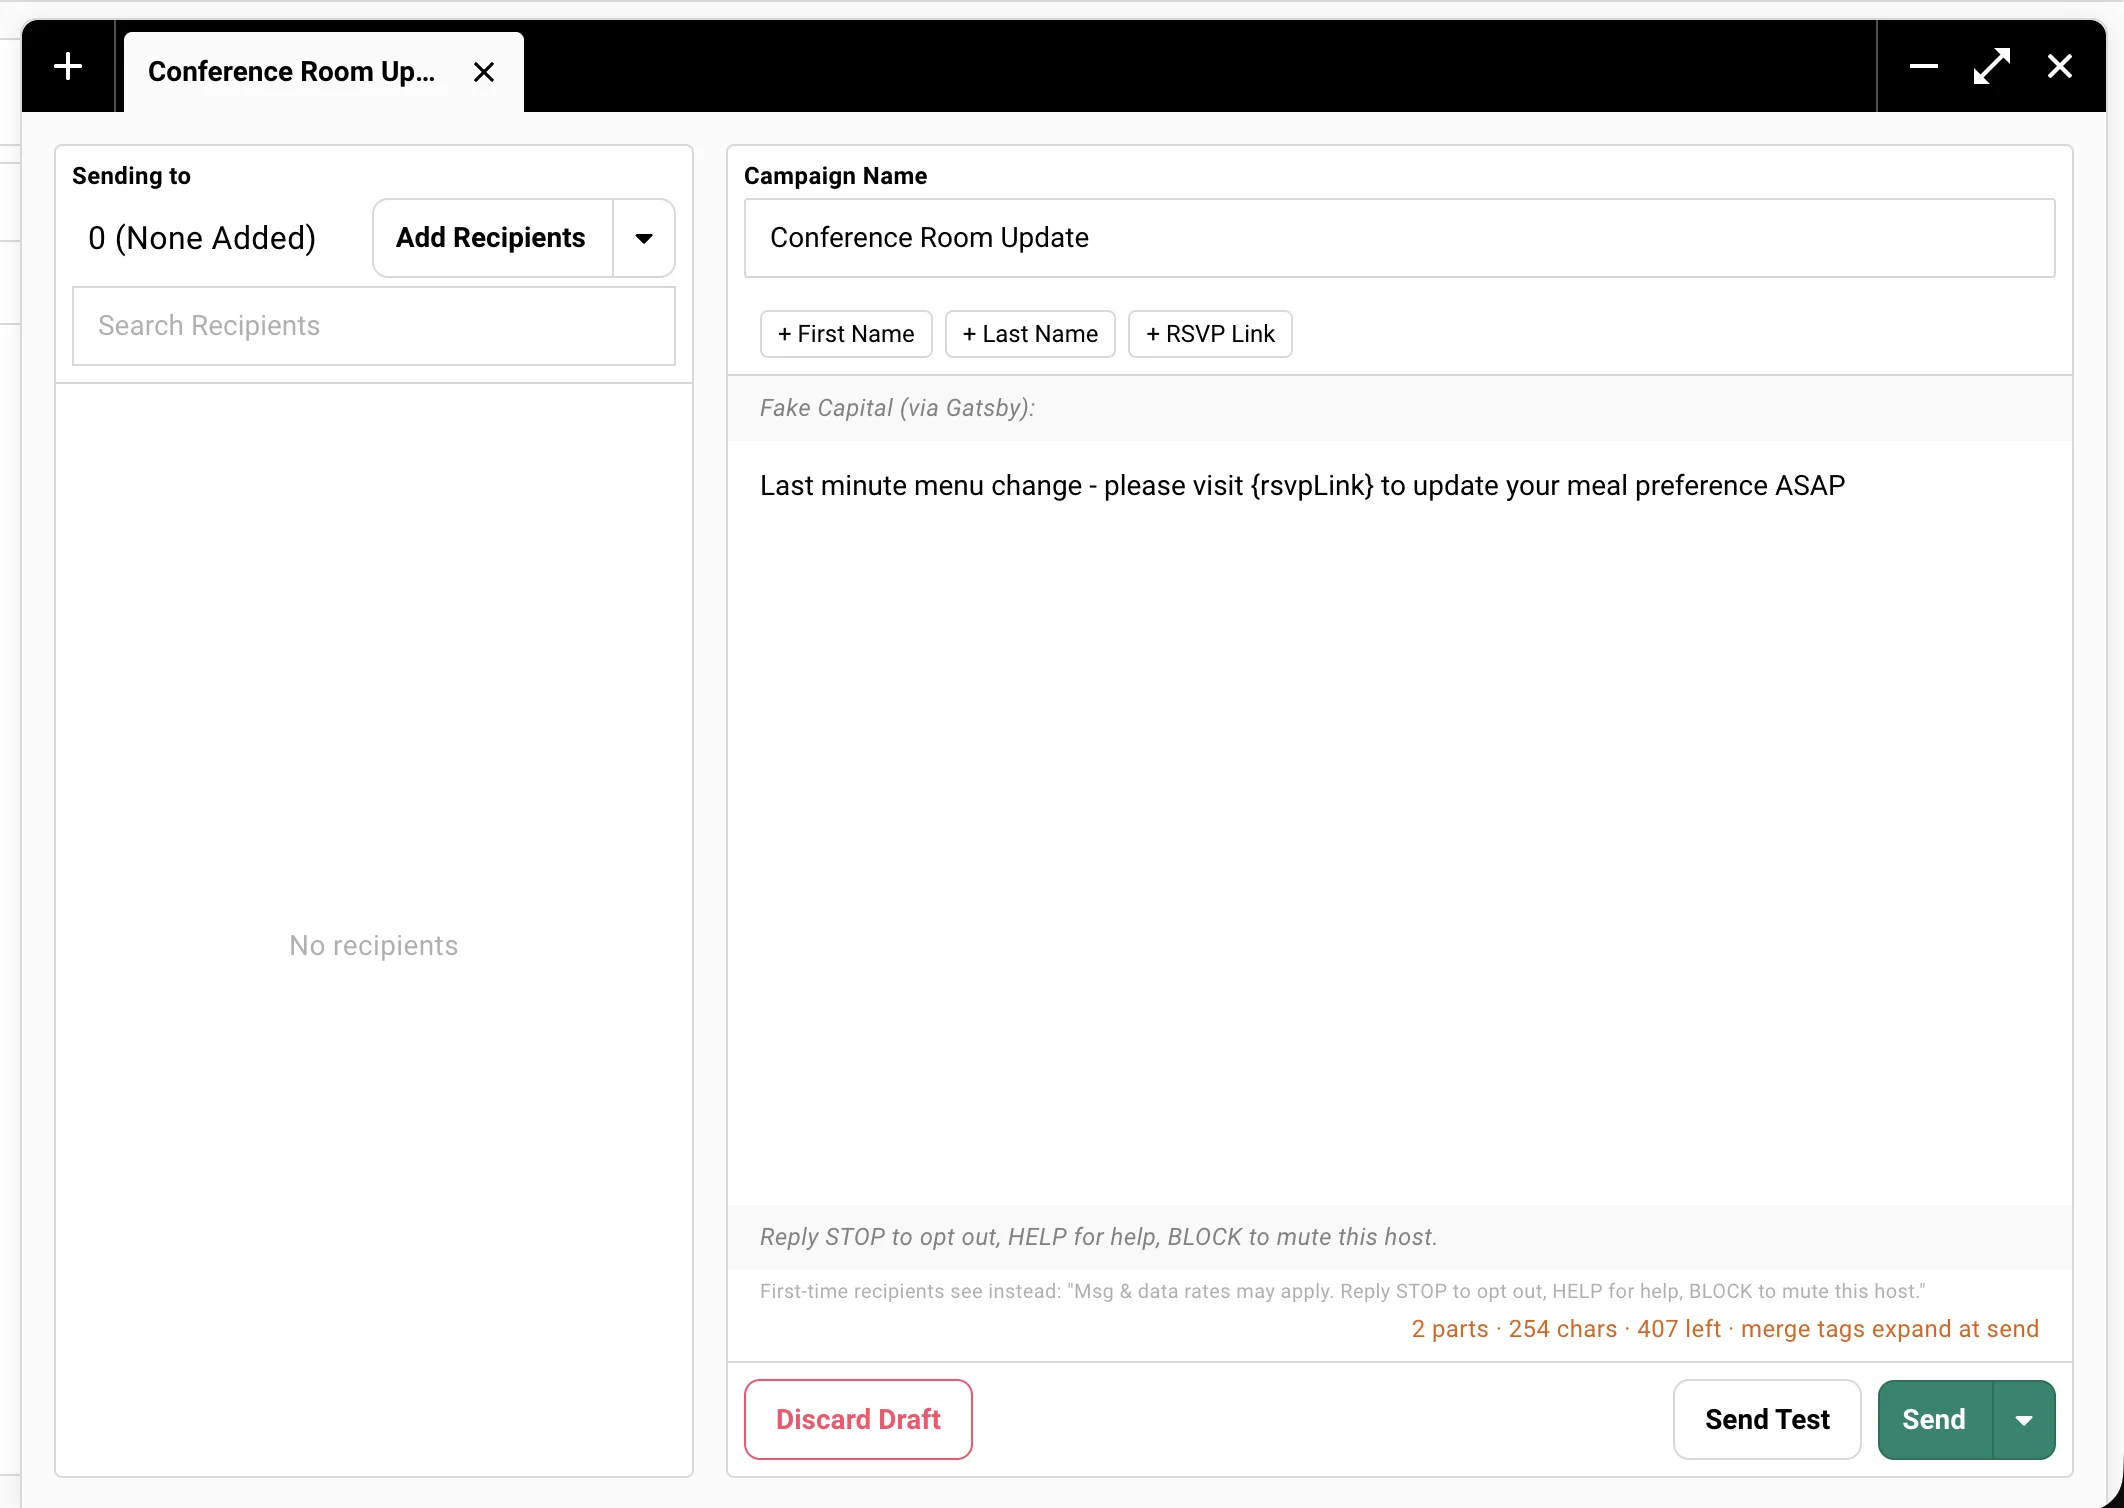
The composer. Your message sits in a text bubble between your organization's name and the keyword footer, which go on every text. The counter beneath shows how much room you have left.
### Choosing recipients
[Section titled “Choosing recipients”](#choosing-recipients)
A guest with no phone number can’t be texted, so Gatsby keeps them out of the picker rather than letting you add them and fail later.
The reachable count+
The recipient picker works the way it does for email, with tabs for Guest List and each RSVP status, a search box, and **Add all guests**. The one difference is that each person is listed with their phone number instead of their email.
Where some guests can’t be reached, the panel says so: **X of Y reachable, US numbers only**. Guests without a phone, and guests whose number isn’t a valid US number, aren’t selectable, and **Add all guests** adds only the reachable ones.
Guests who've opted out+
They stay out of the send. Gatsby re-checks who has opted out at the moment the message goes, not when you build the list, so someone who texts STOP an hour before your campaign fires is dropped. They’re recorded on the campaign as **Unsubscribed**, with the reason *Recipient opted out*.
The send-time preview+
Before the message goes, Gatsby shows it in a text bubble with an **SMS** badge, along with how many people it’s going to and its character count. Personal links are filled in per recipient at send. Anyone who can’t be reached is listed with the reason.
If the whole send works out to more than **10,000 segments**, the units carriers split a long text into, you get an extra confirmation step restating the total. You can still send. It’s there so an accidental full-list blast is a decision rather than a slip.
Scheduling+
Same as email. Pick a date, time, and timezone in the scheduling modal and the campaign fires unattended. Scheduled SMS campaigns appear in the Campaigns list with their send time.
### Tracking what happened
[Section titled “Tracking what happened”](#tracking-what-happened)
Delivery statuses+
An SMS campaign has the same tabbed recipient view as an email one, minus the email-only ones. There’s no Opened, because a text has nothing to track an open with.
**Sent.** Accepted by the carrier and on its way. A delivered message stays here.
***
**In Progress.** Queued and being sent.
***
**Bounced.** The carrier reported the message as undelivered. Usually a disconnected number, or one that can’t receive texts.
***
**Failed.** The send didn’t happen. Most often a number that isn’t a valid US number, which is recorded with that reason.
***
**Blocked.** Gatsby stopped the send before it went. An opted-out guest lands here.
***
**Scheduled**, **Not Sent To**, and **Reminders** work exactly as they do for email.
Where SMS shows up alongside email+
There’s no separate SMS tab, by design. SMS and email campaigns share one Campaigns list, and every campaign carries an **SMS** or **Email** badge: in the Drafts and Sent lists, on the campaign’s own page, in the send preview, and on a contact’s Campaigns tab. The Campaign Reminders dashboard works the same way.
### Who on your team can send SMS
[Section titled “Who on your team can send SMS”](#who-on-your-team-can-send-sms)
Stricter than email, deliberately. Texts cost money per message, and carriers regulate text messaging in ways they don’t regulate email. A careless send costs more than a wasted campaign.
| Role | Can send SMS |
| --------------------- | ------------ |
| Super Admin | Yes |
| Admin | Yes |
| Team Member | Yes |
| External Collaborator | **No** |
External Collaborators don’t see the SMS option in the channel picker, can’t open an SMS composer, and are refused by the server if they try another way. They can still send email campaigns.
Only Admins and Super Admins can buy or manage the SMS add-on. See [Plan & Billing](/platform/account-settings/plan-billing/). Everyone else who runs into the paid features is pointed at [](mailto:help@gatsby.events).
## Common Questions
[Section titled “Common Questions”](#common-questions)
Do I need the paid add-on to use the SMS Auto-Reminder?+
No. The 24-hour reminder is free for every organization, forever, on every event except a quick event. The add-on unlocks writing your own texts and customizing reminders.
If a paid organization stops paying, the add-on switches off but the free reminder keeps working.
Can I text guests outside the US?+
No. The number Gatsby sends from is registered with US carriers and only reaches valid US numbers. Any number outside the US is marked **Unsupported** in the guest list and is filtered out of every SMS send.
Can I change the wording of the free reminder?+
Not the free one. With the SMS add-on you can build a custom SMS reminder with your own copy, timing, and audience. See [Campaign Reminders](/platform/email-campaigns/reminders/). Many organizations run both: the SMS Auto-Reminder as a safety net, a custom one for the events that need a specific message.
Will my guests know the text is from us?+
Yes. Your organization’s name leads every message, ahead of the text you wrote, so a guest sees who is contacting them before they read a word of it. The preview in the composer shows exactly how it will look.
A guest replied STOP. What does that stop?+
Every Gatsby event text to that number, not only yours. STOP is a carrier-level instruction and it isn’t something Gatsby can narrow or undo. The guest gets back by texting START.
A guest who wants to stop hearing from you specifically, without going quiet everywhere, replies BLOCK or uses the preference center. [SMS Consent & Compliance](/platform/email-campaigns/sms-consent/) covers both.
Can I attach an image to a text?+
Not yet. SMS in Gatsby is plain text only.
Where do I see how an SMS campaign did?+
On the campaign, the same as email. The Campaigns tab shows each send with its headline counts, and opening one gives you a tab per outcome with the guests in each. Link clicks aren’t tracked for SMS yet.
What happens if a guest replies to a text?+
Keyword replies (STOP, HELP, BLOCK) are handled automatically. Anything else gets a one-time pointer to the SMS help page, and doesn’t reach your inbox. Gatsby’s short code isn’t a two-way conversation channel; put a reply-to path in the message body if you need one.
# SMS Consent & Compliance
> How Gatsby handles STOP, HELP, and BLOCK, what your guests see, where consent is recorded, and what you're confirming the first time your organization sends a text.
Why it matters
## Text messaging is regulated. Email isn’t.
Mobile carriers audit the numbers that send texts, and they can shut one off. Texting people who never agreed to hear from you doesn’t just annoy a guest, it puts the channel itself at risk. The rules below aren’t Gatsby being cautious. They’re the conditions under which texting keeps working.
What Gatsby handles for you
### Every opt-out, automatically
STOP, HELP, and BLOCK replies are processed without you doing anything, and opted-out guests are filtered out of your sends.
### Disclosure built in
Your organization’s name and the opt-out keywords are added to every text Gatsby sends. A guest’s first text also carries the message-and-data-rates line.
### A record you can point at
Every consent change is stored with its source and timestamp.
## What you’re confirming before your first text
[Section titled “What you’re confirming before your first text”](#what-youre-confirming-before-your-first-text)
Gatsby asks for two confirmations the first time anyone in your organization authorizes a message that reaches a guest. That covers an SMS campaign, a reminder on one, and the SMS Auto-Reminder toggle. Once per organization, ever.
**“My guests agreed to hear from us.”** The people you text have a relationship with your organization and agreed to receive messages from you.
**“Gatsby may process my guests’ data.”** Gatsby stores phone numbers and message activity in order to handle STOP, BLOCK, and HELP replies on your behalf, and to keep opted-out guests out of your campaigns and reminders.
Any Admin, Super Admin, or Team Member can accept. After that, nobody in your organization sees it again. Turning a reminder **off** is never gated.
## The three keywords
[Section titled “The three keywords”](#the-three-keywords)
Every text Gatsby sends carries the same footer: *Reply STOP to opt out, HELP for help, BLOCK to mute this host.* Here’s what each one does.
STOP stops all Gatsby event texts+
A guest who replies **STOP** (or END, QUIT, UNSUBSCRIBE, CANCEL) stops receiving Gatsby event texts completely. That includes any texts they happen to get through Gatsby from an organization other than yours.
That’s not a Gatsby choice. STOP is handled by the carrier, not by us, and it blocks the number the message came from rather than the organization that sent it. Gatsby couldn’t deliver your text to that guest even if it wanted to.
The only way back is the guest texting **START**. No web page, no organizer action, and no re-import can lift it.
BLOCK stops your texts only+
**BLOCK** (or MUTE) is Gatsby’s own keyword, and it’s the narrower of the two. A guest who texts BLOCK stops hearing from your organization. Nothing else about their texts changes.
Unlike STOP, a BLOCK can be undone. Only the guest can do it, though, in the preference center. There’s no SMS keyword that lifts one, and you can’t clear it for them. Gatsby’s reply to the guest confirms which organization the BLOCK applied to.
HELP explains what's going on+
**HELP** (or INFO, SUPPORT, ASSIST) returns a short transactional reply: who sent the text, where to get help, and how to opt out. It doesn’t stop anything.
Keyword replies are handled automatically and never reach your inbox. A guest who texts something that isn’t a keyword gets a one-time pointer to the SMS help page instead of silence. Gatsby’s short code isn’t a two-way conversation channel.
## The preference center
[Section titled “The preference center”](#the-preference-center)
Every Gatsby text points at a self-serve page where a guest can manage who may text them, without signing in to anything.
How a guest gets in+
They enter their phone number, Gatsby texts them a six-digit code, and they enter it. No account, no password, and no personal link, so the same address works from any message they’ve received.
The code is good for ten minutes. Making a second change means requesting a new one.
What they see+
A master switch for **all** Gatsby event texts, and below it one toggle for each organization that has actually texted them. Organizations that have never messaged that number don’t appear.
Turning the master switch off is the same as texting STOP. Turning a single organization off is the same as texting BLOCK for that one.
Getting back a globally opted-out guest+
Only the guest can do it, and only by texting **START**. If they turn the master switch off on the web, the page tells them so. This is the one recovery path Gatsby genuinely cannot offer from a web page. The carrier is enforcing it, not us.
## Consent on the guest list
[Section titled “Consent on the guest list”](#consent-on-the-guest-list)
Every guest with a phone number carries a consent state you can read from the guest list, the contacts table, and the contact profile.
The three states+
**Opted in.** An explicit opt-in on record, or your organization has texted them and they haven’t opted out.
***
**Opted out.** They won’t receive your texts. Gatsby filters them out of every campaign and reminder automatically, so there’s nothing for you to do about it.
***
**No preference.** No signal either way. These guests are still sendable.
Unsupported+
Shown in place of the consent state when the number isn’t a valid US number. Consent is beside the point, because Gatsby’s short code can’t deliver there.
Why 'No preference' guests can still be texted+
Because you’ve already vouched for them. Before your organization’s first text, Gatsby asks you to confirm that the people you’re texting have a relationship with you and agreed to hear from you. That confirmation is the basis for texting a guest who has no recorded preference, and it puts the responsibility for that judgment with you, where the relationship actually is.
It fits how Gatsby is used: invitations, RSVP links, and reminders to your own guest list, not cold marketing to a purchased one. Keep it to people who would recognize your name, and the assumption holds.
Gatsby enforces the other half. Anyone who has opted out is filtered from every send, and no attestation overrides that.
Organizers can't set a guest's consent+
The consent column is read-only everywhere it appears. An organizer asserting a guest’s consent on their behalf wouldn’t be consent.
## Capturing an explicit opt-in at RSVP
[Section titled “Capturing an explicit opt-in at RSVP”](#capturing-an-explicit-opt-in-at-rsvp)
There’s a dedicated survey question that records a real opt-in, with a source and a timestamp, when a guest registers.
Adding it to a survey+
In the survey builder, under **Registration** on the event, the SMS opt-in question sits in the **Predefined** tab. One per survey. See [Forms and Surveys](/platform/registration/registration-forms/) for building the rest of it. It renders as a fixed consent checkbox plus a phone field, so a guest who has no number on file can supply one.
The wording of the checkbox and its disclosure line are fixed. You can’t edit consent language.
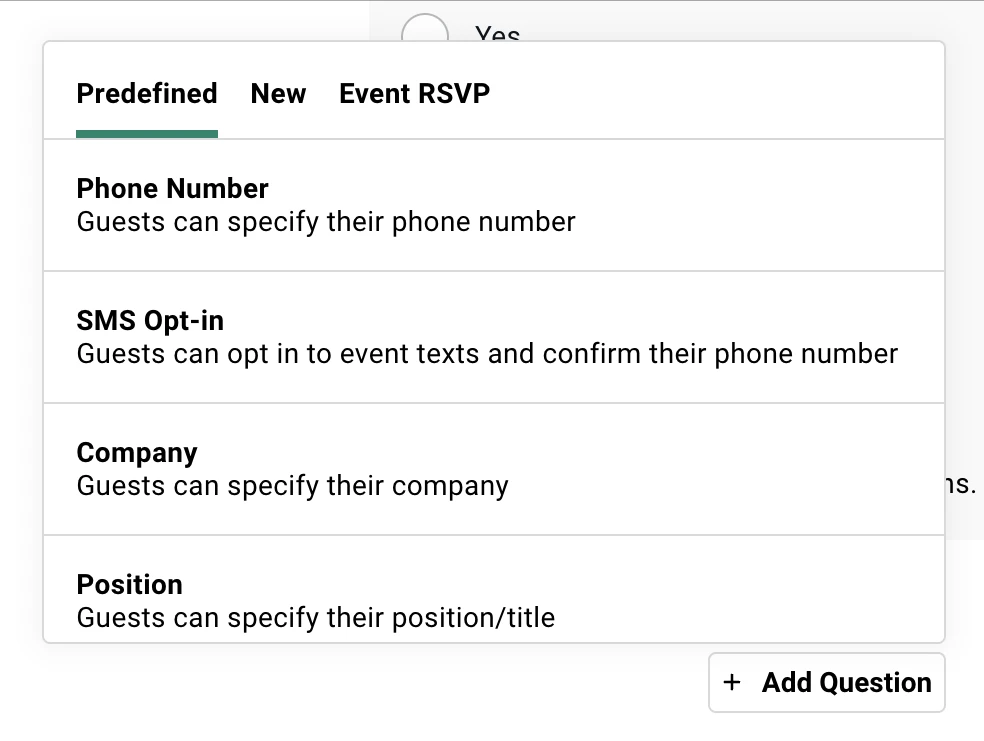
Click Add Question in the survey builder. SMS Opt-in is in the Predefined tab, under Phone Number.
How it behaves+
The phone field is locked to US numbers. If a guest ticks the box and leaves the phone empty, the survey won’t submit.
The question can never be marked required. A forced consent isn’t consent, so the **Required** toggle excludes this type.
An unticked box records nothing. It means *no answer*, not *no*, and it never revokes an existing opt-in.
Who is shown it+
Gatsby hides the question from guests where asking would be pointless or unwelcome:
| The guest | Sees it? |
| ------------------------------------------------------ | ------------------------------- |
| Has already opted in to your texts | No |
| You’ve already texted them, and they haven’t opted out | No |
| Opted out of all Gatsby texts (texted STOP) | No |
| Blocked your organization specifically | **Yes**, this is their way back |
| Has a phone, never texted, no preference recorded | Yes |
| Has no phone on file | Yes |
| A plus-one, or anyone on a public registration link | Yes |
The confirmation text+
A guest who opts in gets one confirmation text, but only when it’s meaningful. If your organization has already texted them, they don’t get another. If the opt-in lifts a previous block, they always do, so a re-subscribe is never silent.
Where the confirmation is the first text a number has ever had from Gatsby, it carries the full program disclosure.
Where the answer shows up+
As a read-only label in the guest list, contacts, seating, and hosted tables, showing the answer to that question on that survey. The consent column described above is the authoritative view, and it reads correctly whether or not the event asked the question.
## Common Questions
[Section titled “Common Questions”](#common-questions)
A guest says they opted out but is still getting texts from another firm. Why?+
Because BLOCK only stops the organization it was aimed at, while STOP stops everything. If they want it all to stop, they reply STOP to any Gatsby message.
Can I re-subscribe a guest myself?+
No. Consent has to come from the guest. Their routes back are texting START (for a global opt-out), the preference center, or ticking the SMS opt-in question on a future registration.
Do email unsubscribes affect SMS?+
No. They’re separate lists. Someone who unsubscribed from your emails can still receive your texts, and vice versa.
Does the SMS Auto-Reminder follow the same rules?+
All of them. STOP and BLOCK both stop it, it carries the same footer and disclosure, and it re-checks consent at the moment it fires.
What happens if a number is disconnected or a carrier reports it as unsubscribed?+
Gatsby records the failure against that recipient on the campaign, and where the carrier signals an opt-out, it’s written into the consent record so future sends skip the number.
Where can I point a guest who's asking about a text they got?+
Send them to [gatsby.events/sms-help](https://gatsby.events/sms-help). It explains in plain English what Gatsby is, why they received a text, who sent it, and how to stop or manage it. It’s the same address the SMS replies point at.
# Calendars
> Create curated event listing pages for any audience. Public calendars share a single URL. Private calendars give each contact their own link with self-service registration.
Why it matters
## Every new event means another email with another registration link. There’s no single place your contacts can go to see what’s coming.
You run a dinner series or a handful of member events each quarter. Each one needs its own email and its own link. Your contacts have no way to see what’s available to them and register on their own.
How it works
### Curated Event Pages
You pick which events appear, and past events drop off automatically. One link your contacts can come back to instead of waiting for the next invitation.
### Public and Private
Public calendars share a single link with anyone. Private calendars give each contact a unique link so they can browse your events and register themselves.
## Setting Up a Calendar
[Section titled “Setting Up a Calendar”](#setting-up-a-calendar)
Calendars live in their own section on your events dashboard. You create one, choose which events appear, and share the link. Public calendars work immediately. Private calendars connect to your contact lists so each person can get sent their own link.
Don’t confuse a Calendar with **calendar view**, the month/week display mode on your own [Events dashboard](/platform/events-lists/guest-lists/#viewing-your-events). A Calendar is the curated page you share with contacts; calendar view is how your team looks at its own events internally.
### Creating a Calendar
[Section titled “Creating a Calendar”](#creating-a-calendar)
Give it a title, set it to Public or Private, and optionally add a logo and page description. Visitors see the title at the top of the page (“Upcoming Events,” “Austin Area Events”). The logo and description set the context.
How to Create a Calendar+
1. Go to **Calendars** below your events dashboard.
2. Click **Create Calendar**.
3. Enter a **Title** for the calendar page.
4. Set **Access** to **Public** or **Private**.
Public calendars get a shareable URL. Private calendars require connecting a contact list.
5. Optionally add a **Logo** and **Description**.
You can control the logo width to match your branding.
6. Toggle **Hide Past Events** if you want ended events to drop off automatically.
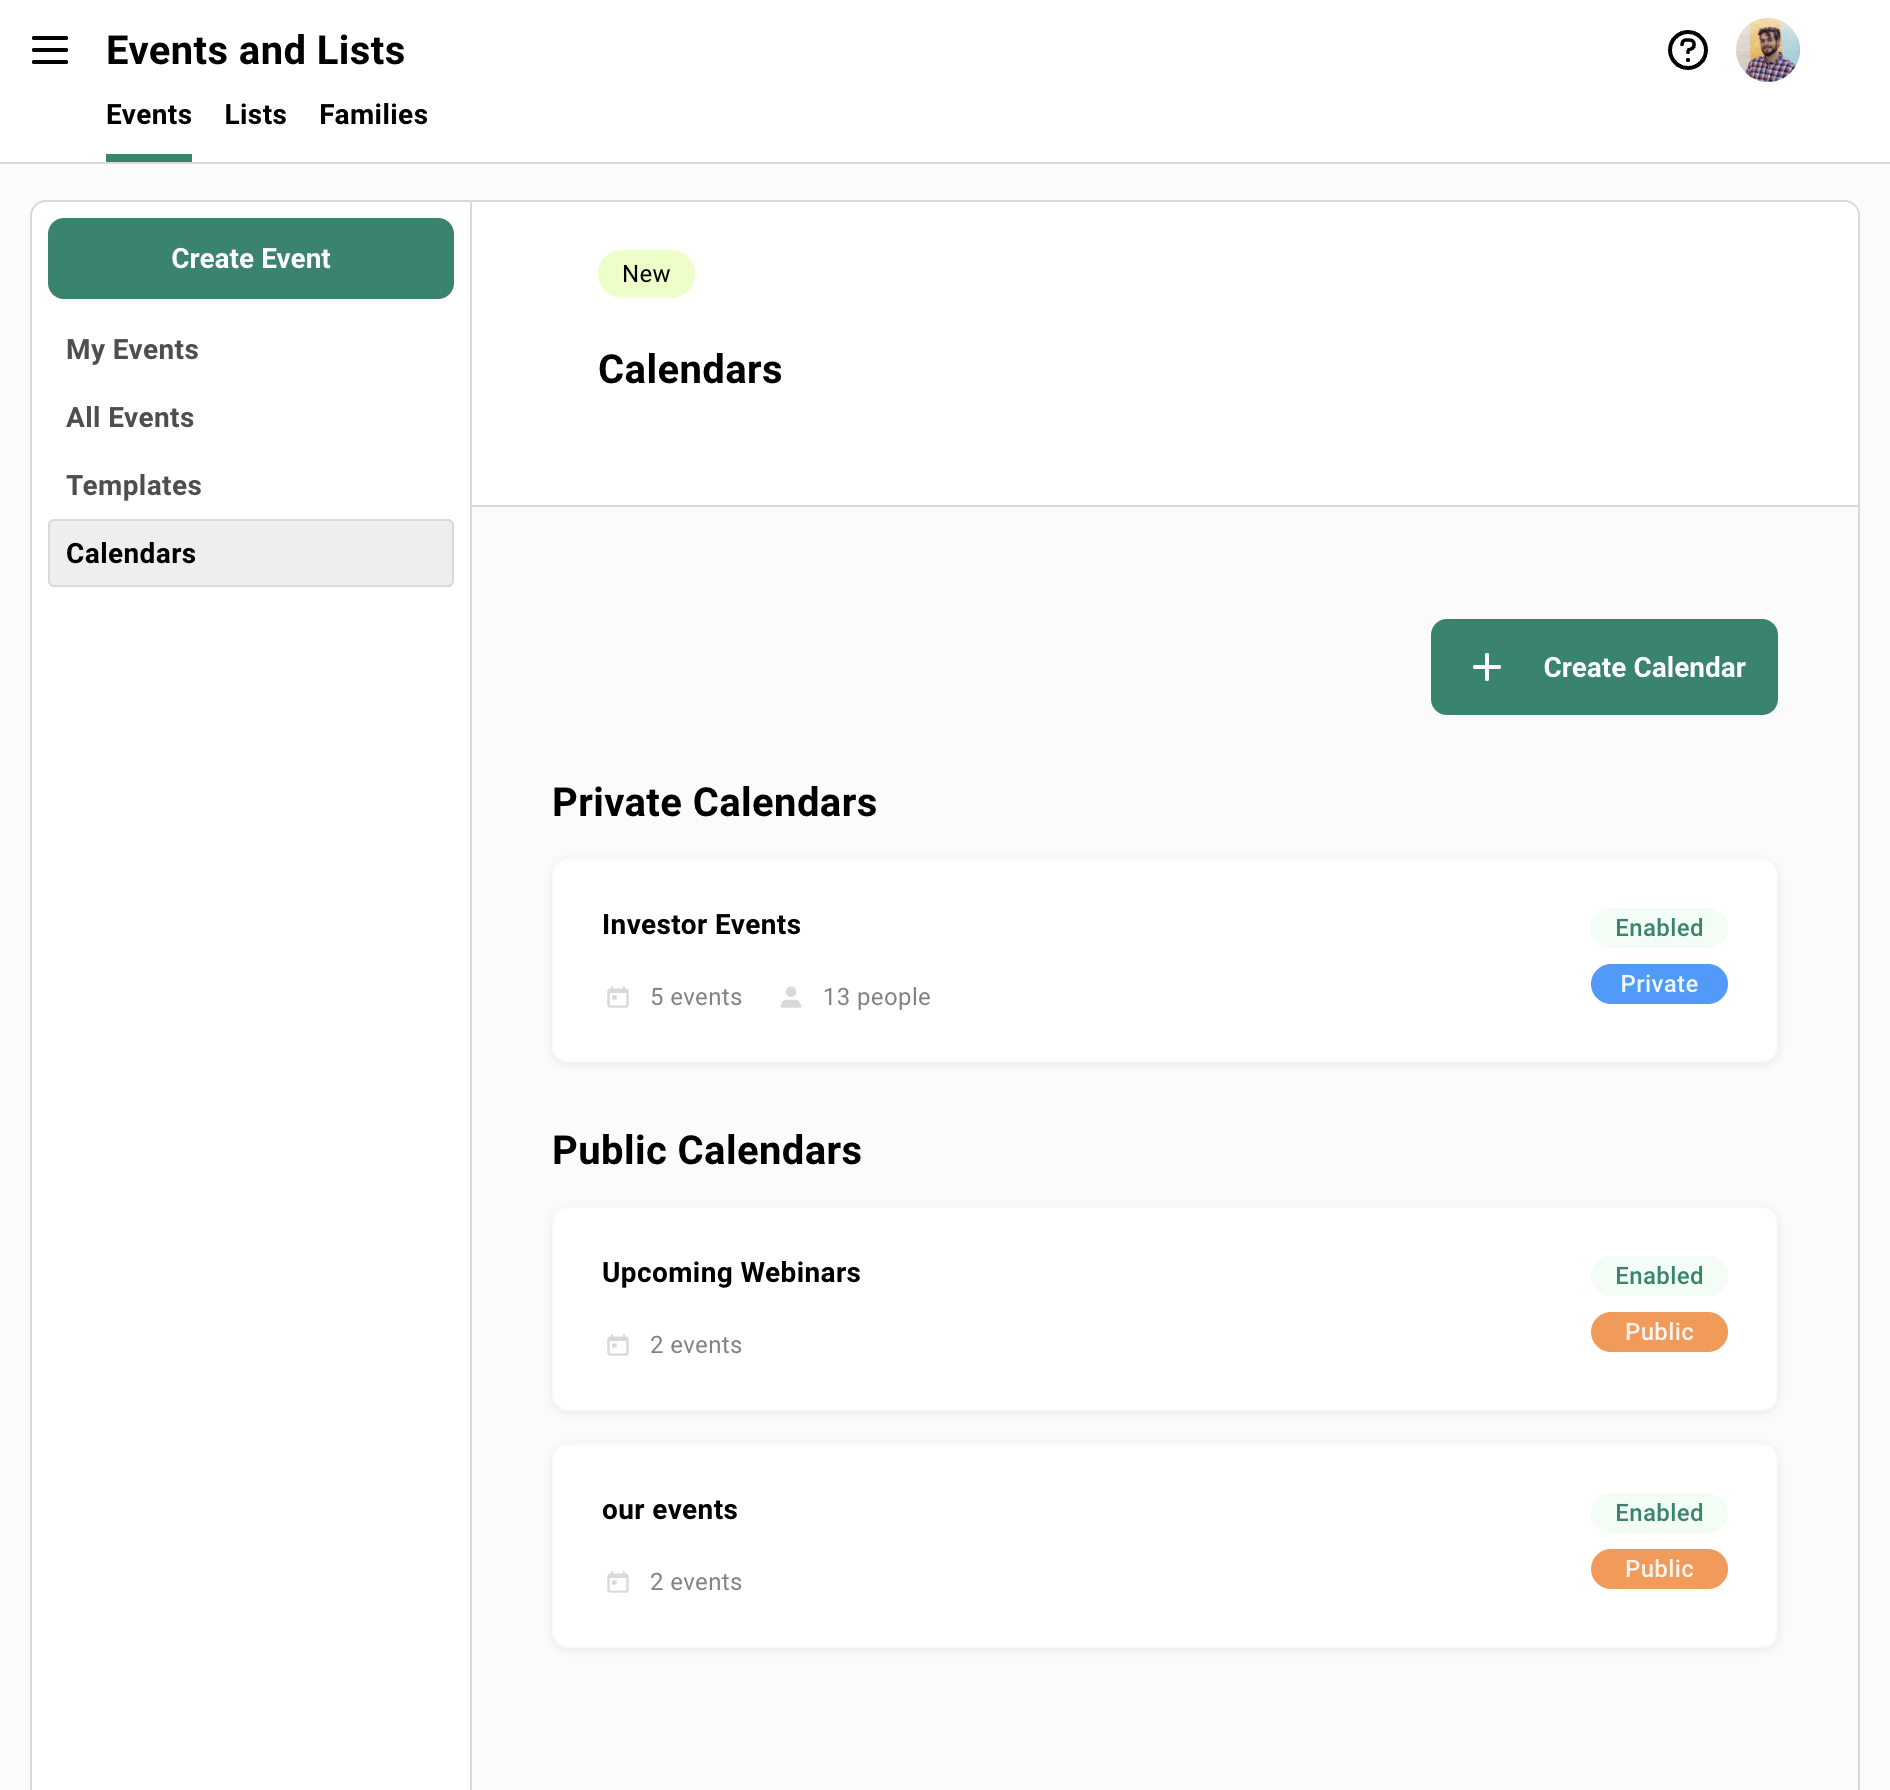
### Adding Events
[Section titled “Adding Events”](#adding-events)
Calendars are curated, not automatic. Creating a new event in Gatsby doesn’t add it to a calendar. You go to the calendar and add events manually. This means you control exactly what each audience sees.
Events appear in chronological order. Visitors see each event’s date, city, image, and description. Clicking an event takes them to its registration page.
The image, description, and title on each event card come from that event’s [Link Preview settings](/platform/registration/landing-pages/#sharing-your-event). Update them there and the card on your Gatsby calendar page changes with them. They don’t appear in the [calendar invites](/platform/registration/calendar-invites/) guests add to Google Calendar or Outlook.
How to Add Events to a Calendar+
1. Open your calendar from the **Calendars** section.
2. Click **Add Events**.
3. Select which events to include.
For public calendars, only events with a public link enabled are available.
4. Events appear on the calendar page in chronological order.
To remove an event, open the calendar and remove it from the list. The event itself isn’t affected.
Organize events by region or topic by creating separate calendars. Each calendar is its own page with its own URL.
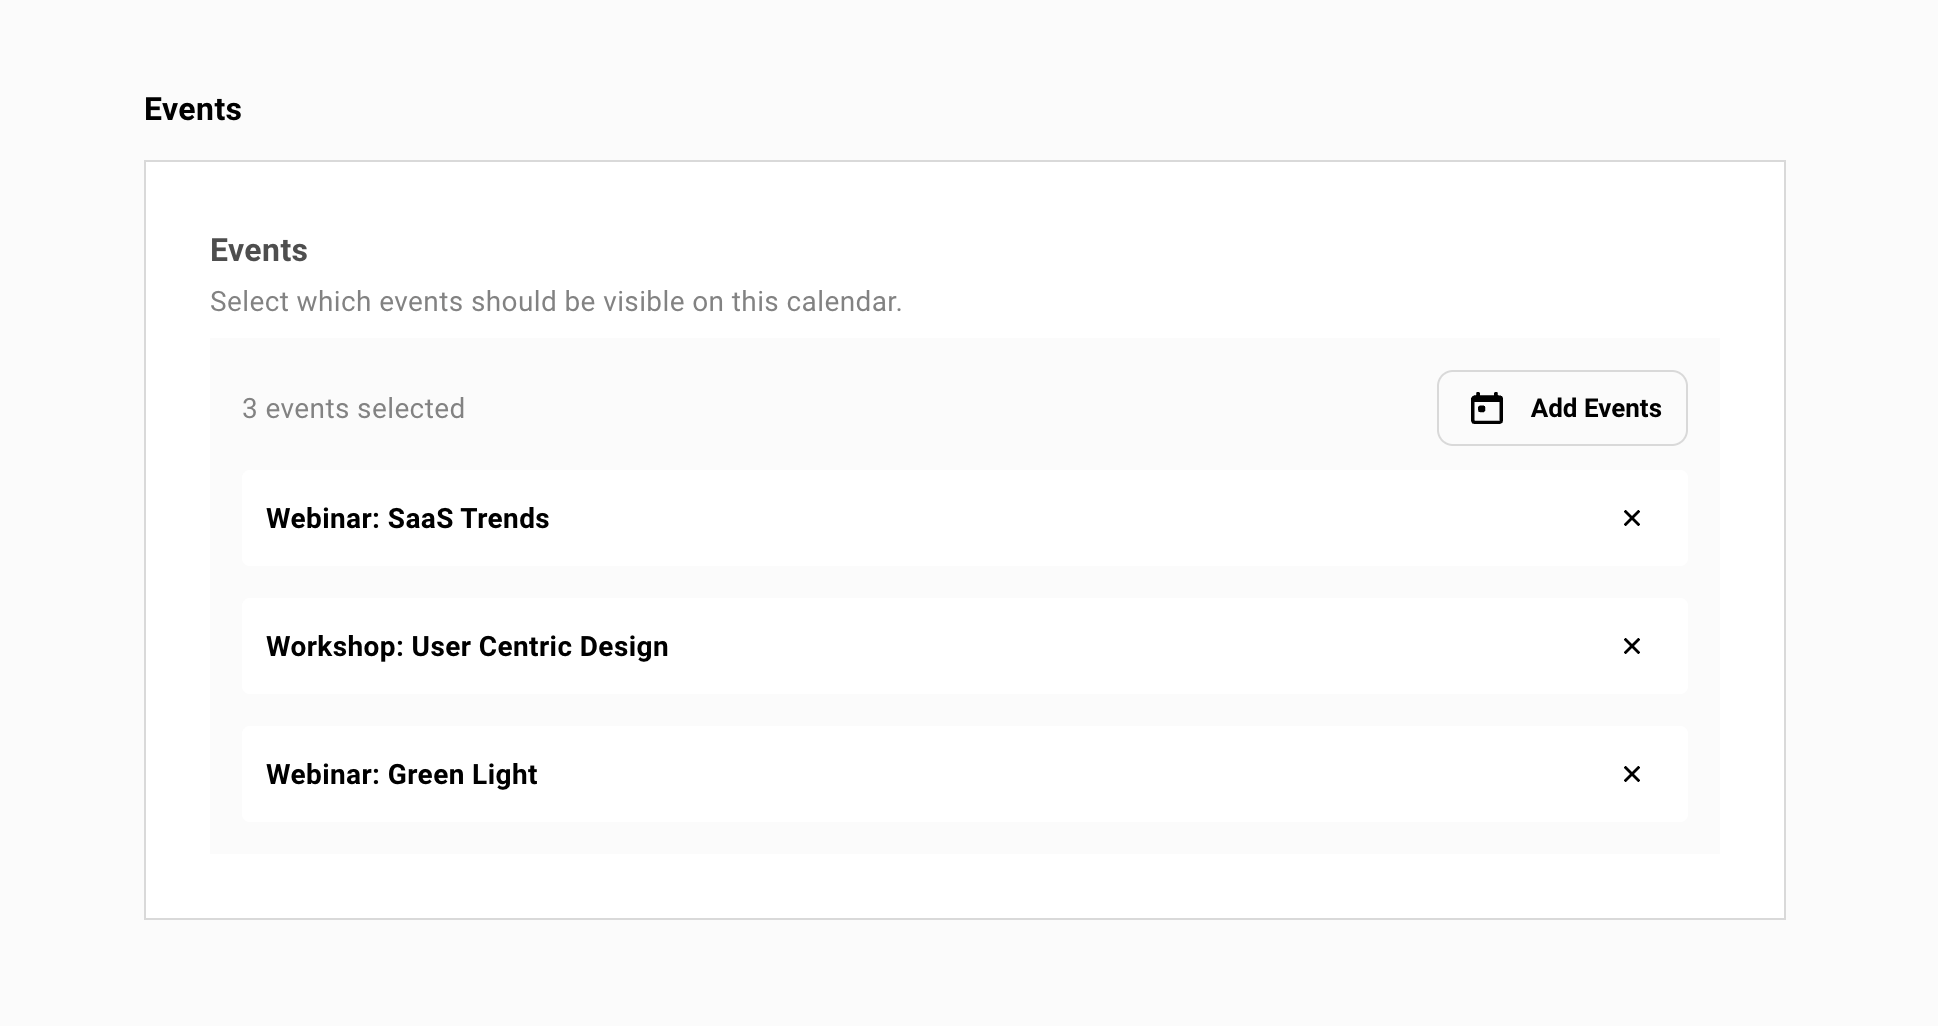
## Private Calendars
[Section titled “Private Calendars”](#private-calendars)
Public calendars share a single URL with anyone. Private calendars give each contact their own link to browse your upcoming events and register with their information already filled in.
### Connecting Contact Lists
[Section titled “Connecting Contact Lists”](#connecting-contact-lists)
Private calendars are tied to one or more contact lists in Gatsby. The contacts on those lists are your audience. You distribute the calendar by emailing each person their unique link using a merge tag in Campaigns.
Events on a private calendar don’t need public links enabled. They can be events that aren’t discoverable anywhere else, visible only to the people who receive the calendar link.
How to Set Up a Private Calendar+
1. Create a calendar and set **Access** to **Private**.
2. Associate it with one or more **Contact Lists**.
3. Add the events you want contacts to see.
4. Go to **Campaigns** inside one of the associated lists.
5. Create an email and insert the **Private Calendar** merge tag.
The merge tag generates a unique URL for each recipient.
6. Send the campaign. Each contact receives their own calendar link.
If you have multiple associated lists, create a separate campaign from each list. The merge tag works the same way in each.
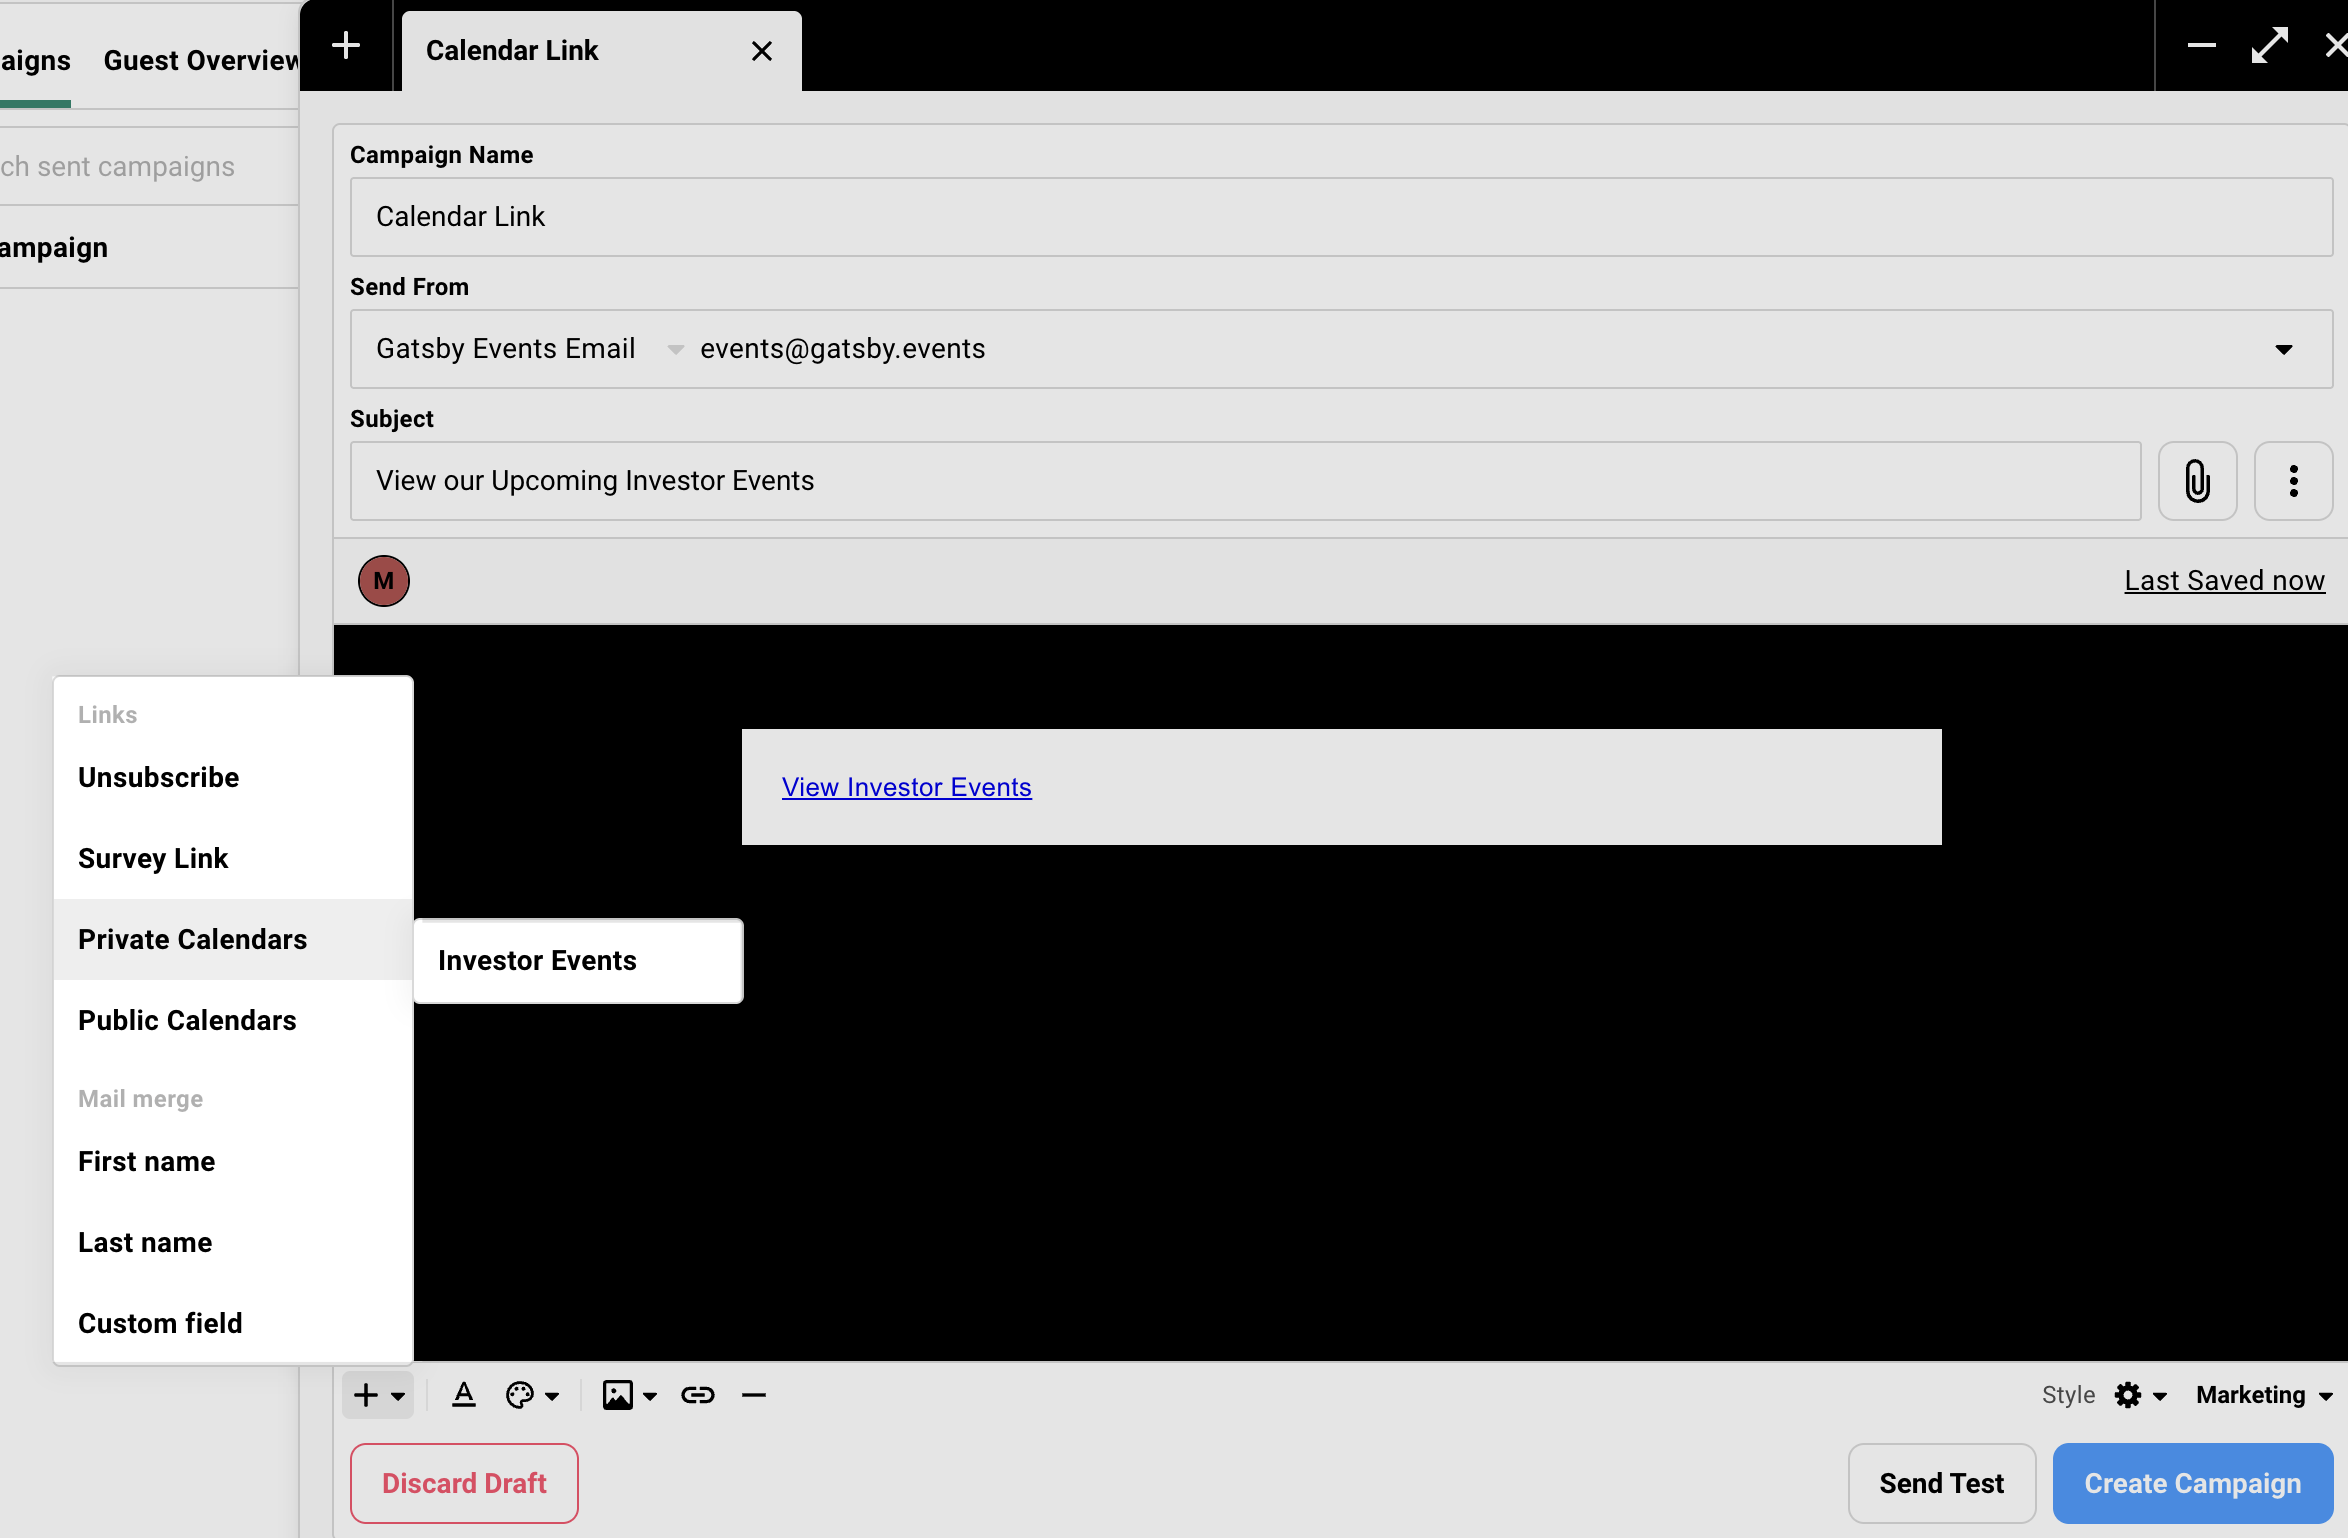
### The Registration Experience
[Section titled “The Registration Experience”](#the-registration-experience)
When a contact opens their calendar link, they see the same event listing as a public calendar. The difference is what happens when they click an event.
Their name and email auto-fill. They register, get added to that event’s guest list, and receive a confirmation email with a calendar invite. No retyping their information for each event. If they’ve already registered, the calendar shows their RSVP status with an option to edit their response.
What Contacts See+
Contacts land on a page showing each event’s date, city, image, and description in chronological order.
***
**Registering for an event**
Click an event. Information auto-fills from their contact profile. They confirm their registration and get added to the event’s guest list automatically. A confirmation email with a calendar invite follows.
On that event’s guest list, the **Guest Source** column records the registration as `Gatsby calendar link`, with the calendar itself linked from the cell. See [Guest Source: what every value means](/platform/events-lists/guest-source/).
***
**Already registered**
If they’ve already registered for an event, the calendar shows their current RSVP status (accepted, declined, or waitlisted). They can edit their response based on the editing permissions you’ve set on that event.
***
**Event at capacity**
Capacity is handled at the individual event level. If an event hits its cap, the next person sees either a closed registration message or a waitlist option, depending on that event’s settings.
## Common Questions
[Section titled “Common Questions”](#common-questions)
What happens if someone forwards their private calendar link?+
The link is tied to a specific contact record, so anyone who opens it acts on that contact’s behalf. An executive assistant could use it to RSVP for their boss, for example. Any registration through the link is attributed to the original contact. Other people can open the link, but it won’t create new contact records.
Is this an actual calendar with a grid view?+
No. A Calendar page shows your events to *your audience* as a chronological list with the date, city, image, and description for each event. There’s no calendar grid, no week/month layout, and no iCal sync. Think of it as a curated event listing page.
Don’t confuse it with the calendar **view** on your own [Events dashboard](/platform/events-lists/guest-lists/#viewing-your-events), which *does* lay your events out on a month or week grid. That’s an internal view for your team; a Calendar page is what your contacts see.
Can visitors filter or search events on the page?+
Not currently. Events display in chronological order. If you need to organize events by region or topic, create separate calendars for each.
Can I customize the page design?+
The logo and event images carry your branding. Beyond that, fonts, colors, and button styles follow Gatsby’s default design. There are no additional customization controls.
Can I connect multiple contact lists to one private calendar?+
Yes. Associate as many lists as you need. Send the calendar link from each list separately using the merge tag in Campaigns.
Do new events appear on the calendar automatically?+
No. Calendars are intentionally curated. When you create a new event, you add it to the calendar manually. This gives you control over exactly what each audience sees.
Can I embed the calendar on an external site?+
Yes, public calendars can be embedded via iframe. They’re designed as standalone pages, but embedding works.
Can I see which events people are clicking on?+
Yes. At the top of each calendar you’ll see summary stats including total views and event clicks. Clicking the event clicks count opens a breakdown showing how many times each event was viewed. You can’t export this data directly, but you can copy and paste it from that view.
# Contact Lists
> Lists are like events without dates. Use them for newsletters, directories, post-event surveys, and anywhere you need to collect information from contacts without the overhead of calendar invites and registration deadlines.
Why it matters
## Events need dates. Not everything you track does.
You need addresses from 50 partners. Feedback from attendees three weeks after a conference. A newsletter subscriber list that lives alongside your contact records. None of that fits an event.
How it works
### Events Without Dates
Same guest list tools. No calendar complexity. Just a landing page that stays open.
### Unified Contact Management
Your contacts live in one place. Data follows them across events and lists.
## Why Lists Exist
[Section titled “Why Lists Exist”](#why-lists-exist)
You need to collect addresses from 50 partners. Or survey attendees three weeks after an event. Or track newsletter subscribers.
None of that has a date.
**Lists handle this.** They share most tools with events. No dates, times, or calendar invites.
For detailed documentation on how the list interface works, see [Guest Lists and Events](/platform/events-lists/guest-lists/). Views, columns, filters, sections, and bulk actions all work identically. The rest of this page focuses on differences and use cases.
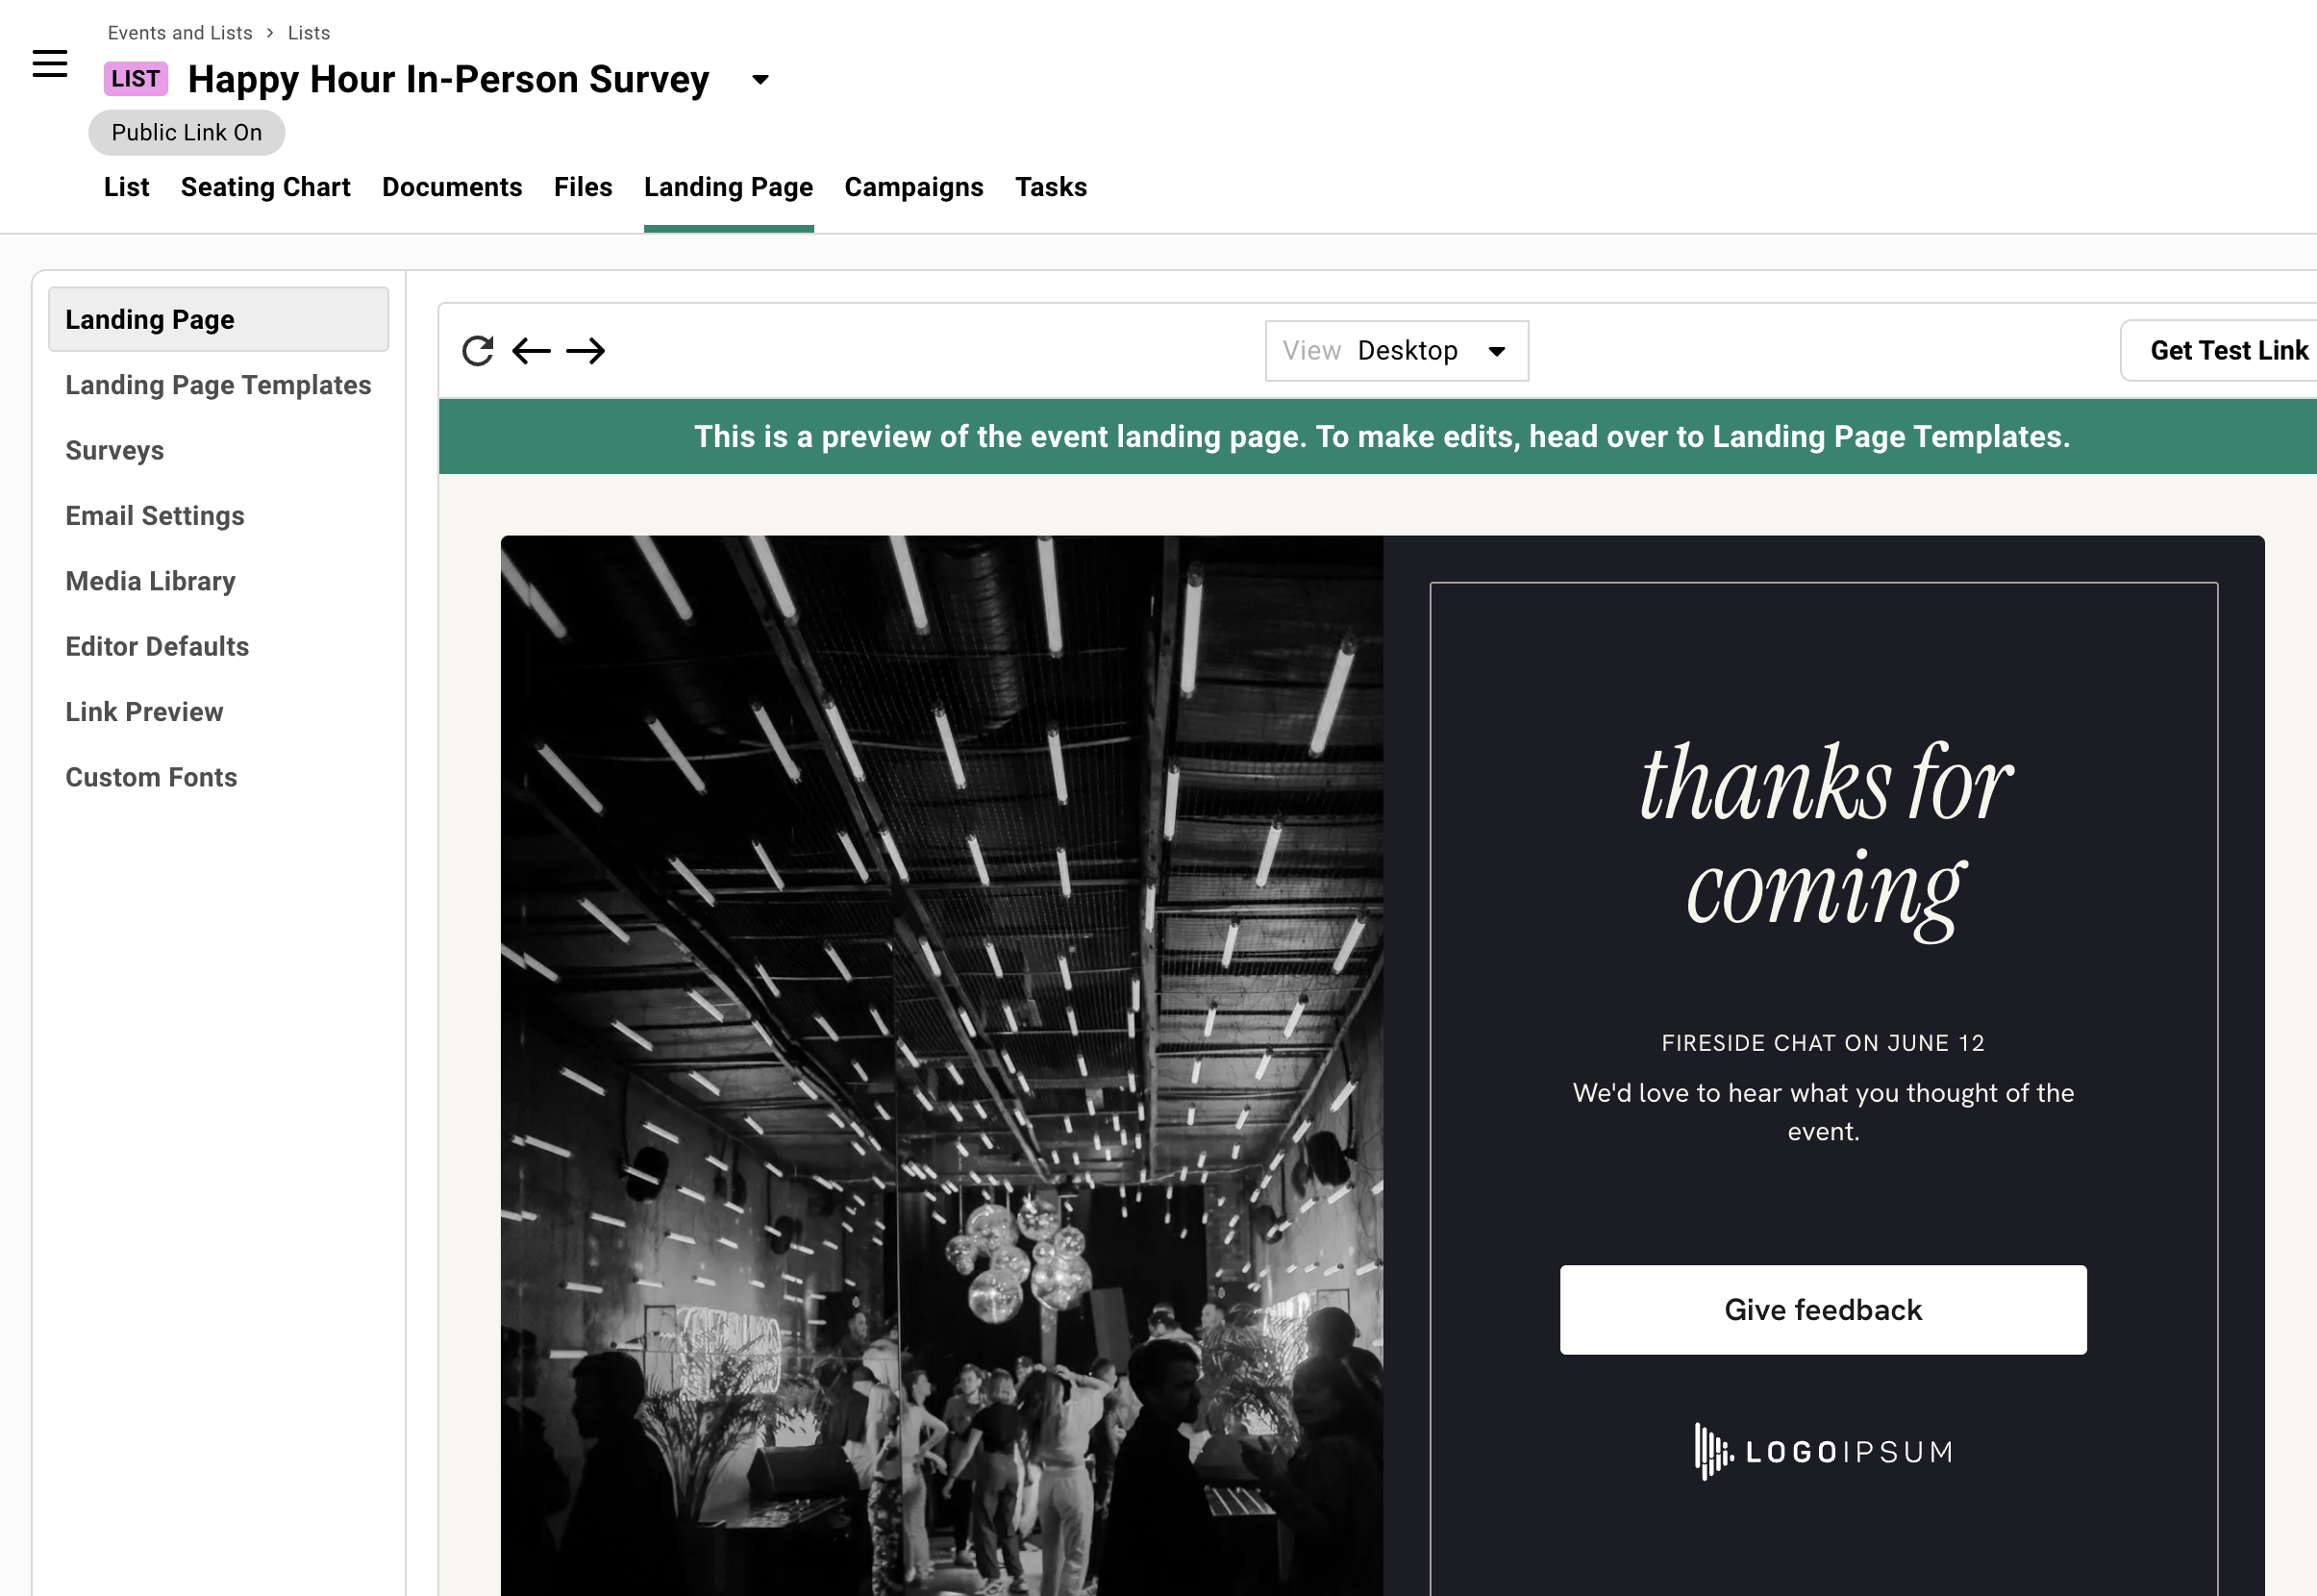
## How Lists Work
[Section titled “How Lists Work”](#how-lists-work)
You already know how to run an event in Gatsby. Lists work almost identically.
### Creating a List
[Section titled “Creating a List”](#creating-a-list)
The Lists dashboard mirrors the Events dashboard. My Lists shows lists you created or collaborate on. All Lists shows everything your team is running.
Creating a List+
Click **Create List** to open the dialog. Much simpler than events.
***
**List Details**
* List name (required)
* Internal name (optional, for your reference)
* Template selection
* Collaborators
***
**Advanced Settings**
* Enable parent-child linking
* Select parent or child lists
No dates. No times. No location. Just a name and you’re ready.
Key Differences from Events+
| Feature | Events | Lists |
| --------------------- | ------------ | ----------------- |
| Status tracking | RSVP Status | Link Status |
| Registration tool | Registration | Landing Page tool |
| Calendar invites | Yes | No |
| Registration deadline | Configurable | Always open |
| Plus-ones | Configurable | Not available |
| Capacity limits | Configurable | Not available |
The navigation inside a list closely mirrors an event’s — same tab structure, same **+** menu for optional tabs like Seating, Files, Documents, and Tasks. The one swap is **Landing Page** in place of Registration, since a list has no calendar invites or RSVP deadlines to configure.
### Link Status vs RSVP Status
[Section titled “Link Status vs RSVP Status”](#link-status-vs-rsvp-status)
Lists use Link Status instead of RSVP Status. The lifecycle is simpler.
> The lifecycle:
>
> **Link Sent → Visited → Completed**
No Accept or Decline because there’s nothing to decline. Guests either complete the survey or they don’t.
Link Status Reference+
| Status | Meaning |
| ----------------- | -------------------------------------------- |
| Blank | Not sent a link |
| Link Sent | Received a campaign with their unique link |
| Visited | Clicked the link. Viewed the landing page. |
| Completed | Finished the survey |
| Survey Incomplete | Started but didn’t finish required questions |
| Bounced | Email bounced |
| Failed | Email failed to send |
| Blocked | Previous bounce detected |
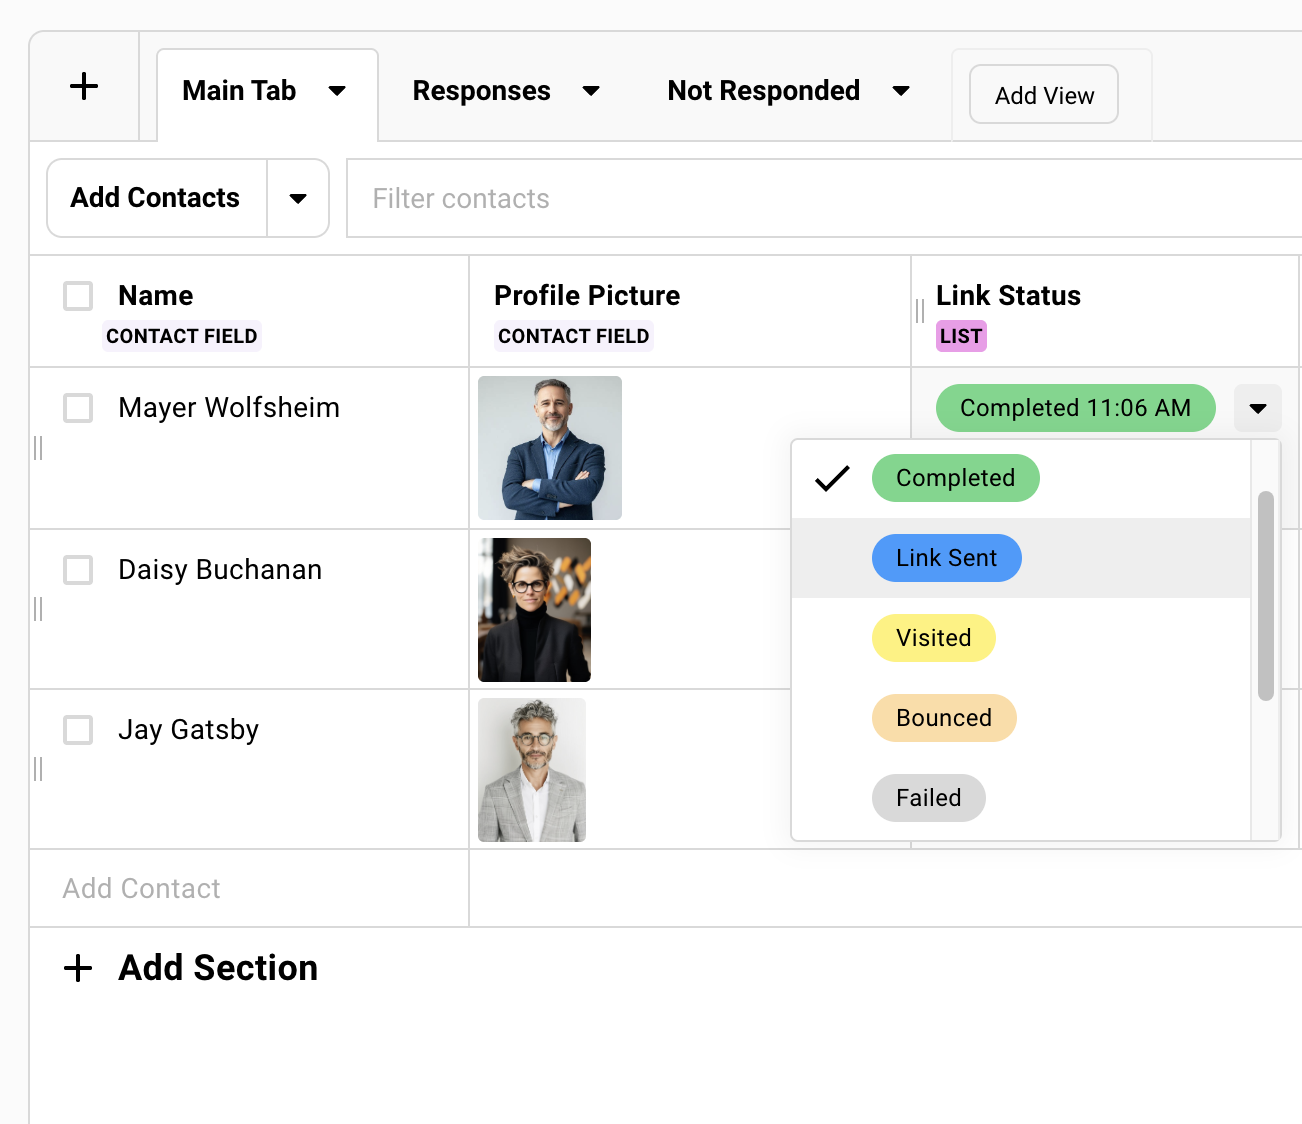
## Use Cases
[Section titled “Use Cases”](#use-cases)
Lists unlock workflows that don’t fit the event model. Here’s how teams use them.
### Newsletter Subscribers
[Section titled “Newsletter Subscribers”](#newsletter-subscribers)
Your newsletter lives in Mailchimp or HubSpot. Your relationship data lives in Gatsby. You want subscribers in your contact database without creating fake events to hold them.
Use a list. The landing page can act as your subscription form. Contacts join your database with their full history intact. Survey questions capture preferences, interests, and segments. Nothing fake, nothing cluttering your events dashboard.
[Newsletters Playbook](/playbooks/beyond-events/newsletters/)
### Post-Event Surveys
[Section titled “Post-Event Surveys”](#post-event-surveys)
You want feedback three weeks after your conference. If you use an event for this, your follow-up could trigger a calendar invite and registration confirmations for guests who already attended. Confusing at best…
Use a list. No calendar complications. The survey stays open. Add attendees from the original event.
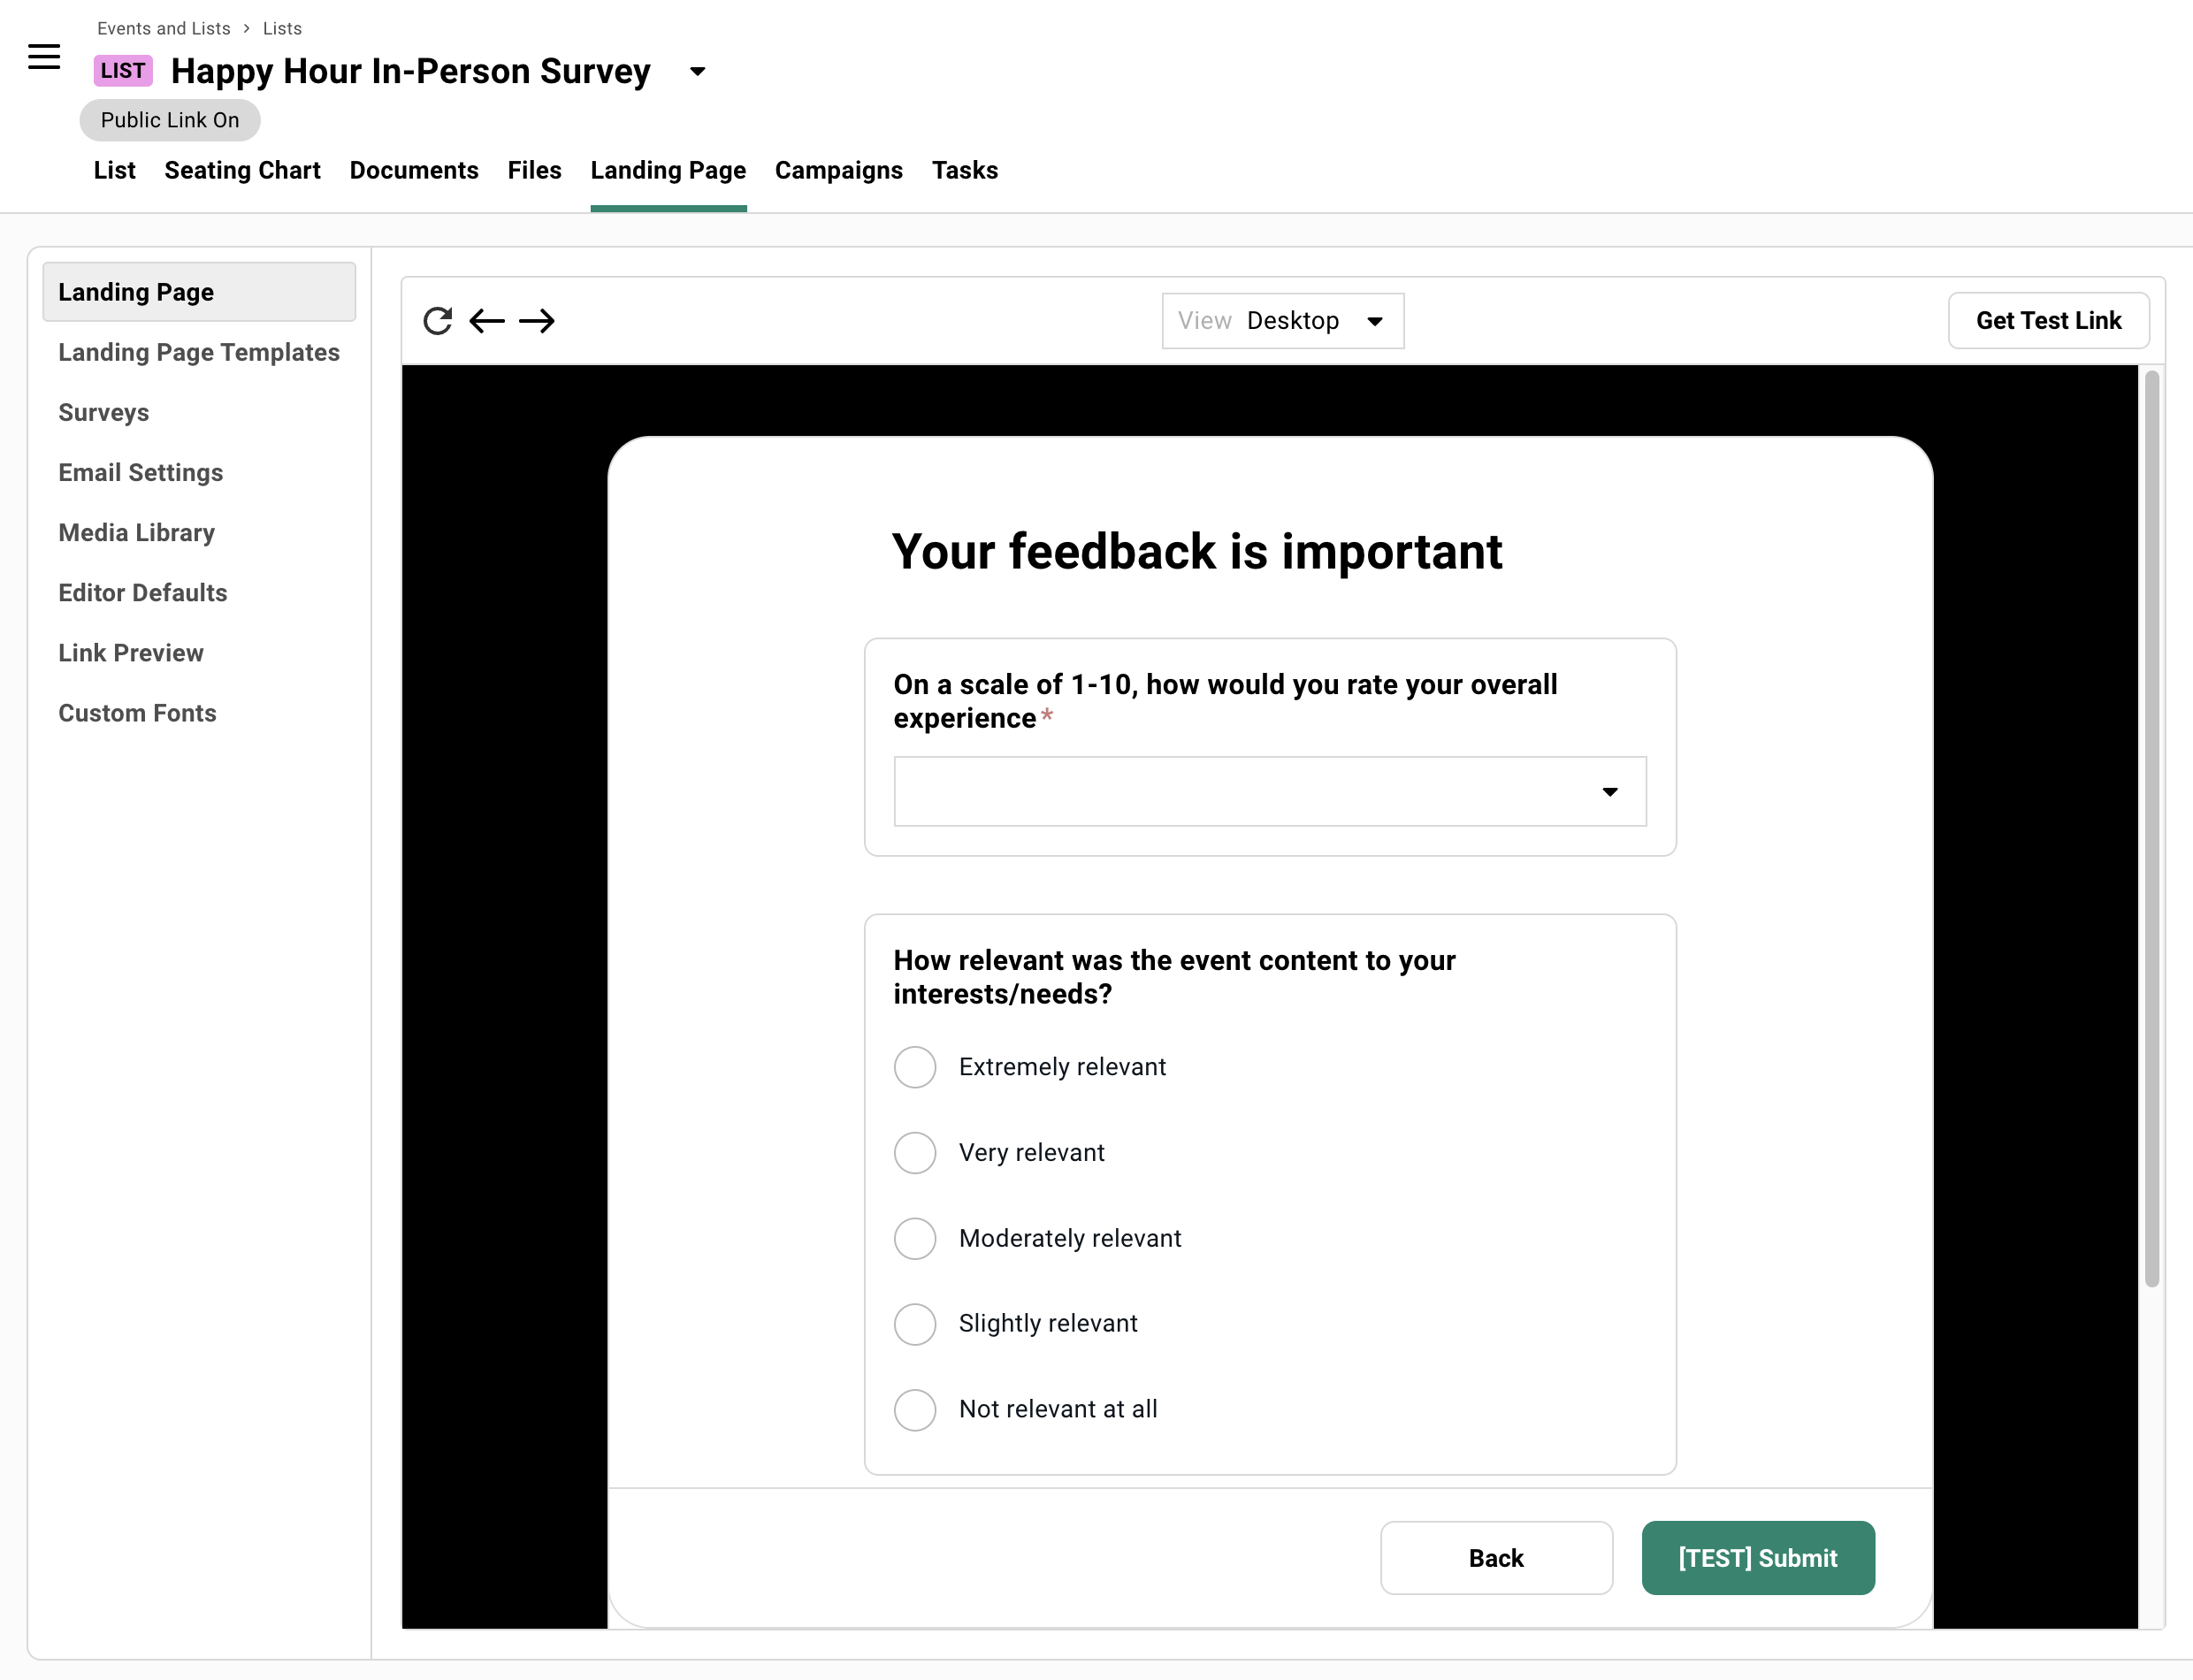
### Network Intelligence Dashboards
[Section titled “Network Intelligence Dashboards”](#network-intelligence-dashboards)
You want to see your entire contact network: who’s engaged, who’s dormant, who RSVPs yes but never shows.
Create a list for this. **Add Event History columns to see engagement patterns.** Filter by total events attended, RSVP patterns, engagement level. Create views for different segments: highly engaged, needs re-engagement, VIPs who never show. No date means no confusion with your actual events calendar.
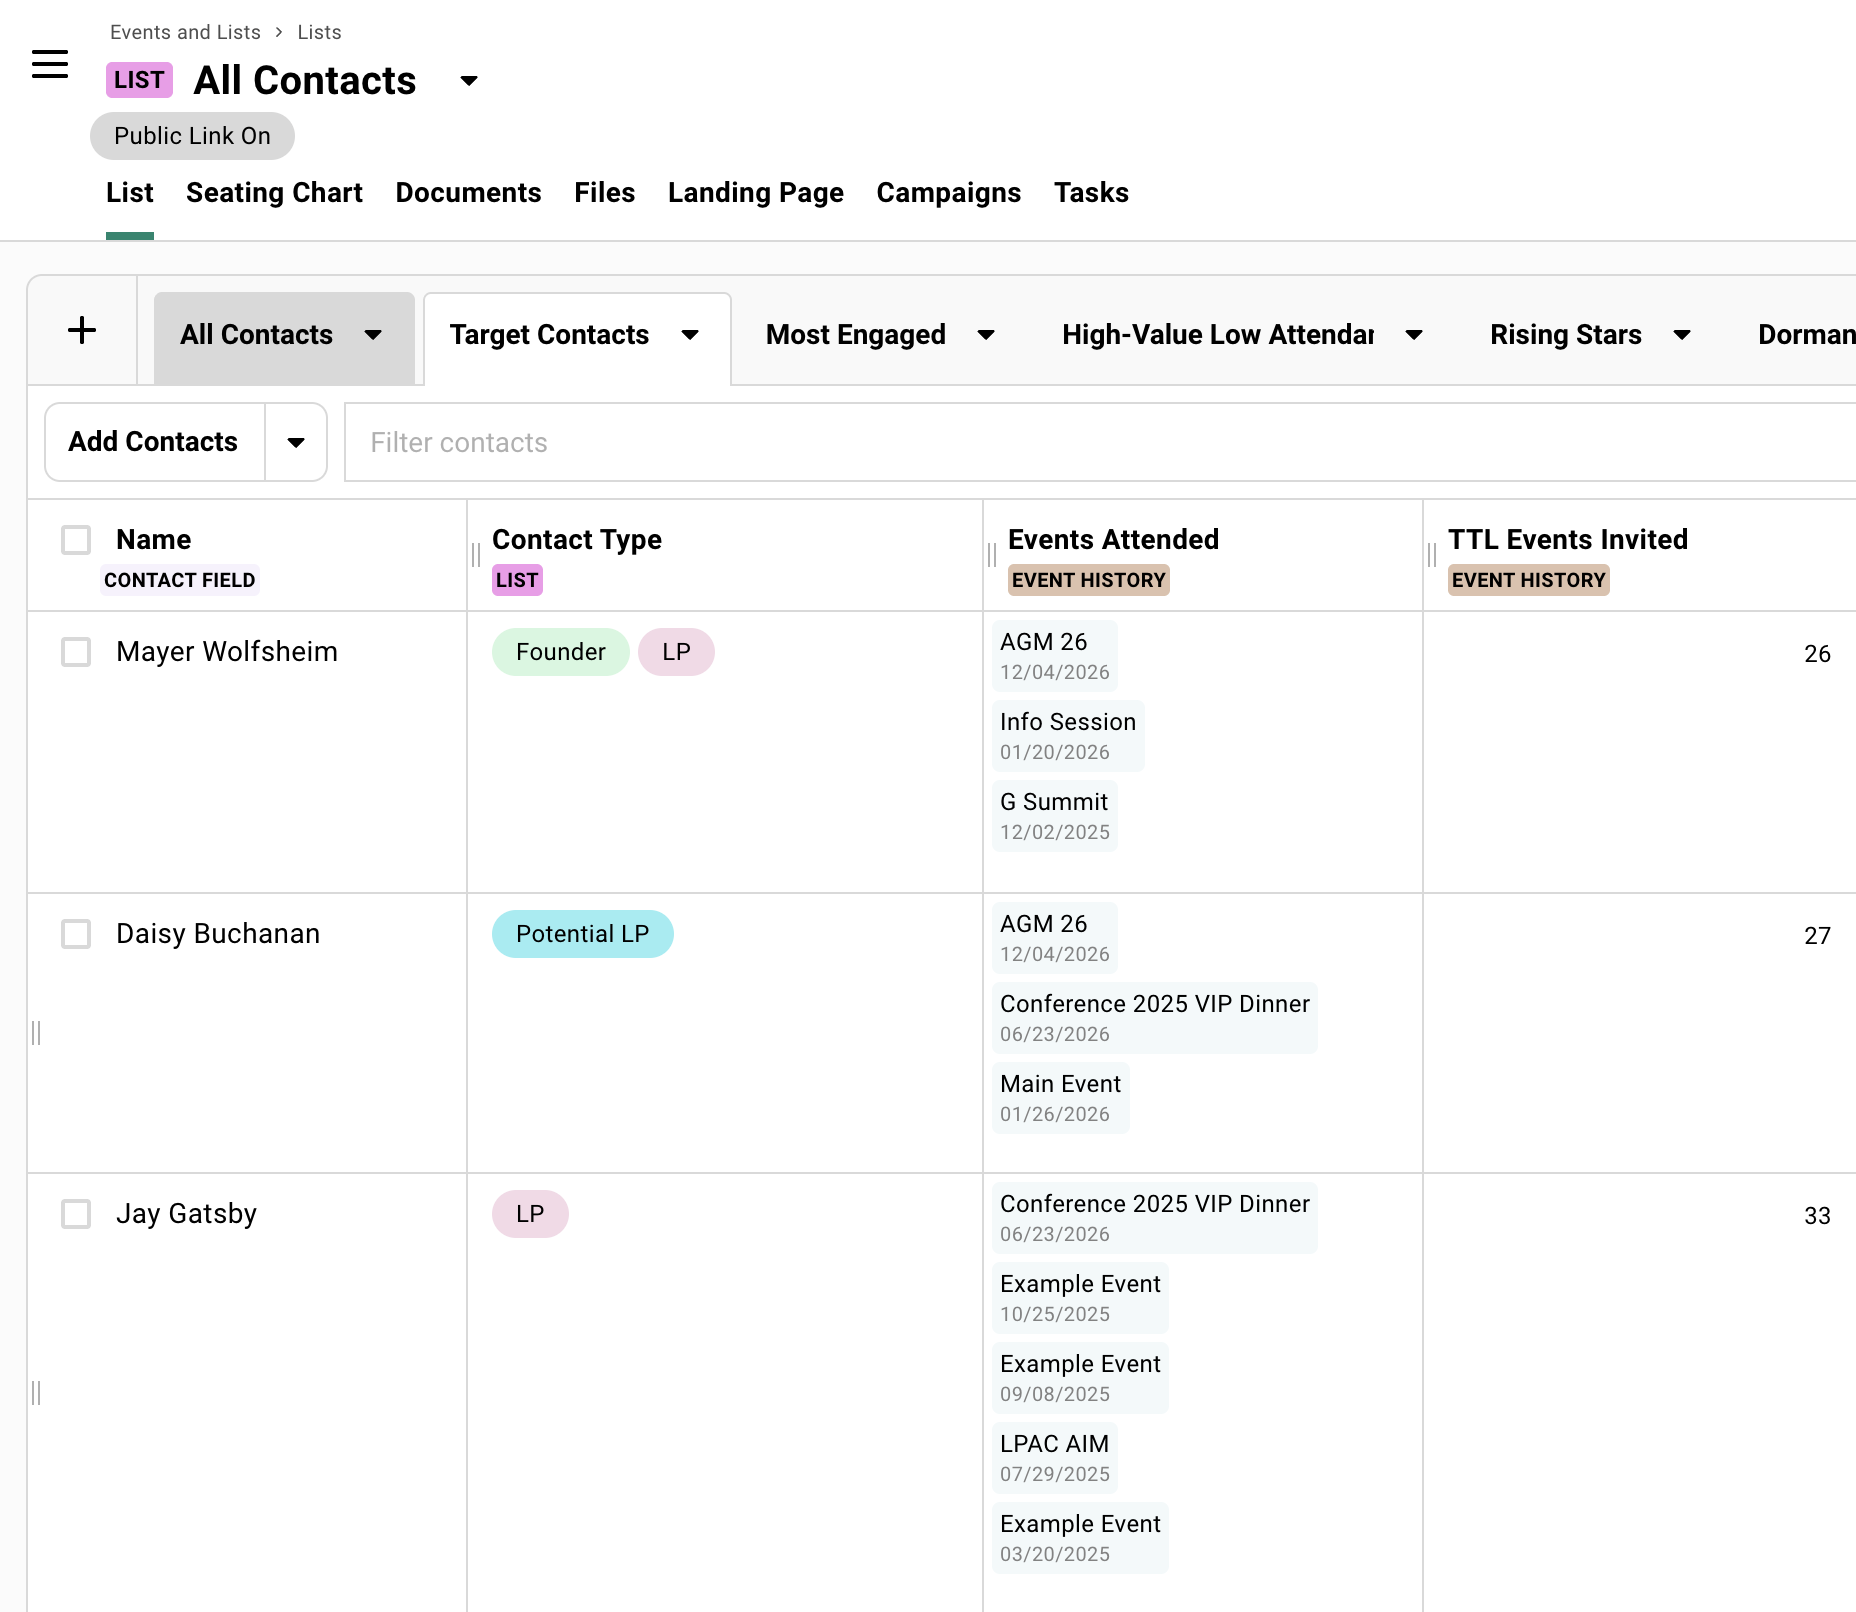
### Internal Directories
[Section titled “Internal Directories”](#internal-directories)
Your team needs a shared reference for key contacts: board members, LP contacts, portfolio company executives. A spreadsheet works until someone needs to filter by relationship owner or see when a contact last attended an event.
Create a list. Organize contacts by relationship type. Add custom columns for internal notes, relationship owners, last contact date. Share views with team members. Password protect if needed. Contact profiles link to full engagement history.
### Event Series Dashboards
[Section titled “Event Series Dashboards”](#event-series-dashboards)
You run a quarterly dinner series. You want to see everyone who’s ever attended any dinner in one place. Individual events show individual dinners. You need the aggregate view.
Create a parent list with child events. Guests bubble up from child events to the parent. Add RSVP Status columns from each child event. Now you see who’s been to one dinner and who’s been to all four.
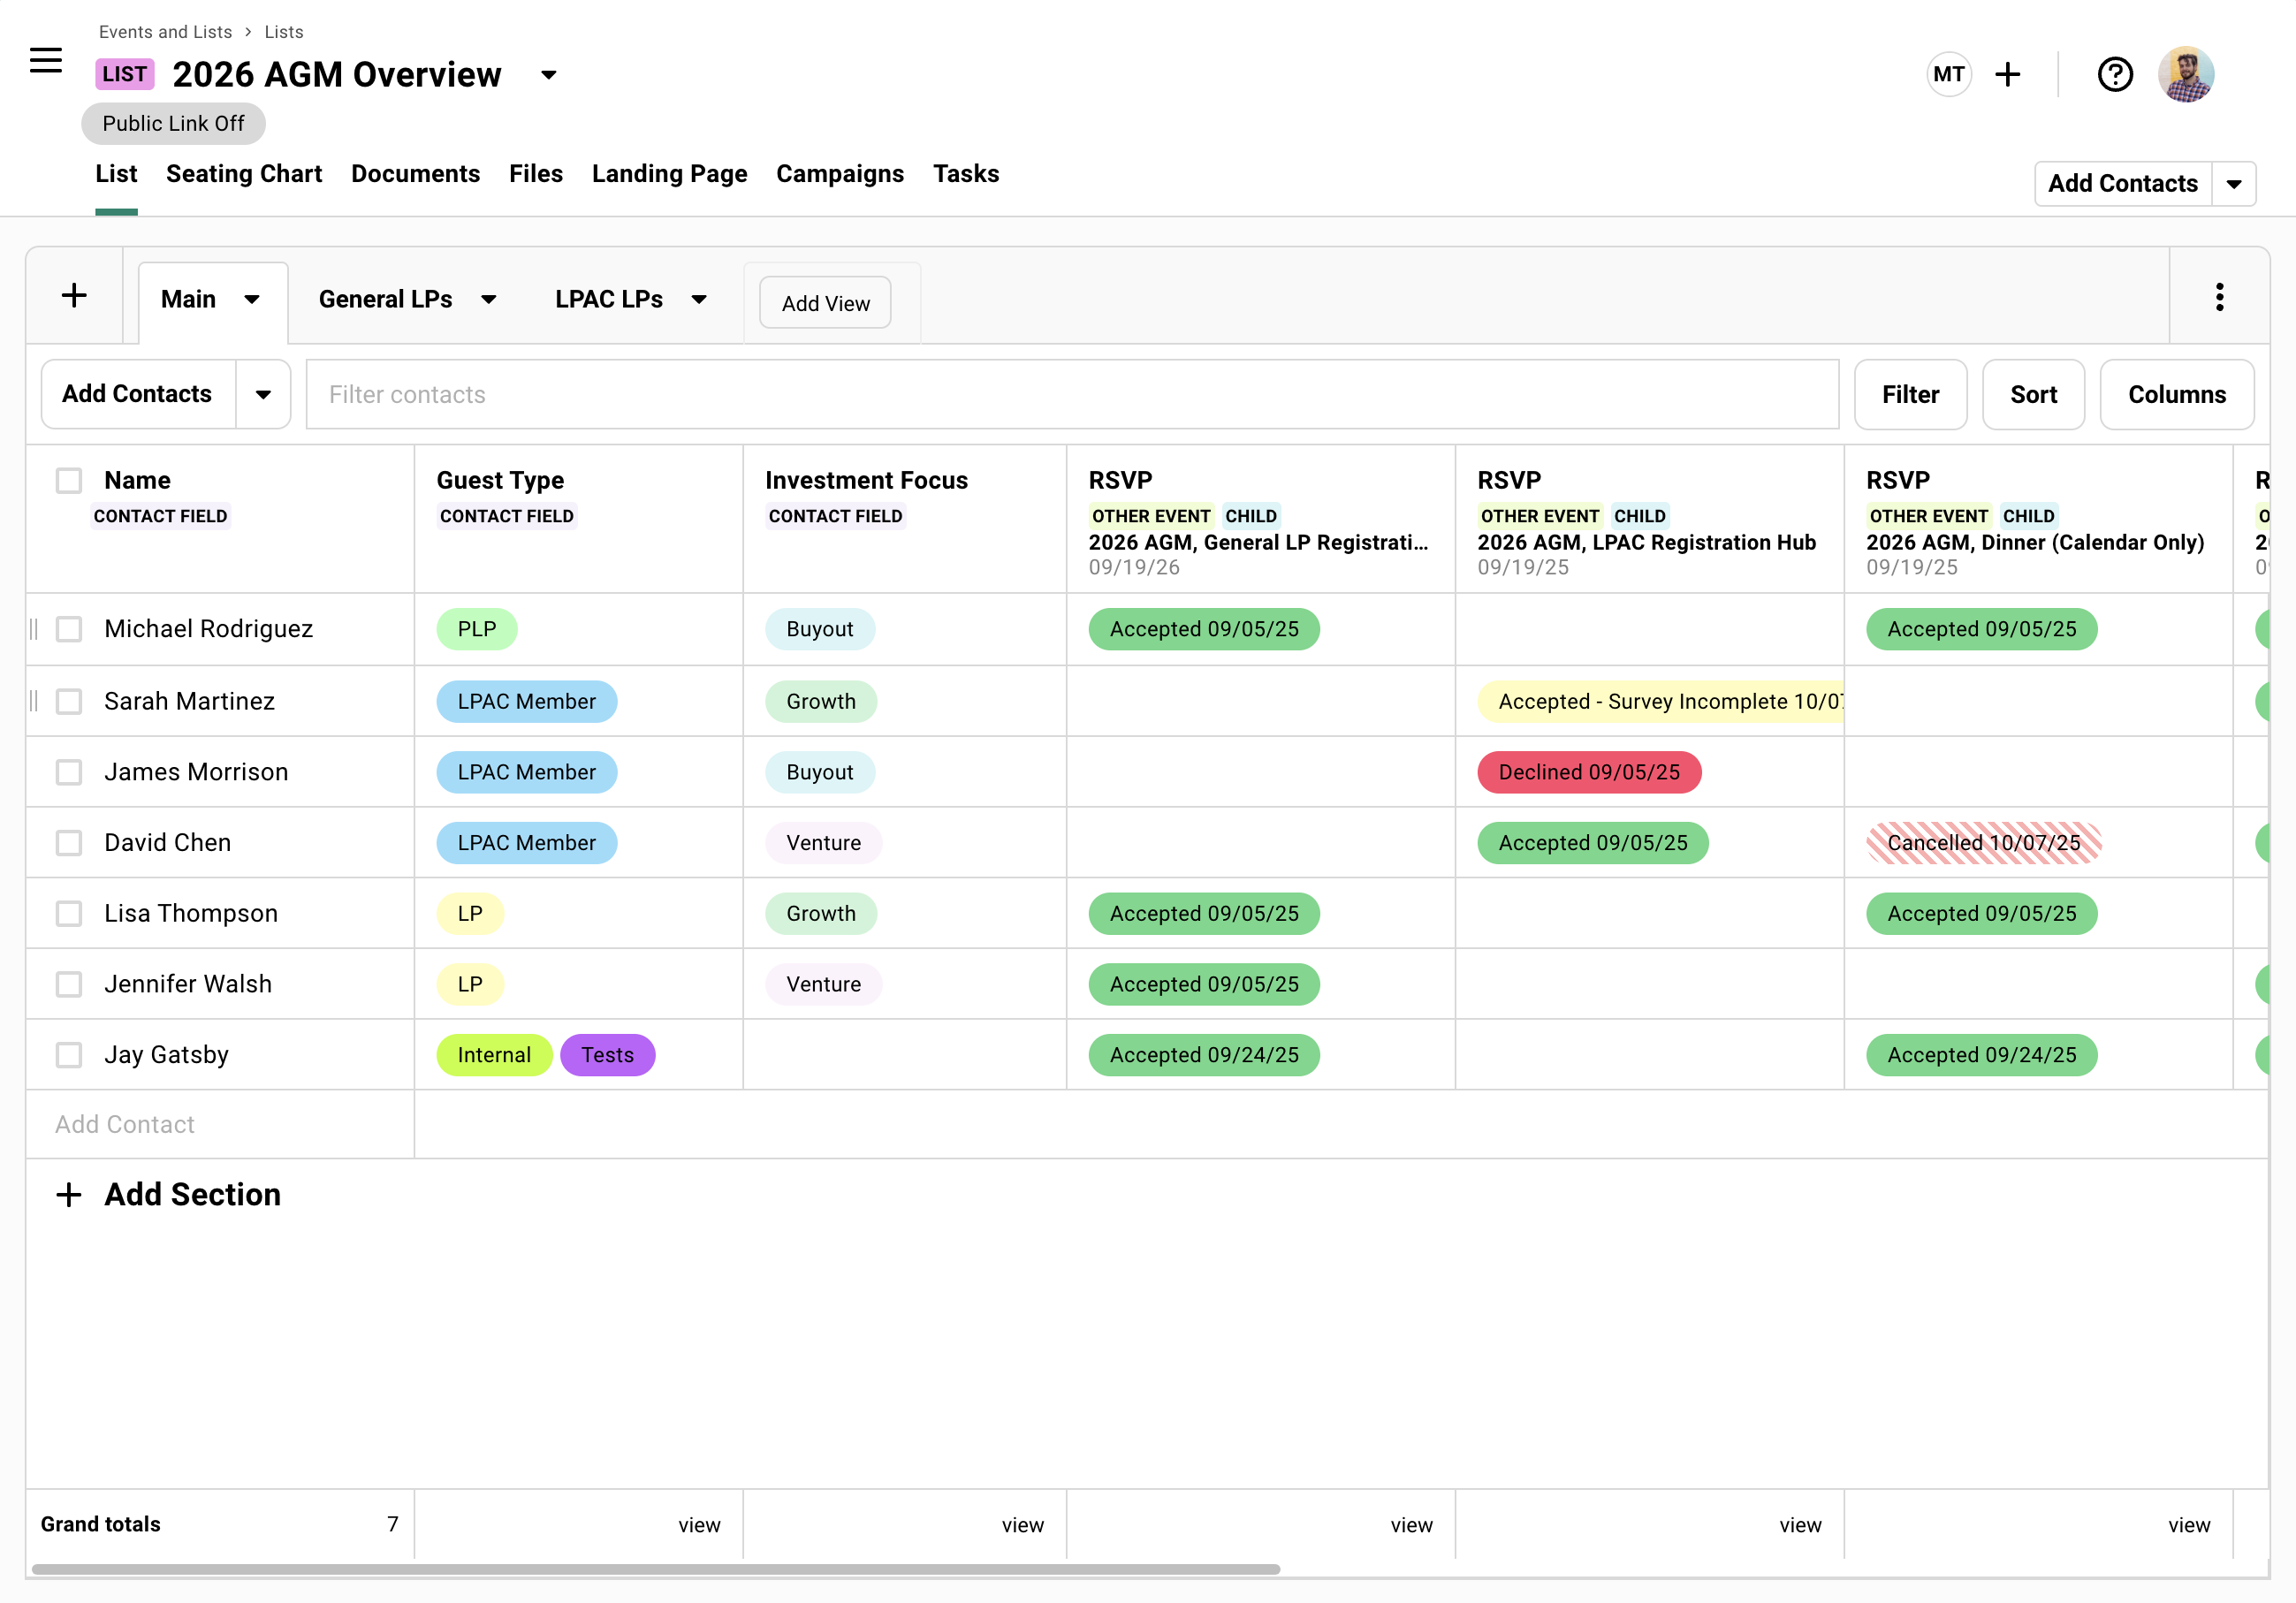
### Holiday Gift Address Collection
[Section titled “Holiday Gift Address Collection”](#holiday-gift-address-collection)
December hits. You need mailing addresses from 50 partners.
Google Forms sends responses to a spreadsheet that has nothing to do with your contact records. Chasing addresses over email means every update lives in someone’s inbox.
Use a list. Your branded landing page replaces the generic form. Personal links tie responses to existing contact records automatically. Addresses sync to contact profiles and persist year over year. Contacts can update if something changed, or confirm what’s already on file. Reuse the same list next year.
[Collecting Addresses Playbook](/playbooks/beyond-events/collecting-addresses/)
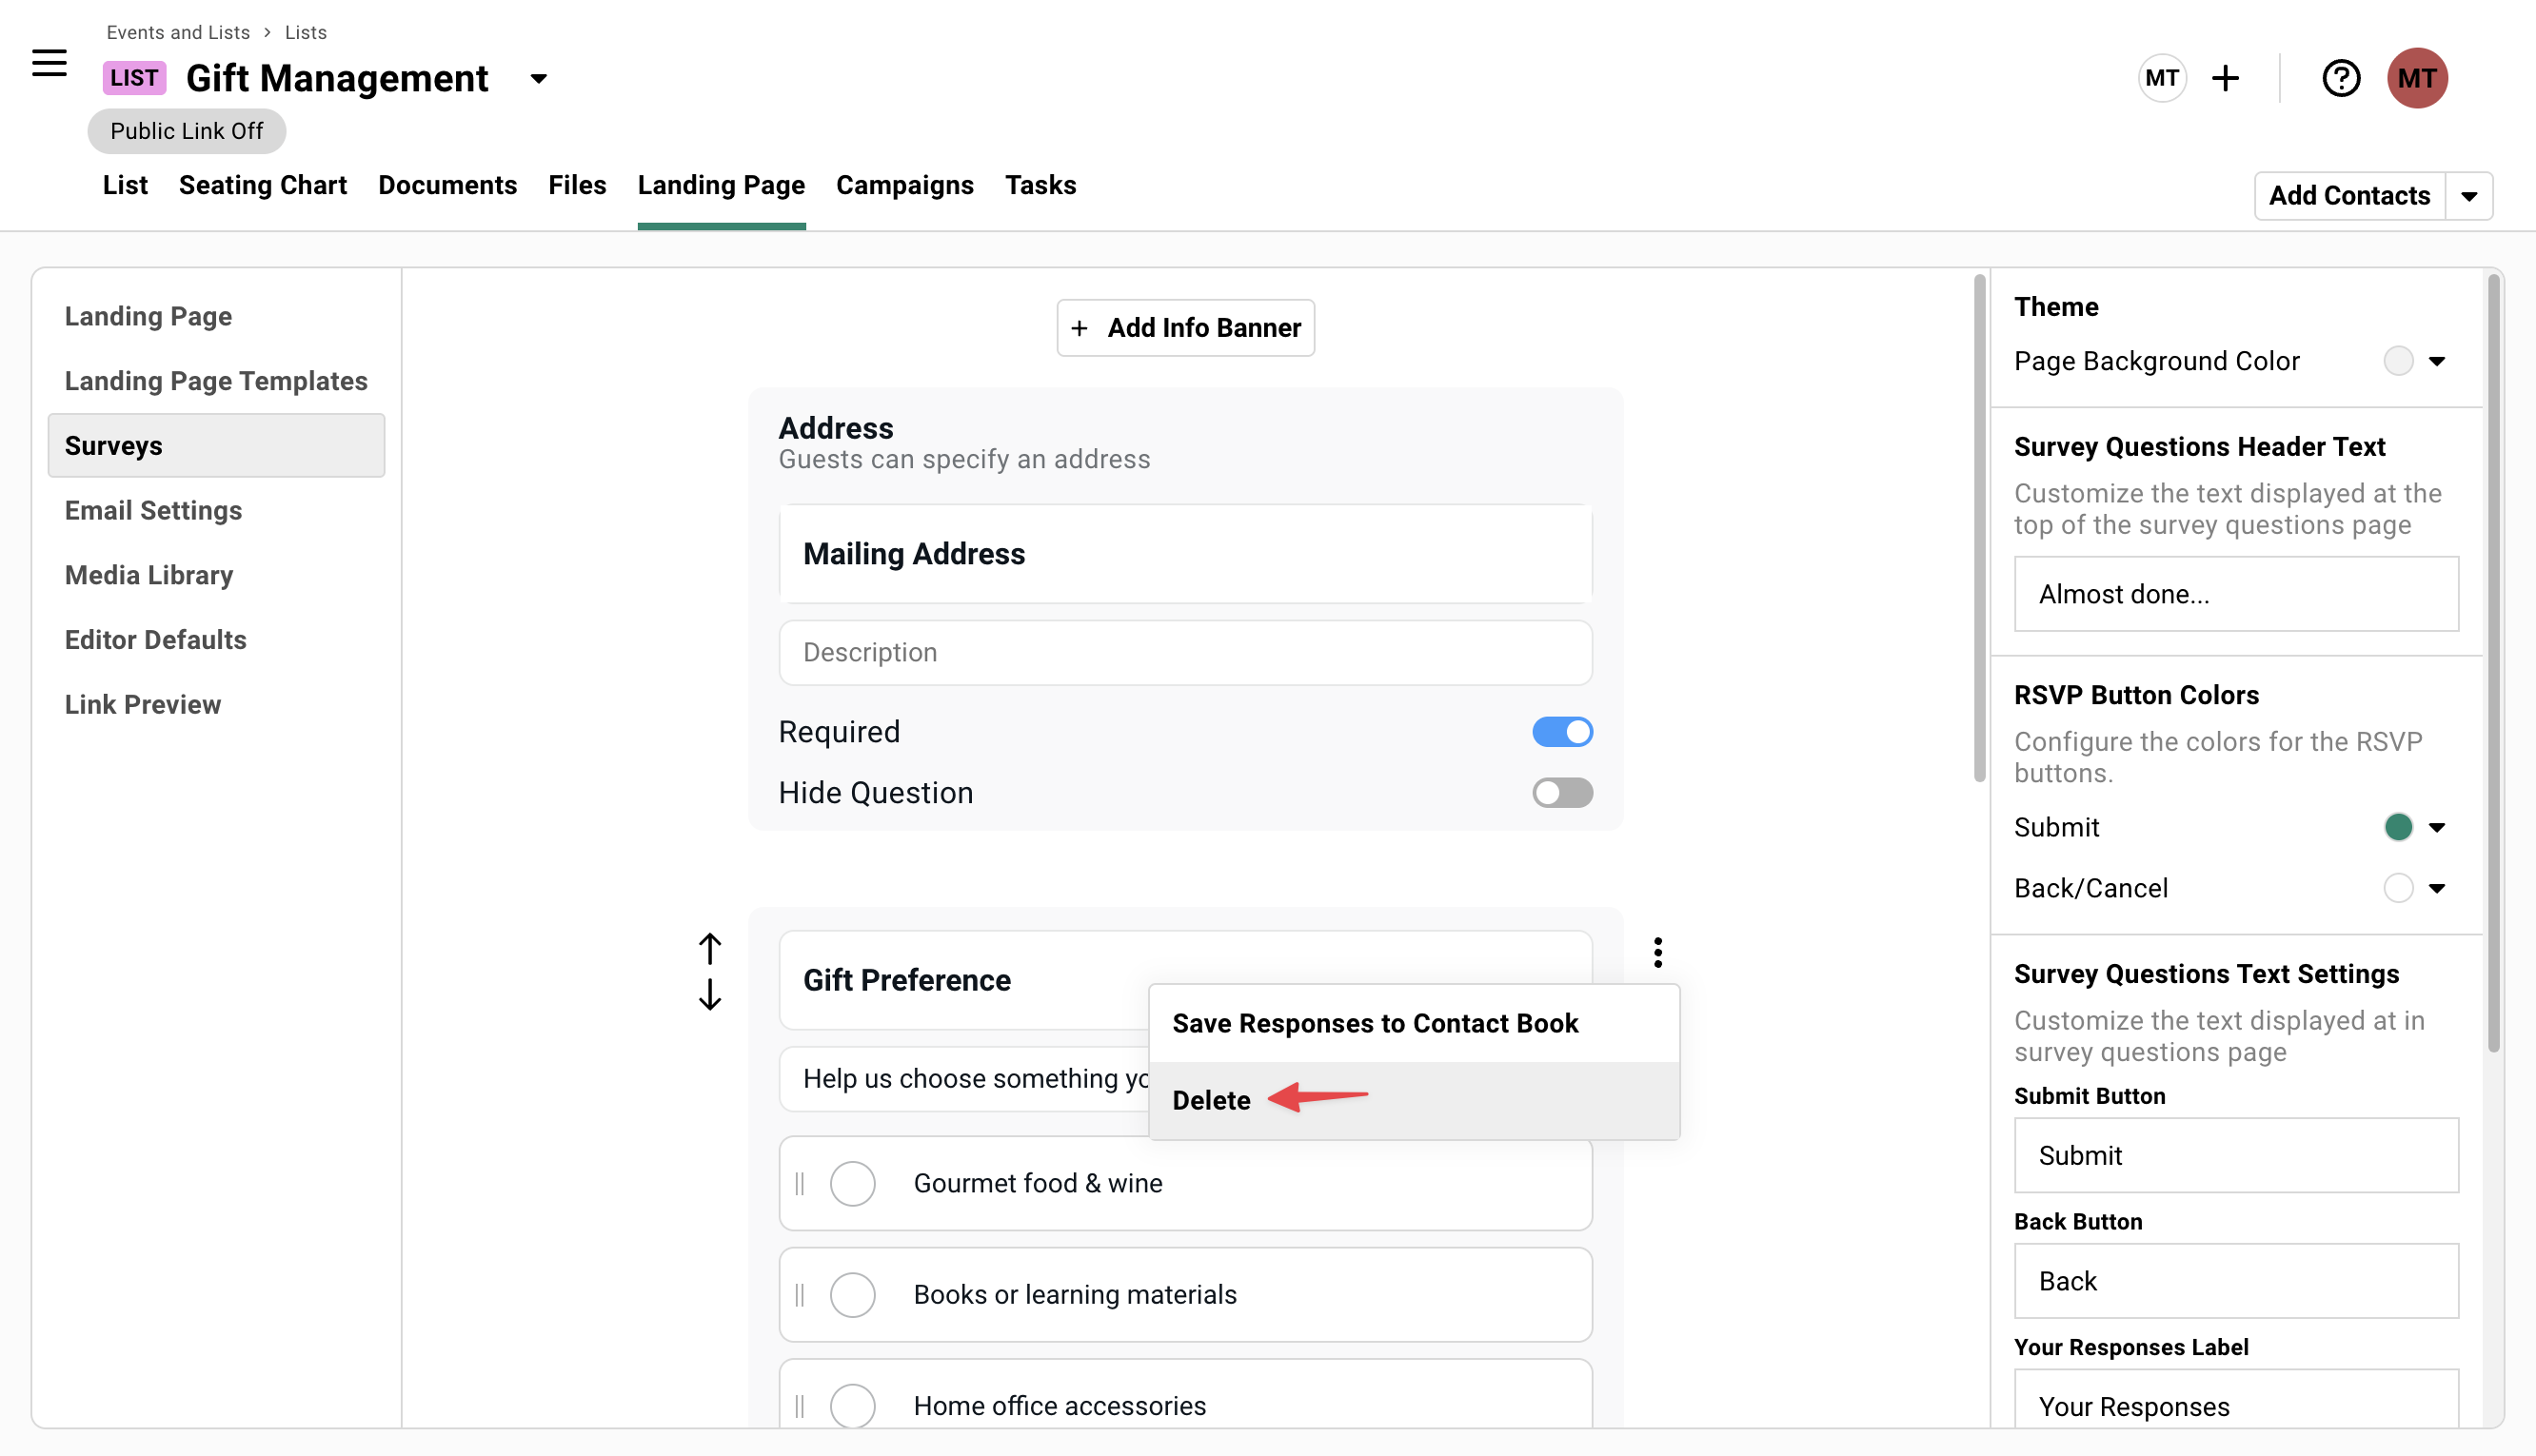
### Parent-Child Lists for External Collaborators
[Section titled “Parent-Child Lists for External Collaborators”](#parent-child-lists-for-external-collaborators)
You’re co-hosting an event. Each contributor has their own invite list. You don’t want them seeing each other’s contacts or your event settings. But you need everyone in one place for the actual event.
Use your event as a “parent” and create child lists for each contributor.
Each contributor gets access to their child list only. They upload their contacts to their child list. Contacts bubble up to the parent automatically. Contributors never see each other’s contacts or the main event settings.
This is the same **Family** relationship documented in full on [Families](/platform/events-lists/families/) — a stable Lists belongs inside a Family the same way an event does, and the same upward-only propagation rule applies: guests sync from a child list to its parent, never the other way.
This pattern works for co-hosted events, sponsor outreach, decentralized invite management, and any situation where multiple people contribute contacts without seeing the full picture.
## Everything Else Works the Same
[Section titled “Everything Else Works the Same”](#everything-else-works-the-same)
Views, columns, filters, sections. Guest actions like bulk edit, send message, add tags, export. The Campaigns tool. Documents, Files, and Tasks.
All identical to events.
For detailed documentation on these features, see [Guest Lists and Events](/platform/events-lists/guest-lists/).
## Common Questions
[Section titled “Common Questions”](#common-questions)
What's the difference between Events and Lists?+
**Events have dates. Lists don’t.**
Use **Events** for gatherings. You get calendar invites, RSVP tracking, check-in, and attendance data.
Use **Lists** for ongoing groups (newsletter subscribers, guest directories, internal team, etc.) and for sending out survey forms (post-event surveys, address updates, event preferences, etc. ). Perfect for multi-event tracking (e.g. event series dashboard).
Both get the same tools: campaigns, landing pages, documents, tasks. Events add the date-specific stuff and different registration modes (waitlist, maybe, decline).
Can I convert a List into an Event later?+
No direct conversion. But you can add list contacts to any event. The contacts and their data carry over.
Can I use the seating chart in a List?+
Yes, the tool is available. Use cases include room assignments, table arrangements for ongoing groups, or organizational charts.
# Families: Multi-Event Series & Sessions
> Link events and lists into parent-child hierarchies that roll contacts up into one guest list. Track participation across quarterly dinner series and roadshows, and delegate guest curation to collaborators.
Why it matters
## A conference has twelve sessions. How do you track who’s attending which ones without spreadsheet chaos?
Manually copying guests across related events creates version control nightmares. One person updates the wrong list. Someone gets double-invited. You lose track of who’s actually attending what.
How it works
### Guests sync upward automatically
Add someone to a child event. They appear in the parent list. No manual copying. One direction only.
### Build series from one canvas
Create a parent and five children in under two minutes. Visual organization shows which events belong together.
## How Families Work
[Section titled “How Families Work”](#how-families-work)
**Families connect events and lists into parent-child hierarchies.**
Most teams keep it simple with one parent and several children. Depth is there when you need it.
**One rule matters: guests bubble UP, never down.** Add someone to a child event, they appear in the parent automatically. Add someone to the parent? Nothing happens in children.
**Think of a family as a contact roll-up.** It decides which guest lists a contact appears on. It isn’t the tool for registration. If guests need to pick sessions when they register, don’t link the sessions as children. Use a registration hub and separate session events connected by an Event RSVP survey question instead. See [Running Events with Multiple Sessions](/playbooks/registration-setups/multi-session-events/).
What syncs vs. what doesn't+
**Syncs upward:**
* Guest presence on the list
**Stays independent per event:**
* RSVP status
* Attendance records
* Survey responses
* Seating assignments
Each event handles its own communications. Confirmation emails, campaigns, calendar invites.
The Child Guestlist column+
When you create children under a parent, a **Child Guestlist** column appears in the parent’s guest list.
Shows which child events each guest has been added to. Click the dropdown to add or remove guests from children without leaving the parent.
Shows presence only. **Not RSVP status.** Add columns from “Other Events/Lists” in your Columns drawer to see actual status.
Seeing RSVPs across several events in one place+
You don’t need a family to see RSVPs from several events side by side. Open the guest list you want to work from, then go to **Columns** » **Add Fields** » **Other Events/Lists**, find the other event under other events’ fields, and enable its **RSVP** column. Repeat for each event. You get one RSVP column per event.
The guests have to be on the guest list you’re working from, since the columns add information to the rows already there. If no single event has everyone, create a new event or list, add all the guests to it, and add the RSVP columns there.
Multi-level hierarchies+
Families can go deeper than parent-child. Grandparent, parent, child, grandchild. Guest sync bubbles through all levels.
Multiple parents allowed. A child can have two parents. Keep it flat when possible.
Priority Families and Accessory Families+
Gatsby distinguishes two kinds of Family: **Priority Families** and **Accessory Families**, and a Family can link both Events and Lists as parents or children.
Accessory families are just an organizing principle for yourself in cases where you have multiple, related families.
Labeling a hub and its sessions+
Every event carries an optional label saying what it’s for — **Single Event**, **Registration Hub**, or **Session** — set from the **What’s this event for?** dropdown on the Event Details tab. In a multi-session setup, the event guests register through is the Registration Hub and each sub-event is a Session.
**The label doesn’t build anything.** It’s there so anyone looking at your events dashboard can tell a hub from a session at a glance, and so you can filter and sort by it. A hub and its sessions are connected by an Event RSVP survey question, not by a family link. Linking a parent to its children, if you want a contact roll-up, is still the work described on this page — the Families tab, or Advanced Settings on the event.
That means the two can disagree, and Gatsby won’t stop you. An event labeled Session with no parent behaves like any other standalone event. Label the events in a family for the benefit of your team, and build the links for the benefit of your guests.
See [Guest Lists and Events](/platform/events-lists/guest-lists/) for the dropdown and what each value means.
**Deletion warning:** Removing a guest from a PARENT removes them from ALL children. Removing from a child does NOT remove them from the parent.
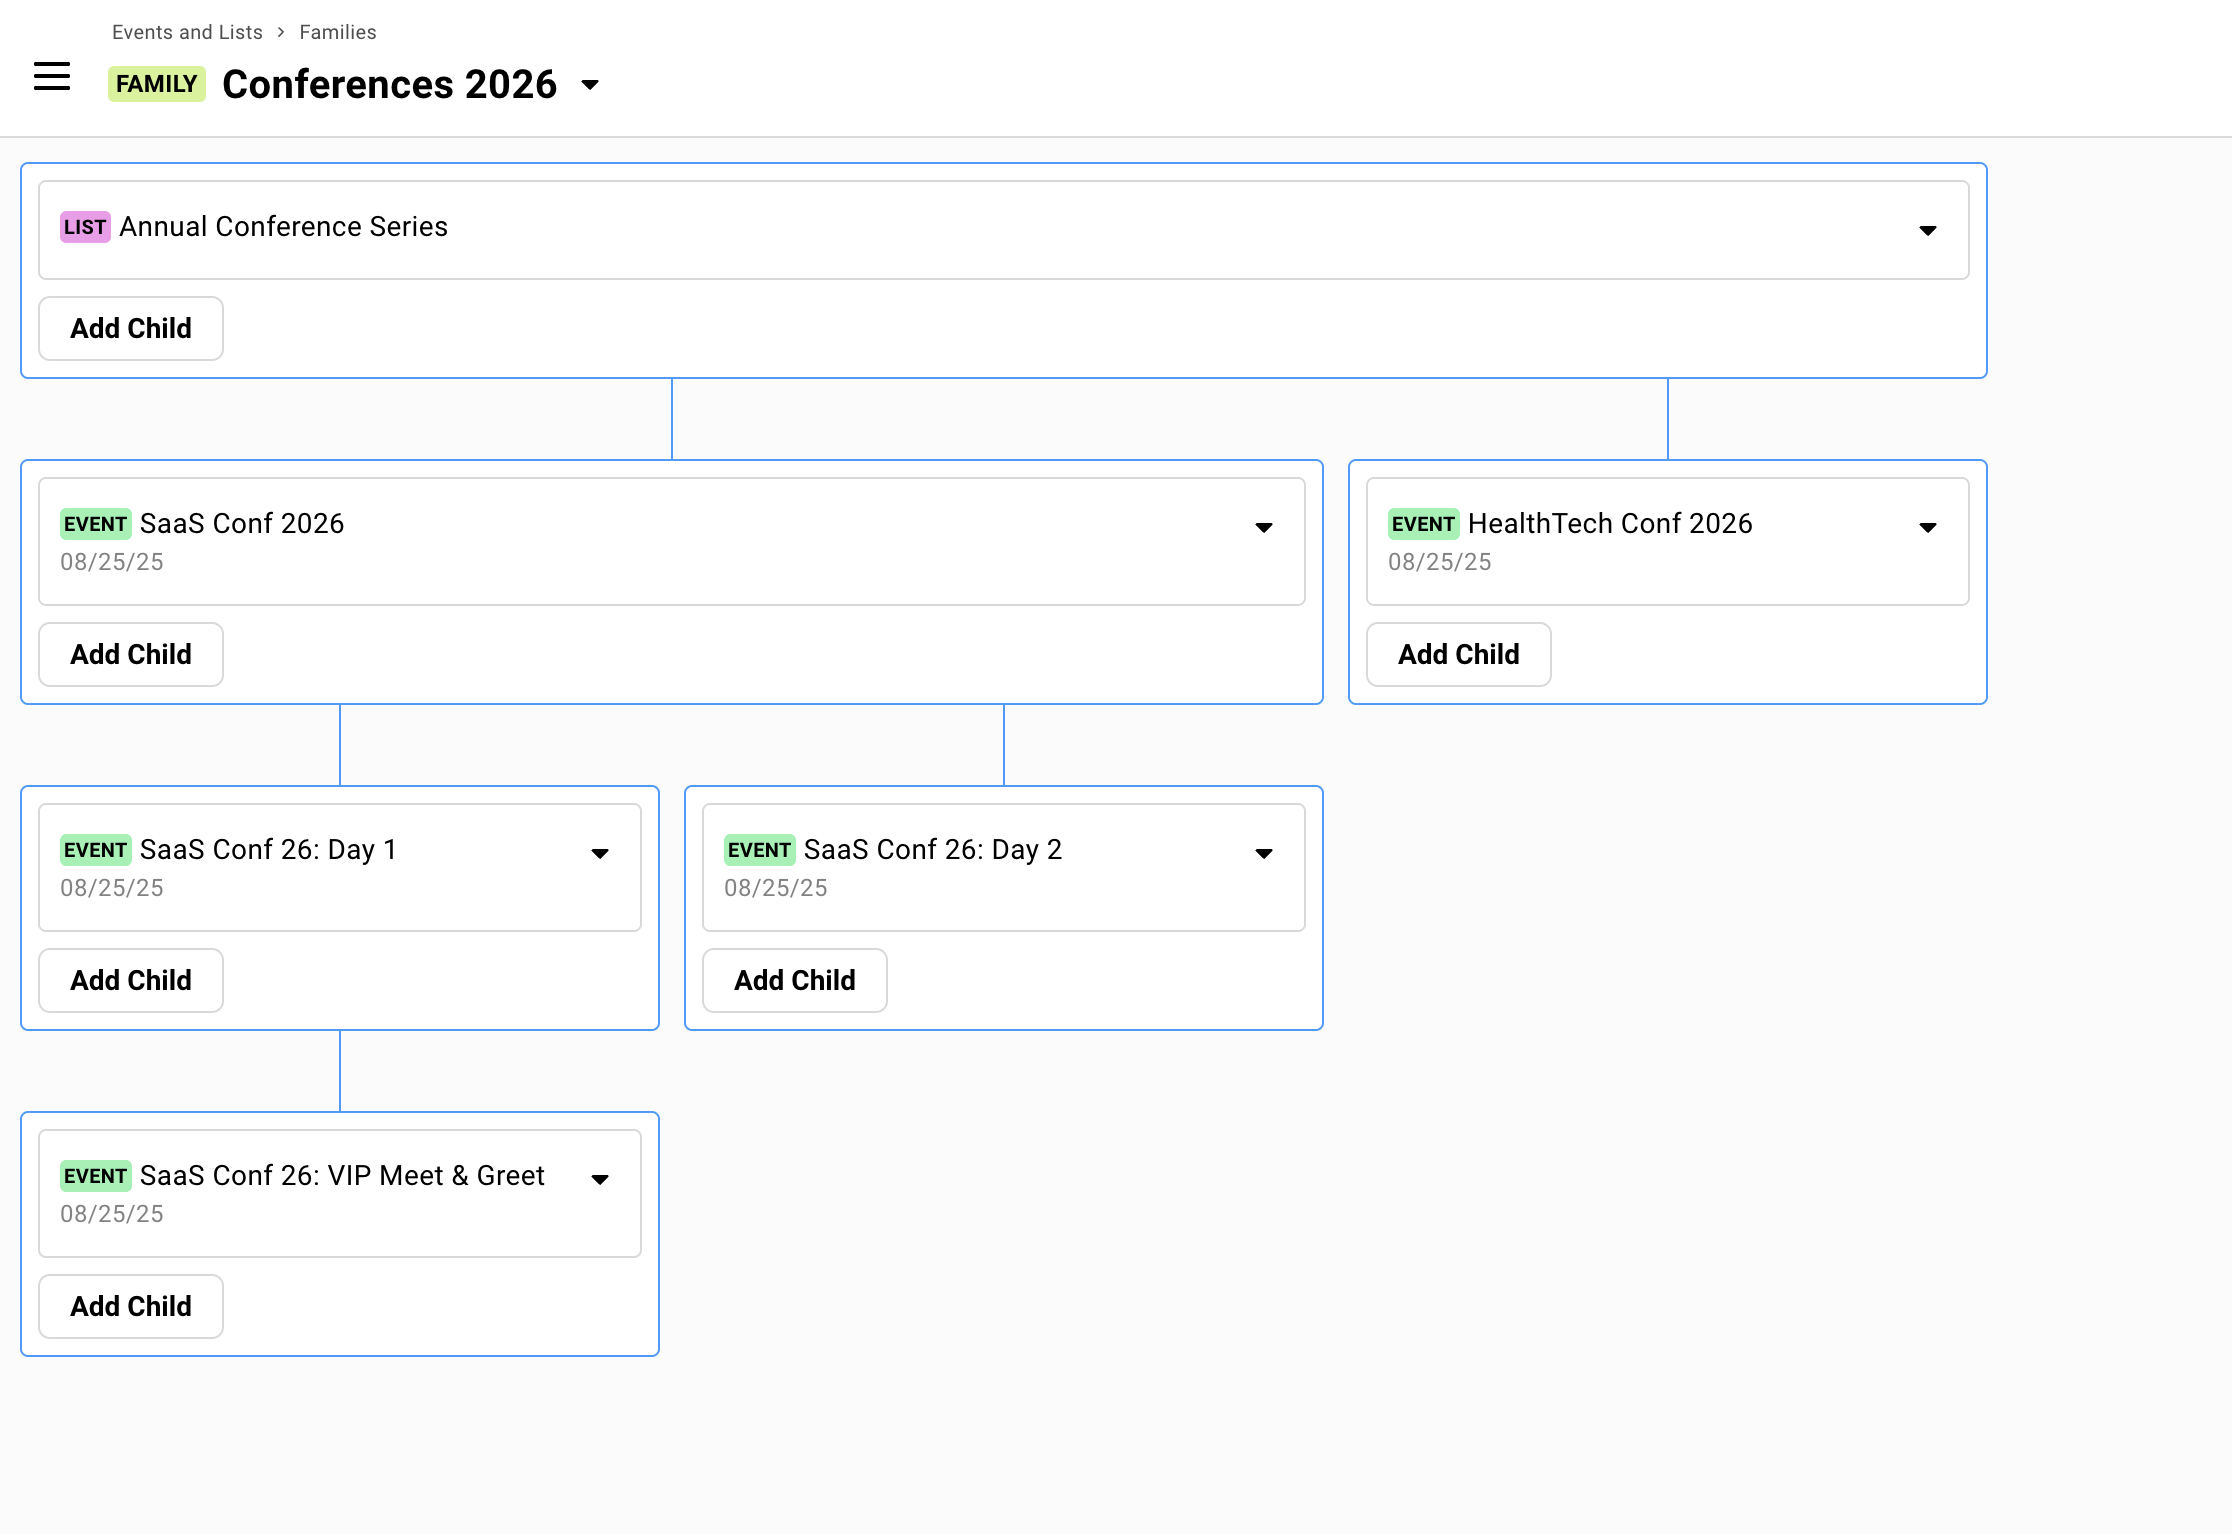
### Multi-Event Registration
[Section titled “Multi-Event Registration”](#multi-event-registration)
For conferences, summits, and events where guests build their own agenda, you don’t need parent-child links. Set up a registration hub event and a separate event for each session, then connect them with an **Event RSVP** survey question on the hub.
One registration flow. Guests select which sessions they’ll attend. Each session sends its own calendar invite. You see everyone on the hub’s guest list.
[See the setup guide →](/playbooks/registration-setups/multi-session-events/)
## The Families Tab
[Section titled “The Families Tab”](#the-families-tab)
A visual canvas alongside Events and Lists on your dashboard. Create, view, and manage all your family structures in one place.
### Creating Families
[Section titled “Creating Families”](#creating-families)
Click **Create Family** from the Families tab. You’ll start with a blank canvas. Add your parent first, then connect children.
Step by step+
1. Click **Create Family** from the Families tab.
2. Click **Add Parent**. Choose **Create New** or **Link Existing**.
3. Click **Add Child**. Same options: create new or link existing.
4. Repeat for additional children. Name your family for clarity.
Linking existing events with guests+
When you link an existing event as a child, its guests sync upward immediately. No notification sent. They just appear in the parent.
That changes who a campaign from the parent reaches. Say you make your Morning session the parent of two other sessions: everyone from those sessions now sits on the Morning guest list too. An email sent to the Morning guest list would go to them as well, so filter carefully before sending from a parent.
If you link by mistake, be careful how you clean up. **Removing a guest from the parent also removes them from every child event.** Don’t remove guests from the parent who should stay on a child. If a wrong link pulled guests onto the parent, unlink the child and then remove guests from a parent.
Alternative: Linking from Event Settings+
You don’t need the Families tab to create parent-child relationships. Individual events have the option in their settings.
Open any event. Click the dropdown next to the event name. Select **Edit Details**. Under **Advanced Settings**, assign a parent or add children.
This creates or joins the same Family object as the Families tab — there’s no separate concept behind the two entry points. The Families tab gives you a visual canvas across the whole Family. Advanced Settings on an individual event is faster for a single link.
## When Families Help
[Section titled “When Families Help”](#when-families-help)
Not every multi-event scenario needs families. The main reason to use them: **you want all guests across related events visible in one parent list.**
Beyond consolidated visibility, families work well for:
Delegating guest curation+
Let’s say you have co-hosts or three partners who should suggest guests. But they shouldn’t see each other’s suggestions or the main event.
Give each collaborator their own child list. They add guests there. Guests bubble up to you in your event. They can’t see the parent or each other’s lists.
Clean separation. You get the full picture.
Dashboard across a series (Lists as parents)+
Lists work well as parent containers for event series.
Example: “2025 Executive Dinner Series” as a list parent. Q1, Q2, Q3, Q4 dinners as event children. The parent list tracks cumulative participation. Each child handles its own logistics, calendar invites, and RSVPs.
Useful when there’s no single “main event” but you want rollup visibility.
When families are optional+
**Events share guests but you don’t need central visibility.** If each event manages its own list independently, skip the family structure.
**You’re using survey questions to add guests to other events.** That works without families. Events don’t need to be connected for surveys to add guests across them.
**Events are loosely related but managed separately.** Not everything needs hierarchy.
Being on a guest list is invisible to guests. Families are purely organizational. Your guests don’t see or know about the structure.
## Checking In Across a Series
[Section titled “Checking In Across a Series”](#checking-in-across-a-series)
When running an event series or multi-session conference with Families, each child event has its own independent check-in. Use Gatsby’s check-in tools on the **child** event to mark attendance for that specific session.
This keeps attendance records scoped correctly: a guest can be “Attended” at the Tuesday dinner and “No Show” at the Thursday workshop. The parent’s guest list shows everyone across the series, but attendance belongs to each individual child event.
After the series wraps, add the Attendance column from your other events to the parent (Columns » Add Fields » Other Events/Lists) to see per-event attendance across all sessions.
## Common Questions
[Section titled “Common Questions”](#common-questions)
Can I convert a standalone event to a parent or child?+
Yes. Use the Families tab to link existing events, or go to the event’s Advanced Settings in Edit Details.
Linking existing events pulls their guests up into the parent right away, so check first whether you need a family at all. If the goal is to see RSVPs from several events in one place, adding each event’s RSVP column (**Columns** » **Add Fields**) does that without linking anything.
What happens if I accidentally delete guests from a parent?+
They’re removed from all children in the family. Use **Restore Deleted Guests** from the Add Guests dropdown if needed. Gatsby shows confirmation warnings before parent deletions.
Do child events need their own landing pages?+
Only if guests will register directly for them, which means building a separate registration experience on that event. Usually there’s no need. If a guest wants to add a session they skipped, send them back to the main registration link and have them update their registration, as long as the main form includes the question for that session.
How do parent-child relationships (Event Families) work?+
Parent-child relationships sync contacts **upward** from any child up to all connected parents. They’re a contact roll-up, not a registration tool.
**Perfect for**:
* Event series (create a Parent List with multiple Event children)
* Dashboard/Overview contact tracking (one List collecting from multiple other Events/Lists)
* Delegated guest curation (one child list per collaborator)
For multi-day conferences where guests pick sessions, use a registration hub with session events instead. See [Running Events with Multiple Sessions](/playbooks/registration-setups/multi-session-events/).
The parent’s guest list shows everyone from all children with a **Child Guestlist** column tracking which event/list each guest has been added to.
Can't see which child events guests belong to+
Add **Child Guestlist** column to parent event. Shows which child events each guest is present on.
# Guest List Warnings
> The Warnings column flags guests Gatsby can't email, registrations that aren't finished, and contacts who rarely respond. Here's what triggers each warning and how to clear it.
## What the Warnings column tells you
[Section titled “What the Warnings column tells you”](#what-the-warnings-column-tells-you)
**Warnings** is a column on every guest list. It answers one question: which guests on this list need something done about them before the event?
Gatsby works it out for you. Each warning is calculated from the guest’s own record, so the column fills itself in and keeps itself current. You can’t type in it, and you can’t clear a warning by hand. Fix the thing the warning points at and the warning goes away on its own.
A guest can carry several warnings at once. They always appear in the same order, so the column reads the same way on every row.
### Where to find it
[Section titled “Where to find it”](#where-to-find-it)
The column is on the guest list of every event you create. A view you add yourself is different: it starts with **Name**, **Email** and **RSVP Link** only, so you switch Warnings on there yourself.
Either way the fix is the same, and it affects only the view you’re looking at:
1. Open the view where you want the column.
2. Click **Columns** in the top right.
3. Find **Warnings** in the list and switch it on.
It’s a standard column, so it’s in the main Columns list. You don’t need **Add Fields**.
### Filtering by warning
[Section titled “Filtering by warning”](#filtering-by-warning)
Open **Filter → Event Fields → Warnings** and tick the warnings you want. By default you get every guest carrying any one of them. Switch on **results must match all selections** to narrow it to guests carrying all of them at once.
Filtering on **Missing Email** before you build a campaign is the fastest way to see who your send would skip.
## Warnings about email
[Section titled “Warnings about email”](#warnings-about-email)
Four warnings about whether you can reach a guest. The first two stop a send before it happens. The last two record what already happened.
### Missing Email
[Section titled “Missing Email”](#missing-email)
No email address on the contact. You can’t invite them or send them a campaign until you add one.
This is normal on plus-ones, on walk-ins added at the door, and on rows imported from a spreadsheet with no email column. Add the address on the guest’s contact record and the warning clears.
### Invalid Email
[Section titled “Invalid Email”](#invalid-email)
There’s an address, but it isn’t a usable one. A typo in the domain, a stray character, a missing `@`.
Gatsby doesn’t attempt delivery to these. If you send a campaign to a list that includes them, the composer warns you first, and if you go ahead those guests are recorded as failures on that campaign rather than being sent to. Correct the address on the contact to clear it.
### Email Bounced or Failed
[Section titled “Email Bounced or Failed”](#email-bounced-or-failed)
The guest’s current RSVP status is **Bounced** or **Failed**, which means the last email Gatsby sent them didn’t get through.
This one is a record, not a block. Nothing stops you sending again. A bounce usually means the address is dead, so check it before you retry. The warning follows the RSVP status, so it clears when the status changes, for example when the guest responds.
### Email Blocked by Gatsby
[Section titled “Email Blocked by Gatsby”](#email-blocked-by-gatsby)
Gatsby stopped a send to this guest. Two things cause it: a previous email to that address bounced, or the guest unsubscribed.
Both protect you. Repeatedly mailing addresses that bounce is what gets a sending domain flagged, and mailing someone who unsubscribed is a compliance problem. If you believe a block is wrong, send us the guest at
Email copied to clipboard
and we’ll look at the delivery record.
## Warnings about registration
[Section titled “Warnings about registration”](#warnings-about-registration)
Three warnings about a guest who started something and didn’t finish, or who got missed.
### Hasn’t RSVP’d yet
[Section titled “Hasn’t RSVP’d yet”](#hasnt-rsvpd-yet)
Their invitation went out more than seven days ago and they still haven’t responded.
Gatsby measures from the **first** send, not the most recent one, and only while the guest is still sitting at **Invited**. As soon as they accept, decline, or go on the waitlist it disappears. Filter on it to build a follow-up list.
### Survey Not Submitted
[Section titled “Survey Not Submitted”](#survey-not-submitted)
The guest responded (Accepted, Waitlist, or Maybe), your registration form has at least one required question, and Gatsby has no answers from them at all.
It shows up when a guest confirms through a route that skips the form, or when an organizer sets the status by hand. Send them their personal RSVP link and ask them to complete it, or enter the answers yourself on their row.
This warning is about having no answers, not incomplete ones. A guest who answered one of five required questions doesn’t get flagged.
### Missing Calendar Invite
[Section titled “Missing Calendar Invite”](#missing-calendar-invite)
They accepted more than 24 hours ago and no calendar invite has reached them.
The 24-hour delay is deliberate. It keeps the warning off guests who accepted a few minutes ago and whose invite is still on its way. Past that, treat it as real: send the invite from the guest’s row, or check whether calendar invites are switched on for this event’s confirmation email.
## Warnings about a guest’s history
[Section titled “Warnings about a guest’s history”](#warnings-about-a-guests-history)
Three warnings that look past this event at everything the guest has been invited to across your org, including this one. Gatsby needs three or more events of history before it will flag anyone.
These describe a pattern, not a person. Someone who ignored three invitations may well come to the fourth. Use them to decide where to spend a phone call, and hide the column if you’d rather not see them.
### Unlikely to RSVP
[Section titled “Unlikely to RSVP”](#unlikely-to-rsvp)
Three or more invitations, and they have never responded to any of them. No accept, no decline, no maybe, no waitlist.
### Unlikely to Accept
[Section titled “Unlikely to Accept”](#unlikely-to-accept)
Three or more invitations, and they have never accepted or joined a waitlist. This one also catches people who reply reliably and always say no, which the previous warning doesn’t.
### Unlikely to Attend
[Section titled “Unlikely to Attend”](#unlikely-to-attend)
They accepted at least twice and have never been marked as attended on an event they accepted. Your serial no-shows.
This one depends on your check-in data. If your team doesn’t record attendance, nobody will ever be marked attended, and the warning stops meaning anything.
## Common Questions
[Section titled “Common Questions”](#common-questions)
Can I clear a warning without fixing the underlying problem?+
No. The column is read-only. Every warning is recalculated from the guest’s record each time the list loads, so anything you typed over would come straight back.
If a warning isn’t useful to you, hide the column in that view: **Columns**, then switch **Warnings** off. It affects only the view you’re looking at.
I filtered on Outdated Calendar Invite and got nobody+
That option is in the filter list but nothing produces it, so it always returns zero guests. The state you’re after lives in a different column.
Add **Calendar Invite State** to see it. That column shows **Out of date** on guests whose invite predates a change to the event’s date, time, or location.
A guest has a warning I think is wrong+
Check their contact record first. Most surprising warnings come from a second contact for the same person, an address that was corrected on one record and not the other, or an RSVP status an organizer set by hand.
If the record looks right and the warning still doesn’t, send us the event and the guest at
Email copied to clipboard
.
Why does a guest who declined show “Unlikely to Accept” but not “Unlikely to RSVP”?+
Because those two ask different questions. **Unlikely to RSVP** is about silence: they never replied at all. **Unlikely to Accept** is about the answer: they replied, and it was never yes.
Someone who declines every invitation is responsive and unavailable. Someone who never replies might not be seeing your emails. The follow-up is different in each case, which is why they’re separate warnings.
Do warnings affect who receives a campaign?+
**Missing Email** and **Invalid Email** do, because there’s no usable address to send to. **Email Blocked by Gatsby** does too. Those guests are skipped and recorded as failures on the campaign.
The rest don’t. A guest flagged **Hasn’t RSVP’d yet** or **Unlikely to Attend** is a normal recipient.
Can I filter reminder emails by warning?+
No. [Reminders](/platform/email-campaigns/reminders/) offer a smaller set of filters than the guest list, and warnings aren’t among them. A reminder resolves its audience days after you set it up, and a warning that’s true today may not be true by then.
Build a campaign from a filtered guest list view instead, where you choose the recipients at send time.
# Guest Lists and Events
> Your guest list is the center of every event. One list per event, multiple views of that list. Real-time updates. No more spreadsheet chaos.
Why it matters
## Your guest list serves five people with five different needs. How does one list do that?
Your caterer needs dietary restrictions. Your venue needs a headcount. Your board member wants to know who else is coming. Three different people, three different cuts of the same list.
How it works
### Purpose-Built Views
Configure each tab for a different audience. The catering view shows dietary info. The check-in view shows what matters at the door. Same data, different cuts.
### Shareable Without Exporting
Send a password-protected link with live data. The recipient sees exactly what you’ve configured. No login required.
## Your Events Dashboard
[Section titled “Your Events Dashboard”](#your-events-dashboard)
Your events live on the Events dashboard. **My Events** shows events you created or collaborate on. **All Events** shows everything your team is running.
Creating an Event+
Click **Create Event** to open the dialog. Tabs organize your options.
***
**Event Details**
* Event name (required)
* What the event is for (Single Event, Registration Hub, or Session)
* Date and time
* Timezone (pick one near your event location)
* Physical location
* Template selection
* Collaborators
***
**Virtual Event Settings**
* Add a virtual meeting link to calendar invites (overwrites physical location)
***
**Advanced Settings**
* Enable parent-child event linking
* Select parent or child events
***
**Tickets** (if you’ve enabled paid ticketing)
* Ticket price, promo codes, and how payment works for this event. See [Ticketing](/platform/registration/ticketing/).
Only the event name is required. Everything else can be added later.
Start from a template. Gatsby provides pre-built templates, and your team can save custom ones. Templates carry over settings, landing page designs, and email templates.
Duplicating an Event+
Running the same dinner quarterly?
Click the three-dot menu on any event card. Select **Duplicate**.
***
Choose what to copy:
* Guests
* Guest list settings
* Registration settings
* Landing page design
* Survey questions
* Seating charts
Adjust the details. The structure carries forward, including what the event is for.
Editing Event Details+
Open your event. Click the dropdown arrow next to the event name. Select **Edit Details**.
You can change the name, date, time, location, timezone, collaborators, and what the event is for.
**Changes sync to your calendar invite.**
If guests already have the invite, you can send an update immediately or hold it for later.
What's This Event For?+
A dropdown at the top of the Event Details tab, on both the create and the edit dialog. It’s a label that tells your team what an event is for, and it’s optional — leave it alone and nothing about your events changes.
**Single Event** is the default. One event, one guest list, one calendar invite, and the right answer for most events.
**Registration Hub** is where guests register and choose what to attend. You build the page and add your guests here.
**Session** is something guests attend by choosing it on a hub. You don’t add guests to a session; they pick it themselves.
A Registration Hub or a Session shows a small colored label wherever the event appears — on tiles, list rows, the calendar detail card, and the event’s own header. A Single Event shows no label at all.
You can change the answer at any time, and changing it does nothing except change the label. See [Families](/platform/events-lists/families/) for the setting that actually links a hub to its sessions.
Finding Events by Role+
**Filter.** On desktop, **Event Role** sits in the Filter menu on the Events dashboard alongside Event Tags. It applies to all three views, so you can narrow the calendar to just your hubs the same way you narrow the grid.
**Column.** The All Events table carries a **Role** column. It’s on by default, you can hide it from the Columns picker like any other column, and you can sort by it. This is the one place a Single Event isn’t blank — the cell reads “Single Event” so a column of empty rows doesn’t look like missing data.
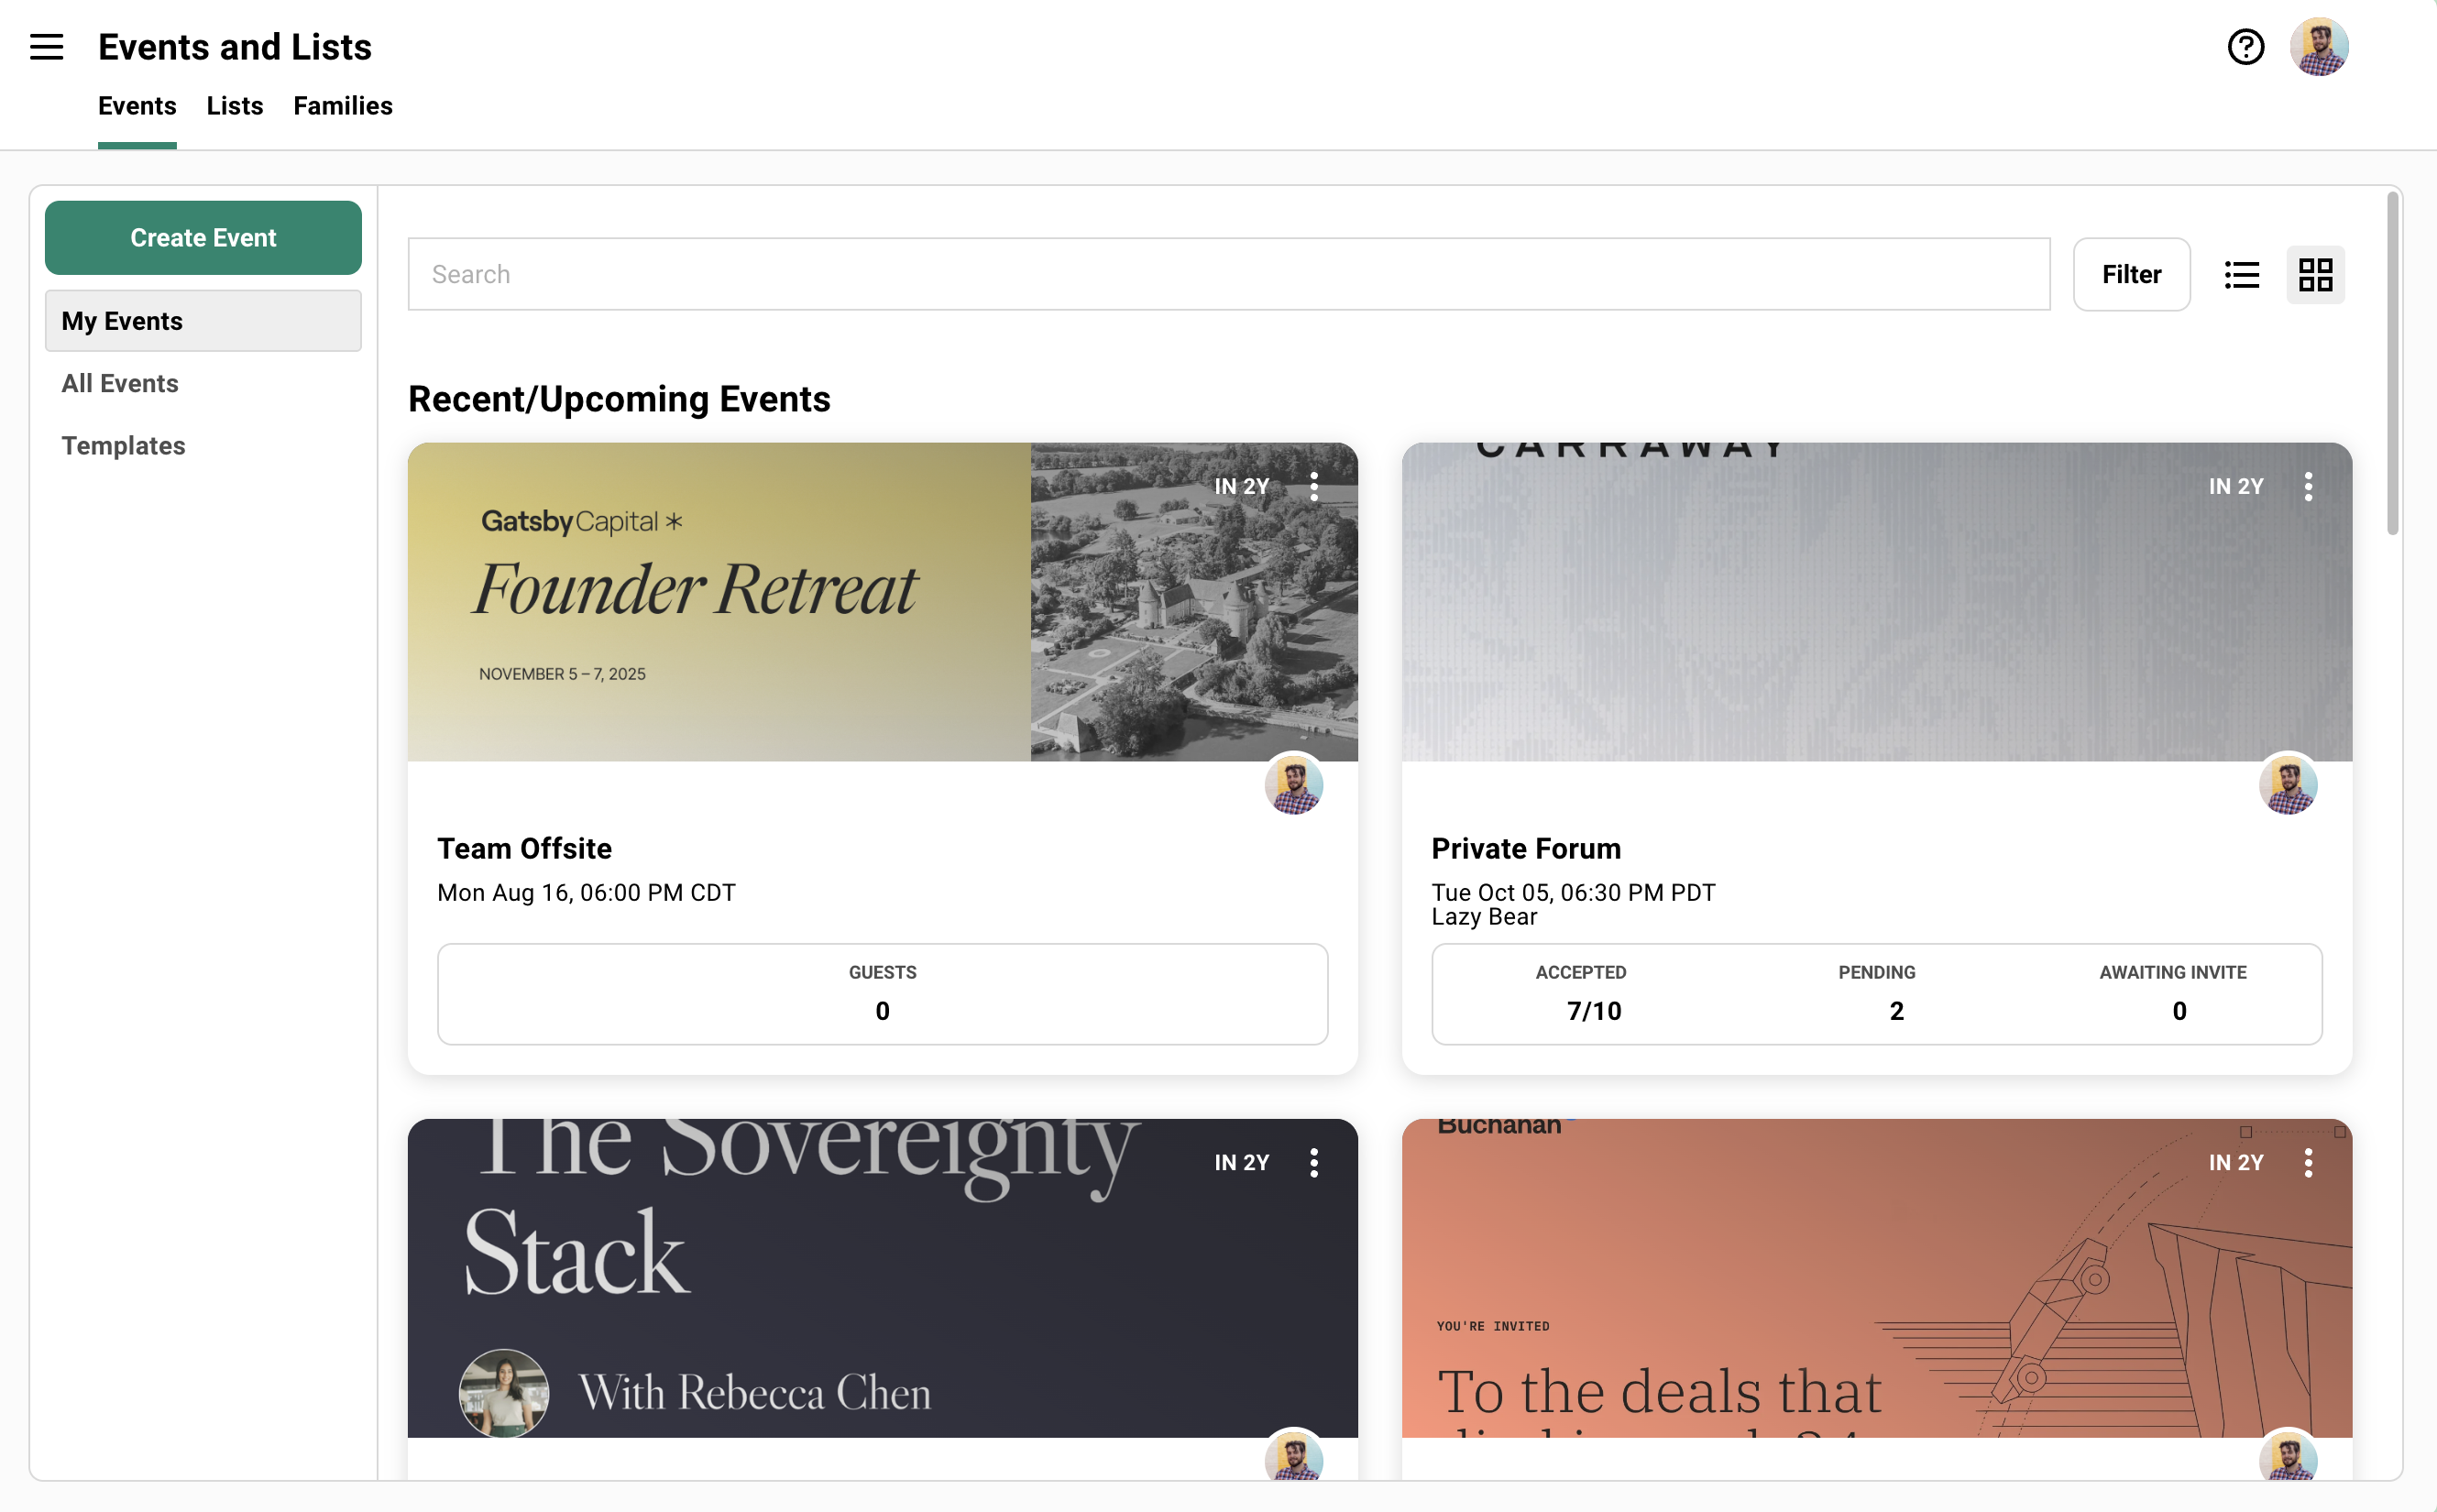
## Viewing Your Events
[Section titled “Viewing Your Events”](#viewing-your-events)
The Events dashboard has three views: **list**, **grid**, and **calendar**. Switch between them from the toggle in the top-right of the toolbar. Your choice sticks, and it works the same in both My Events and All Events.
### The Calendar View
[Section titled “The Calendar View”](#the-calendar-view)
See your programming laid out on a month or week calendar instead of a list. Every event sits on its own date, so a crowded week or an empty stretch is obvious at a glance.
Toggle between **Month** and **Week**. Month is a familiar grid; days with more than one event collapse the extras into a “+N more” you can open. Week splits the days into columns, each stacking its events in time order. A right-hand **Upcoming** rail always shows what’s coming after the period you’re viewing.
Moving around the calendar+
Use the arrows to step forward or back, or click **Today** to jump back to now. There’s no limit in either direction, so you can look ahead to next quarter or back at last spring.
The grid shows your **active events** on their own dates, both upcoming and past. Archived and canceled events aren’t drawn on the grid, but you can still find them with search.
Opening an event or checking guests in+
Hover an event on desktop, or tap a day on mobile, to see its detail card: date, time, location, and RSVP progress. Each card gives you two actions… **Open event** to jump to it, or **Check In** to go straight to the check-in flow.
Search and filter+
Search from the calendar spans **every event you have**, upcoming, past, and archived, not just what’s on screen. Results show as a simple list; clear the search to return to the calendar.
On desktop, filter your events by tag or by what they’re for, and the calendar and Upcoming rail reflow to match. Filtering inside the calendar view isn’t available on mobile yet.
Times always display in each event’s own time zone, with the zone labeled, so a 7:00 AM MDT breakfast reads correctly no matter where you’re sitting.
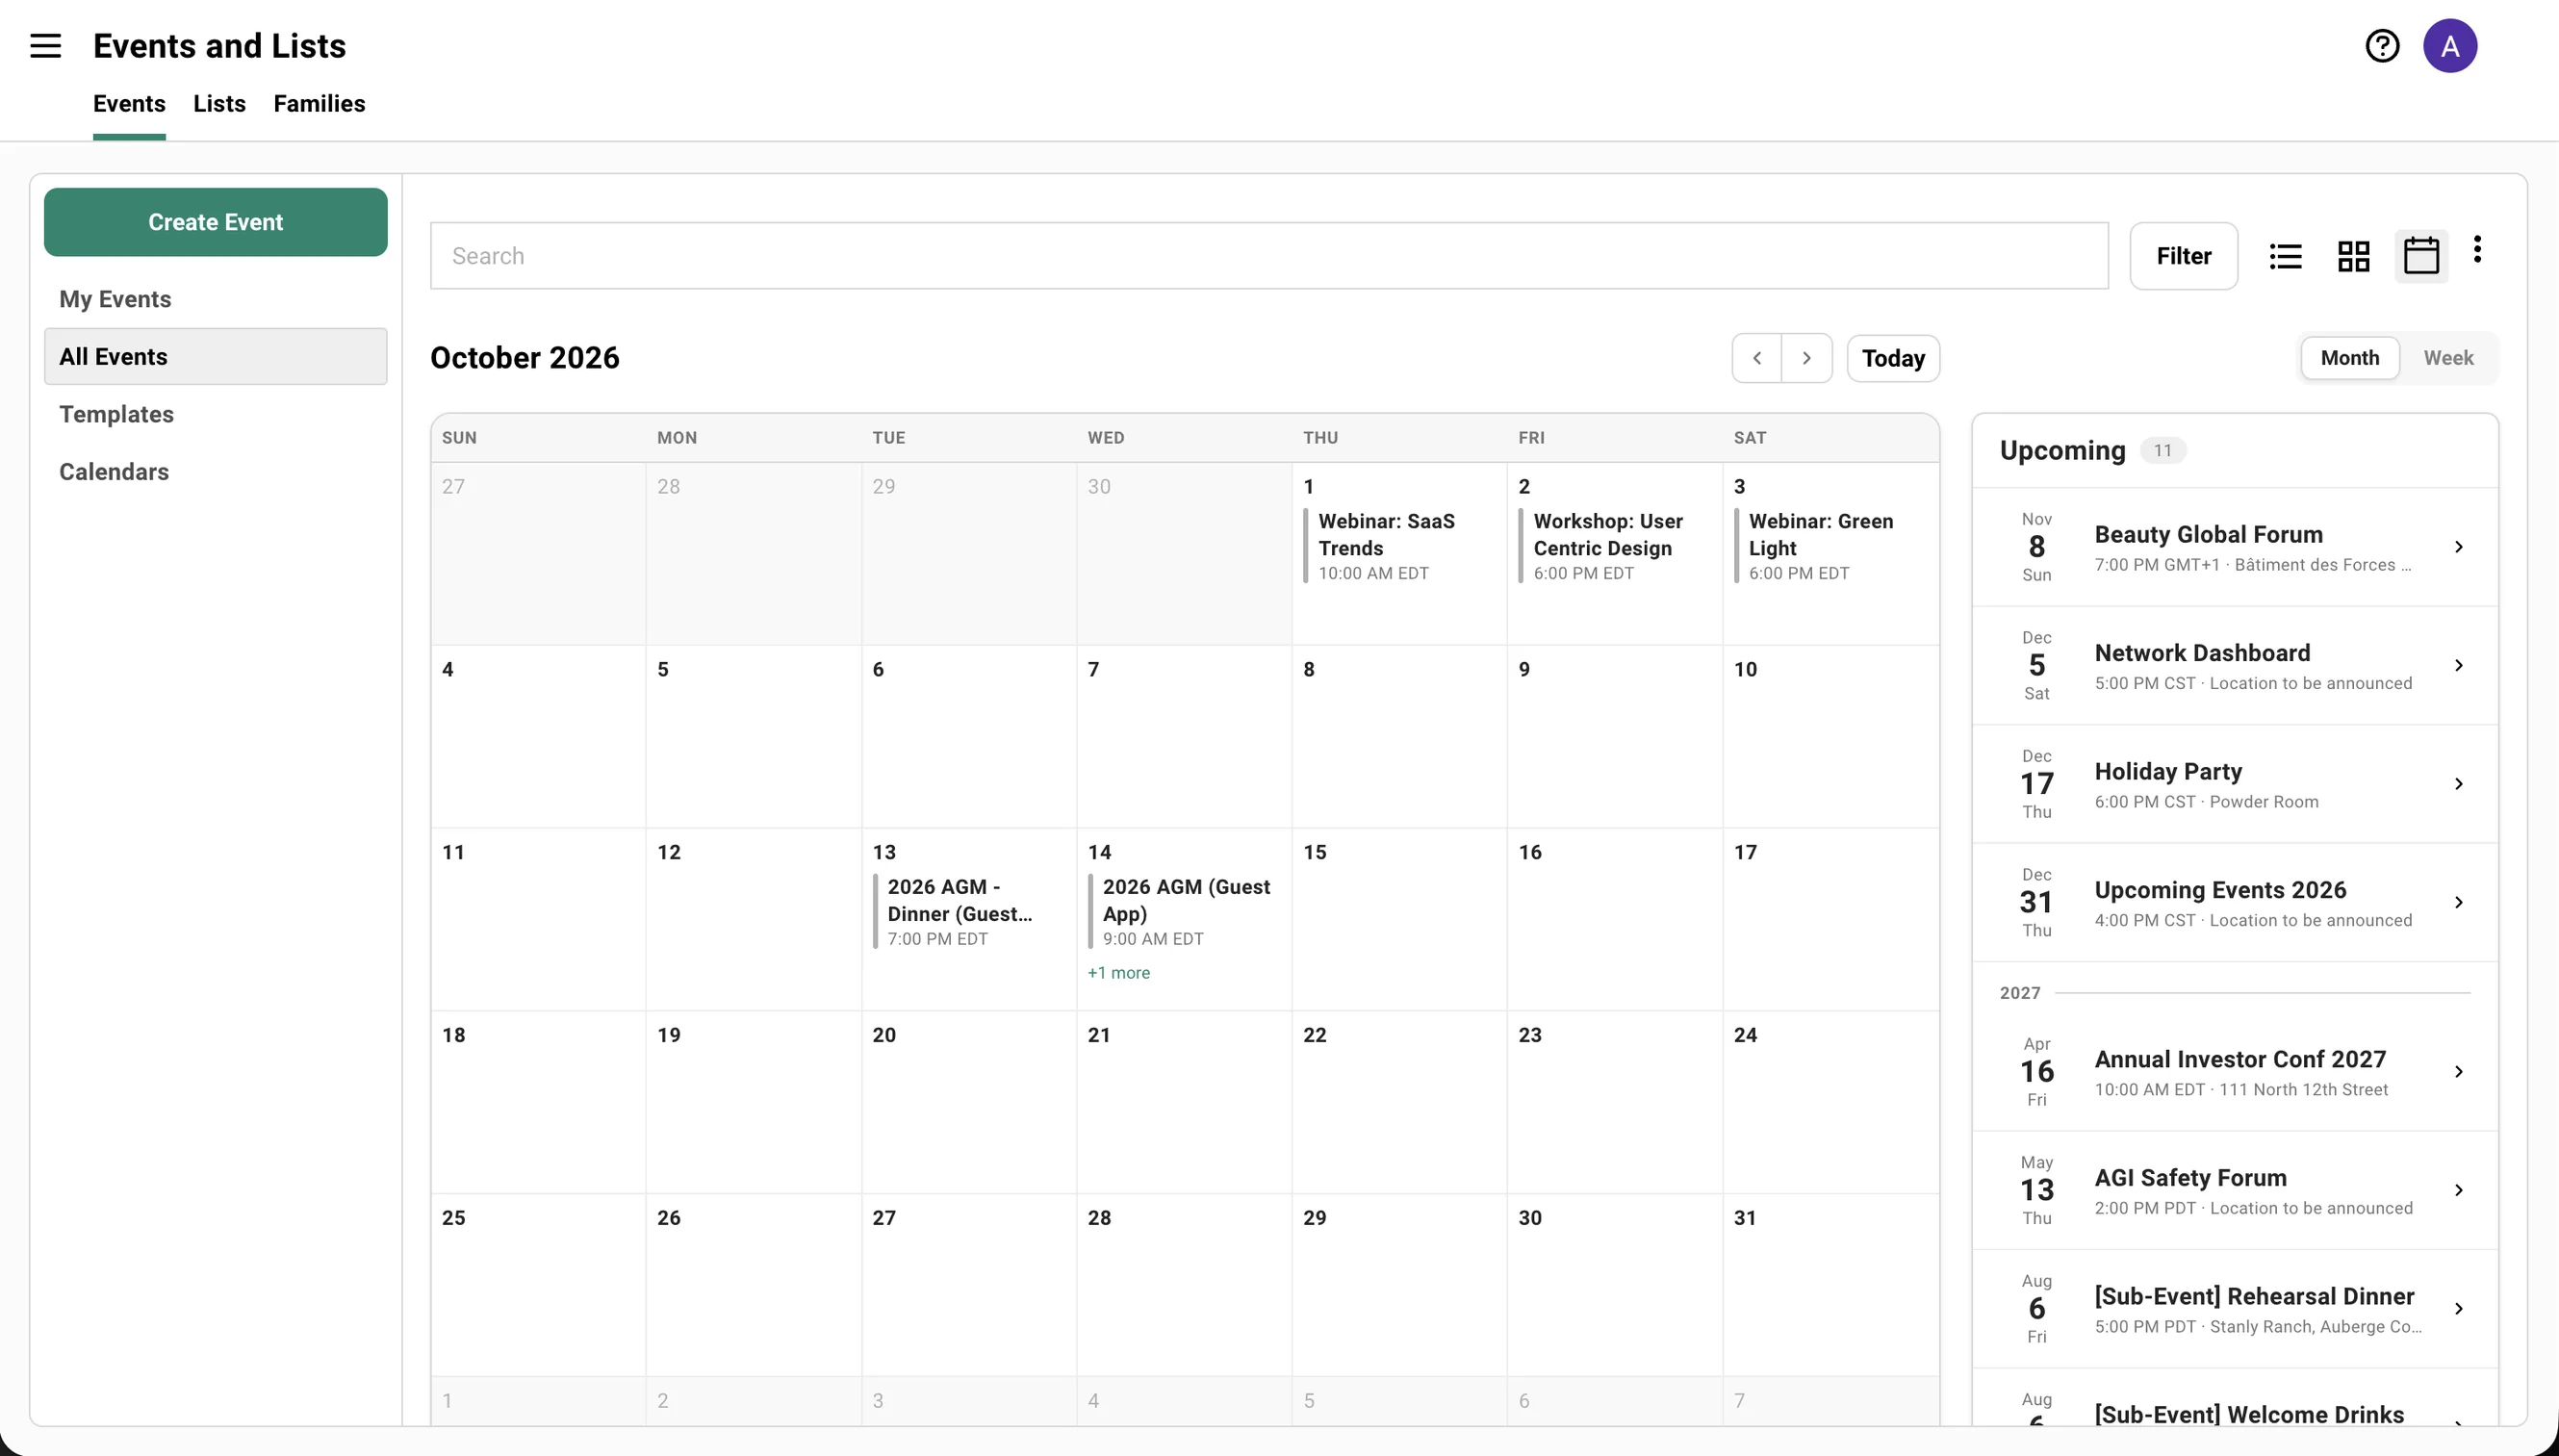
### On Mobile
[Section titled “On Mobile”](#on-mobile)
The calendar stacks into a single column. In month view each day shows up to three colored dots for its events; tap a day to see everything on it below the grid. Gatsby preselects the busiest day of the month so you land somewhere useful. Week view becomes a top-to-bottom agenda, one day after the next.
Your list, grid, or calendar choice carries across desktop and mobile, so the dashboard looks the way you left it.
## Building Your Guest List
[Section titled “Building Your Guest List”](#building-your-guest-list)
Build your guest list before the first invitation goes out.
Add guests, organize them into waves, and plan your outreach order. Send to Wave 1, see who responds, then adjust before Wave 2 goes out. After the event, update who actually walked in. That attendance data drives your follow-up emails and CRM sync.
### The Guests Toolbar
[Section titled “The Guests Toolbar”](#the-guests-toolbar)
Everything on the Guests tab starts from the same toolbar. **RSVP** and **Attendance** summary buttons at the top give you a running headcount without opening a single filter. Your saved views sit as tabs across the top of the list. **Filter**, **Sort**, **Columns**, and **Add Guests** sit at the top right and apply to whichever view you’re on.
The rest of this page walks through each of these controls in turn — Adding Guests, Guest Actions, Views, Filters, Columns — but they all live in this same toolbar on the Guests tab.
### Adding Guests
[Section titled “Adding Guests”](#adding-guests)
Add guests manually before sending invitations. Or enable a public registration link and let people add themselves. Either way, everyone ends up on the same list.
Methods for Adding Guests+
Click **Add Guests** from your guest list.
***
**Search and add**
Find existing contacts by name. Add them one at a time.
***
**From other events**
Pull in everyone from a previous event. Your March dinner attendees become your June dinner invitees.
***
**From lists**
Add contacts from your contact lists. Your “Bay Area LPs” list becomes your San Francisco event guest list in one click.
***
**By tag**
Add all contacts with a specific tag. Everyone tagged “Q1 Prospects” lands on your list at once.
***
The dropdown arrow next to Add Guests reveals more options:
* **Upload CSV:** Bulk import from a spreadsheet.
* **Create contact:** Add someone new to your database.
* **Restore deleted guests:** Bring back guests you removed.
Gatsby events are private by default. Invites are non-transferable. You can enable a public registration link anytime to let people register on their own.
However a guest gets on the list, the **Guest Source** column records who added them, how, and when — right down to the list or spreadsheet they came from. See [what every value means](/platform/events-lists/guest-source/).
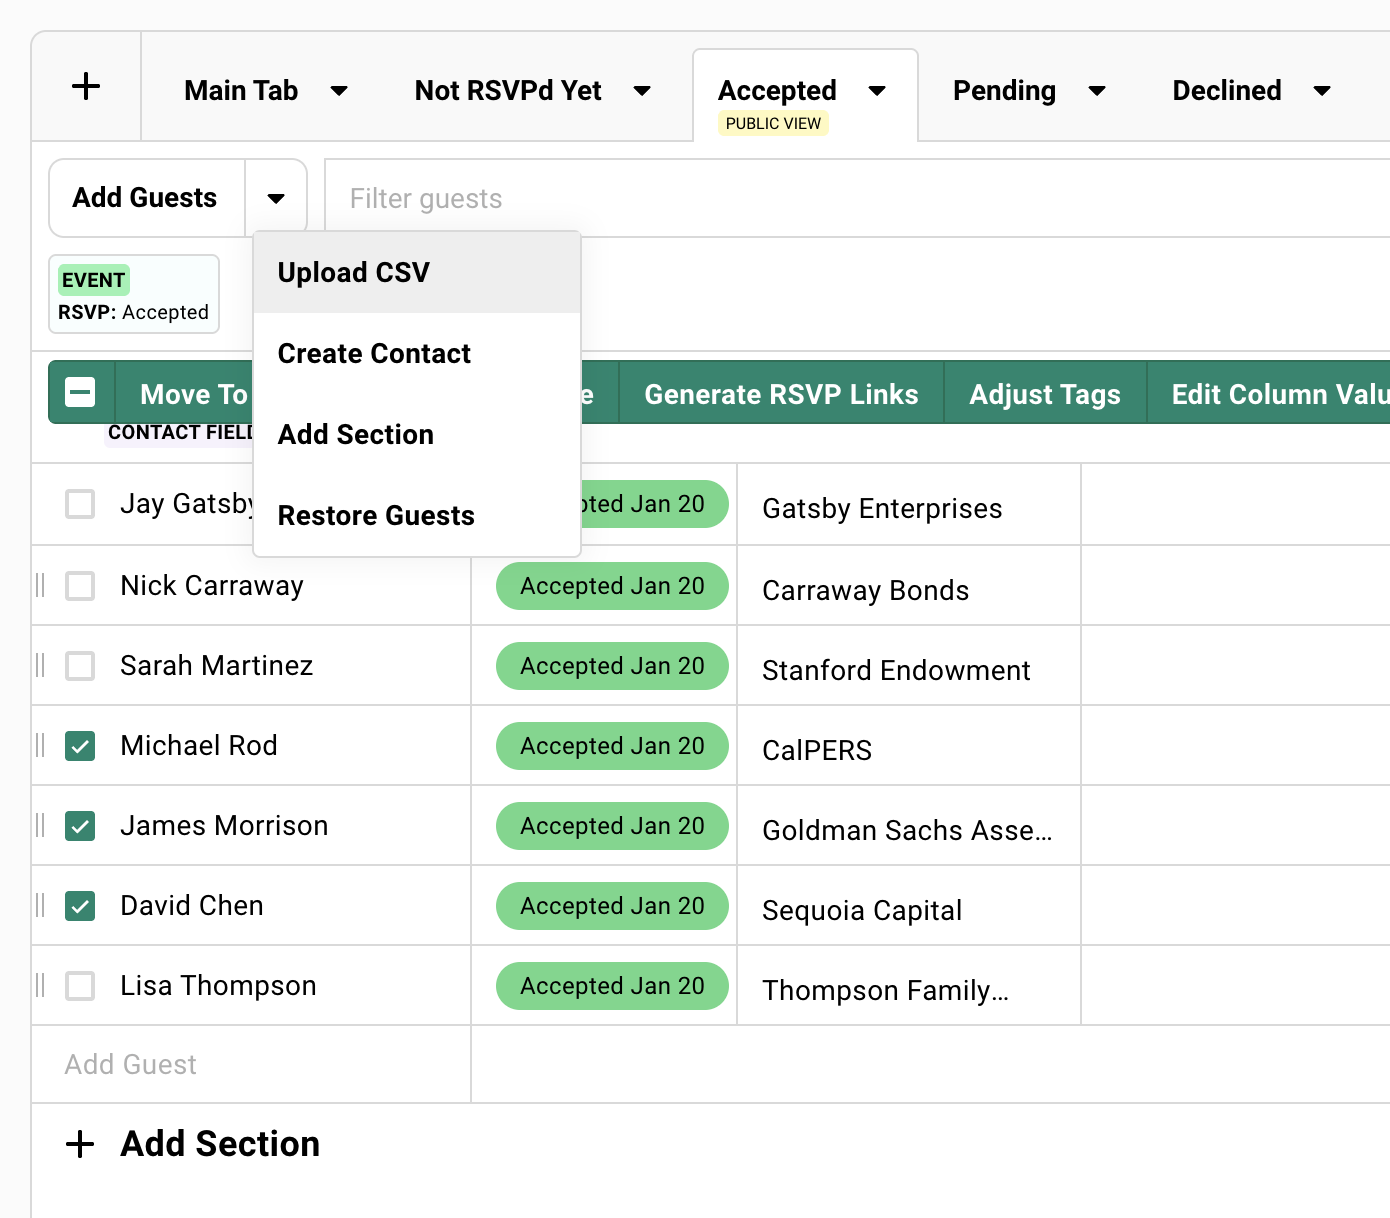
### Guest Actions
[Section titled “Guest Actions”](#guest-actions)
This is where bulk operations save hours.
Move fifty people to a new invitation wave. Send a follow-up to everyone who hasn’t responded. Tag all your VIPs at once. Update a custom field across your entire list.
Selecting Multiple Guests+
**Select a range:**
Click the first guest. Hold Shift. Click the last guest. Everyone in between gets selected.
***
**Other methods:**
* Click the checkbox at the top to select all visible guests
* Click individual checkboxes
* Click a section header to select everyone in that section
Available Actions+
Select guests and a green action bar appears.
***
**Move to Section**
Organize guests into sections. Wave 1 invites. Internal team. Speakers.
***
**Send Message**
Start a draft or choose an existing campaign. Selected guests become recipients.
***
**Generate RSVP Links**
Create unique personal links for off-platform sending and testing the registration experience.
***
**Adjust Tags**
Add or remove tags. Tags persist on the contact across all events.
***
**Edit Column Values**
Update custom fields, RSVP status, or attendance for everyone selected.
Useful for updating custom field values and approving waitlisted guests in bulk.
***
**Add to Event**
Add these guests to another event.
***
**Add to List**
Add guests to a contact list. Useful for post-event workflows.
***
**Add to Newsletter**
Subscribe the selected guests to one of your newsletters. Gatsby confirms the count first and skips anyone already subscribed. See [Newsletter Subscribers](/platform/newsletters/subscribers/).
***
**Remove**
Remove guests from this event. The contact stays in your database.
If the event is a parent in a family, removing a guest here also removes them from every child event. See [Families](/platform/events-lists/families/).
***
**More Options:**
* **Export:** Download selected guests as a spreadsheet.
* **Copy Emails:** Copy addresses to clipboard.
* **Merge Contacts:** Combine duplicates into one profile. Select two or more contacts first. Their event history merges automatically, so they don’t need to be on the same event beforehand. See [Merging Duplicate Contacts](/platform/contacts/contact-profiles/).
* **Create Contact Method Group:** Create a new way to email guests using alternate email columns. See [Contact Method Groups](/platform/contacts/contact-profiles/) for details.
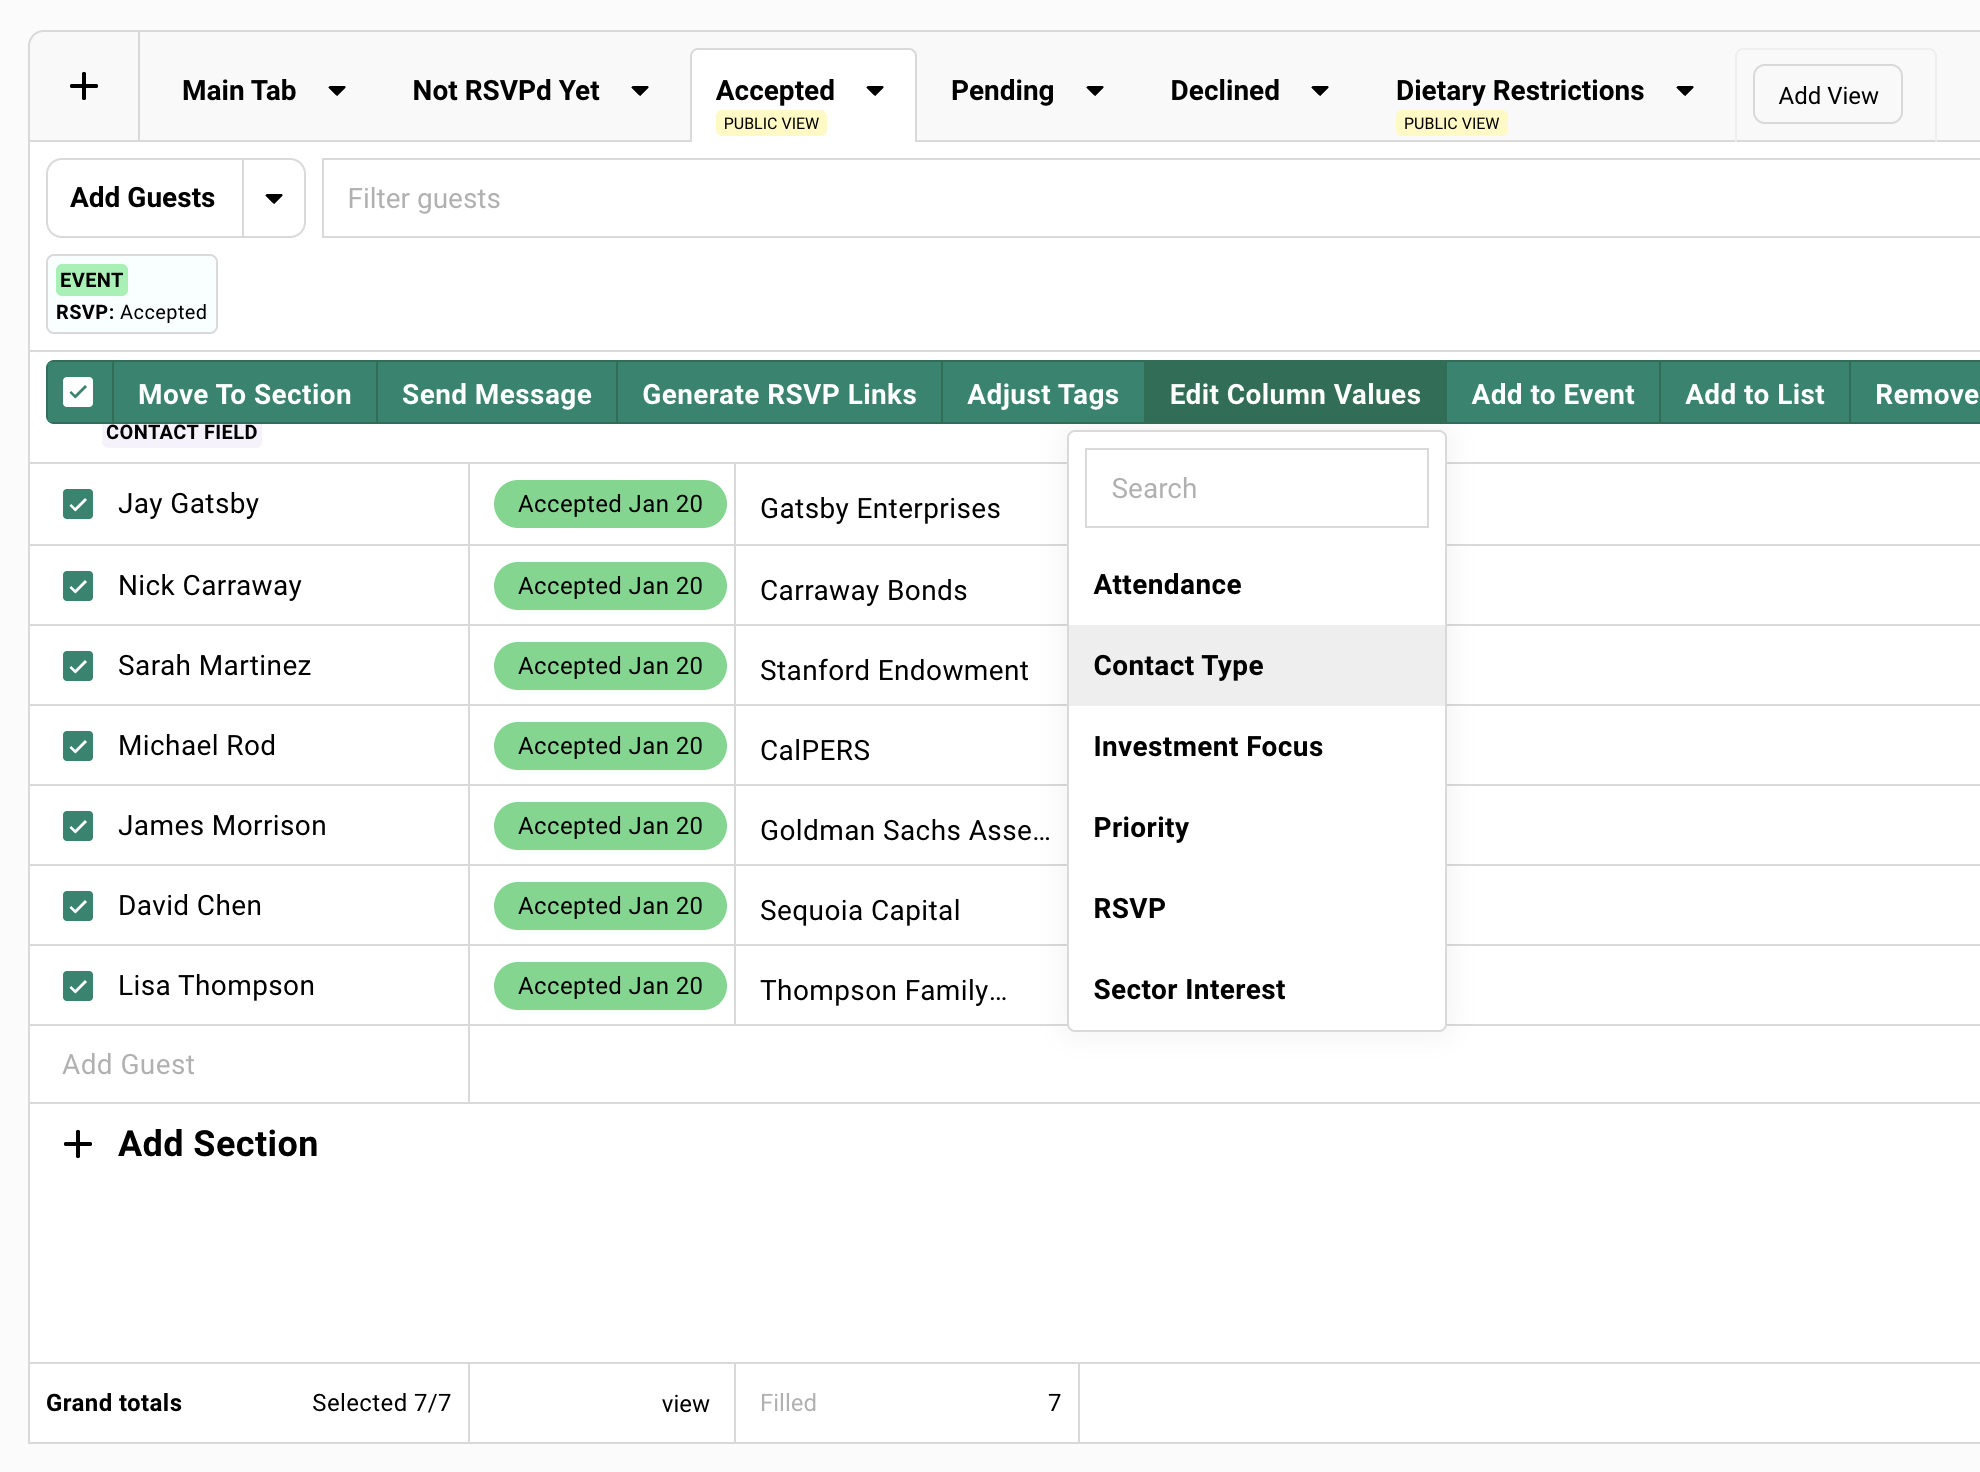
### RSVP Status
[Section titled “RSVP Status”](#rsvp-status)
Guests move through statuses as they interact with your event.
> The lifecycle:
>
> **Invited → Visited → Accepted / Declined / Maybe / Waitlist**
RSVP Status Reference+
| Status | Meaning |
| ---------------------------- | ---------------------------------------------------- |
| Blank | Not invited. Hasn’t registered. |
| Invited | Received a campaign with an RSVP link. |
| Visited | Clicked the link. Viewed your landing page. |
| Accepted | Confirmed attendance. |
| Declined | Confirmed not attending. |
| Maybe | Treated similar as Accepted. Follow-up recommended. |
| Waitlist | Registered for waitlist. |
| Canceled | Guest Accepted, but later declined. |
| Accepted - Survey Incomplete | Clicked accept but didn’t finish required questions. |
| Bounced | Email bounced. |
| Failed | Email failed to send. |
| Blocked | Previous bounce detected. |
Manually Changing RSVP Status+
Guests don’t always click buttons. They reply to your email. They text you. They tell you at coffee.
You can update their status manually.
**When marking as Accepted:**
* Send confirmation email (includes calendar invite by default)
* Send calendar invite only (system email)
* Don’t send anything
**When marking as Declined:**
* Option to send calendar deletion notice
Email-Related Statuses+
**Bounced**
The email server rejected your message. Fix your guest’s email address in their contact profile and resend.
***
**Failed**
Something prevented sending. Check campaign details for specifics.
***
**Blocked**
Previous bounce detected. Gatsby blocks future sends to protect your sender reputation. You can clear this if you’ve verified the address.
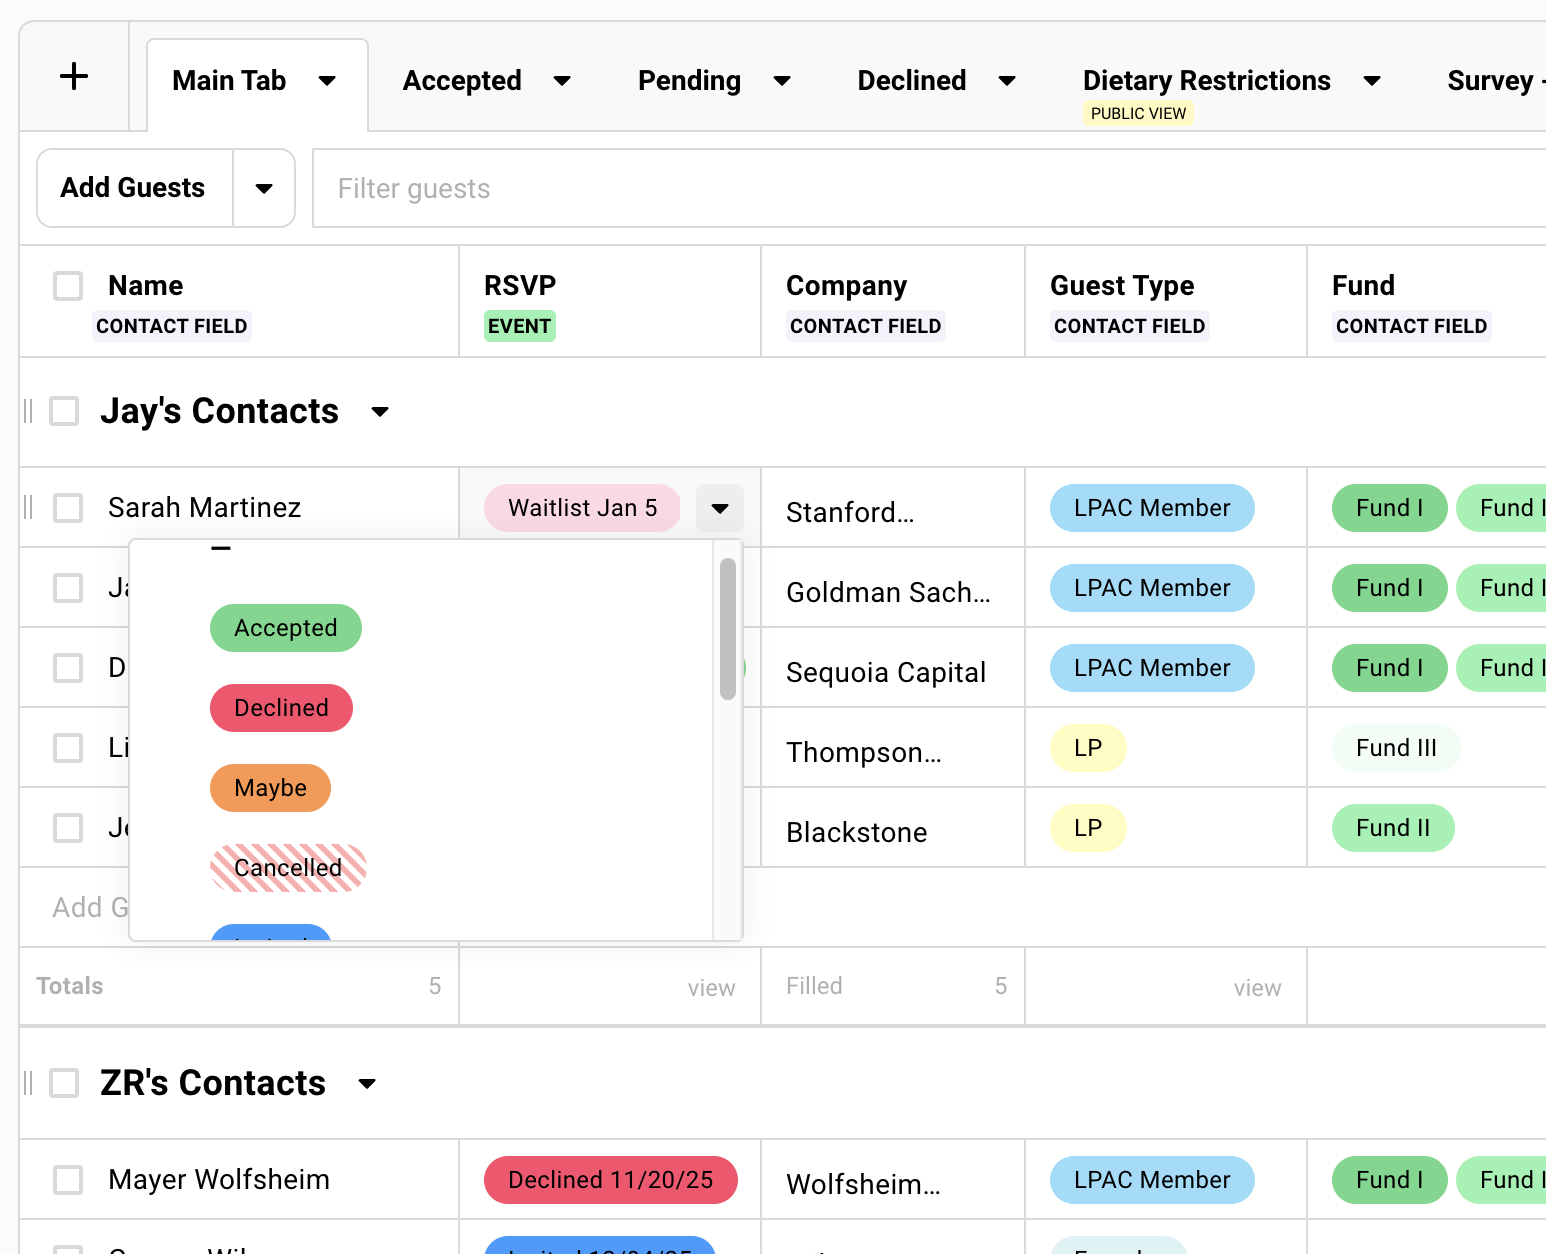
### Attendance
[Section titled “Attendance”](#attendance)
RSVP tells you what someone planned. Attendance tells you who was actually there.
The Attendance column shows **Attended**, **No Show**, or blank. It populates automatically from check-in. You can also update it manually after the event.
This is what syncs to your CRM. This is what your follow-up emails should filter by. Your Salesforce records should reflect reality, not promises.
How Attendance Gets Recorded+
Attendance populates automatically when you check in guests using Gatsby’s check-in tools or mobile app.
You can also update it manually after the event. Select guests. Edit Column Values. Set Attendance.
**What this unlocks:**
* Post-event segmentation. Thank-you emails to attendees. “Sorry we missed you” to no-shows.
* CRM accuracy. Your synced records show who actually came.
* Event intelligence. Track who consistently shows up versus who just RSVPs yes.

## Views and Organization
[Section titled “Views and Organization”](#views-and-organization)
You need to track RSVPs and follow up with non-responders. Your caterer needs dietary restrictions. Your venue needs a headcount. Your internal team needs to see who’s confirmed from each target account.
Four different needs. One guest list.
Views let you save multiple configurations of the same data. Each view has its own columns, filters, and sections. Build what each person actually needs. Share a link. No exports required.
### Creating Views
[Section titled “Creating Views”](#creating-views)
Each tab across the top of your guest list is a view.
The **main tab** shows everyone by default. Add more tabs for specific purposes. Each saves its own column configuration, filters, and sections independently.
How to Create a View+
1. Click **Add View** at the top of your guest list.
2. Choose from a template or start fresh.
3. Configure columns, filters, and sections.
4. The view saves automatically.
Saving View Templates+
Built a view you’ll reuse?
Click the dropdown arrow next to the tab name. Select **Save as View Template**.
Your view becomes available as a template when creating views in other events.
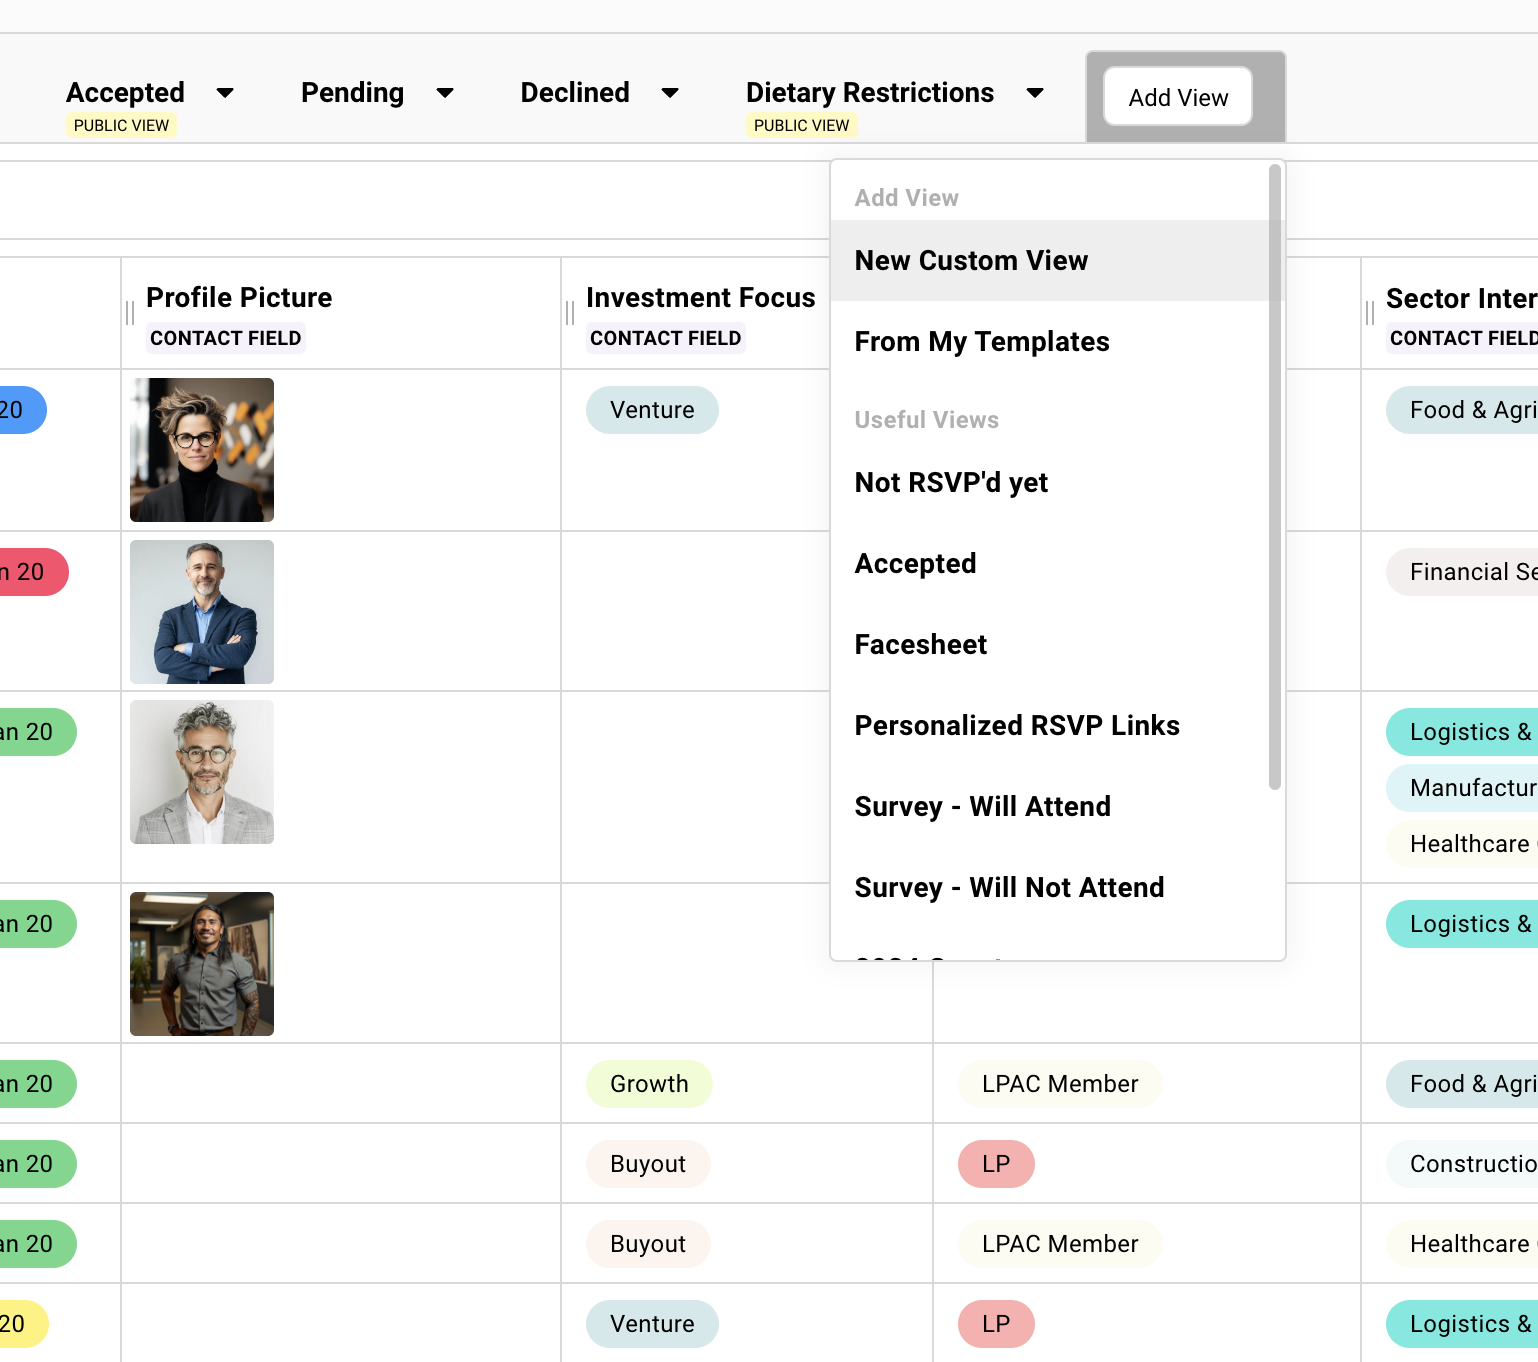
### Columns
[Section titled “Columns”](#columns)
Your guest list can show dozens of data points. You don’t need all of them visible at once.
The Columns button (top right) opens a drawer where you choose what’s visible and available to your views. Each view saves its own column configuration.
Contact Fields vs Event Data+
Two types of data live on your guest list.
***
**Contact-level data** belongs to the person. It follows them across events.
* Email, name, company, position
* Dietary restrictions
* Tags
* Custom contact fields
Update it once. It updates everywhere.
***
**Event-level data** belongs to this specific event and doesn’t carry over to others.
* RSVP status
* Attendance
* Survey responses
* Seating assignments
Columns are also labeled by scope where it isn’t obvious at a glance — a badge like **CONTACT FIELD** or **EVENT** next to a column name in the picker tells you whether it follows the contact everywhere or stays local to this event.
Column Sources+
Click **Add Fields** in the columns drawer.
***
**Contact Fields**
Data that lives with the person. Standard fields plus custom contact fields your team has created.
***
**Other Events/Lists**
Pull data from elsewhere.
Open the Columns drawer » **Add Fields** » **Other Events/Lists**.
A dialog opens: first select which events or lists you want to pull from, then choose which columns to bring in from each. The most common use: add the **RSVP** column from a child event to see sub-event status directly on your parent or overview event’s guest list.
***
**Seating Chart**
Table and seat assignments.
***
**Campaigns**
Email engagement data. Last email sent. Whether they opened a specific campaign.
***
**Event History**
Aggregate data: total events invited, accepted, attended, and more.
Sort by “Total Events Attended” when building your guest list. Your most engaged contacts should be your first invites. They warm up your sender reputation and generate early momentum.
Creating Custom Columns+
Need to track something specific to this event?
1. In the Columns drawer, click **Create New**.
2. Choose the field type:
Text, Number, Single select, Multi-select, User, Date, Time, or Date and Time.
3. Name your field and configure options.
Custom columns are event-specific. The data stays with this event.
Survey responses appear as columns. When you add questions to your registration form, each question becomes an available column.
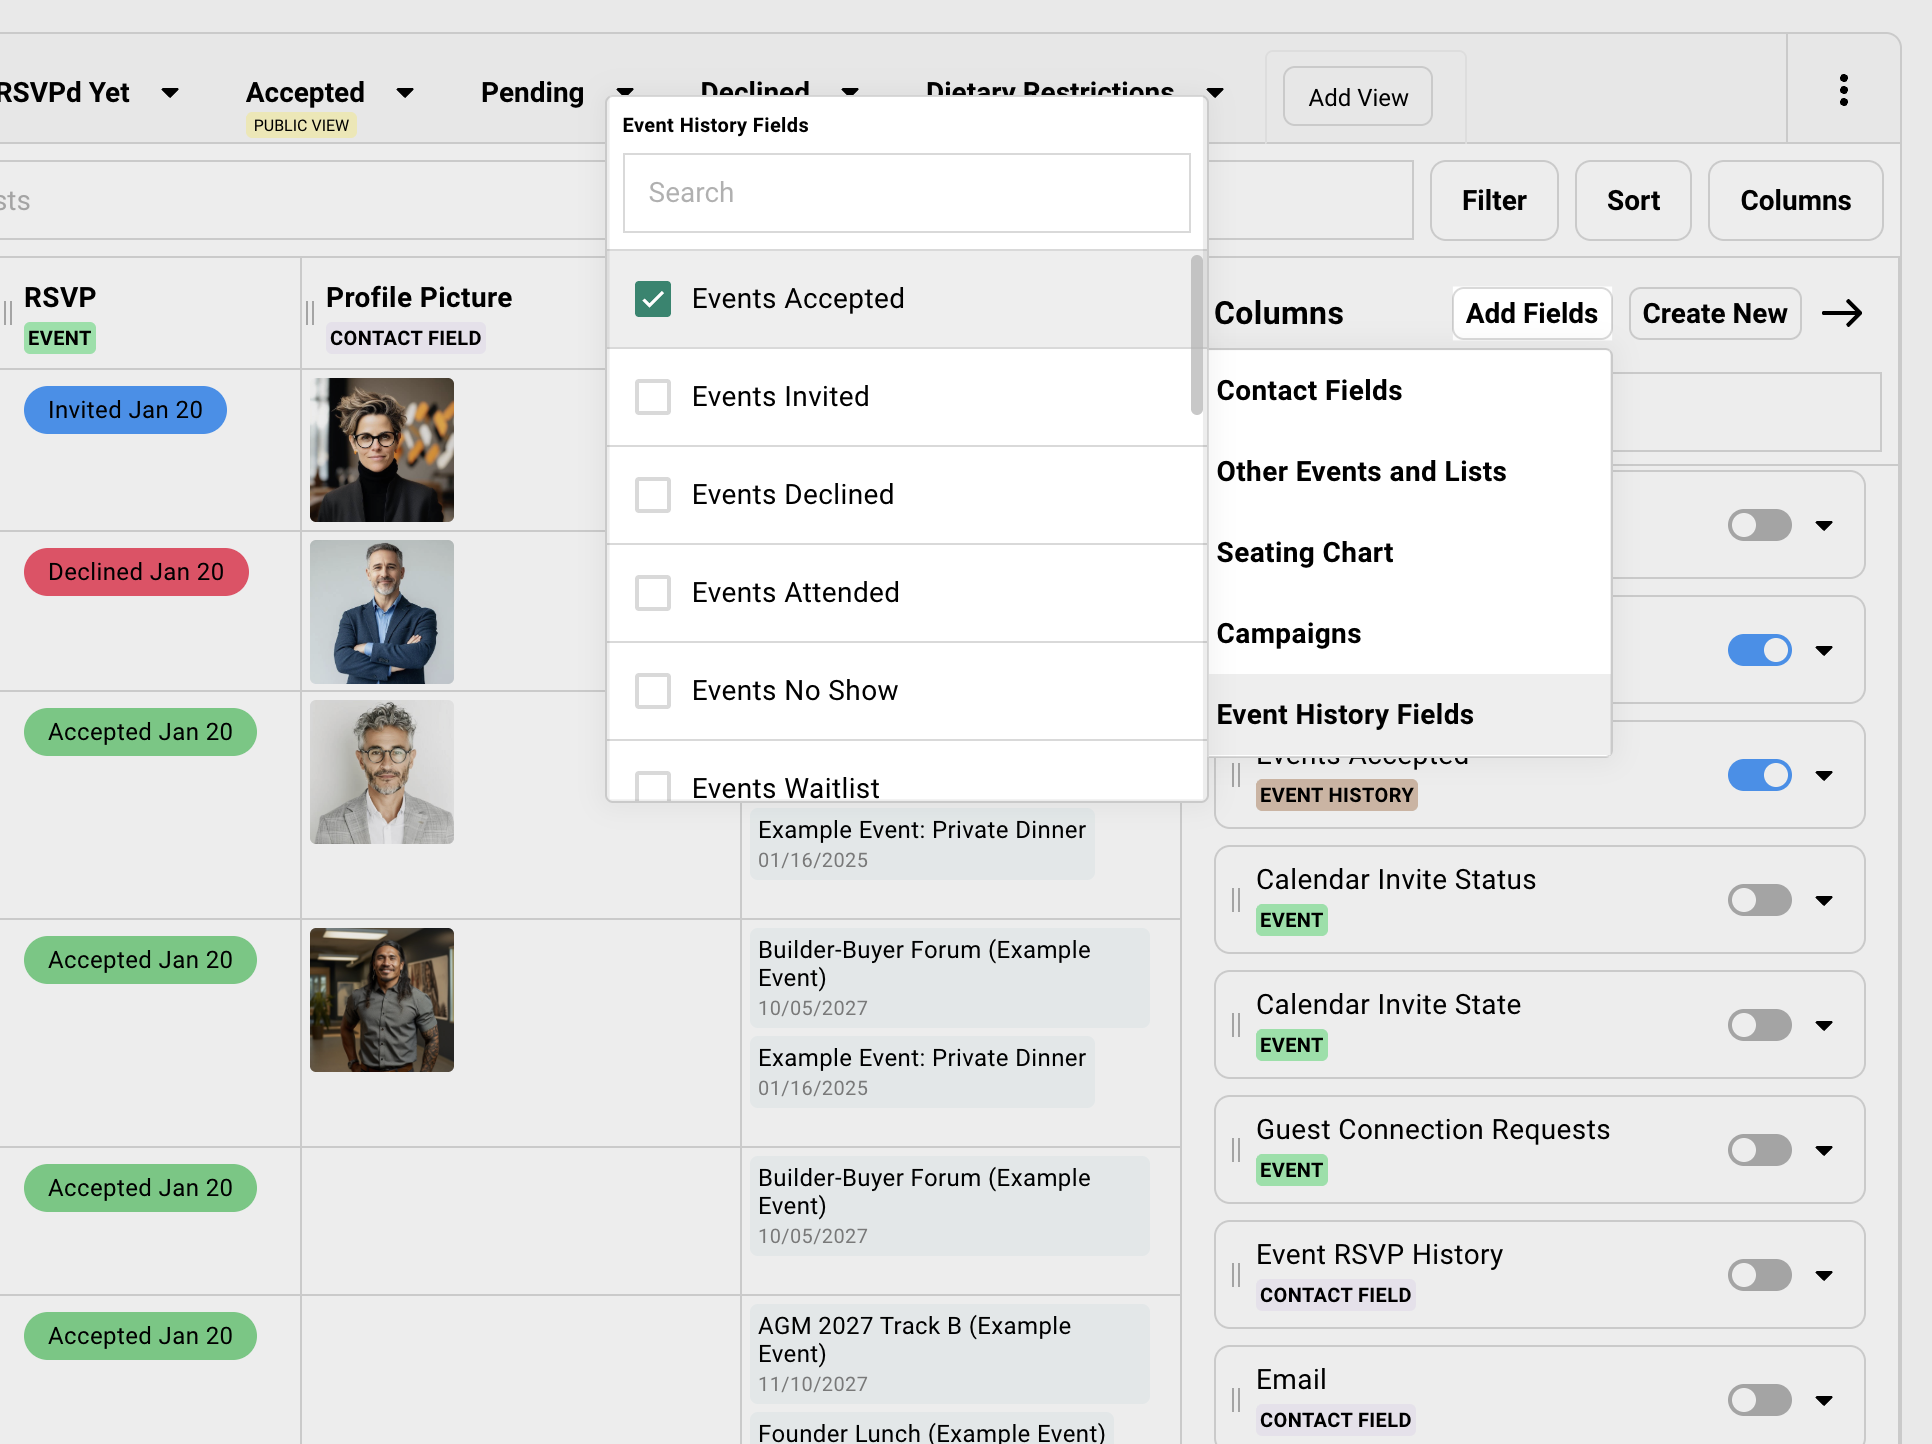
### Filters
[Section titled “Filters”](#filters)
The Filter button (top right) shows only guests who match your criteria.
Filter by RSVP status, attendance, contact fields, event history, campaign engagement, sections, seating assignments, or data from other events.
Setting Up Filters+
Click **Filter**. Choose a category. Select your criteria. Click **Apply**.
Active filters show as labels at the top. Click any label to edit or remove.
Filters are view-specific. Your “Catering” view can filter to Accepted guests while your “Follow-Up” view filters to non-responders.
> Most common use: filter by RSVP status to see only confirmed guests.
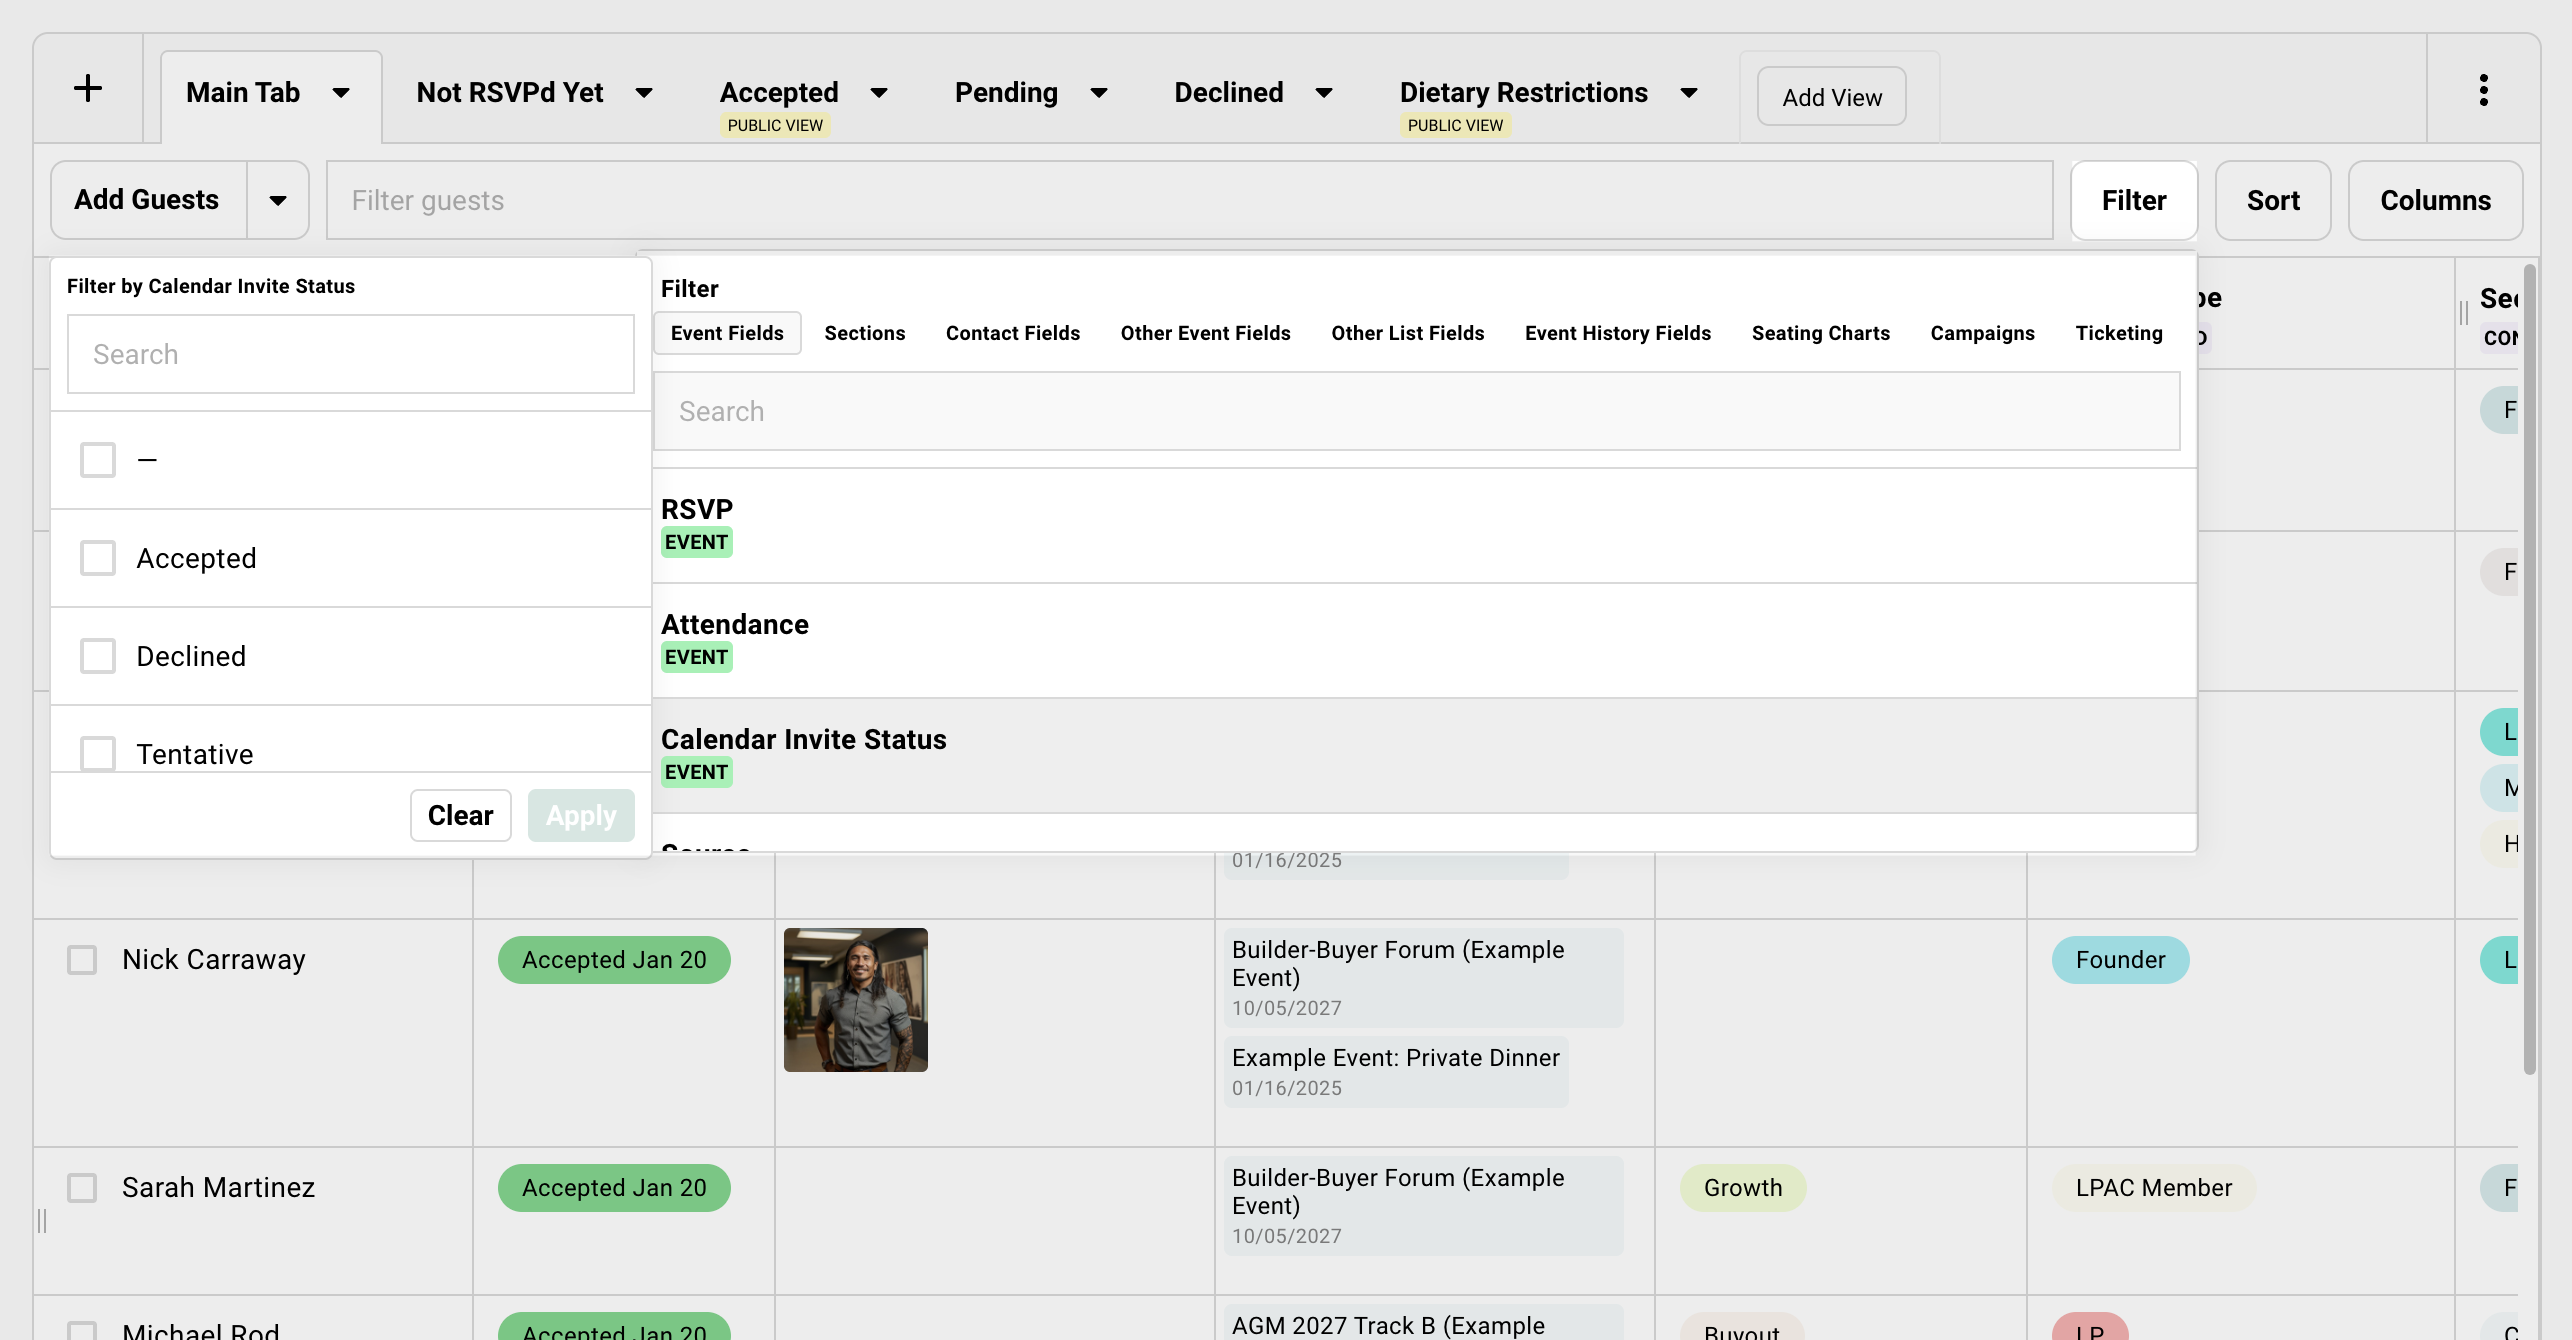
### Sections
[Section titled “Sections”](#sections)
Sections organize guests within a view. Think of them as folders or workflow stages.
Every view has a default bucket at the top. Newly added guests land there. You create named sections for everything else.
> **Common uses**: **Wave 1 and Wave 2** sections for staged invitations. **Internal Team** for testing.
Using Sections+
Click **Add Section**. Name it.
To move guests: Select them. Click **Move to Section**. Choose the destination.
**Workflow tip:** Use sections to organize work. Then use bulk edit to save that organization to a custom field. The section is temporary. The field persists. Now you can filter by that segment in future events.
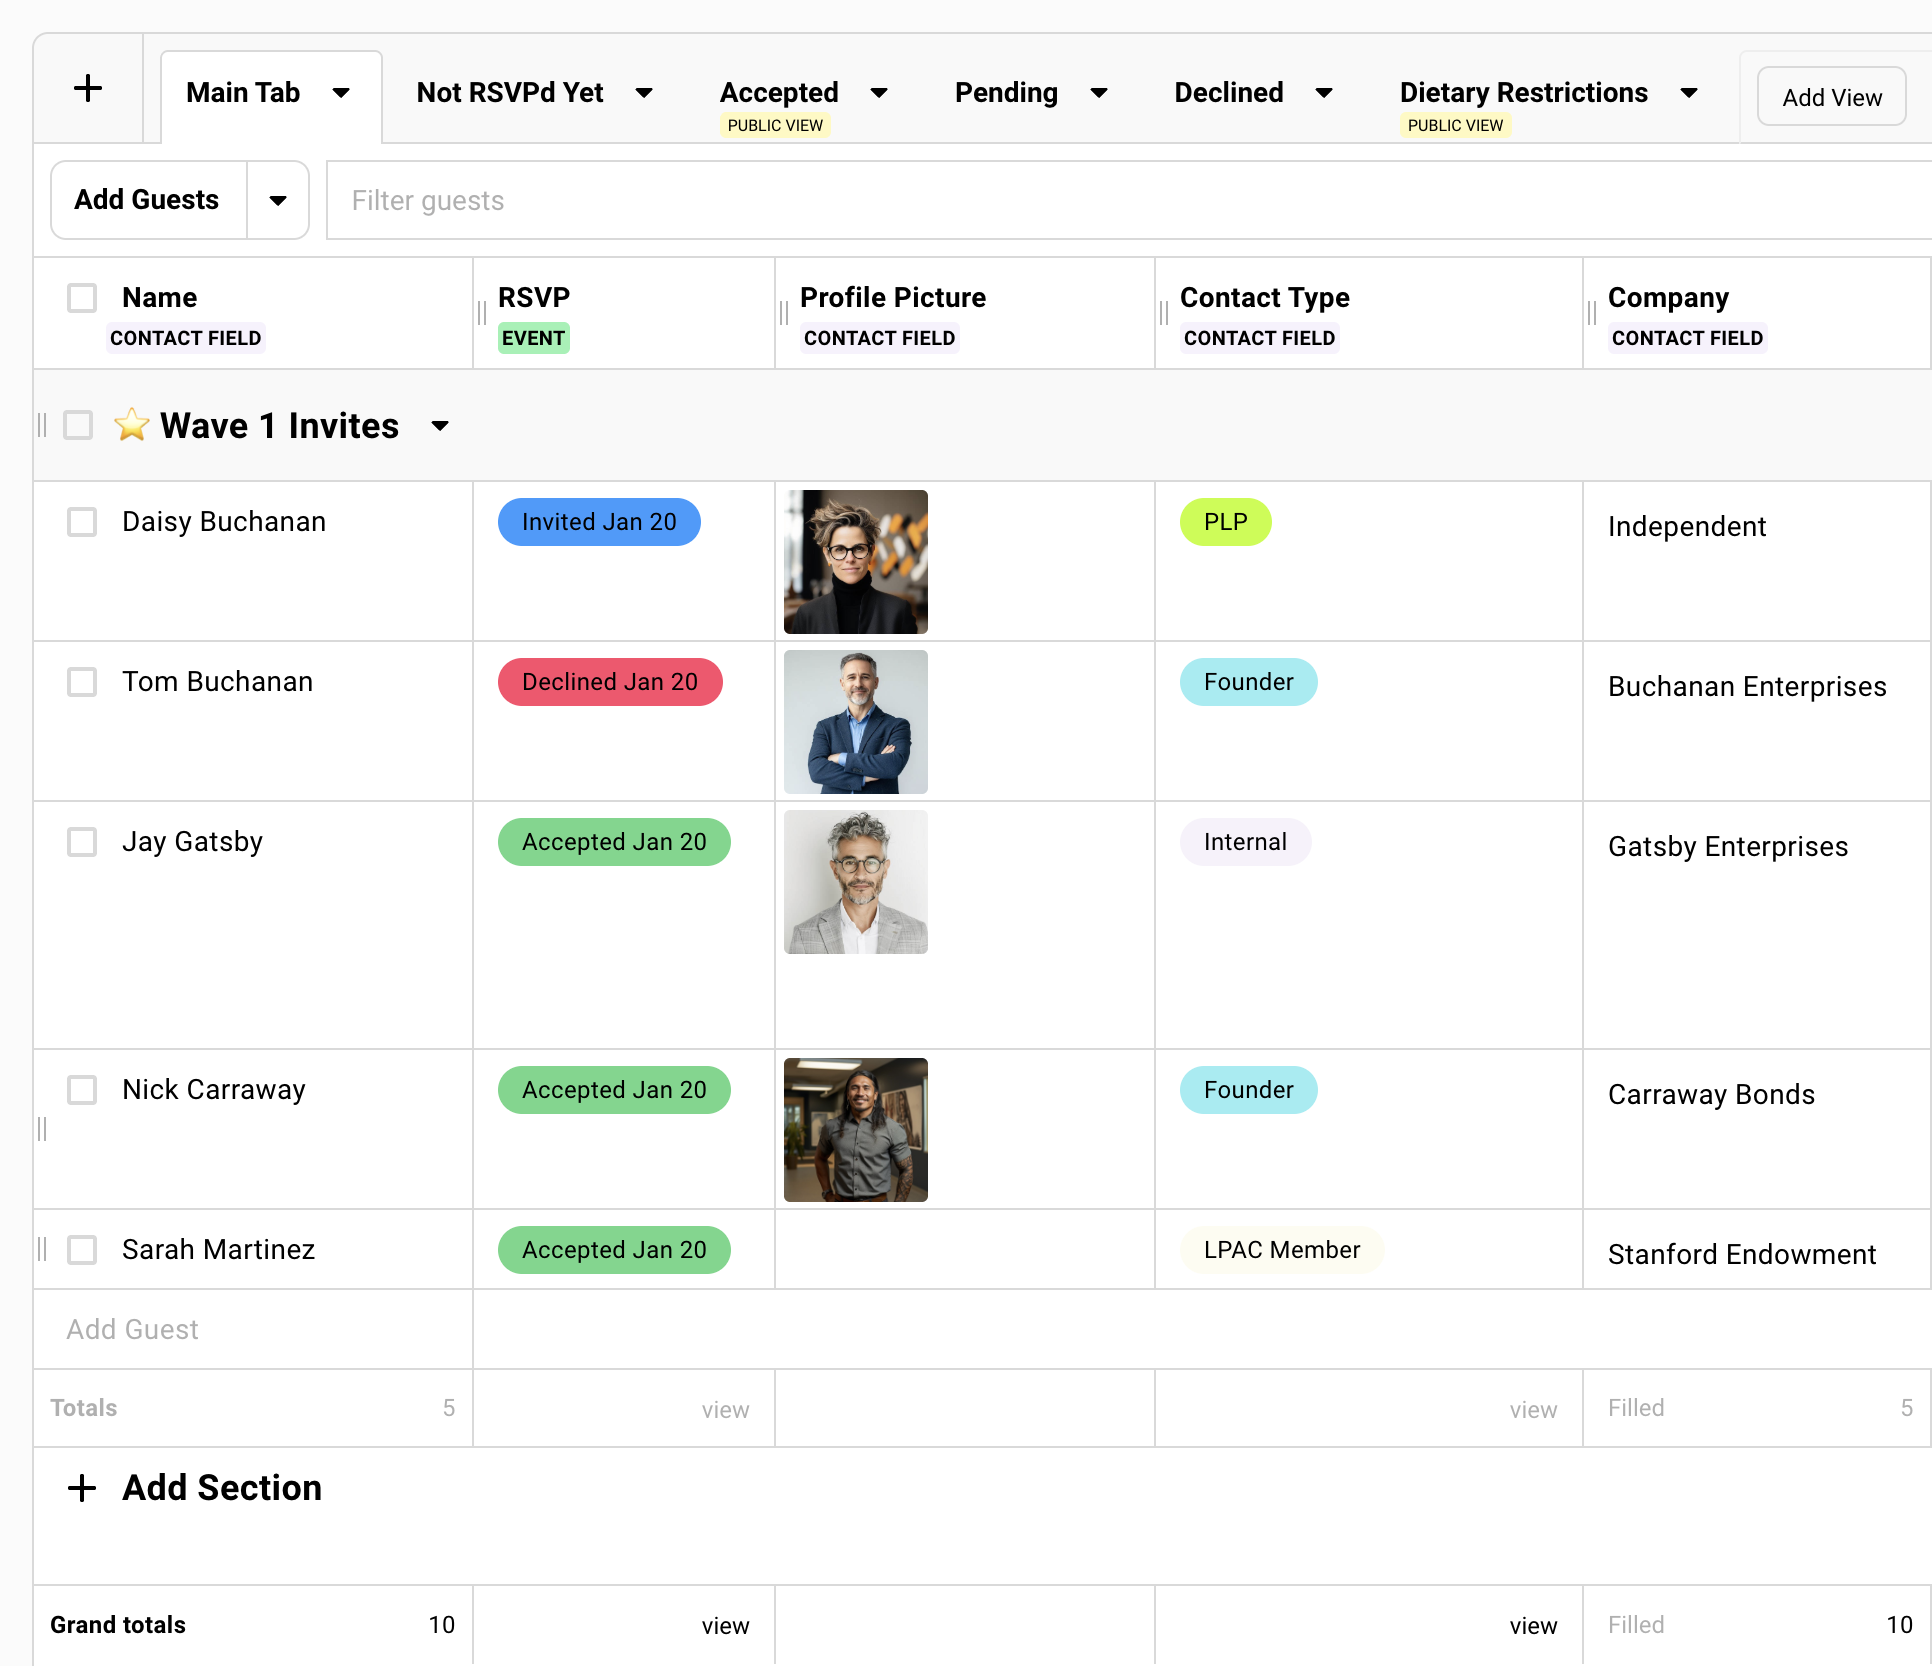
### Sharing Views
[Section titled “Sharing Views”](#sharing-views)
Share a view-only link to any guest list view.
The recipient sees exactly what you’ve configured. Nothing more. No login required.
No access to other views. No ability to see hidden columns. No access to contact profiles.
How to Share a View+
Click the dropdown arrow next to the tab name. Select **Enable Public Link**.
***
**Copy Link**
Get the shareable URL.
***
**Enable Public Field Editing**
Let recipients edit specific columns. Useful for notes and working with co-hosts.
***
**Enable Exporting**
Let recipients download as a spreadsheet. Useful for sponsors and co-hosts.
***
**Password Protect**
Require a password to access the view.
***
Recipients see a read-only version unless you enable editing. They can only export columns visible in that view.

## Key Columns
[Section titled “Key Columns”](#key-columns)
These columns surface information you’d otherwise miss. The first three are already on the guest list of every event you create. The rest you switch on from **Columns**, or add from **Columns → Add Fields** where noted.
A view you add yourself is the exception: it starts with **Name**, **Email** and **RSVP Link** only, so you’ll be switching these on there whatever the event’s own list shows.
Guest Source+
On by default. Shows how each guest got onto this list — who added them, by what method, and when: `By Adam Z. via CSV upload on Apr 15`.
It’s read-only and fills in automatically. Filter by it to isolate every walk-in or everyone who came in through an integration; sort by it to see what’s been added since you last looked.
**[Guest Source: what every value means](/platform/events-lists/guest-source/)** is the full legend — every method, what the `List:` and `CSV:` labels mean, and what shows on guests added before the column existed.
Warnings+
On by default. Flags guests who need something done about them before the event, worked out from each guest’s own record and kept current for you.
Ten warnings across three groups. **Email**: the guest has no address, a bad one, a bounce on file, or a block. **Registration**: they haven’t responded a week after their invitation, they responded without answering your required survey questions, or they accepted and never got a calendar invite. **History**: they rarely respond, rarely accept, or accept and don’t show.
The column is read-only. Fix what a warning points at and it clears itself. Filter on **Missing Email** before you build a campaign to see who your send would skip.
**[Guest List Warnings: what triggers each one](/platform/events-lists/guest-list-warnings/)** covers all ten, what sets each off, and how to clear it.
Event History+
Two different things share this name, and it’s worth knowing which you’re looking at.
**Event RSVP History** is a single column, on by default. It lists the events this guest has an RSVP on, so you can see their run of invitations without leaving the list.
**Add Fields → Event History** is a group of columns you add, each one a count or a list for a single outcome: **TTL Events Invited**, **TTL Events Accepted**, **TTL Events Attended** and so on for declined, maybe, waitlist and no-show, plus **Events Attended** and its siblings, which name the events rather than count them. **Attendance History** lives here too.
Filter for “TTL Events Attended: > 3 events” to find your most engaged contacts.
Plus Ones+
Found under Columns » Plus Ones.
Shows the name of the plus one that the original guest invited. Plus ones are added as separate guests on the guest list.
Last Sent Campaign+
Found under Add Fields → Campaigns.
Shows the most recent email each guest received. Sort by this to see where everyone is in your outreach sequence.
The status shown breaks down by delivery segment — sent, delivered, opened, bounced, and so on — rather than a single generic “sent” state, so you can tell a bounce apart from someone who just hasn’t opened it yet.
Name campaigns sequentially. **Invite, Follow-up 1, Follow-up 2**. This column shows exactly where each guest is in your sequence.
Phone and SMS Consent+
Two columns that decide whether a guest can be texted.
**Phone** — the number on the contact. Guests without one can’t be added to an SMS campaign at all.
**SMS Consent** — whether they’ve agreed to hear from you, shown as a label:
| Pill | Meaning |
| ------------- | ----------------------------------------------------------------------------------------------------------------------------- |
| Opted in | An explicit opt-in on record, or you’ve texted them and they haven’t opted out. |
| Opted out | They won’t receive your texts. The source is named in brackets — STOP, Blocked, Preferences, Send error, Imported, or Manual. |
| No preference | No signal either way. Still sendable. |
| Unsupported | Not a valid US number. Gatsby’s short code can’t reach it, whatever the consent. |
The column is read-only — an organizer can’t set a guest’s consent on their behalf. Filter on it to see who a campaign would actually reach before you build one. [SMS Consent & Compliance](/platform/email-campaigns/sms-consent/) covers what each state means and how a guest changes it.
Calendar Invite State+
Shows whether guests have the current calendar invite.
* Blank — Haven’t received an invite
* Up to date — Have the current version
* Out of date — Event details changed
Filter by “Out of date” after you change event details.
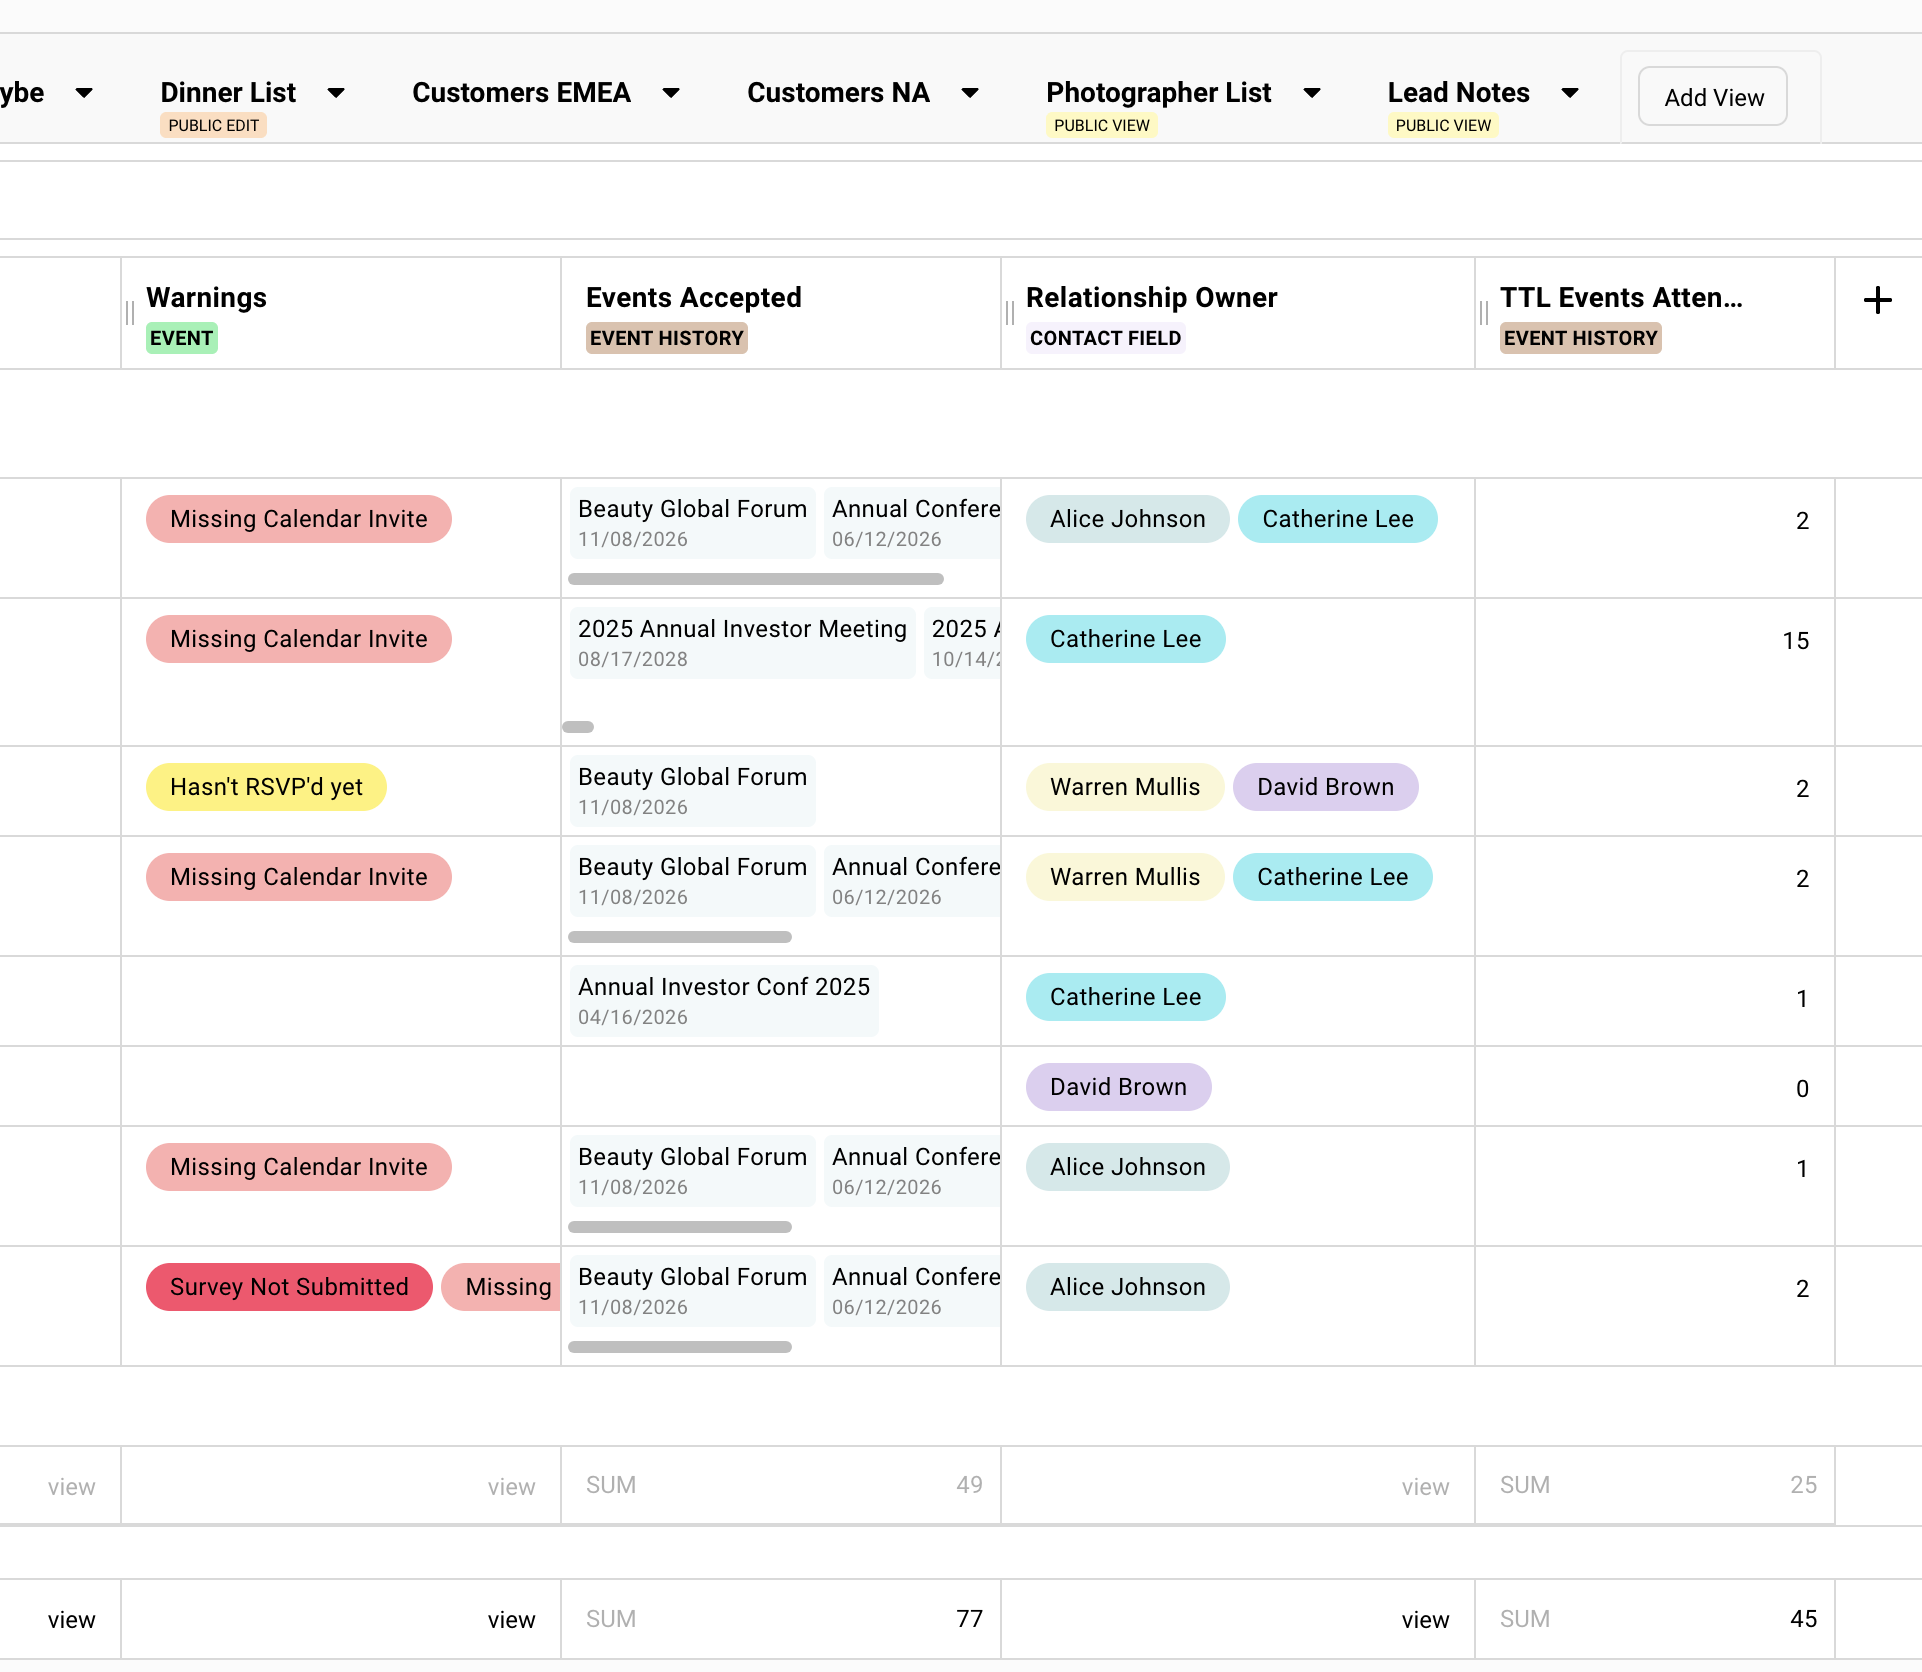
## Common Questions
[Section titled “Common Questions”](#common-questions)
What if a guest replies by email instead of clicking the RSVP button?+
Click their RSVP status field and select the appropriate status. When marking as Accepted, choose whether to send a confirmation email.
If I delete a view, do I lose my guests?+
No. Deleting a view removes that configuration. Your guests and their data stay on the guest list.
How do I know if someone opened my invitation email?+
Add campaign columns. Under Columns → Add Fields → Campaigns, add “Opened” or “\[Campaign Name]” to see who opened specific emails. (Email Open tracking must be turned on in your Team Settings.)
Can I see a guest's history with our events?+
Click their name to open their contact profile. The activity tab shows every event they’ve been invited to, their RSVP status, and attendance. Or add Event History columns to see aggregate data on your guest list.
How do I see who added a guest, and when?+
The **Guest Source** column, on by default. Each guest reads like `By Adam Z. via CSV upload on Apr 15` — who added them, how, and when. Newer guests name the origin too, down to the list or spreadsheet: `By Dana K. via List: Portfolio Founders on Nov 9`.
Guests who added themselves show that instead — `By guest via Public RSVP on May 18`. Filter by it to isolate every walk-in or everything an integration brought in; sort by it to see what’s been added since you last looked.
[Guest Source: what every value means](/platform/events-lists/guest-source/) has the full legend.
How do I share the guest list with people who aren't Gatsby users?+
**Guest List Views** work with non-Gatsby users.
You create custom views for your guest list. You configure which columns to show/hide. Then you get a link to share with that person.
In \[Guests] » Click the dropdown next to the view name » Click **Enable Public Link**.
Can't see who brought Plus Ones+
Add **Plus Ones** column. Guests » **Columns** » **Add Fields** » **Plus Ones**. This shows the original guest who added each plus one — enabling the column lets you see the connection between plus ones and the guests who invited them.
Bulk operations+
Select multiple guests » Click **Edit Column Values** in the green action bar.
Can I export to Excel?+
Yes, via CSV. Guests » Select Guests » More Options » Export to CSV.
Exports visible columns in your current view with any active filters applied. Open in Excel, Google Sheets, or any spreadsheet app.
Accidentally deleted important guests+
**Restore Deleted Guests** from the Add Guests dropdown. Select the guests you want back, then restore.
**Prevention:** Use filters or sections to hide guests instead of deleting. Keeps them in your database for future events.
Need to change event date/time/location+
Edit event details » Click **Save** » Calendar invite updates can be sent automatically or shared later.
Check “Unshared Event Updates” on dashboard if you need to send updates.
# Guest Source
> Every guest on your list now carries a record of who added them, how, and when. Guest Source fills itself in automatically and can't be edited. Here's what each value means.
## What Guest Source tells you
[Section titled “What Guest Source tells you”](#what-guest-source-tells-you)
**Guest Source** is a column on every guest list that answers one question: how did this person get here?
Gatsby records the answer at the moment the guest is added, so it’s still there weeks later. The column is **read-only** and sits on the guest list of every event you create. You don’t fill it in.
### How to read a cell
[Section titled “How to read a cell”](#how-to-read-a-cell)
Most cells follow one pattern: **who**, then **how**, then **when**:
`By Adam Z. via CSV upload on Apr 15`
* **Who**: the person or system responsible. A teammate’s name, the word `guest`, the name of the guest who brought a plus-one, or an integration.
* **How**: the specific method. `CSV upload`, `Public RSVP`, `Walk-in (kiosk)`, and so on. The legend below defines all of them.
* **When**: the date the guest was added. Today shows a time (`1:14 PM`), this year shows a short date (`Apr 15`), earlier years show the full date (`11/09/22`).
Hover a name to see it in full. Hover on longer cells to view the whole value.
### When the cell names the exact origin
[Section titled “When the cell names the exact origin”](#when-the-cell-names-the-exact-origin)
On many rows the **how** goes one step further and names the thing the guest came from, as `Label: name`:
`By Dana K. via List: Portfolio Founders on Nov 9`
| You see | It means |
| --------------------- | ----------------------------------------------------------------------- |
| `List: {name}` | The contact list they were added from. |
| `Tag: {name}` | The tag they were added from. |
| `Event: {name}` | The other event whose guest list they were pulled from. |
| `CSV: {filename}` | The spreadsheet they were imported from, named. |
| `Guest list: {event}` | They were added from another event’s guest list using **Add to Event**. |
| `Contacts` | Added from your Contacts page. |
| `Import history` | Added from the Contact Imports history page. |
Long names are shortened to fit the column (`Portfolio Fo…` for a list, `Q3-prospe…l-v2.csv` for a file, which keeps the file extension readable). Hover to see the untruncated value, and exports always carry the full one.
The date is the **most recent** add. If you remove a guest and later add them back, Guest Source updates to reflect that second add, not the original one.
## The legend
[Section titled “The legend”](#the-legend)
Every value you can see, grouped by who or what added the guest.
### Added by your team
[Section titled “Added by your team”](#added-by-your-team)
Someone on your team performed the add. The cell names them and shows a small avatar with their initials, for example `By Adam Z. via Manual add on Apr 15`.
| Method | What it means |
| ----------------- | ----------------------------------------------------------------------------------------------------------------------------------------------------------- |
| `Manual add` | Added one at a time from the guest list, the **Contacts** tab of Add Guests, or typing directly into a row. |
| `Bulk add` | Several contacts selected at once and added to the event. |
| `Filter add` | Added in one action from a page of contacts. Newer rows name where from instead: `Contacts`, `Import history`, `Guest list: {event}`, or `CSV: {filename}`. |
| `List add` | Added from a contact list, the **Lists** tab of Add Guests. Newer rows name it: `List: Portfolio Founders`. |
| `Tag add` | Added from a tag, the **Tags** tab of Add Guests. Newer rows name it: `Tag: Portfolio`. |
| `Event add` | Pulled in from another event’s guest list, the **Events** or **Parent Events** tab. Newer rows name it: `Event: Annual Meeting`. |
| `Google` | Added from Google Contacts, the **Google** tab of Add Guests. |
| `CSV upload` | Imported from a spreadsheet. Newer rows name the file: `CSV: Q3-prospe…l-v2.csv`. |
| `Multi-event add` | Added to several events at once using the multi-event picker. |
| `Contact card` | Added using **Add to event** from the contact’s own profile. |
| `Walk-in (kiosk)` | Added at the door during check-in. They weren’t on the list beforehand. |
| `Group add` | Added from a contact group. Groups have been replaced by lists, so this appears on older guests only. |
### Added by the guest
[Section titled “Added by the guest”](#added-by-the-guest)
The guest acted on their own, so the cell reads `By guest` and shows a person icon instead of an avatar, for example `By guest via Public RSVP on May 18`.
| Method | What it means |
| ---------------------- | -------------------------------------------------------------------------------------------------------------------------------------------------------------- |
| `Public RSVP` | They registered themselves through your event landing page. |
| `Child-event RSVP` | While RSVPing, they selected this session or sub-event. |
| `Gatsby calendar link` | They RSVP’d from a Gatsby calendar page you shared with them. The word **link** is clickable. It opens that calendar’s settings. |
| `Plus-one` | Another guest brought them. This is the one row that names someone: `By Jane Doe via Plus-one on May 18` shows **the guest who brought them**, not a teammate. |
### Synced from an integration
[Section titled “Synced from an integration”](#synced-from-an-integration)
A connected system added the guest, so there’s no person to name. The cell reads `Synced from` and shows a ⚡️ (the same mark used elsewhere in Gatsby for integrations).
| What you see | What it means |
| --------------------------------- | ---------------------------------------------------------------------------------- |
| `Synced from Salesforce on Nov 9` | Arrived through your [Salesforce integration](/platform/integrations/salesforce/). |
| `Synced from Affinity on Nov 9` | Arrived through your [Affinity integration](/platform/integrations/affinity/). |
| `Synced from Zoom on May 17` | Registered through [Zoom](/platform/integrations/zoom/) and synced across. |
New to these? [Integrations](/platform/integrations/) covers what each one syncs and how to connect it.
### No person to name
[Section titled “No person to name”](#no-person-to-name)
These cells are grey with no icon. Nobody is named because nobody can be: either the add wasn’t performed by a person, or the record predates Guest Source.
| What you see | What it means |
| --------------------------------------- | --------------------------------------------------------------------------------------------------------------------------------------------------------------------------------------------------------------------------------------------------------- |
| `Added via child event on May 12` | The guest was added to a sub-event, and Gatsby propagated them up to this parent event automatically. The originating event isn’t named, because a guest can propagate up through several levels at once. |
| `Added via Walk-in (kiosk) on 11/09/22` | We know **how** the guest was added but not **who** did it: an older guest whose method we could recover, or a teammate whose account has since been removed. Any method can appear in this form. The method shown is accurate; only the name is missing. |
| `Added on 11/09/22` | Nothing about how this guest arrived was recorded at the time. Only the date is known. See below. This is common on guests added before Guest Source existed. |
No cell is ever blank. Every guest has an add date, so at minimum you always get **when**.
## Guests added before Guest Source existed
[Section titled “Guests added before Guest Source existed”](#guests-added-before-guest-source-existed)
Guest Source is a new field. Nothing that was previously visible has been removed. You’re gaining information going forward, plus whatever we could recover from existing records.
**On guests added before this launched, you may see how and when, but never who.** `By {name}` appears only on guests added from the launch onward. Who performed a historical add simply wasn’t recorded anywhere, and we’d rather leave it out than guess at it.
What you’ll see on older guests:
* **The method and the date**, where the original record still shows how the guest arrived: `By Jane D. via Plus-one on 11/09/22`, `By guest via Public RSVP on 11/09/22`, `Added via Walk-in (kiosk) on 11/09/22`.
* **The date alone** (`Added on 11/09/22`), where nothing on the record indicates how the guest was added. **This is most older guests.**
We only name a method where the original record actually supports it. A wrong source is indistinguishable from a right one once it’s written down, so where we can’t tell, we say so.
## Filtering and sorting
[Section titled “Filtering and sorting”](#filtering-and-sorting)
**Filter** by Guest Source to isolate a cohort: every walk-in, everyone who came through a Salesforce sync, everyone a specific method brought in. Each option in the filter carries a colored label showing its category: **Team**, **Guest**, **Integration**, or **Other**.
**Sort** by Guest Source to order the list by when each guest was added, newest or oldest first. It’s the fastest way to see what changed on a list since you last looked at it.
**Export** carries the column through. If Guest Source is visible in your view, the exported file includes it, with the **untruncated** value, so a filename like `Q3-prospects-final-v2.csv` comes through whole and can be searched for in a spreadsheet.
**On mobile**, open a guest’s profile to find their Guest Source, and check the **Events** tab to see how they were added to each of their other events.
## Common Questions
[Section titled “Common Questions”](#common-questions)
I don't see the Guest Source column on my guest list+
It’s on the guest list of every event you create, so you shouldn’t need to add it. Guest Source replaces the old **Source** column and sits in the same place. Any view that already showed Source now shows Guest Source instead.
A view you add yourself is the exception. New custom views start with **Name**, **Email** and **RSVP Link** only, whatever the event’s own list shows.
If it’s missing, it was hidden in that particular view. Each view saves its own column setup, so switching it back on affects only the view you’re looking at:
1. Open the view where you want the column.
2. Click **Columns** in the top right.
3. Find **Guest Source** in the list and switch it on.
It’s a standard column rather than an optional one, so it’s in the main Columns list. You don’t need **Add Fields**.
Why do some rows name a list or file and others just say “List add” or “CSV upload”?+
Because Gatsby only started recording the specific origin recently. Guests added from that point on carry the name: `List: Portfolio Founders`, `CSV: Q3-prospects.csv`. Guests added before it keep the plain method: `List add`, `CSV upload`.
Both forms will sit in the same column from now on, and that’s deliberate. We’d rather show the plain method than imply we know an origin we never recorded.
You’ll also see the plain method on a newer guest if the thing they came from has since been deleted. If that list no longer exists, there’s no name left to show.
Why can't I type in this column?+
Guest Source is a record of what happened, so it’s read-only by design. A field that can be both recorded and overwritten can’t be trusted for either purpose.
If you want to leave a note on a guest, pin a comment on them instead. Pinned comments also appear in check-in arrival notification emails, which typed-in notes never did reliably.
This column used to be called Source, and I kept notes in it. Where did they go?+
Nothing was deleted. The old Source column let you type free-text notes on a guest, and those notes now live on the guest’s **pinned comment**, the same place they were already shared from.
The old column also had a quirk worth knowing about: it only displayed your note if the guest happened to have been added by CSV upload. On every other guest the note was invisible in the column even though it was stored, and still went out in check-in emails. Moving notes to pinned comments removes that inconsistency.
Why does a guest on my parent event say “Added via child event”?+
When you use parent and child events, adding a guest to a child event automatically adds them to the parent as well. Nobody performed that second add, so there’s no name to show.
The originating child event isn’t named either. A guest can propagate up several levels in a single action (a grandchild event will add them to both the parent and the grandparent), so there isn’t one single child event to point to.
Two guests came in from the same spreadsheet but show different sources. Why?+
They shouldn’t. Gatsby has two internal ways of importing a spreadsheet, and both display as `CSV upload` for exactly this reason. Filtering on `CSV upload` returns guests from both.
If you’re seeing a genuine mismatch, it’s likely the guests came in through different actions, for example, one from an upload and one from the **Lists** tab. Send us the event at
Email copied to clipboard
and we’ll take a look.
I removed a guest and added them back. Which add does it show?+
The most recent one. Guest Source always reflects the current membership on the list, not the first time the guest ever appeared on it.
Does the source of a guest change if they RSVP or check in?+
No. Guest Source records how the guest got onto the list and never changes afterward. What they did once they were on it (RSVP status, attendance, plus-ones) lives in its own columns.
# Quick Events
> Create a simpler event in minutes and send a premium mobile-first invitation. Capacity, waitlists, RSVP deadlines, guest questions, and follow-ups, on the same guest profiles as your largest events.
Minutes, not an afternoon
Four steps, with sensible defaults.
Details, Design, Guests, Invite. Add a name and check the event details; the start time, timezone, and design are already filled in. Works on a phone as well as a desktop.
A premium guest page
Six templates, built for phones.
Your photo across the top, your logo, one typeface, and an accent color. Pick one of the template's five or your own brand color. The page reads live event data, so edits show up without a publish step.
On every account
Nothing to switch on.
Create Quick Event sits beside Create Event in your events list.
Why it matters
## The dinner for twelve never felt worth the full event builder.
So it went to a consumer invite tool, and the guest list went with it. Six months later nobody can tell you who came, and the RSVP never made it onto the contact record. Quick Events gives those events a flow of their own without moving them out of Gatsby.
How it works
### A separate, narrower flow
Create Quick Event opens a four-step surface instead of the full event builder. Curated choices, no landing-page editor, no campaign setup.
### A real event underneath
Same guest profiles, same RSVP statuses, same events list. Quick Events changes the interface, not the underlying event and contact data.
**Where to find it.** Open **Events and Lists** and use **Create Quick Event** beside the usual **Create Event** button. It’s on for every account, and choosing it changes nothing about the events you already have.
## Creating a quick event
[Section titled “Creating a quick event”](#creating-a-quick-event)
Four steps, in order, with a live preview of the guest page beside you the whole way. The footer tells you which step you’re on and keeps Back and Continue within reach. On a phone you get the same four steps with the preview one toggle away instead of alongside.
**Saving works differently once invitations go out.** While you’re building a quick event, every change autosaves as you go, so there’s nothing to click. Once any invitation has been sent, that changes: Details and Design switch to an explicit **Save Changes** button, and changing the date, time, or location prompts you to send guests a change notice. See [Editing after you’ve sent](#editing-after-youve-sent).
### Step 1: Details
[Section titled “Step 1: Details”](#step-1-details)
The essentials, and nothing else. Add an **Event name**, then check **Starts**, **Time zone**, and **Location**. The start and timezone are filled in for you, and the end time defaults to two hours after the start. A short note, the RSVP settings, and the questions you ask your guests are all optional and all live on this step.
The timezone is shown on the guest page, so someone reading the invitation in another region sees the time correctly.
Filling in the Details Step+
1. Enter the **Event name**. The header updates to the name as you type.
2. Set **Starts**, and adjust **Ends** if two hours isn’t right.
3. Pick the **Time zone**. This is what guests see on the invitation.
4. Choose **In person** or **Online**:
**In person** accepts a venue or location name you type yourself. Pick a result from the address suggestions when you want Gatsby to add a precise **View map** link on the guest page. Editing a selected place turns it back into a manually entered location and removes that precise map link until you pick another suggestion.
**Online** takes a Zoom, Google Meet, phone, or plain link. The guest page shows a labeled join link instead of a map.
5. Add **A short note** if you want one. It takes bold, italic, underline, bullet lists, and links, so a running order or a dress code reads the way you typed it. The counter turns red past 500 characters but never stops you typing.
6. Open **Guest questions** if you want to ask your guests something as they RSVP. Off by default.
An event is either in person or online. Quick Events doesn’t do both at once.
RSVP Settings+
Four controls, grouped together on the Details step. All default off except Maybe.
| Setting | Default | What it does |
| -------------- | ------- | ----------------------------------------------------------------------------------------------------------------------------------------------------------------------------------- |
| Capacity limit | Off | Caps how many guests can accept. Turning it on reveals a **Max guests** field. Off means unlimited. |
| Waitlist | Off | When capacity is reached, new acceptances go to the waitlist instead of being turned away. |
| RSVP deadline | Off | Stops new acceptances at a date and time. If the waitlist is on, guests can still join it after the deadline. The deadline is shown on the guest page while regular RSVPs are open. |
| Offer Maybe | **On** | Gives guests a third answer. Turning it off hides the Maybe button and disables its label field in Design. |
Only guests with an **Accepted** status count against capacity.
Guest Questions+
A quick event can ask a few questions at the moment someone RSVPs. **Guest questions** sits directly under RSVP settings, switched off and collapsed to a single row.
Switch it on and you get four choices. Nothing is pre-selected, so switching the section on doesn’t quietly start asking anything.
| Question | Wording | Where the answer goes |
| ---------------------- | ----------------------------------------- | ---------------------------------- |
| Company | Gatsby’s own, “Where do you work?” | The contact’s Company field |
| Position | Gatsby’s own, “Your title” | The contact’s Position field |
| Dietary restrictions | Gatsby’s own, “Any dietary restrictions?” | The contact’s dietary restrictions |
| A question of your own | Yours, up to 80 characters | The quick event’s Guests roster |
The first three are Gatsby’s standard questions and carry their own wording, so there’s nothing to write. Only your own question needs a prompt, and guests see it exactly as you type it.
Each selected question gets a **Required** switch, on when you tick the question. Required questions block the RSVP until they’re answered; optional ones are labeled “optional” on the guest page before anyone starts typing.
Questions stay editable after invitations have gone out, and adding or removing one never sends a change notice.
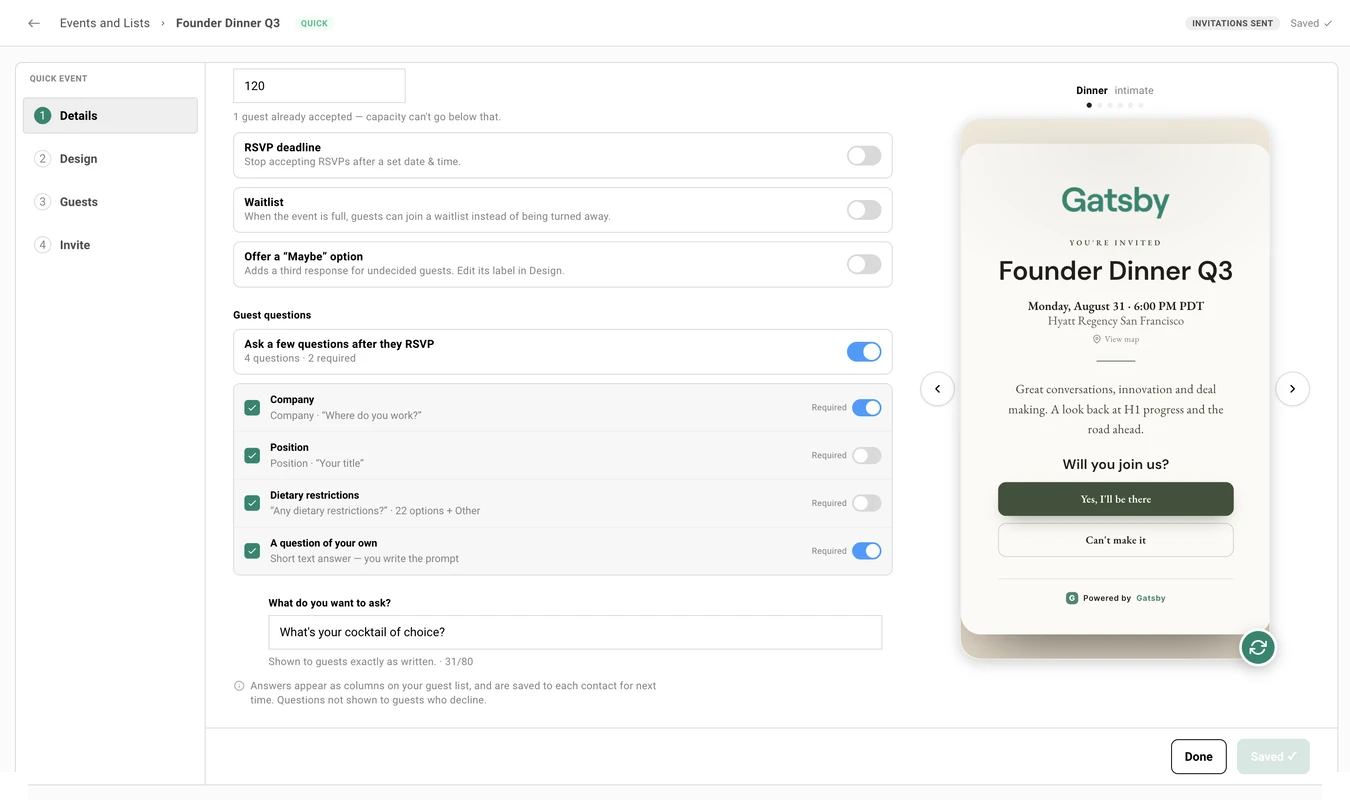
**Switching the whole section off clears the questions.** Turning it back on starts from nothing selected, so untick a single question if you only mean to drop one.
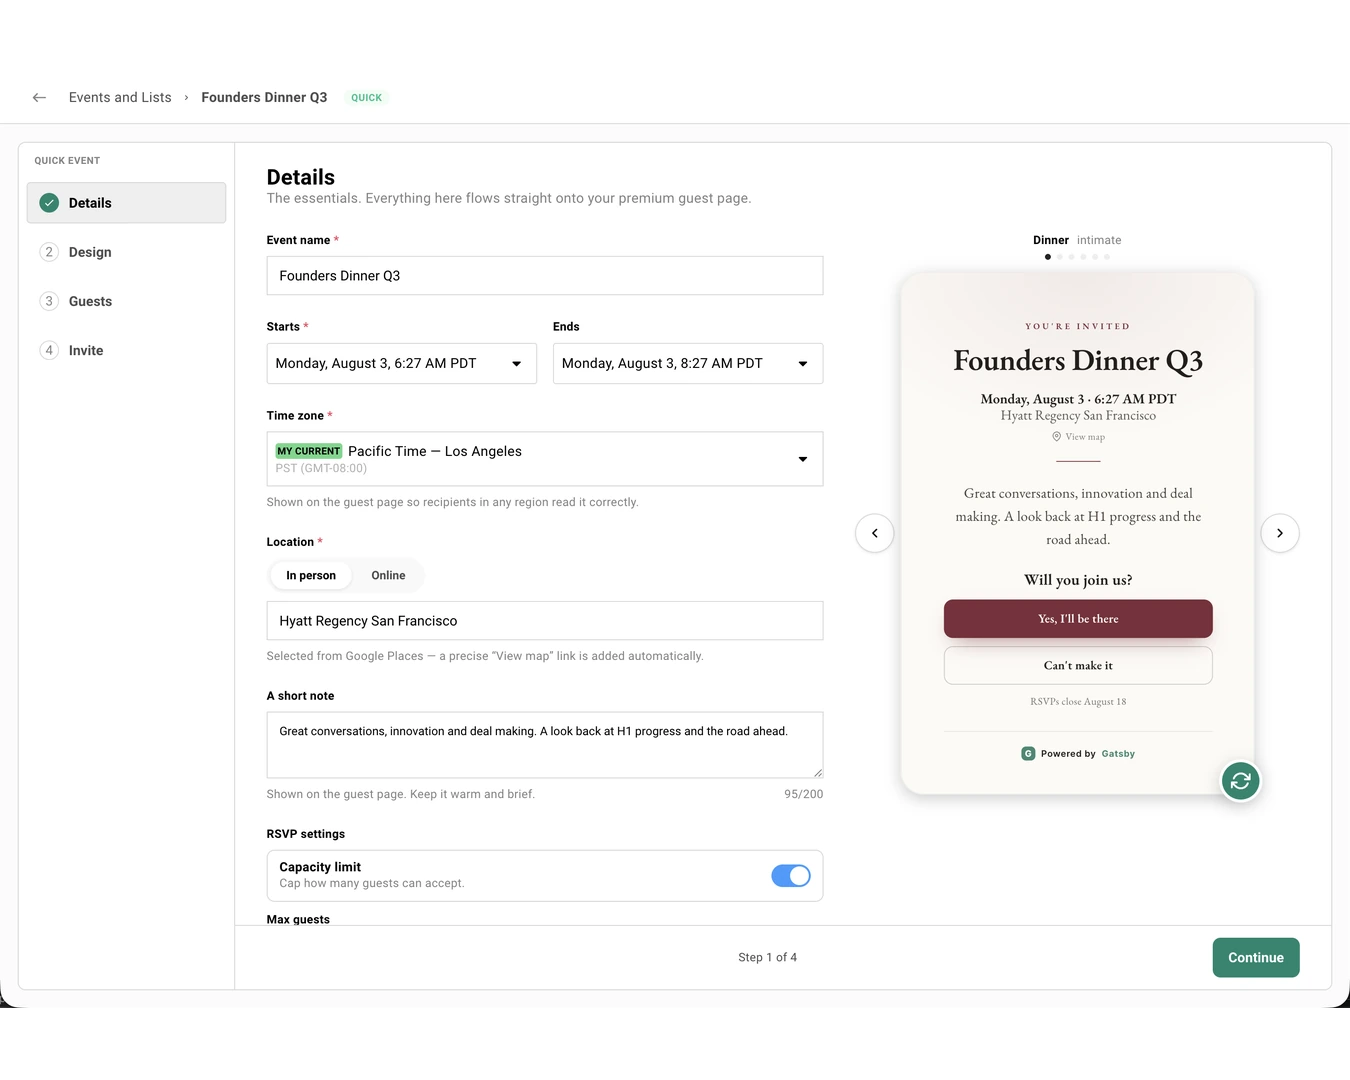
### Step 2: Design
[Section titled “Step 2: Design”](#step-2-design)
Pick a template and make it yours. There are six, each with its own typeface set, color palette, and arrival animation: **Dinner**, **Garden**, **Gala**, **Soirée**, **Happy Hour**, and **Celebration**.
You can also put a photograph across the top of the invitation. **Banner image** is the first control on the step, above **Logo**, and one photo covers both the guest page and the invitation email.
Typefaces come from the template you picked rather than a free font list, so the shortlist always suits the layout. Colors work the same way with one addition: beside the template’s five pre-tuned palettes there’s a sixth **Custom** slot for your own brand color, and it stays put when you switch templates.
Choosing a Template+
Browse with the **‹** and **›** arrows beside the preview. The name, its occasion tag, and a row of dots show where you are in the set. The preview updates as you browse.
Once invitations have gone out, the Design step carries a reminder that you’re editing a live event. You can browse templates and preview your changes before using **Save Changes** to update the guest page.
Adding a Banner Image+
**Banner image** is the first control on the Design step. The same card sits on the Invite step, and both edit one photo. There is one banner per event.
1. Choose **Upload banner image** and pick a JPG or PNG. Wide photos work best, at least 1200 px across.
2. Frame it. The framing stage opens as soon as the photo loads, since the crop is 2:1 and a centered crop beheads half the photos anyone uploads. Drag along whichever axis has room to spare, up and down on a tall photo, left and right on a wide one.
3. Choose **Use this image**. Nothing is stored until you do, so **Cancel** leaves the event exactly as it was.
Once a banner is set, the card offers **Replace**, **Reframe**, and **Remove**. Reframe re-crops from the photo you uploaded rather than from the crop you already saved, so you can move the framing as often as you like and the image never softens.
A photo narrower than 1200 px still sends. Gatsby tells you it may look soft in the email instead of turning it away.
Where the Banner Shows Up+
The guest page and the invitation email, and nowhere else.
| Surface | Banner |
| -------------------------------- | --------------------------------------------------------------------- |
| The guest page | Yes, full width across the top of the card, above your logo |
| The invitation email | Yes, flush to the top of the email card |
| Confirmation and waitlist emails | No |
| Follow-ups and change notices | No |
| The link preview image | No. That still comes from the template, your logo, and the event name |
The crop is baked into the image when you save the framing rather than applied when a mail client renders it, so the page and the email frame the photo identically. Outlook ignores the CSS that would otherwise do the cropping.
**Removing it removes it from both surfaces.** The confirmation says which other surface you’re about to clear, and the choices are **Keep banner** or **Remove from both**.
Adding Your Logo+
Upload a PNG or JPG. Transparency is preserved and the image is resized for you.
The logo sits in a wide slot near the top of the invitation, under the banner when you’ve added one, and is scaled to fit rather than cropped. On a dark template where a dark logo would disappear, Gatsby puts a subtle backing plate behind it so it stays legible. **Remove** returns to the no-logo layout.
Typeface, Color, and Button Labels+
**Typeface** is the shortlist belonging to the current template. The title and the RSVP prompt follow your choice.
**Color theme** sets the accent used on the RSVP button, the date label, and the dividing rules. The first five swatches are the current template’s palette. The sixth is the **Custom** swatch, for your own color. See *Using Your Own Brand Color* below.
**Button labels** rewrite the Accept, Decline, and Maybe copy. “Count me in” and “Can’t make it” read better than Yes and No for some events. Leave a field empty to fall back to the template’s wording.
If **Offer Maybe** is off, the Maybe label field stays visible but dimmed, with a link back to Details to turn it on.
Using Your Own Brand Color+
The last slot in the **Color theme** row is a **Custom** swatch. Click it to open the color picker: drag the spectrum, type a six-digit hex, or lift a color off your screen with the eyedropper where your browser supports one. The preview updates as you drag.
Once you’ve picked a color the swatch keeps showing it, so trying a preset doesn’t throw it away. One click on the swatch puts your color back, and a second click reopens the picker to change it. Your color also survives a template switch, so you can browse layouts without losing your branding.
**Save it once, reuse it everywhere.** The **+** beside the eyedropper saves the color to your team’s palette under a name you choose. Saved colors are shared with everyone in your organization and appear in Gatsby’s other color pickers too, including landing pages and email. Rename or delete them from the same list.
Your color then carries wherever the template’s accent would go: the guest page, the invitation, follow-ups, the confirmation and waitlist emails, and the link preview image.
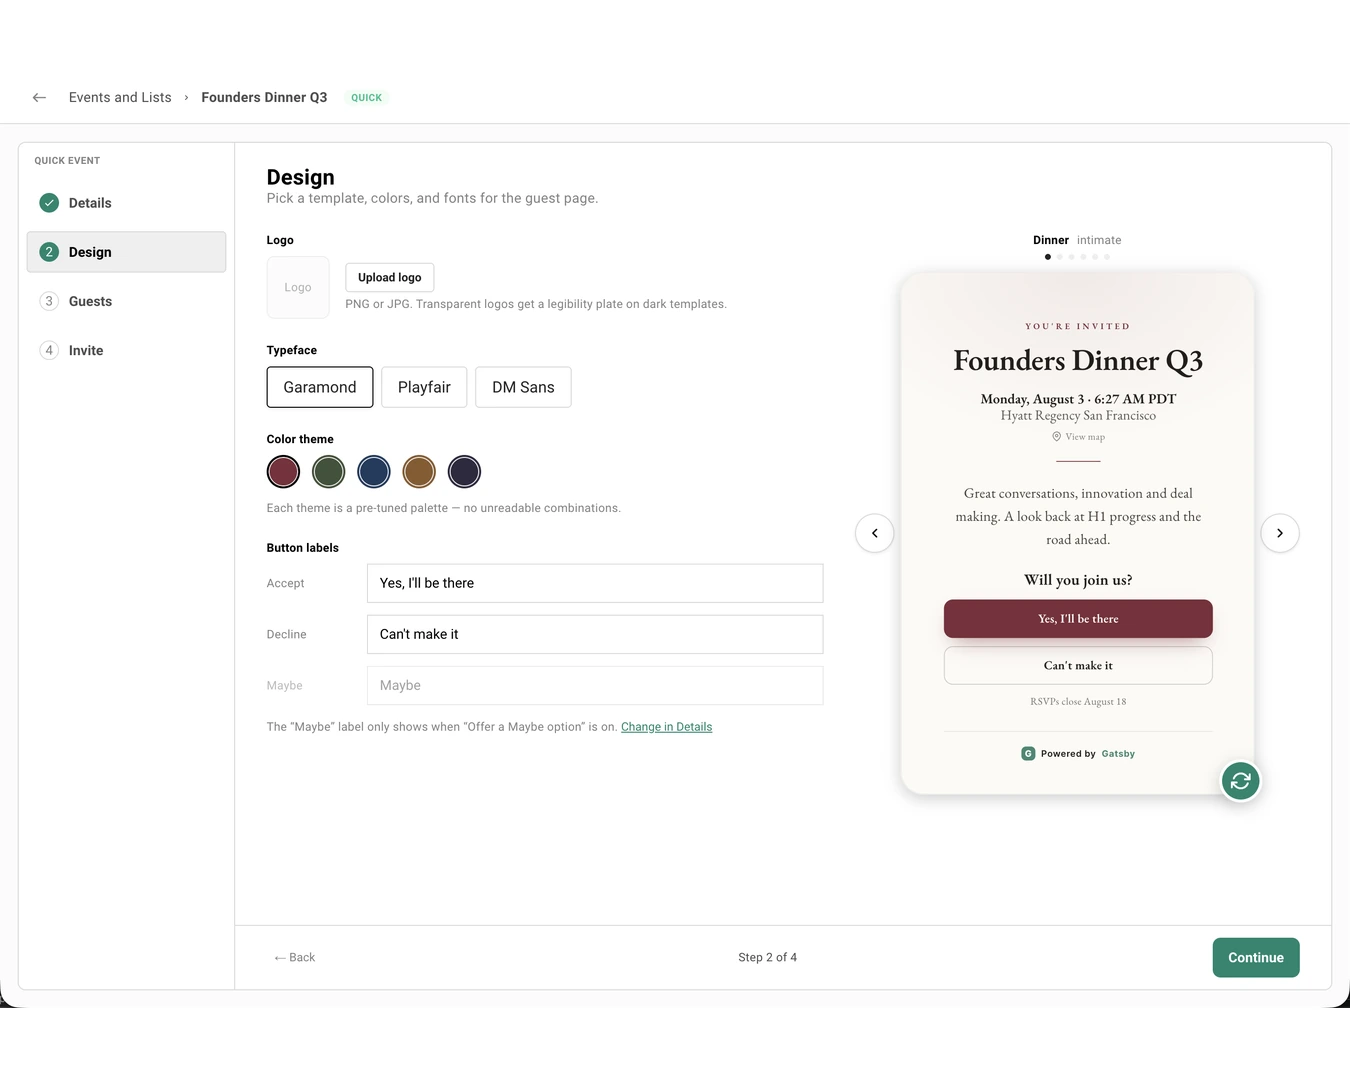
### Step 3: Guests
[Section titled “Step 3: Guests”](#step-3-guests)
Add guests in any of three ways: search your Gatsby contacts, type a new name or email, or upload a CSV.
Every guest gets a personal RSVP link that belongs to them and isn’t transferable. Statuses update live as answers come in, using Gatsby’s normal RSVP vocabulary and colors.
RSVP Statuses+
| Status | Color | Meaning |
| ----------- | ------ | -------------------------------------------------------------------------------------------------------------- |
| Accepted | Green | Coming. Counts against capacity. |
| Declined | Red | Not coming. |
| Maybe | Orange | Tentative, if you left Maybe on. |
| Invited | Blue | Invitation sent, no answer yet. |
| Waitlist | Purple | Accepted after capacity was reached. |
| No Response | Grey | No recorded response. This includes guests who haven’t been invited yet and some failed or blocked deliveries. |
The Public RSVP Link+
Off by default. Turn it on and you get a shareable link anyone can register through, useful when you want a partner to forward the invitation.
Public sign-ups count toward the same invite total as everyone else. Turn the toggle off and anyone who opens the link sees that it isn’t active, without event details or RSVP controls.
Managing the Waitlist+
Guests who join the waitlist show **Waitlist** in the RSVP column. To move someone off it, open their RSVP status and choose **Accepted** or **Declined**. Leave the status as Waitlist to keep them there.
This is manual in this release. Gatsby doesn’t promote people automatically when a spot opens. Changing a waitlisted guest to Accepted sends the Quick Event confirmation email. You can make that change even when capacity is already met; it’s treated as a deliberate override.
Reading Guest Question Answers+
If you turned on **Guest questions** on the Details step, the roster grows one column per question, in the same order the guests saw them. Turn a question off and its column goes away; turn it back on and it returns with the answers intact.
| The cell reads | It means |
| -------------- | ------------------------------------------------------------- |
| An answer | They answered it |
| Several labels | A dietary answer with more than one selection |
| — | They haven’t answered yet, or left an optional question blank |
| *Not asked* | They declined, so they were never shown the questions |
Name stays pinned as you scroll sideways. On a phone the guest’s row opens a sheet with an **Answers** section instead of columns.
Company, Position, and Dietary restrictions are saved to the guest’s contact record. An answer to your own question stays with this quick event and remains available in its Guests roster.
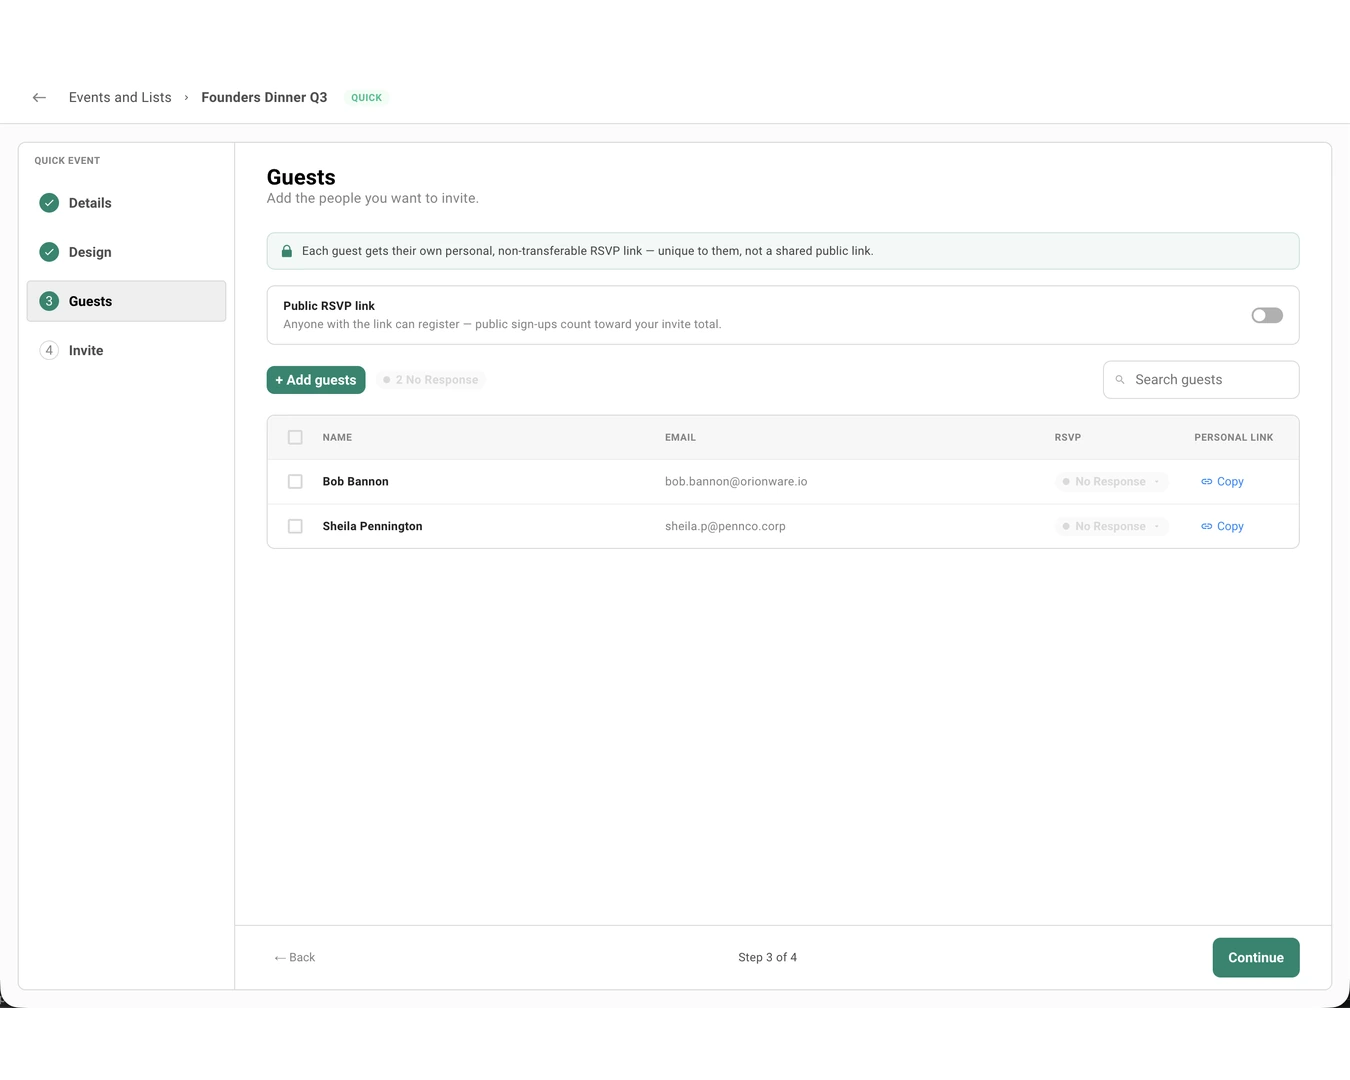
### Step 4: Invite
[Section titled “Step 4: Invite”](#step-4-invite)
One premium invitation that mirrors the guest page you designed, with the banner, logo, accent, and typeface carried across so the email and the page look like the same object.
You write the subject and a short message. The date, location, and RSVP button are added for you, and a live preview sits beside the form as you type.
The Banner on the Invite Step+
**Banner image** appears here as well as on Design, and it is the same photo. Upload, reframe, replace, or remove it from whichever step you happen to be on.
Sending waits for a banner that is still uploading, so an invitation never goes out without the image you just picked. If the photo can’t be resolved at all, Gatsby tells you and sends the invitation without it rather than holding your guests hostage to a decorative image.
Sending, Scheduling, and Testing+
1. Set **Send from**. This is your linked Google, Outlook, or SendGrid address, each labeled with which of the three it is. The number of guests who’ll be invited shows underneath it.
2. Write the **Subject**.
3. Write the **Message**. There’s a 750-character limit with a counter, and you can personalize it with merge tags like `{firstName}`. Bold, italic, underline, lists, and links are available. There’s no full email editor and no marketing mode.
4. Choose **Send now**, or **Schedule** and pick a date and time.
5. Optionally **Send test to me**. A test creates no invitation records and doesn’t touch your guests.
6. Send. Gatsby creates one invitation per guest in a single operation.
You can’t send with an empty guest list. Sending only targets guests who haven’t been invited yet, so nobody gets the same invitation twice.
There’s no way to pick which guests get the invitation. Quick events don’t have the campaigns tool a standard event uses to send to some guests and skip others, so every guest on the list who hasn’t been invited yet receives it. Only add guests you’re ready to invite.
The Confirmation Email+
When a guest accepts, they get the Quick Event confirmation email, which matches the invitation.
If your organization has set org-wide default emails under Team Settings, those don’t apply to quick events. Quick Events use their own templates so the confirmation matches the design you picked, and guests who join the waitlist get the matching waitlist confirmation.
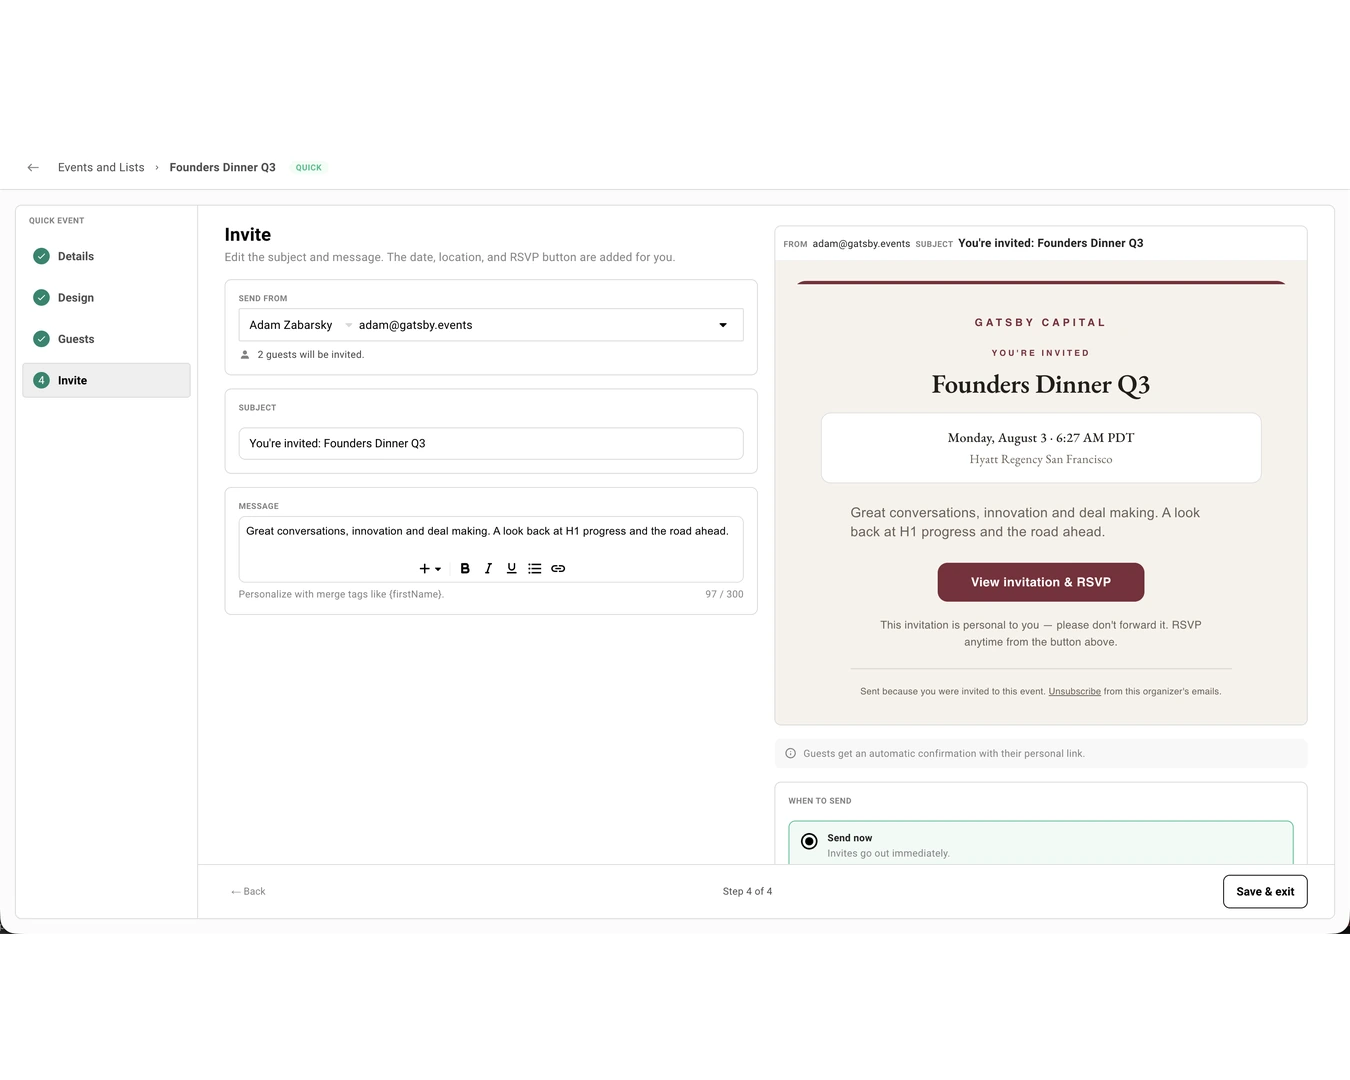
### Collaborators
[Section titled “Collaborators”](#collaborators)
Every quick event has collaborators from the moment it exists — whoever created it is the organizer. You add and change the rest from inside the wizard, without leaving the step you’re on.
The control sits at the far right of the top bar, past the save indicator, and stays there through all four steps. On a desktop it’s a row of avatars — up to five, then a count for the rest — with a button to open the list. On a phone it’s a single people icon.
Role changes save the moment you make them. They aren’t guest-facing, so they don’t wait for **Save Changes** and never raise the change-notice prompt.
Adding Someone to a Quick Event+
1. Open the collaborator control in the top bar. **Manage Collaborators** opens with everyone on your team listed, the people who already hold a role first.
2. Find the person. Typing in the email field at the bottom filters the list as well as starting an invite.
3. Set their role to **Organizer** or **Collaborator**. **No Access** takes the event off their list.
4. Close it. Anyone newly added is emailed that they have access, and a toast confirms how many.
This works on a draft you haven’t named yet and on an event whose invitations have already gone out. Adding someone doesn’t notify your guests.
Organizer, Collaborator, and No Access+
**Organizer** is full control of the event, including changing who else has access.
**Collaborator** can work in the event. They can give access to someone who has none, but can’t change anyone who already holds a role, and the role list only offers roles at or below their own — so a collaborator can’t make someone an organizer.
**No Access** is the default for everyone who hasn’t been added.
Your own row reads **(You)** and can’t be edited; someone else with the right role has to change it.
These event roles are separate from your organization’s permission tiers. See [Team & Permissions](/platform/account-settings/team-permissions/) for what Super Admins, Admins, Team Members, and External Collaborators can do across the organization.
Inviting Someone Who Isn't on Your Team Yet+
The footer reads **Invite a member to your team if they don’t appear above**. Enter their email, then the first and last name fields appear once the email is valid. **Invite** stays disabled until all three are filled in.
Someone whose email domain matches your organization joins as a Team Member. Anyone else joins as an External Collaborator, which limits them to the events they’re assigned. Either way they land on this event as a Collaborator.
Whether you can invite at all depends on your organization’s settings — Super Admins control which roles may add team members.
Who Hears About RSVPs+
The bell beside a person’s role opens **Email notification settings** for this event: Initial Public RSVPs, Initial Private RSVPs, and RSVP Updates. Each toggle saves as you set it.
The bell only appears on rows that hold a role, and only for an organizer, an org admin, or the person looking at their own row.
## What your guests see
[Section titled “What your guests see”](#what-your-guests-see)
The guest page is built for a phone first and reads live event data, so it’s never out of date. It shows the right thing whether RSVPs are open, nearly full, waitlisted, full, or closed.
### The invitation and the RSVP
[Section titled “The invitation and the RSVP”](#the-invitation-and-the-rsvp)
The page opens with a short arrival animation, then the invitation: your banner photo, your logo, the event name, the date and time with its timezone, the location, and your note. In-person events get a **View map** link. Online events get a labeled join link instead.
Answering takes one tap. If you’re asking guest questions, they appear on the card itself the moment the guest picks an answer, above a single **Submit** — no second page, and no separate form to abandon. Personally invited guests can copy their link after answering, and public registrants receive a personal return link in their confirmation email.
Every RSVP State+
**Open**
Accept, Decline, and Maybe, using your labels. If you set a deadline, an “RSVPs close \[date]” line appears.
***
**Nearly full**
A restrained note that spots are limited. Buttons stay active. Gatsby never shows an exact remaining count or a countdown.
***
**Full, with a waitlist**
Accept is replaced by **Join the waitlist**. Decline stays available and Maybe is hidden. Joining sets the guest to Waitlist and sends the waitlist email.
***
**Full, without a waitlist**
An “Event full” message and a single disabled button. No RSVP actions.
***
**Closed**
Closed manually, or past the deadline when the waitlist is off. An “RSVP closed” message and no actions. When the waitlist is on, passing the deadline switches the affirmative action to **Join the waitlist** instead.
***
The full and closed states apply to returning guests too. Their current response still appears in the acknowledgement band, but the RSVP controls are unavailable until the event is reopened or capacity is available.
The Questions on the Guest Page+
Questions only appear after a guest chooses an answer, and only for **Yes**, **Maybe**, and joining the waitlist. Someone who declines is never asked anything, on either kind of link.
Required questions carry an accent asterisk; optional ones say “optional”, both visible before the guest starts typing. Submitting with a required question blank is blocked, and the page scrolls back to the question that needs an answer rather than leaving them hunting.
**Dietary restrictions** is a set of tappable options rather than a dropdown, grouped into **Diet** and **Something to avoid**, with an **Other…** option that opens a text field for anything not on the list. Nothing to scroll through and no keyboard in the way.
On a personal link the guest’s name and email are filled in and locked above the questions, so they can check it’s them before answering. On the public link they type their own name and email as before.
Coming Back Later+
A guest who opens their link again doesn’t see a blank invitation. In place of “Will you join us?” the card shows a band in the template’s own colors and typeface, naming them and stating where they stand — **You’re going**, **You said maybe**, **You’re on the waitlist**, or **You said you can’t make it** — with a line telling them they can change it below.
On a personal link, any questions the guest answered come back filled in and editable, while their name and email stay locked. The arrival animation is skipped on a return visit.
Naming the guest also gives away a forwarded link: open someone else’s personal link and you see their name, not yours.
Personal and Public Links+
Personal links are unique to one guest and aren’t transferable. Forwarding one doesn’t give someone else a seat under their own name.
The public link is a separate, optional link for open registration. It only works while the toggle is on.
Both are short and work on your custom domain as well as on gatsby.events. Existing RSVP links for your other events are unaffected.
Accessibility and Motion+
The arrival animation can be tapped to skip and plays once per guest. If a guest’s device is set to reduce motion, the page skips straight to its final state.
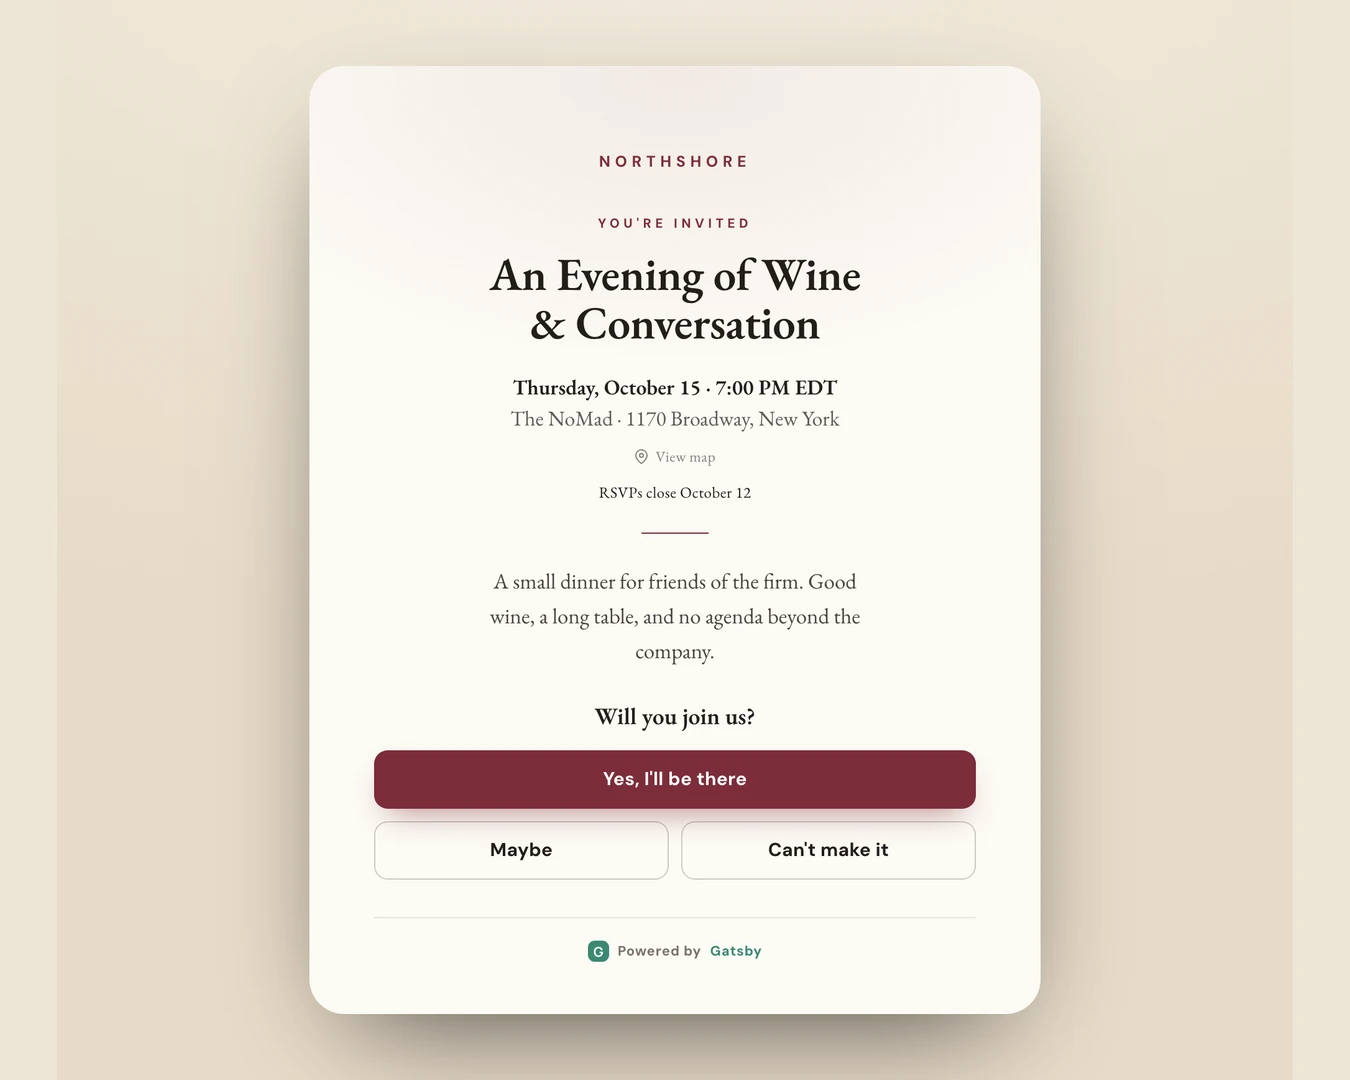
## After invitations go out
[Section titled “After invitations go out”](#after-invitations-go-out)
Reopening a sent quick event lands you on Guests, where the answers are. The steps become freely navigable tabs instead of a wizard, and edits need an explicit save.
### Delivery, resends, and follow-ups
[Section titled “Delivery, resends, and follow-ups”](#delivery-resends-and-follow-ups)
The Invitations step becomes **Invitations & Follow-Ups**. Delivery statistics sit on one side and a follow-up composer takes the main pane.
Gatsby distinguishes a mailbox that was temporarily unavailable from an address that doesn’t exist, and only offers a resend where a resend can actually work.
Reading Delivery Stats+
Four numbers: **Delivered**, **Opened**, **Accepted**, and **Failed**. When nothing failed, the Failed count isn’t emphasised and no failure list appears.
Failed recipients are listed with a reason:
***
**Temporary failure**
A full mailbox or a server that was briefly unavailable. These get a **Resend** action, and a bulk **Resend failed** covers the group.
***
**Undeliverable**
The address doesn’t exist. These show “Undeliverable, check the address” with an **Edit address** action and no resend, so you fix the typo instead of sending into a void.
Following Up by Answer+
Pick a group and Gatsby writes to exactly those people. Each shows a live count, and a group with nobody in it is disabled rather than hidden.
| Group | Who’s in it |
| -------- | ----------------------------------------------------------- |
| Accepted | Everyone coming |
| Declined | Everyone who said no |
| Maybe | Tentative answers |
| Waitlist | Everyone waiting for a spot, when the event uses a waitlist |
| No RSVP | Invited guests who haven’t answered |
Accepted, Declined, Maybe, and No RSVP each have a suggested note you can load in one click, edit, and send. Accepted also has a post-event thank-you. The Waitlist group starts blank so you can write the message that fits the situation.
Follow-ups use the event’s design and include a calendar invite unless your organization has disabled calendar attachments. Following up never changes anyone’s RSVP status.
Branded Follow-Ups+
Every follow-up is wrapped in the event’s design, using the logo, typeface, and colors from your quick event. A live preview beside the composer shows how the message will look before you send it.
Inviting People You Added Later+
Adding guests after the first send gives you a **Send to new guests** action covering only the people who haven’t been invited. It’s deliberately separate from follow-ups and from resending failures, so there’s no way to accidentally re-invite the whole list.
### Editing after you’ve sent
[Section titled “Editing after you’ve sent”](#editing-after-youve-sent)
Details and Design stay editable, with an amber reminder that invitations are already out. Changes commit when you press **Save Changes**, not as you type.
Because the guest page reads live data, a saved edit is visible to anyone who opens their link. Emails already delivered keep the details they were sent with.
Changing the Date, Time, or Location+
These are the changes guests need to know about, so Gatsby asks.
Saving a new start date or time, timezone, or location shows a prompt with the old and new details side by side. You can **Send change notice** to everyone already invited, whatever their answer, or **Skip**. Changing only the end time doesn’t open this prompt.
Skipping is a real choice, not a trap. The guest page still updates either way. Use it when you’ve already told people directly.
Design changes carry the same live-event caution and go live when you press **Save Changes**, without opening a change-notice prompt. That covers the banner: add, reframe, or remove it and the guest page updates for anyone who opens their link, while invitations already delivered keep the image they were sent with.
Setting Defaults for Your Team+
Admins can set a house style once under **Team Settings » Event Defaults**, in **Default Quick Event Design**: template, logo, typeface, color, and button labels. New quick events start from it, and anyone can still change any of it per event.
The **Custom** slot is here too, and here it holds your organization’s brand color. Set it and new quick events open with it already selected, so nobody has to paste a hex to stay on brand.
The banner isn’t part of the house style. It’s a photo of one event, so it belongs to that event, and every quick event starts without one.
Changing the default doesn’t alter quick events that already exist. If no default is set, new events start from Gatsby’s.
The same page holds your organization’s **Default Emails**, which apply to standard events but not to quick events.
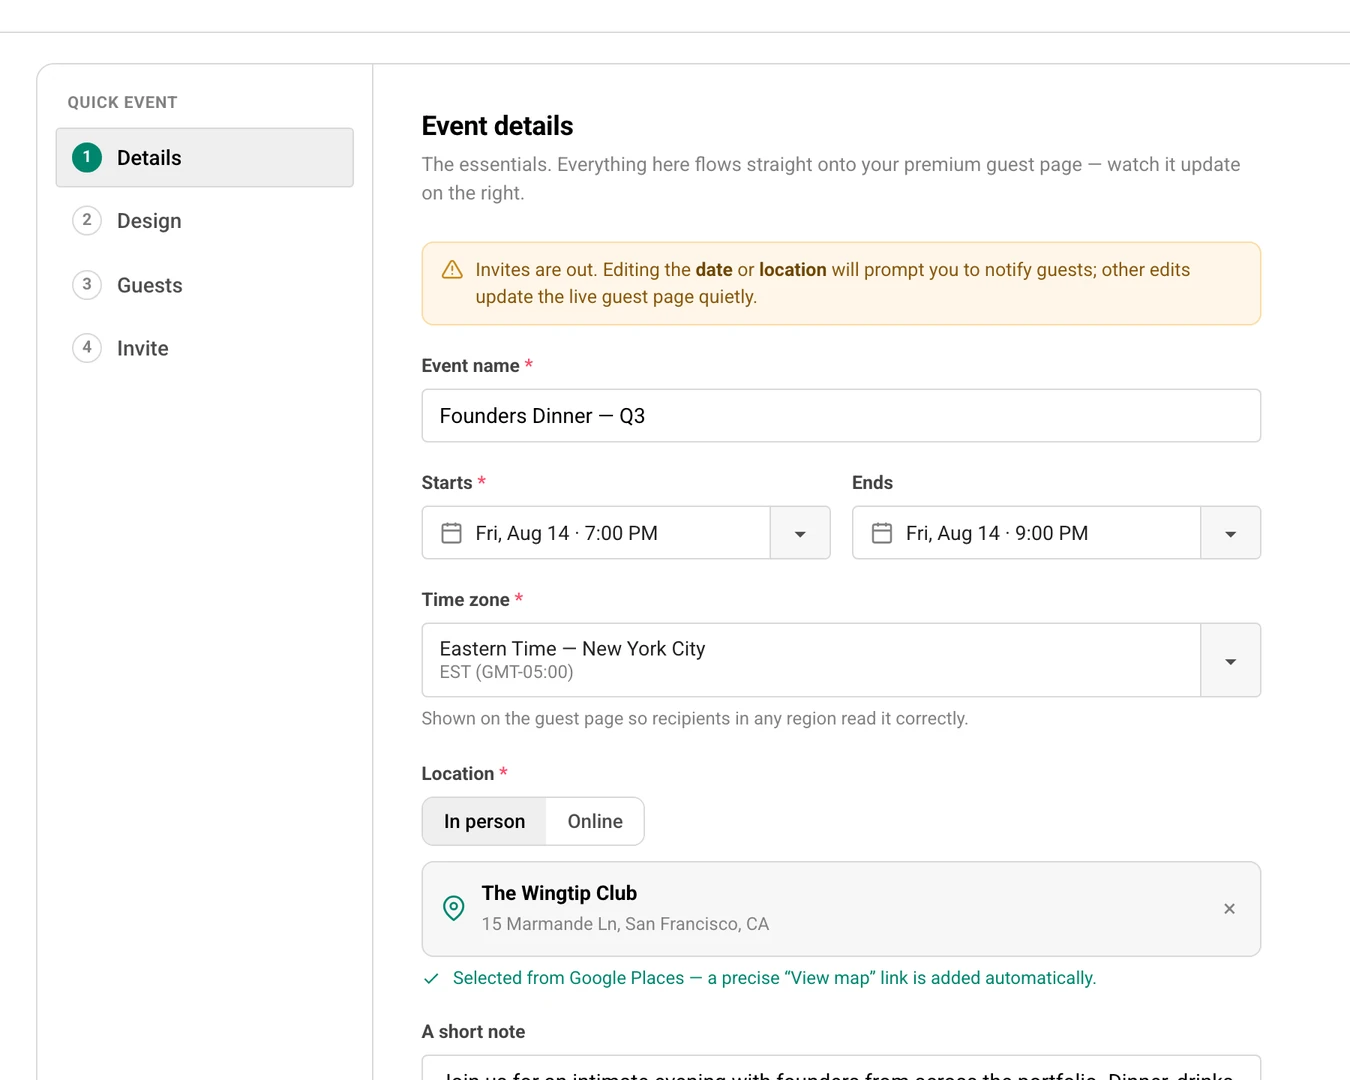
## Common Questions
[Section titled “Common Questions”](#common-questions)
Do I need Quick Events turned on?+
No. It’s available to every Gatsby customer today. Look for **Create Quick Event** next to **Create Event** in your events list. If you don’t see it, refresh once, since an older browser tab can hold a stale menu.
Can a quick event do seating, check-in, or ticketing?+
No. Quick Events covers invitations, RSVPs, capacity, waitlists, a few questions at the RSVP, and follow-ups. Seating charts, name badges, door check-in, paid ticketing, documents, tasks, full registration forms, and post-event surveys are full-event features. For an event that needs those, create a standard event.
Can other people on my team work on a quick event?+
Yes. Open the collaborator control at the right of the wizard’s top bar and set anyone on your team to **Organizer** or **Collaborator**. Role changes save straight away and nothing is sent to your guests. See [Collaborators](#collaborators).
Why don't I see the collaborator control?+
External Collaborators don’t get it. They can work in the events they’ve been assigned, but changing who else has access is limited to your own team.
Can I ask my guests questions when they RSVP?+
Yes, up to four. Switch on **Guest questions** on the Details step and pick from Company, Position, Dietary restrictions, and one question of your own. Guests answer on the invitation itself, right after they choose their answer, and each question can be required or optional.
It’s a short set on purpose, not a form builder. The four questions can’t be reordered, there’s no branching or conditional logic, and only the one custom question has wording you write. For anything larger, use a standard event with a registration form.
Where do the answers to guest questions end up?+
Company, Position, and dietary restrictions land on the guest’s profile fields, so those answers are available anywhere you use that contact. Your own question stays with the quick event instead of creating an organization-wide contact field.
You’ll see every selected question as a column on the quick event’s Guests roster. If you rename your own question, the column keeps its existing answers under the new wording.
Can I convert a quick event into a full event?+
Not in this release. If an event grows past what the quick flow covers, create a standard event for it. Your contacts and their history are shared across both, so nothing about the guests has to be rebuilt.
Do plus-ones work on quick events?+
No. Capacity counts one seat per accepted guest. If you need plus-ones, guest-of-guest registration, or more than the four guest questions, use a standard event.
Do RSVPs from a quick event reach the contact record and our CRM?+
Yes. A quick event is a real Gatsby event on your real contacts, so RSVP history and the standard Company, Position, and Dietary restrictions answers update the contact and can flow through your existing CRM integrations. An answer to your own question stays on the quick event’s Guests roster rather than becoming a CRM contact field.
Can I create a quick event on my phone?+
Yes, the whole flow. All four steps work on mobile web, with a segmented **Edit / Preview** toggle instead of a side-by-side preview and a step picker in place of the desktop sidebar. Sending invitations, reading delivery stats, and writing follow-ups all work the same way.
What does a quick-event link look like when someone shares it?+
Gatsby generates a preview image for every quick event from the template you picked, so a link pasted into Slack, iMessage, or email unfurls as your invitation rather than a generic Gatsby graphic. It carries your logo, or your organization’s name if you haven’t added one, and the event name.
There’s nothing to configure and no image to upload, and a banner photo doesn’t replace it. It refreshes when you change the event name, template, color, or logo. The date and location aren’t drawn on the image on purpose, since messaging apps cache an unfurl and a cached picture of a changed date would be wrong rather than merely stale; the date goes in the link’s description text instead, which apps re-fetch.
Can I put a photo on the invitation?+
Yes. **Banner image** on the Design step takes a JPG or PNG and runs it across the top of the guest page and the invitation email. Wide photos work best, and anything at least 1200 px across stays sharp.
The crop is 2:1, so the framing stage opens as soon as your photo loads and you drag it to the part you want. One photo covers both surfaces, and you can replace, reframe, or remove it at any point, including after invitations have gone out.
Does the banner go on the confirmation email or the follow-ups?+
No. The banner is on the guest page and the invitation email. Confirmation, waitlist, follow-up, and change-notice emails carry your template, logo, and accent color, but not the photo. The link preview image is unchanged too, so a link pasted into Slack still unfurls the generated card rather than your photo.
Can our team set a default banner for every quick event?+
No, and that’s on purpose. **Team Settings » Event Defaults** covers template, logo, typeface, color, and button labels, which are all house style. A photograph belongs to one event, so a default would put last year’s dinner on every new invitation until somebody noticed.
Can I use my own brand color instead of the template's?+
Yes. The **Color theme** row on the Design step ends with a **Custom** swatch that opens a color picker, and the color you set there survives switching templates and carries into the invitation and the emails. Admins can set one for the whole team under **Team Settings » Event Defaults** so new quick events start on brand.
Typefaces and layouts stay template-bound; the accent is the one thing you can bring yourself. For full control over type and layout, use a standard event with a custom landing page.
Can I remove the Powered by Gatsby mark from the guest page?+
No. It appears on every quick-event page and always in Gatsby’s own green, never your accent color. For a fully unbranded page, use a standard event with a custom landing page on your own domain.
Why don't my organization's default emails apply?+
Quick events use their own confirmation and waitlist emails so they match the design you picked. This is intentional and only affects quick events. Your defaults still apply to every standard event.
Does someone get promoted automatically when a spot opens?+
Not in this release. Waitlisted guests stay put until an organizer changes their RSVP status from Waitlist to Accepted or Declined.
What happens if someone forwards their RSVP link?+
A personal link is tied to one guest and isn’t transferable, so forwarding it doesn’t create a seat for someone else under their own name. If you want people to be able to pass the invitation along, turn on the public RSVP link.
Can I duplicate a quick event?+
Yes, and the copy is a quick event too, keeping its design and its capacity, waitlist, and deadline settings. Check In Guests doesn’t appear in a quick event’s menu, since check-in isn’t part of Quick Events.
Can a quick event send text messages?+
No. Texting, including the free [SMS Auto-Reminder](/platform/email-campaigns/sms-campaigns/), works on standard events only.
# Tasks
> Every event gets real Tasks. Assign work, set due dates, track what's blocking the dinner, and see everything due across your events in one place.
Why it matters
## The work of running an event never lived where the event does.
It lived in your head, a side spreadsheet, and three Slack threads. Who’s building the landing page? Did anyone confirm the caterer? Tasks puts that work inside the event itself, with owners and a due date on every line.
How it works
### A workspace in every event
Open the Tasks tab on any event. Track work as a board, a list, or cards. Assign it, date it, and see what’s blocked.
### One view across every event
My Tasks pulls everything assigned to you onto the Events page, sorted by what’s overdue and what’s due soon.
[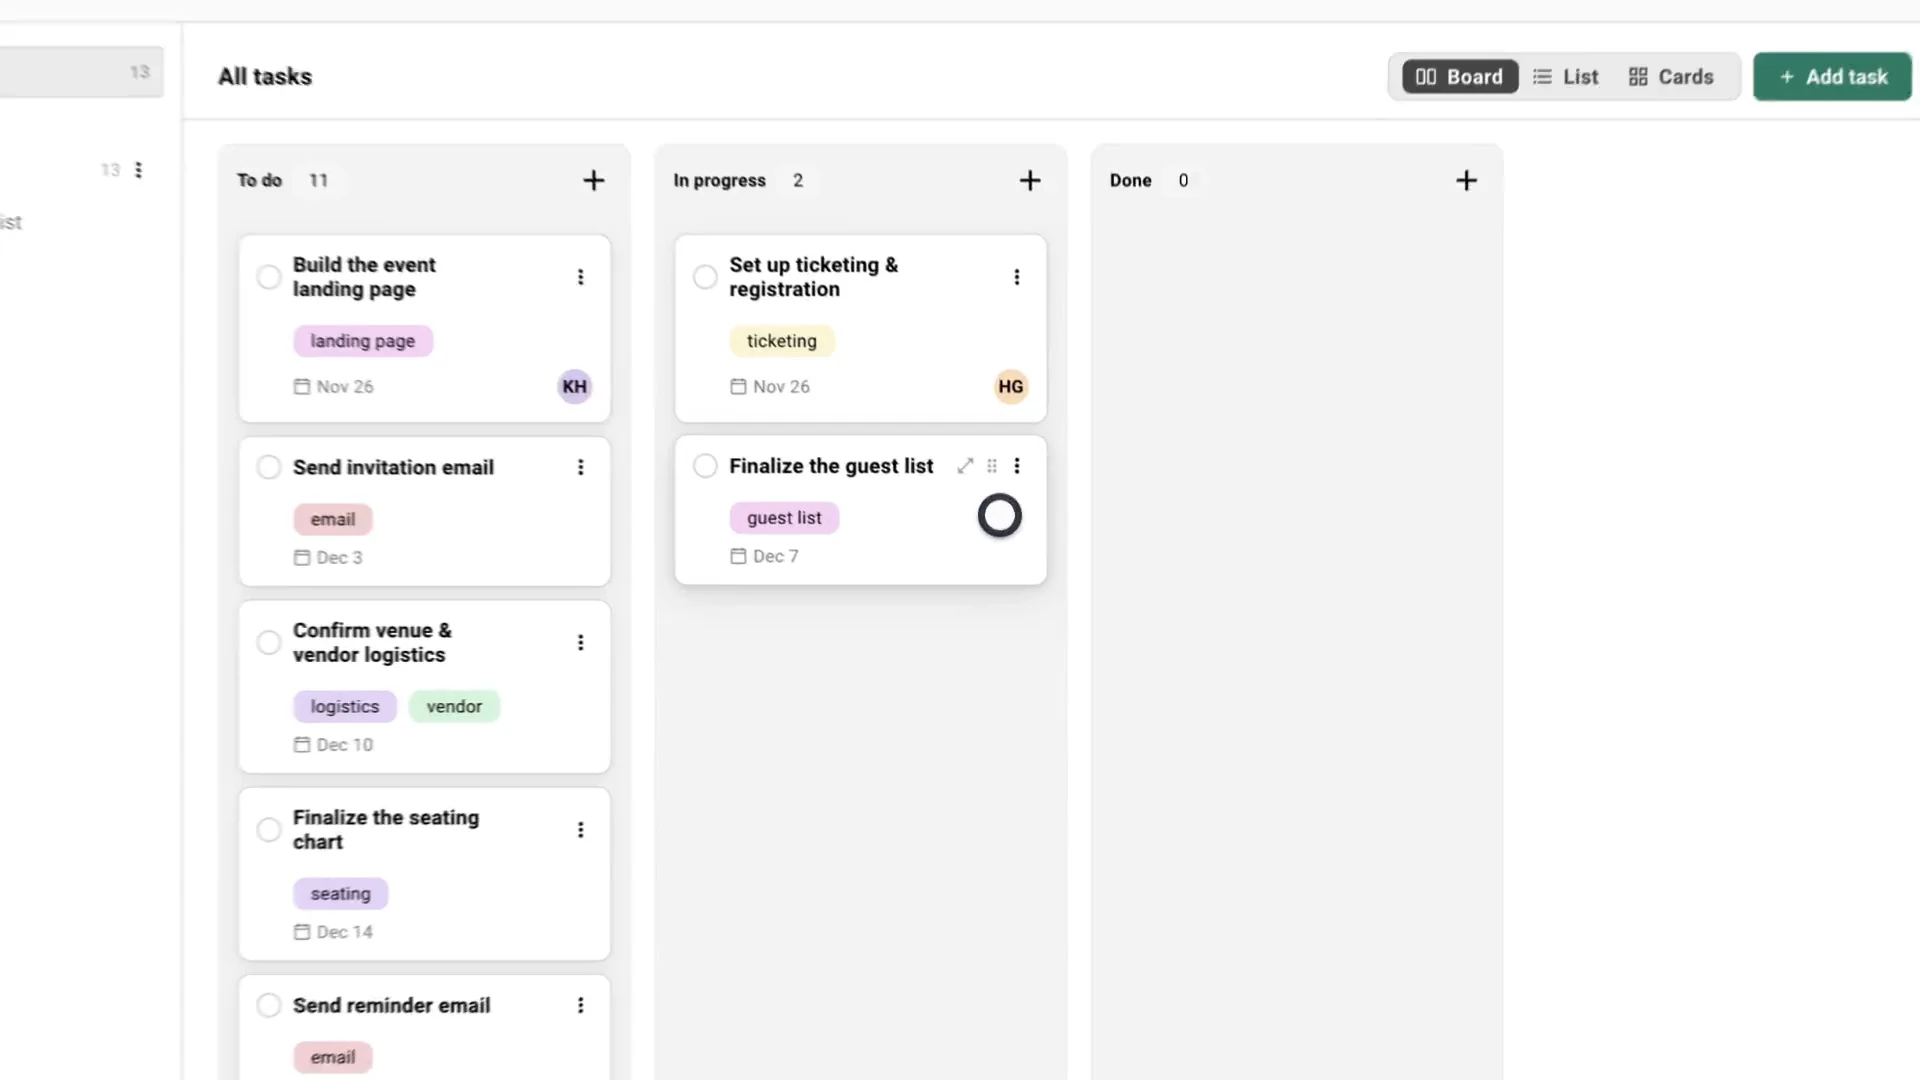](/videos/platform-tasks.mp4)
## Tasks in every event
[Section titled “Tasks in every event”](#tasks-in-every-event)
Every event has a Tasks tab. The tasks belong to the event, not to a spreadsheet view, so reorganizing how you look at them never deletes the work.
Each task carries its assignees, a due date, a priority, and tags. You decide how to see them.
### Board, List, and Cards
[Section titled “Board, List, and Cards”](#board-list-and-cards)
The same tasks, three ways to look at them. Drag a card from **To do** to **In progress** to **Done**, or work down a checklist. Gatsby remembers the view you picked.
Switching Views+
Use the **Board / List / Cards** toggle at the top right of the Tasks tab.
***
**Board**
Kanban columns by status. Drag a task between columns to move it, or use the **Move to** menu. Best for seeing where everything stands at a glance.
***
**List**
Compact rows sorted however you need. Best for working through tasks quickly and scanning dates.
***
**Cards**
A grid of larger cards with more detail visible per task. Best for a roomy overview.
Your choice of view is saved per person, so your teammate’s layout never changes yours.
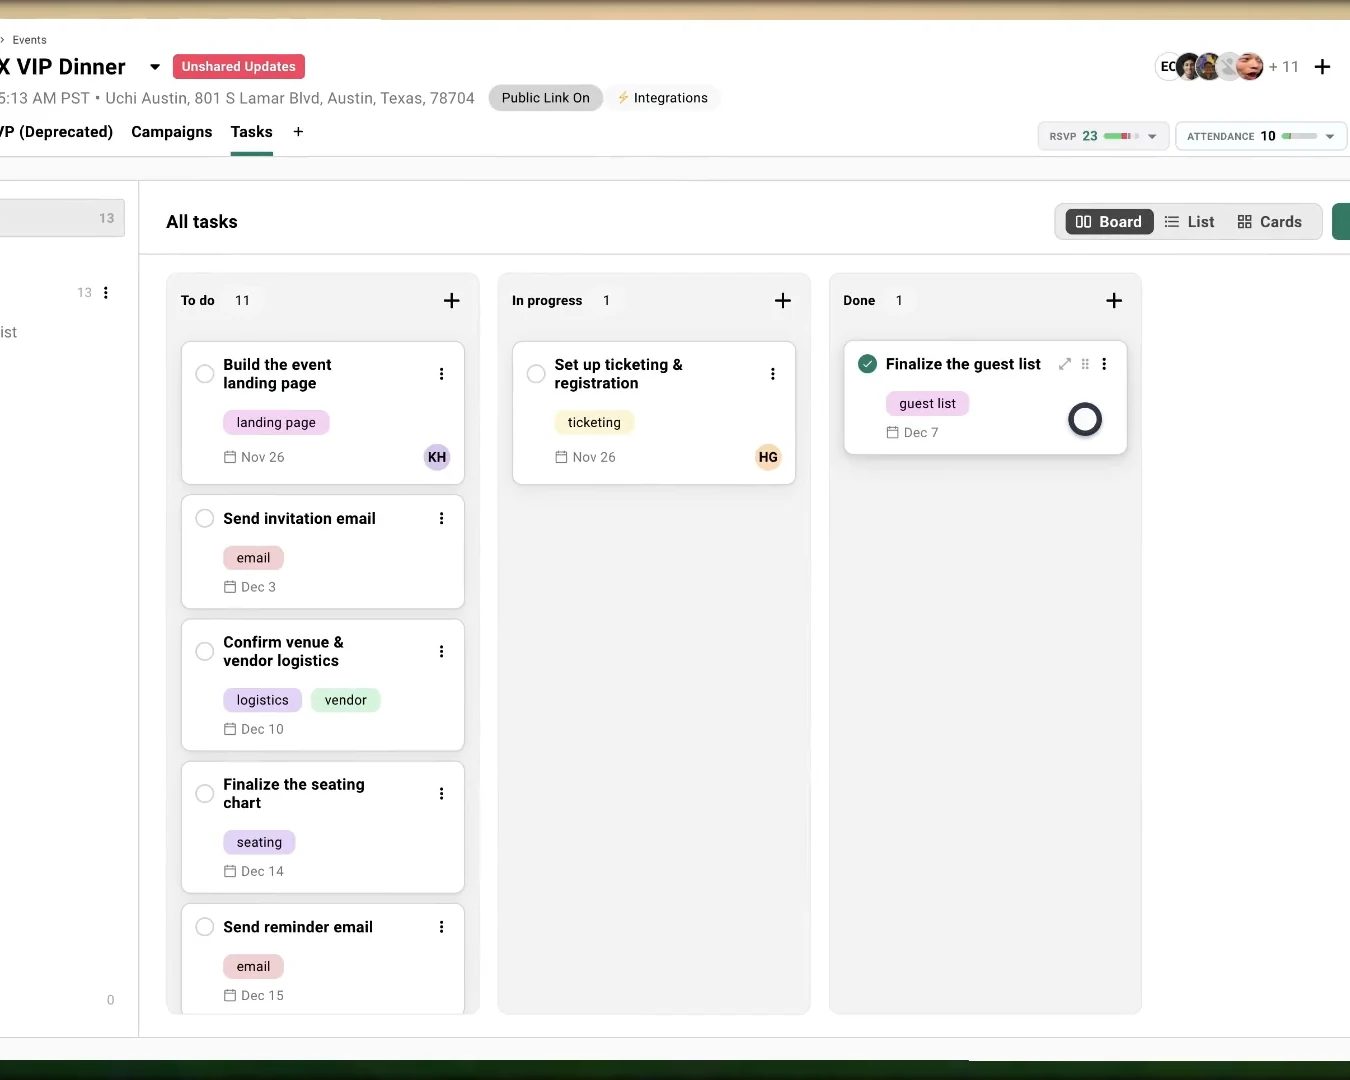
### Filter by tag
[Section titled “Filter by tag”](#filter-by-tag)
A busy event runs to dozens of tasks across several lists. **Filter** narrows the board to the tags you care about — everything tagged email, or just the day-of run sheet — so you can work one thread at a time.
Filtering is your view alone. It never changes what a teammate sees, and it never touches the tasks themselves.
Using the Filter+
Click **Filter** in the header, next to the view toggle, and pick the tags you want. The trigger shows a count once a filter is on.
The picker only lists tags that are actually on tasks in the list you’re looking at, so every option returns at least one task. **Untagged** appears when something in view has no tags at all.
Pick more than one tag and you get every task carrying **any** of them. Tags widen the result rather than narrowing it, so adding a second tag shows you more, not less.
A green **FILTERING** bar appears above the tasks with your tags as labels and a count — *FILTERING 3 of 13 tasks*. **CLEAR ALL** on that bar removes the filter. Column and group counts follow the filtered set, while the task-list rail on the left keeps showing true totals.
The filter is temporary. It survives switching between Board, List, and Cards, and it clears when you switch task lists, leave the Tasks tab, or refresh.

### What’s on a task
[Section titled “What’s on a task”](#whats-on-a-task)
Click any task to open its panel. Set who’s on it, the due date, and the priority. Add a description and subtasks. Mark it **Blocked** when it’s waiting on someone else. Every change is logged.
Task Fields+
| Field | What it does |
| --------- | ----------------------------------------------------------------------------------------------- |
| Assignees | Everyone responsible. Add one person or several. The task shows up in each assignee’s My Tasks. |
| Due date | When it’s due. Drives Overdue and Due Soon. You can’t set a date in the past. |
| Priority | High, Medium, or Low. Shows as a colored dot. |
| Status | To do, In progress, Done. Matches the board columns. |
| Task list | Which list the task belongs to. |
| Tags | Curated labels like landing page, email, or logistics. You can filter the view by them. |
| Blocked | Flags a task that can’t move until something else clears. |
| Subtasks | A checklist inside the task for the smaller steps. |
Assigning More Than One Person+
Work rarely belongs to exactly one person. A task can have as many assignees as you need — open the **Assignees** field and check off everyone who’s on it. The field reads **Unassigned** until you add someone.
One assignee shows as a photo and a name. Add more and they collapse into overlapping circles — three on a task card, then a grey **+2** standing in for the rest. Hover any circle to see whose it is; open the task to see everyone.
Everyone assigned gets the task in their own My Tasks, and the in-app notification when it’s assigned or comes due. Nobody is the single owner — a task assigned to you and a teammate sits on both of your lists.
Profile Photos on Assignees+
Assignees show their profile photo wherever they appear — task cards, the list and cards views, the task panel, and My Tasks. If someone hasn’t added a photo, they show their initials on a colored circle instead, and the color stays the same for that person everywhere.
Photos come from the profile picture on the person’s Gatsby account. Ask them to update it in their account settings if it’s wrong or missing.
The Activity Feed+
Every task keeps a running log: who created it, who assigned it, when the status changed, when it was completed. The panel saves as you type, so the feed is the record of what happened and when.
One thing to know: the log records a task being **assigned** to someone new. Taking an assignee back off doesn’t add its own entry.
Complete, Archive, or Delete+
Three different actions, and they mean different things.
***
**Complete**
Check the task off. It moves to Done and stays on the board.
***
**Archive**
Clear a finished task out of the way without losing it. Archived tasks live in the **Archived** view and can be brought back.
***
**Delete**
Remove a task for good. Use this for tasks created by mistake, not for finished work.
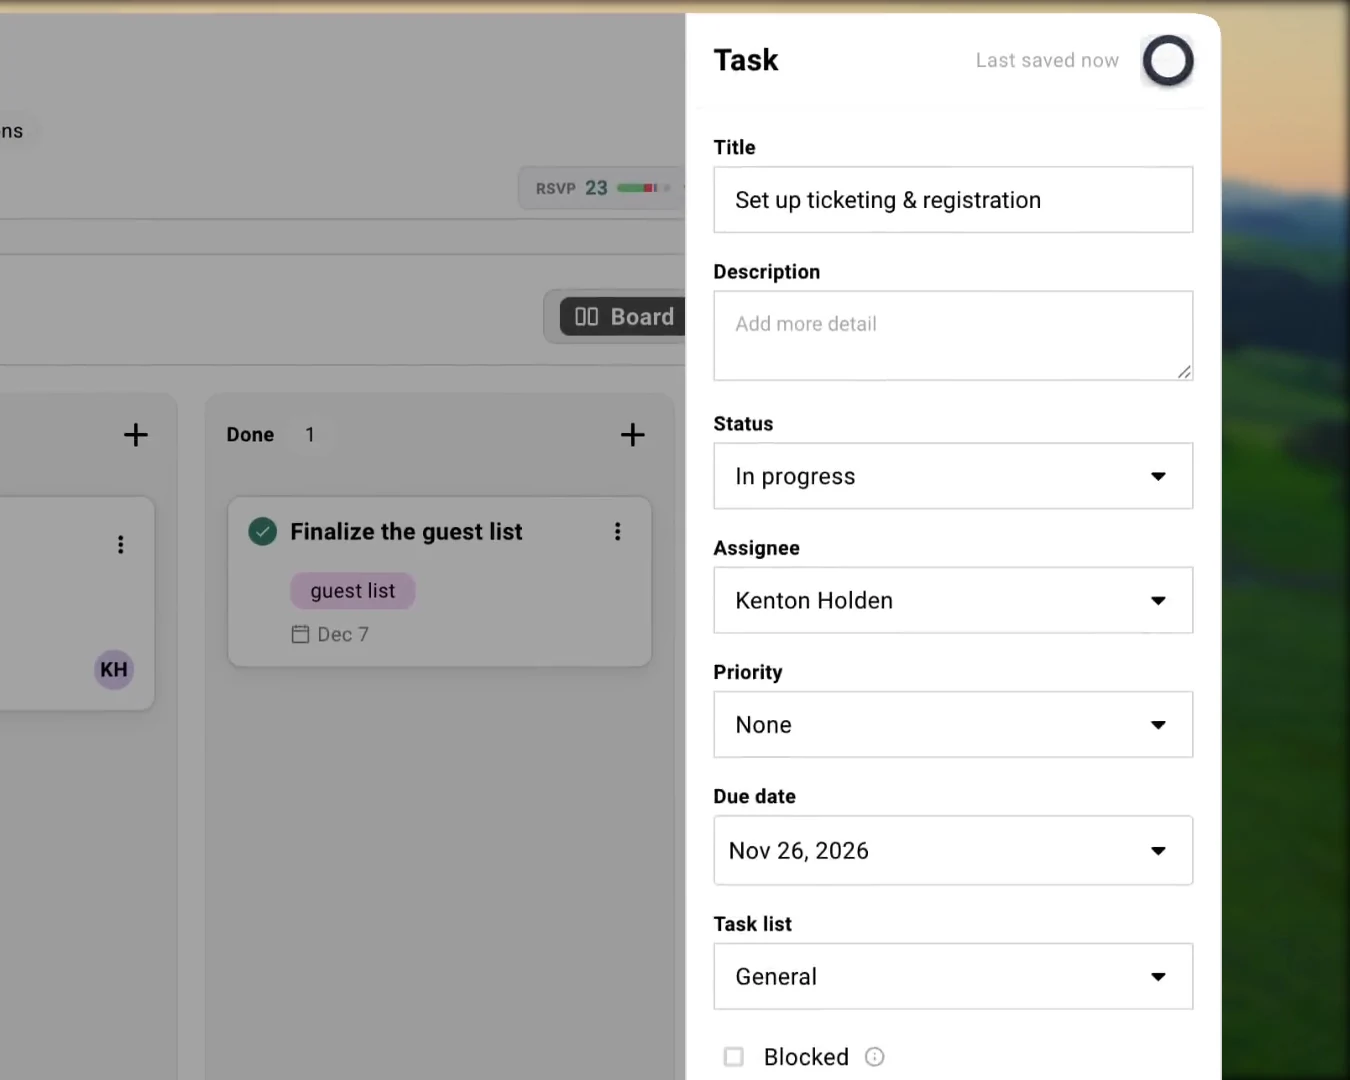
### Lists and starter tasks
[Section titled “Lists and starter tasks”](#lists-and-starter-tasks)
You can create as many task lists inside an event as you need. Keep the catering punch list separate from the day-of run sheet, or split the work by stage like Pre-event and Follow-up. An **All tasks** view pulls every list together when you want the full picture.
You don’t have to start from a blank board. When you create an event, Gatsby offers a starter checklist of the tasks most events need, so the standard work is in place before you add anything of your own.
Use a separate task list per workstream once an event gets big: catering on one, comms on another. Each team works its own list while **All tasks** keeps the whole event in view.
Starting From the Checklist+
When you create an event, a prompt offers Gatsby’s starter tasks: build the landing page, send the invitation, confirm the venue, print badges, run check-in, send the follow-up, and the rest of the usual arc.
Add them and adjust, or skip and build your own. If you skip, you can add the starter checklist later from an empty board.
Organizing Task Lists+
1. Create a list and name it for a stage of your event.
2. Add tasks to it, or move existing tasks between lists.
3. Reorder lists to match your timeline.
If you delete a list, Gatsby asks what to do with its tasks before anything goes away.
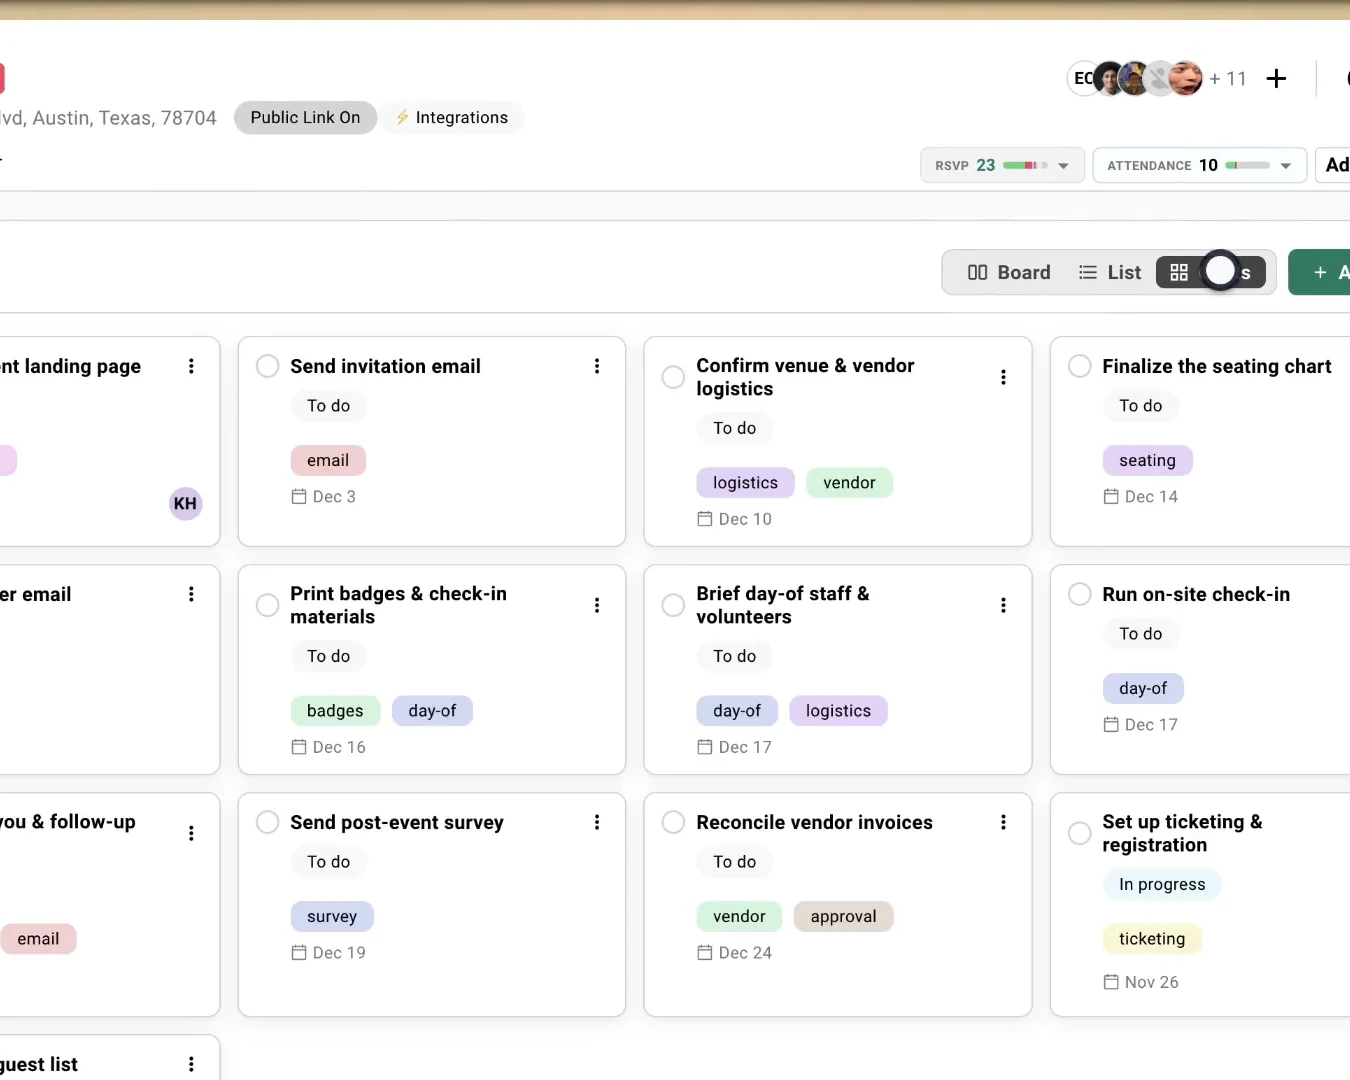
## Stay on top of every event
[Section titled “Stay on top of every event”](#stay-on-top-of-every-event)
You’re rarely running one event. My Tasks rolls up everything assigned to you across all of them, so the dinner you forgot about surfaces next to the one you’re heads-down on.
### My Tasks
[Section titled “My Tasks”](#my-tasks)
My Tasks sits at the top of your Events page. It groups your work into **Overdue** and **Due Soon** so the thing that needs you today is the thing you see first.
Filtering My Tasks+
Switch between **Assigned to me**, **Assigned to others**, and **All**.
**Assigned to me** is your own to-do list across every event. **Assigned to others** shows what you’ve handed off, so you can check on it without opening each event. Dismiss the widget anytime; it’s per person and won’t change what your teammates see.
A task you share with someone counts as yours. If you’re one of several assignees it shows under **Assigned to me**, never under **Assigned to others** — so nothing you’re on can hide in the other tab. **Assigned to others** is only the work assigned to someone else that you’re not on.
Notifications+
Gatsby notifies you in the app when a task is assigned to you and when one of yours is due or overdue.
You can turn task notifications off. Email and mobile push reminders aren’t part of this release yet.
Collaborators and Permissions+
Admins and Team Members create, edit, and assign tasks on the events they can access.
External Collaborators see only the tasks assigned to them and can update their status. They don’t get the My Tasks view. If you want collaborators to edit task details, an admin can turn that on for your organization.
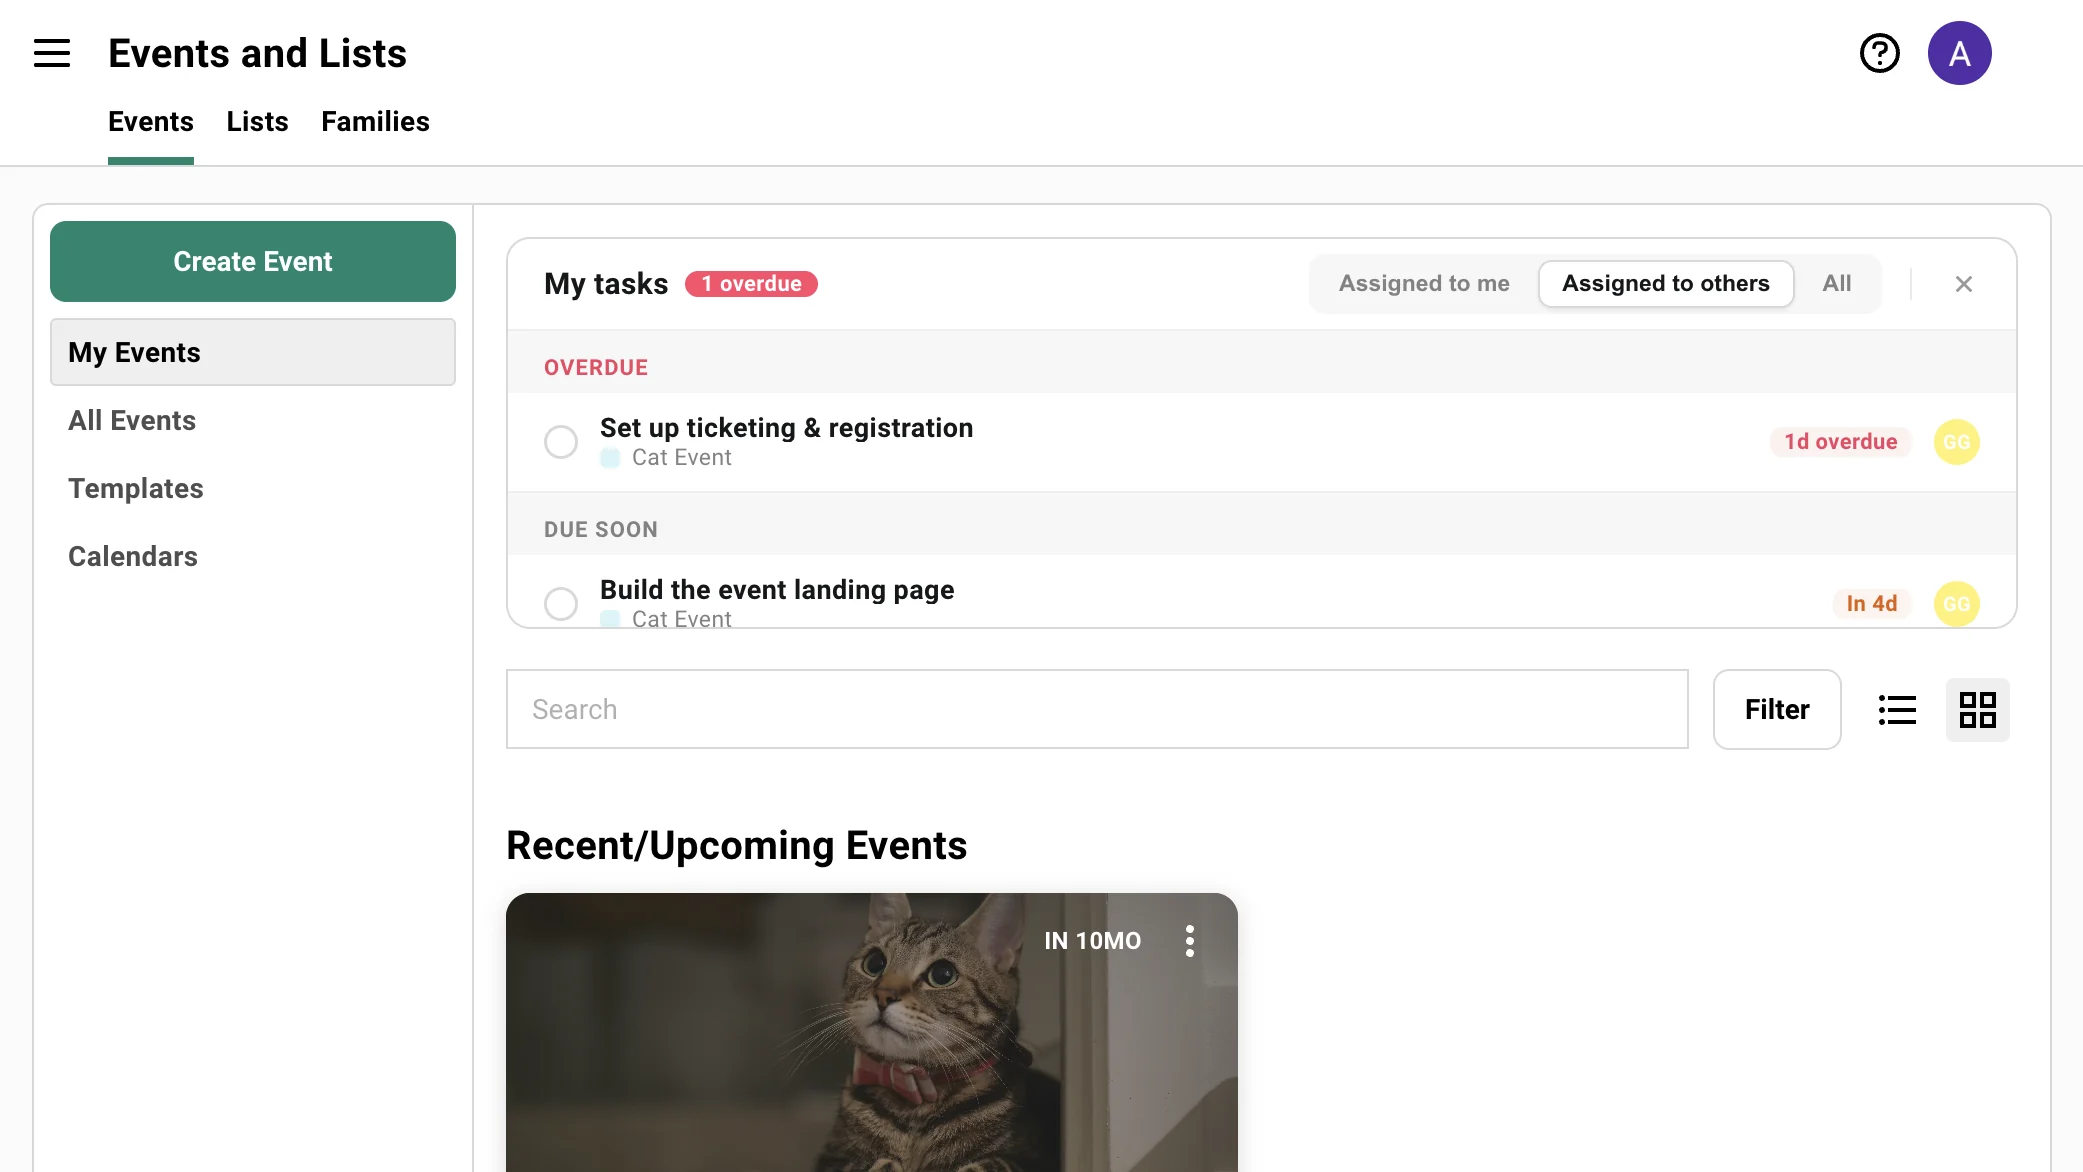
## Common Questions
[Section titled “Common Questions”](#common-questions)
I don't see Tasks on my events. How do I turn it on?+
The Tasks tab is hidden by default. Open any event, click the **+** at the end of the tab bar, and turn on **Tasks**. The tab shows for that event, and you can hide it again the same way.
What happened to my old tasks?+
Existing tasks were migrated to the new Tasks automatically. The new Tasks replaces the old spreadsheet-style tab.
If I delete a task list, do I lose the tasks in it?+
Not without telling you. When you delete a list, Gatsby asks what to do with its tasks first. This is the fix for the old behavior where removing a view could take tasks with it.
Do I get email or text reminders for due tasks?+
Today, reminders are in-app: you’re notified when a task is assigned to you and when one is due or overdue. Email digests and mobile push are on the roadmap.
Can I set a due date in the past?+
No. Due dates have to be today or later, so Overdue always means a date you actually set has passed.
Can two people own the same task?+
Yes. Add as many assignees as a task needs in the **Assignees** field. It lands in every assignee’s My Tasks, and each of them gets the in-app notification when it’s assigned or comes due.
Can I filter the board by tag?+
Yes. Click **Filter** in the header of the Tasks tab and pick your tags. It works on Board, List, and Cards. Picking several tags shows every task that has any one of them.
The filter is temporary — it clears when you switch task lists, leave the Tasks tab, or refresh.
Why doesn't my teammate have a profile photo on their tasks?+
They haven’t added one to their Gatsby account. Assignees without a photo show their initials on a colored circle instead. Ask them to add a profile picture in their account settings and it will appear everywhere in Tasks.
Can external collaborators see all our tasks?+
No. External Collaborators see only the tasks assigned to them and can update status. Full task editing for collaborators is off unless an admin enables it for your organization.
Who can create and assign tasks?+
Admins and Team Members, on any event they can access. A task can have several assignees, and it shows up in the My Tasks view of every one of them.
# Integrations
> Connect Gatsby to your CRM, automation tools, and custom workflows. Native integrations with Affinity, Salesforce, Altvia, and Zoom. Webhooks, API, and MCP for everything else.
The problem
## Every event generates data your CRM never gets.
RSVPs, attendance, dietary preferences, conversation notes. Most of it stays in your event tool until someone exports a CSV and manually updates the CRM. By then, the follow-up window has closed.
What Gatsby does differently
### Native CRM integrations
RSVP status, attendance, and guest data sync to Affinity, Salesforce, and Altvia as it happens. Check in a guest at the door. Your CRM reflects it before they sit down.
### API, Webhooks, and MCP
For tools without a native integration, webhooks push event data through Zapier, Make, or n8n. The REST API gives your developers read and write access to the contacts, events, and guest list data Gatsby captures. Gatsby also has a first-party [MCP server](/platform/integrations/mcp/) for AI-powered workflows on top of the same data.
Integrations
## Your CRM, connected
RSVPs, attendance, and contact updates sync as they happen.
### [Affinity](/platform/integrations/affinity/)
[Build guest lists from Affinity contacts and push RSVP status, attendance, and event history back automatically.](/platform/integrations/affinity/)
### [Salesforce](/platform/integrations/salesforce/)
[Map RSVPs to campaigns. Push attendance, first-party data updates, and custom fields in real time.](/platform/integrations/salesforce/)
### [Altvia](/platform/integrations/altvia/)
[Built on Salesforce for fund managers. Sync LP event participation to Functions automatically.](/platform/integrations/altvia/)
### [Attio](/platform/integrations/attio/)
[Not a native integration. Event activity flows through Google account sync, and webhooks push structured attendance data through Zapier or Make for reporting.](/platform/integrations/attio/)
### [Zoom](/platform/integrations/zoom/)
[Create or connect Zoom meetings from Gatsby. Links appear in calendar invites automatically.](/platform/integrations/zoom/)
### [Webhooks & Zapier](/platform/integrations/webhooks-zapier/)
[Push event data to HubSpot, Attio, Airtable, Slack, or any app through Zapier, Make, or n8n. No code required.](/platform/integrations/webhooks-zapier/)
CRM integrations and API access are available on select plans. We’ll walk through what’s included for your team during a demo.
## Beyond CRM Sync
[Section titled “Beyond CRM Sync”](#beyond-crm-sync)
Native integrations cover the CRMs most of our customers use. For everything else, the API and webhooks put event data wherever your team needs it.
## Your event data, on demand
[Section titled “Your event data, on demand”](#your-event-data-on-demand)
Gatsby exposes a [REST API](https://www.buildwithgatsby.com) — limited release, enabled per org — with read and write access to contacts, events, guest lists, custom fields, and webhook subscriptions. Pull guest history into your CRM, feed a BI tool, or build custom workflows. See the [Gatsby API page](/platform/integrations/api/) for the current setup path and endpoint coverage.
What the API exposes+
* Contacts, with search and event-history lookups
* Events, guest lists, and RSVP status
* Attendance records and check-in data
* Custom field values stored in contact profiles
* Webhook subscriptions for real-time event triggers
Common use cases+
* **Internal dashboards** that aggregate attendance across your full event calendar
* **Custom registration workflows** for complex event series with conditional routing
* **Data warehouse pipelines** feeding BI and reporting tools
* **CRM enrichment** for platforms without a native Gatsby integration
### AI and MCP
[Section titled “AI and MCP”](#ai-and-mcp)
The same structured data that feeds your CRM feeds AI workflows. Gatsby has a first-party [MCP server](/platform/integrations/mcp/) — limited release, enabled per org — that lets any MCP-compatible AI tool query your contacts, events, and RSVPs in natural language. Building a custom MCP server or agent directly on the Gatsby API is also an option for teams with more specific requirements.
What teams are building+
* **The Gatsby MCP server**, connected to Claude, ChatGPT, Cursor, or another MCP-compatible client, for natural-language questions over event history and guest context
* **Custom MCP servers or agents** built on the Gatsby API for more specialized workflows
* **Custom applications** combining Gatsby data with internal deal and relationship systems
* **Automated guest list curation** based on CRM signals and past attendance
* **Post-event reporting** generated from structured attendance and survey data
## Not sure which integrations you need?
We’ll map your current stack and show you how data flows.
Book a demoGet support
# Affinity Integration
> Sync RSVP and attendance data to Affinity CRM automatically. Build guest lists from Affinity contacts and push event participation back without manual data entry.
Cross-Event History
One record, every event.
Event names accumulate on each contact's Affinity record automatically as they RSVP and check in.
Per-Event Rosters
Status and attendance sync.
Connect an event to its own Affinity list. Sync RSVP status and attendance for a clean per-event record.
Build from Affinity
Use your enriched CRM data.
Build guest lists from relationship history, then run the event in Gatsby.
## Two Sync Modes
[Section titled “Two Sync Modes”](#two-sync-modes)
The Affinity integration offers two independent sync modes. They serve different purposes and write different data to Affinity.
**Global Sync** maintains one canonical Affinity list for your entire organization. Every time someone RSVPs or checks in to any event, the event name and date get added to their contact record. Over time, each person accumulates a history of every event they engaged with.
**Event List Sync** connects a single Gatsby event to its own Affinity list. Instead of event names, it writes status values like “Accepted” or “Attended”. You trigger the initial sync manually, then changes sync automatically.
You can use one mode, the other, or both. With Global Sync off, an event only syncs once it’s attached to an Affinity list through Event List Sync.
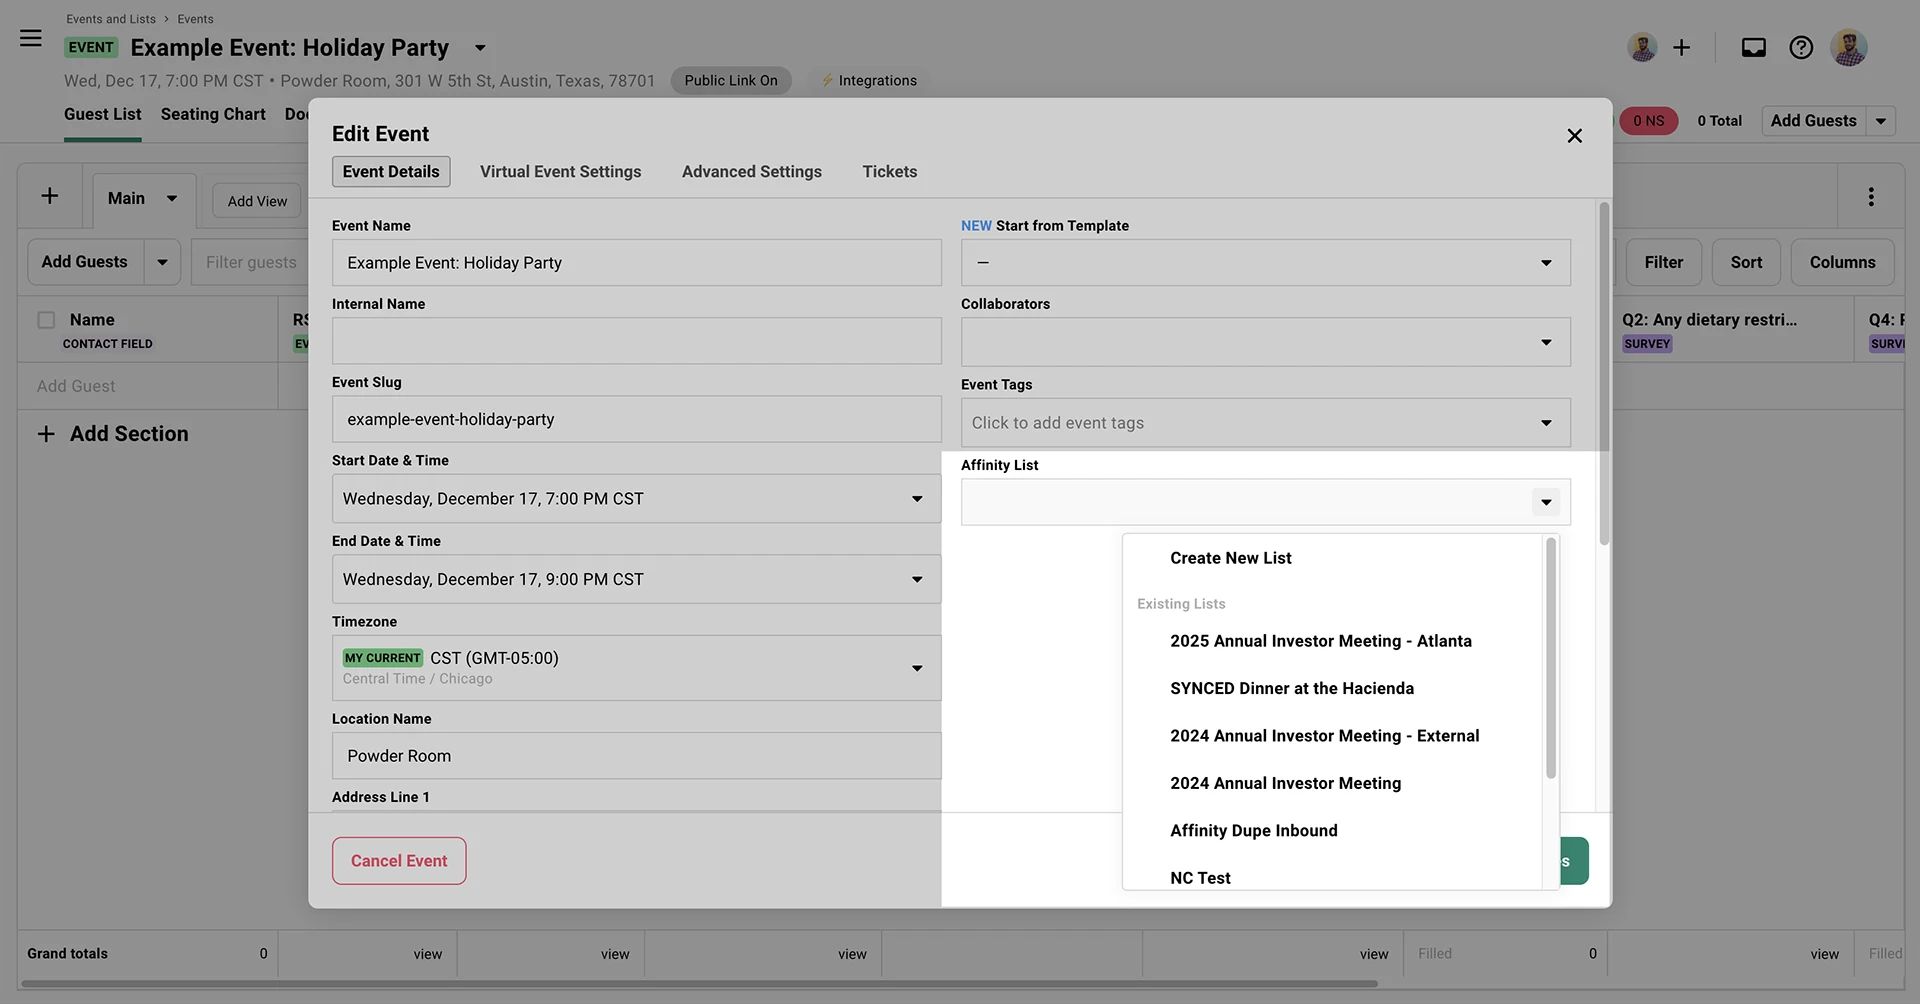
## Global Sync
[Section titled “Global Sync”](#global-sync)
One canonical list tracks every contact’s event history across your organization. RSVP and check-in data sync automatically.
### What Gets Written
[Section titled “What Gets Written”](#what-gets-written)
Three fields update on each contact’s record in your canonical Affinity list:
* **Guest List** records every event where a contact appeared on the guest list
* **RSVP** records events where a contact Accepted an invite
* **Checkin** records events where a contact was checked in
Each field stores event names with dates as dropdown values (e.g., “Annual Meeting Prep Dinner 2024-05-24”). Multiple values accumulate across events. Run five events, and an active guest’s fields show all five.
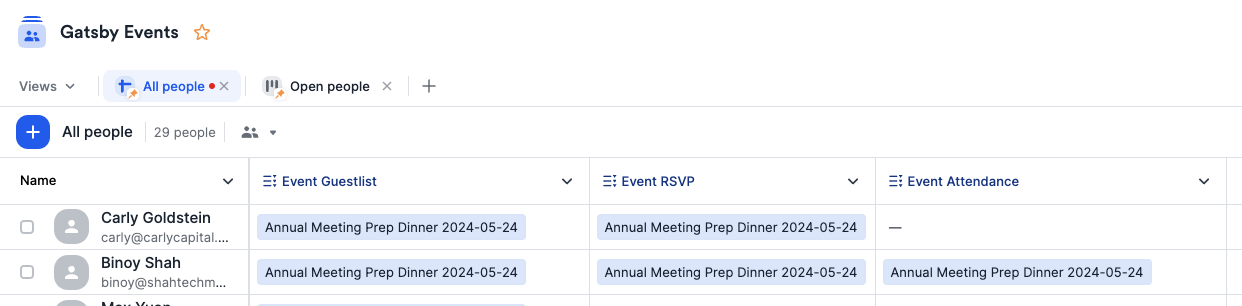
### What Doesn’t Sync
[Section titled “What Doesn’t Sync”](#what-doesnt-sync)
The integration doesn’t pull contact enrichment down from Affinity. Company, title, dietary restrictions, custom fields: none of it transfers automatically. Gatsby captures event data and ships it back. Affinity stays your source of truth for contact details.
For enriched guest lists, export contacts from Affinity as CSV (with the fields you need for your event) and import them into your Gatsby guest list. Email addresses match existing contacts automatically. See the [Import/Export documentation](/platform/contacts/import-export/) for CSV workflows.
## Event List Sync
[Section titled “Event List Sync”](#event-list-sync)
Connect each event to its own Affinity list. Sync RSVP status and attendance for a per-event roster.
### Linking an Event
[Section titled “Linking an Event”](#linking-an-event)
Each Gatsby event can connect to its own Affinity list. The list must already exist in Affinity.
Steps to link an event+
1. Open your event in Gatsby.
2. Go to **Event Details** (the settings panel).
3. Select an Affinity list from the dropdown.
4. Click **Save**.
5. Click **Sync** to trigger the initial full sync. After that, changes sync automatically.

### What Gets Written
[Section titled “What Gets Written”](#what-gets-written-1)
Event List Sync writes status values to each person’s record on the linked Affinity list.
**RSVP Status:** Accepted, Declined, Maybe, Pending, Waitlisted
**Attendance:** Attended, No Show
Unlike Global Sync, there is one status value per person rather than a list of event names. Field names default to “RSVP Status” and “Attendance” but are customizable in your organization’s Affinity settings.
### Inbound Changes from Affinity
[Section titled “Inbound Changes from Affinity”](#inbound-changes-from-affinity)
Allowing Affinity to create guests in Gatsby+
You can optionally enable inbound sync by toggling **Enable Affinity Webhooks** in **Team Settings » Linked Services » Affinity**. When enabled, adding someone to the linked Affinity list creates them in the Gatsby event automatically.
Field value changes in Affinity are not synced back to Gatsby. Only list entry additions and removals trigger an inbound action.
Removing a guest from Affinity+
By default, removing someone from a linked Affinity list leaves them on the Gatsby guest list. Gatsby will not delete a guest based on a change made in Affinity unless you ask it to.
To change that, turn on **Delete Removed Affinity Guests from Gatsby** in **Team Settings » Linked Services » Affinity**. With it on, removing a person from a linked Affinity list also removes them from the connected Gatsby event.
A few things worth knowing before you enable it:
* It requires **Enable Affinity Webhooks**. Without webhooks, Gatsby never hears about the removal.
* It applies to Event List Sync only — lists linked to a specific event. Removing someone from your Global Sync list never affects a guest list.
* Removals cascade to child events, the same as removing a guest by hand in Gatsby.
* Nothing is permanently lost. Removed guests can be restored from **Add Guests » Restore Guests** on the event’s guest list.
## Connecting the Integration
[Section titled “Connecting the Integration”](#connecting-the-integration)
Setup covers the shared API connection and mode-specific configuration. Complete the initial setup first, then configure whichever sync modes you need.
### Initial Setup
[Section titled “Initial Setup”](#initial-setup)
1. Go to **Team Settings » Linked Services » Affinity** in Gatsby.
2. Get your Affinity API key from your Affinity account settings.
3. Paste the API key in Gatsby and click **Connect**.
The Affinity integration requires an additional subscription. Contact us on Slack or email for pricing details.
### Setting Up Global Sync
[Section titled “Setting Up Global Sync”](#setting-up-global-sync)
1. Create a People-type list in Affinity (e.g., “Gatsby Events”). Build from Scratch.
2. On that list, create three Dropdown fields. Each must be set to **Multiple Value**:
* One for guest list tracking
* One for RSVP tracking
* One for check-in tracking
3. Enable **Global List Sync**.
4. In Gatsby under **Team Settings » Linked Services » Affinity**, select your canonical list from the dropdown.
5. Map each Gatsby field to the corresponding Affinity field: **Guest List**, **RSVP**, and **Checkin**.
Event data syncs automatically from this point. Guests who RSVP or check in update in Affinity within seconds.
If you rename any of these fields in Affinity, you must update the field mapping in Gatsby under **Team Settings » Linked Services » Affinity**. Gatsby won’t detect the new field names automatically.
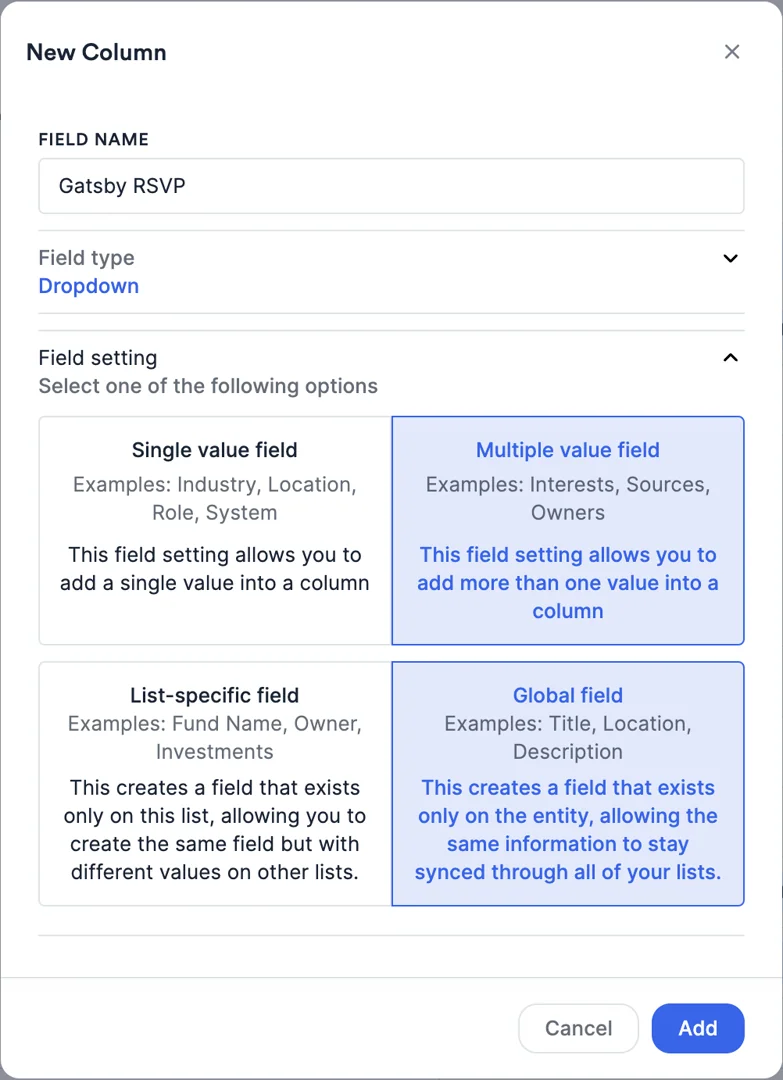
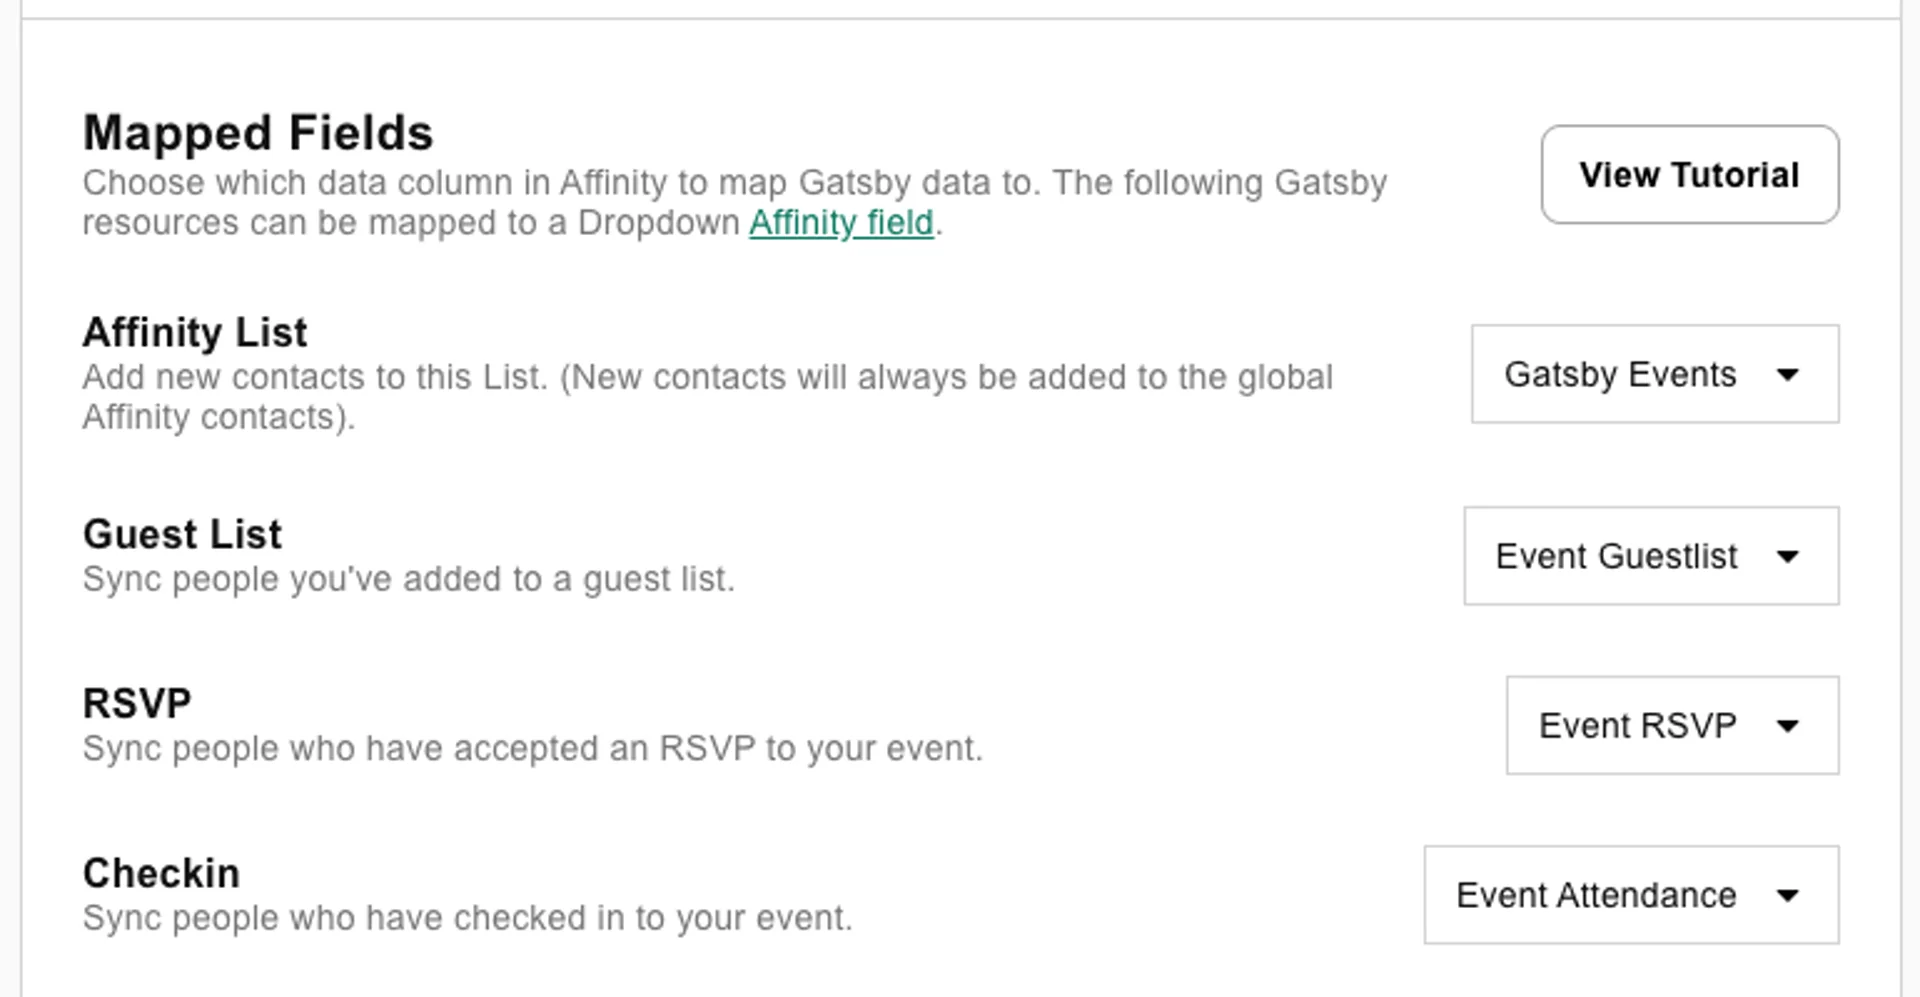
### Setting Up Event List Sync
[Section titled “Setting Up Event List Sync”](#setting-up-event-list-sync)
Link an event+
1. Create a new list in Affinity for the event (People type).
2. Open your event in Gatsby and go to **Event Details**.
3. Select the Affinity list from the dropdown.
4. Click **Save**, then click **Sync** (from the Integrations menu inside of the event) to trigger the initial sync.
After the initial sync, changes sync automatically.
Custom field names (optional)+
By default, Event List Sync creates fields named “RSVP Status” and “Attendance” on the linked list. You can customize these names in **Team Settings » Linked Services » Affinity**. The integration uses your custom names when creating or looking up fields.
If you later rename these fields in Affinity, update the names in Gatsby to match. Gatsby won’t detect the change automatically.
Enable inbound sync (optional)+
Toggle **Enable Affinity Webhooks** to let Affinity list additions create guests in your Gatsby event.
Removals stay one-way by default: taking someone off the Affinity list leaves them on the Gatsby guest list. If you want removals to carry over too, also turn on **Delete Removed Affinity Guests from Gatsby**.
## Direction by Object
[Section titled “Direction by Object”](#direction-by-object)
The integration is not a general bidirectional sync. Direction depends on the object.
| Object | Direction |
| ---------------------------------------------- | ------------------------------------------------------------------------------------------------------------- |
| Guest list history (Global Sync) | Gatsby → Affinity only |
| Event List Sync list membership | Gatsby → Affinity always; Affinity → Gatsby for additions only if **Enable Affinity Webhooks** is on |
| Event List Sync removals | Gatsby → Affinity always; Affinity → Gatsby only if **Delete Removed Affinity Guests from Gatsby** is also on |
| RSVP status | Gatsby → Affinity only |
| Attendance | Gatsby → Affinity only |
| Contact fields (company, title, custom fields) | Not synced in either direction; use CSV export/import |
## Common Questions
[Section titled “Common Questions”](#common-questions)
Does this cost extra?+
Yes. The Affinity integration is an add-on to standard Gatsby pricing. Contact us on Slack or email for current pricing.
Which sync mode should I use?+
Use **Global Sync** if you want a running history of every event each contact has engaged with across your organization. Use **Event List Sync** if you want per-event rosters with RSVP status and attendance. You can use both on separate lists.
Why isn't anything from my event syncing to Affinity?+
Check which sync mode is on. If **Global Sync** is turned off, nothing syncs from an event until you attach that event to an Affinity list. Open the event, go to **Event Details**, select the Affinity list, click **Save**, then click **Sync** to run the initial sync. See [Setting Up Event List Sync](#setting-up-event-list-sync) for the full steps.
Can I use both modes?+
Yes, but use separate Affinity lists and separate fields for each mode. They write different data types — Global Sync writes event name strings (e.g., “Annual Meeting 2026-03-15”) and Event List Sync writes status strings (e.g., “Accepted”). If both modes write to the same fields, the values conflict and corrupt each other’s data.
Does data sync bidirectionally?+
Partly. Person creation can sync from Affinity to Gatsby if you enable inbound webhooks on a linked Event List Sync list. Guest removals can sync inbound too, but only if you turn on **Delete Removed Affinity Guests from Gatsby** — it is off by default. RSVP and attendance data flows from Gatsby to Affinity only.
A guest disappeared after we cleaned up an Affinity list. Can we get them back?+
Yes. Guest removals are reversible: open the event’s guest list and choose **Add Guests » Restore Guests**. If you did not intend removals to sync at all, turn off **Delete Removed Affinity Guests from Gatsby** in **Team Settings » Linked Services » Affinity**.
When does data sync?+
Global Sync is automatic. Every RSVP and check-in triggers a sync immediately. Event List Sync requires a manual initial trigger (click “Sync”), then changes sync automatically after that.
Are there rate limits?+
Affinity enforces a rate limit of 900 requests per 70 seconds. The integration handles this automatically, but large initial syncs (e.g., a 5,000-person event list) may take time to complete.
What are the requirements?+
* API key from your Affinity account
* Dropdown fields (Multiple Value) on People-type lists
* Gatsby add-on subscription
# Altvia Integration
> Sync investor events and LP engagement with Altvia. Track AGMs, fundraising events, and investor relationships through Altvia Functions with automatic RSVP and attendance sync.
Functions, Not Campaigns
Mapped to Altvia's data model.
Events sync as Functions. LPs sync as Function Attendees. Same fields your IR team already uses.
Real-Time Attendance
Check in an LP. Altvia updates.
RSVP and check-in data flows to Function Attendees as it happens. No exports, no batch jobs.
First-Party Contact Updates
Registration cleans your records.
When an LP updates their title during registration, that change pushes back to their Contact in Altvia.
## How It Works
[Section titled “How It Works”](#how-it-works)
After every AGM or investor dinner, someone on your team manually updates Altvia with who showed up. Maybe that week, maybe three weeks later. When the GP asks about LP engagement at the next IC meeting, the data has gaps.
Gatsby sits between your event and your CRM. It captures RSVPs when LPs respond, records attendance at the door, and handles the messy parts (walk-ins, plus-ones, name corrections). Clean records push back to Altvia automatically.
The integration maps directly to Altvia’s data model. Gatsby events become Functions. Guests become Function Attendees. RSVP and attendance status land on the fields your IR team already reports from.
Altvia is a limited-release integration, built on the same Salesforce connection covered in the [Salesforce integration](/platform/integrations/salesforce/) page. Gatsby has to enable Salesforce/Altvia access for your org before these controls appear in Team Settings.
[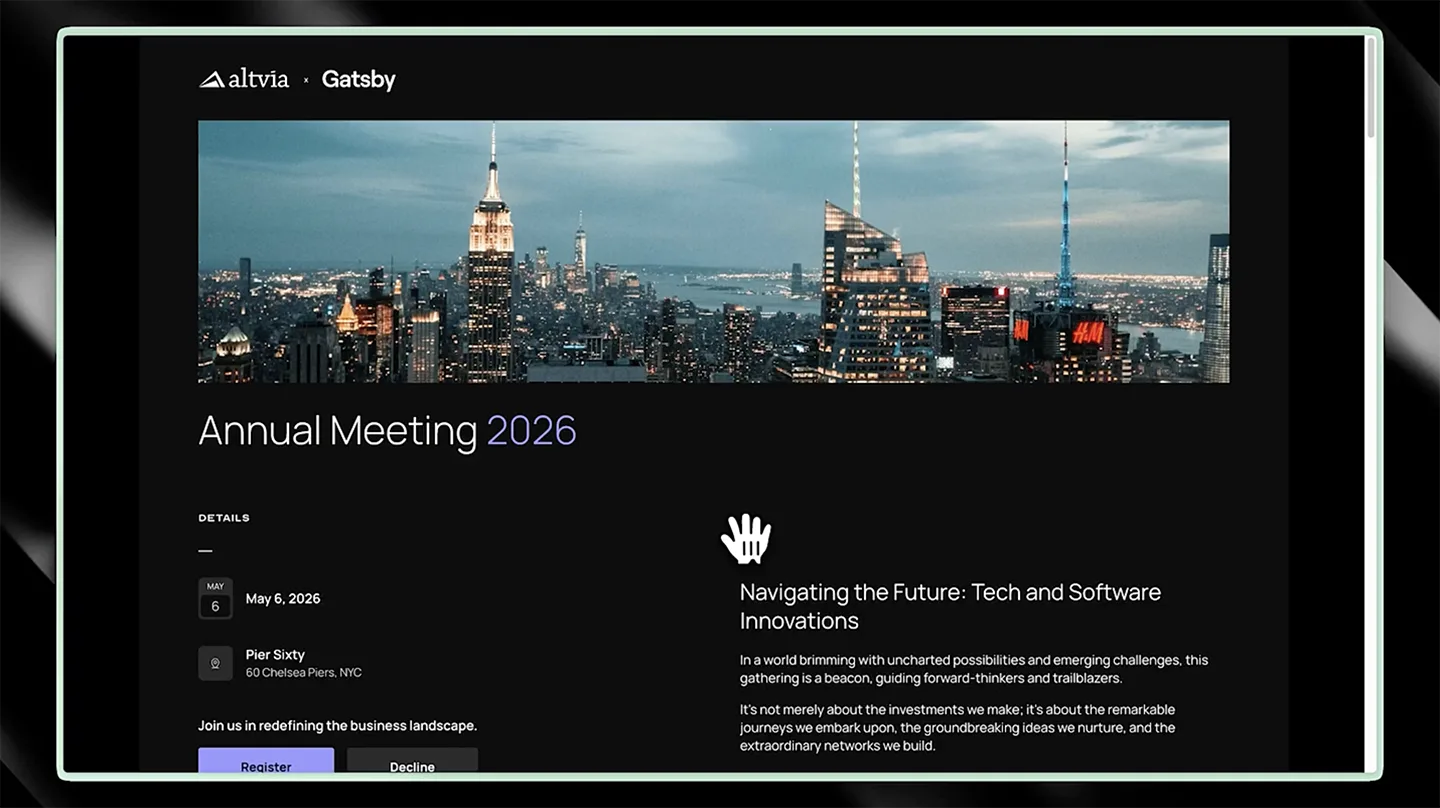](/videos/gatsby-integrations-altiva.mp4)
## What Syncs
[Section titled “What Syncs”](#what-syncs)
Altvia runs on Salesforce, so the sync mechanics match the [Salesforce integration](/platform/integrations/salesforce/). The difference is terminology and object names. Functions instead of Campaigns. Function Attendees instead of Campaign Members.
| Altvia label | Underlying Salesforce object | Altvia-specific? |
| ---------------------------------------------- | -------------------------------------- | ---------------------------------------------------- |
| Function | Custom object (`Function__c`) | Yes — configured in Custom Object Mapping below |
| Function Attendee | Custom object (`Function_Attendee__c`) | Yes — configured in Custom Object Mapping below |
| Contact | Standard `Contact` object | No — same object Salesforce uses generally |
| RSVP Status / Attendance Status | Picklist fields on the attendee object | Shared mechanism with Salesforce; field names differ |
| Sync direction modes (Sync / Enrich / One-Way) | Field-level sync configuration | No — same options documented on the Salesforce page |
RSVP Status+
When an LP responds to your invitation, their status updates on their Function Attendee record in Altvia.
**Values:** None, Invited, Declined, Accepted, Waitlist, Maybe
Attendance Status+
Check-in data syncs to Function Attendees. Ground truth of who walked through the door.
**Values:** N/A, Yes, No Show
Function Attendee Management+
Adding or removing guests in Gatsby updates Function Attendee lists in Altvia. The reverse works too. Add someone to a Function in Altvia, and they appear on your Gatsby guest list.
Removals sync inbound by default, matching the [Salesforce integration](/platform/integrations/salesforce/#removals-from-salesforce) this connection runs on: removing a Function Attendee in Altvia also removes that guest from the linked Gatsby event. Turn off **Remove Guests When Removed From Salesforce Campaign** in **Team Settings > Linked Services > Salesforce** if you don’t want removals to carry over. Either way, a removed guest can be brought back from **Add Guests (dropdown) » Restore Guests** on the event’s guest list.
The integration matches on email address to prevent duplicate contacts.
Contact Field Updates+
When investors update their company or title during registration, those changes can sync back to their Salesforce Contact record in Altvia. First-party data from the LP, not a third-party enrichment database.
You control the sync direction per field. Options are Sync (bidirectional), Enrich (fill blanks only), and One-Way (Gatsby to Altvia). See the [Salesforce integration](/platform/integrations/salesforce/#sync-directions) for details on each mode.
## Linking Events to Functions
[Section titled “Linking Events to Functions”](#linking-events-to-functions)
Each Gatsby event connects to one Altvia Function. Once linked, guests become Function Attendees and all RSVP and attendance data syncs to their record.
Connecting to an Existing Function+
1. Open your event in Gatsby.
2. Go to **Event Details**.
3. Select an Altvia Function from the dropdown.
4. Save.
Creating a New Function from Gatsby+
1. In Event Details, click **Create New** instead of selecting existing.
2. Name the Function.
3. Optionally select a parent campaign.
4. Save. The Function creates in Altvia automatically.
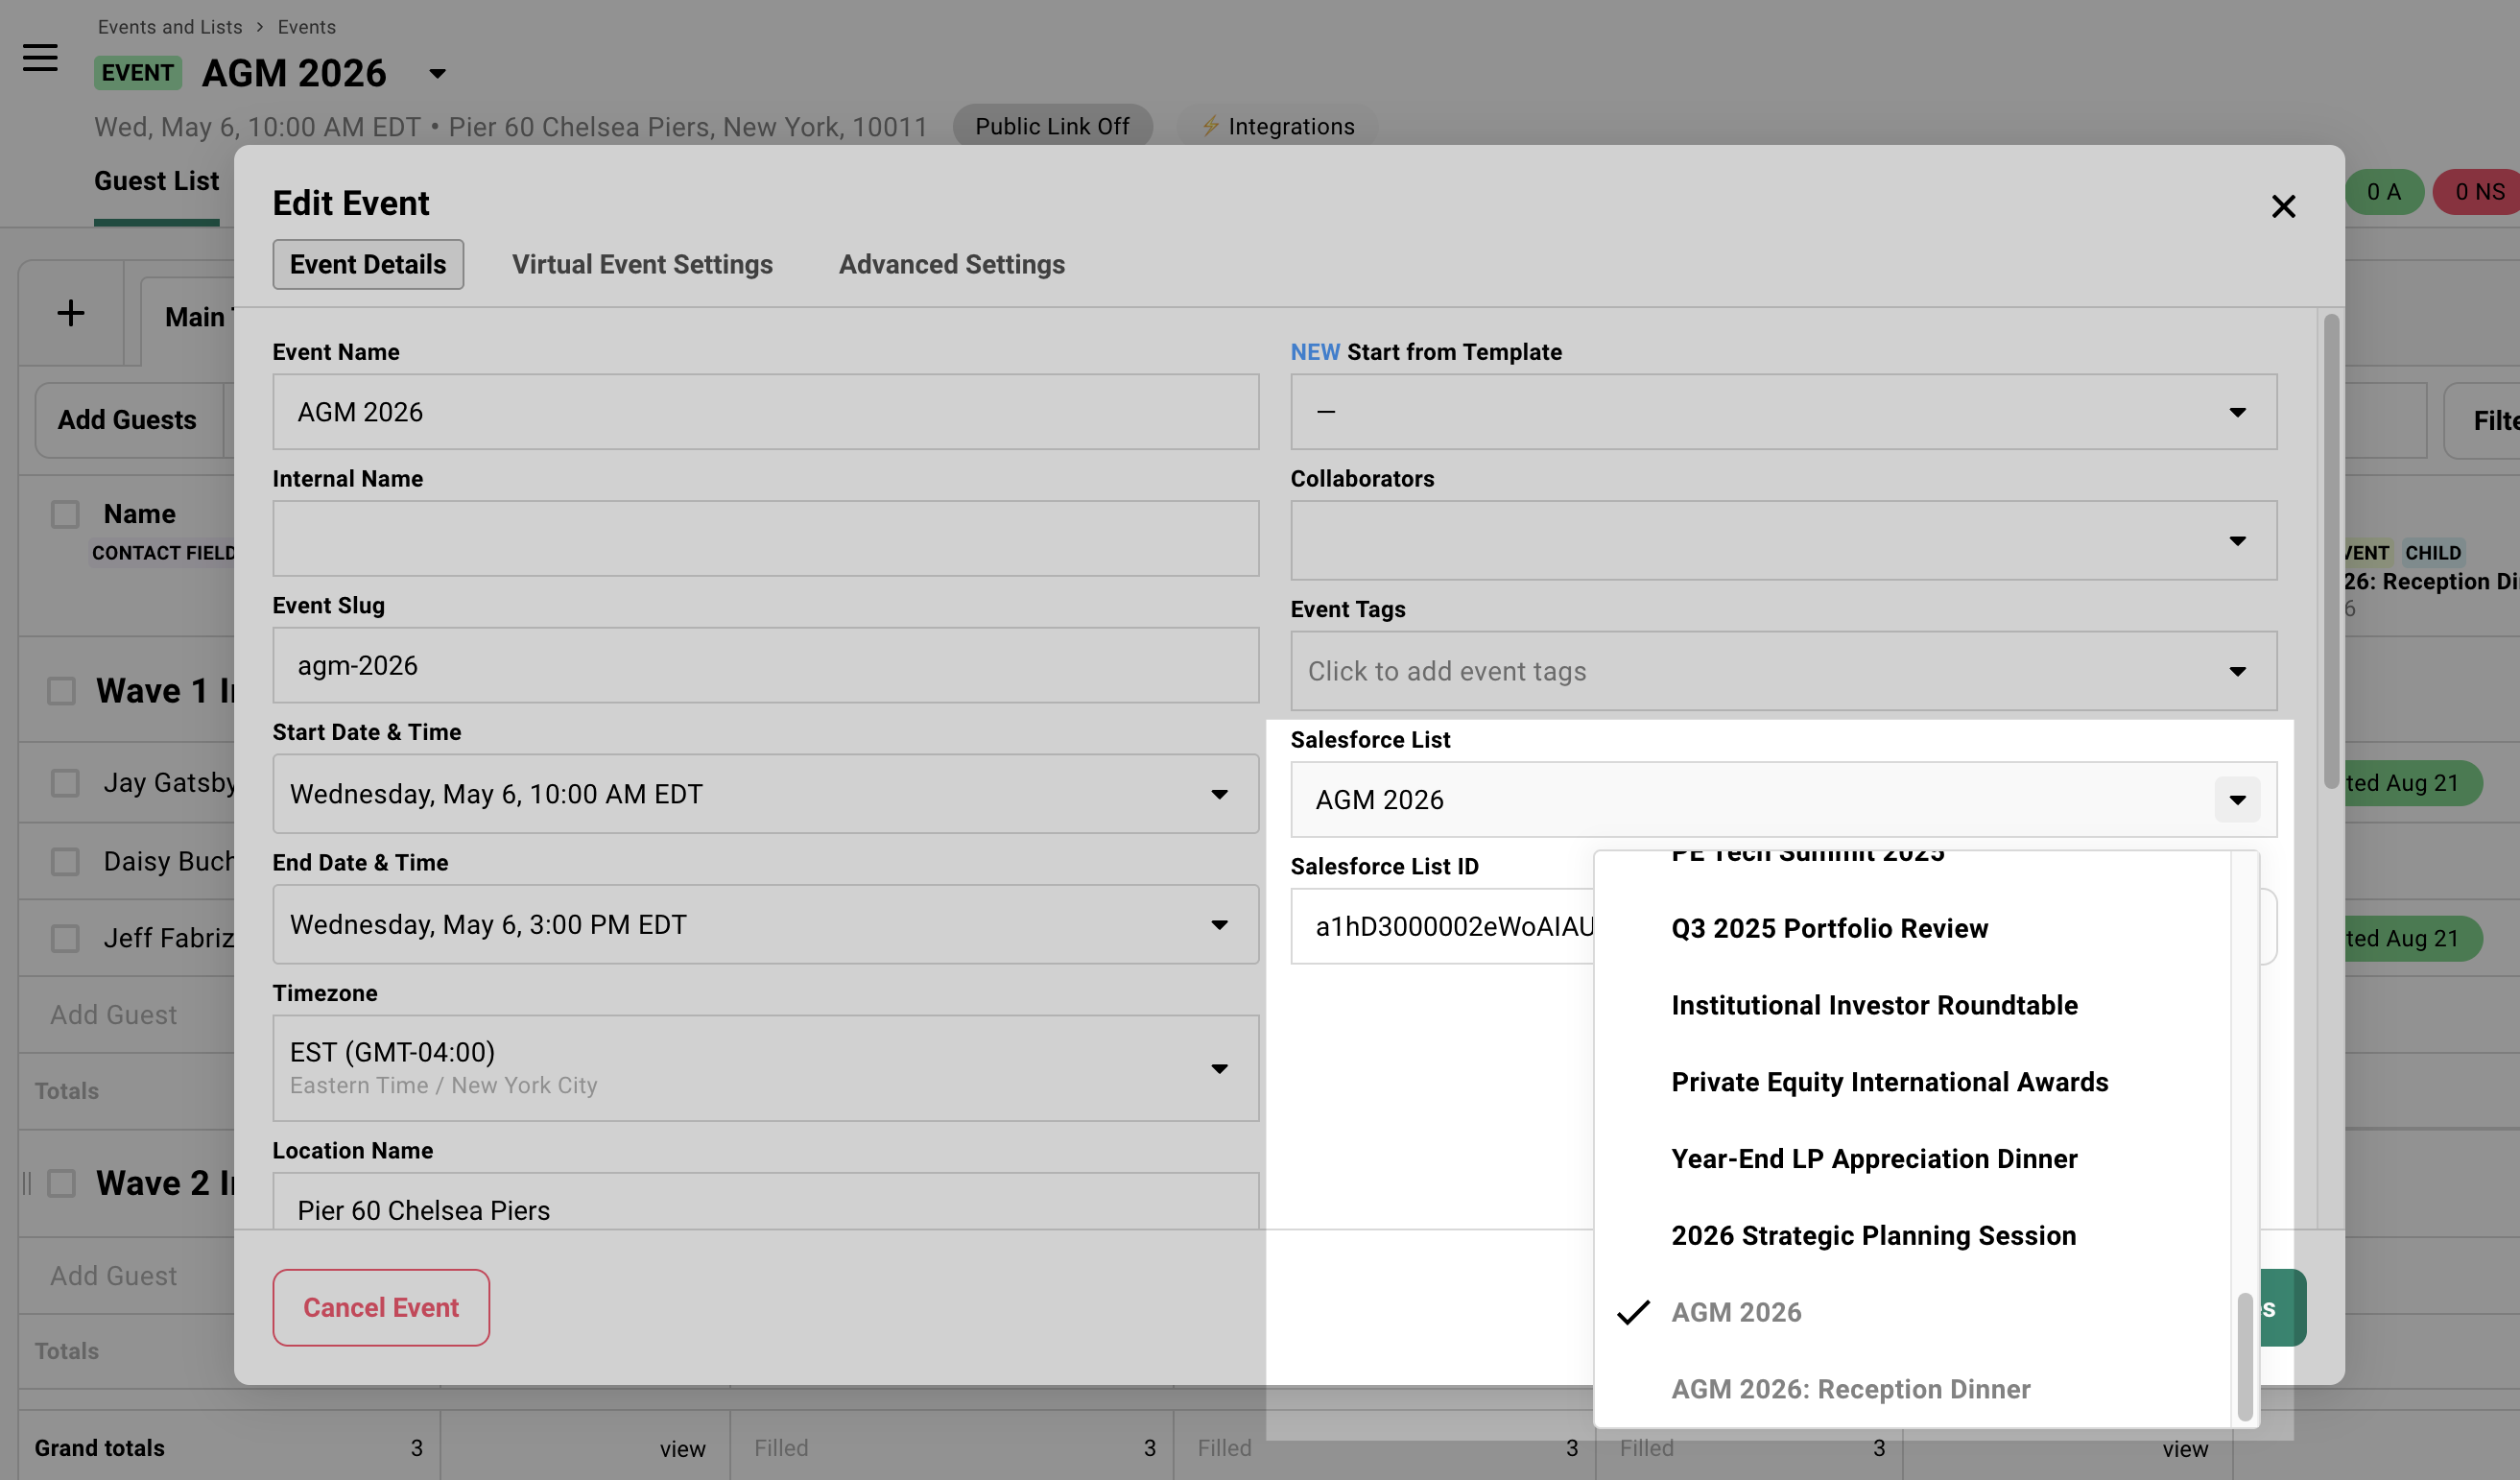
## Setting Up the Integration
[Section titled “Setting Up the Integration”](#setting-up-the-integration)
Altvia runs on Salesforce, so the connection process follows the same steps as the [Salesforce integration](/platform/integrations/salesforce/). The key additions are enabling custom objects for Altvia’s Functions and mapping the right field names.
### Prerequisites
[Section titled “Prerequisites”](#prerequisites)
These apply to any Salesforce-based integration, including Altvia.
Marketing User Checkbox+
The Salesforce user connecting the integration needs **Marketing User** enabled on their profile. This is off by default. Your Salesforce admin has to turn it on.
Without it, the OAuth flow completes successfully but nothing syncs. It fails silently.
Change Data Capture+
In Salesforce Setup, search “Change Data Capture” and move these objects to Selected Entities:
* `Function__c`
* `Function_Attendee__c`
* `Contact`
If you also use standard Campaigns alongside Altvia Functions, add Campaign and Campaign Member too.
Security+
Gatsby is SOC2 Type 2 compliant. The integration uses OAuth for authentication. No passwords stored.
The Altvia integration requires an additional subscription. Contact us on Slack or email for pricing.
### Connect Salesforce
[Section titled “Connect Salesforce”](#connect-salesforce)
1. Go to **Team Settings > Linked Services > Salesforce** in Gatsby.
2. Click **Connect Salesforce**.
3. Enter your Salesforce Login URL (typically `https://login.salesforce.com`).
4. Authenticate with a user that has Marketing User enabled.
5. Authorize Gatsby to access Salesforce.
For full details on field creation (RSVP Status and Attendance Status picklists on Campaign Members) and fallback account configuration, see the [Salesforce setup guide](/platform/integrations/salesforce/#connecting-the-integration).
### Custom Object Mapping
[Section titled “Custom Object Mapping”](#custom-object-mapping)
After the Salesforce connection is live, configure Gatsby to use Altvia’s custom objects instead of standard Campaigns.
1. Go to **Team Settings > Linked Services > Salesforce**.
2. Toggle **Use Custom Objects** to ON.
3. Map the fields:
* Event Object: `Function__c`
* Event Object Name: `Name`
* Event Start Date: `Start_Date__c`
* Event End Date: `End_Date__c`
* Guest Object: `Function_Attendee__c`
* Guest Contact ID: `Contact__c`
* Guest Event ID: `Function__c`
4. Save.
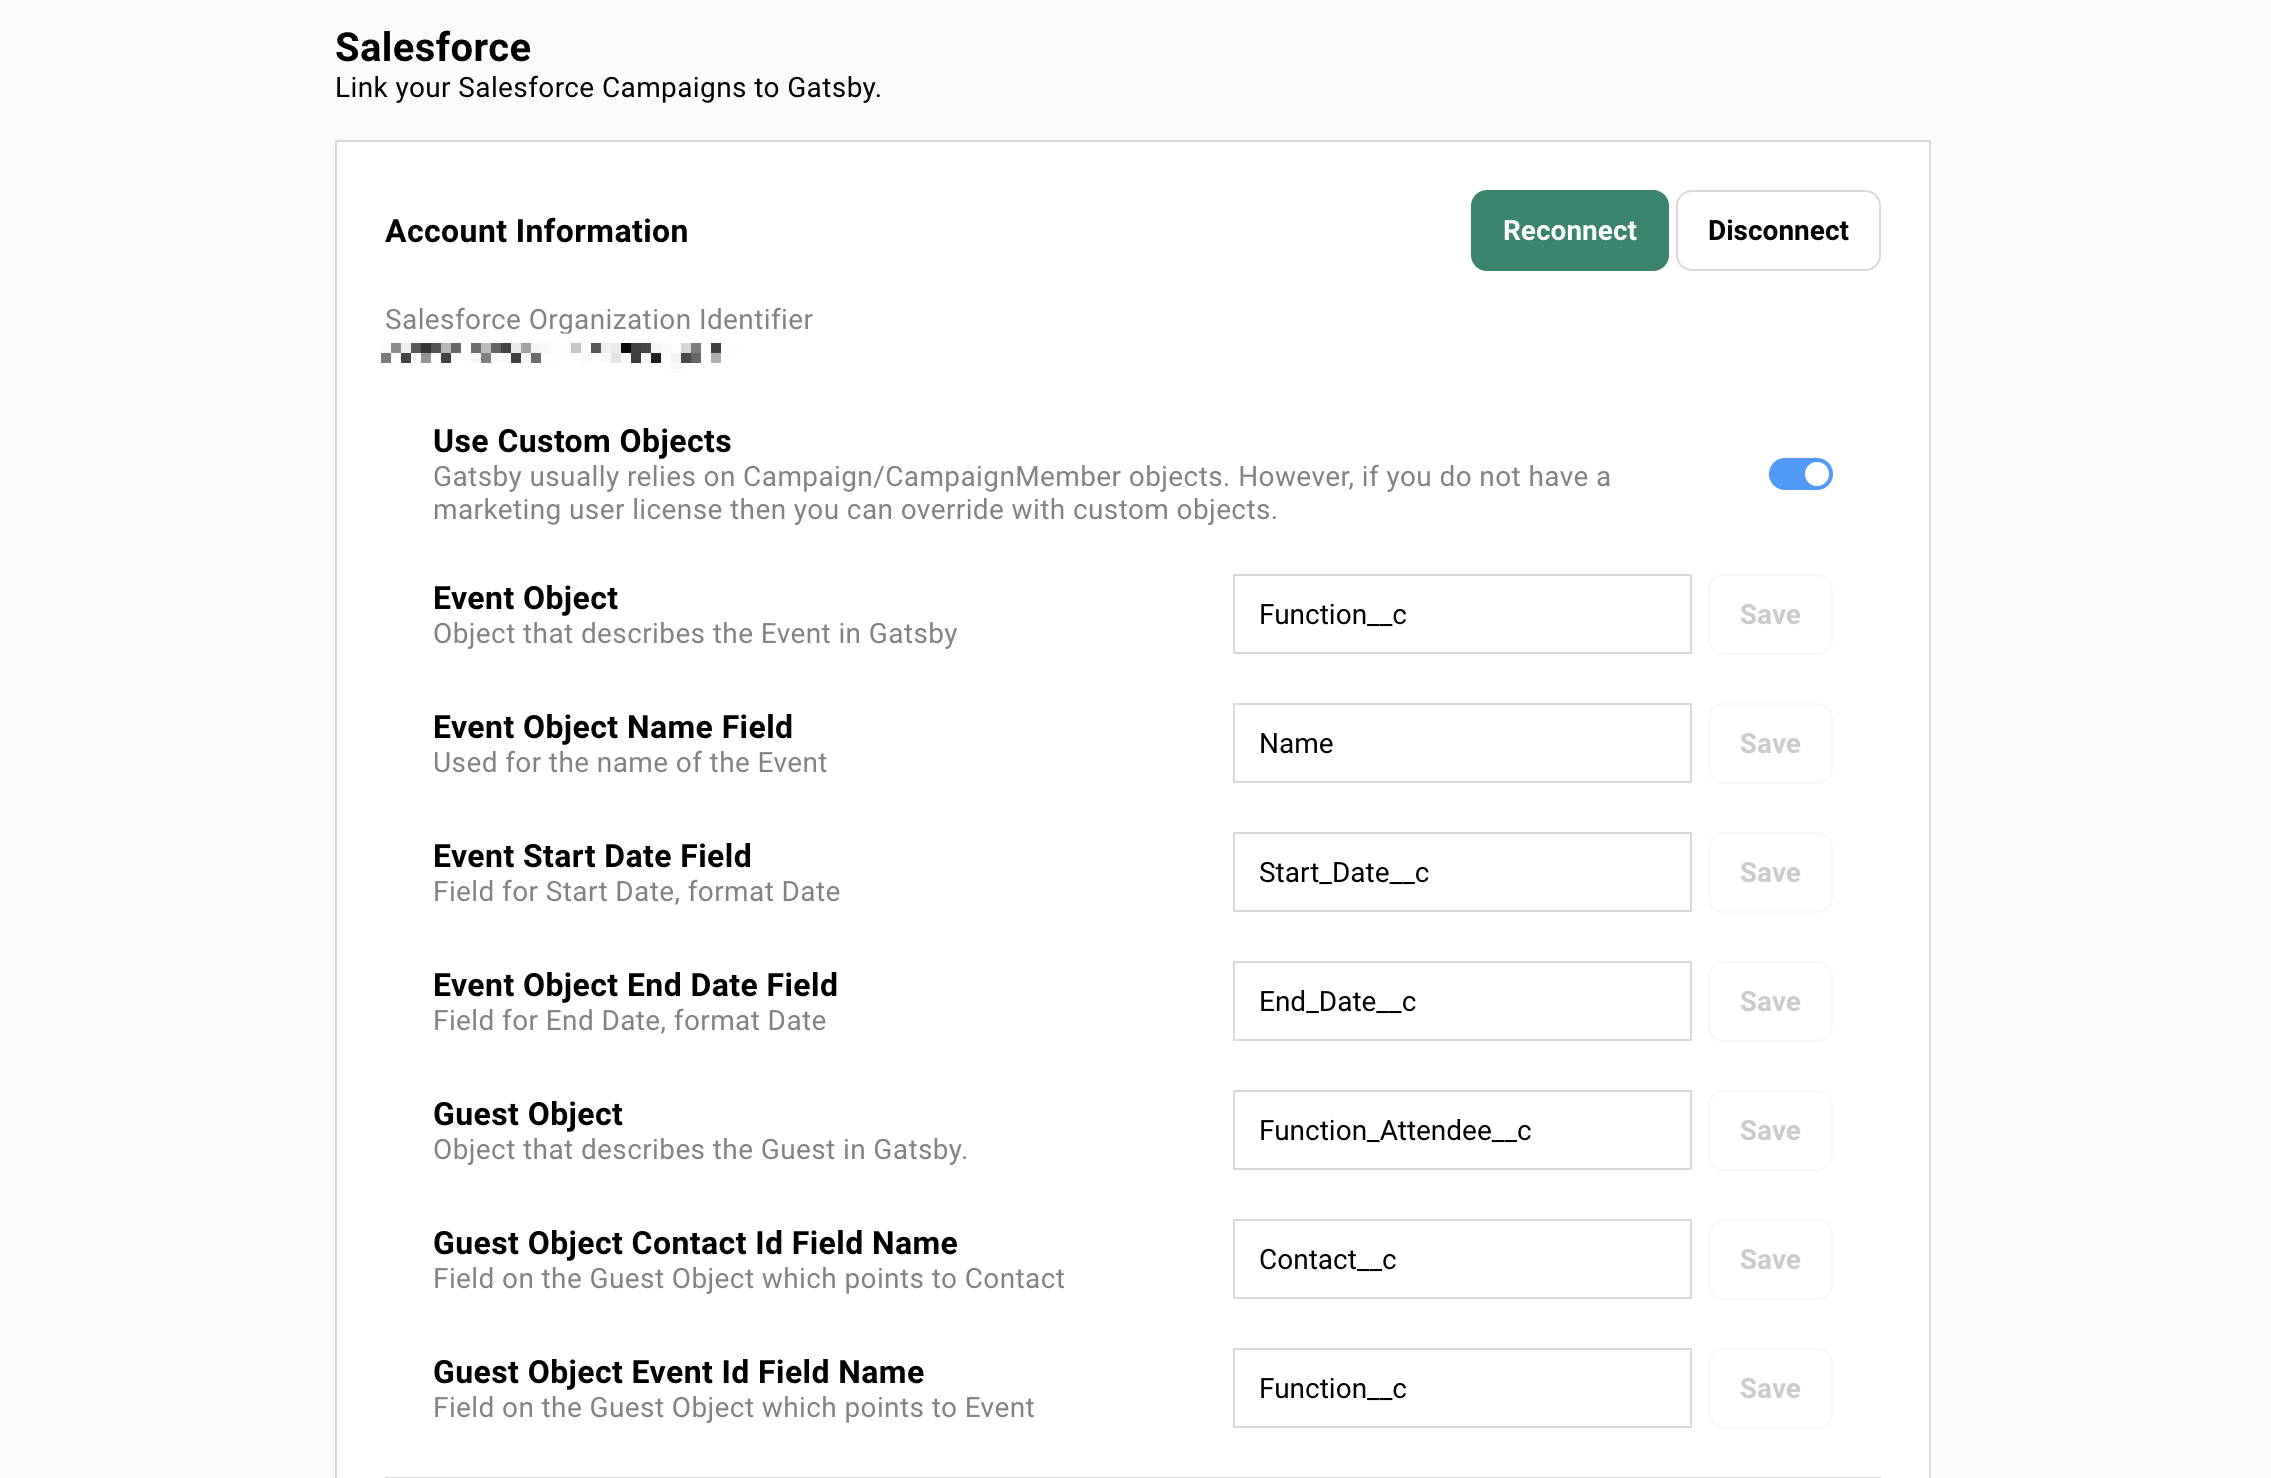
### Fallback Account
[Section titled “Fallback Account”](#fallback-account)
New contacts need a Salesforce Account. When Gatsby creates a Contact that doesn’t match an existing Account, it assigns them to a fallback.
Most PE/VC firms use something generic like “Event Registrations” or “Gatsby Contacts.” Your team reassigns new contacts to the right Accounts in Altvia after the event.
Configure this in **Team Settings > Linked Services > Salesforce** under **Fallback Account**.
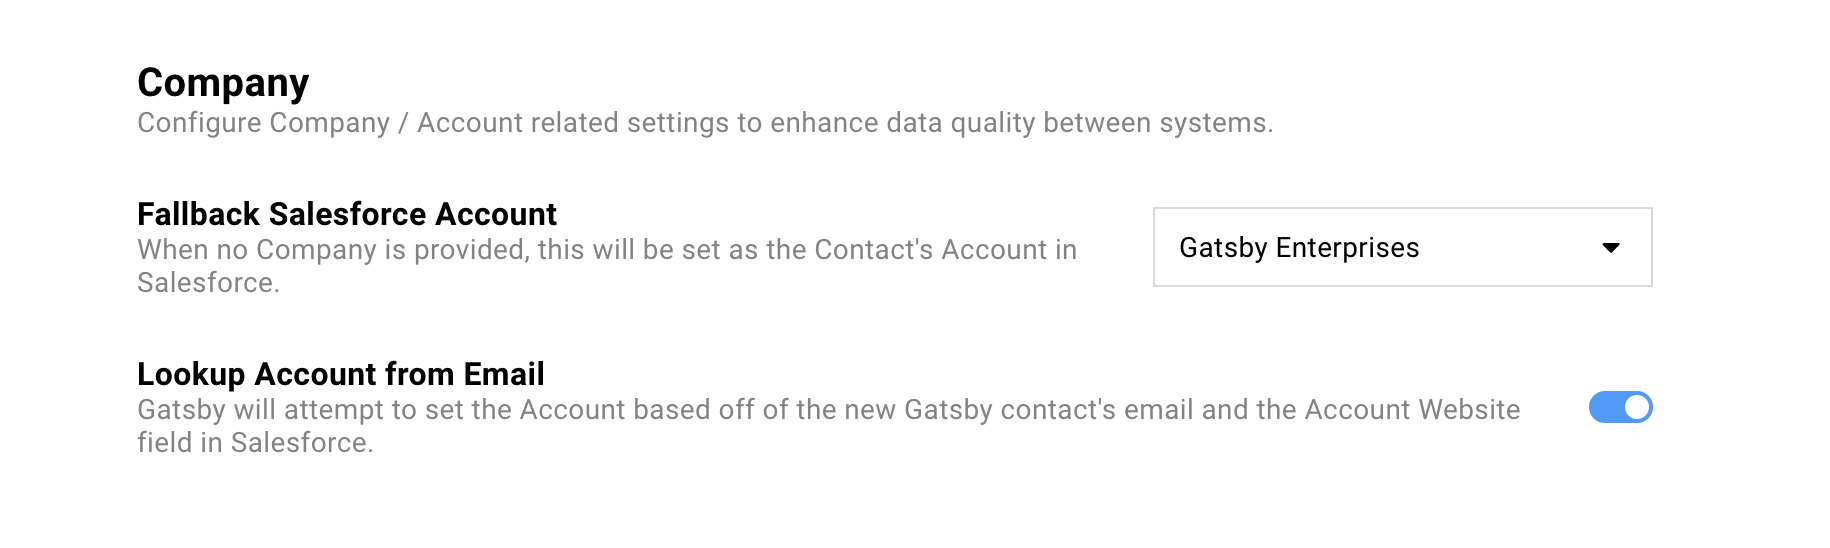
## Common Questions
[Section titled “Common Questions”](#common-questions)
What if we use both standard Campaigns and Altvia Functions?+
The integration supports both. When you link an event, the dropdown shows standard Campaigns and Functions side by side. Pick the right one for each event.
When does data sync?+
Most updates sync in seconds. Check in an LP at your AGM and their Function Attendee record updates before they reach their seat.
Bulk operations (CSV imports, mass RSVP updates) sync in batches every few minutes.
Does this cost extra?+
Yes. The Altvia integration is an add-on subscription. Contact us for pricing.
How does de-duplication work?+
The integration matches on email address. If a Contact with that email already exists in Salesforce, Gatsby updates that record instead of creating a new one.
# Gatsby API
> A REST API for teams that need to read and write Gatsby data from their own systems. Sync contacts, create events, manage guest lists, and configure webhooks programmatically. Available as an add-on.
Pull data, not just push
Webhooks send. The API answers.
Read every contact, event, and guest list on demand. Write new records back. Two-way access, on your schedule.
Core resources
The objects you work with in the app.
Contacts, events, and custom fields, available over HTTPS. JSON in, JSON out. Documented at buildwithgatsby.com.
Limited release
Enabled per organization.
Your account team turns on API access for your org, then a Super Admin creates a key under Team Settings » Linked Services » API Keys. No password login needed.
Why it matters
## Webhooks handle most CRM sync. The API handles everything else.
If you need to push RSVPs into HubSpot or Airtable when a guest registers, webhooks and Zapier cover it. The API is for the workflows webhooks can’t reach: pulling guest history into a data warehouse on a schedule, creating events from a portfolio-company tracker, or running a bulk update against thousands of contacts.
How it works
### REST over HTTPS
Standard endpoints, JSON payloads, bearer-token authentication scoped to your organization. Any language with an HTTP client works.
### Same data as the app
The API reads from and writes to the same records your team sees in Gatsby. A contact updated through the API appears in the app immediately, with full event history intact.
## When to reach for the API
[Section titled “When to reach for the API”](#when-to-reach-for-the-api)
Most teams never need it. Webhooks plus a native CRM integration covers the work. Reach for the API when one of these is true.
### Webhooks send one direction. The API reads both.
[Section titled “Webhooks send one direction. The API reads both.”](#webhooks-send-one-direction-the-api-reads-both)
A webhook fires when something changes inside Gatsby. That’s perfect for keeping a CRM current, but it can’t answer questions on demand. The API can. Pull the full guest list for an event at any time, look up a contact’s complete event history, or fetch every contact who attended your last three dinners.
Signals that you need the API, not webhooks+
* You need to **pull data into your stack** on your schedule, not when Gatsby decides to push it
* You need to **create records from another system** (events, contacts, guest lists)
* You’re running **bulk operations** that would be impractical through the app
* Your destination tool **isn’t supported by Zapier, Make, or n8n**, or the available connector is too limited
* You’re building an **internal dashboard, data warehouse pipeline, or AI workflow** that needs structured access
Signals that webhooks are enough+
* You want guest activity in your CRM as it happens
* Your destination is HubSpot, Airtable, Salesforce, Attio, Notion, or another well-supported Zapier app
* You don’t need to write data back into Gatsby
* You don’t have engineering resources to build and maintain custom integrations
If everything on that list is true, start with the [Webhooks & Zapier page](/platform/integrations/webhooks-zapier/) instead. You can layer the API on later.
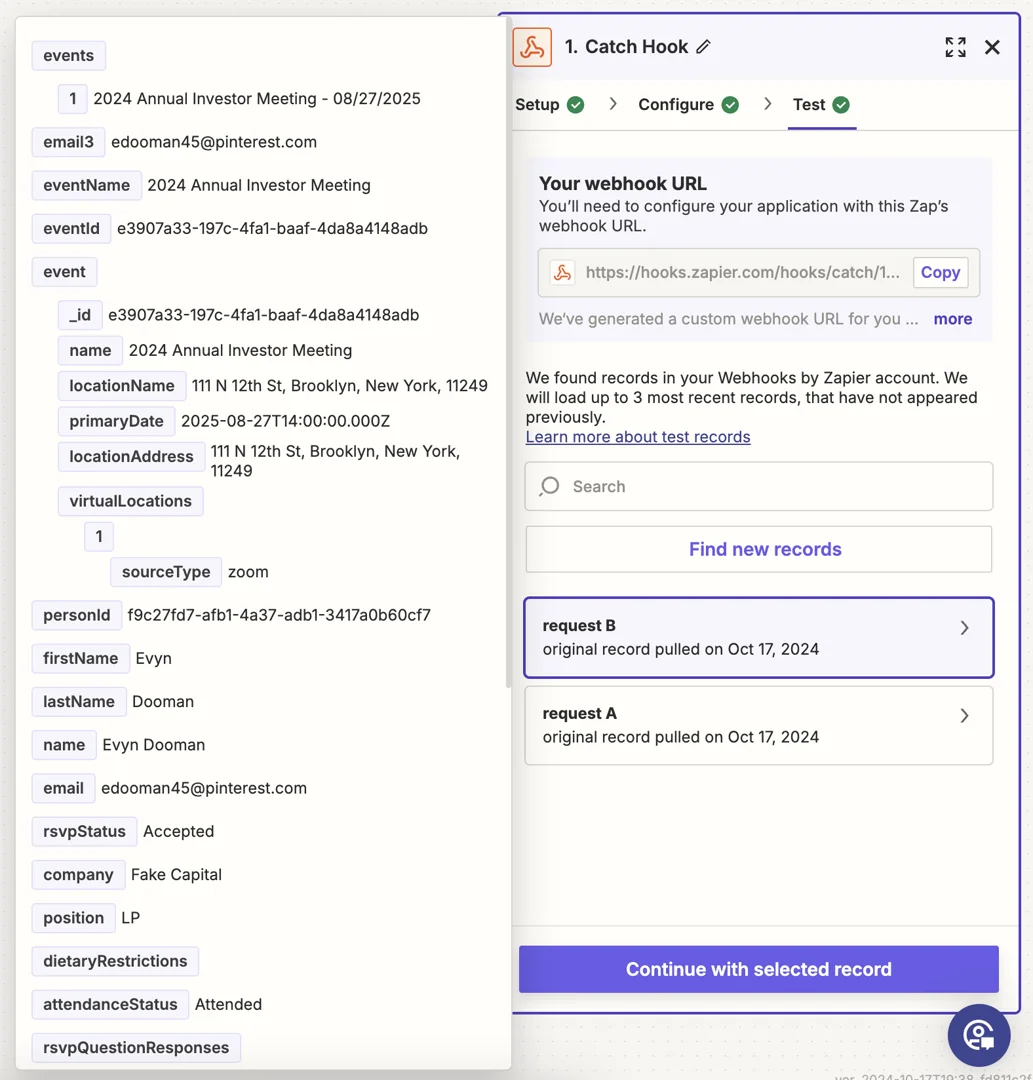
## What the API exposes
[Section titled “What the API exposes”](#what-the-api-exposes)
Four resource groups, matching the objects your team already works with in the app. The technical reference lives at [buildwithgatsby.com](https://www.buildwithgatsby.com). The sections below describe what each resource is useful for.
### Contacts
[Section titled “Contacts”](#contacts)
The Person resource gives your developers full read and write access to contact records. Pull a single contact with their event history, search by name or email, list every contact in your org, or create and update records from outside Gatsby.
What you can do with contacts+
* **Read a contact** with their complete event participation history
* **Search contacts** by name or by exact email match
* **List all contacts** with pagination for large databases
* **Create new contacts** from an external system (your CRM, your data warehouse, a sign-up form on your own site)
* **Update contacts** including company, title, address, and any custom field
* Sync core fields like firstName, lastName, email, company, position, address, and birthday
When teams use this+
* A VC firm pushes new LPs from their deal-flow tool into Gatsby automatically, so the next event invitation already has the right context
* A university development team updates donor records from their fundraising database before every gala
* A B2B field marketing team backfills contact records from Salesforce so seating preferences and dietary restrictions carry forward
### Events and guest lists
[Section titled “Events and guest lists”](#events-and-guest-lists)
The Event resource lets you list events, then read, add, update, or remove guests on any one of them. Guest list operations include RSVP status and attendance, so you can build registration flows and check-in workflows on top of Gatsby.
What you can do with events and guest lists+
* **List events** with pagination
* **Read the full guest list** for an event, with RSVP and attendance status
* **Add guests** to an event (creating new contacts or attaching existing ones)
* **Update guests** to change RSVP status, mark attendance, or adjust custom fields
* **Remove guests** from an event
When teams use this+
* A conference team pipes registrations from a custom landing page directly into the Gatsby guest list
* An investor-relations team auto-populates the guest list for a quarterly LP meeting from their portfolio system, so the right names are pre-loaded the moment the event is created
* A membership organization syncs member status changes into RSVP records, so revoked members can’t register for upcoming events
### Custom fields
[Section titled “Custom fields”](#custom-fields)
Custom fields are how your team categorizes contacts inside Gatsby. The API lets you manage the field definitions themselves: list every custom field, create new ones, and add options to multi-select fields. Text, number, and multi-select types are all supported.
What you can do with custom fields+
* **List every custom field** your org has defined, with all options
* **Read a single field** by ID
* **Create new fields** programmatically, with case-insensitive duplicate protection
* **Add options** to existing multi-select fields, with optional color coding
* Configure number fields as currency, percentage, or decimal
When teams use this+
* A team rolling out a new tagging taxonomy creates dozens of fields at once instead of clicking through the app
* An ops team keeps Gatsby custom fields in lockstep with their CRM properties through a nightly sync
* A field marketing team adds new product-interest options to a multi-select field whenever the product team ships a new SKU
### Webhooks
[Section titled “Webhooks”](#webhooks)
You can configure webhook subscriptions through the API as well as through the in-app settings. Useful when you need to register and tear down webhooks programmatically (for example, when spinning up a new environment) or when you want to inspect a sample payload before writing receiver code.
What you can do with webhooks+
* **Register a new webhook** to receive real-time notifications
* **Remove an existing webhook**
* **Fetch a sample payload** for testing your receiver before going live
* Subscribe to Event, EventPerson, and GuestList change notifications
## What teams build with it
[Section titled “What teams build with it”](#what-teams-build-with-it)
Concrete patterns we see most often. Most start with one of these and layer on more once the integration is live.
### Custom CRM sync where Zapier falls short
[Section titled “Custom CRM sync where Zapier falls short”](#custom-crm-sync-where-zapier-falls-short)
Your CRM has its own data model, validation rules, and permissions. When a Zapier zap can’t handle the logic, teams build a small service that reads from Gatsby on a schedule, runs their own matching logic, and writes back to the CRM.
### Auto-create events from another system
[Section titled “Auto-create events from another system”](#auto-create-events-from-another-system)
Investor-relations teams build the event in their portfolio system. Field marketing teams build the event in their campaign-planning tool. The API creates the matching Gatsby event and pre-loads the guest list so nobody has to enter it twice.
### Internal dashboards and reporting
[Section titled “Internal dashboards and reporting”](#internal-dashboards-and-reporting)
Pull attendance and RSVP data across a year of events into a BI tool or a custom dashboard. The API surfaces the same structured data the app uses, so the numbers in your dashboard match the numbers in Gatsby.
### Data warehouse pipelines
[Section titled “Data warehouse pipelines”](#data-warehouse-pipelines)
Land Gatsby data in Snowflake, BigQuery, or Redshift alongside your CRM and product data. Schedule a nightly job that reads contacts, events, and guest lists, then transforms them for your analytics layer.
### AI workflows and MCP servers
[Section titled “AI workflows and MCP servers”](#ai-workflows-and-mcp-servers)
The same structured data that feeds a CRM sync feeds an AI assistant. Several teams have built MCP servers on top of the Gatsby API so their AI tools can answer questions about guest history, attendance patterns, and event context directly.
### Bulk operations and migrations
[Section titled “Bulk operations and migrations”](#bulk-operations-and-migrations)
Importing thousands of contacts from a legacy system, applying a new tagging taxonomy retroactively, or cleaning up duplicates from an acquired list. Operations that would take days through the app run in minutes through the API.
## How it works
[Section titled “How it works”](#how-it-works)
A one-screen primer for the technical reader. The full reference is at [buildwithgatsby.com](https://www.buildwithgatsby.com).
### The basics
[Section titled “The basics”](#the-basics)
Protocol and format+
* **REST over HTTPS.** Standard verbs (GET, POST, PUT, DELETE).
* **JSON** request and response bodies.
* **Pagination** on list endpoints via `limit` and `skip` query parameters.
Authentication+
* **API key (recommended).** Once your org has API access, a Super Admin creates an org-scoped key under **Team Settings » Linked Services » API Keys** and sends it on each request in the `x-api-key` header. Keys belong to the org rather than to one person’s login, so you can rotate or revoke a key without depending on any individual account.
* Every request includes your **organization slug** alongside the credential, so the API knows which Gatsby org you’re acting on.
* Key issuance, rotation, and storage live with your team. Treat a key the same way you treat any other production secret.
Resources covered+
* **Persons** (contacts), with search and event-history lookups
* **Events**, with full CRUD on guest lists
* **Custom fields**, including options for multi-select fields
* **Webhooks**, for programmatic subscription management
Read the full reference+
Endpoint paths, request shapes, response examples, error codes, and pagination patterns all live at [buildwithgatsby.com](https://www.buildwithgatsby.com). The machine-readable Swagger/OpenAPI reference is at [rest.gatsby.events/docs](https://rest.gatsby.events/docs/). That is the one to hand an integration vendor or a partner tool that generates a connector from a spec.
If you’re asking what changed in the API, whether we’ve shipped breaking changes, or how to support a new registration or RSVP landing page flow from your own app, start there.
The API works hand in hand with webhooks. Most production integrations use the API for reads and writes on a schedule, and webhooks for real-time notifications. The two are designed to be used together.
## Cost and getting access
[Section titled “Cost and getting access”](#cost-and-getting-access)
The Gatsby API is a limited-release add-on. Reach out to Gatsby’s sales team and they’ll scope pricing to your use case and add it to your contract.
### Getting access
[Section titled “Getting access”](#getting-access)
1. **Talk to your account team.** API access is limited release — Gatsby enables it per organization as part of your contract.
2. **Once enabled, go to Team Settings » Linked Services » API Keys.** A Super Admin or Admin creates and manages keys here. API keys are not under **Account Settings**; the keys there are personal keys for the [Gatsby MCP server](/platform/integrations/mcp/). If **API Keys** doesn’t appear under Linked Services, access hasn’t been enabled for you yet. Ask your account team.
3. **Create a key and send it in the `x-api-key` header** on every request, alongside your organization slug.
## Common Questions
[Section titled “Common Questions”](#common-questions)
How is the API different from webhooks and Zapier?+
Webhooks push notifications out of Gatsby when something changes. Zapier routes those notifications to other apps. The flow is one-way and reactive. The API is two-way and on demand: your code asks for data when it needs it, and writes data back when it has new data to share. Most production integrations use both.
Do I need engineering resources?+
Yes. The API is a developer tool. If your team doesn’t have engineering capacity, start with webhooks and Zapier, or ask your account team about integration partners.
Is the data the same as what I see in the app?+
Yes. The API reads from and writes to the same underlying records the app uses. A change made through the API shows up in the app immediately, and vice versa.
What languages does the API support?+
Any language that can make HTTPS requests and parse JSON. There’s no official SDK; you call the endpoints directly.
Can I see the docs before I buy?+
Yes. The full technical reference is public at [buildwithgatsby.com](https://www.buildwithgatsby.com). Read it, share it with your engineering team, then talk to sales about access.
How do I get API access?+
Contact sales. The API is a limited-release add-on — your account team scopes pricing to your use case, enables access for your org, and handles it as part of your contract. Once enabled, create a key under **Team Settings » Linked Services » API Keys**.
# Attio Workflow
> There's no native Attio integration. This is a workflow assembled from Google account sync and webhooks (through Zapier, Make, or n8n) to get invitations, RSVPs, and attendance data into Attio.
Automatic Activity Capture
No export required.
Event invitations and calendar invites sent from connected Google accounts appear in Attio contact timelines automatically.
Structured Event Data
Reports that actually work.
Push RSVP status, attendance, and registration responses to Attio through webhooks for segmentation and reporting.
Flexible Data Model
Your workflow, your structure.
Build Event Participation lists, update Person attributes, or create custom objects based on what your team needs.
## Two Data Paths
[Section titled “Two Data Paths”](#two-data-paths)
There’s no native Gatsby-to-Attio connector. This page documents a workflow assembled from two other pieces of your stack: Google account sync (which Attio already does on its own) and webhooks routed through Zapier, Make, or n8n. Setting it up depends on a connected Google account and, for the webhook path, Webhooks being enabled for your org — see the **Setting Up Webhooks** section below.
Google sync gives you the timeline: invitation emails, calendar responses, follow-ups. Webhooks give you the queryable data: RSVP status, attendance records, event names and dates. Most teams use both.
## Google Sync
[Section titled “Google Sync”](#google-sync)
If you send event invitations and calendar invites from a connected Google account, Attio is already capturing that activity. You may have more event data in Attio than you realize.
### How It Works
[Section titled “How It Works”](#how-it-works)
Gatsby sends event invitations from your actual Google account, not from a generic platform address. Same with calendar invites. Since Attio syncs your Google activity, event communications appear in contact timelines without any configuration on the Gatsby side.
Click into a Person record in Attio. The invitation you sent last Tuesday. The calendar invite they accepted. The follow-up you sent the day before the dinner. All there without an export.
### Requirements
[Section titled “Requirements”](#requirements)
Three things must be connected for automatic sync.
Setup checklist+
**In Gatsby:**
* Email sender set to a connected Google account
* Calendar organizer set to a connected Google account
**In Attio:**
* Same Google user connected for email and calendar sync
For step-by-step instructions on connecting Google accounts to Gatsby, see [Sending Emails](/platform/getting-started/email-services/#connect-your-google-account).
What syncs and what doesn't+
**Captured automatically:**
* Invitation emails sent from connected Google accounts
* Calendar invites where organizer is a connected Google account
* Follow-up emails and replies
**Not captured (use webhooks for these):**
* System emails like RSVP confirmations (sent from Gatsby, not your Google)
* RSVP status
* Attendance data
* Registration form responses
## Webhooks
[Section titled “Webhooks”](#webhooks)
Google sync captures communication history. But you can’t run a report on “everyone who attended events in Q4” from email timestamps. For that, you need structured participation data: RSVP status, attendance records, event names and dates.
### What You Can Capture
[Section titled “What You Can Capture”](#what-you-can-capture)
Webhooks send structured event data that you control.
* Who was invited to which events
* RSVP status changes (Accepted, Declined, Waitlist, Maybe)
* Attendance records (Attended, No Show)
* Registration form responses
* Guest company and title at time of event
* Event details (date, name, location)
### Where Data Originates
[Section titled “Where Data Originates”](#where-data-originates)
| Data | Originates in | Direction |
| -------------------------------------------------------------- | ------------------------------- | --------------------------------------------------------------------------------------------------------------------------- |
| Invitation emails, calendar invites, replies | Google (synced by Attio itself) | Google → Attio; Gatsby doesn’t push this |
| RSVP status, attendance, registration responses, event details | Gatsby | Gatsby → Attio via webhook, one-way |
| Attio contacts pulled into Gatsby | Attio | Possible via the [Gatsby API](/platform/integrations/api/), not through this webhook workflow — contact support for details |
Because Gatsby and Google feed different data through different paths, there’s no single system that resolves a conflicting edit between them. If you edit the same field from both directions, check with support before relying on either value.
### Recommended: Event Participation List
[Section titled “Recommended: Event Participation List”](#recommended-event-participation-list)
Create an “Event Participation” list in Attio. Each entry represents one person at one event, linked to their Person record.
Suggested fields+
| Field | Type | Purpose |
| ----------------- | ---------------- | --------------------------------------------- |
| Person | Record Reference | Links to the Person record |
| Unique ID | Text | De-duplication (combine person ID + event ID) |
| Event Name | Text | Name of the event |
| Event Date | Date | When the event happens |
| RSVP Status | Select | Invited, Accepted, Declined, Waitlist |
| Attendance Status | Select | Attended, No Show, Pending |
| Company at Event | Text | Guest’s company at time of event |
| Position at Event | Text | Guest’s role at time of event |
The Unique ID field matters. Combine the person ID and event ID (like `abc123_xyz789`) so each person gets exactly one entry per event. Multiple events create multiple entries.
Queries this enables+
* All people who attended events in the last year
* Contacts invited to 5+ events but never attended
* Attendance by company
* No-show patterns
* Guests who accepted but didn’t show up
Other data model options+
The Event Participation list is a starting point. You can also update attributes directly on Person records (simpler, less queryable), create custom objects, or build whatever fits your existing Attio setup. Webhooks send raw data. You decide where it goes.
## Setting Up Webhooks
[Section titled “Setting Up Webhooks”](#setting-up-webhooks)
Webhooks require a middleware platform like Zapier, Make, or n8n. You configure Gatsby to send event data, then build workflows in your middleware to route that data into Attio.
### Requirements
[Section titled “Requirements”](#requirements-1)
What you need+
* **Paid middleware plan.** Zapier Pro or higher, Make, or n8n.
* **Attio API credentials.** For your middleware connection.
* **Webhooks enabled in Gatsby.** Webhooks is a limited-release feature — Gatsby enables it per organization, and it won’t appear under **Team Settings » Linked Services » Webhooks** until then. Contact support to request access:
Email copied to clipboard
### Workflow Overview
[Section titled “Workflow Overview”](#workflow-overview)
The core workflow: Gatsby sends guest data via webhook, your middleware creates or updates the corresponding record in Attio.
Workflow steps+
1. **Trigger:** Webhook receives guest data from Gatsby when someone is invited or updates their RSVP.
2. **Create/Update Person:** Match by email address in Attio. Create if new.
3. **Search for existing list entry:** Check for Unique ID match to prevent duplicates.
4. **Update or create:** If the entry exists, update RSVP or attendance status. If new, create an entry for this person/event combination.
Post-event bulk sync (alternative)+
Instead of real-time webhooks, trigger manually after event cleanup. Process all guests at once. This gives you control over when event data flows to Attio and lets you verify data before it syncs.
## Common Questions
[Section titled “Common Questions”](#common-questions)
Do I need both Google sync and webhooks?+
No, but they complement each other. Google sync gives communication timelines automatically. Webhooks give structured data for reporting. Most teams use both.
Google sync isn't capturing some emails. Why?+
Check that both the email sender and calendar organizer in Gatsby are set to connected Google accounts. System emails like RSVP confirmations don’t sync because they send from Gatsby, not your Google account.
Can I capture custom registration responses?+
Yes. Registration form responses come through webhook data. Map them to attributes or list entries in Attio.
Can I sync Attio contacts TO Gatsby?+
Yes, though it requires more setup. Gatsby’s API lets you pull contact data from Attio. Contact support for details:
Email copied to clipboard
Is there a native integration?+
Not yet. Attio integration uses webhooks through Zapier, Make, or n8n. Google sync is automatic if you use connected Google accounts.
How do I test my webhook integration?+
Add a test guest to an event and mark as Invited. Verify the Person and list entry appear in Attio. Then change the RSVP status and confirm the same entry updates without creating a duplicate. For webhook data schemas and field mapping details, contact support:
Email copied to clipboard
# Gatsby MCP Server
> An MCP server that lets your AI tool query your Gatsby contacts, events, and RSVPs in natural language.
Ask, don't query
Natural language over your guest data.
Point your AI tool at Gatsby and ask about contacts, events, and RSVPs the way you'd ask a teammate.
Works in any AI tool
Claude, ChatGPT, Cursor, and more.
Any MCP-compatible client connects to the same endpoint. Sign in with your Gatsby account and you're set, in about two minutes.
Alpha, limited release
Available by request.
We enable the MCP server per organization while we finalize the offer. Free during alpha and may become a paid add-on later.
You don’t have to start from a blank prompt.
Ready-made skills for year-over-year performance, RSVP forecasting, guest recommendations, seating and follow-up. Download one and ask in plain language.
[Browse the Skill Gallery](/gallery/)
The short version
## Your AI tool, connected to Gatsby.
The Gatsby MCP server exposes your contacts, events, RSVPs, and guest history to any MCP-compatible AI client. You ask a question in plain English. Your AI tool calls Gatsby on your behalf and answers using your own data.
Sessions are tied to your Gatsby account, so what the AI can see is exactly what you can see in the app.
Things you can ask
### Find people you haven’t invited yet
”Recommend 10 people from my contacts I haven’t invited to any of my events yet, who’d fit my next founder dinner.”
### Plan a trip around your network
”I’m in New York next Tuesday. Who from my contacts is based there and worth a 30-minute coffee?”
### Segment by profile and history
”Find the founders in FinTech from my contacts who have been to at least one of my past events.”
## How do I get access?
[Section titled “How do I get access?”](#how-do-i-get-access)
The MCP server is in limited release. We enable it per organization. Once it’s on, setup takes a couple of minutes inside Gatsby and inside your AI tool.
As of September 2026: the MCP server is in alpha, limited release, and free for participating customers. Gatsby may turn it into a paid add-on later at our discretion, and will give alpha customers notice well in advance of any change. See [What does it cost?](#common-questions) below if this section is out of date.
### Setup
[Section titled “Setup”](#setup)
Enable the MCP within Gatsby+
1. **Reach out to Gatsby.**
Talk to your account team to request access. We’ll enable the MCP server for your organization on the backend.
2. **Turn on the MCP server in Team Settings.**
Once we’ve enabled the feature, a Super Admin or Admin opens **Team Settings » MCP** and confirms **Enable MCP Server** is on. This is the master switch for your organization.
3. **Decide whether to allow destructive actions.**
In the same settings panel, **Allow Destructive Actions** is off by default. Leaving it off means the MCP is read-only: your AI tool can answer questions about your data but cannot create, update, or delete anything. A Super Admin or Admin can turn it on. Turn it on if you want your AI tool to build things for you (events, emails, seating charts) or to add guests to events. With it on, the AI can write back to Gatsby through a defined set of tools: creating contacts, updating events, adding or removing guests from a list, editing RSVP status, and deleting records, all within the permissions of whoever connected the AI tool. It cannot modify every object in Gatsby; see [What does “Allow Destructive Actions” actually permit?](#common-questions) below for the current scope.
4. **Connect your AI tool.**
Point your AI client at the MCP endpoint:
`https://mcp.gatsby.events/mcp`
The first time you connect, Gatsby opens a web login in your browser. Sign in with your Gatsby account, approve the connection, and you’re done: no keys to copy or store. This is the recommended path. See the per-client instructions below.
Prefer an API key? Clients that don’t support the web login — and automated, non-interactive setups — can authenticate with a personal key instead. Generate one under **Account Settings » API Keys** and paste it into the connector. Treat it like any other production secret: anyone with the key can act as you, subject to your permissions in the app.
### Add the connector
[Section titled “Add the connector”](#add-the-connector)
Claude Desktop+
1. Make sure you’re on the latest version of Claude Desktop. Download from [claude.ai/download](https://claude.ai/download) if needed.
2. Open Claude Desktop. Click your profile in the bottom-left of the sidebar (or press **Cmd+,**) to open **Settings**.
3. In Settings, click **Connectors**, then click **Customize**.
4. In the Connectors list, click the **+** button in the top-right to open the **Add custom connector** modal.
5. Enter the connector details:
**Name:** Gatsby **Remote MCP server URL:** `https://mcp.gatsby.events/mcp`
6. Click **Add**. A browser window opens asking you to sign in to Gatsby; use your Gatsby account and approve the connection.
7. Gatsby will appear in the connectors list and in the tools picker (the slider icon near the composer). Try a prompt: *“Using Gatsby, find 3 people from my contacts who’ve been to more than one of my events.”*
claude.ai (web)+
1. Go to [claude.ai](https://claude.ai). Open **Settings**, click **Connectors**, then click **Customize**.
2. In the Connectors list, click the **+** button in the top-right to open the **Add custom connector** modal.
3. Enter the connector details:
**Name:** Gatsby **Remote MCP server URL:** `https://mcp.gatsby.events/mcp`
4. Click **Add**, then sign in to Gatsby in the popup and approve the connection.
5. Gatsby will be available as a tool in any new chat.
Claude Code (CLI)+
1. In any shell, run:
```bash
claude mcp add --transport http gatsby https://mcp.gatsby.events/mcp
```
2. Launch Claude Code with the `claude` command.
3. Type `/mcp`, select **gatsby**, and authenticate. A browser window opens; sign in to Gatsby and approve the connection.
4. Back in Claude Code, `gatsby` shows as connected. Try a prompt: *“Using Gatsby, find 5 founders in FinTech from my contacts.”*
To use an API key instead, append `--header "Authorization: Bearer YOUR_API_KEY"` to the `claude mcp add` command, using a key from **Account Settings » API Keys**.
ChatGPT, Cursor, Gemini, and other clients+
Any MCP-compatible client can connect to `https://mcp.gatsby.events/mcp`. The endpoint is the same, and most clients sign you in through the same Gatsby web login. Only the UI for adding a custom connector varies by tool.
* **ChatGPT** supports remote MCP connectors on Team, Enterprise, and Pro plans
* **Cursor** supports MCP servers via its settings
* **Gemini** support is rolling out in select clients
Clients that don’t support the web login can use a personal API key from **Account Settings » API Keys** instead. If your daily driver isn’t listed, mention it when you reach out and we’ll walk through setup with you.
## Common Questions
[Section titled “Common Questions”](#common-questions)
Is my data used for training?+
No. Gatsby does not feed your data into any model. The MCP server logs which tools are called and what data is returned so we can spot usage patterns during the limited release. Those logs stay internal to the Gatsby team. We don’t see the natural-language prompt you typed unless you share it with us.
What does 'Allow Destructive Actions' actually permit?+
With it off (the default), the MCP server is read-only. Your AI tool can answer questions but cannot change anything in Gatsby. If your AI tool says it can’t create an event, draft an email, build a seating chart, or add a guest to an event, check this toggle first.
With it on, the AI can perform writes through a defined set of MCP tools: creating contacts, updating events, adding or removing guests from a list, editing RSVP status, and deleting records. This is not full access to every object in Gatsby. Writes follow the same permission rules as the app: whoever connected the AI tool can only do things they’re allowed to do in Gatsby itself.
Only a Super Admin or Admin can change the toggle. We recommend leaving destructive actions off until you’ve spent time with the read-only experience and trust the prompts you’re running.
Do I have to write my own prompts?+
No. The [Skill & Prompt Gallery](/gallery/) has ready-made skills built on this MCP server: year-over-year event performance, RSVP forecasting, guest recommendations, seating charts, post-event follow-up. Download one, unzip it into your AI tool, and ask in plain language.
Each skill lists what it needs. Most are read-only and work with **Allow Destructive Actions** off.
Which AI clients work?+
Any client that supports the Model Context Protocol. That includes Claude Desktop, claude.ai, Claude Code, ChatGPT (on Team, Enterprise, and Pro plans), Cursor, and a growing list of others. The endpoint is the same regardless of which client you use.
Do I need an API key?+
No. The recommended path is to sign in with your Gatsby account when you add the connector; nothing to copy or store. API keys are an alternative for clients that don’t support the web login, or for automated setups. Generate one under **Account Settings » API Keys** when you need it.
This personal key is for the MCP connector. It’s not the same as a [Gatsby API](/platform/integrations/api/) key, which lives under **Team Settings » Linked Services » API Keys** and only appears once API access has been enabled.
How do I revoke access?+
If you connected by signing in with your Gatsby account, remove the Gatsby connector in your AI tool to end the session. If you connected with an API key, open **Account Settings » API Keys** and delete it; any client using that key loses access immediately.
Who can see what through the MCP server?+
Each user connects with their own Gatsby account, through the web login or a personal API key, and the MCP server returns only the data that user can see in the app. If a teammate isn’t allowed to view a given event in Gatsby, the MCP can’t show it to them either.
How is the MCP server different from the Gatsby API?+
The [Gatsby API](/platform/integrations/api/) is a developer tool: REST endpoints, JSON, scripted integrations meant for engineers building software on top of Gatsby. The MCP server is a natural-language layer your AI tool drives on your behalf. Both read from and write to the same underlying records. Use the API when you’re building an integration. Use the MCP when you want to ask questions of your own data without writing code.
What does it cost?+
Free during the current alpha, for participating customers. See the availability callout near the top of this page for the current, dated status; ask your account team for the latest if you need a definitive answer for a contract.
How do I get access?+
Contact your Gatsby account team. We’ll enable the MCP server for your organization on the backend, after which a Super Admin or Admin can turn it on in **Team Settings » MCP** and individual users can connect their AI tool.
# Salesforce Integration
> Sync guest lists and event data with Salesforce CRM. Push RSVP status, attendance, and first-party contact updates to campaigns automatically.
Real-Time Campaign Sync
Check in a guest. Salesforce updates.
RSVP and attendance data flows to Campaign Members as it happens. No exports.
First-Party Data Back to CRM
Registration cleans your records.
When guests update their company or title at registration, those changes push to Salesforce.
Custom Object Support
Works with your Salesforce setup.
Standard Campaigns or custom objects like Events or Functions.
## How the Integration Works
[Section titled “How the Integration Works”](#how-the-integration-works)
Gatsby captures event data at the door and pushes clean records back to Salesforce. Your CRM stays the source of truth for contacts. Gatsby is the staging area for event execution.
Direction depends on the object — RSVP and attendance status flow one-way from Gatsby to Salesforce, while Campaign Member membership itself can sync both directions. See [Direction by Object](#direction-by-object) below for the full breakdown. If you need Salesforce data in your guest list (company, title, custom fields), export a CSV from Salesforce and import it into Gatsby.
Salesforce is a limited-release integration. Gatsby enables it per organization — these settings won’t appear under **Team Settings » Linked Services » Salesforce** until then.
### RSVP and Attendance
[Section titled “RSVP and Attendance”](#rsvp-and-attendance)
Two custom fields sync automatically to Salesforce Campaign Members.
RSVP Status+
Invitation responses sync to the RSVP Status field on Campaign Members.
**Values:** None, Invited, Declined, Accepted, Waitlist, Maybe
When a guest responds to your invitation, their status updates in Salesforce. No manual entry. No batch exports.
Attendance Status+
Check-in data syncs to the Attendance Status field on Campaign Members.
**Values:** N/A, Yes, No Show
This is your ground truth for who actually showed up. When your team checks in a guest at the event, Salesforce updates immediately.
### Campaign Member Sync
[Section titled “Campaign Member Sync”](#campaign-member-sync)
Adding or removing guests in Gatsby updates Campaign Member lists in Salesforce. The reverse works too. Add someone to a Salesforce Campaign, and they appear in the Gatsby guest list.
When Gatsby sends data to Salesforce, it matches on email address. If a Contact or Lead with that email already exists, the integration updates that record instead of creating a new one. No duplicates.
### Removals from Salesforce
[Section titled “Removals from Salesforce”](#removals-from-salesforce)
Removals sync inbound as well as outbound. By default, deleting a Campaign Member in Salesforce also removes that guest from the linked Gatsby event, so the two rosters stay in step without anyone reconciling them by hand.
Turning removal sync off+
If your team prunes Campaigns in Salesforce for reasons that shouldn’t affect who is at the event, turn off **Remove Guests When Removed From Salesforce Campaign** in **Team Settings > Linked Services > Salesforce**.
With it off, Gatsby keeps the guest on the event even after they’re removed from the Salesforce Campaign. RSVP and attendance data continues to sync for everyone still linked.
This setting is on by default and applies across every event in your organization.
Restoring a guest removed this way+
Removals are reversible. Open the event’s guest list and choose **Add Guests > Restore Guests** to bring the guest back with their history intact.
Removals also cascade to child events, the same as removing a guest by hand in Gatsby.
### First-Party Data Updates
[Section titled “First-Party Data Updates”](#first-party-data-updates)
Event registration captures fresh contact data. When guests update their company or title during registration, those changes can sync back to their Salesforce Contact record. This is first-party data from the guest, not a third-party enrichment database.
Configure which Gatsby fields map to which Salesforce fields in **Team Settings > Linked Services > Salesforce** after completing the initial connection.
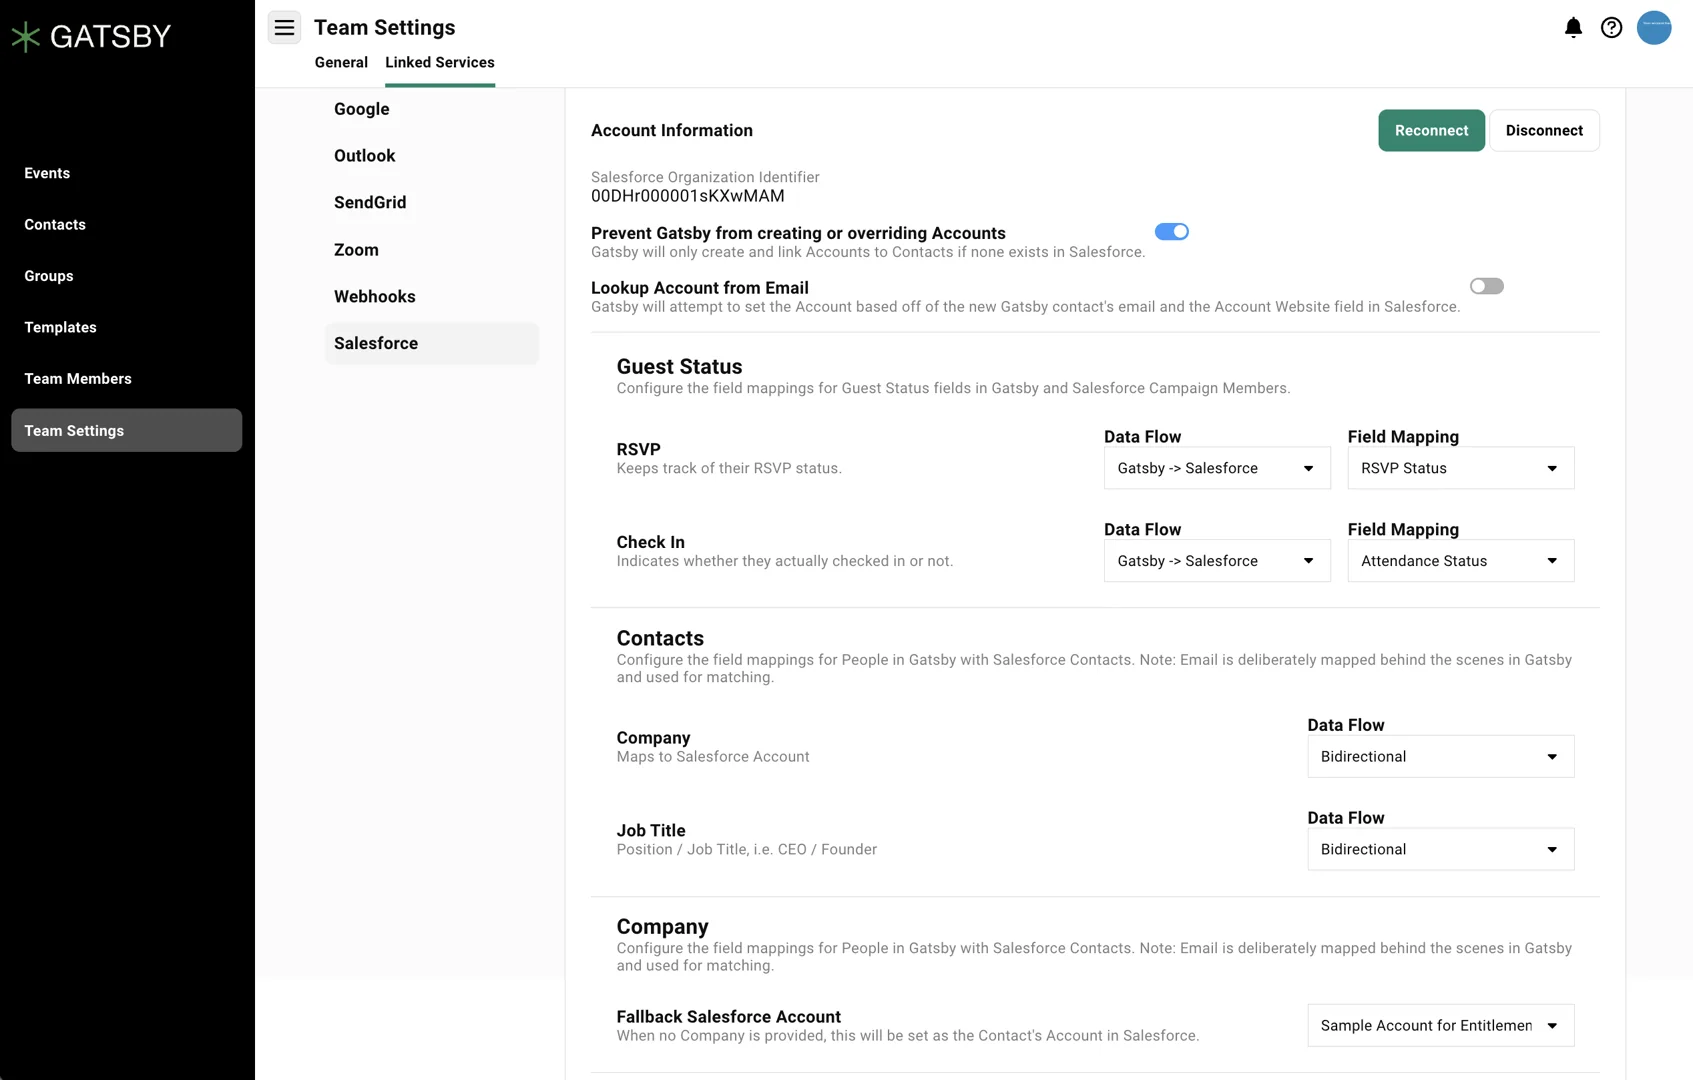
### Sync Directions
[Section titled “Sync Directions”](#sync-directions)
Each mapped field has a sync direction that controls how data moves between systems.
Sync (Bidirectional)+
Data flows both directions. Last update wins.
If a guest updates their title during registration, Salesforce gets the new title. If your team updates it in Salesforce, Gatsby gets the change.
**Best for:** Contact information like company and job title where either system might have fresher data.
**Watch out:** Conflicting updates within seconds. The last one processed wins.
Enrich (Fill Blanks Only)+
Only fills in empty fields. Never overwrites existing data.
If Salesforce has a guest’s job title but Gatsby doesn’t, Gatsby gets the title. If both systems have a value, neither changes.
**Best for:** Supplementary data you want to share without risking overwrites. Phone numbers, secondary emails.
One-Way (Gatsby to Salesforce)+
Data flows from Gatsby to Salesforce only.
RSVP and attendance data should use this direction. Gatsby manages event execution. Salesforce receives the results.
**Best for:** Event-specific data like RSVP status and attendance that originates in Gatsby and should flow to your CRM.
## Direction by Object
[Section titled “Direction by Object”](#direction-by-object)
This is not a uniform two-way sync. Direction varies by object.
| Object | Direction |
| --------------------------------------------- | ----------------------------------------------------------------------------------------------------------------------------------------------------------------- |
| Campaign membership (adding/removing a guest) | Both directions — add or remove in either system and it reflects in the other |
| Campaign Member removals specifically | Salesforce → Gatsby by default; toggle **Remove Guests When Removed From Salesforce Campaign** off in **Team Settings » Linked Services » Salesforce** to stop it |
| Contact/Lead matching | Gatsby matches outbound by email; does not pull unmatched Salesforce records into Gatsby |
| RSVP Status field | Gatsby → Salesforce only |
| Attendance Status field | Gatsby → Salesforce only |
| Mapped contact fields (company, title, etc.) | Per-field, configurable as Sync (bidirectional), Enrich (fill blanks only), or One-Way (Gatsby → Salesforce) — see Sync Directions above |
| Contact enrichment not otherwise mapped | Not pulled automatically; use CSV export/import |
## Connecting the Integration
[Section titled “Connecting the Integration”](#connecting-the-integration)
Setup requires configuration in both Salesforce and Gatsby. Two requirements trip up most first attempts: the Marketing User checkbox on the connecting user’s profile and Change Data Capture enabled for specific objects. Missing either causes silent failures.
### Prerequisites
[Section titled “Prerequisites”](#prerequisites)
Check these before attempting the connection.
Marketing User checkbox+
The Salesforce user connecting the integration must have **Marketing User** checked on their profile. This is not enabled by default. Your Salesforce admin must enable it.
Without this checkbox, campaign-related API calls fail silently. You’ll complete the OAuth flow successfully, but nothing will sync.
Change Data Capture+
In Salesforce Setup, Change Data Capture must be enabled for Campaign, Campaign Member, and Contact objects. This is how Salesforce notifies Gatsby of changes.
Search “Change Data Capture” in Setup. Move the three objects from Available Entities to Selected Entities. Save.
### Initial Setup
[Section titled “Initial Setup”](#initial-setup)
1. Go to **Team Settings > Linked Services > Salesforce** in Gatsby.
2. Click **Connect Salesforce**.
3. Enter your Salesforce Login URL:
* Production: `https://login.salesforce.com`
* Sandbox: `https://test.salesforce.com`
4. Authenticate with a user that has Marketing User enabled.
5. Authorize Gatsby to access Salesforce.
The Salesforce integration requires an additional subscription. Contact us on Slack or email for pricing details.
### Field Configuration
[Section titled “Field Configuration”](#field-configuration)
Create custom fields in Salesforce, then map them in Gatsby.
Creating the RSVP Status field+
1. Go to **Setup > Object Manager > Campaign Member > Fields and Relationships**.
2. Click **New**.
3. Configure the field:
* Field Label: `RSVP Status`
* Type: `Picklist`
* API Name: `RSVPStatus`
* Values: `None, Invited, Declined, Accepted, Waitlist, Maybe`
* Visibility: On for everyone (unless IT specifies otherwise)
4. Save.
Creating the Attendance Status field+
1. Same location: **Campaign Member > Fields and Relationships**.
2. Click **New**.
3. Configure the field:
* Field Label: `Attendance Status`
* Type: `Picklist`
* API Name: `Attendance_Status`
* Values: `N/A, Yes, No Show`
* Visibility: On for everyone
4. Save.
Enabling Change Data Capture+
1. In Salesforce Setup, search “Change Data Capture”.
2. Move **Campaign**, **Campaign Member**, and **Contact** from Available Entities to Selected Entities.
3. Save.
Mapping fields in Gatsby+
1. Return to **Team Settings > Linked Services > Salesforce**.
2. Map each Gatsby field to its Salesforce counterpart.
3. Select sync direction for each field.
4. Save.
Configuring the fallback account+
When Gatsby creates a new Contact in Salesforce, it needs an Account to associate with. The fallback account handles cases where Gatsby can’t match a guest to an existing Account.
1. In **Team Settings > Linked Services > Salesforce**, find **Fallback Account**.
2. Select an existing Salesforce Account or create a generic one like “Event Registrations” or “Gatsby Contacts.”
3. Save.
New contacts without a matching Account get assigned to this fallback. Your team can reassign them later in Salesforce.
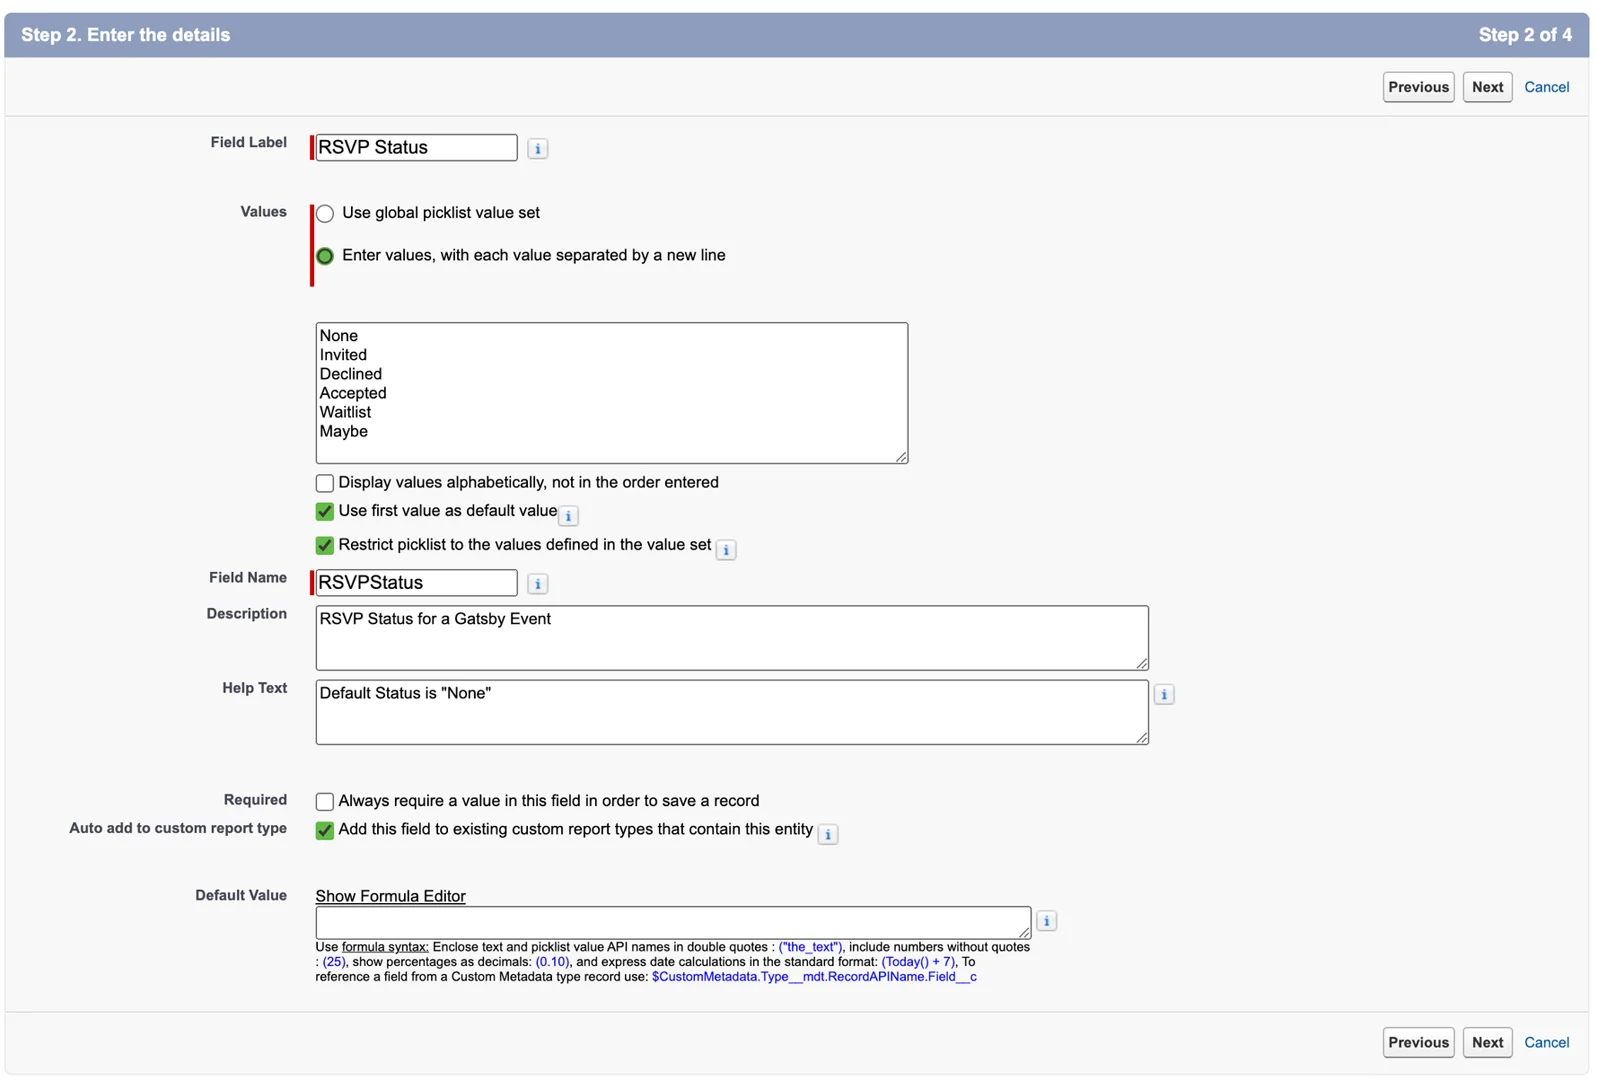
Create the RSVP Status picklist on Campaign Member
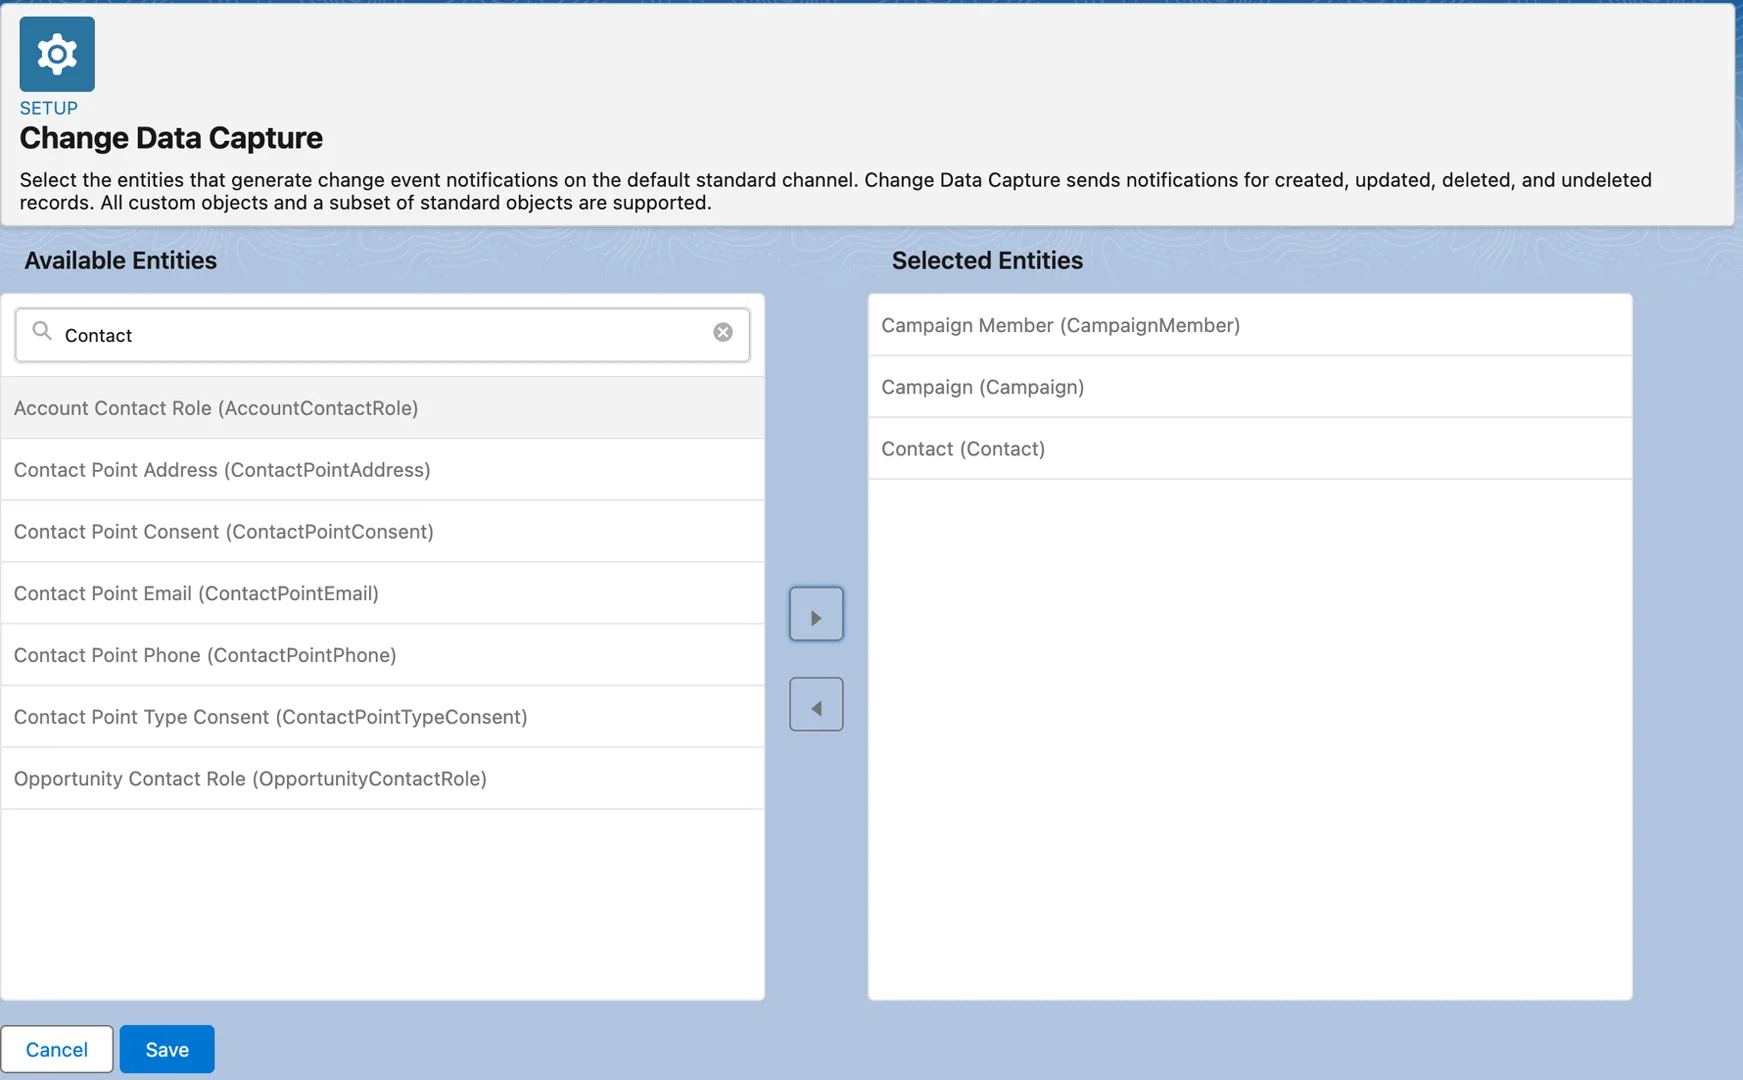
Enable Change Data Capture for the required objects
## Linking Events to Campaigns
[Section titled “Linking Events to Campaigns”](#linking-events-to-campaigns)
Each Gatsby event connects to a Salesforce Campaign. Guests become Campaign Members. RSVP and attendance data syncs to their Campaign Member record.
Connecting to an existing campaign+
1. Open your event in Gatsby.
2. Go to **Event Details** (the settings panel).
3. Select a Salesforce Campaign from the dropdown.
4. Save.
Creating a new campaign from Gatsby+
1. In Event Details, click **Create New** instead of selecting an existing campaign.
2. Name the campaign.
3. Optionally select a parent campaign.
4. Save. The campaign creates in Salesforce automatically.
Changing the connected campaign+
Edit Event Details, select a different campaign from the dropdown, and save. Future syncs go to the new campaign.
Custom objects (not standard Campaigns)+
If your Salesforce org uses custom objects like “Events” or “Functions” instead of standard Campaigns, the integration works with those too. Contact support to configure custom object mapping.
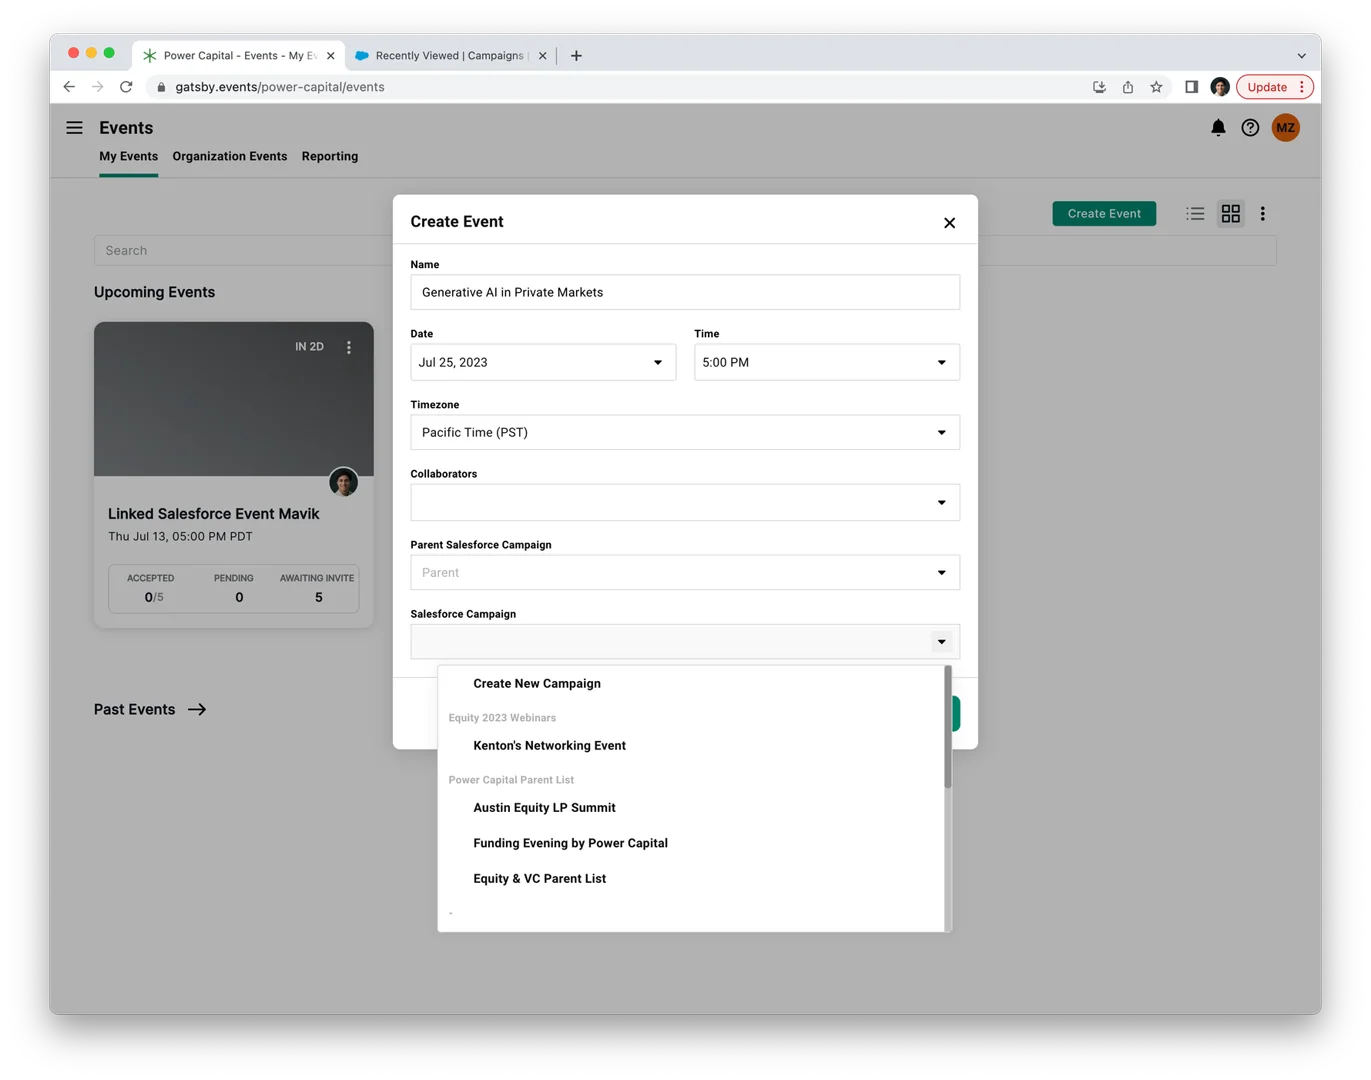
## Common Questions
[Section titled “Common Questions”](#common-questions)
Is this a two-way sync?+
Partial. RSVP and attendance data flows from Gatsby to Salesforce. Campaign Member additions and removals sync both directions, though removals can be switched off with **Remove Guests When Removed From Salesforce Campaign**. Contact enrichment from Salesforce does not automatically pull into Gatsby.
A guest vanished from our guest list after a Salesforce cleanup. What happened?+
Removing someone from the linked Salesforce Campaign removes them from the Gatsby event by default. Restore them from **Add Guests > Restore Guests** on the guest list, and if you don’t want removals to sync at all, turn off **Remove Guests When Removed From Salesforce Campaign** in **Team Settings > Linked Services > Salesforce**.
Can I customize the picklist values?+
Yes. After creating the fields per the setup instructions, you can modify display values to match your terminology. Keep the API names consistent for the integration to work.
When does data sync?+
Immediately. No batch process. No manual sync button. Check in a guest, and Salesforce updates in real-time.
Can I connect sandbox environments?+
Yes. Use `https://test.salesforce.com` as your login URL during setup.
What are the requirements?+
* Marketing User checkbox enabled on the connecting user
* Change Data Capture enabled for Campaign, Campaign Member, and Contact
* Custom picklist fields for RSVP Status and Attendance Status
* Gatsby add-on subscription
# Webhooks & Zapier
> Automate event data flow to any CRM or app. Webhooks push guest activity, RSVP changes, and attendance data to HubSpot, Airtable, Salesforce, and thousands of other tools through Zapier, Make, or n8n.
Real-Time CRM Updates
Guest checks in, CRM updates.
RSVP changes, registrations, and attendance data push to your CRM as they happen. No export step.
Works with Zapier, Make, n8n
Pick your middleware.
Gatsby sends structured webhook data. Zapier, Make, or n8n routes it to HubSpot, Airtable, Salesforce, or wherever your team works.
Configure Once
Paste a URL. Done.
One webhook URL connects Gatsby to your entire automation stack. Every future event uses the same connection.
## The Export Loop Is Killing Your Follow-Up
[Section titled “The Export Loop Is Killing Your Follow-Up”](#the-export-loop-is-killing-your-follow-up)
Guest registers at 2pm on Wednesday. You export the list the following Tuesday. Clean up duplicates. Match to existing contacts. By the time sales sees the record, the prospect forgot they attended.
That’s 10-15 hours of data entry per event and a week-long gap where follow-up dies.
Webhooks close that gap. Gatsby pushes guest data to your CRM automatically, the moment something changes. A guest checks in at your dinner, their Salesforce record updates before dessert.
## What Fires and When
[Section titled “What Fires and When”](#what-fires-and-when)
Gatsby sends webhook data at specific moments. Knowing which webhooks exist and what they contain is the foundation for building the right automation.
The field lists below reflect current webhook behavior but aren’t generated from a live schema, so confirm field names against an actual payload (the “Send real data” and “Test trigger” steps further down show you how) before building anything mission-critical on top of them. Retries and timeouts are covered under [Delivery](#delivery) below. Ordering and duplicate delivery aren’t documented yet; ask support for the current behavior if your integration depends on them.
### Guest Webhooks
[Section titled “Guest Webhooks”](#guest-webhooks)
The workhorse. This single webhook handles most CRM sync use cases.
Guest Created or Edited+
Fires whenever guest data changes on any event.
**Data included:**
* Guest name, email, company
* RSVP status and attendance status
* Custom field responses
* Event details (name, date, location)
**Triggers:**
* Guest added to event (manually or via import)
* Guest submits RSVP through landing page
* RSVP status changes (Accepted, Declined, Maybe, Waitlist, Canceled)
* Guest checks in at event
* Guest information updated
* Custom field responses saved
### Event Webhooks
[Section titled “Event Webhooks”](#event-webhooks)
Track event lifecycle in external systems. Less commonly used, but useful for teams that manage event operations in project management tools.
Event Created / Event Deleted+
**Event Created** fires when you create a new event. **Event Deleted** fires when one is removed.
**Common uses:**
* Sync event calendar to external tools
* Trigger task creation in Asana or Monday
* Create project folders automatically
### Manual Sync
[Section titled “Manual Sync”](#manual-sync)
Push all guest data at once instead of waiting for individual changes.
Sync Entire Guest List+
Triggered manually from within Gatsby. Sends every guest record for an event through the webhook.
**When to use:**
* Setting up a new integration (backfill existing data)
* Verifying your automation works correctly
* Recovering from sync issues
### Delivery
[Section titled “Delivery”](#delivery)
Know how deliveries behave before you point a webhook at your own endpoint.
Retries and timeouts+
Each webhook is sent once. Gatsby doesn’t currently retry failed deliveries or enforce a specific timeout. If your endpoint is down or returns an error, that delivery isn’t resent. After an outage, run **Sync Entire Guest List** on the affected events to catch your destination back up.
## Setting Up Webhooks with Zapier
[Section titled “Setting Up Webhooks with Zapier”](#setting-up-webhooks-with-zapier)
Zapier receives webhook data from Gatsby and routes it to your destination app. Make and n8n work the same way. This guide uses Zapier.
### Connect Gatsby to Zapier
[Section titled “Connect Gatsby to Zapier”](#connect-gatsby-to-zapier)
Before you start+
* **Zapier Pro plan or higher.** The free plan does not support webhooks.
* **Webhooks enabled in Gatsby.** Webhooks is a limited-release feature that Gatsby enables per organization. If you don’t see **Team Settings » Linked Services » Webhooks**, contact support to request access rather than assuming it’s a bug.
* **Your destination app** (HubSpot, Airtable, etc.) connected in Zapier.
Step-by-step setup+
1. **Create your Zap**
In Zapier, create a new Zap. Choose “Webhooks by Zapier” as your trigger app. Select “Catch Hook” as the trigger event.
2. **Copy the webhook URL**
Zapier generates a unique webhook URL. Copy the entire URL including the `https://` prefix.
3. **Paste in Gatsby**
Go to **Team Settings** > **Linked Services** > **Webhooks**. Paste your webhook URL into the appropriate field. For CRM sync, use “Guest Updated Webhook URL” since it captures RSVP changes and new registrations.
4. **Test the connection**
Click Save, then click Test in Gatsby. You should see a “Webhook reachable” confirmation.
5. **Send real data**
Add a guest to any event or update an existing RSVP. Zapier needs actual data to map field names in the next step.
Verify it worked+
In Zapier, click “Test trigger.” You should see “We found a request!” with fields like Email, First Name, Last Name, Company, RSVP Status, and Event Name.
If nothing appears, make sure you triggered an actual guest change in Gatsby after setting up the connection. The test only works with real webhook events.
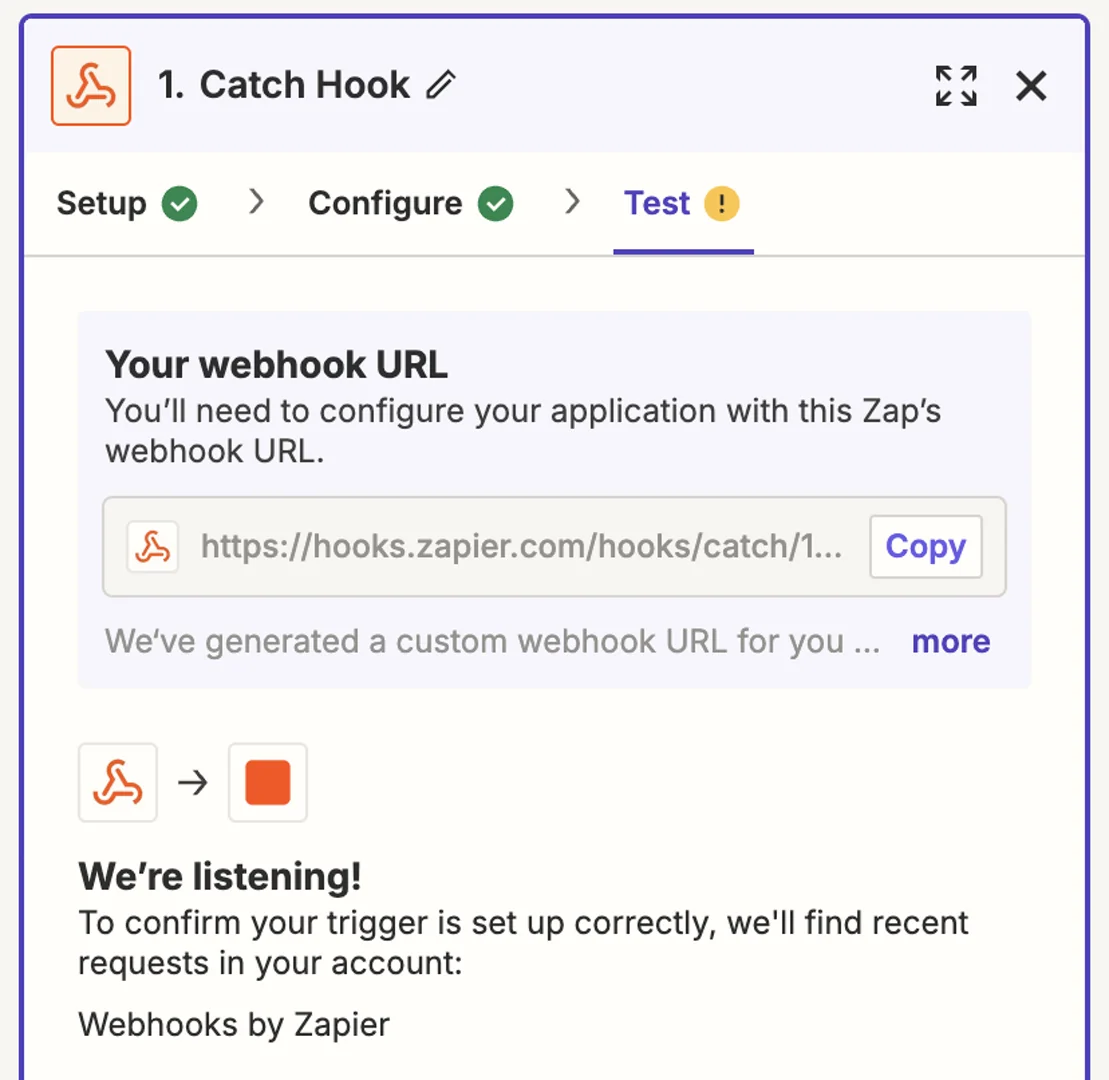
Copy the webhook URL from Zapier
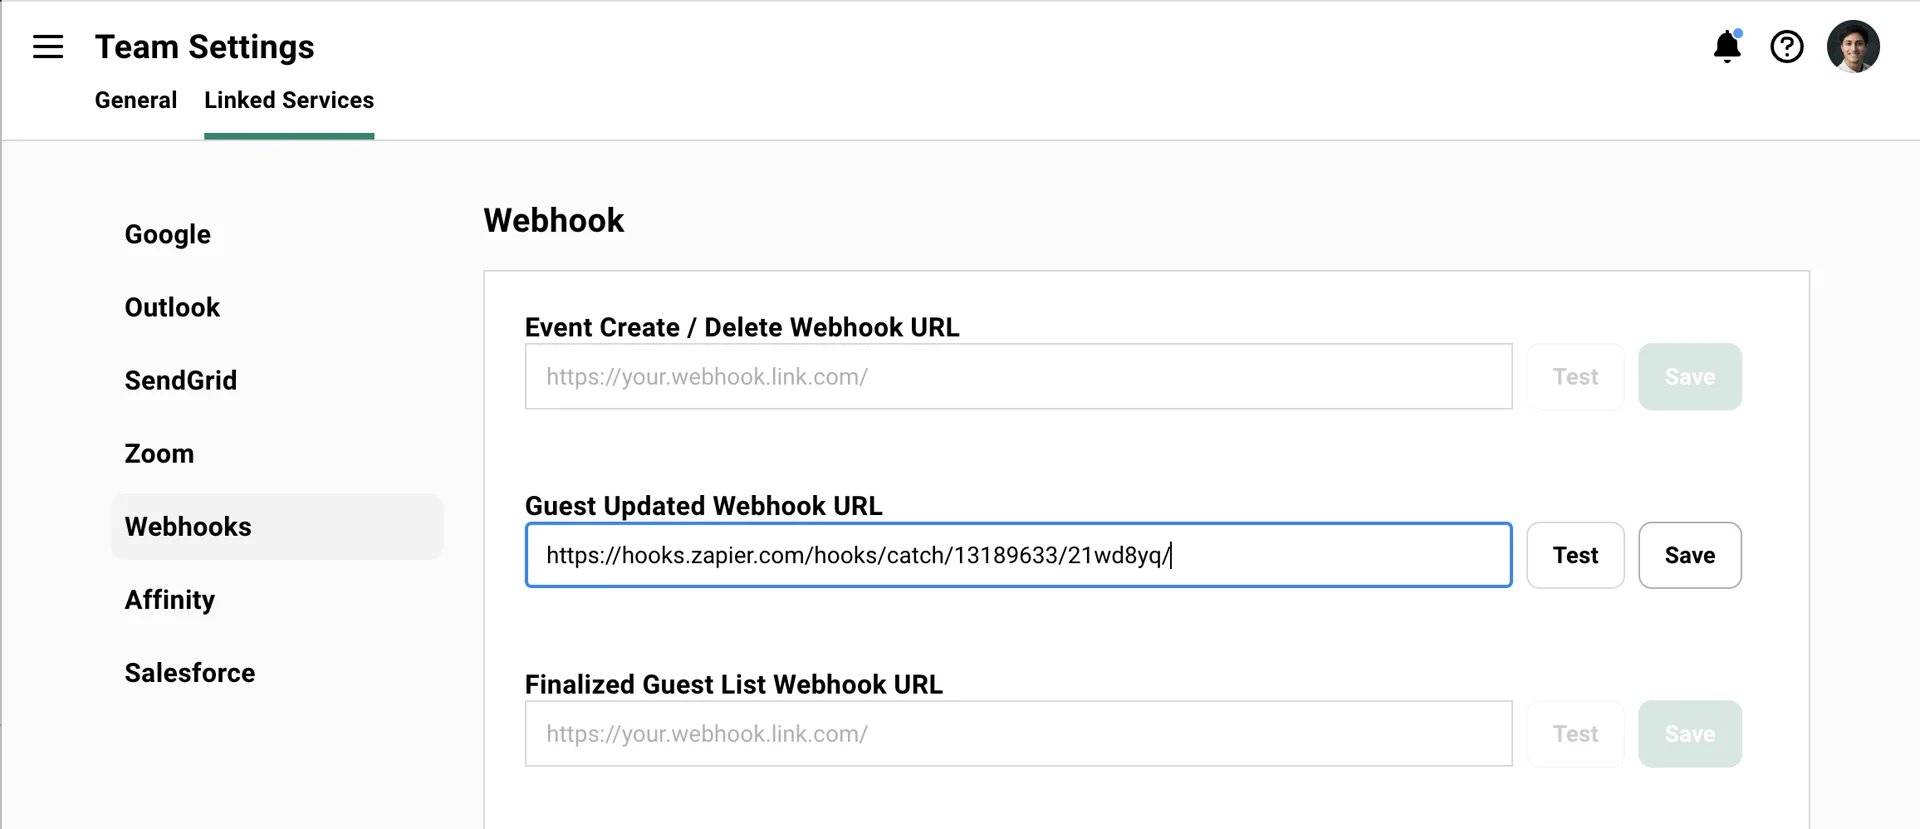
Paste the URL in Gatsby webhook settings

Zapier shows the data fields received from Gatsby
## Routing Data to Your CRM
[Section titled “Routing Data to Your CRM”](#routing-data-to-your-crm)
The webhook receives data. Now you route it somewhere useful. Every destination follows the same logic: search for the person by email, create them if they don’t exist, update their record with event data.
### The Pattern
[Section titled “The Pattern”](#the-pattern)
Email is the primary identifier in Gatsby. Using email as your matching field prevents duplicate records when the same guest appears across multiple events.
Each webhook includes event details, so you can log each event as a separate activity, update a “last event attended” field, or build a complete event history depending on your destination.
HubSpot+
1. After your webhook trigger, add a HubSpot action. Choose “Create or Update Contact.”
2. Connect your HubSpot account and grant Zapier permission to manage contacts.
3. Set email as the field to search for existing contacts. Enable “Create contact if it does not exist.”
4. Map Gatsby fields to HubSpot properties: First Name, Last Name, Company, and any custom properties like Event Name or RSVP Status.
**Tip:** Create a custom HubSpot property for “Events Attended” or use Timeline Events to log each registration separately. This builds a history of each contact’s event engagement.
Airtable+
1. Add an Airtable “Find Record” action. Search by email to check if the person already exists in your base.
2. Add an Airtable “Create or Update Record” action. Use email as your lookup field.
3. Map Gatsby data to Airtable columns: Name, Email, Company, RSVP Status, Event Name, Event Date.
**Tip:** Create a linked “Events” table where each row represents one person at one event. Link to a People table for the master contact record. This lets you query by person or by event.
Other destinations+
The same pattern works for Salesforce, Pipedrive, Copper, Attio, Notion, Monday, Slack, and anything else Zapier connects to. Search by email, create or update, map fields.
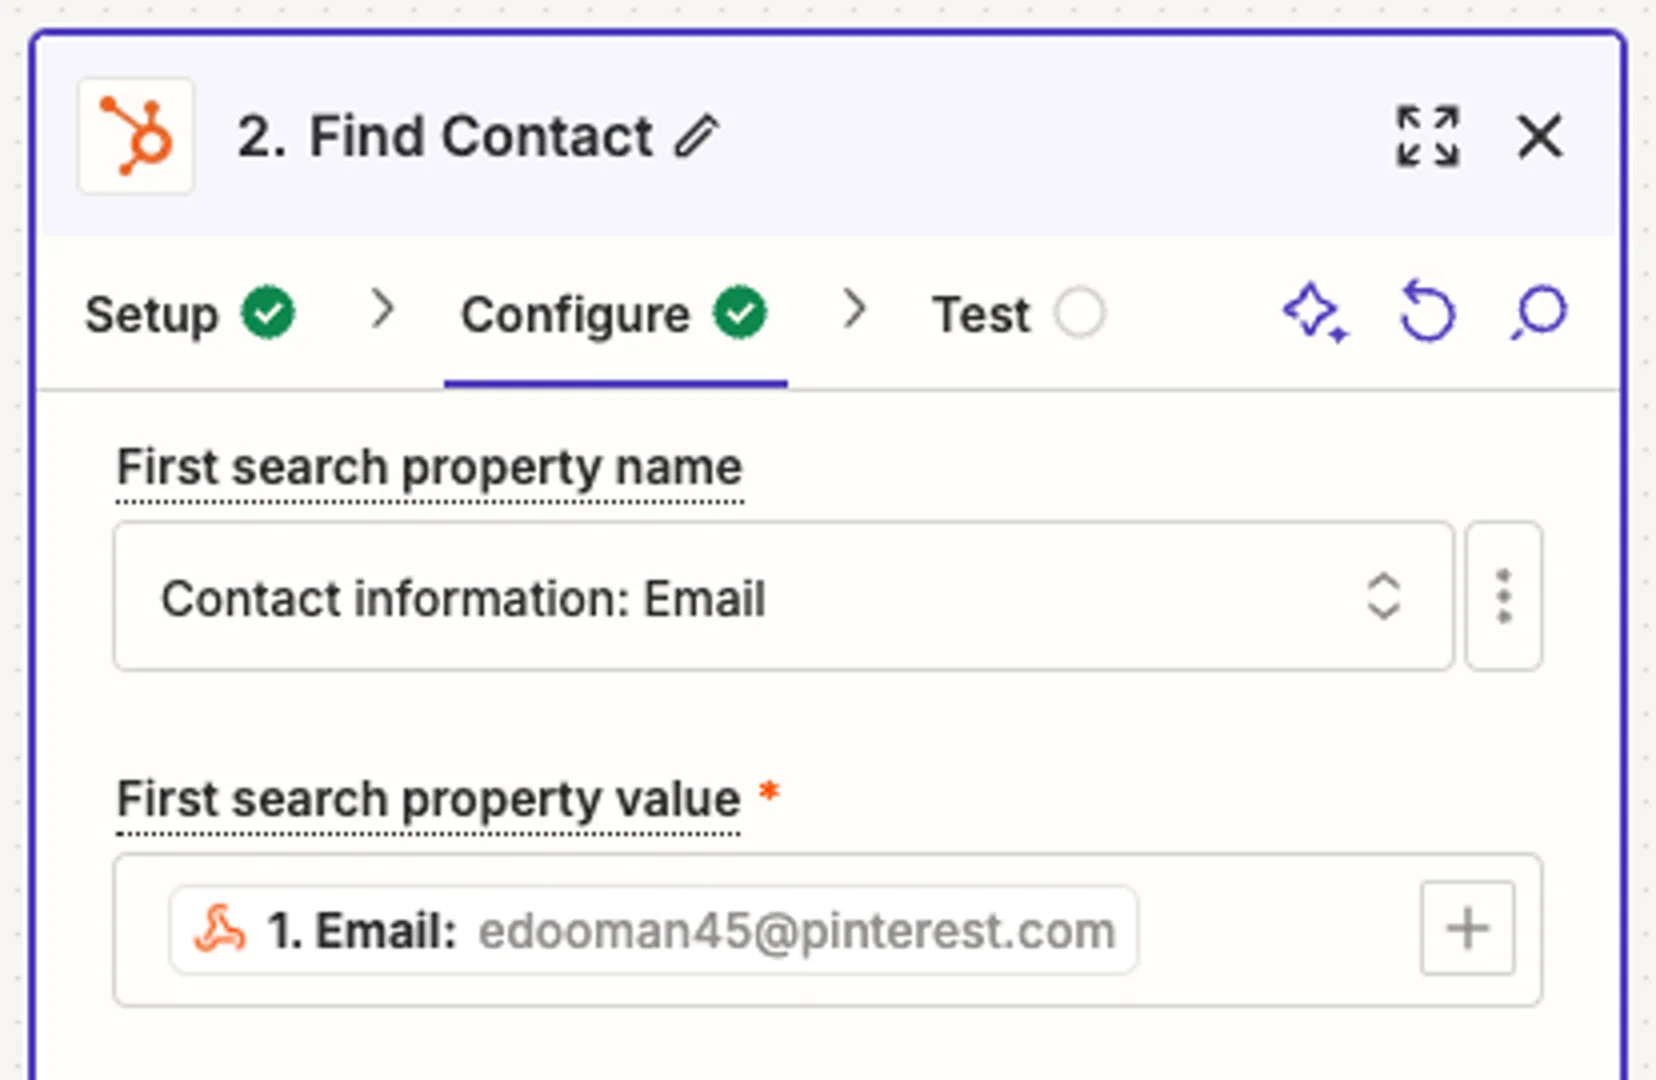
Configure email as the matching field
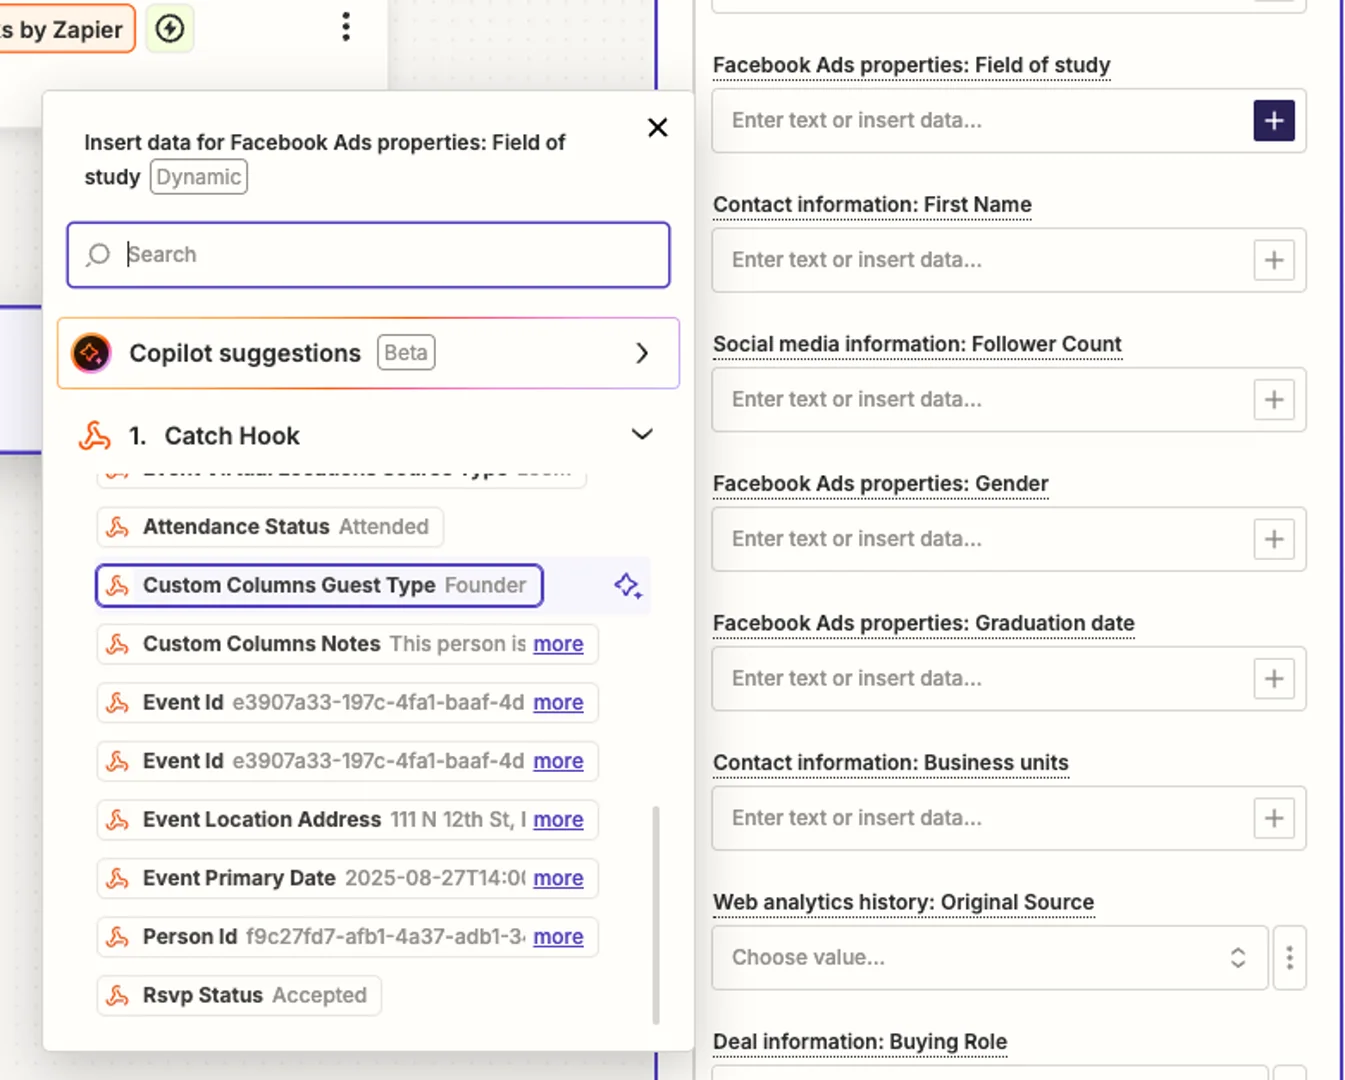
Map Gatsby fields to HubSpot properties
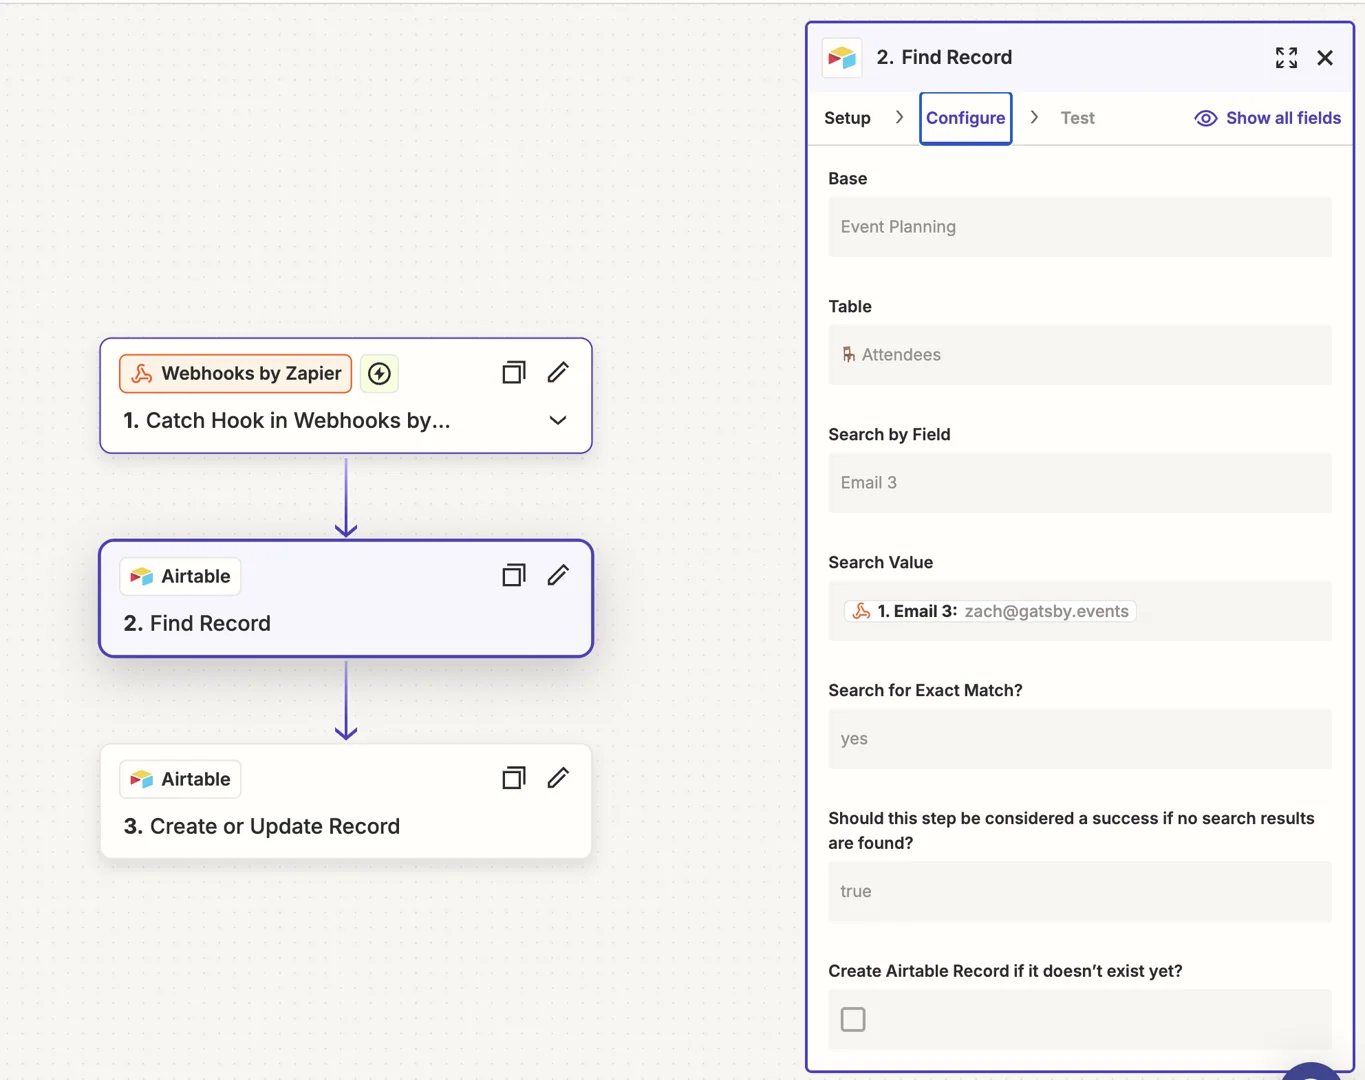
Search for existing records by email in Airtable
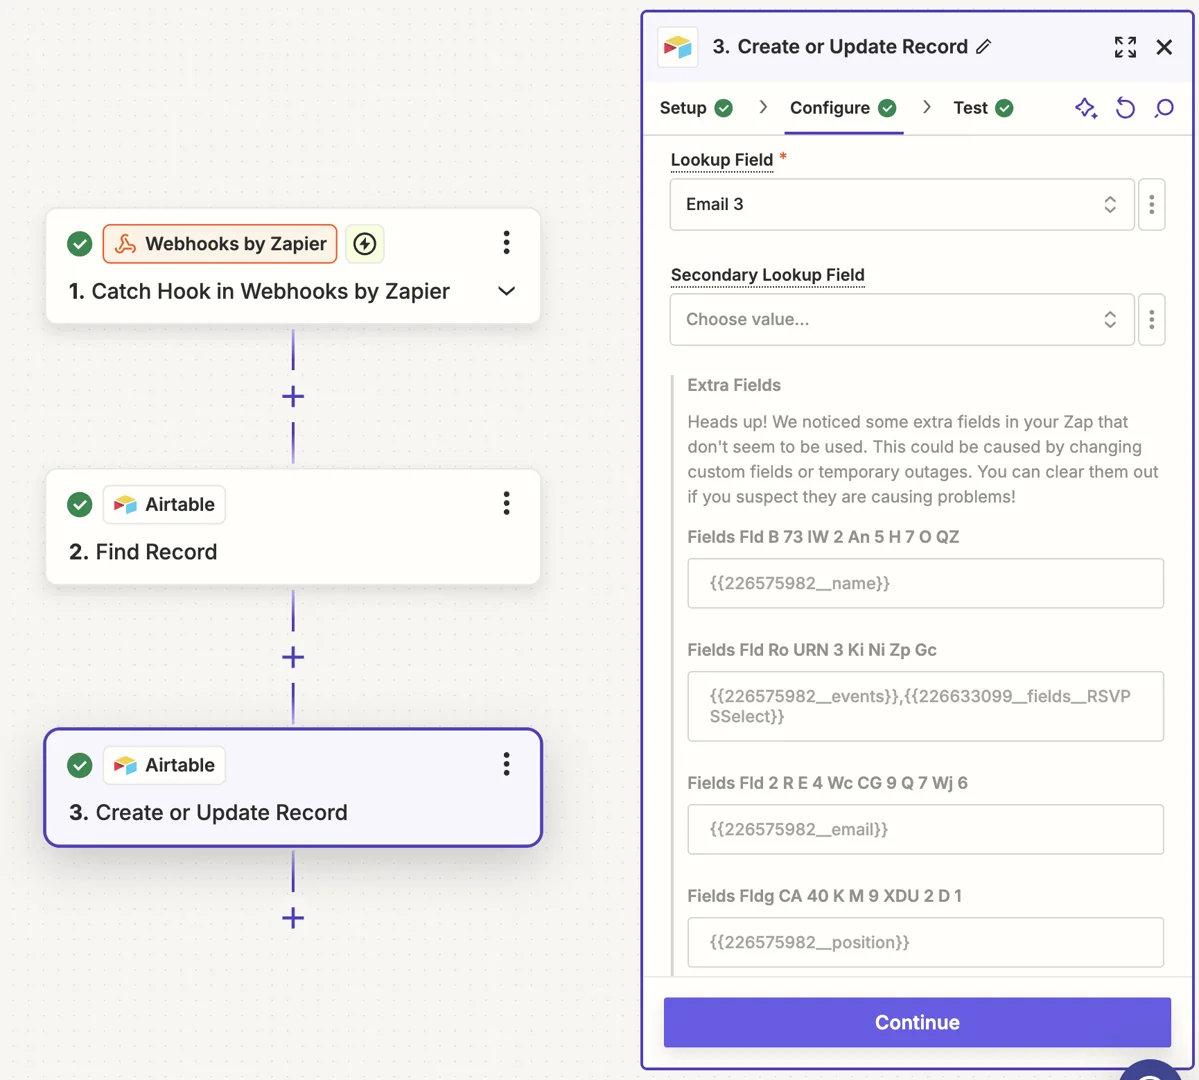
Create or update the Airtable record with Gatsby data
## Common Questions
[Section titled “Common Questions”](#common-questions)
What data comes through the webhook?+
Guest webhooks include: name, email, company, RSVP status, attendance status, custom field responses, plus event details like name, date, and location.
How fast do webhooks fire?+
Within seconds of the action in Gatsby. If you’re not seeing data, check your Zapier task history for errors.
How do I prevent duplicate records?+
Use email as your matching field in the destination app. Configure your action to “create or update” rather than just “create.” This finds existing records before creating new ones.
Can I send webhooks straight to HubSpot without Zapier?+
Yes. You can skip the middleware and build directly in a HubSpot workflow, no code required:
1. In HubSpot, create a workflow that is triggered when a webhook is received, and copy the webhook URL HubSpot provides.
2. In Gatsby, paste it into **Guest Updated Webhook URL** under **Team Settings » Linked Services » Webhooks**.
3. Add a guest to an event or change an RSVP so HubSpot receives a sample payload, then map fields in the workflow using email as the identifier.
Gatsby sends data to the workflow whenever a guest is added to an event and whenever their RSVP or attendance status changes. Webhook-triggered workflows are a HubSpot feature that depends on your HubSpot subscription, so confirm your plan includes them.
To write data back into Gatsby from a HubSpot workflow, the workflow can POST to the [Gatsby API](/platform/integrations/api/) with your API key in the `x-api-key` header. That requires API access on your Gatsby account.
My webhook shows as unreachable+
Check that you copied the complete URL including `https://`. Verify your Zapier plan includes webhooks. Try generating a new webhook URL in Zapier.
Does Gatsby have an API?+
Yes. Unlike a webhook, which only pushes data out of Gatsby when something changes, the [Gatsby API](/platform/integrations/api/) can also read and write data on demand. It’s a separate limited-release add-on from Webhooks. See the API page for setup and access.
How do I enable webhooks?+
Talk to your account team. Webhooks is a premium add-on rather than something included in every plan, so the settings won’t appear until it’s been added to your contract. If you already have the API add-on, or a CRM integration add-on like Salesforce or Affinity, webhooks can usually be bundled with it. Ask your account team what your current package covers.
# Zoom Integration
> Run Zoom webinars through Gatsby. Register guests from your own branded RSVP, bring Zoom's registration questions into your form, give every guest their own join link, and sync attendance back to your guest list.
Why it matters
## Your webinar runs on Zoom. Does it have to look like Zoom?
Zoom’s registration page is Zoom’s. So is its confirmation email. For an invitation-only investor briefing or a client education series, the first thing your guests see shouldn’t be someone else’s product.
Gatsby now supports Zoom webinar flows end to end, so Zoom does the broadcasting and you keep the experience.
How Gatsby helps
### Your registration, your branding
Guests register on your Gatsby landing page and get your confirmation email, not Zoom’s.
### Zoom’s questions, your form
The registration questions you built in Zoom appear inside your Gatsby RSVP. Guests answer once.
### One link per guest
Every registered guest gets their own Zoom join link, so a webinar that requires registration actually requires it.
### Answers where you already work
Responses land on your guest list beside RSVP status and attendance, ready to review before you approve anyone.
## How the Integration Works
[Section titled “How the Integration Works”](#how-the-integration-works)
Gatsby connects to your Zoom account so you can manage meeting links, register guests, and track attendance from one place. Three things happen:
**Meeting links** flow into your calendar invites. You create or link a Zoom meeting from your event page, and the join URL appears in every calendar invite Gatsby sends. No switching between Zoom and Gatsby to copy URLs.
**Registration** can run through your Gatsby RSVP. If your Zoom webinar requires registration, Gatsby can register each guest who RSVPs yes and show Zoom’s own registration questions inside your RSVP form, so guests answer once instead of twice. This is off by default.
**Attendance** syncs back to your guest list. Starting 30 minutes after the meeting’s scheduled end time, Gatsby pulls the attendee list from Zoom and matches it against your guests. When it matches, attendance marks automatically. When it doesn’t, you export from Zoom and import to Gatsby.
## Connecting Your Zoom Account
[Section titled “Connecting Your Zoom Account”](#connecting-your-zoom-account)
Connect with an admin account if you want any team member to create and link meetings from any user on your Zoom account. A non-admin connection also works, but only for that person’s own meetings.
### Setup
[Section titled “Setup”](#setup)
Why admin permissions are required+
The person connecting must be a Zoom account admin. Admin access gives Gatsby visibility into all users on the account, so any team member can link meetings hosted by anyone.
Without admin access, you only see your own meetings. Other team members won’t be able to link theirs.
Connection steps+
1. Go to **Team Settings > Linked Services > Zoom**.
2. Click **Add Account**.
3. Authenticate with your Zoom admin account.
4. Authorize Gatsby to access Zoom.
5. Return to Gatsby. Refresh if needed.
The Zoom option now appears when adding virtual locations to events.
[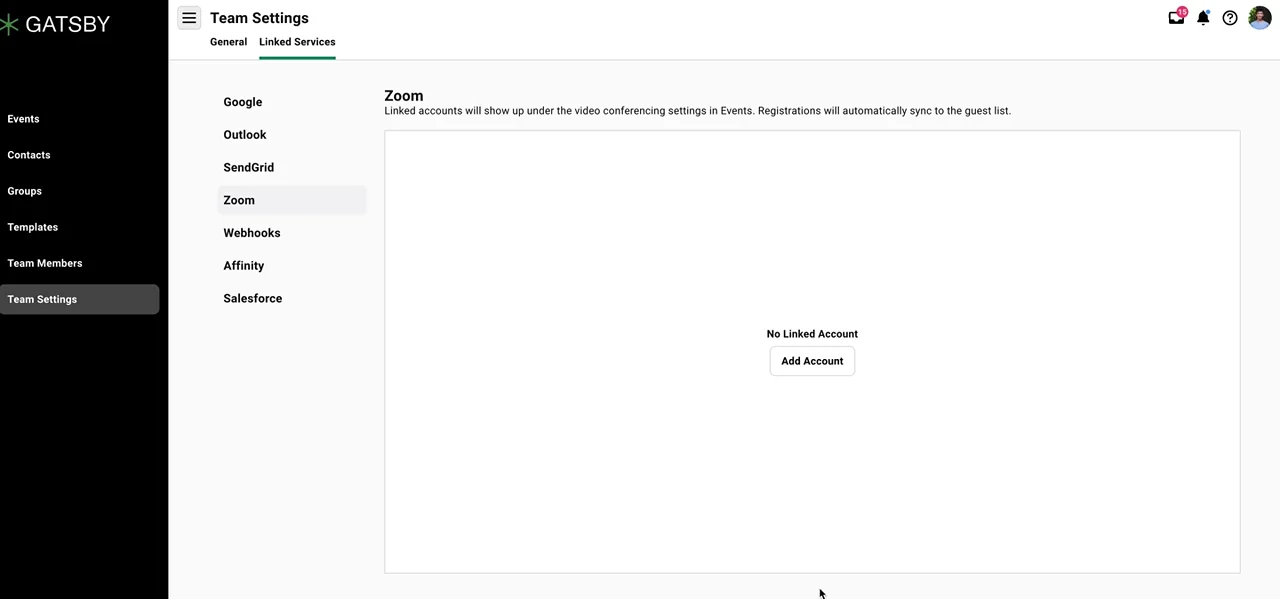](/legacy/zoom-integration-01.mp4)
## Adding Zoom Meetings to Events
[Section titled “Adding Zoom Meetings to Events”](#adding-zoom-meetings-to-events)
Link an existing Zoom meeting or create a new one directly from your event page. Either way, the join URL populates your calendar invite.
Link an existing meeting+
1. Open your event in Gatsby.
2. Go to **Event Details**.
3. Find the **Location** section.
4. Click **Add virtual location**.
5. Select **Link existing meeting**.
6. Choose your meeting from the dropdown, or paste the meeting details.
7. Save.
Create a new meeting from Gatsby+
1. Open your event in Gatsby.
2. Go to **Event Details**.
3. Find the **Location** section.
4. Click **Add virtual location**.
5. Select **Add Meeting**.
6. Gatsby creates the meeting using your event’s name, date, and time.
The meeting appears in your Zoom account immediately.
[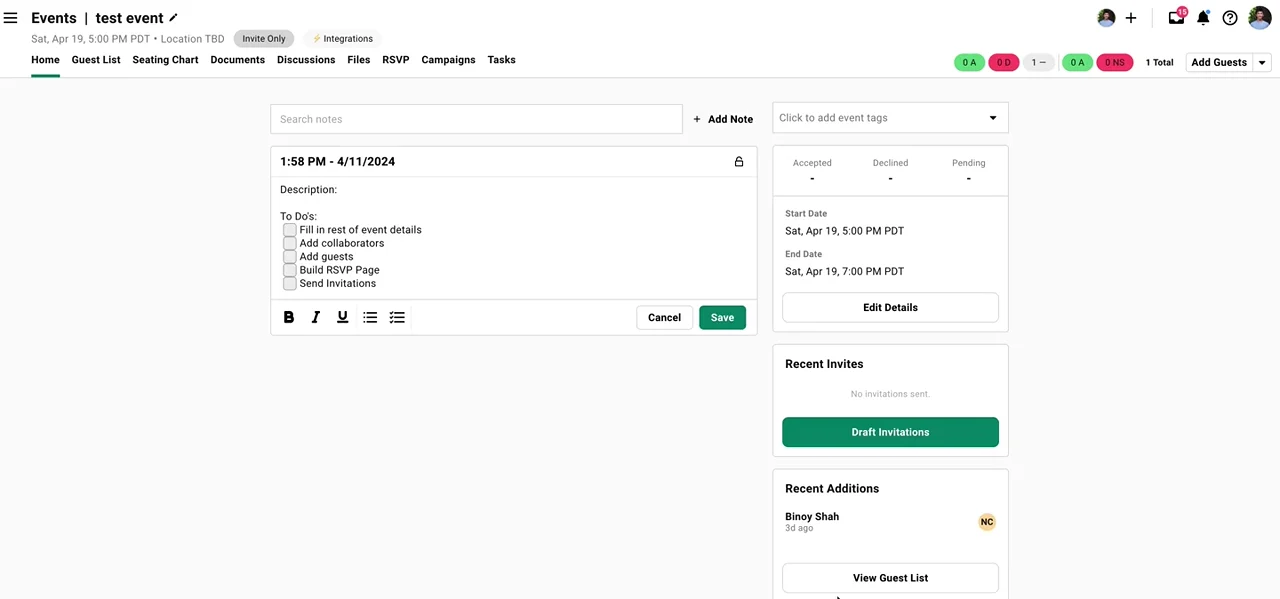](/legacy/zoom-integration-02.mp4)
## Registering Guests Through Gatsby
[Section titled “Registering Guests Through Gatsby”](#registering-guests-through-gatsby)
Zoom webinars can require registration before anyone gets a join link. Left alone, that means your guests fill out your Gatsby RSVP and then fill out Zoom’s registration form too.
One toggle collapses those two steps into one.
### The Registration Questions Toggle
[Section titled “The Registration Questions Toggle”](#the-registration-questions-toggle)
Find **Show Zoom registration questions** in your event’s Zoom settings, alongside the meeting details. It is **off by default**.
Turning it on does two things: it registers guests with your linked Zoom webinar when they RSVP, and it pulls Zoom’s own custom registration questions into your RSVP form so guests answer them there.
Turn it on even if your webinar has no custom questions. The registration itself is what produces each guest’s join link.
**Write your registration questions in Zoom before you invite anyone, and don’t rename them afterwards.** Zoom identifies each question by its title alone, with no ID underneath, so a question you rename later reads to Gatsby as a brand new question. You end up with duplicates in your survey and answers stranded on the old wording. Settle the wording in Zoom first.
What happens when it's on+
* Guests who RSVP **yes**, **maybe**, or land on the **waitlist** are registered with your Zoom webinar. Guests who decline are not.
* Zoom’s custom registration questions appear in your RSVP form. Name and email are filled in from the RSVP automatically, so guests never retype them.
* Required Zoom questions are enforced before the RSVP submits.
What happens when it's off+
Guests are not registered with Zoom and will not receive a Zoom join link. They can still RSVP in Gatsby, and they can still register themselves on the Zoom side.
This is the right setting when you want Zoom to own approvals and its own confirmation emails.
Why the toggle might not appear+
The toggle only shows when there is something for it to do: either the linked webinar actually requires registration, or you have just created the Zoom meeting from Gatsby.
Gatsby checks Zoom live to work this out, so you may briefly see **Checking Zoom registration…** first.
If you created the meeting from Gatsby and have not set registration up in Zoom yet, you can still turn the toggle on now to pre-enable it for when you do.
Limitations worth knowing+
* **Plus-ones are not registered with Zoom.** Only the guest on your list is. Register additional attendees directly in Zoom.
* **Registration never blocks an RSVP.** If Zoom is unreachable when a guest submits, their Gatsby RSVP still saves. The Zoom registration is what fails, quietly, and you may need to add that person in Zoom.
## Per-Guest Join Links and Synced Answers
[Section titled “Per-Guest Join Links and Synced Answers”](#per-guest-join-links-and-synced-answers)
Registering guests through Gatsby produces two things worth having: a join link that belongs to one person, and their Zoom answers sitting where the rest of your guest data already lives.
### Each Guest Gets Their Own Join Link
[Section titled “Each Guest Gets Their Own Join Link”](#each-guest-gets-their-own-join-link)
When Zoom registers a guest, it issues a join link unique to that person. Gatsby stores it and uses it instead of the shared event link.
This matters for webinars that require registration. A shared link lets anyone in without registering, which defeats the approval step you turned registration on for.
Where the per-guest link appears+
* **Calendar invites.** The `.ics` description uses the guest’s own link when there is one, and falls back to the shared meeting URL otherwise.
* **Confirmation emails.** Insert **Zoom Join Link** from the editor’s merge-tag menu. It resolves to each recipient’s own link when the email sends.
The **Zoom Join Link** option only appears in the menu when the event has a Zoom meeting linked through Gatsby, since that’s the only case where per-guest links exist.
Guests who never registered+
A guest with no Zoom registration has no personal link. They get the shared meeting URL, exactly as before.
### Zoom Answers in Your Guest List
[Section titled “Zoom Answers in Your Guest List”](#zoom-answers-in-your-guest-list)
Answers guests give to Zoom’s registration questions now come back into Gatsby as survey responses. They appear on the **Guests** tab beside everything else you know about that person.
This also clears a false warning. Previously a guest could complete registration in Zoom and still show **Survey Not Submitted** in Gatsby, because Gatsby had no record of their answers.
Synced questions are read-only in Gatsby+
Questions that came from Zoom appear in your survey editor marked **Synced from Zoom · edit in Zoom**. You can see them, but you can’t rename, reorder, or delete them from Gatsby.
Zoom owns those questions. Edit them in Zoom, then use **Sync questions from Zoom** to bring the changes across.
Guests don't see the questions twice+
Synced questions are organizer-facing only. Your guests continue to see the single Zoom registration section in the RSVP form, so nothing is duplicated for them.
Why renaming causes duplicates+
Zoom’s API hands Gatsby each custom question as a title, a type, and its answer options. It does not include an ID, and Zoom exposes no stable identifier for a registration question anywhere in its API.
So the title is the only thing Gatsby can match on. Rename **Dietary requirements** to **Dietary needs** in Zoom, and the next sync sees a question Gatsby has never met. It adds the new one and retires the old one, leaving any answers already collected attached to the retired version.
The working order, then:
1. Build your registration questions in **Zoom**, with the wording you actually want.
2. Turn on **Show Zoom registration questions** in Gatsby.
3. Send your invitations.
If you must reword a question after responses exist, expect the old question and its answers to stay behind alongside the new one. Export what you need first.
## Attendance Tracking
[Section titled “Attendance Tracking”](#attendance-tracking)
Gatsby pulls the attendee list from Zoom once the meeting’s scheduled end time has passed, then checks matching guests in on your guest list.
The meeting or webinar has to be linked through Gatsby, not pasted in as a URL. Gatsby needs the Zoom ID to ask Zoom who attended.
When the sync runs+
Gatsby waits until 30 minutes past the **scheduled** end of your Zoom meeting, worked out from Zoom’s own start time and duration, then keeps checking every few minutes until Zoom has the attendee report ready.
Two consequences worth knowing:
* A session that runs long still gets picked up. Zoom reports nothing while a meeting is live, so Gatsby simply keeps checking.
* Changing the duration in Zoom moves when Gatsby starts looking.
How matching works+
Gatsby tries email first, then falls back to the display name.
***
**Email**
Matched against your contacts’ email addresses, ignoring capitalization. This is the reliable path, and it is the reason registration matters: a registered guest has handed Zoom a real email address.
***
**Display name**
If no email matches, Gatsby compares the name the person used in Zoom against **people already on that event’s guest list**. It checks the full name and first-plus-last, ignoring capitalization.
The name fallback is deliberately limited to guests on the event. Zoom display names are unreliable, and matching names across your whole contact database would produce confident wrong answers.
***
So a guest who registered with their work address but joined from a personal laptop can still be matched, as long as the name they joined under resembles the name on your list. Someone who joins with an unmatched email and no recognizable name won’t be.
When matching fails+
Export the attendee list from Zoom, clean up the data so emails match your guest list, and import it into Gatsby.
This is most common on plain meetings that don’t require registration, where Zoom often holds no email address for the people who joined.
Guests who registered on the Zoom side+
Gatsby also pulls Zoom’s registrant list into your event, so people who signed up directly in Zoom still land on your guest list. They arrive tagged **Zoom Registrant**, which keeps them distinguishable from the guests you invited.
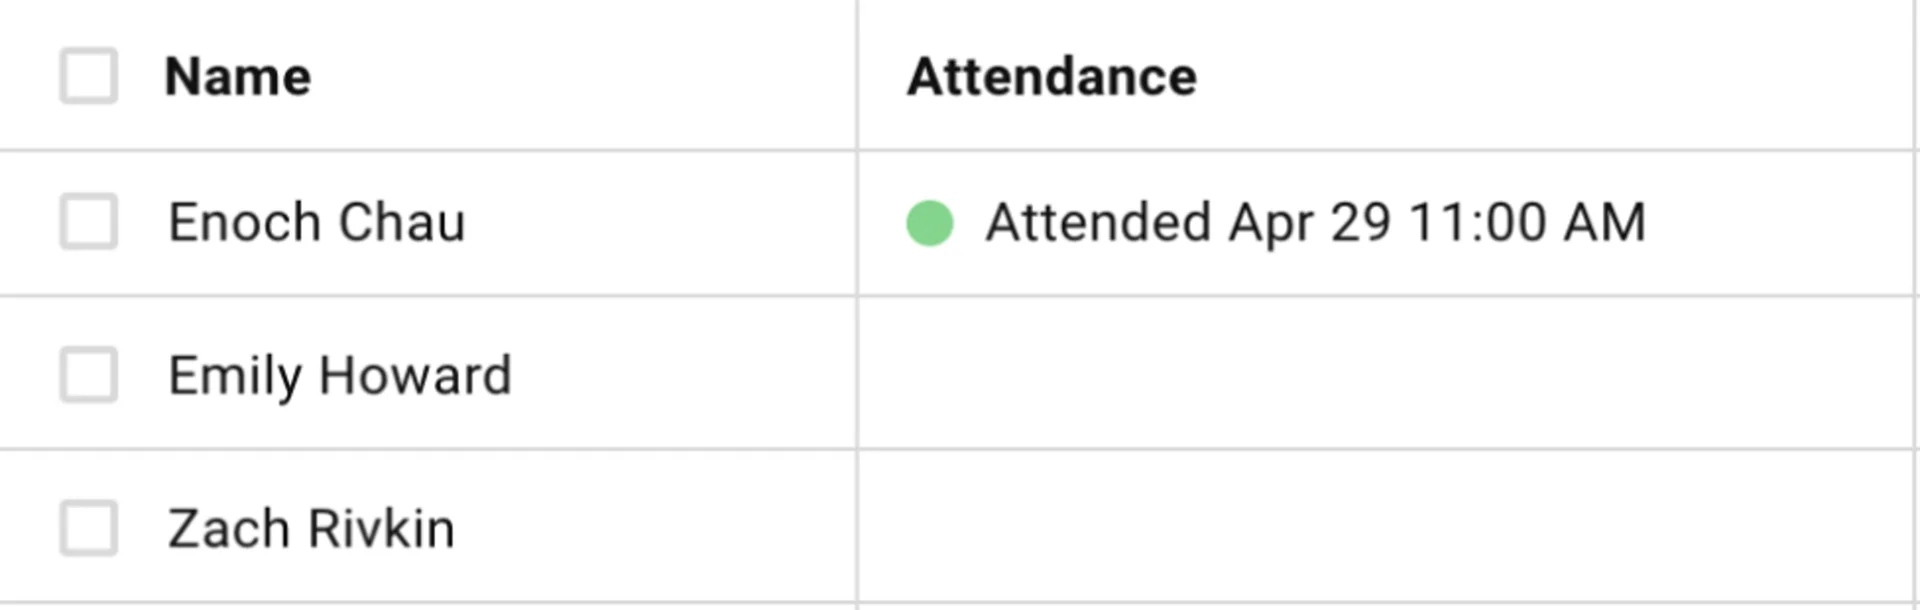
## Common Questions
[Section titled “Common Questions”](#common-questions)
Do I need a webinar license?+
Only to run webinars. Standard Zoom meetings work with any Zoom plan, and Gatsby disables the **Webinar** option if the selected host has no webinar license.
Registration questions are a webinar feature, so the registration toggle is a webinar concern too. Attendance sync itself is not license-gated.
Why can't I see other users' meetings?+
The Zoom account was connected with a standard user instead of an admin. Disconnect and reconnect with an admin account to see meetings from all users on the account.
Why aren't my guests being registered with Zoom?+
Most often, **Show Zoom registration questions** is off. It’s off by default, so a webinar that requires registration won’t register anyone through Gatsby until you turn it on.
The same toggle explains guests all receiving the same join link. Unique join links come only from Zoom registration, so turn the toggle on even if your webinar has no custom questions.
Also check that the meeting was linked through Gatsby rather than pasted in as a URL, and remember that plus-ones are never registered with Zoom.
Why didn't attendance sync?+
Common causes:
* **The meeting was pasted in instead of linked.** Gatsby needs the Zoom ID to ask who attended.
* **The scheduled end time hasn’t passed yet.** Gatsby starts looking 30 minutes after the scheduled end, not 30 minutes after everyone leaves.
* **Zoom has no email and no recognizable name for the attendee.** Common on meetings that don’t require registration.
Can I use this for hybrid events?+
Yes. Add both a physical location and a Zoom meeting to your event. Guests get both in their calendar invite.
# Newsletter Campaigns
> Write a newsletter campaign in HTML, preview it against real subscriber data, test it on yourself, then send or schedule it. Read what happened from eight numbers that each mean one thing.
Why it matters
## The scary part of a newsletter is the send button.
Two thousand people, your firm’s name at the top, and no way to pull it back. So the composer is built to let you check: a preview drawn with real merge values, a test to your own inbox, and a final step that names the exact number of people about to receive it before anything leaves.
How it works
### Write it
Subject, reply-to, and your HTML. Merge tags in single braces.
### Check it
Preview it with the footer attached, then send yourself a test.
### Send it
Pick who gets it, then send now or schedule. A first wave goes out ahead of the rest, so there’s still time to stop it.
## The campaigns list
[Section titled “The campaigns list”](#the-campaigns-list)
Open a newsletter and the **Campaigns** tab is where you land. One row per campaign, drafts and sent alike:
**Name**, **Subject**, its **Status**, the **Size** of the HTML, the **Date** it went or was last touched, and then **Delivered**, **Opens** and **Clicks**. Search across the top, **Create Campaign** on the right.
The icon at the start of each row says where it opens. A chart opens a sent campaign’s report. A pencil opens a draft in the editor.
The row menu on a sent campaign holds **Duplicate** and **Send to new subscribers**. On a draft it’s **Duplicate** and **Delete**, and a scheduled campaign adds **Cancel scheduled send**.
## Writing a campaign
[Section titled “Writing a campaign”](#writing-a-campaign)
Four things to fill in and one toggle. Your sender identity and your footer come from your team’s newsletter settings, so nobody sets them again for each campaign.
### The form
[Section titled “The form”](#the-form)
Starting one+
1. From the newsletter’s **Campaigns** tab, click **Create Campaign**.
2. Give it a **Campaign name**. Only your team sees it, so name it the way you’ll look for it in the list, like *Q3 LP Update (final)*.
3. Write the **Subject line**.
4. Check the **Sender** card. **Send from** is your organization’s newsletter from address and comes from Team Settings.
5. Set a **Reply-to email** if replies should go somewhere specific. Leave it blank and it falls back to your team’s newsletter sender identity.
6. Add your **Email body**: paste HTML into the box, or **Upload HTML file** to bring in an `.html` file.
7. **Save draft**.
Save the draft before anything else. **Send test email** and **Next** are both disabled until you do, and they say so when you hover them.
Where your HTML comes from+
Gatsby doesn’t design the email. The body of a campaign is HTML you bring. Three common sources:
**An email tool you already use.** Mailchimp, HubSpot and most others let you export or copy the HTML of a finished design. Gatsby strips scripts, iframes and forms out of whatever you paste, so a template built for another platform is safe to bring across. An embedded signup form in it simply won’t render.
***
**A designer.** Ask for a responsive HTML email around 600px wide with the CSS inlined, and for the images to be hosted rather than embedded in the file.
***
**Your own HTML.** This works well for a text-led campaign. Use tables for layout, inline your CSS, and link images from somewhere public.
Whichever you use, send yourself a test before you send it to two thousand people.
Mail-merge tags+
Tags use **single** braces, and they have to match exactly, braces and capitalization included. A tag Gatsby doesn’t recognize renders as an empty string rather than as an error, so a typo removes itself quietly. Expand **Available mail-merge tags** under the body box to see all eight with descriptions, and copy them from there rather than typing them.
| Tag | What it becomes |
| -------------------- | ------------------------------------------------------- |
| `{firstName}` | The subscriber’s first name |
| `{lastName}` | Their last name |
| `{nickname}` | Their nickname |
| `{email}` | Their email address |
| `{newsletterName}` | The name of this newsletter |
| `{companyLegalName}` | Your organization’s legal name, from Team Settings |
| `{companyAddress}` | Your organization’s mailing address, from Team Settings |
| `{unsubscribeUrl}` | That subscriber’s unsubscribe link |
The last three come from **Team Settings → Newsletters**. You don’t have to place them: Gatsby appends the compliance footer with all three in it whether or not they appear in your HTML. They’re available for the times you want the address or the unsubscribe link somewhere else in the email as well.
Note the syntax difference from the event email editor, which uses the `#firstName` form. Newsletters read single braces only.
Size limit+
The counter under the body box reads something like *703 B of 85 KB (est. with link tracking)*.
Two things about that number. It measures the **whole composed email**, not just what you pasted, so the footer and Gatsby’s additions are already in it. And it’s an estimate, because turning links into tracked links makes them longer, and how much longer depends on how many you have.
The 85 KB ceiling exists because Gmail clips messages past roughly 102 KB, and a clipped message is one where the unsubscribe link at the bottom is behind a “view entire message” link. Staying under the cap keeps the whole email, footer included, in front of the reader.
If you’re bumping against it, the usual culprit is an image pasted in as a base64 data URI. Host images and link to them.
Link tracking+
**Track link clicks** is on by default. It rewrites the links in your HTML so opens and clicks show up in this newsletter’s metrics.
Turn it off and the campaign sends with your links untouched. You lose the clicks number and the Top Links breakdown for that campaign.
What Gatsby adds to your HTML+
Two things, on every campaign, whatever your HTML says:
**The compliance footer**, appended at the end. Your intro line, your social links, then your legal name, your physical address, and the unsubscribe link. The last three can’t be removed. See [Newsletter Settings](/platform/newsletters/newsletter-settings/).
***
**Sender identity**, applied from Team Settings so a campaign author never sets it per send.
### Checking it before it goes
[Section titled “Checking it before it goes”](#checking-it-before-it-goes)
Two checks, and they answer different questions. Use both on your first campaign.
Preview+
**Preview** opens a drawer showing the email as a subscriber receives it: the from address, the subject, your content with merge tags filled in, and the footer attached underneath.
The To line reads *Each subscriber, at their preferred address*, which is worth knowing. Gatsby resolves each person’s address at the moment of sending rather than freezing it when they were added, so a subscriber who changed their email last week still gets this campaign.
This answers “does it look right and did my tags work?”
Send a test+
**Send test email**, bottom left. Your own address is prefilled, and **Add another recipient** lets you copy a colleague.
The subject arrives prefixed with **\[TEST]**. Test sends don’t touch your subscriber list and don’t count toward the campaign’s metrics.
This answers “does it render in a real inbox?” which the preview can’t tell you. Outlook and Gmail disagree about HTML email in ways no preview pane reproduces. On your first campaign, and after any template change, send the test.
### Sending and scheduling
[Section titled “Sending and scheduling”](#sending-and-scheduling)
**Next**, at the bottom of a saved draft, opens a full-screen flow headed *Send campaign to \[newsletter]*. It has two steps: who gets it, then when.
Step 1: Select subscribers+
The step asks *Who should receive this campaign?* and offers two cards.
**All subscribers** sends to everyone subscribed to the newsletter, and shows how many people that is.
***
**Leave out people who received other campaigns** skips anyone who got the campaigns you pick. Click **Choose campaigns** and pick any sent or scheduled campaign in your organization, or a whole newsletter from the **Newsletters** tab. The dropdown at the start of the box flips it to **Include**, which sends only to people who received what you picked. The card shows its count once you’ve picked something.
That covers the sends people usually ask for: a note to everyone who got last quarter’s LP update, or this month’s campaign to everyone except the people who already got the preview.
Under the cards is the subscriber list itself. A **This send** column says **Will receive** for each person, or why they won’t. Three more ways to narrow it:
* The **Deliverability** filter keeps only one status, such as **Healthy**.
* Untick a row to leave that person out.
* Search a name or a domain, then **Exclude all \[number] matches** to leave out everyone it found.
The bar above the list reads *SENDING TO* with the count, and every rule you’ve set shows as a chip beside it. **Clear all** at the right end drops them. **Show** switches the list between **All**, **Included** and **Excluded**, so you can check who’s being left out.
This step only narrows. Everyone in it is already subscribed, so reaching someone new means adding them as a subscriber first. See [Newsletter Subscribers](/platform/newsletters/subscribers/).
Step 2: Schedule or send now+
A summary of **Recipients**, **From**, **Subject** and **When**, beside a preview of the email. **Change** next to Recipients takes you back to step 1.
If you haven’t sent yourself a test since your last edit, the step says *You haven’t sent a test of this version.*, with **Send test to me** beside it. It doesn’t stop you sending, but it’s the cheapest check there is.
The recipient count comes with your rules in plain words, such as *Excluding people who received “Q3 LP Update”*. When subscribers are being skipped, a line says who and why: *14 subscribed contacts are excluded: 9 opted out · 5 with no valid email.* If that gap is bigger than you expect, find out why before you send.
Choose **Send now** or **Schedule**, then confirm with **Send now** or **Schedule send**. If any images in the email couldn’t be checked or loaded, the step says so and the button reads **Send anyway**. **Back** returns to step 1.
When it’s done, a confirmation names how many subscribers it’s on its way to, or when it’s scheduled for.
Scheduling+
Pick a date and time. The picker opens on the next full hour that’s at least an hour away, and the caption names the timezone it’s using: your team’s, or your device’s if your team hasn’t set one.
**The list is built when it sends.** Anyone who subscribes between now and the send time is included, and anyone who opts out in the meantime is skipped. A search you removed with **Exclude all matches** is the exception: Gatsby saves the people it matched when you scheduled, so someone who subscribes later and would match it still gets the email.
To call it off, use **Cancel scheduled send** in the campaign’s row menu, or on the banner at the top of the editor. The campaign goes back to a draft and nothing is sent.
Sending to new subscribers+
Your list grew after a campaign went out, and the new people should get it too. In the sent campaign’s row menu, **Send to new subscribers** makes a copy and opens it straight in the send flow. The second card, **Only people who haven’t received it**, is already selected, and it skips everyone who got the original or any earlier send of it.
The copy is named *\[campaign name] (new subscribers)*. Close the flow without sending or scheduling and the copy is deleted.
If you stopped the original partway through, the same item reads **Send to the rest, including new subscribers**, and covers everyone it didn’t reach.
Switch to **All subscribers** instead and step 2 tells you how many people will get the email twice, and the button reads **Send anyway**.
Drafts+
**Save draft** keeps everything and puts the campaign in the list with a **Draft** status. Reopen it and carry on.
The row menu on a draft has **Duplicate** and **Delete**. Deleting names the draft in the confirmation and can’t be undone.
**Duplicate** works on a sent campaign too, and gives you a fresh draft with the same subject and body when you want to edit before sending again.
## After you hit send
[Section titled “After you hit send”](#after-you-hit-send)
Hitting send opens a ten-minute window where the send is still yours to stop. Gatsby puts a first wave out and holds the rest, so there’s time to catch the broken link or the wrong name before it reaches your whole list. Stop it, skip the wait, or decide the rest never goes.
### The first wave
[Section titled “The first wave”](#the-first-wave)
What goes out first+
Gatsby sends to a tenth of your subscribers, up to 300 people, and holds everyone else for ten minutes.
The report says so while it’s happening: *First 300 sent. The rest go out at 10:15 AM.* The status stays **Sending** the whole time, and the tiles fill in from the first wave as the numbers come back.
The hold is ten minutes whether you’re sending to 500 people or 50,000, and nothing is throttled once it lifts. Audiences under 20 skip the hold entirely and go out in one go.
What the window is for+
Two things, and the first one is you.
**The mistake you only see in your own inbox.** The link that goes nowhere, the merge tag that didn’t fire, last quarter’s numbers in this quarter’s letter. Preview and a test send catch most of it, and the rest you notice about forty seconds after you commit. **Stop sending** is how you keep it away from the rest of your list while you fix it.
***
**Dead addresses, which nothing reveals until you mail them.** Someone left the firm a year ago and their address still looks like every other address on your list. You find out it’s gone when their mail server refuses the message, and that refusal takes about a minute to reach Gatsby.
A send outruns a minute. With no hold, the entire list is mailed before the first refusal lands, and the first thing you learn about the list arrives too late to act on. The hold creates the one stretch of time where results exist and the rest of the send hasn’t happened yet, so a first wave that bounces hard pauses the campaign before it reaches anybody else.
Addresses that bounced on an earlier campaign are already held back, so a list you mail regularly carries little of this. The exposure is a list you’ve just imported. It’s worth the ten minutes because a bounce costs more than the message: mailbox providers score a sender on them, so today’s dead addresses make the next campaign likelier to land in spam.
If you don't want to wait+
**Send the rest now** on the report sends the remainder straight away instead of at the time the hold names.
The button is dimmed for the first two minutes, and the caption says why: *You can send the rest early once the first wave has had two minutes to report back.* Those two minutes are what the first wave’s bounces need to arrive, so pressing it skips the waiting and keeps the check.
The confirmation spells out what you’re skipping. The first wave has already gone, and a high bounce rate still pauses the campaign whether or not you press it.
### Stopping a send
[Section titled “Stopping a send”](#stopping-a-send)
Stop sending+
**Stop sending** sits in the report header for as long as the status is **Sending**. Use it the moment you spot a broken link, the wrong merge tag, or last quarter’s numbers.
The confirmation tells you how far it got, because that part is settled: *1,284 of 12,000 sent already, those can’t be recalled.* Email that has already left can’t be pulled back from anyone’s inbox, by Gatsby or by anyone else.
What stopping does is keep the rest from going. A handful of messages already handed to the mail servers will finish, and everyone still waiting stays waiting. The campaign moves to **Paused** and the report carries a **Sending stopped** banner naming who stopped it.
A second banner runs across the top of every Newsletters page for as long as the campaign stays paused, so nobody on your team misses it: *Sending was stopped on “\[campaign name]”*, with who stopped it, how many it reached, and a **Review campaign** button that opens the report.
Then fix it, or don't send the rest+
A paused campaign gives you two choices, both on the banner.
**Resume sending** picks the send back up from where it stopped. Nobody gets a second copy.
***
**Don’t send the rest** ends it for good. The remaining subscribers are marked **Not sent**, the campaign closes, and there’s no resuming afterward. The report keeps a closing banner with who stopped it, when, how many received it and how many didn’t.
Reach for resume when you’ve fixed the problem somewhere else, like a broken link on your own site. Reach for not sending the rest when the issue is in the email itself, since the email that already went is the email that would keep going.
When Gatsby pauses a send+
Gatsby pauses a campaign by itself when too much of it is bouncing. The banner reads **Paused automatically** or **Paused by Gatsby** rather than **Sending stopped**, which is how you tell it apart from something a colleague did. The banner across the Newsletters pages says *Sending is paused on “\[campaign name]”* and that too many emails bounced.
Your options are the same with one exception. Some Gatsby-owned pauses ask you to contact support before resuming, and the banner says so instead of offering the button. **Don’t send the rest** is always yours.
A pause like this is worth reading as information. Something about the list is wrong, and the campaign stopping is what kept it from reaching everyone.
Stopping a send is about the people who haven’t received it yet. For the ones who have, the fix is the next campaign, not this one. A short, plain correction sent to the same list does more for you than a resend of the original with the typo quietly repaired.
## Reading what happened
[Section titled “Reading what happened”](#reading-what-happened)
Eight numbers, in the same order, on both the campaign report and the newsletter’s rollup. Four of them are ways an email can fail to arrive, and each one has a different fix, so each gets its own count.
### The eight numbers
[Section titled “The eight numbers”](#the-eight-numbers)
Each tile has an information icon that repeats its definition in the product.
| Tile | What it counts |
| ---------------- | ----------------------------------------------------------------------------------------------------------------- |
| **Delivered** | Accepted by the recipient’s mail server. One per recipient. |
| **Opens** | Recipients who opened at least once, including automated opens by inbox privacy services. |
| **Clicks** | Recipients who clicked at least one link. Automated link scans by security software are filtered out. |
| **Bounced** | The address rejected the message permanently. It no longer exists, or it refuses mail. |
| **Blocked** | Refused temporarily by the receiving server. Three refusals in a row block the address. |
| **Suppressed** | Not sent. Mail to this address has failed before, so it’s on your bounce list. |
| **Dropped** | Never sent. Usually the address had already bounced, unsubscribed, or reported spam. Sometimes a technical error. |
| **Unsubscribes** | Recipients who unsubscribed using this campaign’s link. |
Treat opens and clicks as directional+
**Opens** run high, and Gatsby says so on the tile. They include automated opens from inbox privacy services. Apple Mail Privacy Protection fetches the tracking pixel whether or not a human looks at the message, so a chunk of your open rate is software.
**Clicks** are closer to human. Corporate security software follows every link in an inbound email to check it’s safe, and Gatsby filters those scans out. The campaign report’s Clicks tile says how many automated clicks it removed from that send.
Both numbers are worth reading as a trend. Compare this campaign to your last six. Don’t quote the open rate to your partners as a headcount.
Bounced, Blocked, Suppressed, and Dropped are four different problems+
**Bounced** means you tried and the address is dead. Someone left the firm. Remove them.
**Blocked** means the receiving server refused this one message, often because the mailbox is full or the server is being cautious. The address is probably fine, and the next campaign tries it again. Three refusals in a row and Gatsby stops sending to it.
**Suppressed** means Gatsby didn’t send, because the address is on your bounce list from an earlier failure. Click the **Suppressed** status on their row to **Edit email address**, or to **Unblock this address** once you’ve confirmed it works.
**Dropped** means it never went out at all. Most often the person had unsubscribed or reported spam, so sending would have been the wrong thing to do.
Rising **Bounced** is a list-age problem, and the answer is to clean the list. Rising **Dropped** usually means you’re mailing people who’ve told you not to.
### The campaign report
[Section titled “The campaign report”](#the-campaign-report)
Open any sent campaign for the full picture.
What's on it+
The header carries the status, subject, and the exact time it went. A line under it says who it went to: *Sent to everyone subscribed when it sent*, or the rules you picked in step 1, with a link to any campaign they name. **Refresh** pulls the latest numbers, and **View sent email** shows exactly what was delivered, footer and all. **Duplicate** is in the row menu.
Then the eight tiles, a **Top Links** table of which links got clicked, and the recipient list.
The recipient list+
Every person the campaign touched, with their **Name**, **Email**, **Status**, and **Last activity**.
The **Status** filter narrows to one outcome and shows counts and percentages as you open it: **Delivered**, **Opened**, **Bounced**, **Blocked**, **Suppressed**, **Dropped**, **Unsubscribed**, **Removed before send**, **Opted out before send**, and **Not sent**. Search by email or name, and **Export CSV** takes the current view out.
Clicking a row opens that person’s contact panel on its **Newsletters** tab, where you can see every campaign they’ve received. The row menu offers the same thing as **View contact**, plus **Remove from newsletter**.
What to do the day after a send+
Filter to **Bounced** and remove them. It takes a couple of minutes and it protects the next campaign’s deliverability, because repeatedly mailing dead addresses is one of the things receiving servers score you on.
Then look at **Unsubscribes** against your usual number. One campaign that spikes it is telling you something about that campaign, not about your list.
### The Metrics tab
[Section titled “The Metrics tab”](#the-metrics-tab)
The same eight numbers across every campaign in the newsletter, rather than one at a time.
Time ranges+
**Last 30 days**, **Last 90 days**, or **All time**. The exact date range and the number of campaigns in it appear alongside, so you always know what you’re looking at.
Each tile shows a comparison against the previous period of the same length.
Counts are per send, not per person+
The line under the tiles says it: a subscriber who received twelve campaigns can count up to twelve times in each number.
So the **Delivered** figure on a quarterly view is deliveries, not people. That’s the right way to count a newsletter, and it’s the wrong number to quote as audience size. Your audience size is the subscriber count in the newsletter header.
Trends+
A chart under the tiles plots all eight over the selected range, with a chip per metric to toggle lines on and off.
Delivered usually dwarfs everything else, so the chart is most readable when you switch it off and look at the smaller lines against each other. Watch for Unsubscribes and Bounced climbing together over a quarter, which is the pattern that costs you deliverability if it runs.
**Top Links** underneath aggregates clicks across every campaign in the range.
## Common Questions
[Section titled “Common Questions”](#common-questions)
Why can't I click Next?+
Hover it and it tells you which of three things is missing. The draft isn’t saved, it has changes you haven’t saved, or your organization’s legal name and mailing address aren’t filled in under **Team Settings → Newsletters** yet.
If something is holding sends back, there’s a banner at the top of the Newsletters pages naming the reason. It’s usually a from address that isn’t set, a SendGrid connection that needs attention, or a campaign that’s paused and waiting for someone to resume or end it. See [Newsletter Settings](/platform/newsletters/newsletter-settings/).
A merge tag didn't come out right.+
Newsletters read **single** braces, `{firstName}`, and the tag has to match exactly, spelling and capitalization included. It fails two different ways depending on what you typed.
**The tag printed as text.** You used the double-brace form, `{{firstName}}`, or the `#firstName` form from the event email editor. Neither is substituted, so the reader sees the tag itself.
***
**The tag vanished.** You used single braces but the name inside didn’t match, `{firstname}` for `{firstName}` say. An unrecognized single-brace tag renders as nothing at all, which is the worse failure because the sentence around it still reads as a sentence.
Gatsby watches for both while you write. Anything questionable raises a note under the body box headed *N mail-merge tags need a look*, with a line per tag. It’s advisory and never blocks saving, so read it rather than clicking past it. Preview then shows you the result with real values filled in.
Can I send to only some subscribers?+
Yes. Step 1 of the send flow narrows the list: leave out or keep only the people who received campaigns you pick, filter by deliverability, or untick people one at a time. See [Sending and scheduling](#sending-and-scheduling).
Narrowing only works within the newsletter’s subscribers. If two audiences should never get the same campaigns, they’re two newsletters, each with its own subscribers and its own unsubscribe.
Can I cancel a campaign after I hit send?+
Partly, and faster than you’d expect. A scheduled campaign can be canceled any time before its send time. A campaign already sending can be stopped with **Stop sending** on the report, which holds back everyone who hasn’t received it yet.
What can’t be undone is mail that has already gone. Gatsby sends a first wave of up to 300 people and holds the rest for ten minutes, so stopping inside that window usually means most of your list never receives it. See [After you hit send](#after-you-hit-send).
Is there a BCC field?+
No field in the composer. If your organization has Gatsby’s org-level BCC turned on for compliance or CRM logging, newsletter campaigns respect it automatically, the same way event email does.
Do test sends cost anything?+
No. Test sends don’t count toward your subscriber billing and don’t appear in metrics. See [Plan & Billing](/platform/account-settings/plan-billing/).
# Newsletter Settings
> Set your CAN-SPAM sender identity, authenticate a sending domain, pick between Gatsby's SendGrid account and your own, and style the footer that appears on every newsletter you send.
What this is
## Set once, applies to every newsletter you send.
Four settings live here: who the mail says it’s from, which domain it’s authenticated on, whose SendGrid account carries it, and what the footer looks like. They apply org-wide, so a campaign author never has to think about any of them.
The four cards
### Newsletter sender identity
Your legal name and mailing address, printed in every footer.
### From address
The address subscribers see, and the one Gatsby verifies.
### Sender domain
Gatsby’s SendGrid account, or one you bring yourself.
### Email footer
Brand color, an intro line, social links. The required lines are locked.
## Finding it
[Section titled “Finding it”](#finding-it)
**Team Settings → Newsletters.**
Super Admins and Admins see the tab. If you can’t see it and something here needs changing, ask an Admin on your team, or email [](mailto:help@gatsby.events).
## Sender identity
[Section titled “Sender identity”](#sender-identity)
US law requires every marketing email to name its sender and print a real physical address. The CAN-SPAM Act is where that comes from. An email that goes out without them is a violation, whatever else is right about it. Gatsby prints both in the footer of every campaign, and keeps them there.
### Company legal name and address
[Section titled “Company legal name and address”](#company-legal-name-and-address)
Filling it in+
1. Open **Team Settings → Newsletters**.
2. The **Newsletter sender identity** card comes prefilled from your billing address.
3. Check the **Company legal name**. Edit it if your newsletter goes out under a brand or DBA rather than the entity on the invoice.
4. Check the address: **Address line 1**, an optional second line, **City**, **State / territory**, and **ZIP code**.
5. **Save changes**.
Country is fixed to the United States. The page says it plainly: newsletters are available to US-based senders only for now.
Your billing address itself is edited in [Plan & Billing](/platform/account-settings/plan-billing/), and the card links there.
Which name to use+
Use the name a subscriber would recognize. If your firm is *Meridian Capital Partners LLC* but everyone knows you as Meridian, and Meridian is what’s on the invitations, put Meridian here. The point of the requirement is that the reader can tell who emailed them.
A PO box is acceptable under CAN-SPAM if it’s registered to you. An address that doesn’t reach you is not.
## Where the mail comes from
[Section titled “Where the mail comes from”](#where-the-mail-comes-from)
Two settings, and they’re easy to confuse. **From address** is what a subscriber sees in their inbox. **Sender domain** is whose SendGrid account actually carries the message. You set both, and they have to agree.
### From address
[Section titled “From address”](#from-address)
Setting it+
1. In the **From address** card, enter a **From name**. Optional, and it’s the display name subscribers see, like *Meridian Insights*.
2. Enter the **From email**. This has to be on your authenticated sending domain.
3. **Save changes**.
Gatsby checks the address with SendGrid at the moment you save, rather than finding out at send time. **Newsletter sends stay paused until a from address is set.**
If the address is refused+
You’ll see the reason inline and the field will be cleared rather than saved half-broken. Two common causes:
**It isn’t on your authenticated domain.** The **From address** card shows which domain you’re authenticated on. Your address has to be at that domain.
***
**You’re on your own SendGrid account and the address isn’t verified there.** Verification happens inside your SendGrid account rather than in Gatsby. Add the address there as a verified sender, or authenticate the domain it’s on, then come back and save.
Reply-to+
There’s no org-wide reply-to. It’s set per campaign, and left blank it falls back to your newsletter sender identity. See [Newsletter Campaigns](/platform/newsletters/campaigns/).
### Sender domain
[Section titled “Sender domain”](#sender-domain)
Two ways to send, and the choice is mostly about whether you already run SendGrid.
Gatsby shared domain (the default)+
Your newsletters go out on Gatsby’s SendGrid account. You don’t create one, configure one, or pay SendGrid.
They still send from **your** address on **your** domain. Sending on Gatsby’s account is not the same as sending from a Gatsby address. You authenticate your domain either way.
This path carries a separate charge: **$500 a year on top of the Newsletters add-on**, billed with it. Bringing your own SendGrid key avoids it. See [Plan & Billing](/platform/account-settings/plan-billing/).
Bring your own SendGrid+
Connect a SendGrid API key and your newsletters send on your account, at your SendGrid rates, with your reputation.
Gatsby stores the key encrypted and shows it masked afterward. **Replace key** rotates it. The card shows two things about the key, and both have to be right:
**Valid.** The key authenticates. Gatsby re-checks this on a schedule, so an expired or revoked key surfaces before a send fails rather than after.
***
**Events connected.** SendGrid has to send delivery, open, click, bounce, drop and spam-report events back to Gatsby. Until it does, your metrics stay empty and bounce protection is off, which is the more serious half. **Newsletters won’t send from your SendGrid account until this feed is connected.** Use **Connect** on the card.
Branded link tracking lives in your own SendGrid account on this path, not in Gatsby. Set it up there if you want it. Gatsby leaves click tracking on unless SendGrid tells us the brand is invalid.
Switching between them+
Switching clears your from address, because an address verified on one account isn’t necessarily verified on the other. Set it again after you switch, and send yourself a test before the next real campaign.
If you move from Gatsby’s account to your own and you’re paying the $500 Gatsby sending charge, cancel it in **Plan & Billing** so it doesn’t renew. Cancelling stops the next year. The year you’ve already paid isn’t refunded.
If sends are paused+
A banner appears across the Newsletters pages when something is wrong with sending, and it names what. It’s scoped to Newsletters rather than following you around the rest of Gatsby, and it clears itself once the underlying problem is fixed. **Fix in Newsletter Settings** takes you straight back here.
### Authenticating your domain
[Section titled “Authenticating your domain”](#authenticating-your-domain)
Authentication is how a receiving mail server confirms the message really came from you. Without it, mail from your domain sent by someone else’s servers looks exactly like a forgery, and gets filed accordingly.
Adding the records+
Gatsby generates five CNAME records for your sending domain. Add them at your DNS provider, then click **Check status**.
Three of them authenticate the domain. Once those resolve the card reads **Authenticated**, names the domain, and confirms newsletters can send from any address on it. The other two brand your tracked links, and they’re graded separately. See **Branded link tracking** below.
Records usually propagate within an hour, and a provider that caches aggressively can take up to 48. A record can flip between Verified and Not found while it settles, so leave a few minutes between checks rather than re-checking straight away.
**Don’t manage DNS? Forward this to your IT team** writes the email for you, with all five records in it. Once everything is verified the table collapses, and **View DNS records** brings it back.
This is self-serve. You don’t need to open a support ticket to get a domain authenticated.
Branded link tracking+
Two of the five records point a subdomain of yours at the click tracker, so a tracked link in your newsletter goes out on something like `url1234.yourdomain.com` instead of a redirect domain shared with every other SendGrid customer.
It’s worth doing. Spam filters score the root domain of the links inside an email, and a shared redirector carries whatever reputation every other sender on it has earned. It also doesn’t match the domain your mail says it came from, which is its own small signal against you.
Your newsletters send without these two. What you give up is click data. Rather than rewrite links through a domain that isn’t resolving, which would break every link in the email, Gatsby turns link tracking off for the campaign and says so on the card. The **Authenticated** badge doesn’t wait for them either, so a domain with three of five records verified is a sendable domain.
If a record won't verify+
**Check status** grades each row on its own and says what’s wrong with the ones that failed:
**Proxied.** The record exists, but your DNS provider is answering for it rather than returning the value you entered. Set it to DNS only. In Cloudflare that’s the **Proxy status** column on the record.
***
**Points somewhere else.** A record with that host already exists and holds a different value. Replace the value with the one Gatsby shows.
***
**Not found.** Nothing at that host. Check for typos, and remember some providers append your domain to whatever you type in the host field.
***
**Couldn’t check.** A lookup that didn’t answer. Re-check in a few minutes.
Removing a domain+
**Remove domain** on the same card. Do this only when you’re moving to a different sending domain, and expect to set the from address again afterward.
Set both branded-link records to **DNS only**. Some DNS providers can answer for a record with their own servers instead of handing back the value you entered. Cloudflare calls that setting **Proxied**, and CNAME flattening has the same effect. Either one stops the links in your newsletters working.
Switching a record to proxied after it’s verified breaks the links in newsletters you have already sent, not only the ones still to come. Gatsby re-checks the records daily, and the sending domain card goes back to reporting link tracking as off. Set the record to DNS only again and all of those links start working, including in mail already sitting in someone’s inbox.
Your event email has its own sender configuration, separate from this one. Authenticating a domain for newsletters doesn’t change how invitations send. See [Sender Settings](/platform/email-campaigns/sender-settings/).
## The footer
[Section titled “The footer”](#the-footer)
Every newsletter carries the same footer, and the legal part of it is fixed. That part is what keeps you compliant, so an author working at speed on campaign #34 can’t delete it by accident.
### What you can change, and what you can’t
[Section titled “What you can change, and what you can’t”](#what-you-can-change-and-what-you-cant)
The parts you style+
**Brand color** sets the rule above the footer.
**Intro line** is one optional sentence, sitting at the top of the block. Something like *Thanks for being part of our community.*
**Social links** are optional and there are four slots: **Website**, **LinkedIn**, **X**, and **Instagram**. Only the ones you fill in appear.
A **Live preview** beside the fields redraws as you type, so you can see the whole footer before saving.
The parts that are locked+
Three things always render, pulled from your sender identity above:
* Your **company legal name**
* Your **physical address**
* The **unsubscribe link**
They can’t be removed, restyled away, or dropped by uploading HTML that omits them. Gatsby adds the footer after your HTML, on its way out.
There’s also a line naming the newsletter the reader subscribed to, so someone who’s forgotten why they’re hearing from you has an answer without having to reply and ask.
One footer, every newsletter+
The footer is org-wide. Every newsletter in your organization uses it, and there’s no per-newsletter override. Change it here and the next campaign from any newsletter picks it up.
## Common Questions
[Section titled “Common Questions”](#common-questions)
Do I have to authenticate a domain, or can I just use a Gatsby address?+
You authenticate a domain. Newsletters send from your address on your domain on both sending paths, and the from address has to be on the authenticated one.
What's the difference between the $500 Gatsby sending charge and the Newsletters add-on?+
The Newsletters add-on buys the feature. The $500 a year buys sending it on Gatsby’s SendGrid account instead of one you run yourself. If you already have SendGrid, connect your key and skip the charge. Both are on the same add-on row in [Plan & Billing](/platform/account-settings/plan-billing/).
Our legal name and our brand are different. Which goes in the footer?+
The name subscribers know you by, as long as it’s a name your organization actually trades under. Gatsby prefills from billing because that’s usually right, and lets you edit it because it isn’t always.
Can each newsletter have its own sender or footer?+
Not today. Sender identity, from address, sending path and footer are all org-wide. Reply-to is the one thing set per campaign.
My key says Valid but SendGrid events aren't connected. Can I send?+
No, and that’s on purpose. The **Events connected** line on the card is about SendGrid’s feed of delivery and bounce notifications. It has nothing to do with your Gatsby events. Without that feed Gatsby can’t see bounces, so it can’t stop sending to addresses that are failing. Use **Connect** on the sender domain card to wire it up.
Does any of this touch our event email?+
No. Newsletter credentials and event email credentials are held apart, and neither sending path can reach the other’s. Changing a setting here has no effect on invitations, confirmations, or reminders.
# Newsletters
> Send recurring marketing newsletters from Gatsby, to a subscriber list you build from your guest lists, events and tags. A paid add-on with its own sending infrastructure, kept separate from your event email.
Why it matters
## Your contact list lives in Gatsby. Your newsletter lives somewhere else.
So twice a month someone exports a CSV, uploads it to Mailchimp, and the two lists start drifting apart the same afternoon. The person who unsubscribed over there is still getting invited over here. The guest who came to three dinners this year never made it onto the list at all. Newsletters puts the send where the contacts already are.
How it works
### A newsletter is a publication
”The Weekly Wrap-Up” is a newsletter. It has its own subscribers, its own history, and its own numbers.
### A campaign is one send
Each email you send is a campaign inside that newsletter. You write it, preview it, and send or schedule it.
### Built from your lists and events
Add subscribers from an event’s guest list, a Gatsby list, or a tag. The guest list from March’s dinner is a starting audience for April’s campaign.
## Marketing email, walled off from your event email
[Section titled “Marketing email, walled off from your event email”](#marketing-email-walled-off-from-your-event-email)
A guest who unsubscribes from your newsletter still gets their invitation, their RSVP confirmation, and their reminder. Newsletters keep their own sender identity, their own opt-out list, and their own sending path, because marketing consent and event correspondence are different things and the law treats them differently.
## Finding it
[Section titled “Finding it”](#finding-it)
**Newsletters** sits in the main sidebar, under Contacts. It appears once Gatsby turns Newsletters on for your organization, and it has two tabs at the top:
**Newsletters** lists your publications. **Subscribers** shows everyone subscribed to any of them, in one place.
Down the left of the Newsletters tab: **My Newsletters** (the ones you’re a collaborator on, and the default view), **All Newsletters**, and **Archived**.
Once it’s on, Team Members work in Newsletters the same way they work in the rest of Gatsby. External Collaborators don’t see it. Sending setup in **Team Settings → Newsletters** is for Admins and Super Admins.
## Before your first send
[Section titled “Before your first send”](#before-your-first-send)
Three things have to be true before a campaign can go out, and all three live in **Team Settings → Newsletters**. [Newsletter Settings](/platform/newsletters/newsletter-settings/) walks through each one.
A sender identity+
Your company’s legal name and physical mailing address. Both render in the footer of every newsletter, because CAN-SPAM requires them. Gatsby prefills them from your billing address, and you can edit them if the brand you send under differs from the entity that pays the invoice.
An authenticated sending domain+
Newsletters send from your own domain, not a Gatsby one. Authenticating it means adding five CNAME records at your DNS provider. Three of them are what receiving mail servers check, and the domain reads **Authenticated** once those resolve. The other two brand the links in your newsletters, and it’s easiest to add all five in one sitting.
A from address on that domain+
The specific address the newsletter comes from. Gatsby verifies it when you save. Sends stay paused until one is set.
## Working with newsletters
[Section titled “Working with newsletters”](#working-with-newsletters)
Most organizations run one or two. A firm might keep a monthly letter for its investor list and a separate quarterly note for portfolio founders, each with its own subscribers and its own numbers.
### Creating one
[Section titled “Creating one”](#creating-one)
Starting a newsletter+
1. Open **Newsletters** from the sidebar.
2. Click **Create Newsletter**.
3. Fill in the **Newsletter name**. Subscribers see it in the footer of every campaign and on the unsubscribe pages, as the reason they’re receiving it, so write it the way you’d say it out loud.
4. Optionally, fill in an **Internal name**. Only your team sees it, so use it to tell similar newsletters apart, like *Investor Update (LPs)* and *Investor Update (Founders)*. Leave it blank and the internal name matches the newsletter name.
5. Save. Gatsby drops you on the new newsletter’s **Campaigns** tab.
A new newsletter starts with no subscribers and no campaigns. Add subscribers first. See [Newsletter Subscribers](/platform/newsletters/subscribers/).
What's on the list+
One row per newsletter: its **Name**, the **Collaborators** working on it as avatars, its **Subscribers** count, and when it was **Last Updated**. Search by name across the top.
The row menu holds **View**, **Duplicate**, **Archive**, and **Delete**.
### Inside a newsletter
[Section titled “Inside a newsletter”](#inside-a-newsletter)
The header carries the newsletter’s internal name and its current subscriber count. The menu beside the name holds everything that acts on the newsletter itself: **Rename**, **Duplicate**, **Archive**, and **Delete Newsletter**. Four tabs underneath:
| Tab | What’s there |
| --------------- | ------------------------------------------------------------------------------------------------------ |
| **Campaigns** | Every campaign, sent and unsent, with delivered, opens, and clicks per row. Where you start a new one. |
| **Subscribers** | Who receives it, with subscription and deliverability status on each person. |
| **Metrics** | The same numbers rolled up across every campaign, over 30 days, 90 days, or all time. |
| **Settings** | The newsletter’s two names, plus **Archive** and **Delete**. |
### Archiving and deleting
[Section titled “Archiving and deleting”](#archiving-and-deleting)
Archive+
**Archive** from the menu on the newsletter, or from its row menu in the Newsletters list. The newsletter moves to the **Archived** view and out of your way. Its subscribers and its history stay intact.
Use this for a publication you’ve stopped sending but don’t want to lose.
Delete+
**Delete Newsletter**, from the same menu. Deleting removes the newsletter and its campaign history.
It does not delete anyone’s contact record. A subscriber is a contact with a subscription attached, and deleting the newsletter removes the subscription, not the person. Their event history, their dietary restriction, and everything else on the contact stays where it is.
Rename+
**Rename** from the menu opens the **Settings** tab with both names ready to edit.
The **Newsletter name** is what subscribers see in the footer of every campaign, so changing it changes what they read on the next send. The **Internal name** only changes what your team sees in Gatsby. Internal names are unique across your organization.
Duplicate+
**Duplicate**, from either menu, creates a second newsletter set up like the first. Useful when you’re splitting one publication into two, or standing up a sister letter for a different audience.
## Common Questions
[Section titled “Common Questions”](#common-questions)
What has to be set up before the first send?+
Three things, all in **Team Settings → Newsletters** and all Admin-only: a sender identity (your legal name and mailing address, which the footer prints), an authenticated sending domain, and a from address on that domain. Sends stay paused until the from address is set. See [Newsletter Settings](/platform/newsletters/newsletter-settings/).
How do I add subscribers to a newsletter?+
Open the newsletter, go to **Subscribers**, and use **+ Add Subscribers**. You can pull from an event’s guest list, a Gatsby list, or a tag, type people in one at a time, or bring a CSV with **Import CSV**. You can also select people on any guest list or the Contacts page and click **Add to Newsletter** in the action bar. See [Newsletter Subscribers](/platform/newsletters/subscribers/).
How do I design my newsletter?+
You bring the HTML. Paste it into the campaign or upload an `.html` file, and Gatsby adds your sender identity, the compliance footer, the unsubscribe link, mail merge and link tracking around it. There’s no drag-and-drop editor yet.
If you’re starting from nothing, the [Skill & Prompt Gallery](/gallery/#newsletter) has four newsletter layouts with the prompts to generate them: a monthly community letter, a quarterly LP update, a curated links digest, and a plain branded shell. See [Newsletter Campaigns](/platform/newsletters/campaigns/) for what happens to your HTML once it’s in.
How do I send a campaign, and can I schedule it?+
From the newsletter’s **Campaigns** tab, **Create Campaign**. Name it, write a subject, add your HTML, and **Save draft**. Saving unlocks **Preview** and **Send test email**, and **Next** opens the send flow: pick who gets it, then **Send now** or **Schedule**. See [Newsletter Campaigns](/platform/newsletters/campaigns/).
I just sent something wrong. Can I stop it?+
Usually most of it. Gatsby sends to a tenth of your list first, up to 300 people, and holds the rest for ten minutes. **Stop sending** on the campaign report keeps back everyone who hasn’t received it yet, and from there you can fix the problem and resume, or decide the rest never goes. Mail already delivered can’t be recalled. See [After you hit send](/platform/newsletters/campaigns/#after-you-hit-send).
How do I tell whether it worked?+
Every sent campaign has its own report, and the newsletter’s **Metrics** tab rolls the same eight numbers up across every campaign over 30 days, 90 days, or all time. See [Newsletter Campaigns](/platform/newsletters/campaigns/).
What does it cost?+
An annual fee for the add-on, plus a per-subscriber rate charged each quarter, counted once per person per year rather than once per campaign. The first 250 subscribers are included, and that allowance starts over on 1 January. Sending on Gatsby’s own SendGrid account is a separate yearly charge you avoid by connecting your own key. While Newsletters is in limited release, Gatsby turns it on for each pilot organization. Email to ask about joining. See [Plan & Billing](/platform/account-settings/plan-billing/) for the current rates.
How is this different from an event campaign?+
An event campaign is correspondence about a specific event: the invitation, the confirmation, the reminder. It goes to that event’s guest list and it sends on your event email infrastructure.
A newsletter is marketing. It goes to people who subscribed to it, it sends on separate infrastructure with its own sender identity, and it carries a required unsubscribe link. The two keep separate opt-out lists on purpose. See [Campaigns & Invites](/platform/email-campaigns/campaigns/) for the event side.
If someone unsubscribes, do they stop getting event email?+
No. Unsubscribing from a newsletter stops that newsletter. It doesn’t touch invitations, RSVP confirmations, or reminders, and the unsubscribe page tells the reader so in as many words.
A subscriber can also opt out of every newsletter your organization sends, in one click from the same page. That still leaves event email alone.
Can we send outside the US?+
You can send to subscribers anywhere. The sender has to be US-based: activation requires a US billing and postal address, and Team Settings says so on the sender identity card. International sender support is coming later.
Does the newsletter affect our event email reputation?+
That’s exactly what the separation is there to prevent. Newsletter sending runs on its own credentials and its own sending path, and the code that sends event email can’t reach the newsletter ones. A rough newsletter send doesn’t drag your invitations down with it.
Who can work on a newsletter?+
Admins and Super Admins set up sending in Team Settings. Everyone with access to the Newsletters area can create newsletters, manage subscribers, and write campaigns. See [Team & Permissions](/platform/account-settings/team-permissions/).
# Newsletter Subscribers
> Build a newsletter's list from an event's guests, a Gatsby list, a tag, a filtered selection, a CSV, or one person at a time, and see every subscription on the contact record itself.
Why it matters
## Your guest lists are already your audience.
The people who came to your dinners last year are in Gatsby with their titles, their firms, and their history. Pull them into a newsletter from an event, a list, a tag, or a filtered selection of exactly the people you want. Change someone’s email later and the next campaign follows them to the new address.
How it works
### Six ways in
From an event’s guests, a Gatsby list, a tag, a selection on any guest list or the Contacts page, a CSV, or typed in one at a time.
### Built to be searched
The list shows the 25 most recent and search returns the top 50 matches. It stays fast at 250,000 rows.
### Two statuses per person
Whether they want it, and whether their address can receive it. One can be true without the other.
## Two places to look
[Section titled “Two places to look”](#two-places-to-look)
**Inside a newsletter**, the **Subscribers** tab shows who receives that one publication, and is where you add people to it.
**Across all of them**, the **Subscribers** tab at the top of the Newsletters area shows every subscription in your organization, with a **Newsletter** column and a picker to narrow to one. Adding is disabled here until you pick a newsletter, because a subscriber has to be subscribed to something in particular.
Both lists work the same way: the 25 most recently added, a count of the full total underneath, and a search that returns the top 50 matches.
## Adding subscribers
[Section titled “Adding subscribers”](#adding-subscribers)
Four of the six routes pull from data already in Gatsby: an event, a list, a tag, or a selection you make on a guest list or the Contacts page. Type people in or bring a CSV when they genuinely live outside the platform, not as a way to move contacts from one part of Gatsby to another.
### From what you already have
[Section titled “From what you already have”](#from-what-you-already-have)
From a Gatsby event+
1. Open the newsletter and go to **Subscribers**.
2. Click **+ Add Subscribers**.
3. Pick the **From Event** tab.
4. Search your events and choose one.
5. **Add subscribers**.
This is how most newsletters start. You ran the dinner, forty people came, and now they should hear from you between events.
**Every guest on that event, whatever they replied.** Accepted, declined, pending and not-yet-invited all come across, as long as they have an email address. Picking your Q1 dinner subscribes the twelve people who turned it down alongside the forty who came.
That’s usually not what you want. If the audience is “people who actually attended,” filter the guest list to them and add the selection instead. See **From a selection** below.
The tab tells you the number before you commit, as *312 contacts with an email will be added*. Contacts with no email are left out, because there’s nothing to send to.
From a selection+
1. Open an event’s **Guests** tab, a list’s **Members** tab, or your **Contacts** page.
2. Narrow it to the people you want with filters or search, then select their rows. Select all takes everyone your filters match.
3. Click **Add to Newsletter** in the action bar.
4. Pick a newsletter. Each one shows its current subscriber count, and the box at the top searches by name.
5. Check the confirmation and click **Add \[number] contacts**.
This is the route for an audience you can describe but haven’t saved anywhere. Filter your Q1 dinner to the guests marked attended, select them, and the forty who came are added without the twelve who declined. On the Contacts page, filter to a title or a firm and select all.
**Nothing is written until you confirm.** The second screen names the newsletter and the count, and the button repeats the number. **Back** returns you to the picker.
Anyone already on that newsletter is skipped, and so is anyone without a valid email address. Someone who opted out earlier comes in as unsubscribed and stays that way, so a selection can’t quietly put them back on the list.
A selection of more than 500 people runs in the background while you keep working. The message that it started links to the newsletter’s **Subscribers** tab, which holds the progress bar and **Stop**. When it finishes, a second message gives the count added and skipped, with a link to the newsletter.
A few things to know:
* One newsletter per add. Archived newsletters don’t appear in the picker.
* It’s a one-time copy, like every other route. Someone added to the guest list tomorrow isn’t added to the newsletter.
* One subscriber import runs at a time. Start another while one is still going and Gatsby asks you to wait for it to finish.
* **Add to Newsletter** appears for Admins and Team Members. External Collaborators don’t see it.
From a Gatsby list+
Same modal, **From List** tab. Search your Gatsby lists and choose one.
This is the closest thing to a standing audience Gatsby has. A contact list is ongoing and has no date, which is the same shape as a newsletter audience. See [Contact Lists](/platform/events-lists/contact-lists/).
You get the whole list, and adding from it is a one-time copy of who’s on it rather than a live link. Someone added to the list next month isn’t added to the newsletter.
By tag+
Same modal, **By tag** tab. Pick one tag and everyone carrying it who has an email address is added. The dropdown opens on the tags most of your contacts carry and narrows as you type.
Useful when the audience is a category rather than a list or an event: everyone tagged *LP*, or *Portfolio Founder*, or *Alumni*.
**If the tag doesn’t exist yet,** you add it on the contact rather than here. Open a contact and use its **Tags** field, or select several people on a guest list and use **Adjust Tags** in the action bar to label them all at once. See [Organizing Contacts](/platform/contacts/organize-contacts/).
Worth getting right the first time: a tag can’t be renamed or merged once it exists. If you’re creating one to drive a newsletter audience, pick the name you’ll still want a year from now.
One at a time+
Same modal, **Add manually** tab, which is where it opens. Enter a **Name** and an **Email**, and use **+ Add another** for more rows before saving.
For the one person who asked to be added after a meeting.
### From a CSV
[Section titled “From a CSV”](#from-a-csv)
Importing a file+
1. Open the newsletter and go to **Subscribers**.
2. Click **Import CSV**. This is its own button, next to **+ Add Subscribers**.
3. Check your file has a name column and an email column. Names can be a single **Name** or **Full Name** column, or separate **First Name** and **Last Name** columns. Download the example file from the modal if you want the exact shape.
4. Drag the file in, or **Choose File**.
This is Gatsby’s own contact importer with a subscribing step on the end, so it dedupes the way the rest of the platform does. See [Import & Export](/platform/contacts/import-export/).
**Email is the identifier, so importing the same people twice doesn’t duplicate them.** An address already in Gatsby matches its existing contact and the import enriches that record rather than creating a second one. Where your spreadsheet and Gatsby disagree on a field, the wizard puts both values side by side and you pick the winner, one field at a time or across the whole import at once. An address with no match gets a new contact.
That makes a file safe to re-run. If some rows fail, or another subscriber import is still finishing, Gatsby says so and tells you to run the same CSV again, skipping anyone already added.
One thing to watch: a contact imported without a usable email address lands in your contact book but can’t be subscribed. Gatsby reports the count rather than leaving you to find out at send time. Large files subscribe in the background, so you can keep working while it runs.
What happens to people who already opted out+
They stay out. An address that previously unsubscribed comes in as unsubscribed, no matter what the CSV says, and no matter how it got into the file.
This is worth understanding before you import a list from another tool. Re-uploading a spreadsheet doesn’t reset anyone’s opt-out, and it shouldn’t: an unsubscribe is the reader’s decision, not a data field.
Importing a list of people who never asked to hear from you is where marketing email goes wrong, and no amount of product tooling fixes it. Bought and scraped lists bounce hard, get reported as spam, and take your sending reputation down with them.
## Reading the list
[Section titled “Reading the list”](#reading-the-list)
Every subscriber carries two independent statuses. One is about whether they want the newsletter. The other is about whether their mail server will take it. Confusing the two sends you looking for the wrong fix.
### Subscription status
[Section titled “Subscription status”](#subscription-status)
Whether this person wants this newsletter.
**Subscribed.** They’re on the list and the next campaign goes to them.
***
**Unsubscribed.** They’re not, and future campaigns skip them. They stay on the list, visibly, rather than vanishing. A record of who opted out and when is the thing you need if anyone ever asks.
The filter at the top of the list carries both values plus **All**, with a live count and percentage next to each. Filtering to Unsubscribed and seeing the number climb after a particular campaign tells you something about that campaign.
### Deliverability status
[Section titled “Deliverability status”](#deliverability-status)
Whether this address can actually receive mail. Same words the campaign report uses, so the two surfaces agree.
| Status | What it means |
| ------------------- | ----------------------------------------------------------------------------------------------------------------- |
| **No Delivery Yet** | Nothing has been sent to them yet. New subscribers sit here until the first campaign. |
| **Healthy** | Mail is landing. |
| **Bounced** | Their mail server rejected the message permanently. The address is gone, or it refuses mail. |
| **Blocked** | Refused temporarily by the receiving server. Three refusals in a row and Gatsby stops sending to the address. |
| **Dropped** | Never sent. Usually the address had already bounced, unsubscribed, or reported spam. Sometimes a technical error. |
The **Deliverability Status** filter carries all five plus **All**, again with counts.
Filter to **Bounced** after a campaign and you have your list-hygiene work for the week in one screen. A handful of dead addresses is normal. A wall of them means the list came from somewhere it shouldn’t have.
### Finding and changing one person
[Section titled “Finding and changing one person”](#finding-and-changing-one-person)
Search+
The box at the top searches by email or name, and returns the top 50 matches. Reach for it first. The list itself only ever shows the 25 most recent, so search is how you reach anyone else.
The row menu+
Clicking anywhere on the row opens the contact panel on its **Newsletters** tab. The menu does the same thing under **View subscriber**, and adds **Remove from list**, which takes them off this newsletter.
Removing in bulk+
Select rows with the checkboxes and act on the selection. Combine it with the filters: narrow to **Bounced**, select, remove.
## On the contact record
[Section titled “On the contact record”](#on-the-contact-record)
Click a subscriber anywhere in Newsletters and the contact panel you already use opens, on a **Newsletters** tab. Subscription detail sits next to their event history, their dietary restriction and everything else you know about them, rather than in a profile of its own.
### The Newsletters tab
[Section titled “The Newsletters tab”](#the-newsletters-tab)
Open any contact and there’s a **Newsletters** tab alongside Campaigns, Events, Lists, Groups, Files, Notes and CRM. Four things on it:
Deliverability status+
At the top, the same status the subscriber list shows, for this person. Next to it, **+ Add to a newsletter**.
A contact who isn’t subscribed to anything still has the tab. It just shows the empty state and the button.
Engagement+
Every campaign this person has received, most recent first. Each one names the newsletter, when it was sent, when it was delivered, when they opened it, and where they got to: **Opened**, **Delivered**, or a failure state.
This is where you check whether you’ve actually been reaching someone, which is a more useful thing to know before a meeting with them than your org-wide open rate.
Organization-wide+
One row covering every newsletter you send. **View history** shows what’s happened at that level, and the row menu holds **Unsubscribe from all newsletters**.
Use this when someone tells you to stop emailing them altogether. It covers newsletters you haven’t created yet, which a per-newsletter unsubscribe can’t.
Active memberships+
One row per newsletter they’re subscribed to, with their status and when they were added. **View history** shows the subscribe and unsubscribe events with timestamps.
The row menu has two actions, and they’re different:
**Unsubscribe from this newsletter** marks them opted out. They stay on the list, visible, with the opt-out on the record.
***
**Remove from this newsletter** takes the subscription off entirely.
Reach for unsubscribe when the person asked. Reach for remove when they were added to the wrong newsletter in the first place.
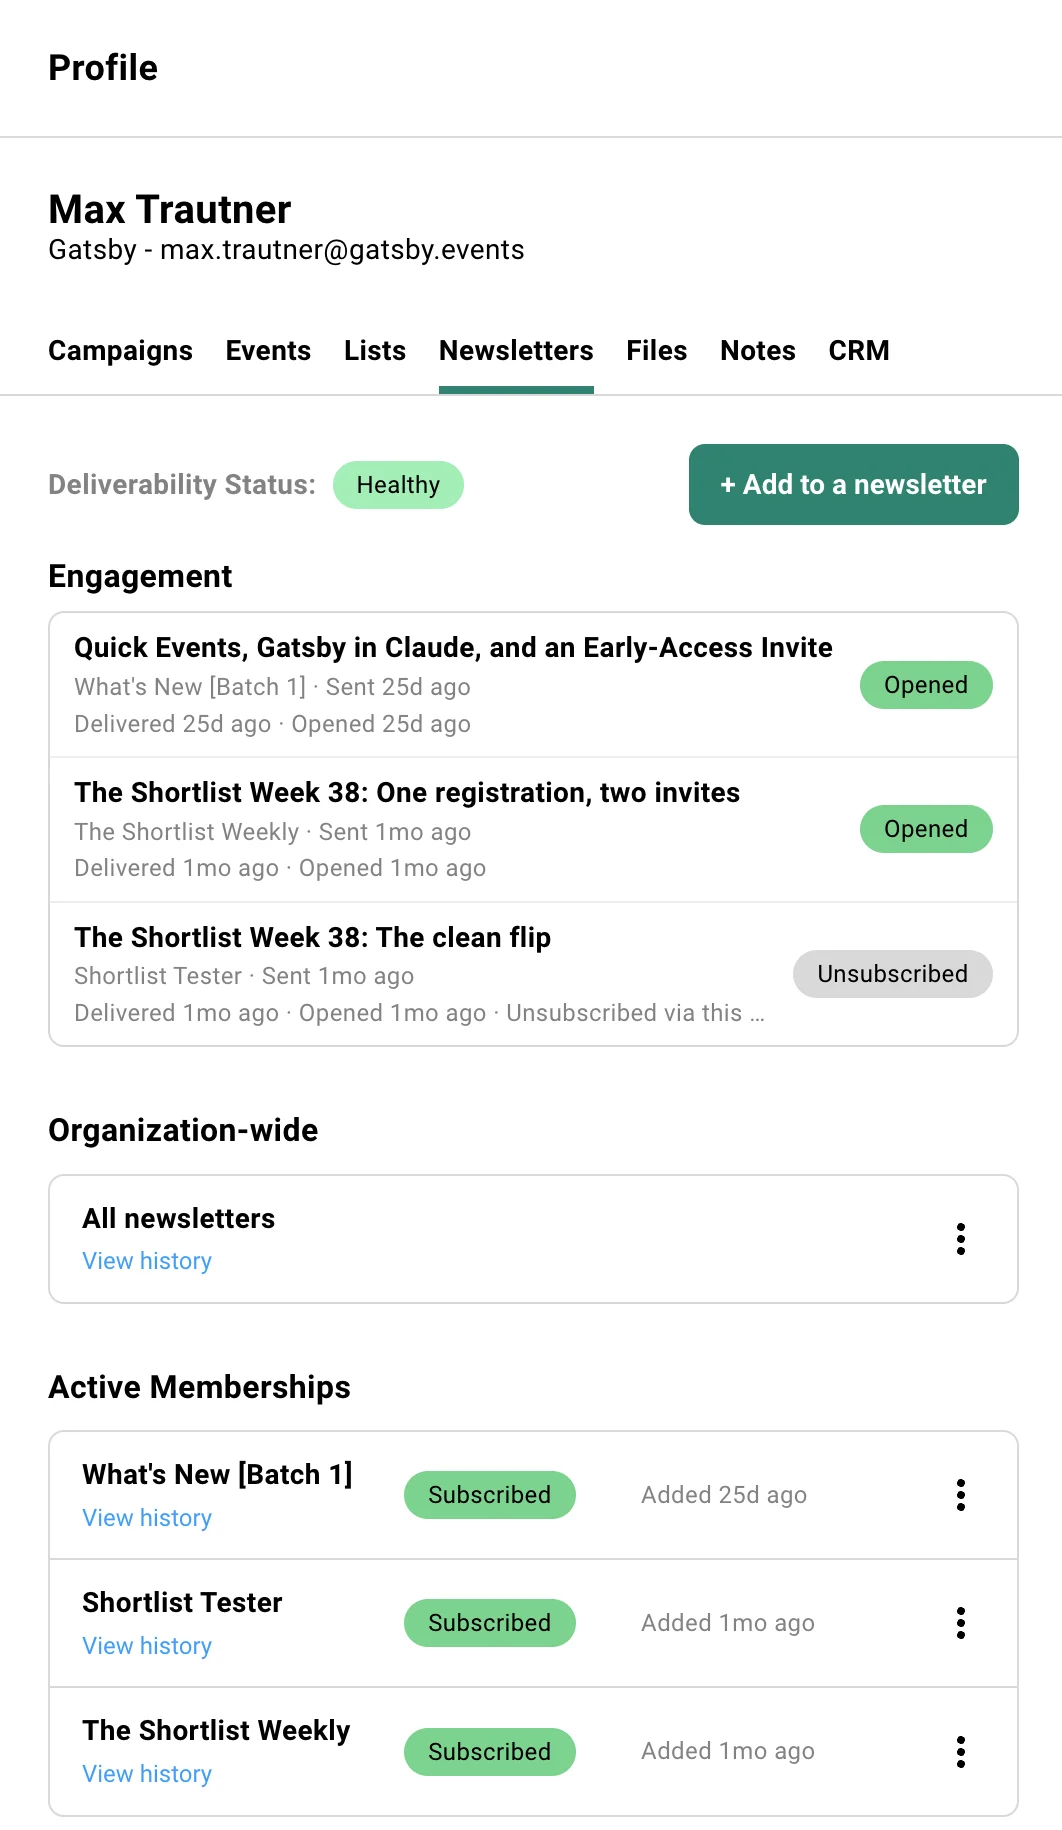
A contact's Newsletters tab, opened from a subscriber row
## Common Questions
[Section titled “Common Questions”](#common-questions)
Someone changed their email address. What do I update?+
Their contact record, and nothing else. Open the contact, click **Edit**, change the **Email** field and save. See [Contact Profiles](/platform/contacts/contact-profiles/).
There’s nothing to change in Newsletters. The subscription belongs to the person rather than the address, and each campaign looks up the address at the moment it sends, so the next campaign goes to the new one.
The same holds in the other direction: an opt-out follows the person too, so changing an email doesn’t quietly put someone back on the list.
Can I put someone back on after they unsubscribe?+
You can, from the row menu on the contact’s Newsletters tab. Think about whether you should.
Someone who clicked unsubscribe has told you something. Re-subscribing them because they’ve since become interesting is how organizations end up in spam folders and, in the US, on the wrong side of CAN-SPAM. The defensible case is narrow: they asked you to, or they were opted out by mistake.
Does removing a subscriber delete the contact?+
No. Removing takes the subscription off. The contact, their event history, their dietary restriction, their notes and their CRM record all stay exactly as they were.
Can I add subscribers from the Contacts page?+
Yes. Select contacts on the Contacts page, or filter and select all, then click **Add to Newsletter** in the action bar. See **From a selection** above.
To put one person on several newsletters at once, open the contact, go to their **Newsletters** tab, and use **+ Add to a newsletter** to tick as many as you need.
Can I add two lists at once?+
No. Each picker takes one list, one event, or one tag per add, so an audience made of three sources is three trips through **+ Add Subscribers**. Duplicates are skipped, so overlapping sources are safe to add in any order.
Can I filter a list or event and add just those people?+
Yes, from the guest list itself. Filter it, select the rows, and click **Add to Newsletter** in the action bar. See **From a selection** above.
The pickers inside **+ Add Subscribers** work differently. They take a whole list, event or tag by name, and the filters, saved views and searches on a guest list have no effect there.
A selection isn’t saved anywhere. If you’ll want the same audience for the next newsletter, put those people on a contact list or give them a tag, so it’s there to pick next time.
Can one person subscribe to more than one newsletter?+
Yes, and each subscription is independent. Unsubscribing from the monthly letter leaves the quarterly one alone. All of them show under Active Memberships on the contact.
How do I send to only part of the list?+
In step 1 of the send flow. Leave out or keep only the people who received campaigns you pick, filter by deliverability, or untick people one at a time. See [Newsletter Campaigns](/platform/newsletters/campaigns/#sending-and-scheduling).
Does adding subscribers cost anything?+
Adding doesn’t. Sending to them does, counted once per subscriber per calendar year rather than per email. The first 250 are included, and that allowance starts over on 1 January. See [Plan & Billing](/platform/account-settings/plan-billing/).
# Calendar Invites
> Send calendar invites that update automatically when event details change. Set the organizer, customize the description, and push updates to guests with one click.
Why it matters
## One venue change and now 150 guests with the wrong calendar entry…
Most guests won’t open the update email. The ones who do rarely fix their calendar manually. You find out the morning of when the questions start.
How Gatsby helps
### Push updates automatically
Change the venue or time and send updated invites. Guest calendars overwrite the old entry automatically.
### Track per-guest invite state
Each guest gets a unique calendar entry tied to their registration. You see who has current details and who still needs an update.
## How Calendar Invites Work
[Section titled “How Calendar Invites Work”](#how-calendar-invites-work)
Calendar invites attach to confirmation emails by default, sending automatically after a guest registers. Each event has one calendar invite configuration. Find it in Registration → Calendar Invite.
Gatsby generates individual calendar invites per guest. When details change, you push an update. Their calendar app receives it and overwrites the old entry. No manual action required from guests.
Why Individual Invites+
Each guest gets a unique calendar entry tied to their email. This lets you track state (up-to-date vs outdated) and push targeted updates.
The tradeoff: the organizer sees duplicate entries on their personal calendar if using. One entry for every guest. A shared address like saves this.
When Invites Are Sent+
By default, calendar invites attach to confirmation emails. These send automatically after a guest registers.
You can also attach calendar invites to any campaign email. Useful for save-the-date flows or waitlist approvals where you want a personalized message alongside the invite.
One Invite Per Event+
Each event generates one calendar invite configuration. One set of details. One organizer. One description.
Multi-day conferences or events with separate sessions need other events created. Each sub-event has its own calendar invite. Guests register through the parent and select sessions. Each session sends its own calendar block.

## Setting Up Your Calendar Invite
[Section titled “Setting Up Your Calendar Invite”](#setting-up-your-calendar-invite)
Get the organizer wrong and you end up with 150 duplicate events cluttering your personal calendar. Change it after sending and guests get duplicates too.
Set this up correctly before you send.
### Choosing the Organizer
[Section titled “Choosing the Organizer”](#choosing-the-organizer)
The organizer is who appears as the calendar organizer on guests’ calendars. This is the most important setting to get right before your first send.
Gatsby has two places this is configured: an org-wide default under **Team Settings » General » Calendar Invite Organizer**, and a per-event setting under **Registration » Calendar Invites**. The event-level organizer is what actually sends on that event; the org default is the starting point new events inherit until you override it.
Use a Shared Address+
Use or a similar shared address.
Since each guest gets an individual invite, the organizer’s calendar shows a duplicate event for every guest. A shared address keeps personal calendars clean.
Organizer Options+
Select from connected email accounts. Gmail, Outlook, or SendGrid addresses all work.
The name that appears can be customized separately from the email address. Show “Acme Events Team” even when sending from .
Do Not Change After Sending+
Changing the organizer email after invites are sent creates duplicate events on guests’ calendars, one from the old organizer and one from the new. They cannot be recalled.
Change the display name if needed. Never change the email address after your first send.
### Customizing the Invite Content
[Section titled “Customizing the Invite Content”](#customizing-the-invite-content)
Event name, date, time, and location sync automatically from your event settings. The description field is where you add context.
Steps to Customize+
1. Navigate to Registration, then Calendar Invite.
2. Click **Edit**.
3. Modify the description field.
4. The synced fields (name, date, time, location) can be overridden here if needed.
Description Field Defaults+
The default description includes each guest’s unique RSVP link with helper text:
> “Change or edit your response” with the link below.
This reminds guests that declining the calendar invite does not decline them from the event. They need to use their RSVP link to change their registration.
Plain Text Only+
Calendar invites do not support custom fonts, images, or rich formatting. Spam filters are strict.
Keep it simple. Text that renders correctly everywhere is better than formatting that breaks in half your guests’ calendar apps.
## Sending Updates
[Section titled “Sending Updates”](#sending-updates)
Details change after invites go out. Every change means another email that guests need to open, read, and act on by manually updating their calendars. Most won’t.
Gatsby tracks calendar invite state per guest. When you change event details, you push an update that automatically overwrites the old calendar entry on guests’ devices.
Two ways to send updates: during the save flow or later from the event home screen. The system tracks who has up-to-date versus outdated calendar invites.
This applies to ordinary content changes — date, time, location, description. Changing the organizer itself is different and is not recoverable the same way: see “Do Not Change After Sending” above.
Update During Editing+
1. Make changes to event details (date, time, location).
2. Click **Save**.
3. A prompt asks if you want to send updated calendar invites.
4. Click **Share details now** to send immediately.
Update Later+
Decline the prompt when saving. The “Unshared Event Updates” box appears on your event home screen.
Click **Send Event Updates** when ready.
Useful when you want to batch multiple changes. Make several edits over a few days. Send one consolidated update instead of five.
Who Receives Updates+
Updates go to guests who previously received calendar invites. Typically, this means Accepted guests.
Guests who never received an invite are not affected. Their calendar stays empty. They will get the invite when they register.
Tracking Update Status+
Add the “Calendar Invite State” column to your guest list.
Shows “Up-to-date” or “Out-of-date” per guest. Filter by this column to see who still needs the update. Useful after adding guests late or if some updates failed to send.
Updates Aren't Going Out+
Calendar updates are sent from the calendar invite organizer’s account. If the organizer is a connected Google or Outlook account and that connection has expired, updates can’t send until it’s reconnected.
1. Go to **Team Settings » Linked Services** and check the organizer’s account. If it needs to sign in again, the account owner reconnects it.
2. Return to the event and use **Unshared Event Updates** to send the update to guests who still have the old details.
A SendGrid organizer address doesn’t expire this way.
## Calendar Invite Columns
[Section titled “Calendar Invite Columns”](#calendar-invite-columns)
Two columns track calendar invite information on your guest list. State shows whether their invite is current. Status shows their calendar response (if using Google integration).
Calendar Invite State+
Shows “Up-to-date” or “Out-of-date.”
Updates after you send calendar updates. Use this to identify guests who missed an update or were added after the last send.
Calendar Invite Status+
Shows Accept, Decline, or Pending based on how guests responded to the calendar invite itself.
Requires the organizer to be a connected Google Calendar account — Outlook connected accounts do not support this. Google Calendar creates a separate calendar entry for every guest on the organizer’s calendar, so this works best with a dedicated events Google account (e.g., ) rather than a personal one.
Worth setting up if you have an events-dedicated Google account already integrated with Gatsby. Otherwise, the duplicate calendar entries on your personal calendar make it more noise than signal.
Why Status Is Unreliable+
Calendar Invite **State** (Up-to-date/Out-of-date) just tracks whether the invite was sent — that’s reliable. Calendar Invite **Status** (Accept/Decline/Pending) tracks the guest’s response on their calendar, and only works when the organizer is a connected Google account; Outlook and other providers don’t report guest responses back to Gatsby at all.
Even where Status is available, people treat calendar invites differently than event RSVPs. Guests decline the calendar invite but show up. Others accept it and never attend. And some decline on their work calendar entirely — not because they’re not coming, but because they don’t want colleagues seeing their schedule — then add the event manually to a personal calendar.
Use RSVP status as your source of truth, not calendar status.
## Common Questions
[Section titled “Common Questions”](#common-questions)
Can I make the calendar invite an all-day event?+
There’s no “all day” toggle. Set the event’s start and end time to midnight to midnight, and guests’ calendars show it as an all-day hold. For a hold across several days, run it from midnight at the start of the first day to midnight at the end of the last.
Useful for save-the-dates when the exact time isn’t set yet. Push a calendar update once it is.
Why didn't guests who used the public link get a calendar invite?+
The public link has its own **Add to Guest Calendar** setting. If it’s off, public registrants get the confirmation email without the calendar invite, even though invited guests receive it. Turn it on in your public link settings. See [Registration Links](/platform/registration/registration-links/).
When should I send calendar invites?+
After registration, not before.
Attach them to confirmation emails. Including calendar invites in initial invitations feels like calendar bombing. Let guests commit first.
Can I send calendar invites to specific guests?+
Yes. Attach the calendar invite to a campaign and send to selected recipients.
Useful for waitlist approvals or manual follow-ups where you want a personalized message alongside the calendar block.
What if I need separate calendar invites for different sessions?+
Create child events. Each child event has its own calendar invite, confirmation email, and capacity settings.
Guests register through the parent and select sessions. Each selection triggers its own calendar invite.
See [Event Families](/platform/events-lists/families/) for setting up parent-child structures.
Can guests add the event without registering?+
Skip the ICS download link. Two things go wrong with it. You lose visibility: a download isn’t captured as an RSVP, so you never learn who is planning to come. And the entry is a one-time copy: once a guest has added it themselves, Gatsby has no way to update or cancel it, so a date, time, or venue change never reaches their calendar. An attached calendar invite is different. Gatsby tracks it per guest and overwrites the existing entry when you push an update. If you want the event to stay correct on a guest’s calendar, have them register and use the attached invite.
Do calendar invite responses update RSVP status?+
No. Calendar Accept or Decline is separate from Gatsby RSVP status.
Include the RSVP link in your calendar description so guests can update their actual registration if plans change.
What happens if I change event details but do not send an update?+
Guests keep the old calendar entry.
The “Unshared Event Updates” box appears on your event until you send or dismiss it.
Can I recall or delete calendar invites?+
You can send delete notifications to guests whose status changes to Declined.
This instructs their calendar app to remove the event. Covered in the postponing and canceling events workflow.
How can I check if a calendar invite was sent?+
Check “Calendar Invite State” column on the guest list. “Up to Date” means a calendar invite was sent.
How can I collect Yes/No/Maybe status from the calendar invite?+
Set the Calendar Invite Organizer to a connected Google account with calendar permissions enabled. The Calendar Invite Status column on the guest list shows each guest’s response.
# Capacity & Waitlists
> Control who registers and when. Set capacity limits, require approval through waitlists, and manage plus-ones so your headcount stays accurate.
Why it matters
## Let some people register immediately while vetting everyone else
Exclusive events need selective admission. LPs bring spouses but associates cannot, unknown registrants need vetting, and capacity changes as people register. An on/off switch doesn’t handle this.
How Gatsby helps
### Automatic Triggers
Hit your limit and registration switches to waitlist. No manual intervention.
### Per-Guest Plus-Ones
Set individual limits per guest. Real-time headcount includes plus-ones.
## Registration Modes
[Section titled “Registration Modes”](#registration-modes)
Most tools give you binary control. Open or closed. But exclusive events need something in between.
Some people should register immediately while others get vetted. Registration needs to adapt as capacity fills, which means more than an on/off switch.
Registration mode controls what guests see and what happens when they click buttons. Find this setting under **Are RSVPs open?** on the right side of **Registration » Invite Landing Page**.
Open+
Registration is available. Guests can RSVP immediately. This is the standard flow for most events.
When a guest clicks Accept, their status changes to Accepted. When they click Decline, their status changes to Declined.
Closed+
No new RSVPs accepted. Guests who already registered can still modify their responses. Your landing page shows a closed state.
Use this when registration is complete and you want to lock in your guest list.
Waitlist+
All registrations require your approval. When guests register, their status is set to Waitlisted instead of Accepted.
The button on your landing page can say anything. “Apply to Attend.” “Register.” “Request Invitation.” Guests do not have to see the word “waitlist.”
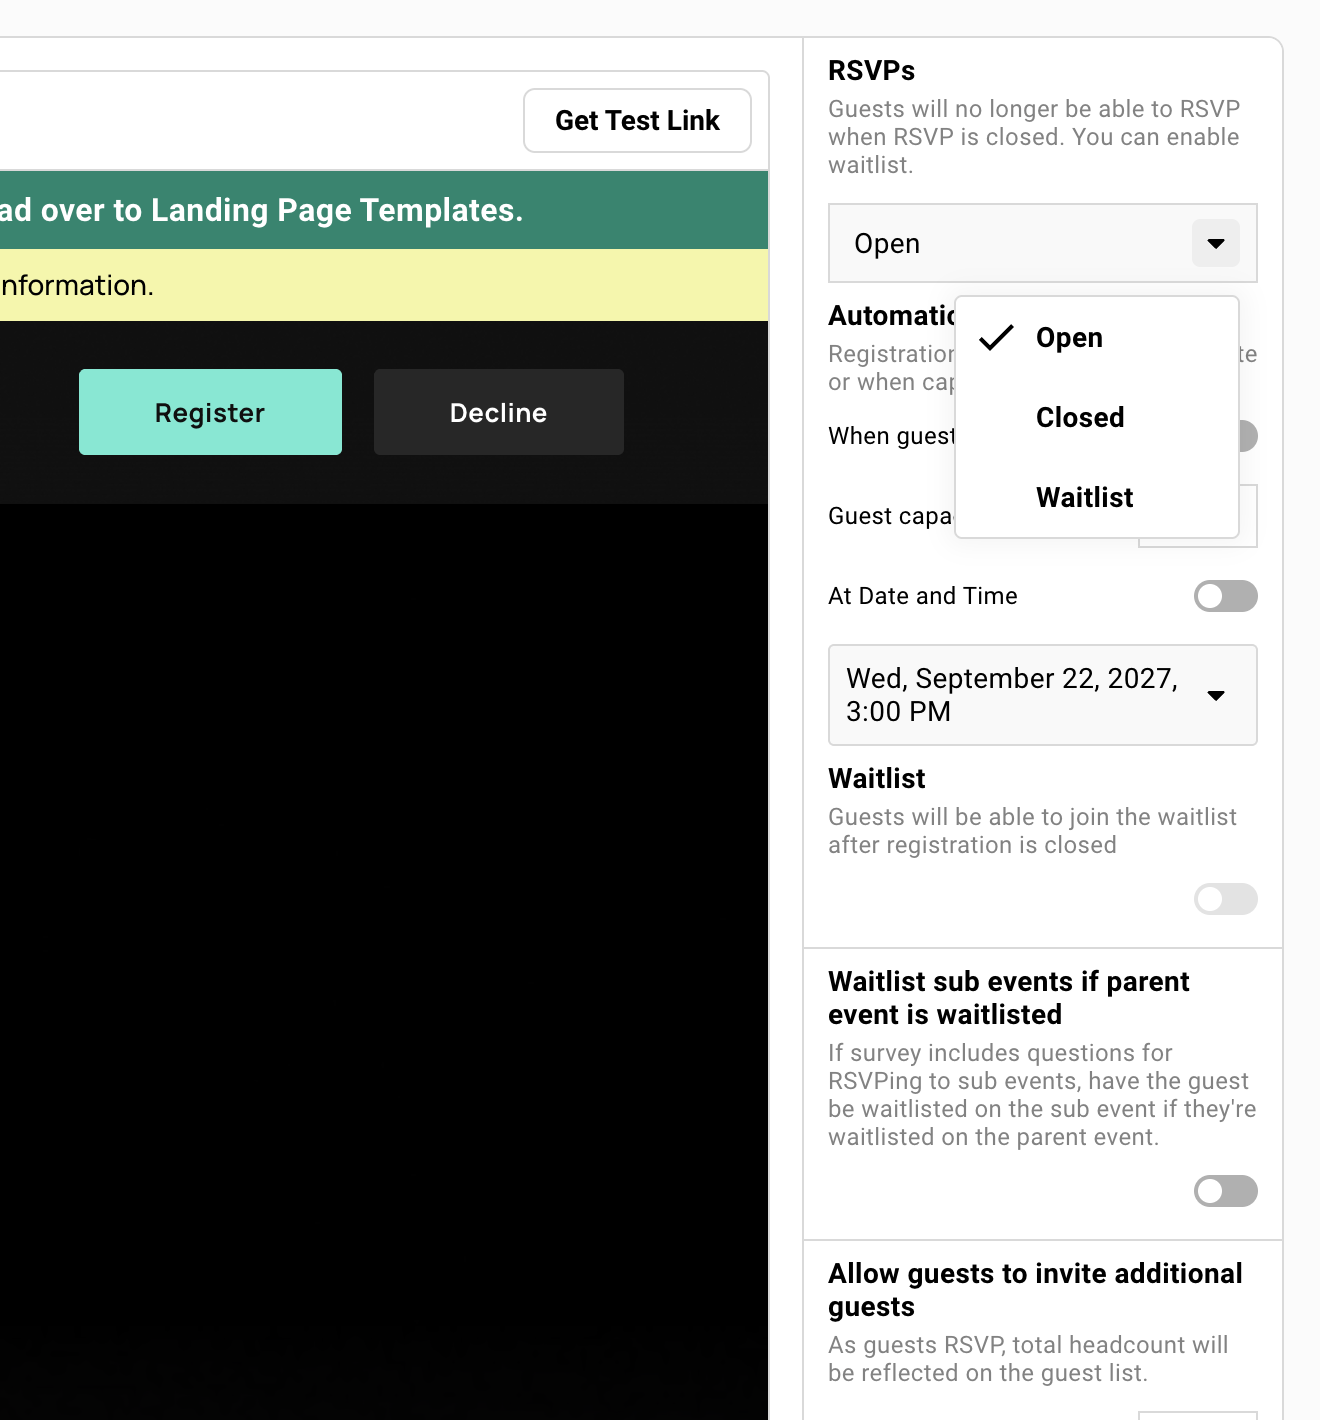
## Controlling When Waitlist Activates
[Section titled “Controlling When Waitlist Activates”](#controlling-when-waitlist-activates)
You rarely want full waitlist mode from day one. Usually, you want normal registration until something triggers the switch.
Capacity limits, deadlines, and public link registrants each work differently. Those three patterns cover most situations.
### Capacity and Deadline Triggers
[Section titled “Capacity and Deadline Triggers”](#capacity-and-deadline-triggers)
Set registration to close or switch to waitlist on its own when you hit a capacity limit or reach a deadline. Whichever comes first.
How to Set Up+
1. Go to **Registration » Invite Landing Page** and set **Are RSVPs open?** to **Open**.
2. Turn on **Close them automatically**.
3. Under **Close when**, turn on **Capacity is reached** and enter a **Guest capacity**, turn on **A date and time passes** and pick the date, or both.
4. Under **Then guests get**, choose **RSVP Closed** or **Join Waitlist**.
These settings only appear while RSVPs are Open. If you set RSVPs to Closed or Waitlist by hand, the automatic close stops running and the list says so. Your capacity and date are kept for when you switch back to Open.
Capacity Limits+
Maximum number of acceptances allowed. When reached, new guests get the button you chose under **Then guests get**: a closed page, or the waitlist.
The count includes plus-ones since they appear as separate entries on your guest list. A 40-person capacity with 30 primary guests and 15 plus-ones means you are over capacity.
Account for internal team members if they are on the list.
Registration Deadlines+
Date and time when registration behavior changes. You can either close entirely or switch to waitlist mode.
Useful for events with venue deadlines or catering cutoffs. Guests who miss the deadline can still request a spot through the waitlist.
How These Work Together+
Toggle on both capacity and deadline triggers. Whichever condition hits first wins.
Example: 50-person capacity with a Friday deadline. If you hit 50 on Wednesday, waitlist activates Wednesday. If Friday arrives with only 40 guests, waitlist activates Friday.
### Public Link Waitlist
[Section titled “Public Link Waitlist”](#public-link-waitlist)
Require approval only for guests who find you through a public link. Invited guests using personal links register immediately.
How to Enable+
1. Go to **Registration » Invite Landing Page**.
2. Under **How guests get in**, turn on **Public link**.
3. Turn on **Waitlist everyone who uses this link**.
This gives the event two registration paths. With the event’s registration mode set to **Open**, guests using their personal link register as **Accepted**, while anyone registering through the public link goes to the waitlist for your approval.
The same two switches are also in the **Change Event Privacy** window, which opens from the gray **Public Link** button at the top of your event. Change them in either place. Both show the same setting.
Guests You Already Added+
Someone already on your guest list might register through the public link instead of their personal link. By default they skip the waitlist and are accepted, because you invited them.
To waitlist them too, turn on **Also waitlist guests you already added**. It appears under **Waitlist everyone who uses this link** once that is on. It changes nothing a guest sees on the page, only what happens after they submit.
When to Use This+
Grow your network while protecting your event. Post on LinkedIn but vet unknown registrants.
Known contacts get instant confirmation with a calendar invite. Unknown contacts apply and you review them before they get access.
Duplicate Registrations vs. Duplicate Contacts+
By default, if someone registers with an email already in your database, Gatsby matches them to their existing contact rather than creating a duplicate contact. That matching always happens.
Matching doesn’t mean updating. A public link registration never overwrites an existing contact’s profile, even if their name fields are blank in Gatsby, so nobody can change another person’s profile through a public link. To collect details like a preferred name from existing contacts, ask a survey question, then export the answers and import them back onto the contacts.
### Full Waitlist from Start
[Section titled “Full Waitlist from Start”](#full-waitlist-from-start)
When every registration needs approval. Creates an “Apply to Attend” experience regardless of link type.
How to Enable+
1. Open your event’s Registration tab.
2. Select **Invite Landing Page** in the left-hand menu, then set **Are RSVPs open?** on the right to **Waitlist**.
All guests must be approved before their status changes to Accepted. Personal links, public links, it does not matter. Everyone goes through your approval workflow.
When to Use This+
**Curated events** where the guest mix matters. You need the right combination of industries, seniority levels, or companies at the table, and not everyone who applies gets in.
**Security-sensitive events** requiring verification before admission. Government clearance checks, background verification, or identity confirmation.
## Approval Workflow
[Section titled “Approval Workflow”](#approval-workflow)
Other tools make approval clunky. You approve someone and they get a generic email. Or the system remembers their old status and lets them bypass your decision.
Gatsby separates the status change from the notification, so you control both.
### Reviewing Waitlisted Guests
[Section titled “Reviewing Waitlisted Guests”](#reviewing-waitlisted-guests)
Waitlisted guests appear in your guest list with a pink “waitlisted” tag. Create a filtered view to see them all in one place.
Creating a Waitlist View+
1. Open your guest list.
2. Click **Add Filter**.
3. Set RSVP status equals **Waitlisted**.
4. Save as a view for quick access.
Now you have a saved Guests view for pending approvals. No scrolling through your entire guest list.
Information Available for Review+
Three types of information are available for each waitlisted guest.
***
**Survey responses**
Answers to your registration questions. Industry, company, role, how they heard about you.
***
**Contact profile**
Company info, custom fields, notes from previous events.
***
**External verification**
Cross-reference with LinkedIn or your CRM before deciding.
### Approving Guests
[Section titled “Approving Guests”](#approving-guests)
Change RSVP status from Waitlisted to Accepted. The system asks if you want to send a confirmation email.
Standard Approval Flow+
1. Select the guest in your guest list.
2. Change their RSVP status to **Accepted**.
3. Click **Yes** when asked about confirmation email.
Guest receives your confirmation email with the calendar invite attached (if configured). One status change handles the approval and the notification.
Custom Approval Flow+
1. Select the guest in your guest list.
2. Change their RSVP status to **Accepted**.
3. Click **No** to skip the automatic email.
4. Send a personalized campaign instead.
More control over messaging. Include their RSVP link, calendar invite, and any event-specific details. Useful when the standard confirmation email does not fit the situation.
Locking Responses After Approval+
Turn on **Prevent editing after submitting** under **Everything else** on the Invite Landing Page if you don’t want guests changing their survey answers or RSVP after they’ve been approved. Useful once you’ve finalized catering counts or seating and don’t want late edits.
You can also set a different confirmation-page header for each RSVP outcome (Accepted, Declined, Waitlisted), so guests see messaging that matches their status. See [Forms and Surveys](/platform/registration/registration-forms/) for where these settings live.
### Guests You Will Not Approve
[Section titled “Guests You Will Not Approve”](#guests-you-will-not-approve)
Do not change waitlisted guests to Declined. Leave them in waitlist status.
Why Not Decline Them+
If you decline a waitlisted guest, the system no longer remembers they were waitlisted.
Next time they visit their registration link, they see Accept and Decline options. They can mark themselves Accepted. You lose control.
This is not a bug. It is how the status system works. Declined means “guest chose not to attend.” Not “organizer did not approve the registration.”
The Right Approach+
Leave unapproved guests as Waitlisted. Their status stays locked.
If you need to communicate rejection, send a campaign. Personal, professional, on your terms.
Consider adding a custom column like “Approved: Yes/No” to track your internal decision. Filter by that column to separate approved guests from pending and rejected. The RSVP status stays Waitlisted either way.
Showing Rejected Guests as Not Approved+
By default, a waitlisted guest who revisits their registration link without being approved still sees a Waitlisted status.
Turn on **Show rejected guests as Not Approved** under **Everything else** on the Invite Landing Page to give them a clearer “not approved” status instead. The guidance above about never manually setting them to Declined still applies.
Never change a waitlisted guest to Declined. Leave them as Waitlisted and send a separate communication if you need to inform them.
## Plus-One Settings
[Section titled “Plus-One Settings”](#plus-one-settings)
A single plus-one setting for every guest does not work for exclusive events. Giving everyone the same allocation means LPAC members cannot bring spouses, or associates bring friends to a board dinner.
You need granular control per guest.
Start with a global default, override it per guest, and require email addresses to capture plus-one info for future events.
Global Default+
Set on **Registration » Invite Landing Page**. Open **Everything else** and find **Additional guests allowed** under Plus ones.
Choose the default number. Zero means no plus-ones unless you override. One means everyone gets one unless you override.
Decide whether email addresses are required. Required email means you capture the plus-one as a real contact. Optional means you might get “Guest of John” with no contact info.
Per-Guest Overrides+
1. Open your guest list.
2. Add the **Plus Ones Allowed** column.
3. Set specific numbers for each guest.
LPAC members get 1. GPs get 2. Everyone else gets 0. Each guest sees only their allocation when they register.
Why Require Email Addresses+
When required, plus-one info syncs to your contact database. Name, email, dietary restrictions. They become known contacts for future events.
Without required email, plus-ones are anonymous. You know someone is bringing a guest. You do not know who. Next quarter, you start from scratch again.
How Plus-Ones Count Toward Capacity+
Each plus-one is a separate entry on the guest list. They count against capacity.
A 40-person capacity with 30 primary guests and 15 plus-ones means you are at 45. Five over capacity.
Plan accordingly. If you give 30 guests one plus-one each, your theoretical maximum is 60 people.
## Parent-Child Event Behavior
[Section titled “Parent-Child Event Behavior”](#parent-child-event-behavior)
When using event families (parent event with child sub-events), waitlist and plus-one settings cascade.
Waitlist Cascade+
If the parent event is in waitlist mode, guests registering through the parent also get waitlisted on child events they select.
This applies to public link registrations. A guest finds your parent event on LinkedIn, registers, and selects three breakout sessions. They are waitlisted on the parent and all three children.
Plus-One Cascade+
Plus-one settings from the parent apply when guests add plus-ones during registration. If the primary guest is waitlisted, their plus-ones inherit that status.
Plus-ones do not bypass the approval workflow.
Learn More+
See [Event Families](/platform/events-lists/families/) for full parent-child documentation. For conferences where guests pick sessions at registration, see [Running Events with Multiple Sessions](/playbooks/registration-setups/multi-session-events/), which uses a registration hub and session events rather than parent-child links.
## Common Questions
[Section titled “Common Questions”](#common-questions)
Can I hide that guests are on a waitlist?+
Yes. The button on your landing page can say anything. “Register.” “Apply to Attend.” “Request Invitation.” Guests do not need to see the word “waitlist.”
The waitlist notification email can also be customized. Frame it as “application received” instead of “you are on a waitlist.”
What happens when someone registers who is not in Gatsby yet?+
Their information gets added to Gatsby automatically. As long as they complete the required survey questions on the registration page, they become a contact in your database.
Do plus-ones receive confirmation emails?+
Yes, if your guest provides their plus-one’s email address. Gatsby sends them a separate confirmation email with the event details.
Is plus-one information saved for future events?+
Yes. All plus-one details sync to your organization’s contact database. They appear in the Plus Ones column on your guest list and become known contacts for future events.
Do waitlisted guests receive an email?+
Yes. Configure the waitlist notification email in the Registration tab. It can include different information than the confirmation email. Calendar invite is not attached by default.
See [Confirmation Emails](/platform/email-campaigns/confirmation-emails/) for configuration details.
What if a waitlisted guest decides they cannot attend?+
They can decline themselves. Their status changes to Declined. This is rare, but possible. Most guests simply do not respond.
How do I see my current capacity status?+
At the top of your event, colored badges show how many guests are Accepted, Declined, Waitlisted, Invited, or have no status.
Those badges give you a quick count without adding anything up.
We want to post our event on social to allow people to register their interest+
Enable the Public Link with Registration Mode set to Waitlist. Anyone with the link can register, but they land on your waitlist for approval.
Can I require approval for all registrations?+
Yes. Set Registration Mode to “Wait for approval” (or Waitlist). Every registration goes to the waitlist regardless of how they register.
You manually move guests to Accepted when ready.
How do I approve waitlisted guests?+
Change their RSVP status from Waitlist to Accepted. They can automatically receive the confirmation email with calendar invite, or you can notify manually.
**Bulk approval:** Select multiple guests » Actions » Change Status » Accepted.
Need to close registration immediately+
**Registration » Invite Landing Page**
* Set **Are RSVPs open?** to **Closed**
**Public Link**
* Under **How guests get in**, turn off **Public link**
# Landing Pages
> Your registration website. Design branded pages that reflect your organization, not your event software. Start from a template or customize every detail.
Why it matters
## Your guest goes to register and lands on a page that looks nothing like your team
It reads like a startup threw together a quick page, not an established team running polished events. Guests pick up on that.
How it works
### Full Design Control
Choose your own fonts, colors, and imagery. Start from a template or customize every detail until the page looks like it came from your team, not your software vendor.
### Build Once, Reuse Everywhere
Save templates to your global library. Your next executive dinner starts from your last one.
## What Landing Pages Are
[Section titled “What Landing Pages Are”](#what-landing-pages-are)
Landing pages are your registration website. When a guest clicks their RSVP link, this is the page they see. You control the design, the content, and the branding. The page reflects your organization, not your software vendor.
One Page Live at a Time+
You can have multiple templates for your event, but only one is “in use” at any moment. That’s the one guests see.
There’s no publish button. Changes save automatically, and you can swap which template is live anytime.
Every guest sees the same page regardless of how they got there. Personal links, public links, and referral links all point to the same landing page.
Local vs Global Templates+
**Local templates** live within one event only. Design something for your March dinner, and it stays with that event.
***
**Global templates** live in your library, available across all events. Design once for executive dinners. Duplicate it to global, and your next executive dinner starts from a proven foundation.
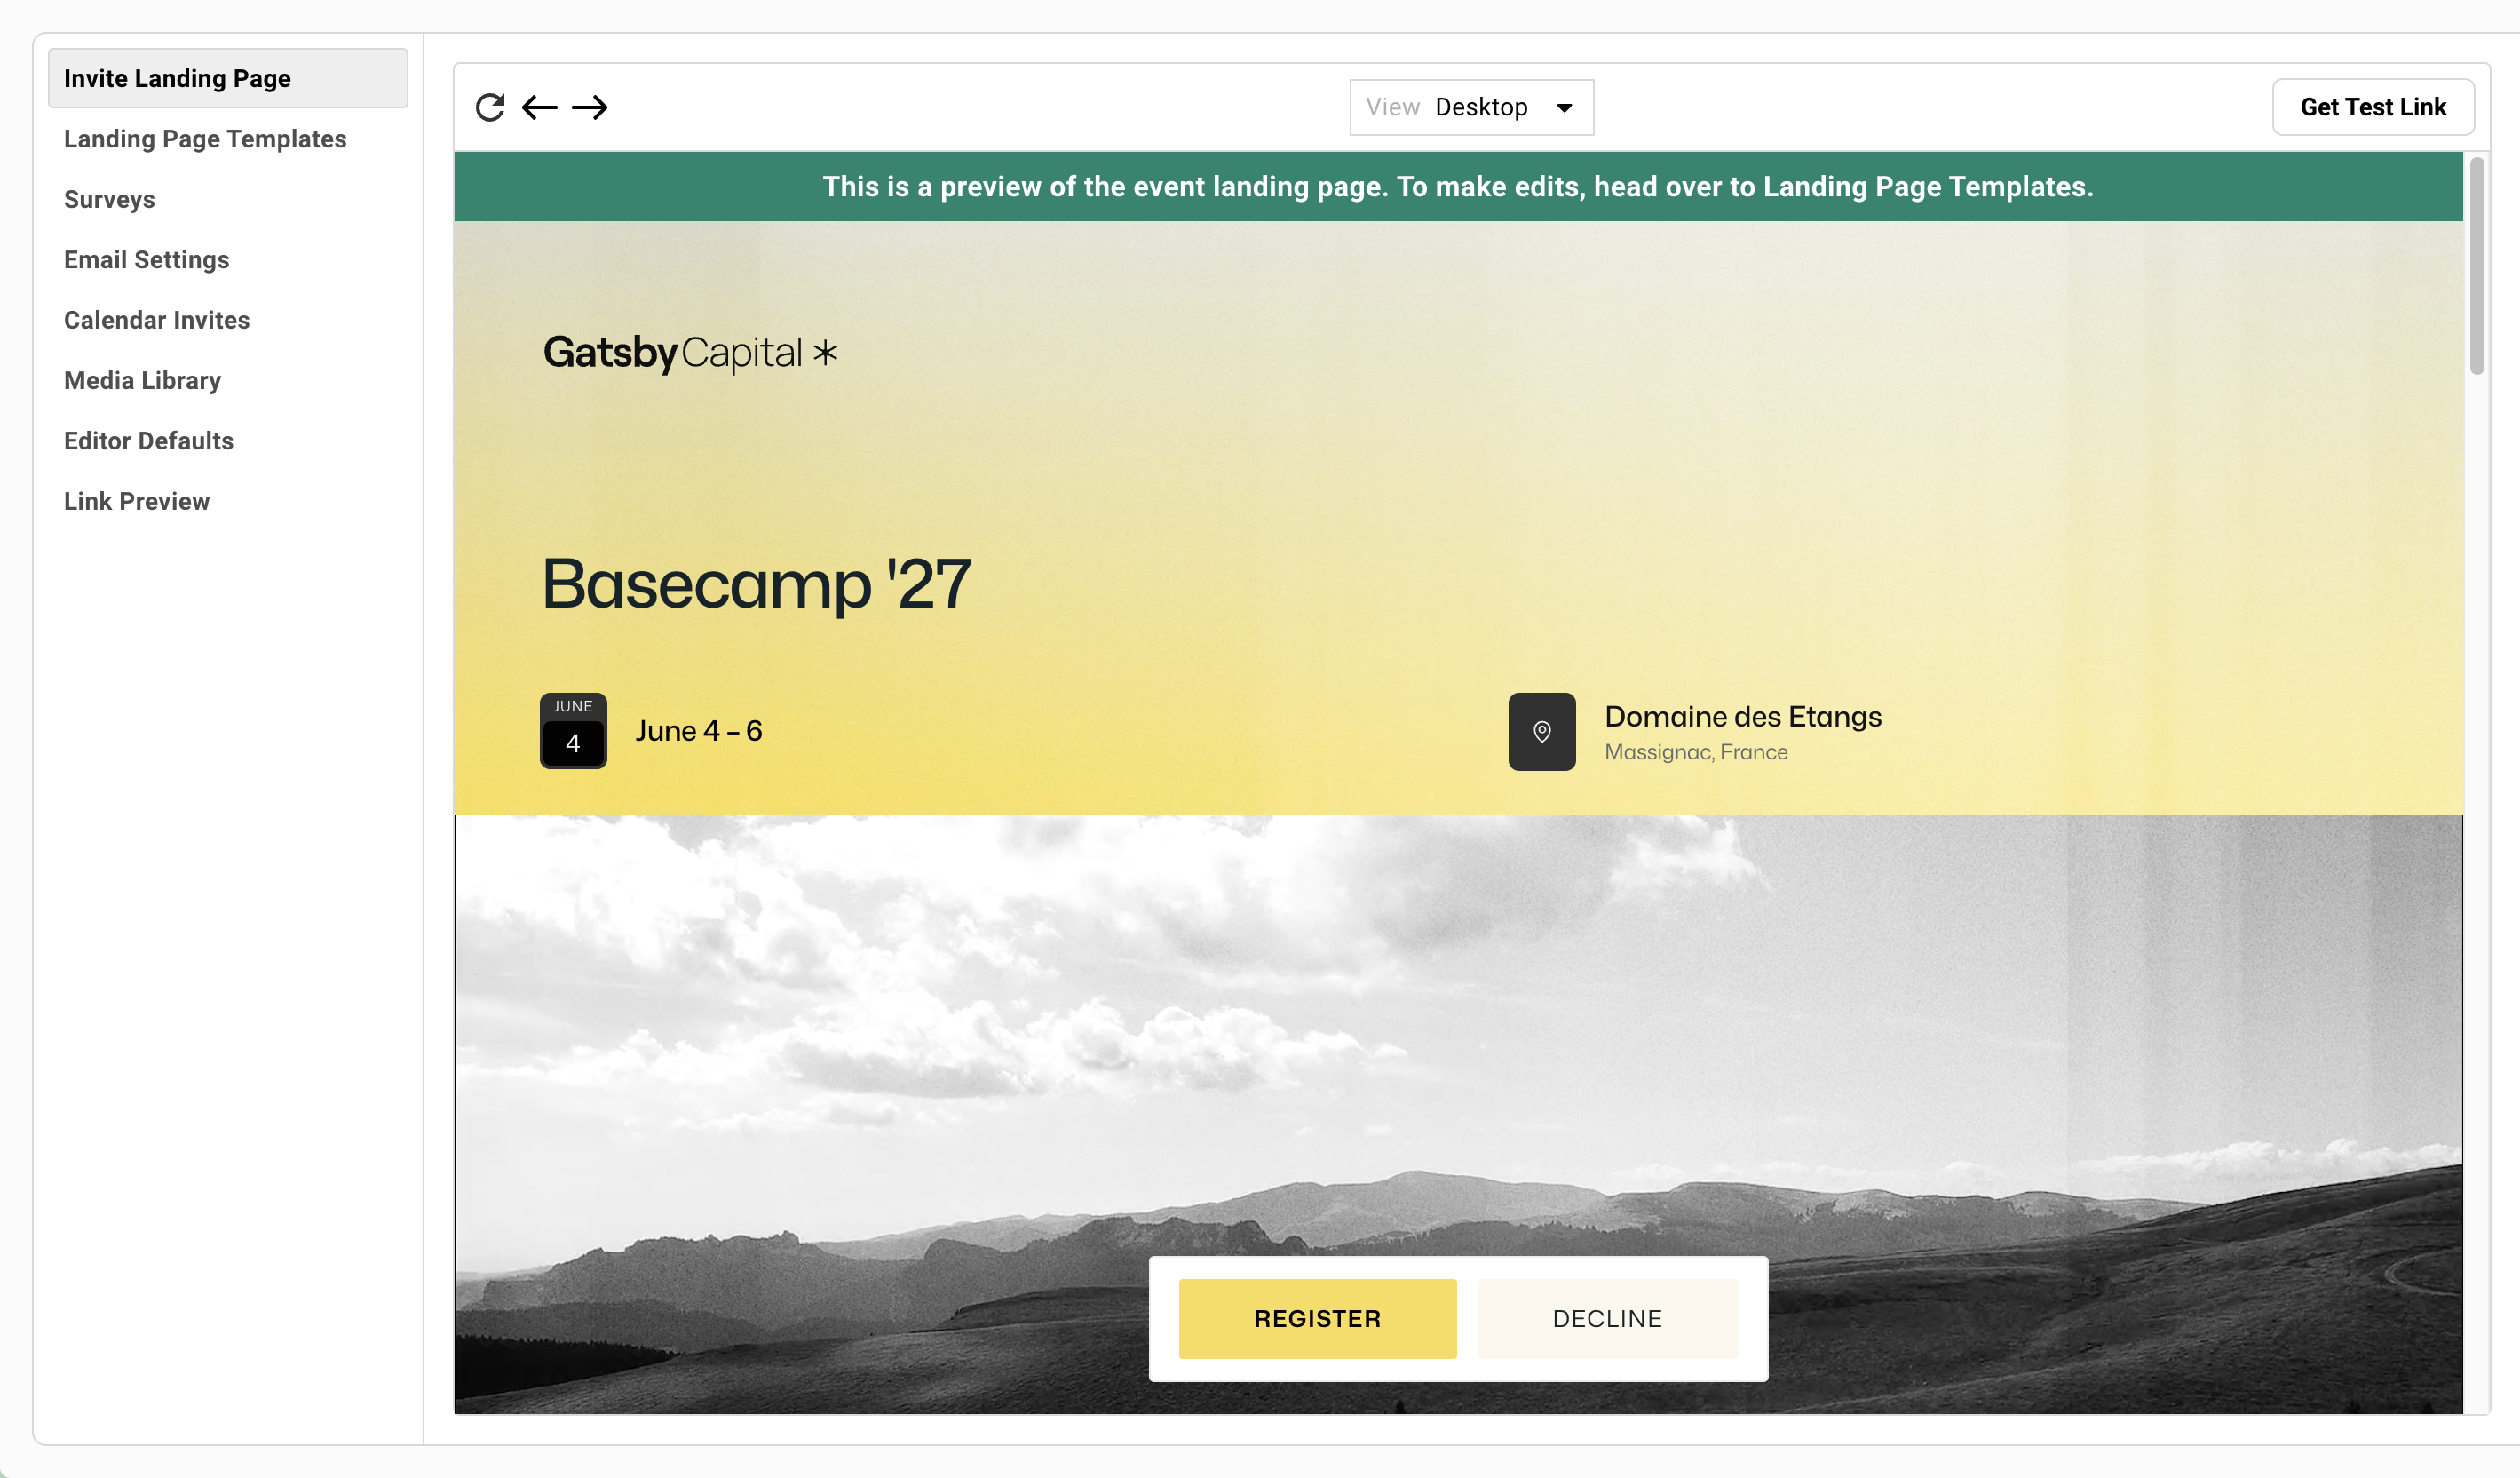
## Working with Templates
[Section titled “Working with Templates”](#working-with-templates)
You spend hours designing the perfect registration page. Three months later, your colleague runs a similar event and starts from scratch. Wrong fonts, old logo, nobody knows where the approved design went.
Templates solve that problem. Design a page once, save it, and every future event of that type starts from a proven foundation.
### Browsing and Starting
[Section titled “Browsing and Starting”](#browsing-and-starting)
Browse the template library and preview your options before committing. Once you find one you like, duplicate it to your event and customize from there.
Finding Templates+
1. From your event’s Registration tab, click **Landing Page Templates**.
2. Browse available designs. Gatsby templates and your team’s saved templates appear here.
3. Click any template to preview it on desktop, tablet, and mobile.
Preview Modes+
Preview shows what guests will see in different registration states.
***
**Normal registration** shows Accept, Decline, and Maybe buttons as configured.
***
**Waitlist mode** shows a single button that joins the waitlist.
***
**Registration closed** shows the page with no active buttons.
See how buttons change in each state before going live.
Duplicating to Your Event+
You cannot edit global templates directly. They belong to everyone.
1. Preview the template you want.
2. Click **Duplicate to Event**.
3. The template becomes a local copy you can customize.
4. After customizing, you can duplicate back to global to save improvements for future events.
### Using the Global Library
[Section titled “Using the Global Library”](#using-the-global-library)
The global library stores templates that any event in your organization can access.
What Global Templates Contain+
Fonts, colors, logo placement, approved content structure.
Someone on your team designs the executive dinner template once. Everyone who runs executive dinners starts from that foundation. No more hunting for the “right” version.
Promoting Local to Global+
1. Customize a template for your event.
2. Open the template’s dropdown menu.
3. Select **Duplicate to Global Library**.
4. The template is now available for any future event.
Recommended Workflow+
1. Browse the global library first.
2. Duplicate a template to your event.
3. Customize for this specific event.
4. Set as in-use.
Start from what exists. Customize what you need.
## Customizing Your Page
[Section titled “Customizing Your Page”](#customizing-your-page)
Templates give you a starting point, but your event has its own agenda, speakers, and details that need to make it onto the page. How far you take the customization depends on how much control you need and how much time you have.
### Basic Mode
[Section titled “Basic Mode”](#basic-mode)
Basic is where the editor starts. It locks the layout, so you change content without breaking how the page looks on a phone.
What You Can Do+
* **Replace images and logos.**
Click any image to upload a new one.
* **Edit text content.**
Click any text block to update it.
* **Update colors and fonts.**
Use “Change all fonts and colors” for quick brand application.
* **Move blocks up and down.**
Reorder content without breaking the layout.
* **Duplicate or delete blocks.**
Expand agendas or speaker lists. Remove sections you do not need.
What You Cannot Do+
* Change text size
* Add new block types
* Change padding, spacing, or responsive breakpoints
* Deep layout modifications
That requires Advanced mode.
Why the Limits Exist+
The limits protect your brand. Your event team cannot accidentally break the mobile layout, and non-designers stay within safe boundaries. The approved design stays approved.
### Advanced Mode
[Section titled “Advanced Mode”](#advanced-mode)
Sometimes the template is close but not quite right. You need different padding on mobile, custom spacing between sections, or a block type that the template didn’t include.
Basic mode can’t do that. Advanced can.
Switching Modes+
The **Mode** switch sits at the left of the editor toolbar. Click **Basic** or **Advanced** to change modes. Your content stays exactly as it is.
Advanced adds three controls to the toolbar: **Add Block**, a page size menu with device presets and a custom width and height, and a **Colors and styling** menu. Both modes keep the device previews and zoom.
The editor opens in whichever mode you used last. Your choice doesn’t change the mode for anyone else on your team.
In Basic, settings that only work in Advanced still show in the right panel. **Crop Style** and **Image Style** on image blocks read “Available in Advanced mode” with a **Switch to Advanced** link that changes modes and keeps the block selected.
What It Unlocks+
* **Copy and paste blocks between templates.**
Grab a section from one design, use it in another.
* **Add new block types.**
Insert blocks that did not exist in the template.
* **Modify responsive breakpoints.**
Control exactly how content adapts to different screen sizes.
* **Precise spacing and sizing.**
Every padding value, every width, every margin.
When to Use It+
* When Basic mode cannot do what you need
* When building a new template from scratch
* When copying elements between templates
* When you need pixel-level control
Learning Resources+
Advanced mode is more complex than Basic and takes time to learn.
Detailed tutorials are available in the video help center when logged into Gatsby. Start there.
### Content Blocks
[Section titled “Content Blocks”](#content-blocks)
Everything on your landing page is a block. Different block types serve different purposes.
Block Types Reference+
**Text blocks**
* **Text:** Written content and descriptions.
* **Bullet list:** Unordered lists for agendas and highlights.
* **Number list:** Ordered lists for schedules and sequences.
***
**Media blocks**
* **Image:** Full images with optional captions.
* **Cropped Image:** Images with custom crop settings.
* **Video:** YouTube links, Vimeo embeds, or direct uploads (24MB max).
* **Embed:** External content like maps or forms.
***
**Structure blocks**
* **Layout:** Organize content into columns.
* **Horizontal Set:** Side-by-side elements in a row with wrapping.
* **Divider:** Visual breaks between sections.
***
**Action blocks**
* **Button:** External links to other pages.
* **Invite Buttons:** RSVP actions. This block is always connected to Gatsby’s registration modes. Which buttons guests see is set in Registration. How they look is set here, from the **RSVP buttons** card in the left column. To link somewhere else, use a regular Button block instead.
Block Settings+
All blocks share common settings:
* Background color
* Width and height
* Corner radius
* Borders
* Padding
Specific blocks have additional settings unique to their type. Click any block to see what you can configure.
Sizing Images, Logos, and Columns+
These settings require Advanced Editor mode.
**Images.** Set images to **Fill** width, not **Fixed**. A fixed-size image doesn’t adapt to the screen and can clip on phones.
***
**Logos side by side.** Avoid fixed sizing here too. Keep each logo proportional and set it to fill the width of its column. To balance logos that look uneven, adjust the column proportions in the Layout (give the wider logo a slightly wider column) and add padding around the smaller one.
***
**A thin gap of background above a block.** New blocks come with top padding by default. If you see a sliver of background above an image or section, select the block and remove its top padding.
***
**Columns of uneven height.** Select the Layout and turn on **Match Column Heights**. If one column still falls short, check whether its blocks have been grouped together. Copying and pasting a column can group its blocks, and the group then needs to fill the column’s height too.
How to Add a Google Maps Embed+
Requires Advanced mode.
1. Click **Advanced** in the **Mode** switch at the top of the editor.
2. Click **Add Block** and select the **Embed** block type.
3. In the embed block options, select **Google Maps**.
4. Type your location name. Google will search and pull up the address.
5. Set the block to **Full Width** and choose a height that works for your template (around 400px is a good starting point).
Fixed-size blocks are not responsive. Use Full/Fill Width so blocks adapt to different screen sizes.
### The Sticker Sheet
[Section titled “The Sticker Sheet”](#the-sticker-sheet)
The Sticker Sheet is a library of pre-designed blocks that came with your template. If you deleted a section and need it back later, this is where you find it.
What It Is+
Pre-designed blocks that came with the template.
Toggle between **Page** view and the **Stickers** view in the editor toolbar. Page shows your landing page. Sticker Sheet shows blocks you can add.
When to Use It+
You deleted the agenda early on. The event was six weeks out. No agenda finalized.
Now it is two weeks out. Agenda is ready. You need the section back.
1. Switch to Sticker Sheet view.
2. Find the agenda block.
3. Click **Add to page**.
4. Edit the content.
Why It Matters+
You can safely delete sections you do not need yet. Add them back later without redesigning from scratch.
The template’s original components stay in its Sticker Sheet.
## RSVP Button Options
[Section titled “RSVP Button Options”](#rsvp-button-options)
You deleted the “Maybe” button in the template editor, but guests still see three buttons. That’s because which buttons show is an event setting, and the template only decides how they look.
A template carries all five RSVP buttons: Yes, No, Maybe, Join Waitlist, and RSVP Closed. The event decides which of them a guest gets. The same template might show Maybe on one event and hide it on another.
Where to Configure Buttons+
Go to **Registration » Invite Landing Page**. The settings to the right of the preview are split into four groups.
* **Are RSVPs open?** Set RSVPs to Open, Closed, or Waitlist. While they are Open, **Close them automatically** closes them when capacity is reached or a date and time passes.
* **How guests get in.** Personal links, the public link and its settings, referral links, and **Skip the page, go straight to the survey**.
* **What guests can choose.** **Accept** is always on and locked, so every guest can say yes. Turn **Maybe** on or off, separately for personal links and the public link. If your org can turn off declining, **Decline** appears here too. Otherwise guests can always decline.
* **Everything else.** Plus ones, the confirmation page, guest permissions, and sub events. None of it changes which buttons a guest sees, so it stays folded shut until you click it.
Each group shows a setting only when it can have an effect. The public link column appears once the public link is on, and the automatic-close rules appear only while RSVPs are Open.
These settings control what guests actually see. Not the template editor.
Styling Buttons in the Template Editor+
The **RSVP buttons** card sits in the left column of the template editor, under Event Details. It lists every RSVP button, drawn the way a guest gets it, so you never have to hunt for the button block on the canvas.
Switch the card between **Guest list** and **Public link** to see each audience. The card splits the buttons into the ones those guests see and the ones they don’t see, with a reason under each hidden one.
1. Open the template from **Landing Page Templates**.
2. In the **RSVP buttons** card, click the button you want to style.
3. The canvas switches to a state that shows that button, and its styling opens on the right.
Hidden buttons stay in the card so you can style them before you need them. **Cut off for guests** under a button means its label is too long for the space guests will see.
Turning Maybe or Decline On from the Template Editor+
When Maybe or Decline is hidden for an audience, the card shows a link such as **Turn on Maybe to use it** under that button.
Click it and choose which guests should get it: **Guests on your list**, **Anyone with the public link**, or both. This changes the event’s setting, the same one under **What guests can choose** in Registration.
To change the rest, click **Set which ones appear in Registration** at the bottom of the card. Registration opens in a new tab with **What guests can choose** highlighted.
Common Configurations+
**Accept + Decline** (default)
Standard two-button setup. Clear yes or no.
***
**Accept only**
No decline option. Useful when you want to minimize friction.
***
**Accept + Decline + Maybe**
Let guests indicate interest without full commitment. Maybe is treated similar to Accepted. Follow-up recommended.
***
**Waitlist mode**
Single button joins the waitlist. Used when capacity is full or you want to control acceptance manually.
The Common Mistake+
Deleting button labels in the template editor does not remove the button. The button is still there. Just with no label.
Configure visibility in Registration, not the editor.
See [Capacity and Waitlists](/platform/registration/capacity-waitlists/) for when to use waitlist mode.
The **Everything else** group on the Invite Landing Page covers settings that go beyond buttons: response-edit restrictions, outcome-specific confirmation headers, and whether a rejected guest shows as Not Approved. See [Capacity and Waitlists](/platform/registration/capacity-waitlists/) for the approval-related settings and [Forms and Surveys](/platform/registration/registration-forms/) for confirmation-page configuration.
## Common RSVP Scenarios
[Section titled “Common RSVP Scenarios”](#common-rsvp-scenarios)
Approving public registrants, closing at capacity, offering a Virtual option, skipping the landing page, splitting an event into sessions. [Common RSVP Scenarios](/platform/registration/rsvp-scenarios/) walks through the setups teams ask about most, with the exact settings for each.
## Previewing and Testing
[Section titled “Previewing and Testing”](#previewing-and-testing)
Preview what guests will see before going live. Test every button state.
The Preview Screen+
The Registration tab opens to the **Invite Landing Page** preview by default. This shows what guests see when they click their link.
Use the preview to check:
* How your page looks with current content
* Which buttons each kind of guest gets
* Overall layout and branding
Previewing as a Specific Guest+
Your guest list and the public link can get different buttons, and a full or closed event changes them again. **Previewing as** above the preview lets you pick who is looking:
* Someone on my guest list
* Someone with the public link
* Someone arriving after the event fills up
* Someone arriving after RSVPs close
* Someone sent a save the date
The preview redraws as that person’s page, and the line under the picker names their buttons, for example *They see Will Attend and Decline*.
***
**When nobody can reach that page yet**
Some choices describe a page your event can’t produce. If nothing sends guests to a waitlist, nobody will ever arrive after the event fills up. The picker marks those options, and choosing one shows an amber note such as *Nothing sends guests to a waitlist yet.* and a button, such as **Set one up**, that takes you to the setting that would change it.
***
**Jumping to a setting**
Settings you reach from a note, or from **Set which ones appear in Registration** in the template editor, flash once when the page opens so you can find them.
Device Previews+
View your page on desktop, tablet, and mobile.
The viewport is pixel-accurate. Cycle through viewport presets to ensure your page works on all devices. Check mobile especially. Most guests will view on their phones.
Survey and Confirmation Preview+
Click through buttons to preview the full guest experience.
* Click Accept to see the survey form
* Complete the survey to see the confirmation screen
* Verify the entire flow before going live
Test Links vs Live Links+
Preview uses a test link. Nothing auto-fills.
Live personal links will show pre-filled guest information (name, email, company). Public links will show empty form fields.
To walk the flow outside Gatsby, pick someone in **Previewing as** and click **Get test link for this view**. The copied link opens that person’s version of the page. Nothing you submit there is saved, and no confirmation email or calendar invite is sent. The button is unavailable for a page nobody can reach yet.
## Media Library
[Section titled “Media Library”](#media-library)
A central library for images and videos used across your templates and events.
How It Works+
Upload assets directly to the media library. Or add them while editing a landing page. Either way, they appear in your library.
Same asset can be used across multiple templates and events.
Replacing Assets+
Update a speaker photo in the library. It updates everywhere that photo is used.
Useful when a speaker sends a better headshot. Or when you update your logo. One change, everywhere at once.
Managing Assets+
Delete, rename, and organize images and videos. Same workflow for both.
Keep your library clean. Old assets pile up fast.
## Sharing Your Event
[Section titled “Sharing Your Event”](#sharing-your-event)
When someone pastes your event’s link into Slack, LinkedIn, X, or a text message, the app shows a preview card with a title, description, and image. You set all three in **Link Preview**.
Where to Configure+
In your event’s **Registration** tab, open **Link Preview**.
The preview on the right updates as you edit. Switch it between **Default** and **X (Twitter)** to see both layouts. It’s a close approximation. Each app draws its own card, and links people already shared may take a while to refresh.
Set this before sharing any links. First impressions happen before the click.
Title and Description+
This is what people see before they click. The title uses your event name unless you enter one.
Keep the description to one or two short sentences. Apps may shorten it or leave it out.
Make it compelling. “Q3 Executive Dinner” tells them what. “Join 40 portfolio CEOs for an evening of…” tells them why.
Click **Save changes** to publish your title, description, and X card format. **Discard** returns everything to what you last saved.
Featured Image+
The image that appears when your event’s link is shared. It also shows on your public events calendar.
Use 1200 × 630 pixels in PNG, JPG, or WEBP. Until you choose one, your links use the default Gatsby image.
The image saves the moment you pick it, separately from **Save changes**. A “Featured image updated” message confirms it. Use **Replace** or **Remove** to change it, and **Undo** if you remove it by mistake.
If you update the image but others still see the old one on Slack, that’s Slack’s cache. Add a parameter like `?1` to the end of the URL you share and Slack fetches the latest version.
X (Twitter) Card Format+
Choose how your link looks on X:
* **Large image** shows your featured image full width above the title. This is the default and the right choice for most events.
* **Compact** shows a small square thumbnail beside the title. Use it when your image is a logo or doesn’t read well cropped wide.
This setting applies to X. Slack, LinkedIn, and messaging apps choose their own layout.
Public Links On vs. Off+
**Public link on.** Anyone who pastes your public link sees your title, description, and image.
**Public link off.** The same link shows a generic Gatsby preview with no event details, and opening it shows a page saying the link isn’t active.
**Personal links.** These always show your full preview, whether your public link is on or off. If a guest pastes their invitation link into a group chat, everyone in it sees your event’s title, image, and description. See [Registration Links](/platform/registration/registration-links/) for how the two link types differ.
## View-Only Links
[Section titled “View-Only Links”](#view-only-links)
Share your landing page without enabling registration. RSVP buttons are visible but non-functional.
How to Get One+
1. Open your landing page template.
2. Click the dropdown arrow next to the **Edit** button.
3. Select **Get view-only link**.
Use Cases+
**Design review**
Share with your boss before going live. Get approval without enabling real RSVPs.
***
**Parking and logistics**
Link to a logistics page from your confirmation email. Guests can view details without re-registering.
***
**Speaker bios**
Create a standalone page with speaker information. Share or embed anywhere.
***
**Live agenda at event**
QR code at the venue linking to an agenda you can keep updated. Changes reflect immediately.
## Common Questions
[Section titled “Common Questions”](#common-questions)
Can I use my own fonts and colors?+
Colors, always. Use “Change all fonts and colors” in Basic mode for quick brand application, or Advanced mode for precise control over every element. Font choice from Gatsby’s built-in library works the same way for everyone.
If the font list looks shorter than expected, scroll it with your mouse or trackpad. More fonts sit below the visible area.
Uploading your own custom font file must be done by Gatsby. Send us the font files, ideally in WOFF2 format, and we’ll add them to your account. For a licensed or purchased typeface, include proof of license. An invoice with “self-hosting” or “page views” as a line item usually covers it. If an agency bought the license on your behalf, the agency’s invoice works.
Once uploaded, your font appears under the **Custom** tab when you change fonts in the Landing Page Editor.
Can I add anchor links or more than one page?+
No. A Gatsby landing page is a single page with no anchor links, so everything lives on that one page. If you need more room for content, add a section lower on the page.
If you need in-page navigation or multiple pages, see [AI Landing Pages](/playbooks/registration-setups/ai-landing-pages/).
How much time does this take?+
Anywhere from 20 minutes customizing an existing template to 20 hours building a fully custom design.
Most teams duplicate a template and update content in under an hour.
Why does my template show buttons I didn't want?+
A template carries every RSVP button, and the event decides which ones guests get. The **RSVP buttons** card in the editor’s left column shows which ones this event’s guests see and why the others are hidden. To change them, go to **Registration » Invite Landing Page** and use **What guests can choose**.
Can I copy blocks between templates?+
Yes. Requires Advanced mode.
If I delete a section, can I get it back?+
Yes. Use the Sticker Sheet to restore pre-designed blocks that came with the template.
Do I need a landing page for every event?+
For a standard event, the **Invite Landing Page** is what guests see when they click their link. Turn on **Skip the page, go straight to the survey** to bypass the need for having a landing page.
Landing pages are most valuable when you need to provide detailed information or build excitement. Executive dinners, conferences, and high-touch events benefit most from investing in the full editor; a Quick Event is the better fit when you don’t need that.
Image and file size limits/recommendations+
**Images on Landing Pages**
* PNG, JPG, GIF, WEBP, AVIF, SVG supported
* **Less than 5MB** recommended (24MB maximum)
* Optimal size varies on template (use 2880px wide as a baseline)
* For a full-width header or hero, 2880px × 1380px works across the standard templates
* **There is no mobile variant of an image.** The same file scales down on phones, where most of your guests will open the page. Design the hero as a background texture and keep text, logos and any graphic element that has to stay readable out of it — put those in text blocks above or below the image, which reflow properly. Preview on a real phone before you send invitations.
**Images in Emails**
* PNG, JPG, GIF recommended
* **Less than 2MB** recommended (24MB maximum)
* In Marketing mode, 1200px wide recommended
**Documents**
* 24MB max per file
* PDF watermarking available
* All common formats supported
**Videos on Landing Pages**
* 24MB max for direct upload
* Unlimited via YouTube/Vimeo embed
* MP4 recommended format
* Gatsby does not re-encode/optimize videos for streaming
# Forms and Surveys
> Collect guest information during registration. Ask different questions based on who guests are. Responses save to profiles and pre-fill for future events.
Why it matters
## One form serves returning VIPs, first-time guests, and public registrants. Each needs a different experience.
Your $500K client should not fill out an intake form. New contacts need full details. Public registrants need vetting. A static form gets all three wrong.
How Gatsby helps
### Conditional Logic
Show questions based on guest attributes. VIPs see one button. New registrants see ten questions. Each guest gets the form that fits them.
### Profile Pre-Fill
Responses save to contact profiles. Dietary restrictions from March auto-fill in June. No one re-enters information you already have.
## The Friction Tradeoff
[Section titled “The Friction Tradeoff”](#the-friction-tradeoff)
You want to ask twenty questions. Budget, timeline, dietary restrictions, session preferences, T-shirt size. Every field gives you better data.
Every field also costs you registrations.
Someone on their phone at a coffee shop will abandon a five-minute form. Someone at their desk planning ahead might complete it. The math is always the same: what information is worth the friction of asking for it?
Gatsby gets you the data without the drop-off. Profiles pre-fill what guests already answered, conditional logic hides questions that don’t apply, and staged collection lets you spread the ask across weeks instead of front-loading a single form.
The Pre-Fill Advantage+
When responses save to contact profiles, they auto-fill for returning guests.
Someone who attended three events never types their dietary restrictions again. You still have the data. They skip the form fields.
Your most engaged contacts get the smoothest registration. New contacts provide information once, then carry it forward. By the second event, most guests complete the form in seconds.
Progressive Collection+
You do not have to ask everything at once.
Collect interest first. Logistics later. Add questions to the same form as your event approaches. Send guests back to update their responses before the deadline.
The form grows with your planning timeline. Early registrants see fewer questions. Late registrants see the full set. Both work.
What to Make Required+
Only require what you truly need.
Name and email come automatically. Everything else is a choice. Optional fields convert better than required ones.
Ask yourself: would you rather have 100 registrations with 60% completing this field, or 80 registrations with 100% completing it? The math usually favors optional.
## Question Types and Configuration
[Section titled “Question Types and Configuration”](#question-types-and-configuration)
The form builder has more options than it explains.
Predefined versus custom. Save to Contacts or not. Single select versus multi-select. These choices affect whether data persists across events and how guests experience the form.
### Predefined Questions
[Section titled “Predefined Questions”](#predefined-questions)
Predefined questions connect directly to contact profile fields. Responses save and pre-fill without configuration. Use these for standard guest information.
Available Predefined Questions+
* **Phone number:** Mobile or office number
* **Company:** Organization name
* **Position/Title:** Job title or role
* **Dietary restrictions:** Food preferences and allergies
* **Address:** Mailing address fields
* **Profile picture:** Photo upload
* **Associated CC contact:** Someone who should receive copies of communications
* **SMS opt-in:** A consent checkbox plus a phone field, recording a guest’s explicit agreement to receive your text messages
The SMS opt-in question+
Different from the others, because consent has rules the rest of a form doesn’t.
**One per form**, and its wording is fixed — you can’t edit consent language.
**It can never be required.** The Required toggle excludes it, because forced consent isn’t consent. An unticked box records nothing at all; it means *no answer*, not *no*, and it never revokes an opt-in a guest gave you earlier.
**The phone field is locked to US numbers**, since that’s all Gatsby’s short code can reach. Tick the box with the phone blank and the form won’t submit.
**Gatsby hides it from guests who don’t need to see it** — anyone who has already opted in, anyone you’ve already texted, and anyone who has opted out of Gatsby texts entirely. A guest who has blocked your organization specifically *is* shown it, because ticking it is their way back.
**The answer is read-only wherever it shows up** in your tables. Only the guest can assert their own consent.
Full detail is on [SMS Consent & Compliance](/platform/email-campaigns/sms-consent/).
Why Use Predefined Over Custom+
No configuration needed. Automatic profile sync. Standardized across your organization.
If you are asking for company name, use the predefined Company question rather than creating a custom text field. The data goes to the right place. It pre-fills next time. Everyone on your team sees consistent data.
Limitations+
You cannot add conditional logic to predefined questions. You cannot change their format. They are fixed to specific contact fields.
If you need conditional behavior or custom formatting, create a custom question instead.
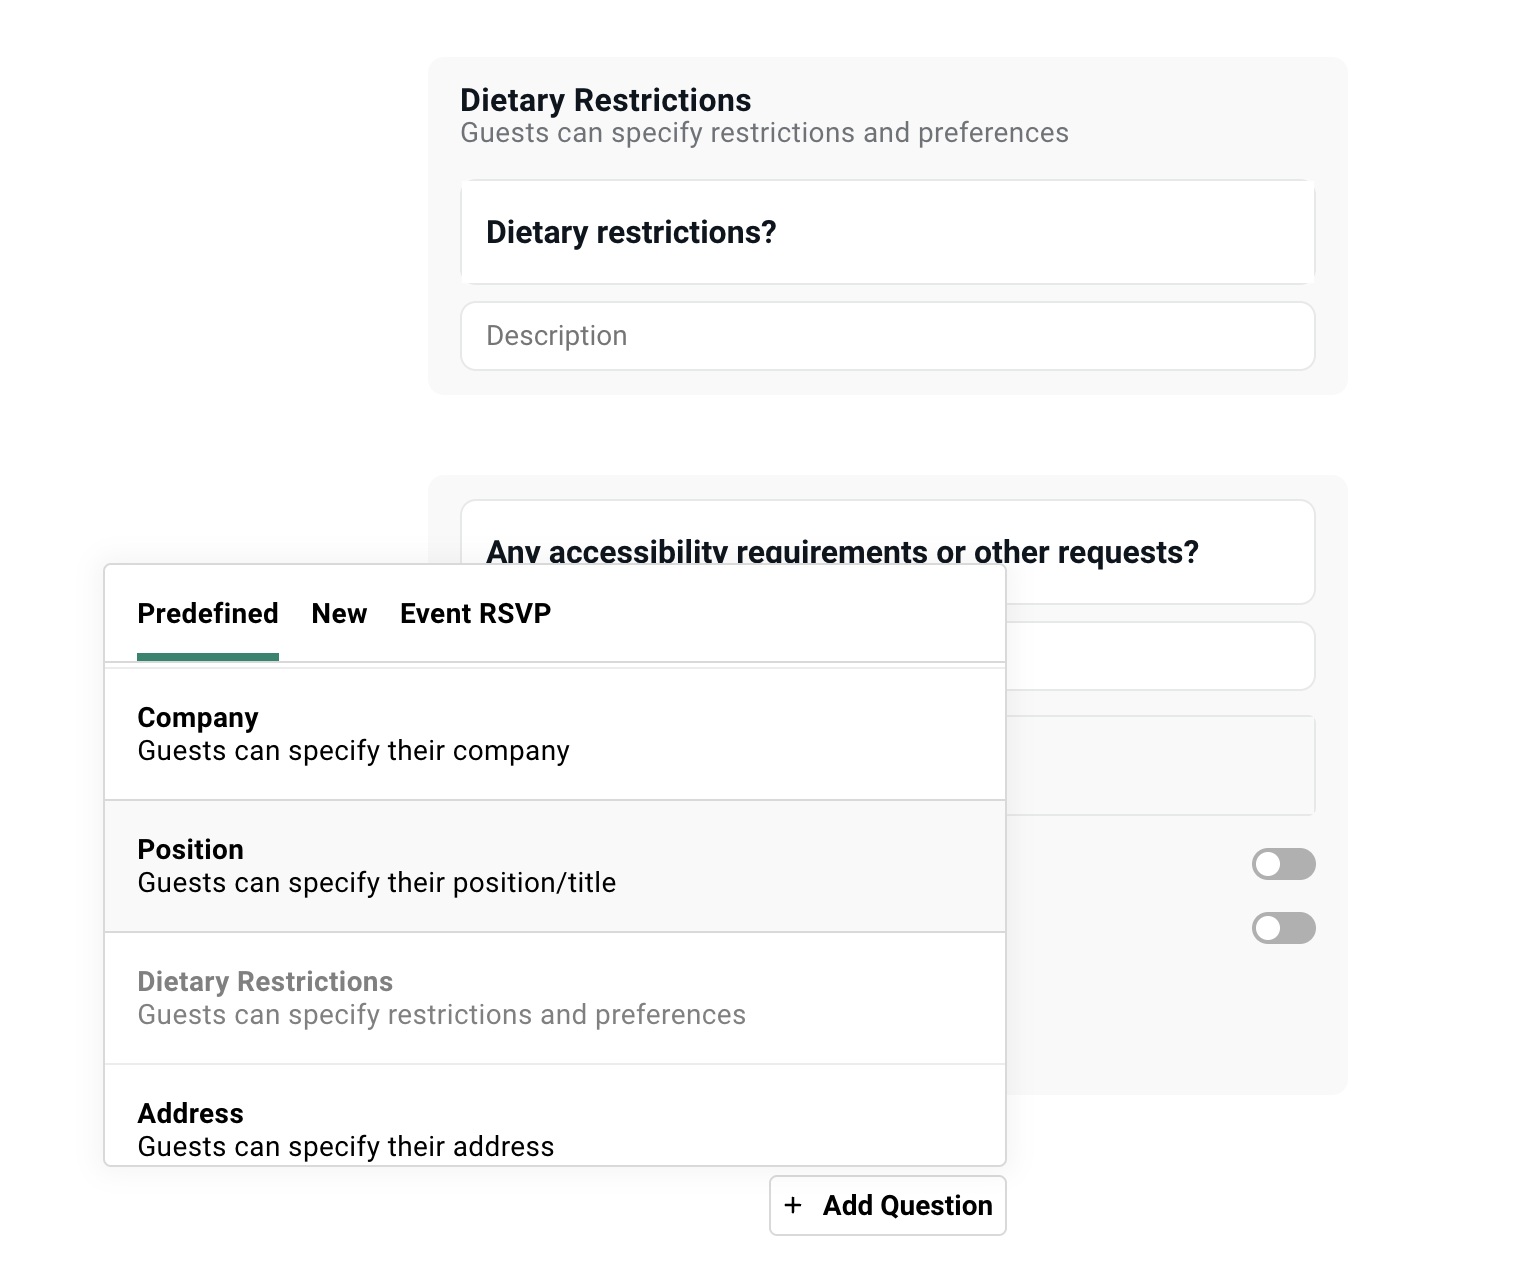
### Custom Questions
[Section titled “Custom Questions”](#custom-questions)
Custom questions cover everything else. Choose the format that fits the data you need.
Question Type Reference+
**Short text**
One-line answers. Names, brief responses, specific details.
***
**Long text**
Multi-line answers. Bios, explanations, detailed feedback.
***
**Single select**
Choose one option from a list. Use for mutually exclusive choices like t-shirt size.
Gatsby picks the control for you based on how many options the question has: a short list renders as radio buttons, and once the question reaches six or more options it renders as a dropdown instead. There is no per-question setting for this — two single-select questions on the same form will look different if one is above the threshold and one is below it. If you want a shorter question to render as a dropdown anyway, add a blank option to push it over the line.
***
**Multi-select**
Choose multiple options. Renders as checkboxes. Use for non-exclusive choices. Which breakout sessions interest you?
***
**File upload**
Headshots, speaker decks, documents. Guests upload directly. Files attach to their guest record.
***
**List subscription**
Opt-in to a Gatsby contact list. Use for newsletter signups, interest-based lists, or ongoing communication preferences.
***
**Informational text**
Not a question. Display text or images within the form. Use for instructions, legal disclaimers, or section breaks.
### Question Settings
[Section titled “Question Settings”](#question-settings)
Every question has settings that control who sees it, whether it is required, and where responses go.
Required vs Optional+
Mark questions as required to force completion. Be thoughtful. Every required field is friction.
Save required status for what you truly need. Name and email are already captured. Everything else is negotiable.
Save Responses to Contacts+
This setting determines whether data is visible in the contact profile. It only works for custom questions.
**When enabled:** The response saves as a contact field on the contact profile and auto-fills next time. Data persists across events.
**When disabled:** Responses stay event-specific. (Default)
Save to Contacts for information you will want at future events.
Keep event-specific for one-time questions.
Ask Plus-Ones+
When your event allows plus-ones, you can ask the same question for each plus-one.
The primary guest completes it on behalf of their guests. No separate form needed. Dietary restrictions for the whole party in one submission.
Hidden Questions+
Hide a question from guests while keeping it in the form.
Useful when you want to stage questions to show them later.
## Conditional Logic
[Section titled “Conditional Logic”](#conditional-logic)
Conditional logic shows questions only when they are relevant.
Someone who answered “yes” to traveling from out of town sees follow-up questions. Someone who answered “no” doesn’t need to see hotel details.
How It Works+
Under any custom question, click “Only ask Question If…” and add conditions.
The conditional question stays hidden until the trigger condition is met.
Common Patterns+
* Ask session preferences only if attending in person
* Ask breakout preferences only if they selected the workshop track
* Ask travel requirements only if they need accommodation
Multiple Conditions+
You can add multiple conditions to a single question. All conditions must be true for the question to appear.
Use this for highly targeted follow-ups. Ask about the CFO roundtable prep materials only if they selected the CFO track AND indicated they want to participate actively.
What You Cannot Do+
Predefined questions do not support conditional logic. The format is fixed.
You cannot condition based on plus-one answers. The primary guest answers for plus-ones.
You cannot create branching paths where one condition leads to multiple dependent questions in sequence. Each conditional question is independent.
## Segment-Based Questions
[Section titled “Segment-Based Questions”](#segment-based-questions)
A single static form treats everyone identically. That’s wrong for different reasons depending on who is filling it out.
### Questions by RSVP Type
[Section titled “Questions by RSVP Type”](#questions-by-rsvp-type)
Show different questions to guests based on how they register. Public link registrants see the full intake (when set to Waitlist mode). Invited VIPs see two fields and a confirm button.
Accepted vs Declined Questions+
Separate question sets exist for guests who accept versus decline.
Guests who accept see logistical questions. Dietary restrictions. Session preferences. Arrival times.
Guests who decline might see a single question asking why. Or nothing at all.
Toggle between “Will attend” and “Will not attend” at the top of the survey questions interface.
The **Will not attend** questions have two limits. They show when a guest declines the first time they register, not when a guest returns to edit an earlier response. And they only work on personal links, not the public link.
Waitlist-Specific Questions+
Questions are configured once in the **Survey** tool and shown to everyone who reaches that path.
There is no separate question set for public-link registrants. But you can filter by RSVP Type = Wailist (e.g. if you public link has the waitlist enabled).
Accepted vs Waitlist Path+
Invited guests who click “Accept” follow the accepted path. Public registrants hitting the waitlist follow a different path.
Condition questions on RSVP type to show different experiences. Your known guests get one form. Unknown applicants get another.
### Questions by Guest Attributes
[Section titled “Questions by Guest Attributes”](#questions-by-guest-attributes)
Use custom fields and tags to control which questions each guest sees. If you tagged someone as a VIP last Tuesday, the form already knows that when they click their link.
Conditioning on Custom Fields+
If you have a “Guest Type” field with values like VIP, General, or Speaker, you can show questions only to specific types.
VIPs see a confirmation button. Speakers see session preference questions. General attendees see the standard intake.
The form knows who they are. It treats them accordingly.
The Setup+
1. Ensure guests have the relevant custom field or tag set before they register.
2. Add your conditional question.
3. Click “Only show if…” and select the field condition.
4. Choose the specific value that reveals this question.
The field must exist on the guest record before they click their link. Set it during import. Or add it manually to the guest list.
Not on Public Links+
Conditions on guest attributes, such as Guest Type, only work on personal links. On a public link Gatsby doesn’t know who is registering, so it has no field values to check. If public registrants need different questions, condition them on RSVP type or on an answer they give earlier in the form instead.
Why This Matters+
Your event team tagged 50 people as VIPs last week. Those VIPs click their personal link and see a three-question form. Everyone else sees ten questions.
One form, one URL pattern, no routing logic on your end. The conditions you set handle who sees what.
See [Contact Profiles](/platform/contacts/contact-profiles/) for setting up custom fields before registration.
## Event RSVP Questions
[Section titled “Event RSVP Questions”](#event-rsvp-questions)
You are running a retreat with a welcome dinner, three breakout sessions, and an optional excursion.
If you create one event, you get one calendar invite. If you create separate events, you manage separate guest lists…
Event RSVP questions put multiple events on a single form. Guests select what they’d like to attend. Each selection sends its own calendar invite with the correct time.
How It Works+
Add an Event RSVP question to your form. Select which events or lists guests can choose from.
**Multi-select** for additive options. Select all sessions you want to attend.
**Single select** for mutually exclusive options. Pick one track.
Calendar Invite Behavior+
Each child event the guest selects sends its own calendar invite.
The welcome dinner is on their calendar at 6pm. The morning session is at 9am. The excursion is Saturday afternoon. Separate entries. Correct times.
No more “Day 1: 9am-6pm, Day 2: 9am-3pm” marathon calendar blocks.
Where to See Responses+
Guests appear on both the main event’s guest list and every other event they selected.
Filter the main to see who is attending the excursion. Open the excursion event to see just those guests. Both views are accurate. Both update in real time.
Conditional Logic with Event RSVP+
Show follow-up questions based on which events guests select.
If they choose the outdoor excursion, ask about mobility requirements. If they choose the CFO roundtable, ask about their current challenges.
The form builds itself around their choices.
Event Families Behavior+
Event RSVP questions don’t require [Event Families](/platform/events-lists/families/) (parent-child event structures) — you can point one at any set of events or lists.
[Event Families](/platform/events-lists/families/) (setting up parent-child event structures) is **not** required for this.
## Where Responses Live
[Section titled “Where Responses Live”](#where-responses-live)
Survey responses appear in multiple places. Knowing where to look depends on what you need.
Guest List Columns+
Add survey questions as columns on your guest list. See all responses in one view.
Sort by dietary restriction. Filter by session preference. Export to a spreadsheet.
Every question you add becomes an available column. Enable the ones you need for each view.
Contact Profiles+
Responses saved to Contacts appear on each guest’s contact profile.
Visible across all events. Pre-fill on future registrations. The institutional knowledge your team builds over time.
Export Options+
Export your guest list with all survey columns included.
Standard CSV format. Works with Excel, Google Sheets, CRM imports. Whatever your downstream systems need.
Editing Responses+
Use a guest’s personal RSVP link to view and edit their responses.
Useful when collecting information over the phone. Or updating details on their behalf. You see exactly what they see. Your changes save to their record.
## Adding Questions Over Time
[Section titled “Adding Questions Over Time”](#adding-questions-over-time)
You do not have to ask everything upfront. Add questions as your event develops. Prompt guests to return and complete new fields.
Staged Collection Workflow+
1. Launch with basic questions to gauge interest.
2. Add logistical questions as the event approaches. Dietary restrictions. Arrival times. Session choices.
3. Send a campaign with their RSVP link asking them to “complete your registration.”
4. Repeat as needed before the deadline.
Each visit shows the current form. Guests complete what is new. Previous answers stay intact.
The Cancellation Question+
When guests return to their registration, they see an “Are you attending?” question at the top.
This lets them cancel if plans changed. Useful for events with long lead times.
You can hide this during initial registration if you only want one button on the landing page.
Late Additions+
Add questions after some guests have already registered.
Existing guests see new questions when they return. New guests see the full form. Both paths work.
No need to plan every question upfront. The form evolves with your event.
See [Email Campaigns](/platform/email-campaigns/campaigns/) for sending guests back to update their registration.
## Skip to Survey
[Section titled “Skip to Survey”](#skip-to-survey)
Bypass the landing page entirely. Send guests straight to the form.
When to Use It+
* Post-event surveys where you don’t need a landing page
* Quick data collection from existing contacts
* Address or preference gathering for non-event purposes
* NPS scores and feedback forms
How to Enable+
In the Registration tab, select **Invite Landing Page** on the left.
* **On an event:** under **How guests get in**, find **Every link** and turn on **Skip the page, go straight to the survey**.
* **On a list:** turn on **Invite link skips to survey** in the settings on the right.
Guests click their link and land directly on the form. No landing page view. No RSVP buttons. Just questions.
This applies to every link, personal and public. While it’s on, a note under the switch reminds you that nobody sees the landing page or its buttons, whichever link they used. Turning it on also turns off **Show event details** on the confirmation page.
Post-Event Survey Workflow+
1. Create a List (not an Event).
2. Add your feedback questions.
3. Enable Skip to Survey.
4. Filter your original event for attendees.
5. Add them to the new List.
6. Send a campaign with their survey link.
Responses tie back to contact profiles. Your post-event feedback connects to the same people who attended.
## Plus-One Questions
[Section titled “Plus-One Questions”](#plus-one-questions)
When your event allows plus-ones, the form automatically asks for their names. You can extend additional questions to plus-ones as well.
Automatic Name Collection+
When plus-ones are enabled, guests see fields for plus-one names.
Email address can be required or optional. Configured in your plus-one settings.
Extending Questions to Plus-Ones+
Toggle “Ask plus-ones” on any survey question.
The primary guest answers for each plus-one. No separate form needed. One submission covers the whole party.
Where Plus-One Data Appears+
Plus-ones appear as separate rows on your guest list.
Their survey responses (answered by the primary guest) attach to their own records. Filter, sort, and export just like any other guest.
See [Capacity and Waitlists](/platform/registration/capacity-waitlists/) for plus-one limits and settings.
## Form Appearance
[Section titled “Form Appearance”](#form-appearance)
Limited customization on purpose. Clean forms with fewer distractions complete at higher rates.
What You Can Change+
* Page background color
* Button labels and colors
* System text labels (useful for translations or tone adjustments)
* Header image at the top
What You Cannot Change+
Fonts. Question styling. Layout structure.
This is intentional. Simple forms without distractions convert better. The limitations protect your conversion rate.
Confirmation Screen+
After submission, guests see a confirmation message.
You can add an image and customize the text. You can also set a separate header for each RSVP outcome (**After RSVP yes**, **After RSVP no**, **After joining the waitlist**) so the confirmation guests see matches their status, and choose whether **Show event details** displays on that screen. Find them on the Invite Landing Page under **Everything else » Confirmation page**. See [Capacity and Waitlists](/platform/registration/capacity-waitlists/) for related approval-and-response controls.
## Testing Your Form
[Section titled “Testing Your Form”](#testing-your-form)
Test the full guest experience before going live. Not just the preview. The actual form with real data.
Why Test Links Are Not Enough+
Test links show a preview but don’t auto-fill.
Conditional logic based on guest attributes does not fire. You see a generic experience, not what your VIPs will see.
The preview is useful, but it’s not complete.
The Right Way to Test+
1. Add yourself as a guest on the guest list.
2. Set any custom field values that affect conditional logic.
3. Generate your personal RSVP link.
4. Open in a new browser tab.
5. Submit the form.
Your responses save for real. You experience exactly what that guest segment will see.
Testing Different Segments+
Add yourself multiple times with different emails.
Set different custom field values on each. Test the VIP experience. Test the general attendee experience. Test the public link experience.
Find problems before your guests do.
## Common Questions
[Section titled “Common Questions”](#common-questions)
Where do I see guest responses?+
Survey answers are saved to the guest list and already exist as **Survey** columns — you don’t add them, you switch them on. Click **Columns** and enable the survey questions you want. Events also get an automatically generated **Survey - Will Attend** tab, which shows them already enabled.
**Add Fields** is for data that isn’t on this list yet — contact fields, event history, seating chart, campaign data. You won’t find your survey questions there.
Should I save responses to Contacts or not?+
Save to Contacts if you want the data at future events. Dietary restrictions. Company info. Communication preferences.
Keep event-specific for one-time questions. Which session track this time. How they heard about this specific event.
Can returning guests update their answers?+
Yes. Responses pre-fill when they return. They can change answers and re-submit.
Updates save to their profile if Save Responses to Contacts is enabled.
When a guest edits an existing registration, the form shows an extra confirmation checkbox that doesn’t appear the first time they register. That’s expected. But, it can be toggled off.
What happens to responses if I delete a question?+
Existing responses remain on guest records. The column stays available on the guest list.
You just cannot collect new responses.
Can I require questions for some guests but not others?+
Not directly. Required status applies to everyone who sees the question.
Use conditional logic to hide questions from certain segments instead. If they do not see it, they do not have to answer it.
We collect information over the phone. Can we fill out forms for guests?+
Yes. Use the guest’s personal RSVP link.
Fill out the form on their behalf. Responses save to their record. They can return later and see what you entered.
Can I let guests pick sessions?+
Yes, guests can register once, pick sessions, get individual calendar invites for each.
1. Anything that needs its own calendar invite needs to be an event in Gatsby
2. Add survey question: Event RSVP » **Multiple Events - Multiple Select**
3. Each selection sends separate confirmation email (with calendar invite attached) from the other event.
You don’t need parent-child links (Families) for this. See [Running Events with Multiple Sessions](/playbooks/registration-setups/multi-session-events/) for the full setup.
Need to collect more information or different information from guests+
Add new questions to survey. Send follow-up campaign asking accepted guests to update their registration using their RSVP link.
Data not auto-filling for guests on survey form+
Doesn’t work with Public Links.
For personal/unique links, enable **Save Responses to Contacts** for custom survey questions. This connects survey responses to custom contact fields. If there’s data in the custom field, it will be auto-filled for guests. Guests are able to change and update data.
# Registration Links
> Control who can register with personal links for invited guests or public links for open registration.
Why it matters
## Personal links for your guest list. Public links for everyone else.
Invited guests get unique URLs with their info pre-filled. Open registration gives anyone a way in. Both work on the same event.
How it works
### Personal Links
A unique URL for each guest with their name and email pre-filled. If someone else clicks it, they RSVP for the original guest.
### Public Links
One link anyone can use. Post it on LinkedIn, embed it on your site, or print it as a QR code.
## Personal Links (The Default)
[Section titled “Personal Links (The Default)”](#personal-links-the-default)
Each guest gets a unique URL tied to their identity. If someone else uses it, they RSVP on behalf of the original guest. They do not create a new record.
How Personal Links Work+
Every personal link contains a unique invite ID. When a guest clicks their link, Gatsby knows exactly who they are.
***
**Pre-filled information**
Name and email appear automatically. Guests confirm instead of re-typing information you already have.
***
**Click tracking**
See who opened their link and when. Even if they did not complete registration.
***
**Conditional logic**
Survey questions can adapt based on guest attributes. Ask executives different questions than their assistants.
This only works on personal links. Gatsby doesn’t know who is using a public link, so conditions based on guest attributes like Guest Type can’t apply there.
Sending Personal Links+
Personal links generate automatically when you send campaigns with the RSVP link merge field.
***
**Via email campaigns**
Insert the `{rsvpLink}` merge field in your campaign. Each recipient gets their unique link.
***
**Manual delivery**
Copy individual links from the guest list. Send via WhatsApp, text, or any other channel.
Select guests → **Generate RSVP Links** action → copy from the RSVP Link column. Useful for last-minute VIP outreach or guests in regions where WhatsApp is the preferred communication channel.
Reuse the Same Link Throughout the Event+
A personal link does not expire after the initial RSVP. The same link works for the entire lifecycle of your event.
Include the `{rsvpLink}` merge field in every email you send, not just the invitation. When you send the know-before-you-go email a week out and ask guests to confirm or update their details, that same personal link lets them make changes. If someone needs to cancel, switch their meal choice, or update a plus-one, they click the link they already have.
This means your guest always has one URL that takes them back to their registration. No new links to track. No “which email had the RSVP link?” confusion.
Generating Personal Links+
1. Open your guest list.
2. Select the guests who need links.
3. Click **Generate RSVP Links** from the selected-guests action menu.
4. Links appear in the **RSVP Link** column on your guest list.
You can also show the RSVP Link column directly on your guest list to see all links at once.
Executive Assistant Workflow+
Assistants often manage their executive’s calendar. Personal links handle this gracefully.
The assistant clicks the executive’s link. They complete the survey. The registration stays tied to the executive. Not the assistant.
Data stays clean. You know who is actually attending.
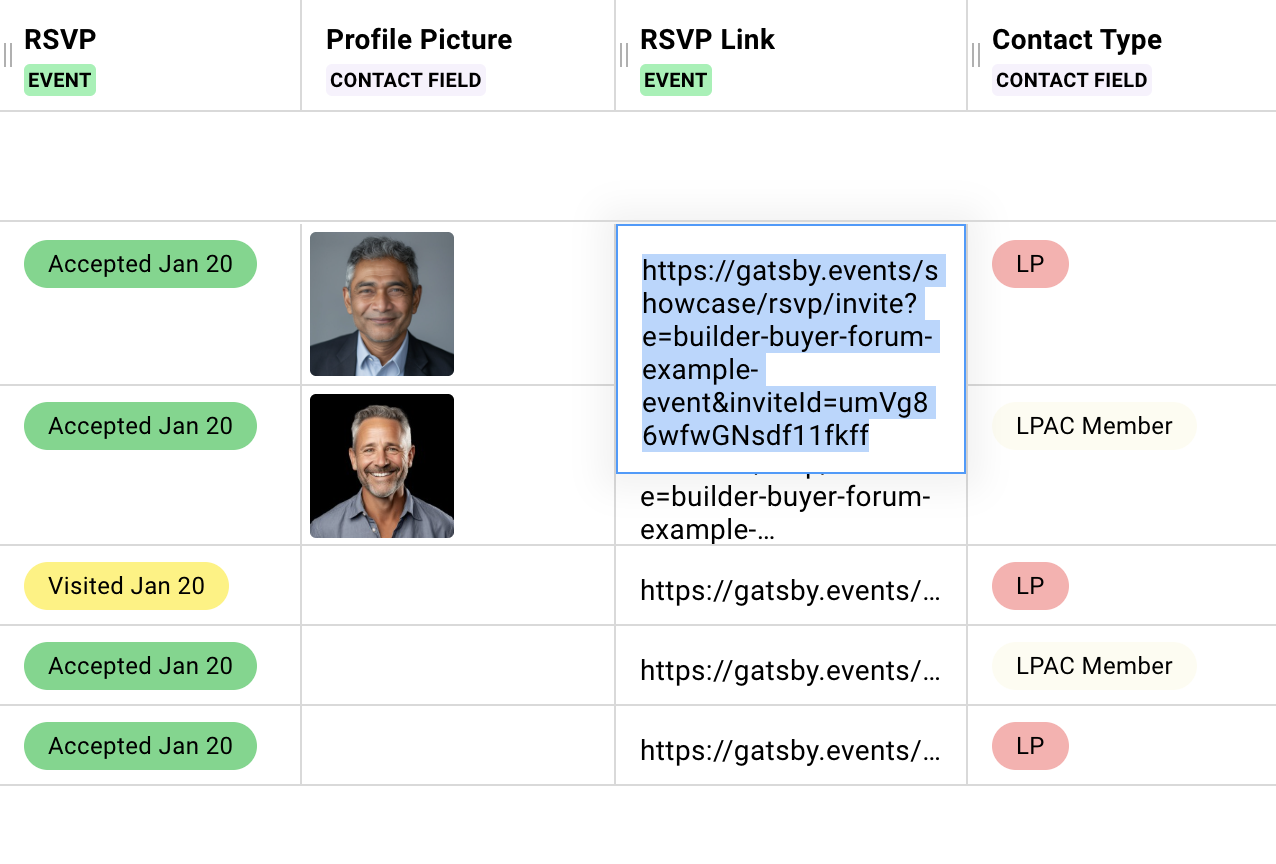
## Public Links
[Section titled “Public Links”](#public-links)
You cannot generate a personal link without an email address. You need a way to let people add themselves. That’s what public links are for.
### Enabling Public Registration
[Section titled “Enabling Public Registration”](#enabling-public-registration)
Public links let anyone with the URL register for your event. No invitation required.
How to Enable+
1. Open your event’s Registration tab.
2. Find the gray **Public Link** button at the top.
3. Toggle it on.
4. Copy the public link that appears.
The link works immediately. Anyone with the URL can register.
Before you post it, set the title, description, and image people see when the link unfurls in Slack, LinkedIn, or a text message. That’s in your event’s [Link Preview settings](/platform/registration/landing-pages/#sharing-your-event).
Testing Public Links+
1. Copy your public link.
2. Open it in a new browser tab or incognito window.
3. Complete the full flow to see what guests experience.
This shows you exactly what public registrants see. Survey questions, confirmation screens, everything.
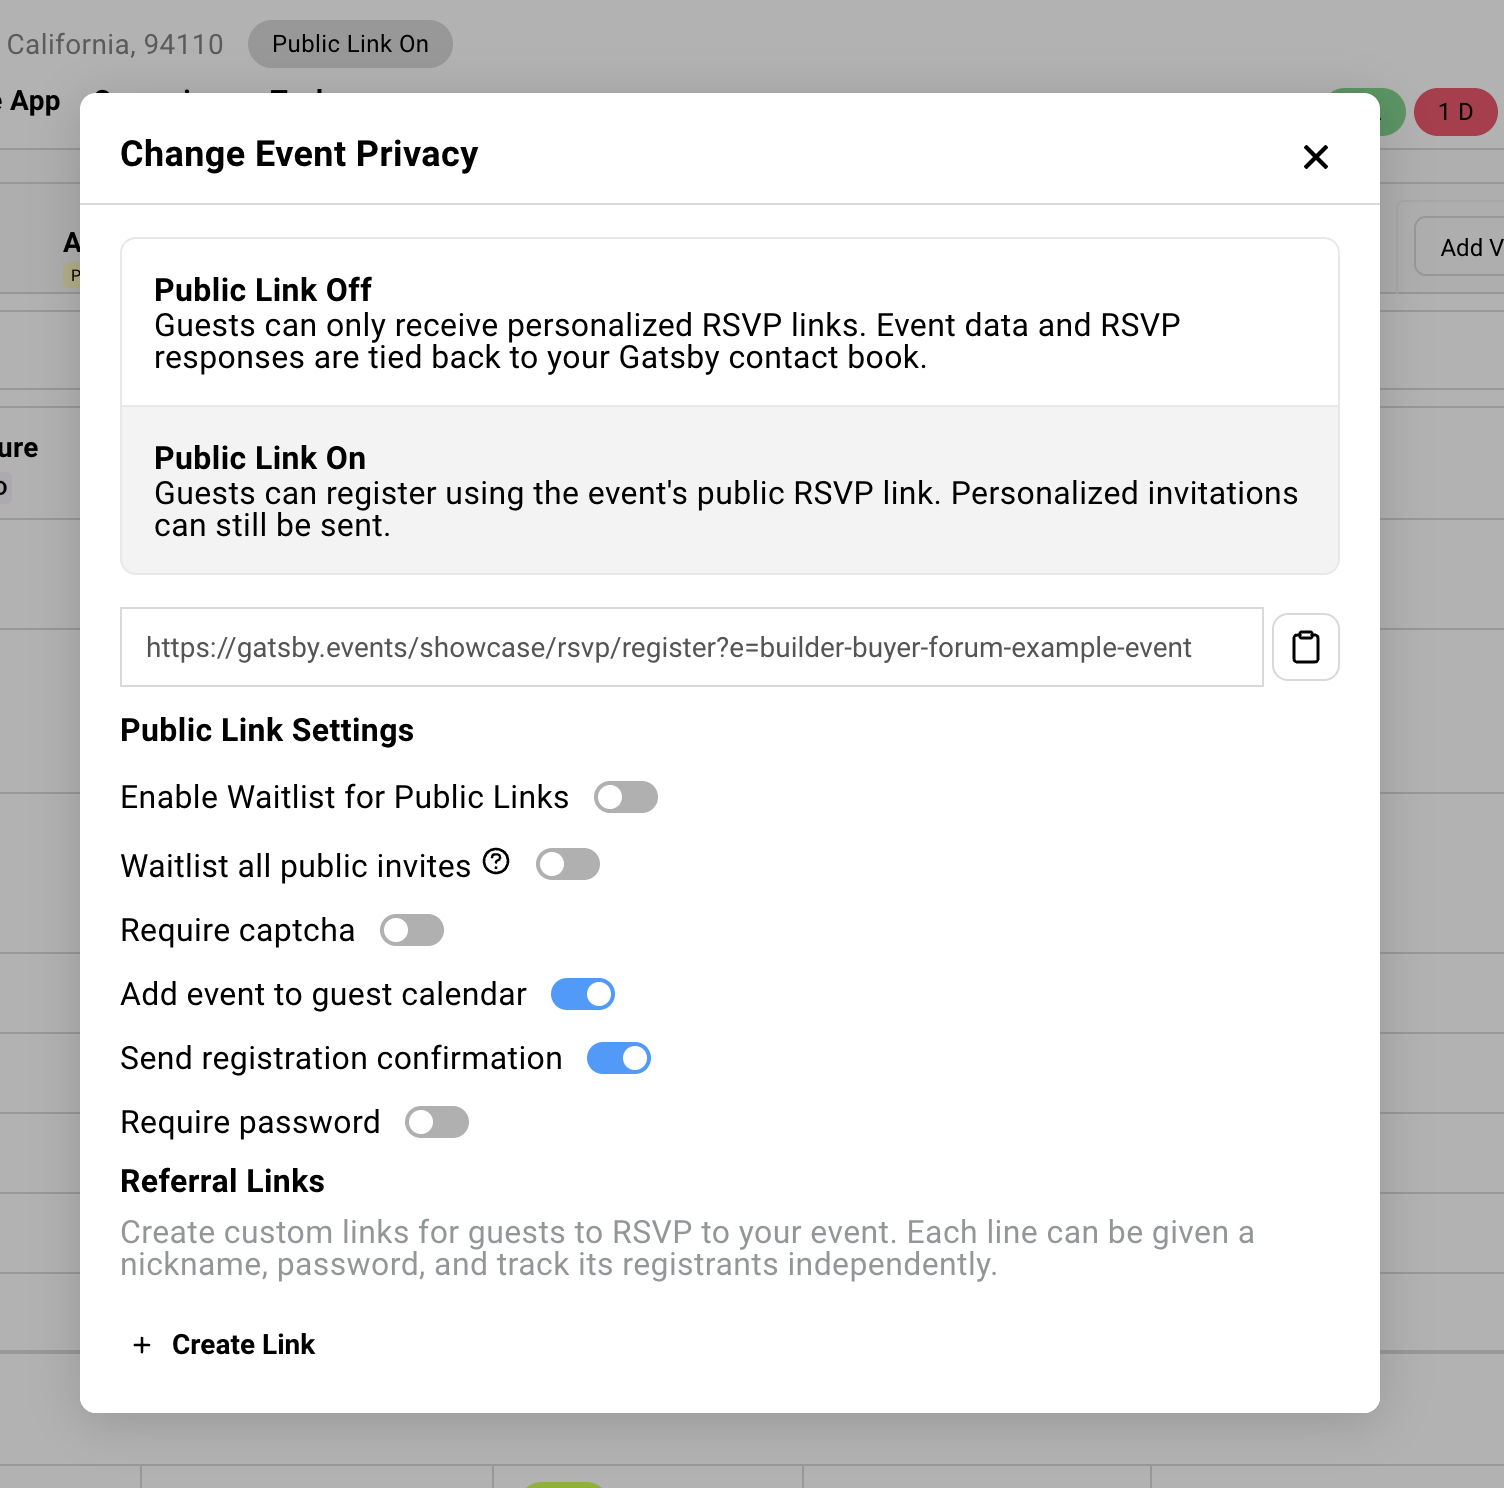
### Public Link Options
[Section titled “Public Link Options”](#public-link-options)
Public registrants can follow a separate path. You can configure their experience differently from invited guests by requiring approval to attend using Gatsby’s **Waitlist** functionality.
Waitlist (Approval Required) for Public Registrants+
Send all public registrations to the waitlist for manual approval. Essential for curated events where you want to vet attendees before confirming.
Under **How guests get in** on **Registration » Invite Landing Page**, turn on **Public link**, then **Waitlist everyone who uses this link**. With the event’s registration mode set to Open, invited guests using their personal links still register as Accepted. Only public-link registrants wait for approval.
See [Capacity and Waitlists](/platform/registration/capacity-waitlists/) for approval workflows.
Waitlist Everyone Who Uses This Link+
Turn on **Waitlist everyone who uses this link** to send public registrants to your waitlist for approval. It’s in two places that show the same setting: under **How guests get in** on **Registration » Invite Landing Page**, and in the **Change Event Privacy** window.
Guests already on your guest list are the exception. If they register through the public link, they skip the waitlist and are accepted. To waitlist them too, turn on **Also waitlist guests you already added**, which appears once the waitlist switch is on. Useful when you want to confirm intent even from known contacts.
Add to Guest Calendar+
Toggle whether public registrants receive calendar invites attached to the confirmation email. Recommend keeping this turned on.
Send Registration Confirmation+
Toggle whether to send your confirmation/notification email. If enabled, public registrants receive either the Waitlist or Confirmation email depending on your settings. Recommend keeping this turned on.
Require CAPTCHA+
Prevents bot spam. Enable if you are posting links publicly on social media or your website.
Require Password+
Add a layer of access control without generating personal links. Share the password with specific groups. Anyone with the link but not the password cannot register.
Decline on the Public Link+
Off by default. Most people will not fill out a form just to say no.
Turn it on under **What guests can choose**, in the **Public** column of the **Decline** row, if you are directing existing contacts to the public link and want to track who cannot attend.
Sharing on WhatsApp or Social Media+
The public link works anywhere. Paste it directly into a WhatsApp message, group chat, broadcast list, or LinkedIn post.
For EU, UK, and LatAm guests, WhatsApp is often the preferred channel. Use the public link (not personal links) for any group or broadcast message.
### Referral Links
[Section titled “Referral Links”](#referral-links)
Track where registrations come from. Create different links for different channels or co-hosts.
What Referral Links Are+
Public link variants with source tracking. The URL includes a UTM parameter that identifies where the registration came from.
Same registration experience. Different attribution.
Creating Referral Links+
1. Open your public link settings.
2. Click **Create Referral Link**.
3. Name the source (e.g., “LinkedIn” or “Partner-ABC”).
4. Copy the generated link.
Each referral link has a unique source identifier that lives as a column on the guest list: “Referral Link”.
Viewing Referral Data+
The referral source appears in a column on your guest list: “Referral Link”.
Filter and sort by source to see which channels drive the most registrations.
This is different from the **Guest Source** column, which categorizes how a guest entered your database at all (imported, added manually, self-registered, and so on). Referral Link tells you which specific link or campaign drove a given registration; Guest Source tells you the broader origin category. Use them together for full attribution.
Use Cases+
**Channel tracking**
Different links for LinkedIn vs Instagram vs email newsletter. See which platform performs best.
***
**Co-host attribution**
Different links for each co-host or partner. Track who drives the most registrations.
***
**Campaign comparison**
Different links for different email sends. Compare early invite performance to reminder performance.
## How Link Type Affects Registration
[Section titled “How Link Type Affects Registration”](#how-link-type-affects-registration)
Personal and public links are technically on separate registration paths. You can control which buttons show and which survey questions appear for each one.
Different Buttons for Each Path+
Public RSVPs can have Decline disabled while personal RSVPs show it. Configure visibility separately for each path.
Find these settings under **What guests can choose** on **Registration » Invite Landing Page**. Each row has a **Personal** and a **Public** switch. The Public column appears once the public link is on. **Accept** is always on for both and can’t be turned off.
To check the result, set **Previewing as** above the preview to **Someone on my guest list** or **Someone with the public link**. The line under it names the buttons that person gets.
Different Survey Questions+
Show certain questions only to public registrants. “How did you hear about us?” makes sense for self-registrants. Not for guests you personally invited.
Show other questions only to invited guests. VIP-specific questions or internal tracking fields.
One difference is built in rather than configurable: the public link does not show the “Are you attending?” question. A public registrant has no record yet, so there is nothing to accept or decline against. They give their name and email first, and the attendance question appears on the personal link they get back.
Two more things only work on personal links. Conditional logic based on guest attributes (like a Guest Type field) can’t apply on the public link, because Gatsby doesn’t know who is registering. And the **Will not attend** question set isn’t available on the public link.
If you are testing your own RSVP flow and the form jumps straight to the information fields, check whether you opened the public link rather than a personal one. Add yourself as a guest and use your own personal link to see what invited guests actually see.
See [Forms and surveys. ](/platform/registration/registration-forms/)for conditional question setup.
The Public Label+
Public registrants show up on your guest list with gray “Public” text next to their name.
Easy to identify who added themselves versus who you invited.
## Other Link Types
[Section titled “Other Link Types”](#other-link-types)
Two more link types. Test links let you preview without saving data. View-only links share your page with registration disabled.
### Test Links
[Section titled “Test Links”](#test-links)
Preview the registration experience without saving data. Useful for design checks. Don’t send to real guests.
What Test Links Are+
Preview-only links that do not save information. Not tied to any guest. Show a green “This is a preview” bar at the top.
Registration fields (like first and last name) can appear greyed out on a test link. If a guest reports greyed-out fields on your form, check whether they were sent a test link instead of their personal link.
What You Cannot Test+
* Auto-fill does not work. You will not see pre-filled name and email.
* Confirmation emails do not send.
* Calendar invites do not attach.
* Conditional survey logic based on guest attributes does not fire.
Test links show you the page. They do not replicate the full guest experience.
The Test Link Trap+
If you only test with test links, you may issues and touchpoints.
Add yourself as a guest. Use your personal link. Complete the full flow. That is the real experience.
Where Test Links Appear+
Sent automatically when you preview from campaigns. Also accessible from the Registration preview screen.
### View-Only Links
[Section titled “View-Only Links”](#view-only-links)
Share your landing page without enabling registration. RSVP buttons are visible but do nothing when clicked.
How to Get One+
1. View your landing page templates.
2. Click the dropdown arrow next to the **Edit** button.
3. Select **Get view-only link**.
Use Cases+
**Design review**
Share with your team before going live. Get approval without enabling real RSVPs.
***
**Parking and logistics**
Link to a logistics page from your confirmation email or a campaign email.
***
**Speaker bios**
Create a standalone page with speaker information. Share or embed anywhere.
***
**Live agenda at event**
QR code at the venue linking to an agenda you can update in real time. Changes reflect immediately.
## Common Questions
[Section titled “Common Questions”](#common-questions)
Can I switch between public and private after launch?+
Yes. Toggle anytime via the Public Link button. Existing personal links continue to work. You are adding an option, not replacing one.
What happens if someone forwards a personal link?+
The new person RSVPs on behalf of the original guest. They do not create a new record.
For true self-registration, share the public link instead.
We want to post on LinkedIn to gauge interest. How?+
Enable the public link. Enable waitlist for public registrations. Customize the button text to “Register Interest.”
Approved guests get a follow-up with full access. See [Capacity and Waitlists](/platform/registration/capacity-waitlists/) for the approval workflow.
Can I use my own domain for links?+
Yes. The custom domain add-on lets links come from your domain instead of Gatsby’s. Contact your account manager for setup.
How do I prevent duplicates from public registration?+
Gatsby matches by email address. If someone registers with an email already in your database, they’re matched to the existing contact rather than creating a duplicate.
Matching never edits the profile. A public link registration doesn’t update an existing contact’s name or other details, even if those fields are blank. Anyone can type any email into a public link, so it’s never allowed to change someone else’s guest profile. To collect updated details, see [Contact Profiles](/platform/contacts/contact-profiles/) for the export-and-re-import workaround.
What about events with security clearance requirements?+
Use waitlist mode. Registration means “application submitted,” not “confirmed attendance.”
Your security team reviews the guest list and approves individually. See [Capacity and Waitlists](/platform/registration/capacity-waitlists/) for approval workflows.
What are Personal vs Public Links?+
**Personal Links:** Unique per guest. Pre-filled with their info. One-click RSVP. Trackable. Non-transferable.
**Public Links:** One link for everyone. Empty form. Good for social media, website embed, QR codes.
Events can use both. Personal links for your curated list. Public link for open registration — posting on LinkedIn, embedding on your site, or printing as a QR code.
Can't track where registrations came from+
**Referral Links** let you track registration sources.
Public Link settings » **Referral links** » Create Link. Add a label like “LinkedIn” or “Newsletter”. Each referral link tracks separately.
View “Referral Link” column on guest list to see where each registration came from.
# Common RSVP Scenarios
> Step-by-step setups for the RSVP situations teams ask about most. Approve public registrants, close at capacity, offer Maybe or Virtual, skip the landing page, split an event into sessions, and more.
Why it matters
## Your event rarely wants the default
Invited partners should walk straight in while strangers from LinkedIn wait for your review. The dinner caps at 40. Some guests are joining by video. Each of these is a handful of settings, and this page names them.
How to use this page
### Find your situation
Each item is a question teams ask us. Open it for the exact settings to change and what tends to trip people up.
### Check the result
Most settings live on Registration » Invite Landing Page. When you’re done, set Previewing as to each kind of guest and read the line naming their buttons.
## Who Gets In
[Section titled “Who Gets In”](#who-gets-in)
Personal links, the public link, and the waitlist decide who can register and who needs your approval first.
### How do I make public-link registrants wait for approval, while guests I invite are confirmed right away?+
1. Go to **Registration » Invite Landing Page** and set **Are RSVPs open?** to **Open**.
2. Under **How guests get in**, turn on **Public link**.
3. Turn on **Waitlist everyone who uses this link**.
Guests on your personal links are accepted when they RSVP. Anyone who comes in through the public link lands on your waitlist, and you approve them from the guest list.
There’s no separate “require approval” setting. The waitlist is how you approve. Don’t set **Are RSVPs open?** to **Waitlist** for this, because that waitlists your invited guests too.
Someone already on your guest list who registers through the public link skips the waitlist and is accepted. To waitlist them as well, turn on **Also waitlist guests you already added**.
The button doesn’t have to say “waitlist.” Rename it to “Apply to Attend” or “Request an Invitation” in the template editor.
### How do I approve someone from the waitlist so they get the confirmation email and calendar invite?+
1. Open the guest list and filter RSVP status to **Waitlisted**.
2. Change the guest’s status to **Accepted**.
3. When asked, choose to send the confirmation email.
The Accepted confirmation email carries the calendar invite by default, so approving and sending is one step. The waitlist email has no invite attached, which is why guests don’t see the event on their calendar until you approve them.
Never set a waitlisted guest to Declined to turn them away. They can come back and accept themselves. See [Capacity & Waitlists](/platform/registration/capacity-waitlists/) for how to reject a guest without that risk.
### How do I let guests forward the invite, see where registrations came from, or keep it from spreading?+
A personal link belongs to one guest. Whoever opens it responds as that guest, so a forwarded personal link can overwrite your guest’s RSVP.
* **To let guests pass it on:** turn on **Public link** and include it in your invitation for guests to share.
* **To see where registrations came from:** create a referral link for each channel or co-host from **Referral links**. The source shows in the Referral Link column on your guest list.
* **To keep it contained:** turn on **Require password** and share the password only with the people who should register, or pair the public link with **Waitlist everyone who uses this link** so you approve each one.
Referral links are variants of the public link, so they only work while the public link is on. See [Registration Links](/platform/registration/registration-links/).
## What Guests Can Choose
[Section titled “What Guests Can Choose”](#what-guests-can-choose)
Yes is always there. Decline, Maybe, and what happens after each answer are yours to shape.
### How do I remove Decline, or add Maybe, and show different choices on personal and public links?+
Go to **Registration » Invite Landing Page** and use **What guests can choose**. Each row has a **Personal** switch and a **Public** switch, so a guest you invited can see Decline while the public link shows only the yes button. **Accept** is always on and can’t be turned off.
The template editor won’t do this. Deleting a button’s label there leaves a blank button on the page. The template only decides how the buttons look.
The Public column appears once the public link is on. If you don’t see a **Decline** row at all, your org always shows Decline.
### How do I offer a Virtual option alongside attending in person?+
1. Under **What guests can choose**, turn on **Maybe** for the links that should offer it.
2. In the template editor, rename the Maybe button to “Attend Virtually.”
3. In your survey, add the virtual follow-up questions and show them only when the RSVP is Maybe.
Those guests still show as Maybe on the guest list. Filter by that status to see your virtual attendees.
### How do I control what guests see after they say no?+
In the survey, switch between **Will attend** and **Will not attend** at the top of the questions. Guests who decline see only the Will not attend questions, so you can ask one question about why, or none.
To change the heading on the page they see after declining, go to **Registration » Invite Landing Page**, open **Everything else**, and edit **After RSVP no** under Confirmation page.
The Will not attend questions appear the first time a guest replies through their personal link. A guest who changes an earlier yes to no doesn’t see them.
## When RSVPs Close
[Section titled “When RSVPs Close”](#when-rsvps-close)
Capacity and deadlines can close registration for you, so you’re not watching the count the night before.
### How do I close registration when we hit capacity or a deadline, and waitlist everyone after that?+
1. Go to **Registration » Invite Landing Page**, set **Are RSVPs open?** to **Open**, and turn on **Close them automatically**.
2. Under **Close when**, turn on **Capacity is reached** and enter a **Guest capacity**, turn on **A date and time passes** and pick the cutoff, or both. Whichever happens first closes RSVPs.
3. Under **Then guests get**, choose **Join Waitlist** to keep collecting names, or **RSVP Closed** to stop.
Capacity counts plus-ones, because each one is its own row on the guest list. A 40-person cap with 30 guests and 15 plus-ones is already over.
These rules only run while RSVPs are Open. If you switch to Closed or Waitlist by hand, the automatic close stops, and your capacity and date are kept for when you switch back.
## Forms, Sessions, and Skipping the Page
[Section titled “Forms, Sessions, and Skipping the Page”](#forms-sessions-and-skipping-the-page)
Some events need no landing page at all. Others need one form that fans out into several calendar invites.
### How do I skip the landing page so guests go straight to the form, or confirm with one click?+
Go to **Registration » Invite Landing Page** and turn on **Skip the page, go straight to the survey** under **How guests get in**. It applies to every link, personal and public.
With survey questions, guests land on the form. With no survey questions, clicking the link confirms them, and the confirmation email with the calendar invite goes out. That’s the one-click save the date. See [Save the Date Pre-Registration](/playbooks/invitation-workflows/save-the-date-pre-registration/).
Because there’s no page, there are no buttons, so nobody can decline from the link. If guests need to say no, leave this off and use the landing page.
### How do I let guests register once, pick sessions or days, and get a calendar invite for each?+
Each event sends one calendar invite, so anything that needs its own calendar entry needs to be its own event in Gatsby.
1. Create an event for each session, dinner, or day.
2. On the main event’s form, add an Event RSVP question, **Multiple Events - Multiple Select**, and choose those events.
3. Invite guests to the main event.
Each session a guest picks sends its own confirmation email with the right time on the invite. Guests appear on the main guest list and on every session they chose.
You don’t need to link the sessions to the main event as parent and child. See [Forms and Surveys](/platform/registration/registration-forms/) for single-select tracks and follow-up questions based on what guests pick.
### How do I show certain questions or sessions only to certain guests?+
Give guests a tag or a custom field, such as a Guest Type of VIP, Speaker, or General. Then, under any custom question, click **Only ask Question If…** and set it to that field.
Everyone gets the same page and form, and the form shows each guest only what applies to them. To offer a session to some guests only, put its Event RSVP question behind the same condition.
See [Forms and Surveys](/platform/registration/registration-forms/) for the setup.
# Ticketing
> Sell tickets directly through Gatsby. Set prices, manage promo codes, track payment status, and issue refunds from Guests.
Why it matters
## When an event has a ticket price, payment tracking stays on Guests.
Not every event charges admission. But when yours does, you shouldn’t need a separate platform to handle it. Gatsby adds payment status, receipts, and promo codes directly to Guests, where you already manage RSVPs, dietary preferences, and seating. One less system to reconcile after the event.
How it works
### Ticket Sales and Payouts
A global menu for sales and payouts across all your events. This is also where you connect your Stripe account for receiving funds.
### Event Ticket Settings
A dedicated tab inside each event where you set price, configure promo codes, and control how payment works for that event.
## Getting Access
[Section titled “Getting Access”](#getting-access)
Ticketing is not enabled by default. To get access, email:
Email copied to clipboard
## Stripe Setup and Payouts
[Section titled “Stripe Setup and Payouts”](#stripe-setup-and-payouts)
Gatsby processes all ticket payments through its own Stripe account. Your connected Stripe account is where payouts land after events close.
How payouts work+
Gatsby processes all ticket sales through its own Stripe platform account, tracking your organization’s balance on an internal ledger. Your connected Stripe account is where funds land once a transfer is issued to you.
You do not need Stripe connected before your event goes live — guests can buy tickets before you’ve connected a payout destination. Funds sit in Gatsby’s ledger and transfer out to your Stripe account as explicit payouts, with refunds and disputes tracked and reconciled against that same ledger.
How to connect Stripe+
1. Open **Ticket Sales and Payouts** in the main navigation.
2. Select **Payment Settings**.
3. Click **Connect Stripe Account** and follow the prompts.
You only need to do this once. The connected account applies to all your events.
Ticket Sales and Payouts dashboard+
The **Ticket Sales and Payouts** section gives you a summary of sales and payouts across all your events. Check total revenue, outstanding balances, and payout history without opening individual events.
This is also where you find the transaction ledger. It records every purchase, refund, and dispute across your events. You can filter by guest, ticket type, or amount, view invoice details for individual transactions, and download logs for reporting or reconciliation.
## Enabling Tickets on an Event
[Section titled “Enabling Tickets on an Event”](#enabling-tickets-on-an-event)
Ticketing is off by default on every new event. Turn it on from the event’s settings.
1. Open your event.
2. Go to the **Tickets** tab in the event details.
3. Toggle ticketing on.
4. Set your ticket price and configure settings.
One ticket type per event+
Each event supports one monetization configuration: either a fixed-price ticket or a donation range, not both. If you need multiple price tiers, like GA and VIP, set up a series (Registration Hub) and enable ticketing separately on each session event — each can have its own fixed price or donation setup.
Guests register through a Registration Hub event and select their session during the RSVP flow. The ticket price adjusts based on which sub-event/session they choose.
Fixed price vs. donations+
**Fixed price** sets a specific dollar amount. Every guest pays the same.
**Donations** let guests choose what they pay within a range you define. Set a minimum and a maximum. Guests enter their amount at checkout.
Plus ones+
Plus ones function as additional ticket purchases. When a guest registers and adds plus ones, the total charge multiplies. A $100 ticket with two plus ones comes to $300.
Guests set the number of plus ones during the RSVP flow. You control whether plus ones are allowed in your event settings.
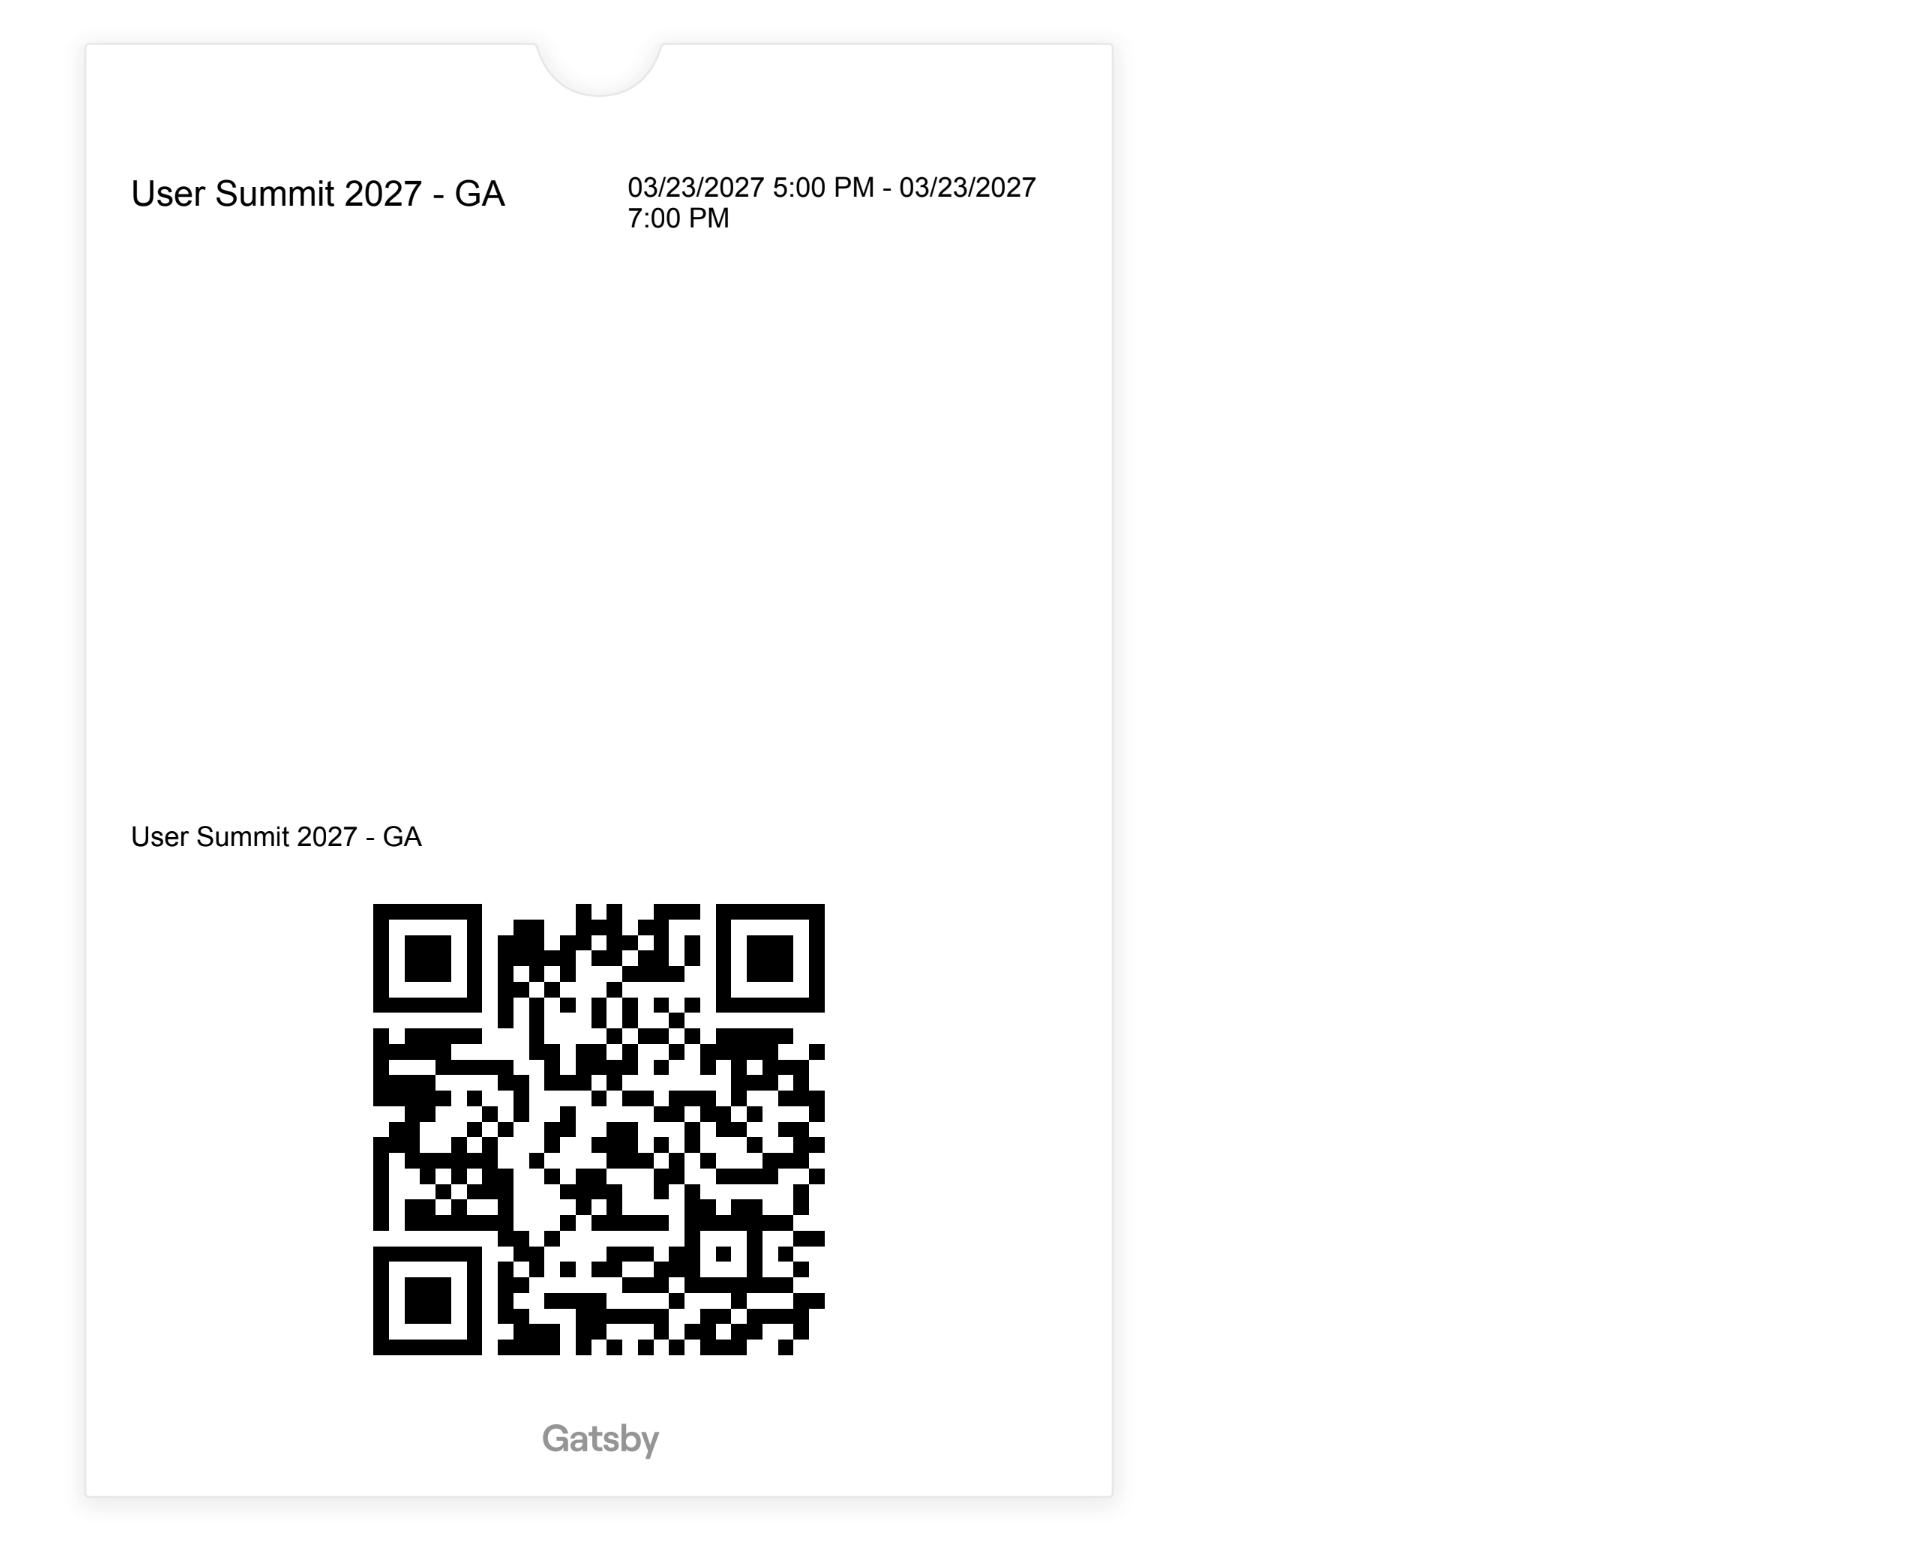
## Ticket Settings
[Section titled “Ticket Settings”](#ticket-settings)
Configure each ticket from the **Tickets** tab when creating or editing your event.
Ticket name and price+
The ticket name appears on the receipt and in the checkout form. Price is in USD.
Transaction fees+
By default, Gatsby absorbs the transaction processing fee. Toggle this on to pass the fee to guests instead. The checkout form shows the total including the fee before guests confirm payment.
Sales tax+
Sales tax is disabled by default. Most event scenarios don’t require it. If your jurisdiction requires you to collect sales tax, enter the applicable rate. Consult a tax advisor before enabling this. Requirements vary by location.
Statement descriptor+
Controls what appears on a guest’s credit card statement. By default it reads “Gatsby.events tickets.” Change this to something your guests will recognize, like your company name or event name.
Refund contact email+
Add an email address to receipts so guests know who to contact about refunds. Optional, but useful if you want refund requests routed to your team rather than Gatsby support.
## Promo Codes
[Section titled “Promo Codes”](#promo-codes)
Offer discounts, early bird pricing, or free tickets. Each event supports multiple promo codes.
Each promo code has four properties you set when creating it.
Creating a promo code+
**Code**
The string guests type at checkout.
***
**Discount type**
Four options: **Percentage** takes a percentage off the price. **Fixed amount** subtracts a specific dollar amount. **Fixed price** sets the ticket to an exact price you choose. **Free** makes the ticket $0.
***
**Quantity**
How many times the code can be used. Once the limit is reached, the code stops working.
***
**Expiration**
An optional date. The code becomes invalid after this date passes.
Early bird pricing+
Create a code with a percentage discount and an expiration date. Share the code in a campaign before the deadline. When the date passes, the code stops working and registrants pay full price.
Example: 25% off a $200 ticket, expiring one week before the event. Anyone who registers with the code pays $150. After the expiration, no discount applies.
Bulk unique codes per guest+
Export a promo code template, fill in unique codes in a spreadsheet, and import the list back into Gatsby. Each guest gets their own code.
Use the `{promoCode}` merge field in a campaign email to send each guest their unique code. Pair it with the `{rsvpLink}` merge field so they click straight through to checkout.
Tracking usage+
Guests gains a **Promo Code Used** column once ticketing is on. Sort or filter by this column to see which codes were redeemed and by whom.
Pausing a promo code+
You can pause a code without deleting it. A paused code stops working at checkout but keeps its settings and usage history. Unpause it when you’re ready to reactivate.
## Payment Tracking
[Section titled “Payment Tracking”](#payment-tracking)
Enabling ticketing adds three columns to your guest list: **Payment Status**, **Receipts**, and **Promo Code Used**.
Payment Status+
**Payment Status** shows where a guest stands: **Paid**, **Pending**, **Refunded**, **Chargeback**, or **Failed**.
***
**Chargeback**
The guest disputed the charge with their bank. Stripe handles the dispute. You’ll see the status update on your guest list and in the transaction ledger.
***
**Failed**
The payment attempt did not go through. The guest may have had insufficient funds or a declined card.
Receipts+
**Receipts** stores a link to each guest’s receipt. The receipt is a PDF showing the ticket name, promo code (if used), payment method, and amount charged. Click the dropdown arrow next to any receipt to view details, initiate a refund, or resend it to the guest.
RSVP statuses with ticketing+
When ticketing is on, registration tracks three states instead of one.
***
**Accepted**
Payment complete. The guest is confirmed and has a receipt.
***
**Accepted, Payment Incomplete**
The guest finished the survey and reached the credit card form but did not pay, or their payment attempt failed. They are the closest to completing checkout. Follow up with these guests first.
***
**Survey Incomplete**
The guest started registration but did not finish the survey. They never reached payment. Follow up after you have chased down the Payment Incomplete group.
## What Guests Receive
[Section titled “What Guests Receive”](#what-guests-receive)
After payment, guests receive two emails: a confirmation email with their ticket PDF attached (alongside the calendar invite, if enabled) and a separate receipt email from Stripe.
Ticket PDF+
The ticket PDF includes the event name, event date and time, the guest’s name, the ticket type, and a QR code. The QR code works with Gatsby’s check-in app at the door. Each ticket is event-specific, so a VIP ticket only scans at VIP check-in, not GA.
For series events, the ticket attaches to the confirmation email of the main series event where the guest registered.
Receipt email+
Stripe sends a separate receipt email with Gatsby branding. It includes an itemized invoice showing the ticket name, promo code (if one was used), payment method, and the amount charged. The receipt is a downloadable PDF.
Re-downloading tickets and receipts+
Guests can return to their registration page to download their ticket and receipt again. Both PDFs are available from the edit registration view.
Organizers can resend a receipt to a guest directly from the guest list.
## Refunds
[Section titled “Refunds”](#refunds)
Refunds are issued from the **Receipts** column on your guest list. Expand the dropdown arrow next to a receipt and select the refund option. Service fees are non-refundable. The guest’s payment status updates to **Refunded** and they receive a confirmation to the email on their record.
Whether to refund is your decision as the organizer, not Gatsby’s. If a guest contacts Gatsby support asking for a refund, we forward the request to you. Add a **Refund contact email** in your ticket settings so guests can reach your team directly.
## Ticketing with Approval Workflows
[Section titled “Ticketing with Approval Workflows”](#ticketing-with-approval-workflows)
If your event uses waitlist approval to vet guests, the status you move them to after approval determines whether they get prompted to pay.
When you approve a waitlisted guest, the status you assign matters. One option requires payment. The other confirms them outright.
The right status sequence+
Move approved guests to **Accepted, Payment Incomplete**, not **Accepted**.
**Accepted** means the guest is confirmed. No payment required. A guest moved from Waitlisted directly to Accepted skips the payment prompt and won’t be charged.
**Accepted, Payment Incomplete** tells the system the guest is approved but still owes payment. They get prompted to complete checkout when they return to their registration link.
Prompting payment via campaign+
After moving guests to Accepted, Payment Incomplete, send a campaign email with the `{rsvpLink}` merge field. When guests click their link, they see a banner at the top of the registration page prompting them to complete checkout.
No separate payment link needed. The personal RSVP link handles it.
## Common Questions
[Section titled “Common Questions”](#common-questions)
How do fees work?+
Gatsby charges a platform fee on each ticket sale. Stripe charges a separate processing fee per transaction. Contact your account manager for current rates.
Can I use my own Stripe account to sell tickets?+
No. Ticket sales always run through Gatsby’s Stripe account. Your connected Stripe account is where payouts land, after the event closes. See [Stripe Setup and Payouts](#stripe-setup-and-payouts).
What payment methods are supported?+
Guests pay by credit card. Google Pay, Apple Pay, and Stripe Link appear at checkout if the guest’s browser supports them.
What do guests see at checkout?+
Guests see a Stripe checkout form with the ticket name, price, and a field for card details. If you enabled fee pass-through, the total with fees is shown before they confirm.
Can I make a guest exempt from paying?+
Yes. Mark a guest as exempt from the guest list before they register and their ticket price is waived. You can also create a 100% off promo code and share it with specific guests.
What if a guest doesn't finish checkout?+
Their RSVP status shows as Accepted, Payment Incomplete. Send them a campaign email with the `{rsvpLink}` merge field. When they click through, they see a prompt to complete payment.
Can I have multiple ticket types?+
Each event supports one ticket type. For multiple price tiers, create a series and enable ticketing on each sub-event. Guests pick their sub-event during registration and pay accordingly.
What happens if a guest disputes a charge?+
Their payment status changes to **Chargeback** on your guest list and in the transaction ledger. Stripe handles the dispute process directly. Contact your account manager if you need help responding to a dispute.
# Reporting & Analytics
> See RSVP performance, engagement, and guest growth across every event in one dashboard. Numbers that match each event's RSVP summary exactly, filterable by tag and exportable to CSV.
Why it matters
## You ran a dozen dinners this quarter. Which invite actually filled the room?
Attendance data usually dies inside each event. You have twelve guest lists and no way to compare them, so the question every partner asks after an event — “did that work?” — gets answered by gut feel.
Reporting rolls every event into one dashboard. Response rates, best send times, which colleagues drive the strongest turnout, and how your guest base is growing — across all of it, at once.
How it works
### One view, every event
Go to Reporting in the main navigation. It aggregates analytics across all your events automatically. Dateless Lists are excluded, so newsletters and directories never skew your event numbers.
### Numbers that reconcile
Every RSVP count uses the same buckets as the RSVP summary on each event’s Guests tab. What you see in Reporting matches what you see on the event, guest for guest. Reporting itself covers invitations and RSVPs across events — attendance for the day itself lives on each event’s own Guests tab.
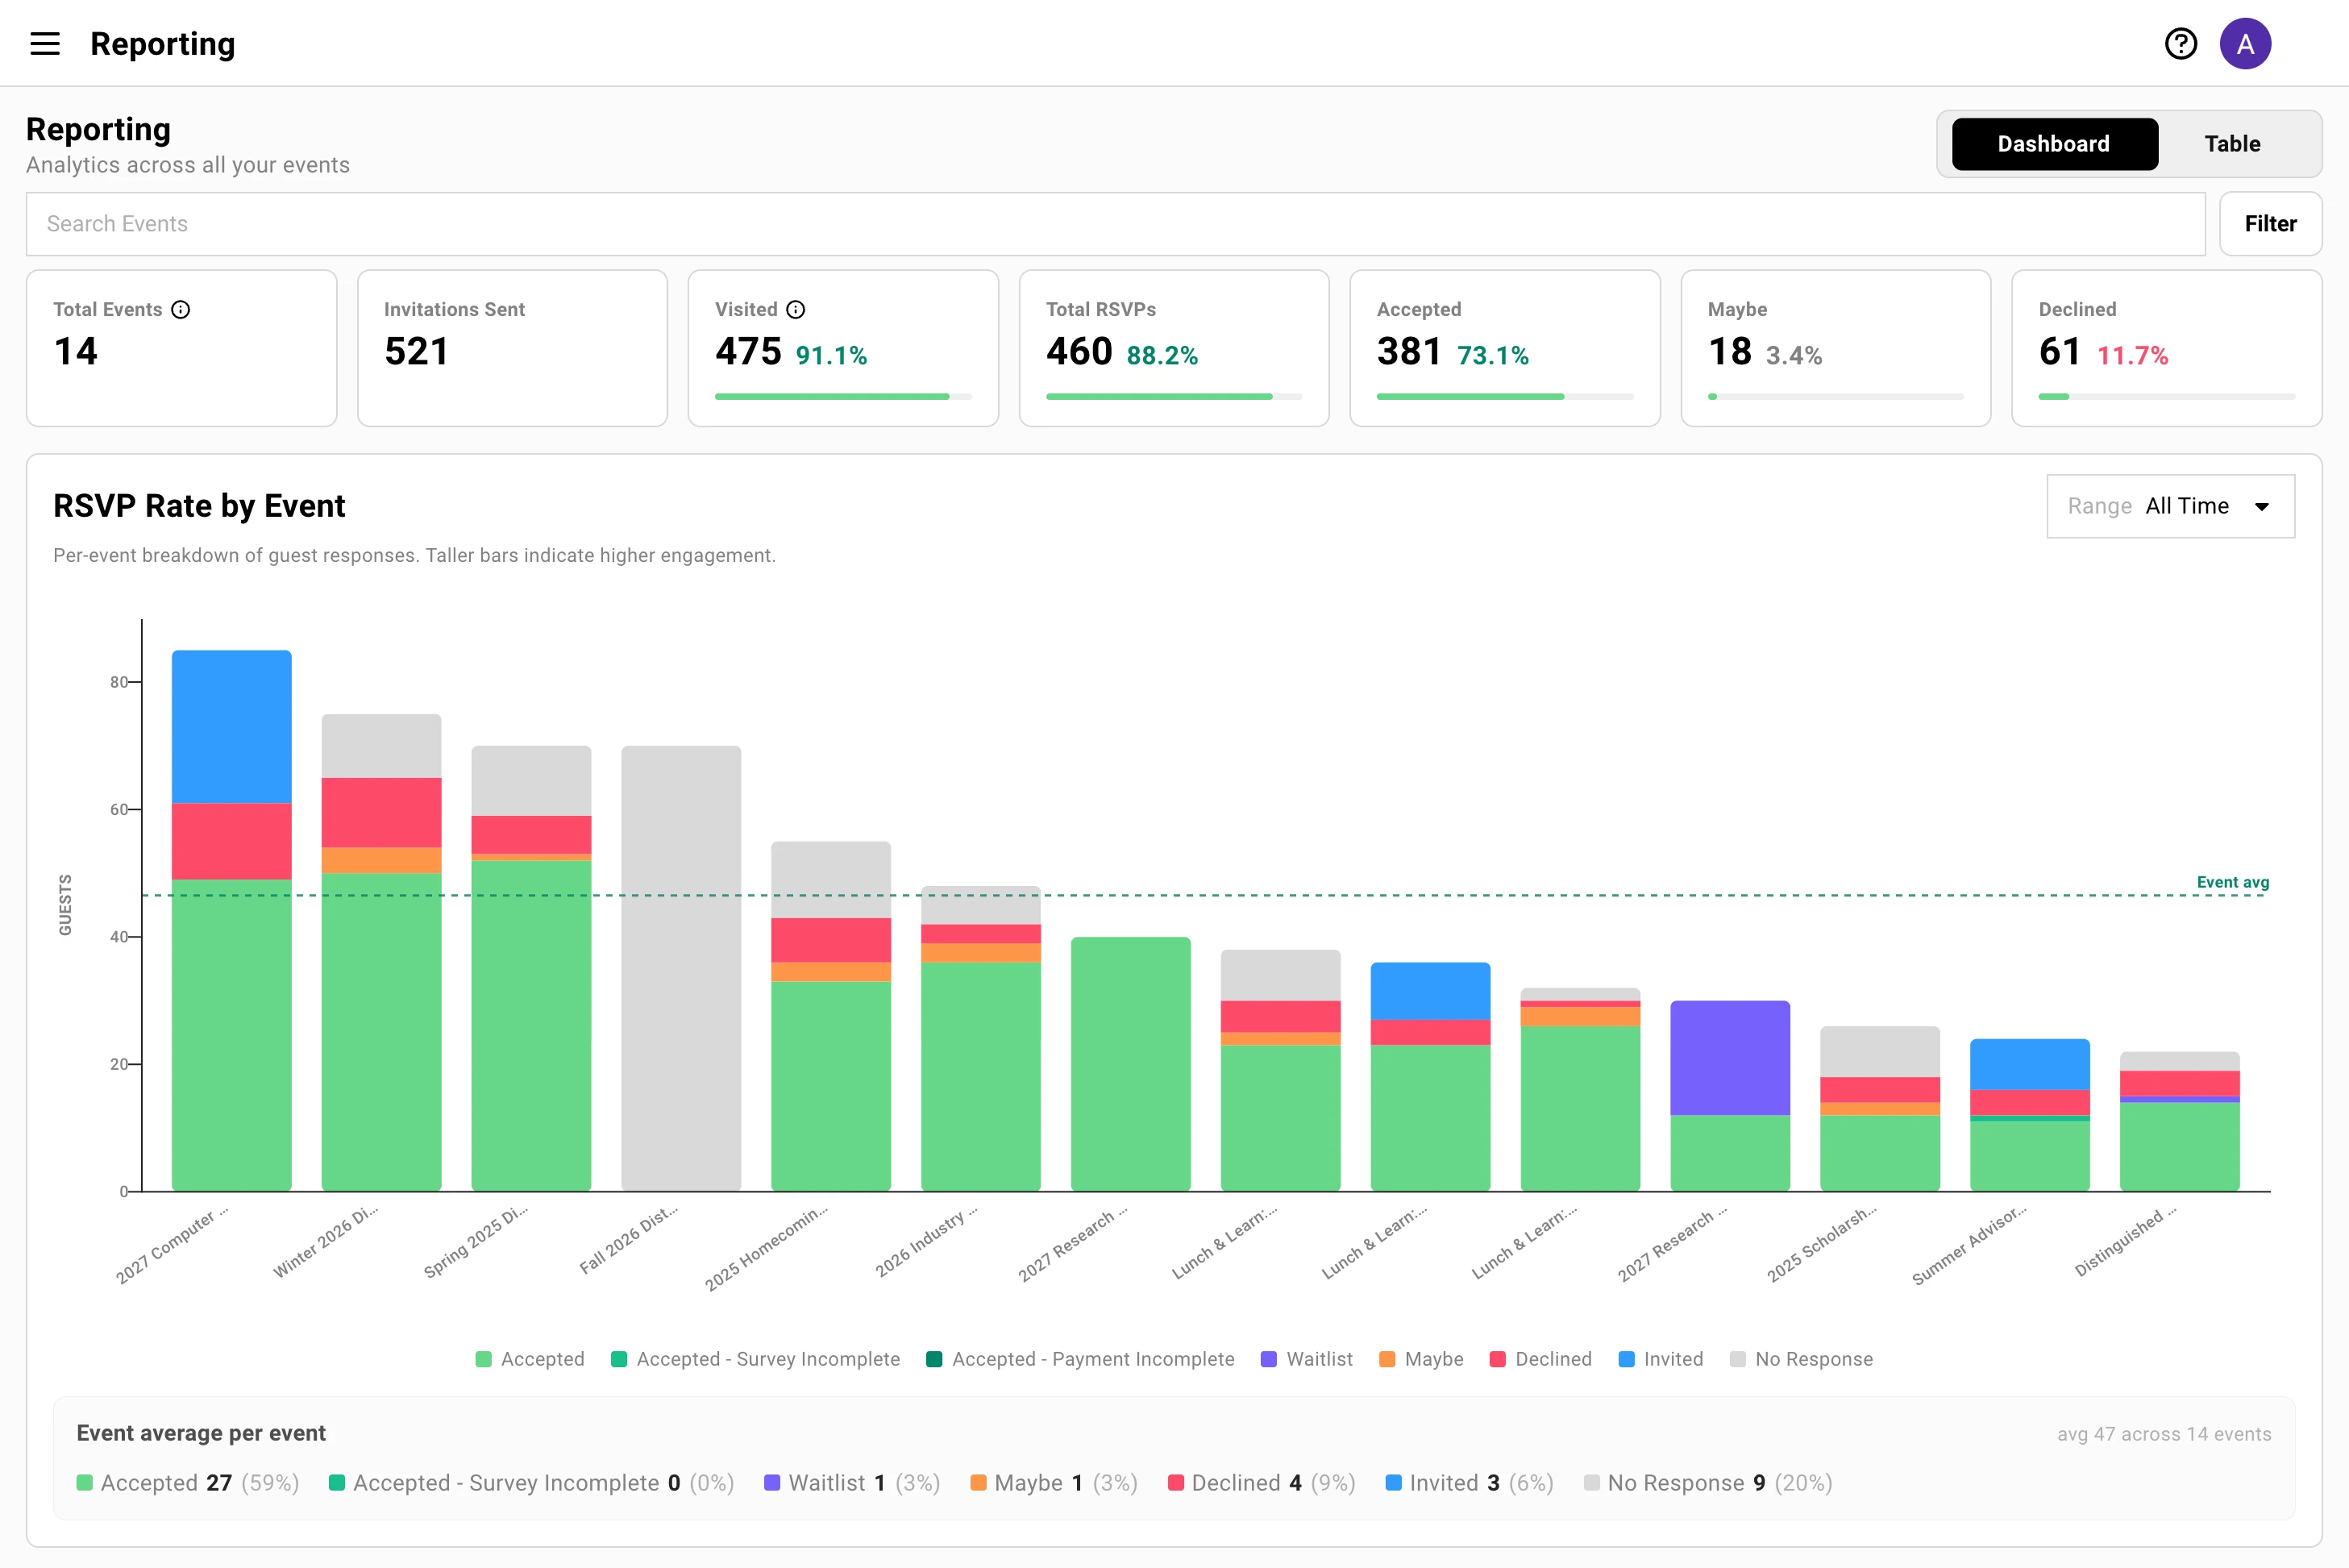
### Dashboard and Table
[Section titled “Dashboard and Table”](#dashboard-and-table)
Reporting opens on the **Dashboard**. Switch to **Table** for a row-per-event view of the same data. Both share the same **Search Events** and **Filter** controls at the top, and the Dashboard leads with the headline funnel before its charts.
## The headline numbers
[Section titled “The headline numbers”](#the-headline-numbers)
Seven metrics sit at the top of the dashboard, rolled up across every event. This is the funnel: how many people you invited, how many showed interest, and how they responded.
### The top-line funnel
[Section titled “The top-line funnel”](#the-top-line-funnel)
These load first, before the charts, so the answer to “how are we doing overall” is on screen instantly. Each disposition metric shows both a count and a percentage of invitations sent.
What each metric means+
* **Total Events:** Every event counted in the dashboard. Dateless Lists are excluded.
* **Invitations Sent:** Total invitations delivered across all events.
* **Visited:** Guests who landed on the RSVP page. This tracks page visits, not email opens or clicks — those aren’t tracked separately. Shown as a count and **Visited %**.
* **Total RSVPs:** Everyone who responded — Accepted, Maybe, or Declined combined.
* **Accepted / Maybe / Declined:** How responders answered, each with its own count and percentage.
Why 'Visited' and not 'opens' or 'clicks'+
Gatsby measures the moment that actually matters: a guest arriving on your RSVP page. Email open and click tracking is noisy and increasingly unreliable across mail providers, so Reporting doesn’t dress it up as engagement it can’t verify. **Visited** is a real signal — someone reached the page where they decide to attend.
## Narrow to the events that matter
[Section titled “Narrow to the events that matter”](#narrow-to-the-events-that-matter)
Running hundreds of events? You don’t have to read them all at once. The controls at the top of the dashboard scope everything below them — every chart, the headline funnel, and the table — down to just the events you care about: one region, one program, one quarter.
### Filter the whole dashboard at once
[Section titled “Filter the whole dashboard at once”](#filter-the-whole-dashboard-at-once)
**Search Events** and the **Filter** menu sit at the top of Reporting and apply everywhere at the same time. Change either one and the funnel, every chart, and the table all recalculate together — so the numbers you’re reading always describe the same slice of events.
Search by event name+
Type in **Search Events** to narrow to events whose name matches. Everything on the page updates as you type — useful for pulling up a single series like “Investor Dinner” across every city you’ve run it in.
Filter by event tag+
Open the **Filter** menu and choose one or more **Event Tags**, then switch between **AND** (events carrying *every* selected tag) and **OR** (events carrying *any* of them).
This is the real power tool for large accounts: tag your events by region, fund, or program, and you can pull a clean read on just that slice — only your APAC events, only LP meetings, only this year’s roadshow. Untagged events won’t be captured, so consistent tagging is what makes this sing.
Zoom a single chart by date+
Some charts add their own **Range** control on top of the dashboard filters — RSVP Rate by Event and Time to RSVP Response each offer Last Month, Last Quarter, Last Year, All Time, or a custom start–end. Use these to focus one chart on a window without changing the rest of the page.
When a chart still has more events than it can show clearly, it displays your top 25 by volume with a **View all in table** link — filter down with tags first, or jump to the table for the complete list.
## RSVP performance across events
[Section titled “RSVP performance across events”](#rsvp-performance-across-events)
The centerpiece: how every event performed, side by side, broken down by the exact same RSVP statuses your team already reads on each event page.
### RSVP Rate by Event
[Section titled “RSVP Rate by Event”](#rsvp-rate-by-event)
A stacked bar per event shows its full RSVP breakdown across eight status buckets, with a dashed line marking your average total so you can spot the events that over- and under-performed at a glance.
The eight RSVP buckets+
Every RSVP status a guest can hold rolls up into one of these buckets — the same grouping used by the RSVP summary on each event’s Guests tab:
| Bucket | Includes |
| --------------------------------- | ------------------------------------------------------------ |
| **Accepted** | Accepted (and legacy accepted-incomplete) |
| **Accepted – Survey Incomplete** | Accepted but the registration survey isn’t finished |
| **Accepted – Payment Incomplete** | Accepted but payment isn’t finished |
| **Waitlist** | Waitlisted guests |
| **Maybe** | Tentative responses |
| **Declined** | Declined, cancelled, and rejected |
| **Invited** | Sent, visited, or seen — no response yet |
| **No Response** | Awaiting, pending, failed, bounced, blocked, and predictions |
Two buckets are conditional: **Accepted – Payment Incomplete** only appears on events that use paid ticketing (the guest accepted but hasn’t paid), and **Accepted – Survey Incomplete** only appears when an event has a registration survey the guest hasn’t finished. Most events show neither.
Because Reporting and each event’s RSVP summary read from one shared definition, the counts always agree.
Filtering by date+
1. Use the timeframe selector on the chart to pick **Last Month**, **Last Quarter**, **Last Year**, or **All Time**.
2. Or choose a **Custom** range with start and end dates.
3. The chart recalculates for the events in that window.
When you run a lot of events+
The chart shows your top events by volume — you’ll see a **Top 25 of \[total]** label and a **View all in table** link when there are more. Click it to jump to the Table view for the full list. The Invite Sender and Guest Source charts cap the same way, so the visuals stay readable while the table holds everything.
### The same numbers, on every event
[Section titled “The same numbers, on every event”](#the-same-numbers-on-every-event)
Reporting rolls things up across events — but each event carries the same analytics inline. Open any event’s Guests tab and two live summaries sit at the top: one for RSVPs, one for attendance.
RSVP summary+
The **RSVP** summary breaks the Guests tab into the same buckets Reporting uses — Accepted, Waitlist, Maybe, Declined, Invited, and No Response, plus the conditional Accepted – Payment Incomplete (paid-ticketing events) and Accepted – Survey Incomplete (events with a registration survey) — each with a count and a percentage of total guests. It’s the single-event version of the RSVP Rate by Event chart, and because both read from one shared definition, the numbers match exactly.
Attendance summary+
The **Attendance** summary tracks the day itself: **Attended**, **No Show**, and **Pending**, with a running **Checked In** count and each as a percentage. This is where per-event attendance analytics live. The cross-event dashboard focuses on invitations and RSVPs, so the event’s own summary is your at-a-glance read on who actually showed. See Event Check-In for how arrivals get recorded.
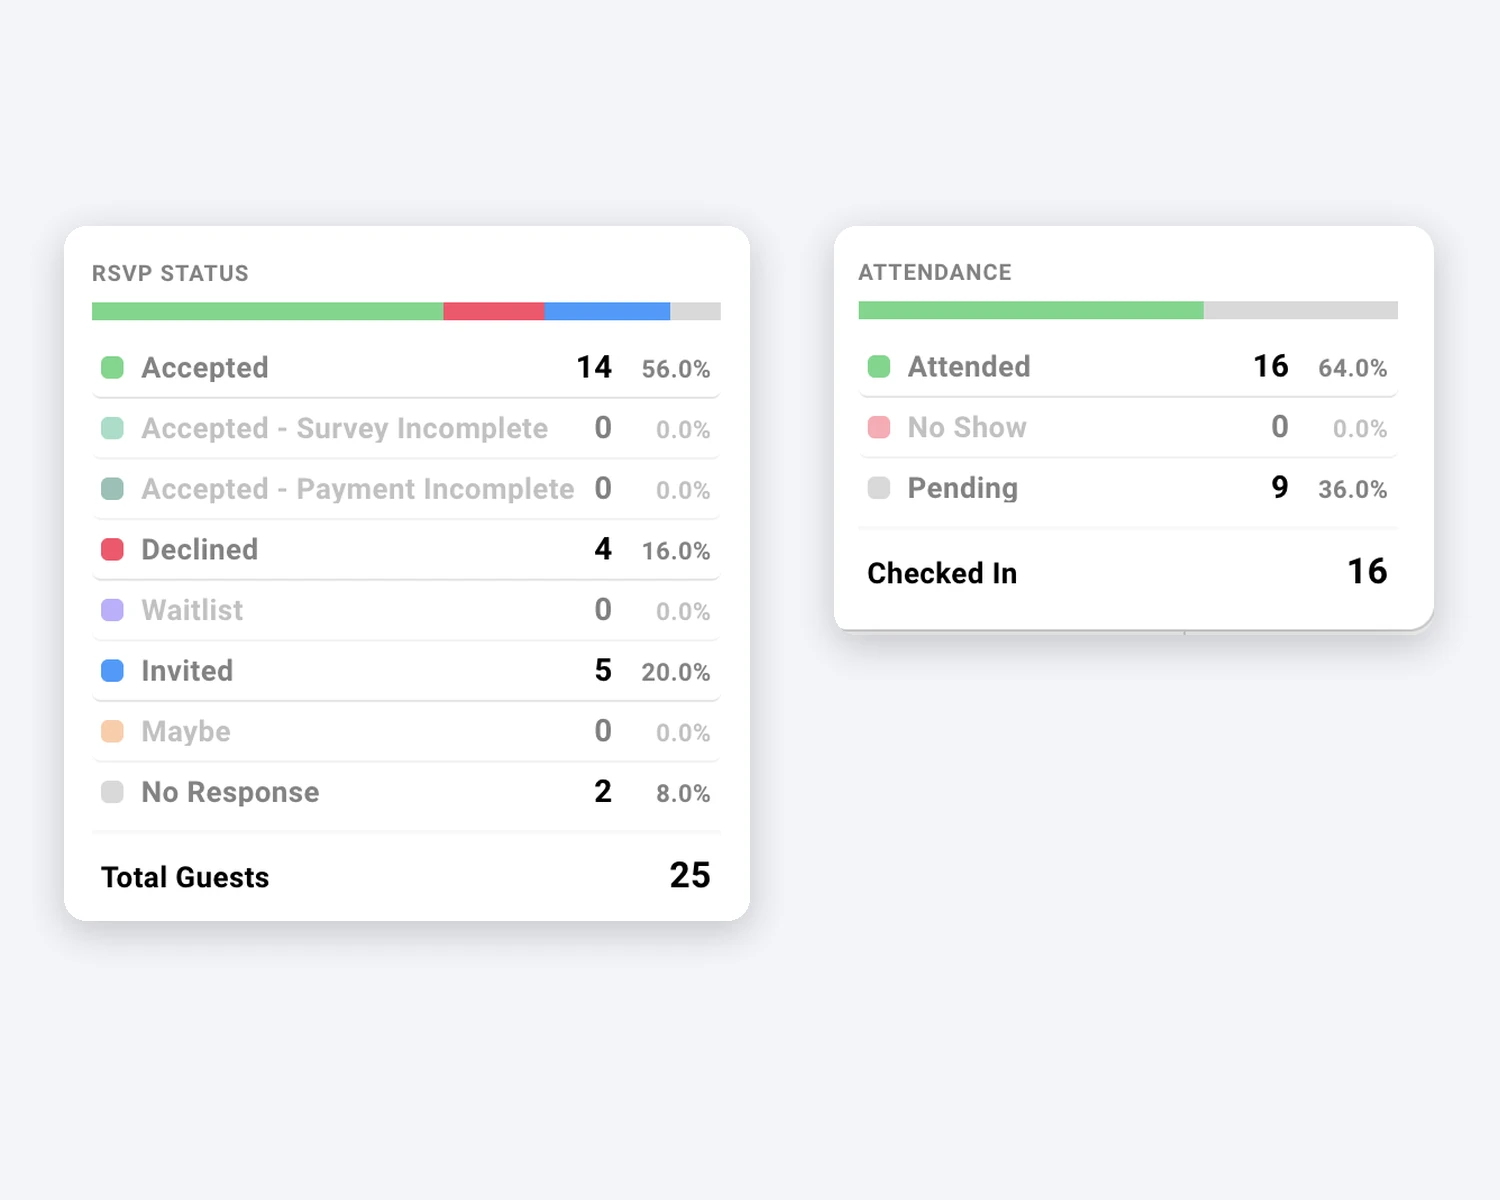
## When — and how fast — people respond
[Section titled “When — and how fast — people respond”](#when--and-how-fast--people-respond)
Timing decides open rates on the next invitation. Two charts show when your guests engage and how quickly they commit.
### Response timing
[Section titled “Response timing”](#response-timing)
Invite Interactions by Time of Day+
Twenty-four bars, one per hour, showing the share of guest responses that land in each hour of the day. Use it to schedule your next send for when your audience is actually paying attention.
Time to RSVP Response+
A cumulative curve showing how quickly guests respond after an invitation goes out — what share have replied within an hour, a day, a week. Switch the range between **12h**, **24h**, and **7d**. A slow curve tells you a reminder is worth sending; a fast one tells you your timing is already working.
## What drives your best RSVPs
[Section titled “What drives your best RSVPs”](#what-drives-your-best-rsvps)
Not every invitation carries the same weight. A note from the right partner outperforms a generic blast. These charts show whose outreach converts.
### Sender and source performance
[Section titled “Sender and source performance”](#sender-and-source-performance)
RSVP Rate by Invite Sender+
For each sending address, a bar shows the unique guests reached and a line shows the acceptance rate. Sort by **Guest Count** or **Invites Sent**. This is how you find out that dinners sent from the partner’s own inbox convert at twice the rate of the shared events address.
RSVP Rate by Guest Source+
The same view, grouped by who owns the guest relationship — the colleague whose network a guest came from. Rates are capped at 100%, so the comparison stays honest. It surfaces which relationships reliably turn invitations into attendance.
### Guest Growth Over Time
[Section titled “Guest Growth Over Time”](#guest-growth-over-time)
One chart tracks how your guest base is building. Toggle between **Cumulative** and **Per-period** to see either the running total or the pace of additions, and between **Total** and **Unique Guests** to separate raw volume from distinct people.
Flip to **Unique Guests** to see how much of your growth is new relationships versus re-inviting the people you already know.
## Every event in one table
[Section titled “Every event in one table”](#every-event-in-one-table)
The dashboard is for patterns. The table is for pulling exact numbers — and handing them to someone who wants a spreadsheet.
### Table view and export
[Section titled “Table view and export”](#table-view-and-export)
Switch from **Dashboard** to **Table** for a row per event with every metric in columns. The **Search Events** and **Event Tags** filters carry over from the dashboard, so whatever slice you were looking at is already applied here.
Sorting and drilling in+
1. Click any column header to sort — by RSVP rate, invitations sent, or any other metric.
2. Narrow the list further with **Search Events** or the **Event Tags** filter (the same dashboard controls).
3. Click an event name to jump straight to that event’s Guests tab.
Exporting to CSV+
Export the table — in its current sort and filter state — from the menu in the table header. The export carries over whatever **Search Events** and **Event Tags** filtering is applied, and dateless Lists are never included since Reporting excludes them entirely. Two formats are available:
* **CSV** — standard, for any tool.
* **CSV (Excel)** — encoded so it opens cleanly in Excel.
The file downloads as `Gatsby-Reporting-[date].csv`.
Matches your events
Counts that reconcile.
RSVP totals use the same buckets as each event's own summary. Reporting and the event always agree.
Honest signals
Visited, not vanity.
Real page visits — not unreliable email open and click tracking dressed up as engagement.
Loads fast
Answers first.
The top-line numbers appear immediately; each chart streams in as it's ready.
## Common Questions
[Section titled “Common Questions”](#common-questions)
Where do I find Reporting?+
Go to **Reporting** in the main navigation. It opens on the Dashboard, showing analytics across all your events.
Why do the numbers finally match my event page?+
Reporting and each event’s RSVP summary now read from one shared set of status buckets. Every RSVP status lands in the same bucket in both places, so the totals reconcile guest for guest — no more explaining why two screens disagree.
Are my dateless Lists included?+
No. Reporting covers events with dates. Lists — newsletters, directories, ongoing contact groups — are excluded so they don’t distort your event metrics.
Does Reporting track email opens and clicks?+
Gatsby tracks **Visited** (guests who reached your RSVP page) on the guest list and email opens or clicks per campaign (which mail providers report inconsistently). Visited is the signal you should act on.
Can I report on a single date range or a set of events?+
Yes. The RSVP Rate by Event and Time to Response charts have their own timeframe and custom-date controls, and the whole dashboard filters by event name and event tag.
Can I get this data out of Gatsby?+
Yes. The Table view exports to CSV and Excel-encoded CSV in your current sort and filter state. For live, ongoing sync of attendance and RSVP data into your CRM, see Integrations.
# Playbooks
> How to set up and run specific event types in Gatsby. Each playbook covers which tools to use, how to connect them, and what we recommend.
## Your First Event
[Section titled “Your First Event”](#your-first-event)
**Five steps cover every event you’ll ever run in Gatsby.**
This walkthrough builds a real one from scratch. By the end, you’ll know how guest lists, campaigns, and registration connect.
[View Guide](/playbooks/invitation-workflows/first-event/)

Invitation Workflows
## From guest list to RSVP
Build your event, send invitations, follow up, and handle changes.
### [Sending Invitations](/playbooks/invitation-workflows/sending-invitations/)
[Campaign to registration to confirmation email with calendar invite.](/playbooks/invitation-workflows/sending-invitations/)
[](/playbooks/invitation-workflows/sending-invitations/)
### [Follow-Up Emails](/playbooks/invitation-workflows/follow-up-emails/)
[Filter by RSVP status, send targeted reminders to non-responders.](/playbooks/invitation-workflows/follow-up-emails/)
[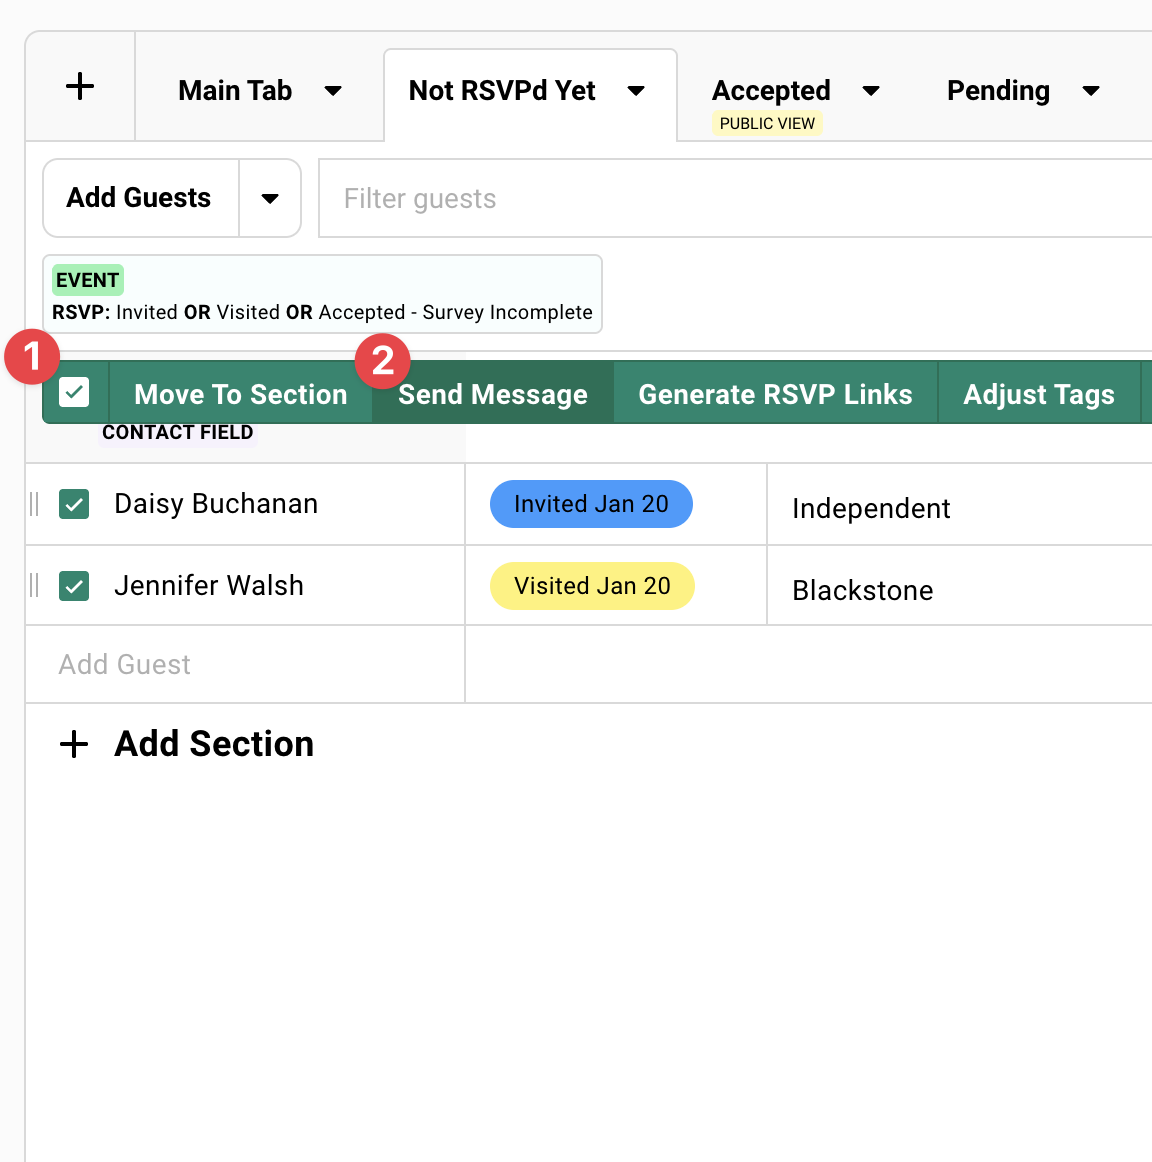](/playbooks/invitation-workflows/follow-up-emails/)
### [Canceling Events](/playbooks/invitation-workflows/canceling-events/)
[Communicate with guests when plans change.](/playbooks/invitation-workflows/canceling-events/)
[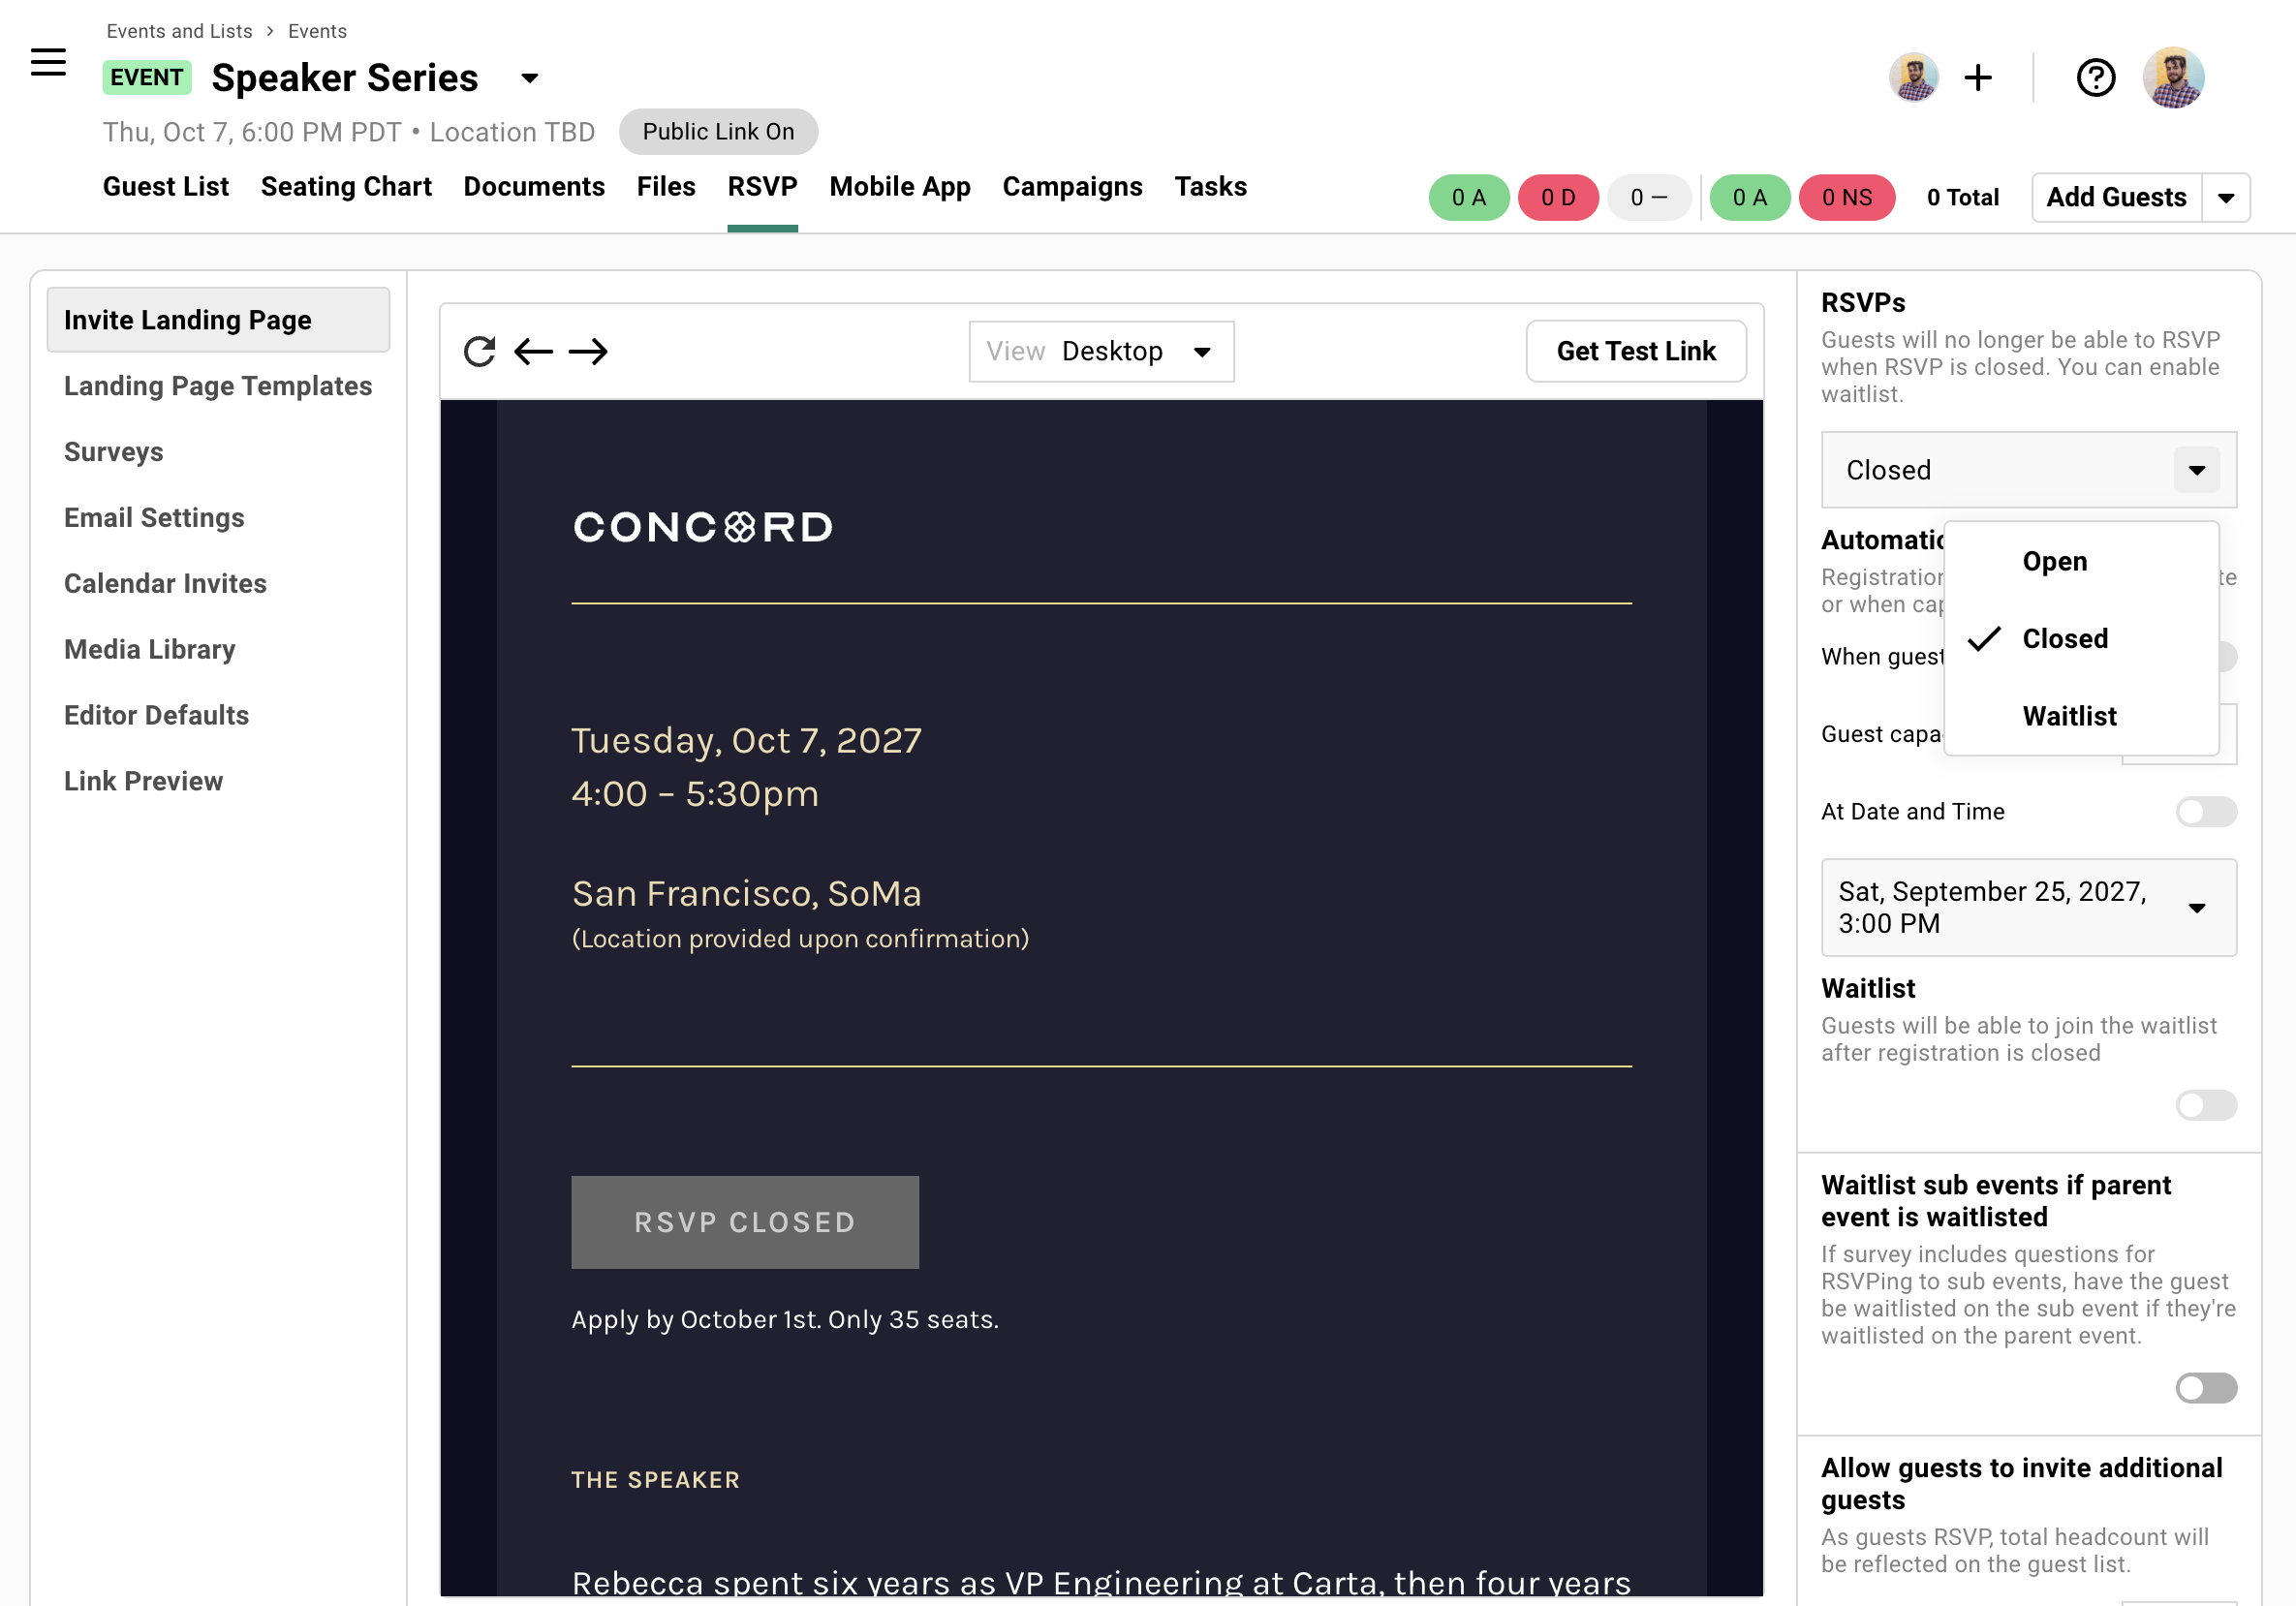](/playbooks/invitation-workflows/canceling-events/)
Registration Setups
## Control who registers and how
Different events need different registration flows. These guides walk through specific setups.
## Multi-Session Events
[Section titled “Multi-Session Events”](#multi-session-events)
**This guide sets up one registration flow where guests pick their sessions.**
Each session gets its own guest list, capacity limits, seating chart, and calendar invite. Guests register once. You get a clean list for every room.
[View Guide](/playbooks/registration-setups/multi-session-events/)
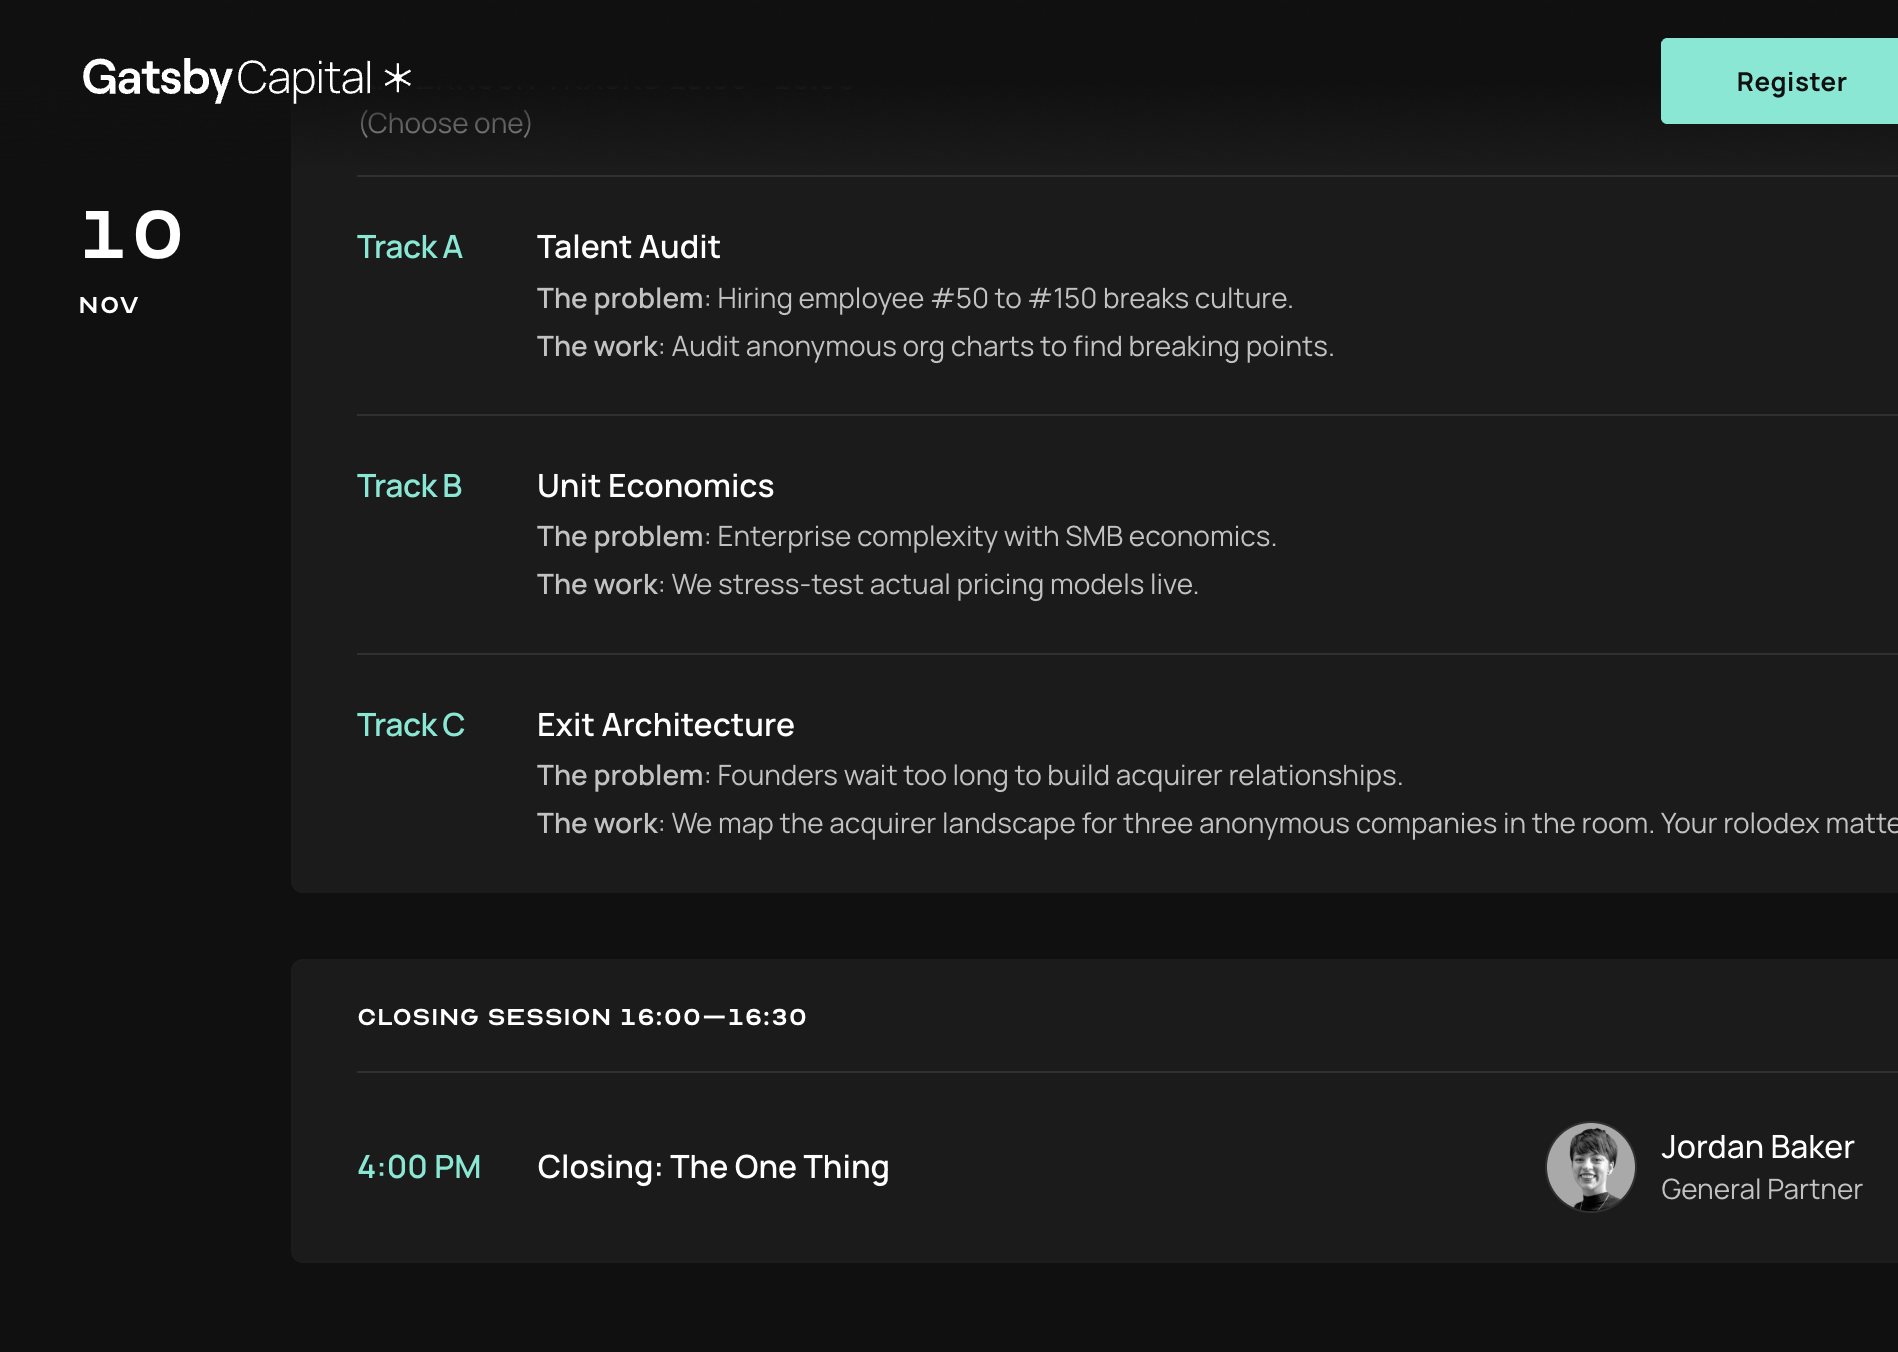
## Private Events
[Section titled “Private Events”](#private-events)
**“Private event” means different things depending on who you ask.**
This guide covers three levels of privacy and how to combine them for everything from a quiet dinner to a vetted investor meeting.
[View Guide](/playbooks/registration-setups/private-events/)
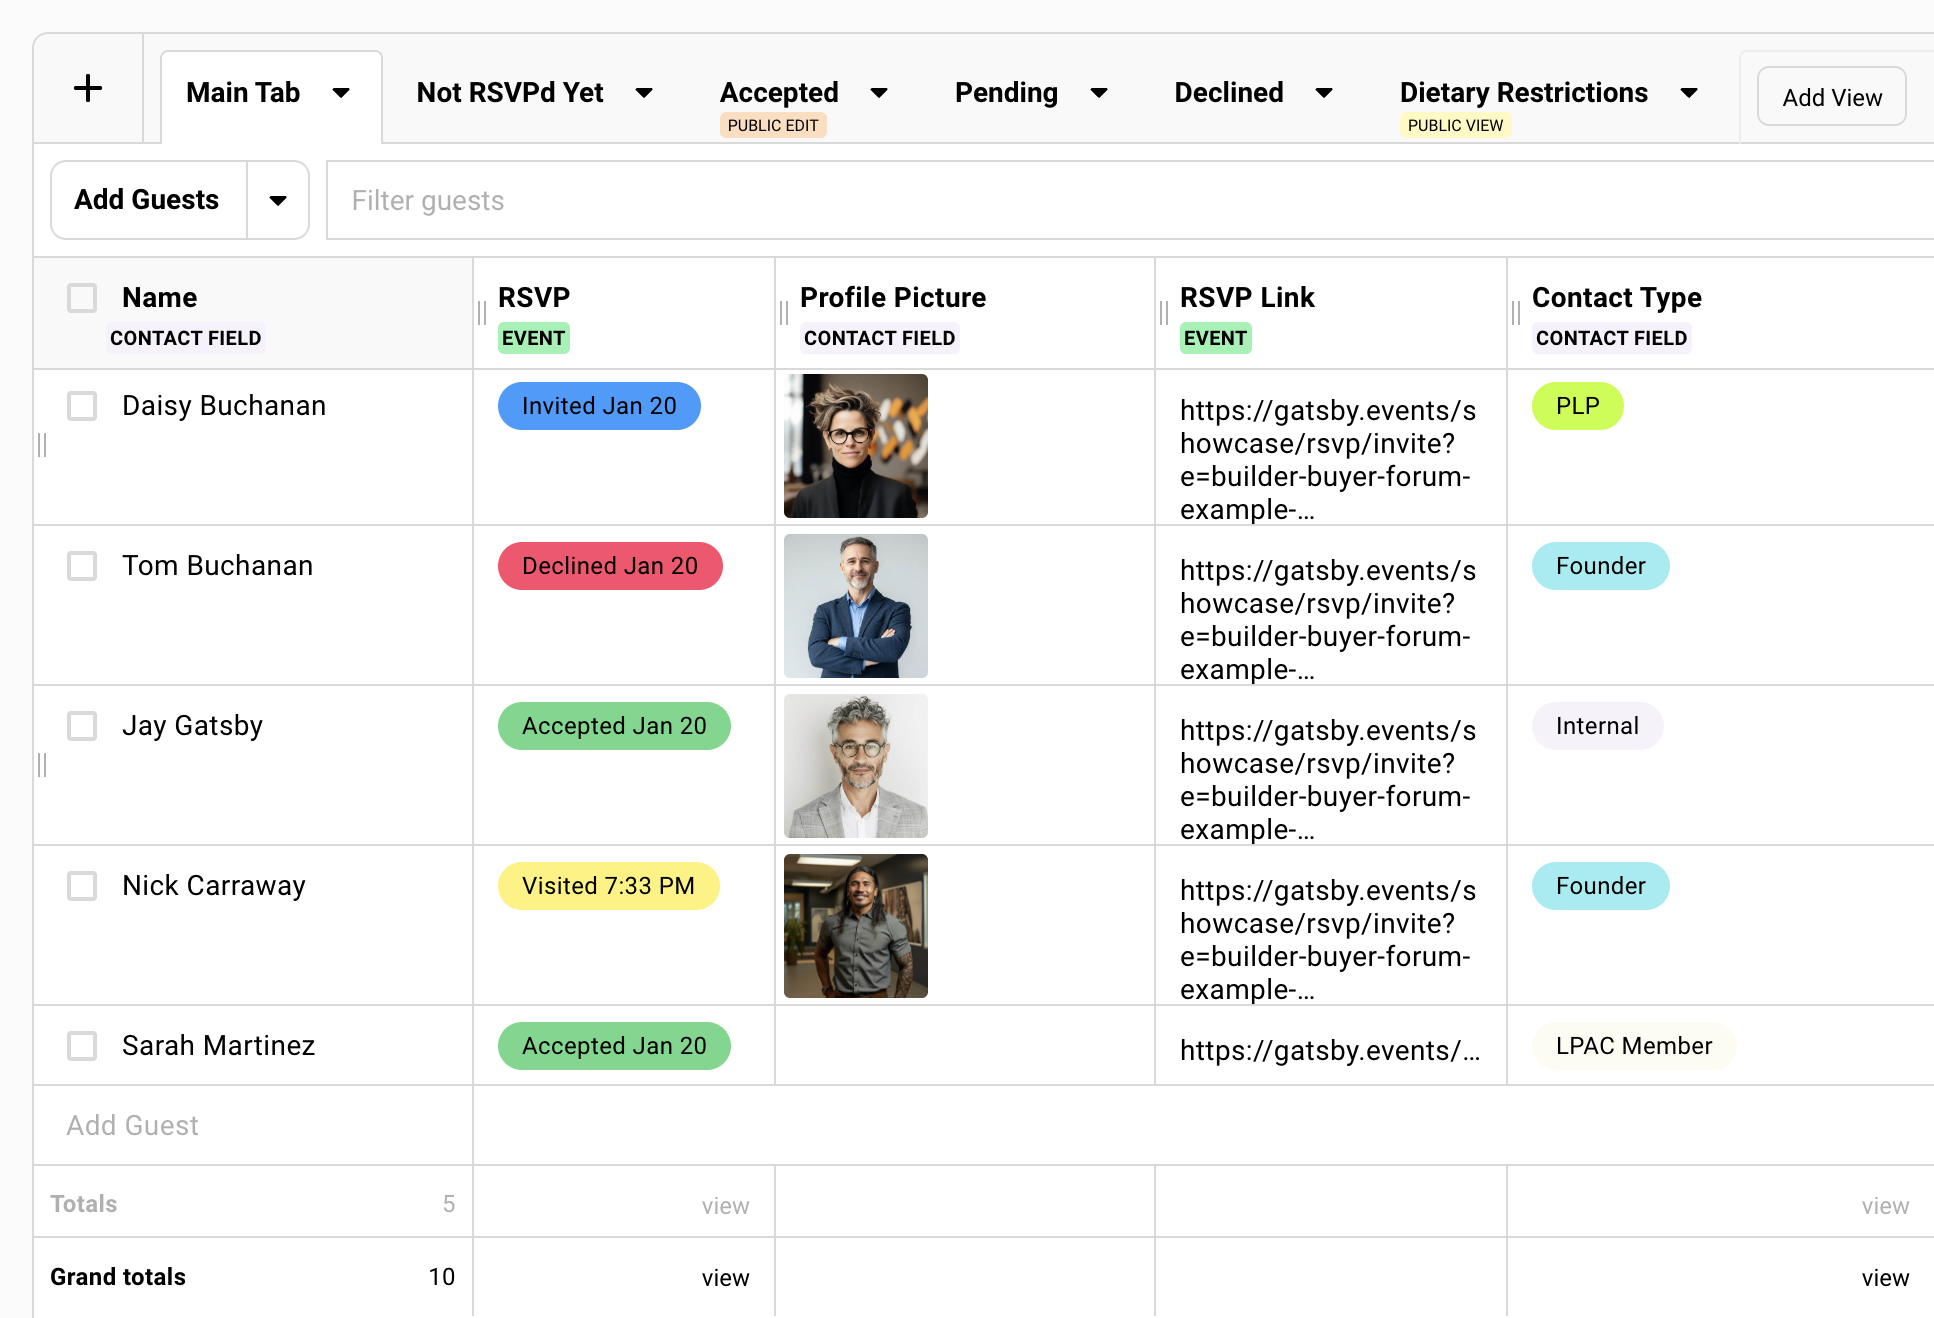
## AI Landing Pages
[Section titled “AI Landing Pages”](#ai-landing-pages)
**Premium-looking, custom-designed landing pages, generated from a prompt.**
Animations, multi-page navigation, bespoke brand expression. Prompt Claude, Lovable, Bolt, or v0 to build the page. Gatsby wraps it with the RSVP frame and runs registration.
[View Guide](/playbooks/registration-setups/ai-landing-pages/)
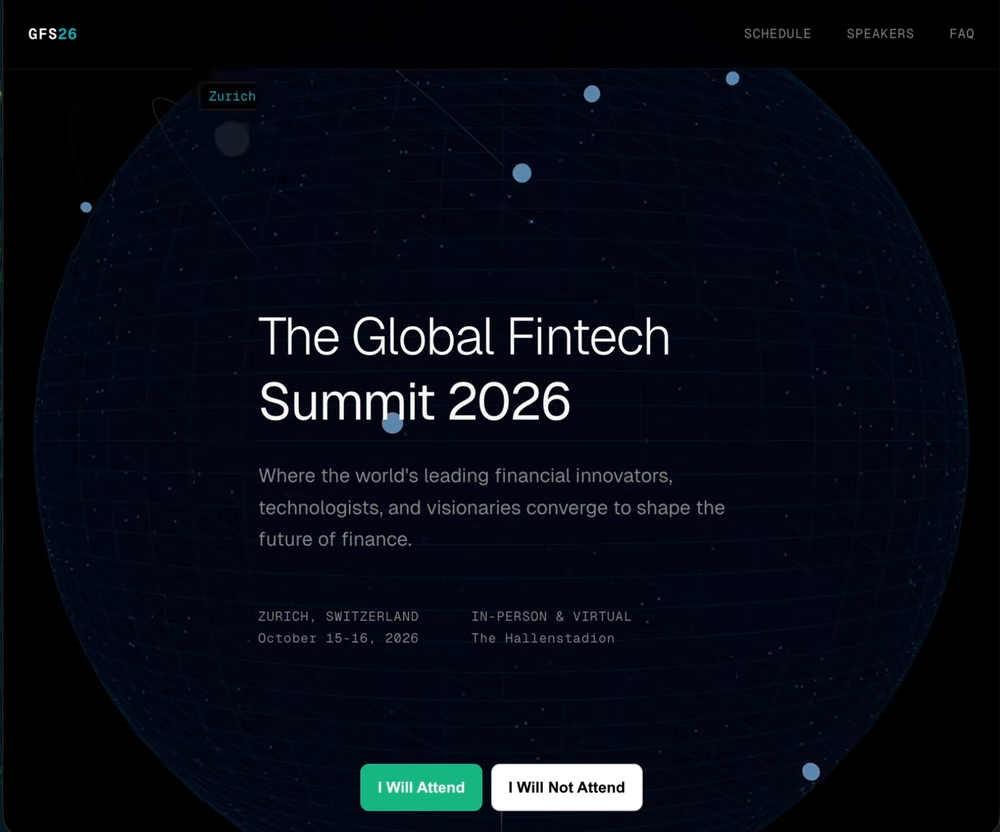
Beyond Events
## What Gatsby does when there’s no event date
Post-event cleanup, newsletters, and non-event use cases.
### [Post-Event Workflows](/playbooks/beyond-events/post-event/)
[Mark attendance, collect feedback, save templates for next time.](/playbooks/beyond-events/post-event/)
[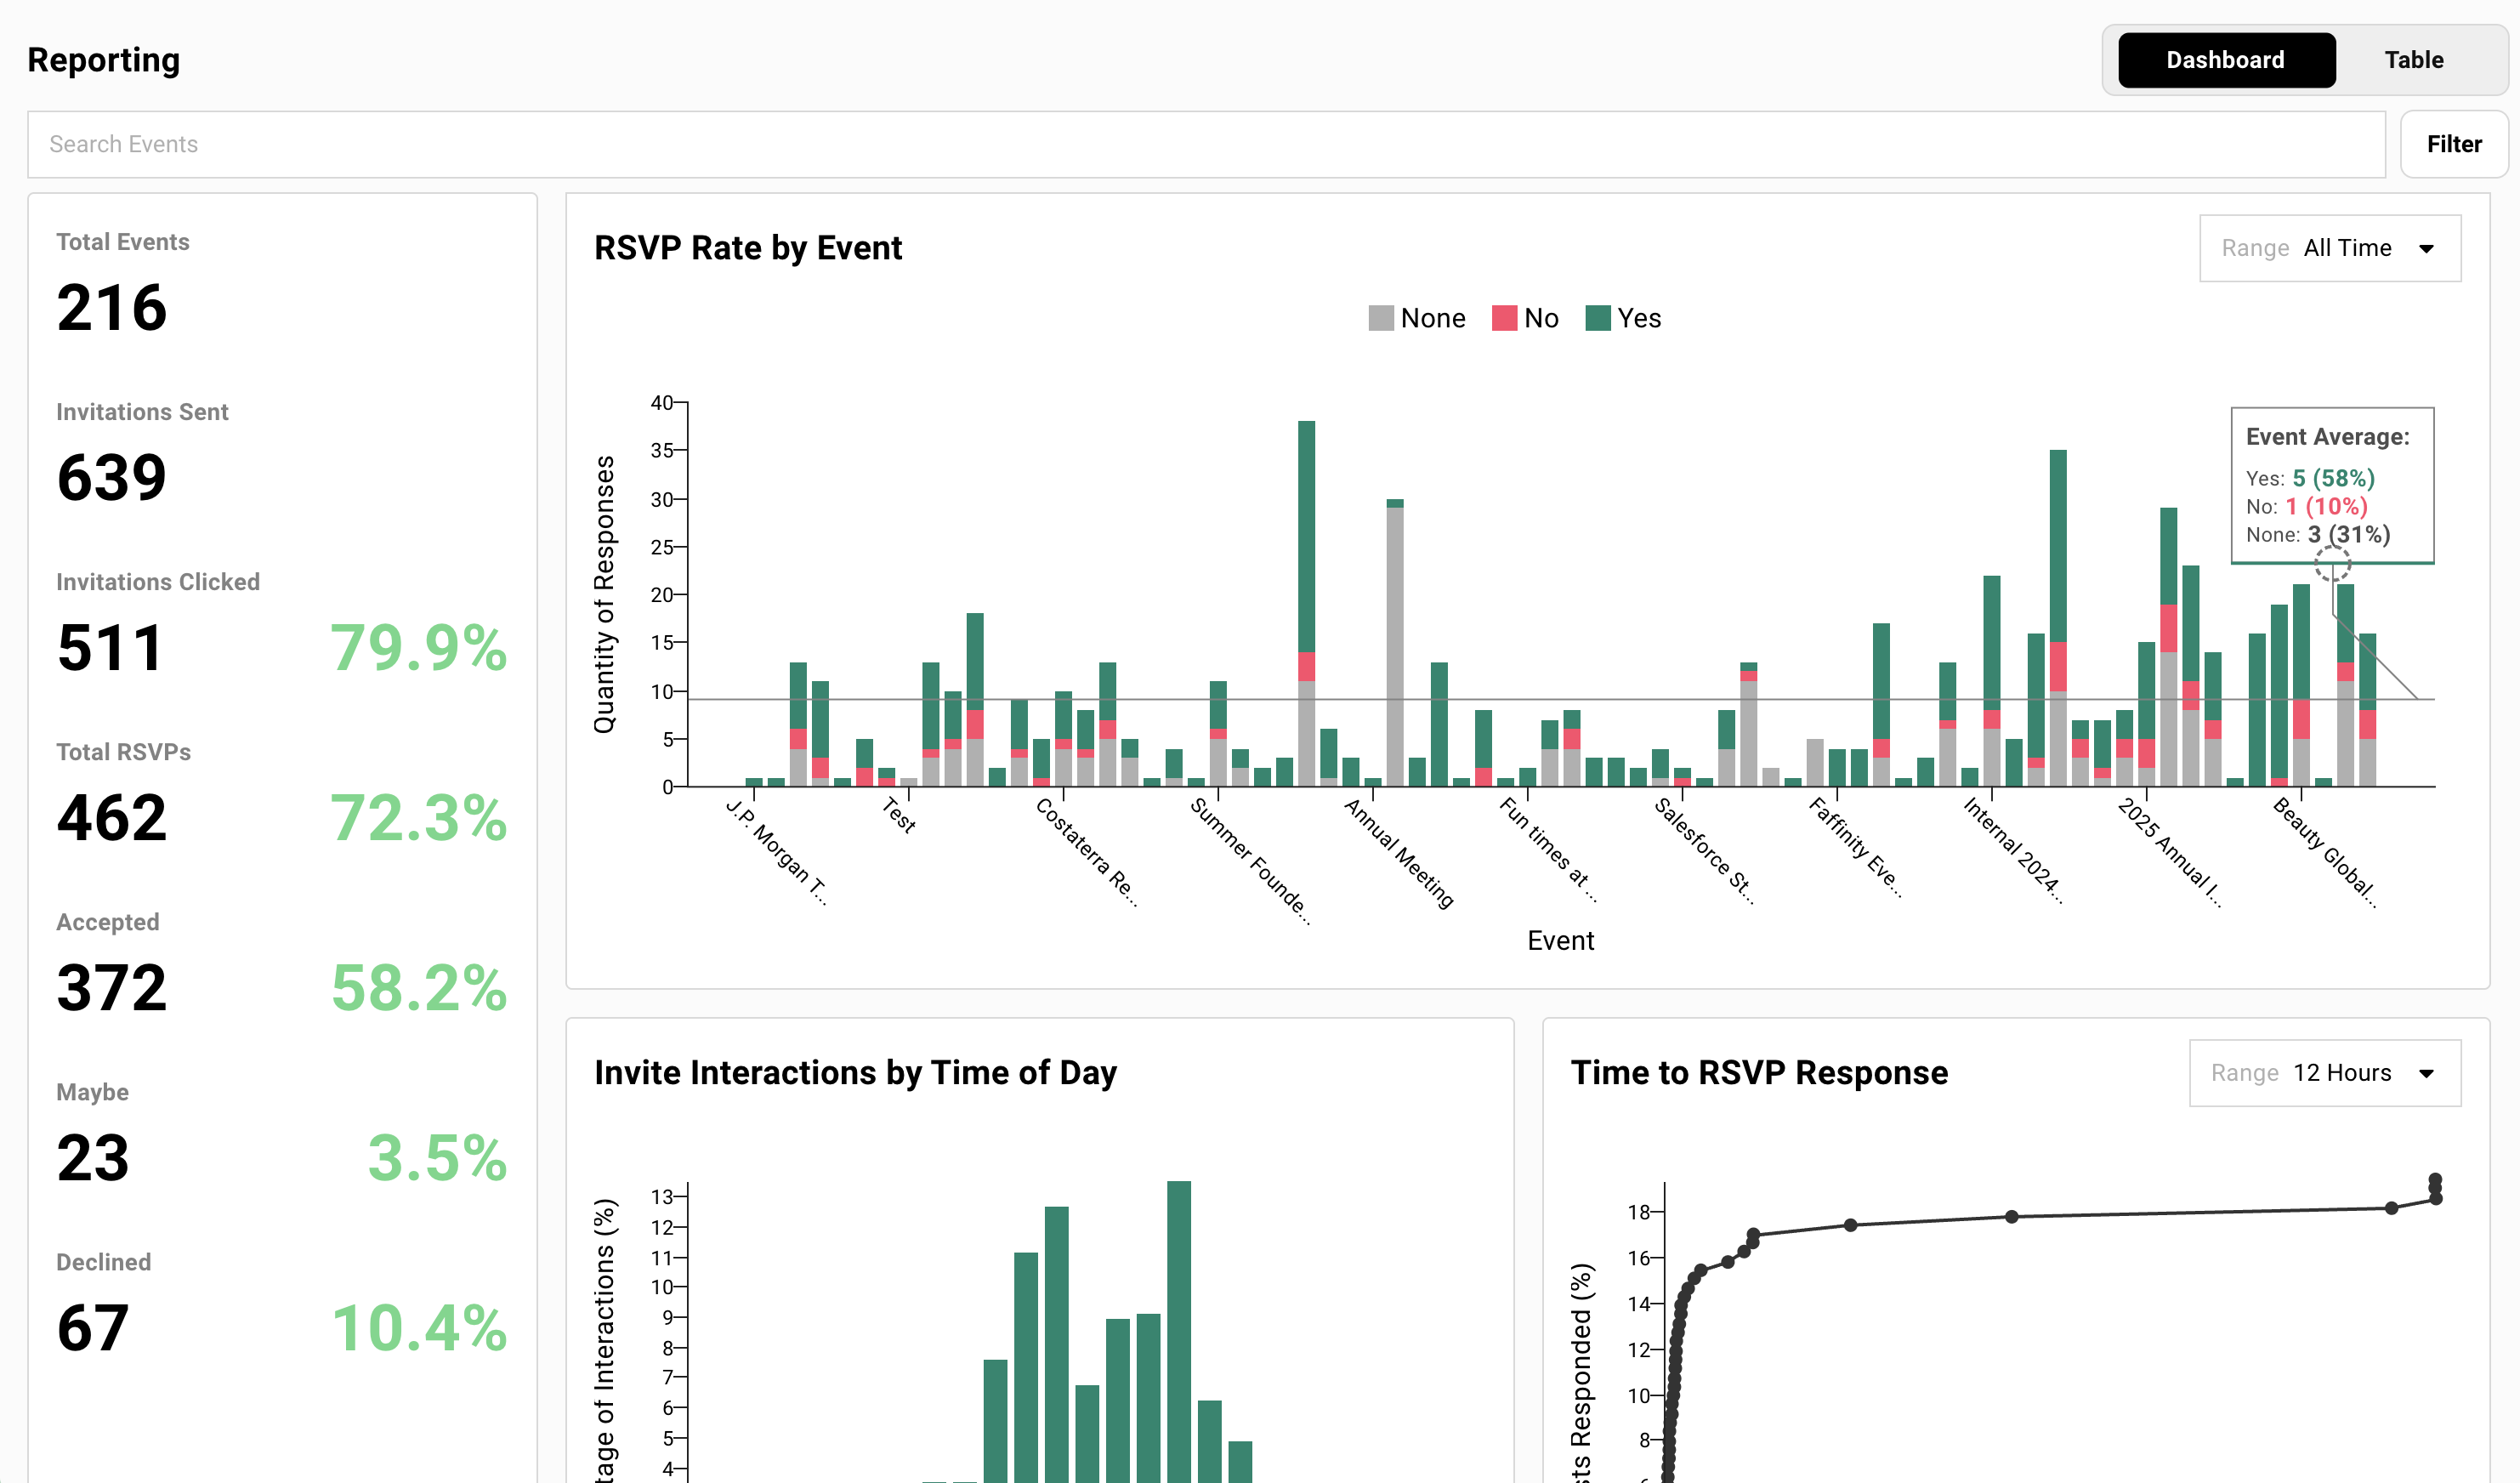](/playbooks/beyond-events/post-event/)
### [Newsletters](/playbooks/beyond-events/newsletters/)
[Subscription lists and opt-in management for ongoing communications.](/playbooks/beyond-events/newsletters/)
[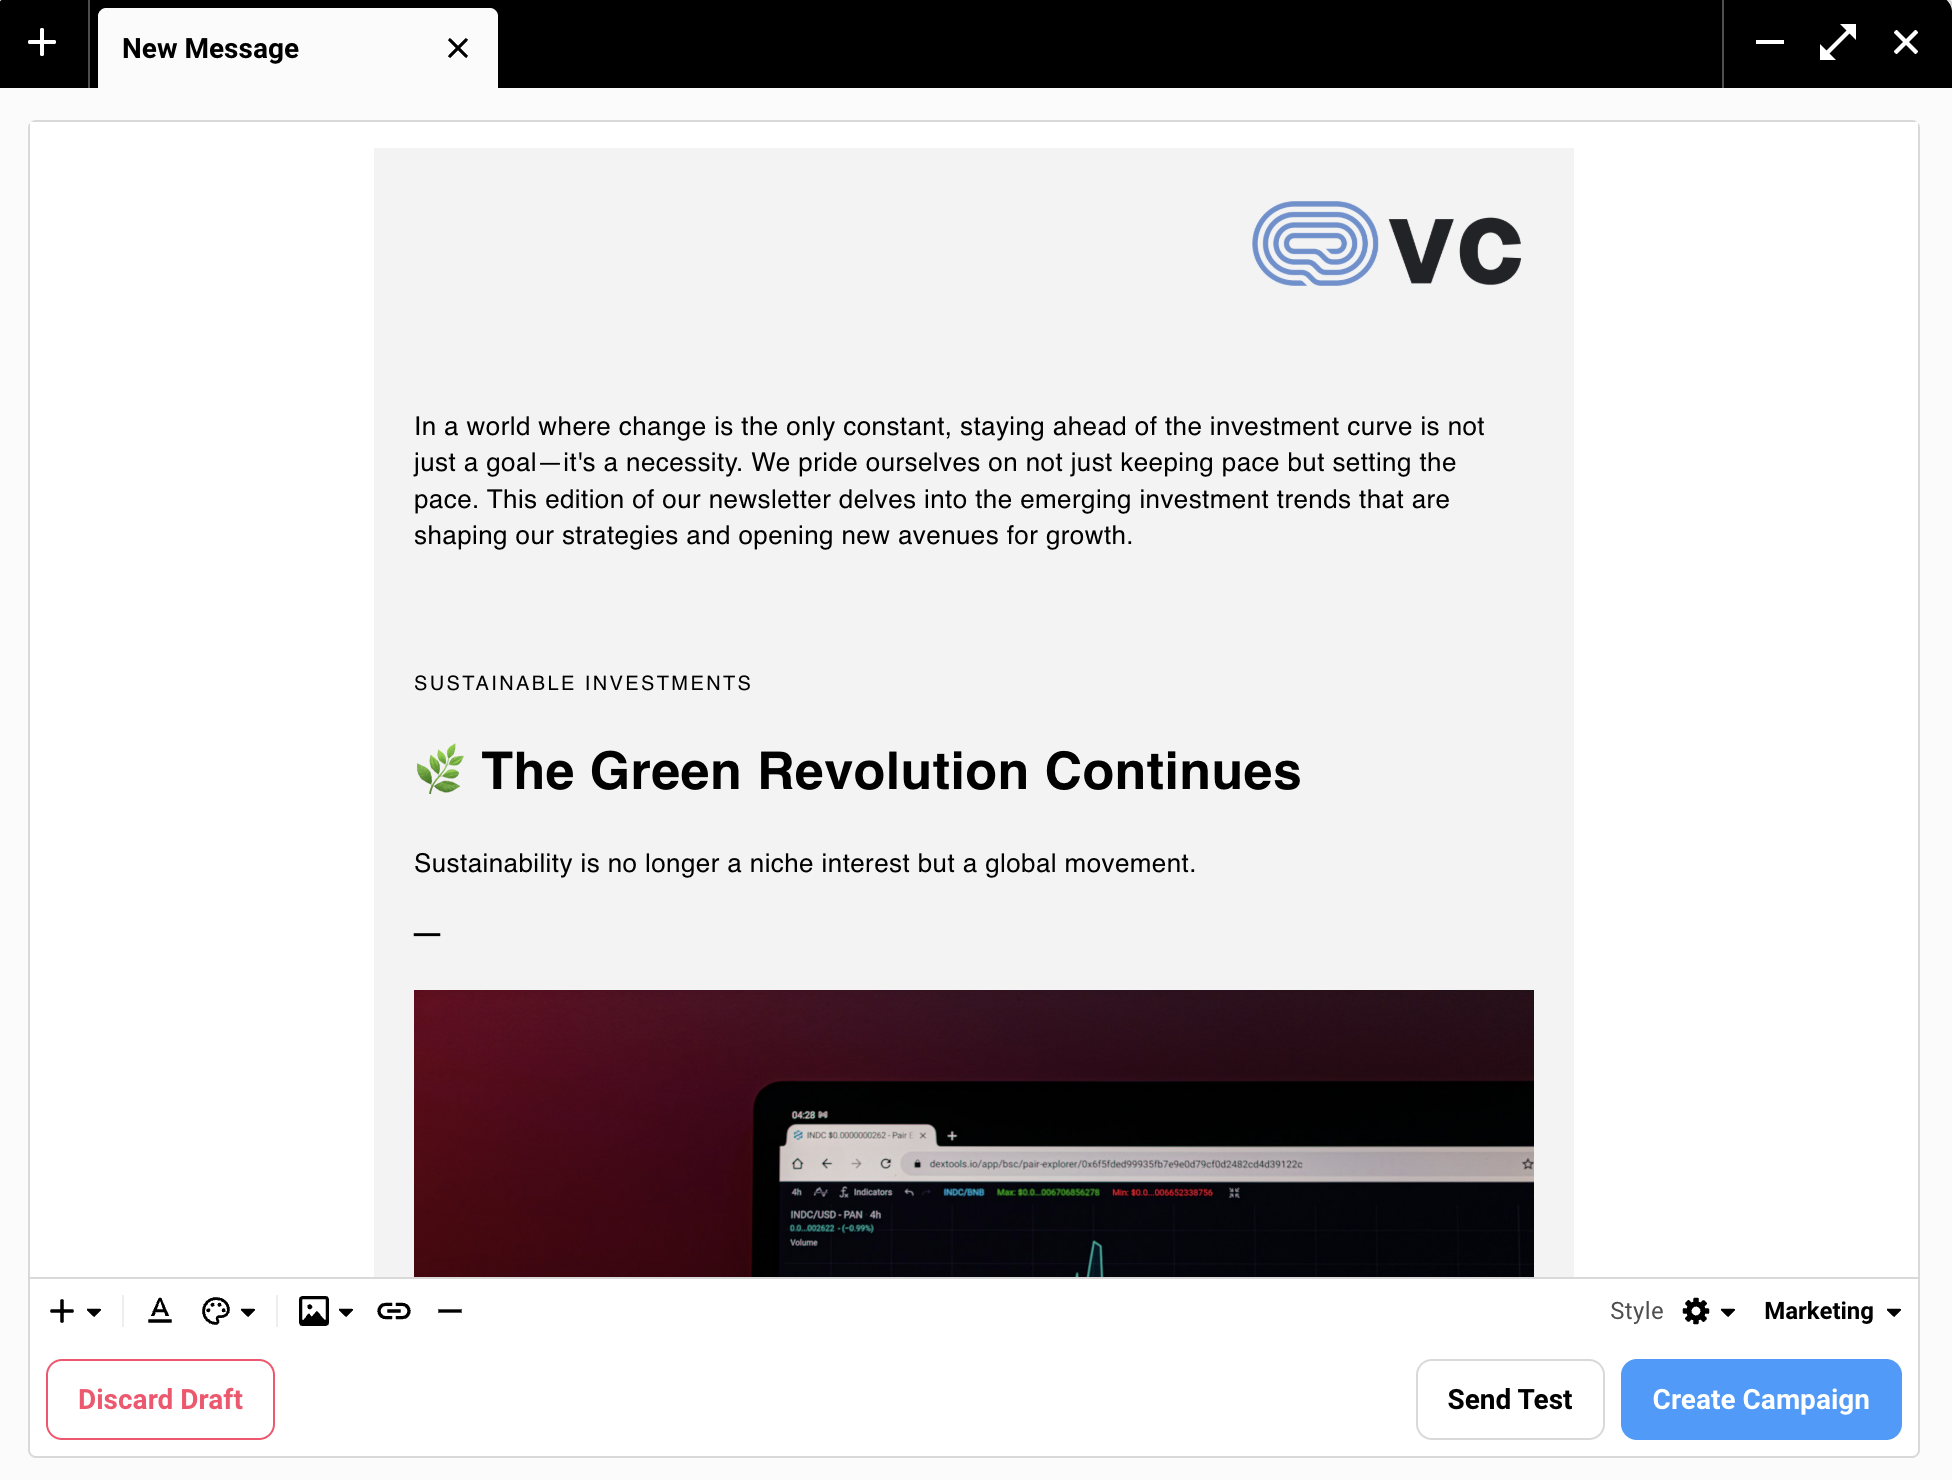](/playbooks/beyond-events/newsletters/)
### [Collecting Addresses](/playbooks/beyond-events/collecting-addresses/)
[Branded forms for mailing addresses with automatic tracking.](/playbooks/beyond-events/collecting-addresses/)
[](/playbooks/beyond-events/collecting-addresses/)
## Not sure where to start?
30 minutes. We’ll ask about your events and show you how similar teams set them up.
Book a demoGet support
# Collecting Addresses for Holiday Gifts
> Use Gatsby Lists to collect mailing addresses and survey responses with branded forms, automatic tracking, and contact enrichment.
## Why Use a Gatsby List
[Section titled “Why Use a Gatsby List”](#why-use-a-gatsby-list)
Holiday season means corporate gifting, which means chasing down 50+ contacts for their mailing addresses. Google Forms feels sketchy, TypeForm costs money for features you don’t need, and email threads are chaos.
**Use a Gatsby List instead.**
**Branded survey forms.**
Each contact gets a unique link. No asking for name and email.
***
**Pre-filled data.**
If you already have someone’s address, it shows up on their form. They confirm instead of re-typing.
***
**Automatic contact enrichment.**
Survey responses save directly to contact records. No spreadsheet matching.
***
**Built-in follow-up tracking.**
Pre-filtered tabs show who responded and who hasn’t.
***
**Permanent data.**
Addresses live in contact records. Next year? Same thing.
[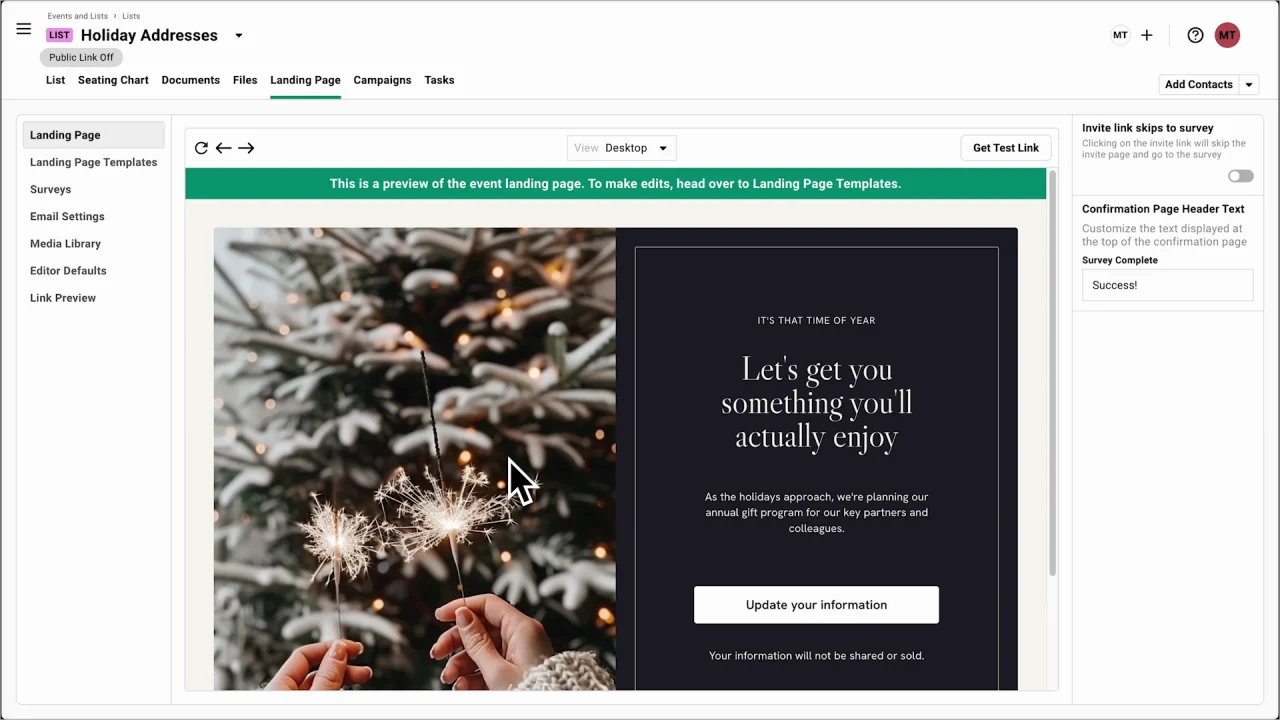](/videos/gatsby-74-holiday-addresses.mp4)
[View a live example](https://gatsby.events/showcase/rsvp/register?e=gatsby-playbook-address-collection-for-holiday-gifts)
Public demo; production uses unique, non‑transferable links without asking for name/email.
When this workflow works+
* **Holiday corporate gifting** (>50 contacts, need mailing addresses fast)
* **Event swag collection** (pre-event surveys for shirt sizes, dietary needs)
* **Post-event follow-ups** (feedback forms tied to actual attendee records)
* **Client data enrichment** (collecting information that updates contact profiles permanently)
* **Any scenario** where you need survey responses tied to specific people, not anonymous submissions
## Setting Up Your List
[Section titled “Setting Up Your List”](#setting-up-your-list)
Create a List from the Gift Management template. Add your contacts. Customize the survey and landing page. The template does most of the work.
### Create from Template
[Section titled “Create from Template”](#create-from-template)
The Gift Management template comes with survey fields, email campaigns, and filtered views pre-configured.
Creating the list+
1. From your dashboard, click **Create List** → pick the **Gift Management** template.
2. Use **Add Guests** to import from CSV or pull from other events/lists.
You need contact records before sending surveys.
> Related: [Uploading Contacts](/platform/contacts-guests/uploading-contacts/)
What the template includes+
* Pre-configured survey fields for mailing addresses and gift preferences
* Two email campaigns (initial announcement + follow-up for non-responders)
* Filtered guest list tabs (Need Addresses, Completed)
* Landing page with branded form
Delete what you don’t need. Add what you do.
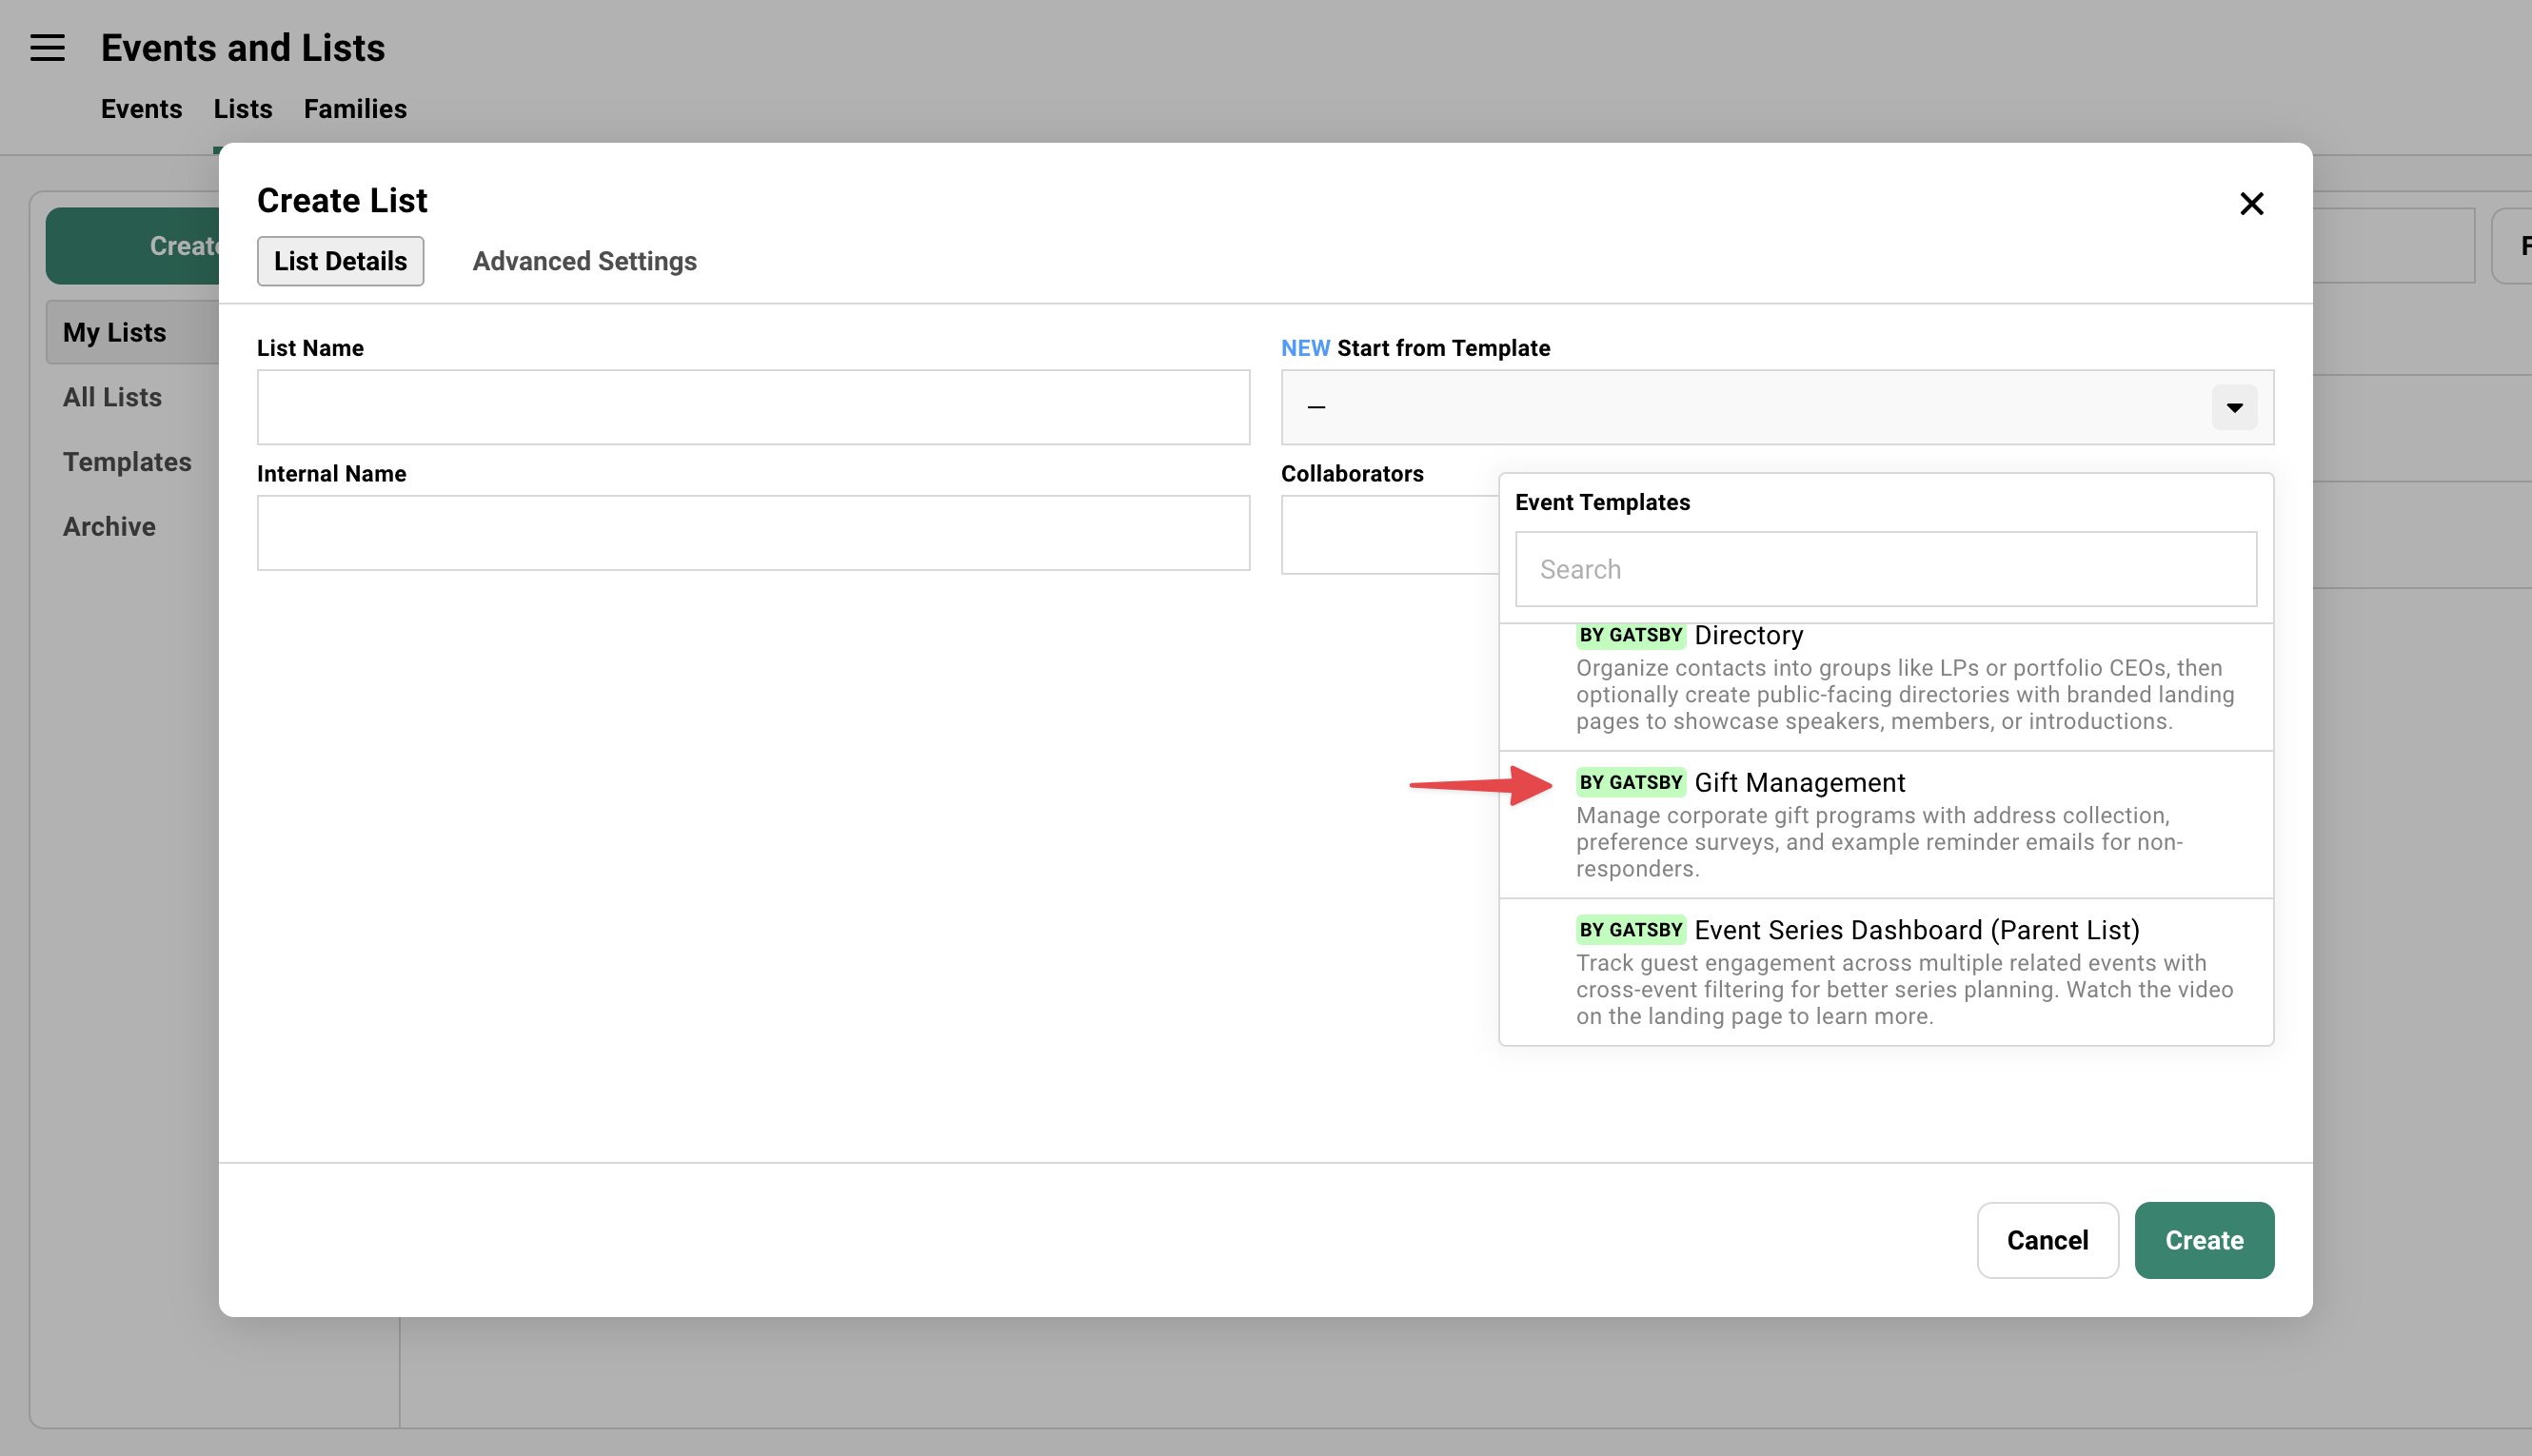
### Customize the Survey and Landing Page
[Section titled “Customize the Survey and Landing Page”](#customize-the-survey-and-landing-page)
The template includes example questions for gift preferences and dietary restrictions. Edit to match what you need.
Editing survey questions+
1. Go to the **Surveys** tab.
2. Edit the existing questions or add new ones.
3. Delete questions you don’t need.
Standard question types: text fields, multiple choice, checkboxes.
Branding the landing page+
The form works without the landing page content (use the “Skip to Survey” option), but adding context increases response rates. Why you’re asking. What you’re sending.
1. Check the **Landing Page Templates** section to edit the landing page.
2. Add context about the gift program.
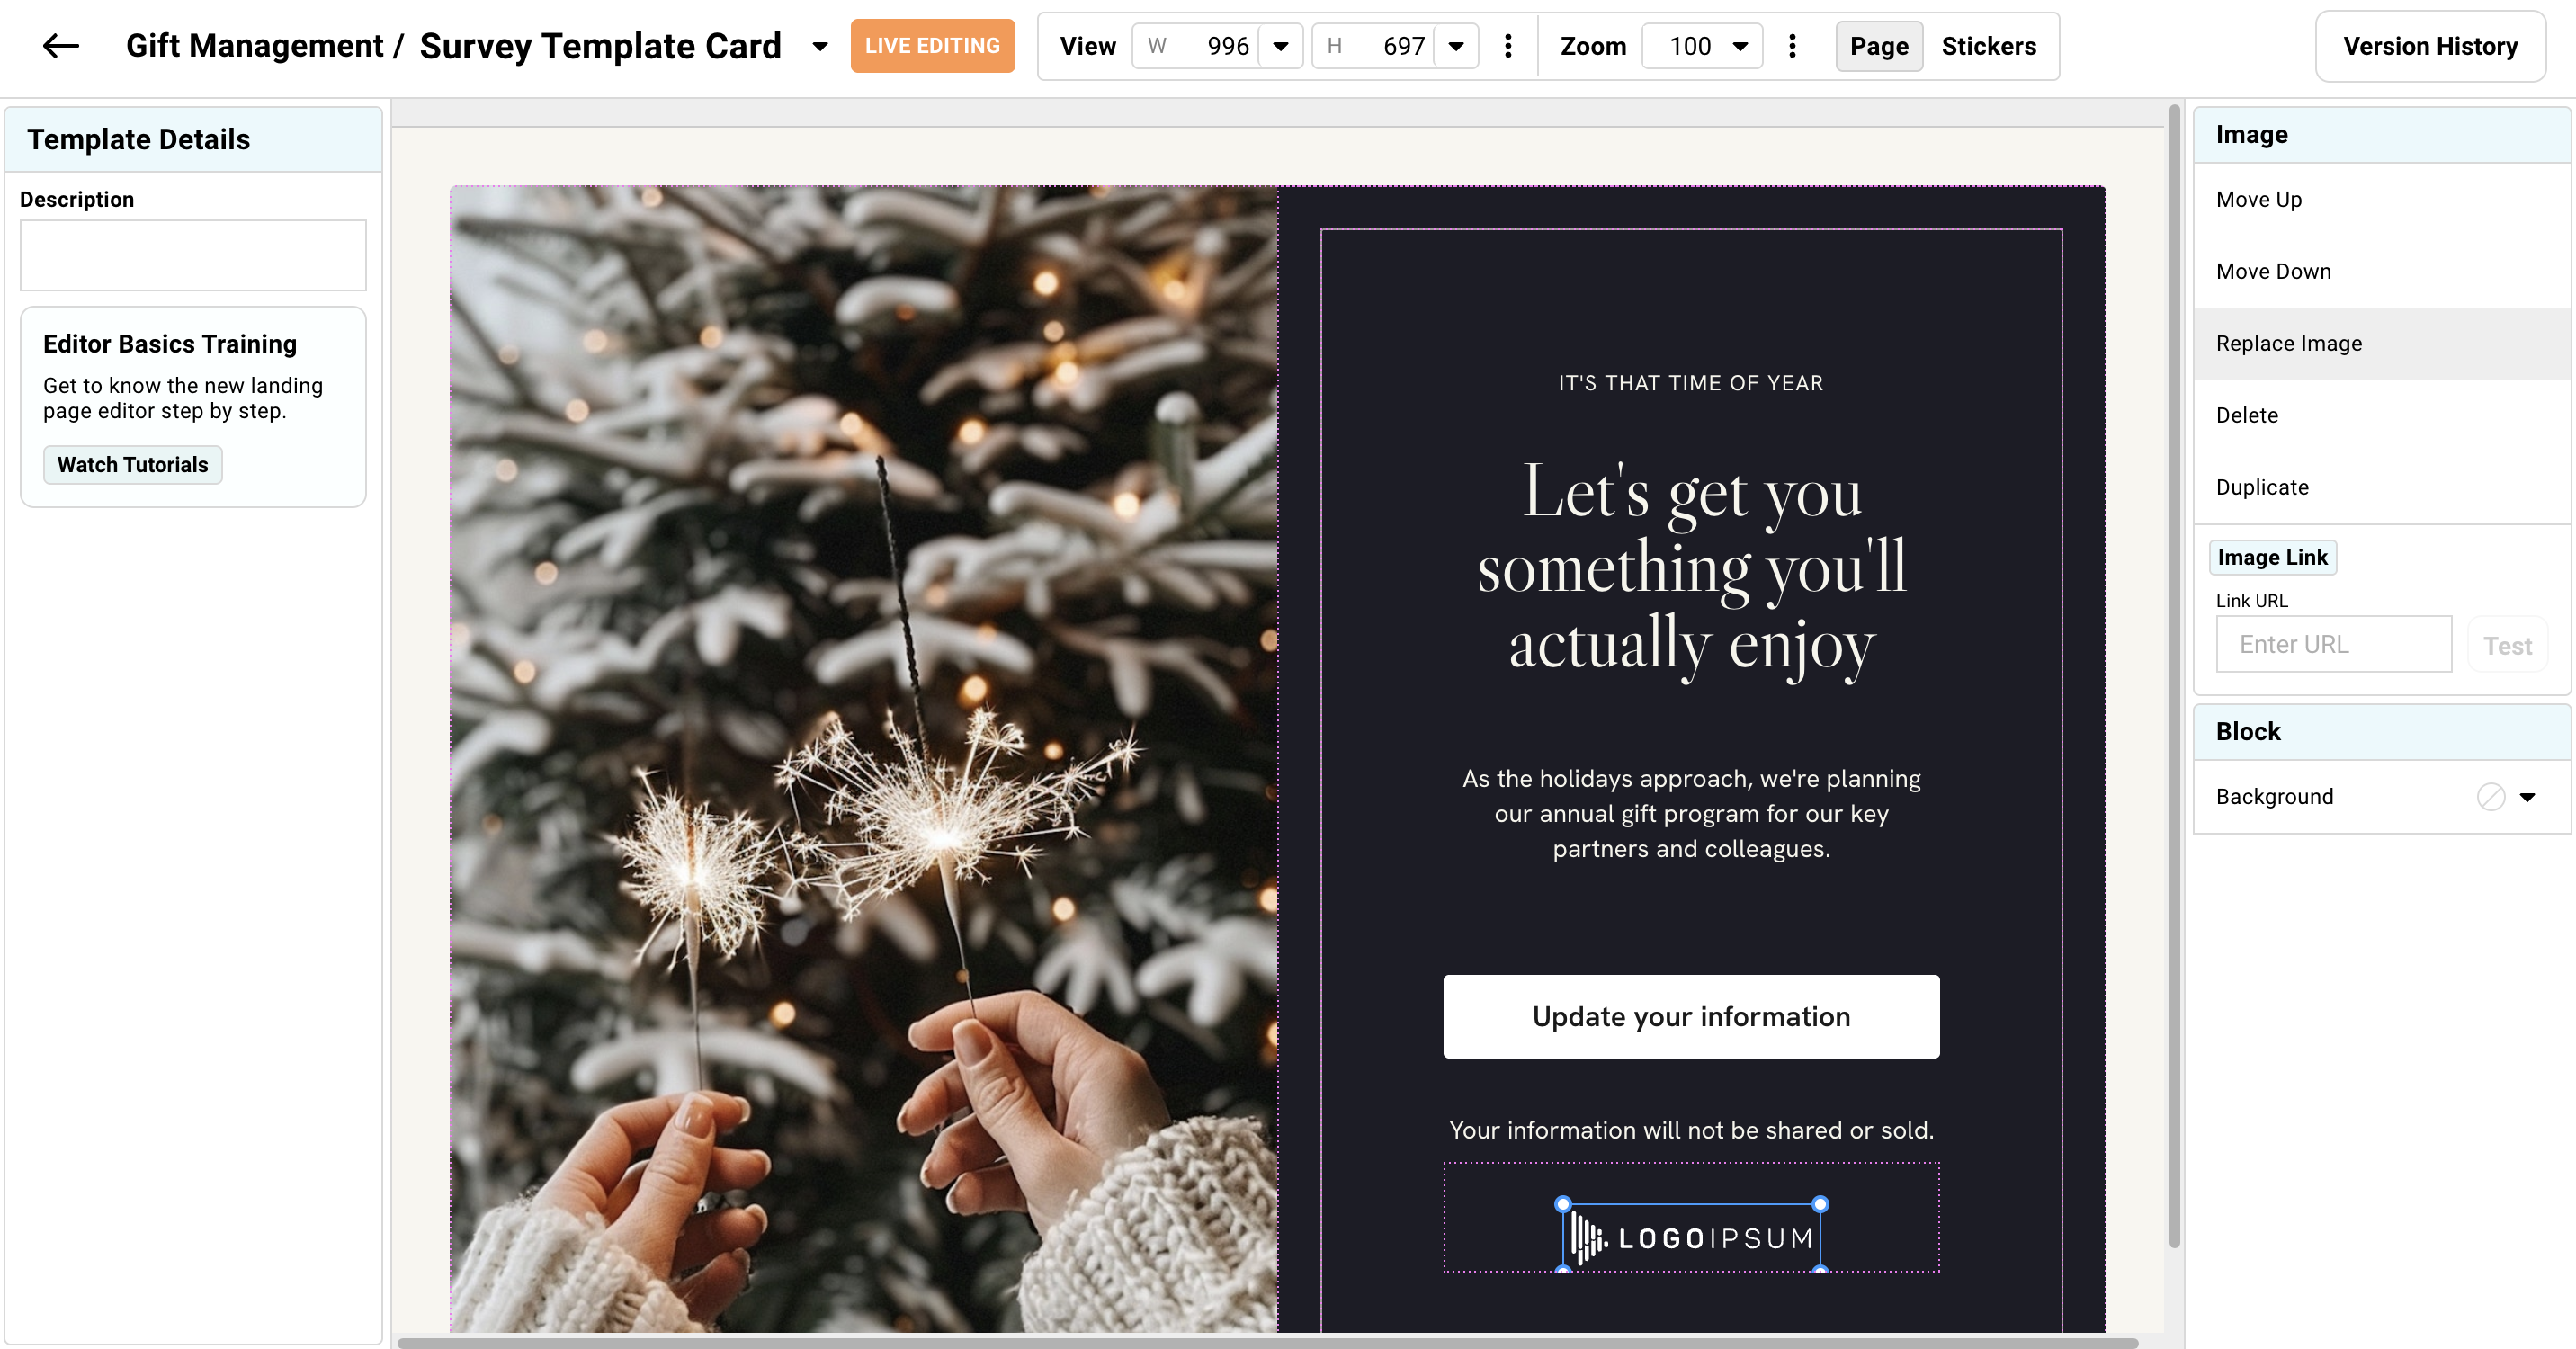

## Sending Emails
[Section titled “Sending Emails”](#sending-emails)
The template includes two pre-written email campaigns. Edit the copy, then send. Each person gets a unique survey link that already knows who they are.
### Initial Campaign
[Section titled “Initial Campaign”](#initial-campaign)
Edit the “Initial Gift Announcement” campaign to match your voice. The unique survey link means no one has to enter their name or email.
The workflow+
1. Go to **Campaigns** tab → open the “Initial Gift Announcement” campaign.
2. Edit the copy to match your voice.
3. Ensure `{surveyLink}` is used in your email.
4. Send.
Why unique links matter+
Each person’s survey link is unique and non-transferable. When they fill out the form, the data automatically saves to their contact record. No manual spreadsheet matching.
If you already have their address from a previous campaign, it pre-fills on the form. They confirm instead of re-typing.
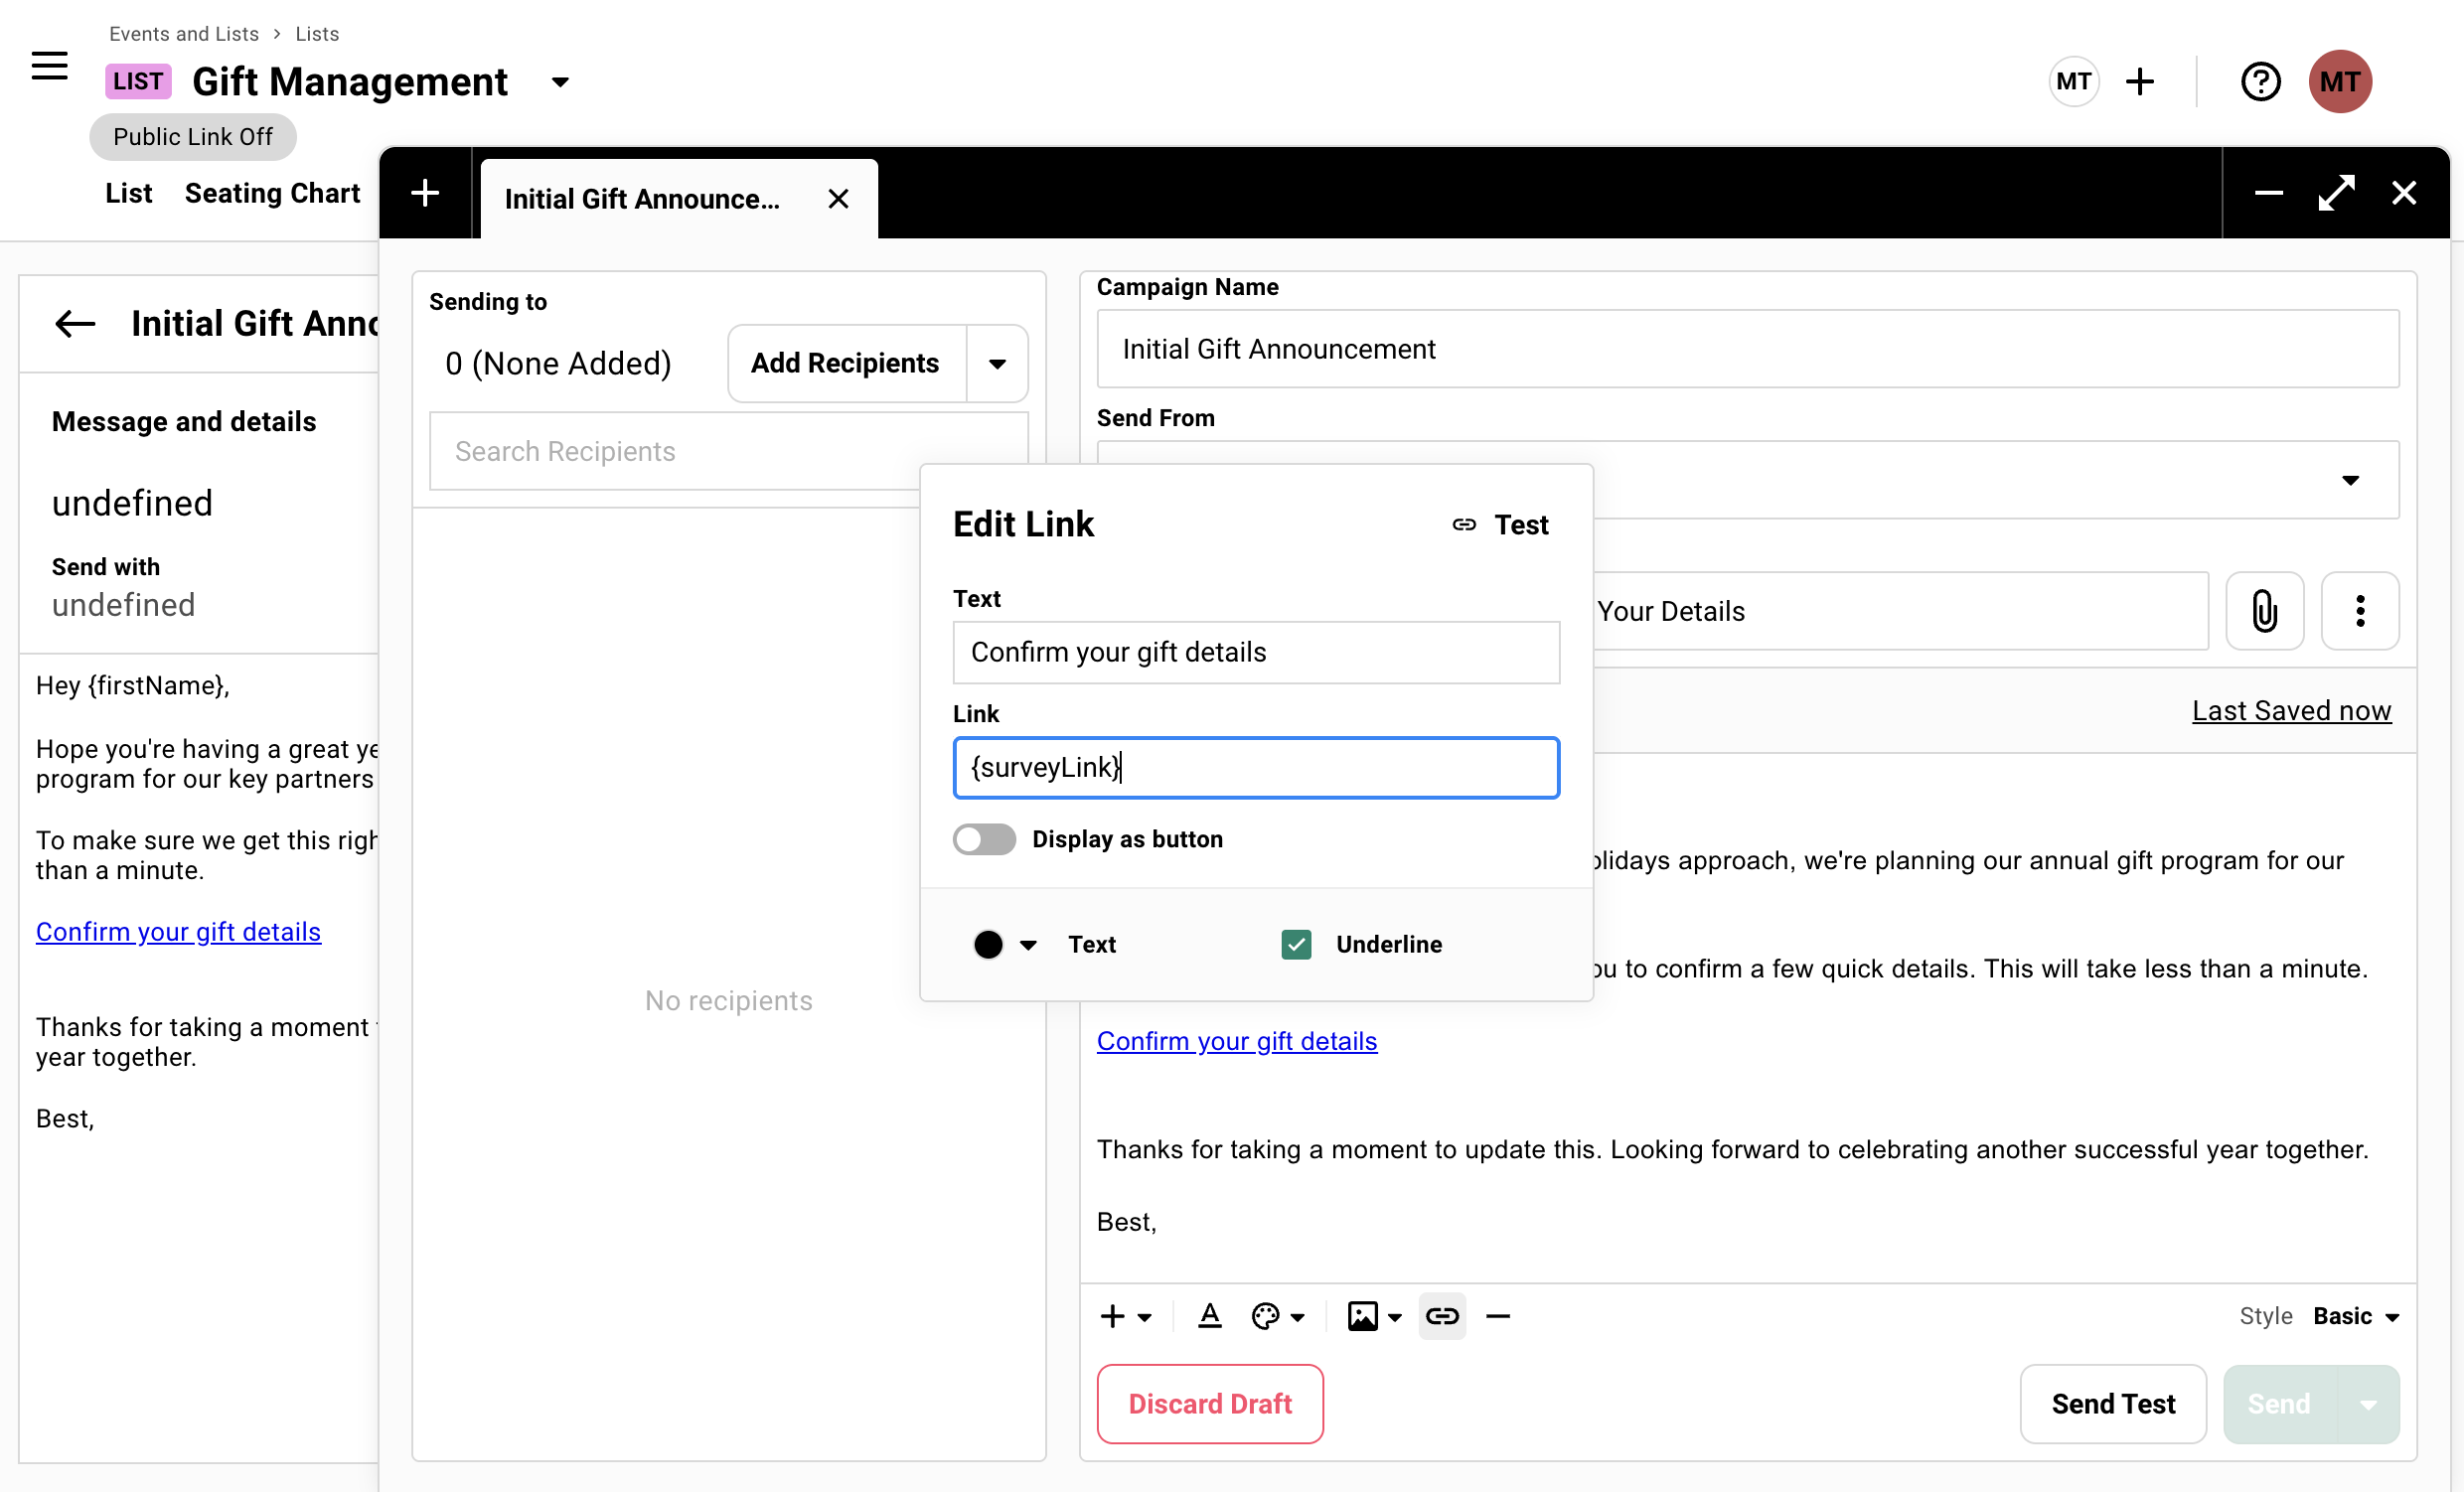
### Follow Up Non-Responders
[Section titled “Follow Up Non-Responders”](#follow-up-non-responders)
Wait 3-5 days. Check who hasn’t responded. Send the follow-up campaign with different messaging. They were probably just busy.
The workflow+
1. Check the **Guest List** tab’s “Need Addresses” filter to see who hasn’t responded.
2. Send the follow-up campaign only to that filtered group.
The template includes a pre-written follow-up with different messaging.
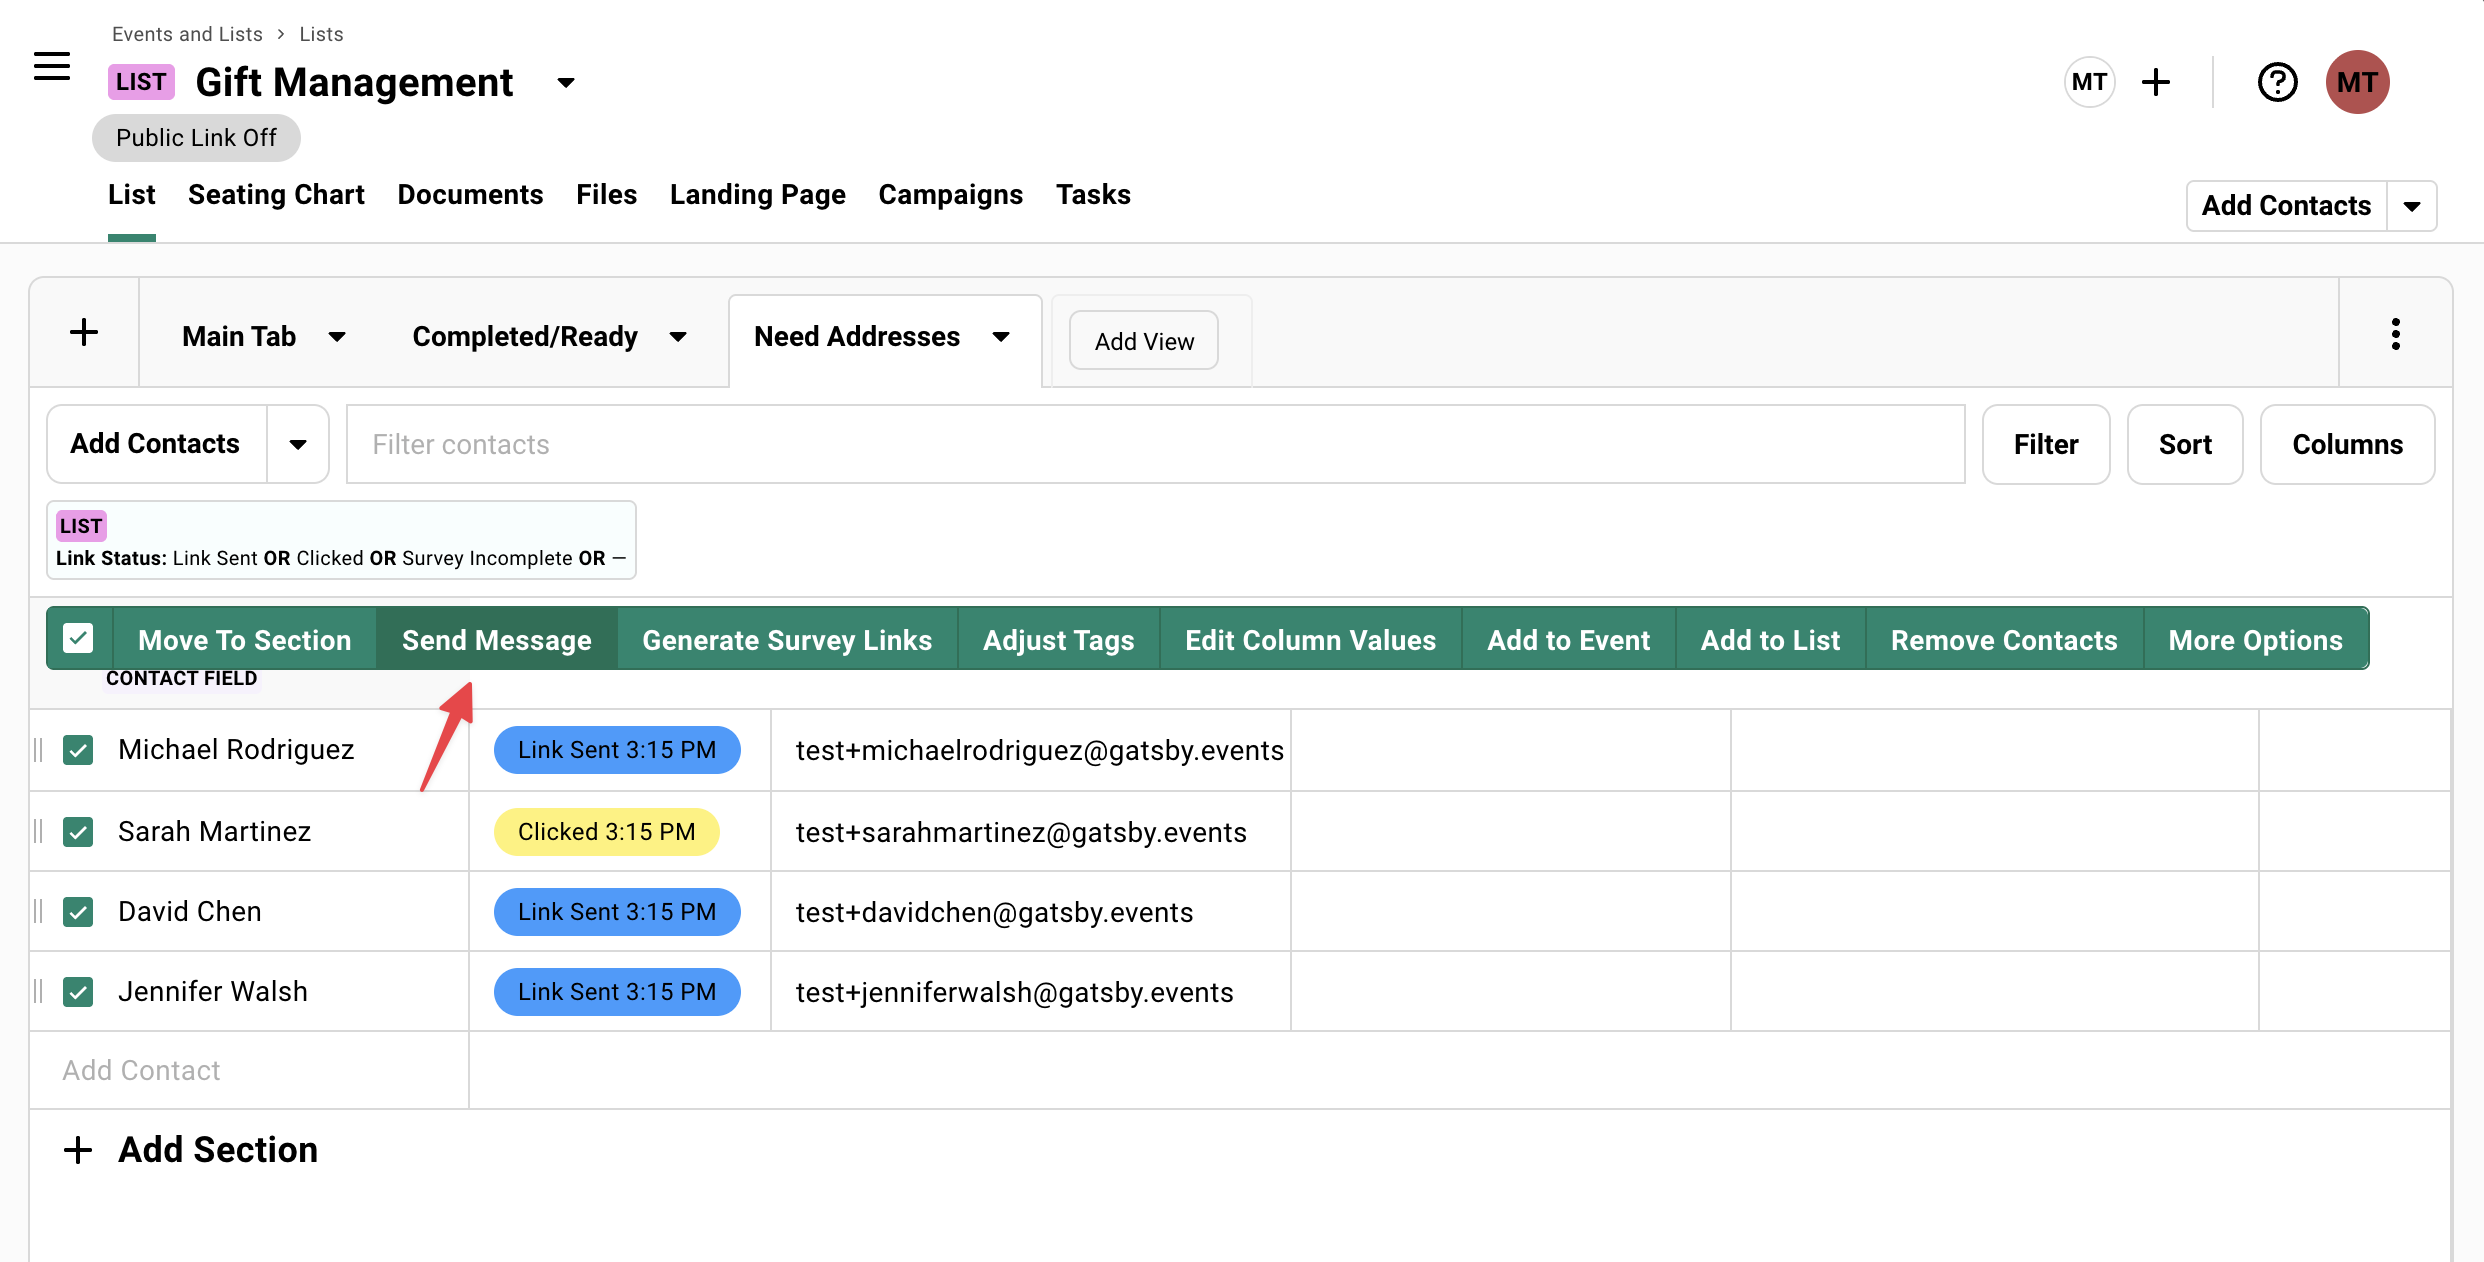
## Track and Export Addresses
[Section titled “Track and Export Addresses”](#track-and-export-addresses)
The pre-configured filters do the work. When your fulfillment team needs the data, it’s ready.
Exporting addresses+
1. Click the **Completed** filter tab.
2. Hit **Export** → choose CSV format.
3. You get names, addresses, and any preference responses.
Where the data lives+
Addresses live permanently in each contact’s profile. Next time you need to mail someone something, it’s already there.
If a contact’s address is already in Gatsby, the form pre-fills it. They confirm it’s still current and click submit. Next year when you need addresses again? Same thing. The data persists across campaigns and years.
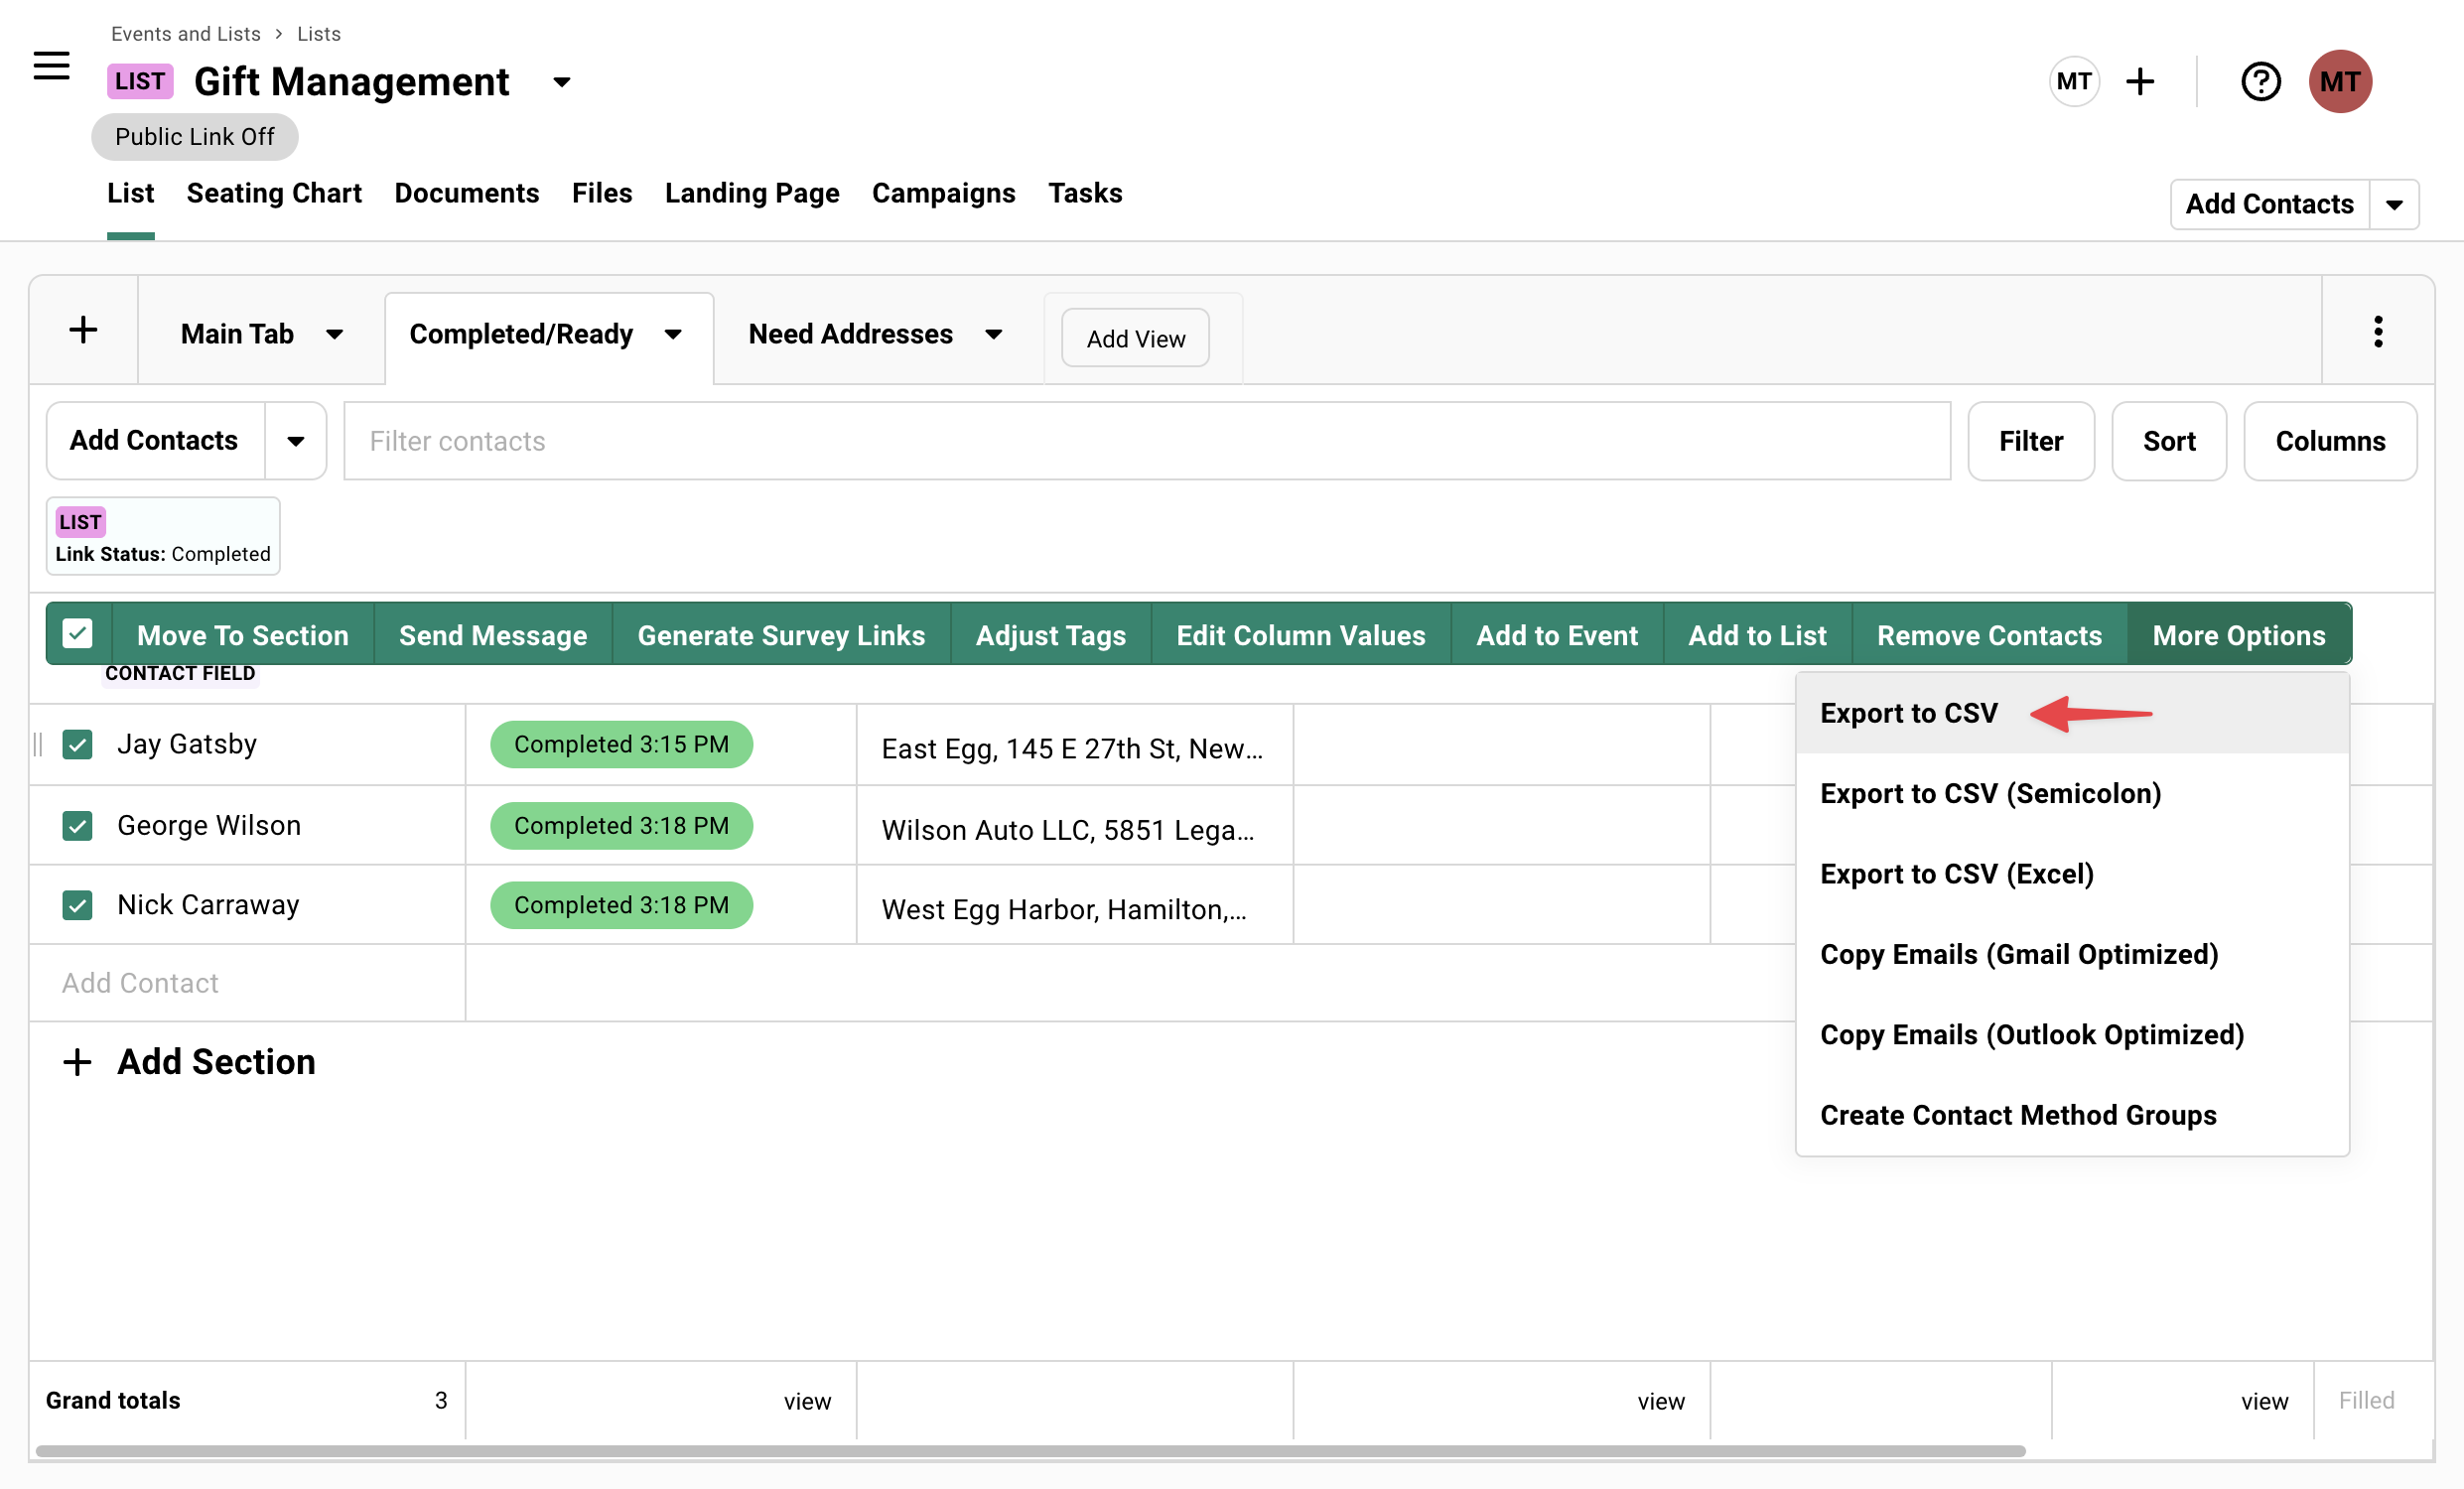
## Why This Beats Other Survey Tools
[Section titled “Why This Beats Other Survey Tools”](#why-this-beats-other-survey-tools)
**Google Forms:** Anonymous responses you have to manually match to contacts. No way to send personalized follow-ups to non-responders. Looks impersonal.
**TypeForm:** Costs $35/month+ for features like hidden fields (which you need to track who’s who). Responses don’t sync to your contact system.
**Email threads:** Chaos. Half the people reply, half don’t. You’re manually updating a spreadsheet and sending follow-ups one by one.
***
**Gatsby Lists:** Responses enrich your contact records permanently. Pre-filtered tabs show exactly who you need to chase. Branded forms build trust. Export when ready. Done.
## Common Questions
[Section titled “Common Questions”](#common-questions)
Can I use this for surveys that aren't gift-related?+
Yes. The template is called “Gift Management” but it’s just a List with survey fields pre-configured. Use it for any scenario where you need to collect information from specific contacts: feedback forms, registration data, preference collection.
Do contacts need a Gatsby account to fill out the survey?+
No. They click the link in your email, fill out the form, done. No login required.
What if someone's address changes later?+
They can update their contact info if they have access to their unique survey link. Or you can manually edit their contact record in Gatsby. The form submission isn’t locked after completion. It’s live contact data.
Can I add custom questions beyond the template?+
Yes. Go to the Surveys section under Registration and add whatever fields you want. Text fields, multiple choice, checkboxes.
Does this work for Lists with >100 contacts?+
Yes. No contact limit on Lists. Send campaigns, track completion, export addresses the same way whether you have 20 people or 200.
# Newsletters
> Build newsletter subscription lists and manage opt-ins for ongoing communications. Perfect for membership organizations and investor relations.
## Why Lists, Not Events
[Section titled “Why Lists, Not Events”](#why-lists-not-events)
A law firm sent quarterly thought leadership using Events instead of Lists. 200 general counsel got an email that said “RSVP to our newsletter.” Half replied asking if it was an actual event. No date was listed, but the format implied one.
Events have dates, calendar integrations, and RSVP tracking. Newsletters don’t. When you send a newsletter through an Event, guests expect a calendar invite and get confused when there’s no date or time.
Newsletters belong on Lists.
**Events** = board dinners, AGMs, webinars. Date-specific gatherings. **Lists** = newsletter subscribers, alumni directories, member groups. Ongoing relationships without dates.
**Create your subscriber list.**
Use a List to manage your newsletter audience. Import existing contacts or grow the list through event opt-ins.
***
**Send campaigns from the list.**
Same campaign tools as event invitations. Different context, no calendar expectations.
***
**Let guests subscribe through events.**
Add a survey question to your RSVP page. Guests opt in while registering for something else.
## Creating Your Newsletter List
[Section titled “Creating Your Newsletter List”](#creating-your-newsletter-list)
A List is your subscriber base. No dates, no calendar invites, no RSVP expectations. A permanent group you message whenever you have something worth sending.
### Setting Up the List
[Section titled “Setting Up the List”](#setting-up-the-list)
The setup workflow+
1. Go to the **Lists** tab and click **Create List**.
2. Name it something specific. “Monthly Updates” or “Investor Newsletter.” Your team should know what this list is at a glance.
3. Import contacts or add them manually to build your subscriber base.
4. Customize your view with relevant columns, tabs, and sections.
Structuring for multiple audiences+
Create separate lists for different audiences or topics. An “LP Quarterly” list and a “Portfolio Company Digest” list keep your messaging targeted and your unsubscribe rates low.
You can also segment within a single list using tabs and custom fields. Different content for different audiences = separate lists. Same content, different tracking needs = one list with segments.
[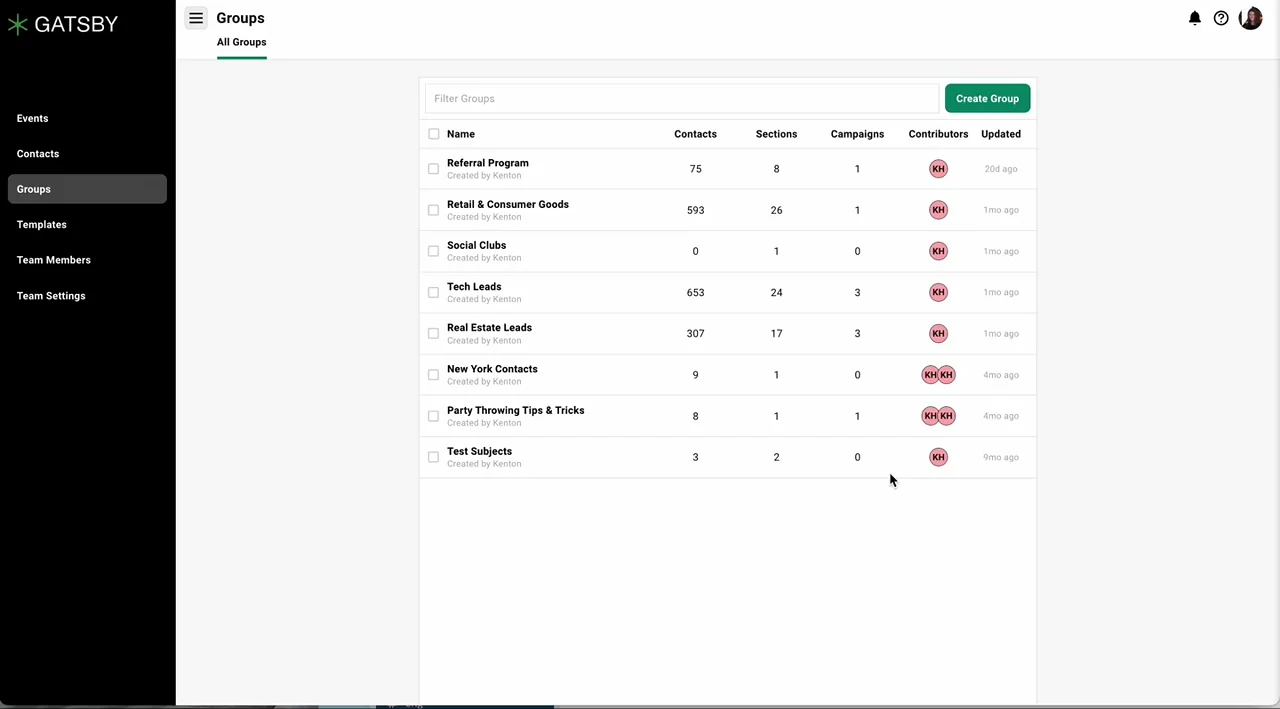](/legacy/newsletter-02.mp4)
## Sending Your Newsletter
[Section titled “Sending Your Newsletter”](#sending-your-newsletter)
Same campaign tools you use for event invitations. Select recipients from your list, compose your message, send or schedule.
### The Campaign Workflow
[Section titled “The Campaign Workflow”](#the-campaign-workflow)
Sending a newsletter+
1. Navigate to the **Campaigns** tab and create a new campaign or load a template.
2. Add recipients from your newsletter list.
3. Send immediately or schedule for the time that works best.
Including an unsubscribe link+
Include the unsubscribe link through the mail merge menu (the **+** button at the bottom left while drafting). Anyone who clicks it is unsubscribed from all campaign emails sent by your organization, not just this list.
Sending to a large list+
Send newsletters to more than about 500 people from a SendGrid address, not a connected Gmail or Outlook account. Gmail and Outlook senders have daily caps from Google and Microsoft, and Gatsby paces them at about one email every 8 to 10 seconds, so a send of a few thousand takes hours. With Google senders, a smaller send started in the meantime waits behind it. SendGrid isn’t subject to those caps. See [Sender Settings](/platform/email-campaigns/sender-settings/).
[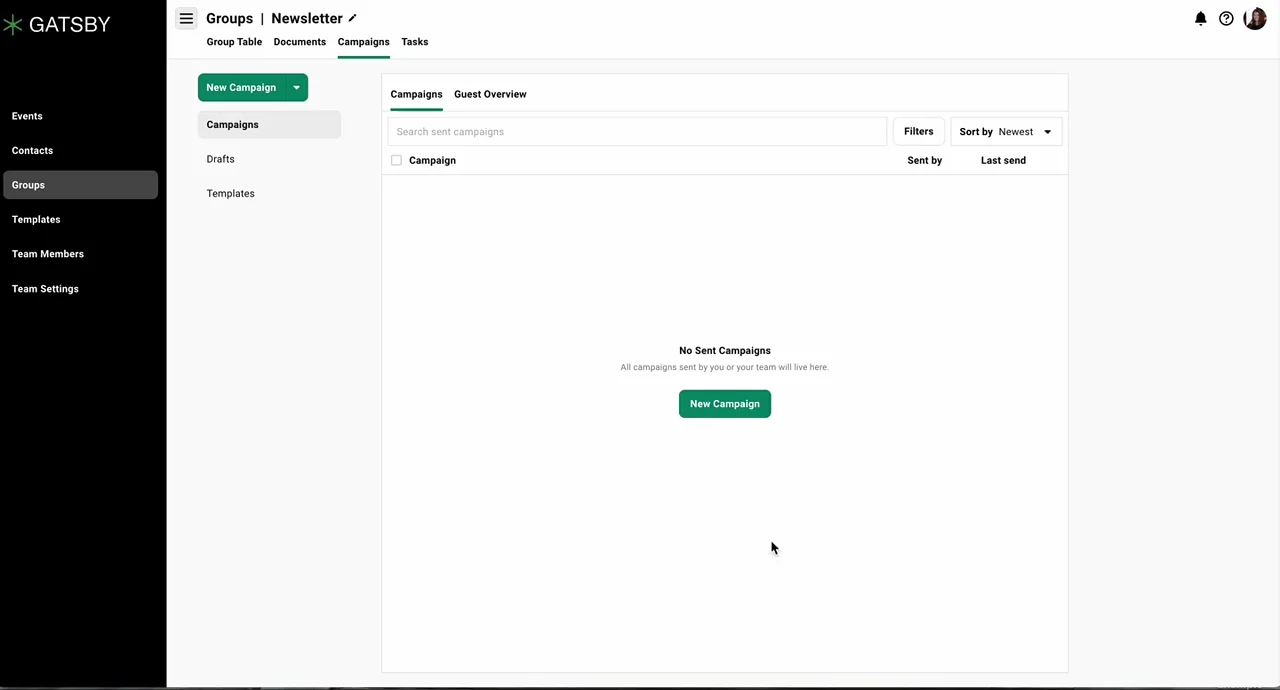](/legacy/newsletter-03.mp4)
## Growing Your List Through Events
[Section titled “Growing Your List Through Events”](#growing-your-list-through-events)
Every event is a chance to grow your newsletter audience. A subscription question on your RSVP page lets guests opt in while they’re already engaged.
### Adding a Subscription Question
[Section titled “Adding a Subscription Question”](#adding-a-subscription-question)
The setup workflow+
1. Open any event’s RSVP page.
2. Find the survey questions section. For basic RSVP cards, this appears at the bottom. For premium RSVP pages, look for **Surveys** in the left sidebar.
3. Click **Add Survey Question**, go to the **New** tab, and select **List Subscription**.
4. Write your question. “Would you like to receive our quarterly updates?” tells the guest what they’re getting. Better than a generic “Subscribe to our newsletter?”
5. Select the newsletter list you want subscribers added to.
Using multiple subscription questions+
Add multiple subscription questions to the same RSVP form. A firm running both an investor newsletter and a portfolio company digest gives guests the choice of one, both, or neither.
Each question connects to a different list. Guests who opt in get added automatically.
[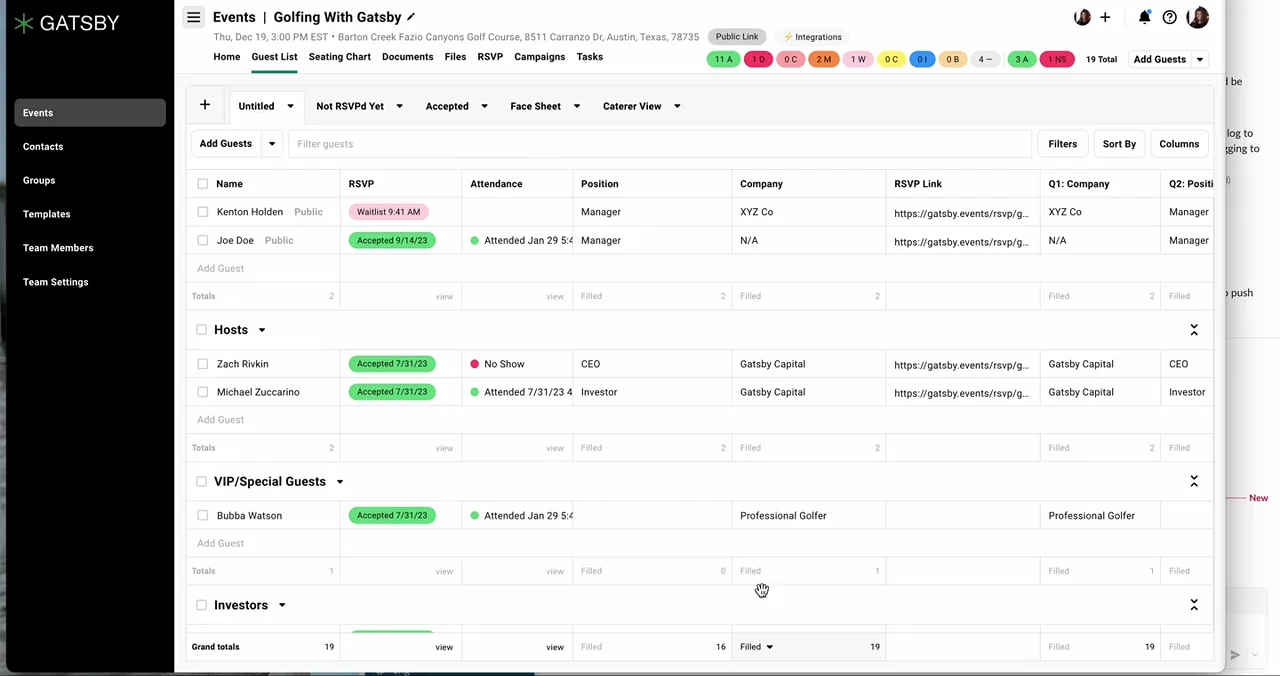](/legacy/newsletter-01.mp4)
# Post-Event Workflows
> Mark attendance, merge duplicates, send follow-ups, and save what worked. The work after the event is what makes the next one better.
## Why Post-Event Matters
[Section titled “Why Post-Event Matters”](#why-post-event-matters)
Your team knows who showed up, who didn’t, and what was said. That knowledge fades fast. The work you do this week is what separates a good event from a pattern of good events.
**Finalize attendance data.**
Verify check-ins and mark no-shows while the details are fresh.
***
**Clean up contacts.**
Merge duplicates from public registration. One person, one profile.
***
**Send follow-ups.**
Thank-you emails from relationship owners. Surveys on a separate list.
***
**Export and report.**
Get data into your CRM. See how this event compared to your others.
***
**Save what worked.**
Email, landing page, and event templates so next time starts mostly done.
***
**Capture guest context.**
Interaction notes from your team before conversations fade.
## Finalizing Your Attendance Data
[Section titled “Finalizing Your Attendance Data”](#finalizing-your-attendance-data)
You tracked check-ins at the door. Now verify the data before you export or mark no-shows.
Sometimes people show up who declined. Sometimes check-ins get missed in the rush. A quick review catches the gaps.
### Reviewing Attendance Records
[Section titled “Reviewing Attendance Records”](#reviewing-attendance-records)
How to view attendance data+
1. Open your guest list.
2. Click the **Columns** drawer.
3. Enable the **Attendance** column.
4. The column shows status (Attended, No-Show, blank) with timestamps.
What to check+
**Accepted but no check-in**
Filter by RSVP = Accepted and Attendance = blank. Could be a no-show. Could be a missed check-in. Verify before marking.
***
**Attendance timestamps**
The Attendance column shows when each guest checked in. A timestamp hours before doors opened suggests a test check-in. Review for anything that looks off.
***
**What about declines who showed up?**
Sometimes guests who declined your invite still show up. Whether you update these declined RSVPs to Accepted is up to you. Depends on how your team uses the data. Gatsby doesn’t enforce a rule here.
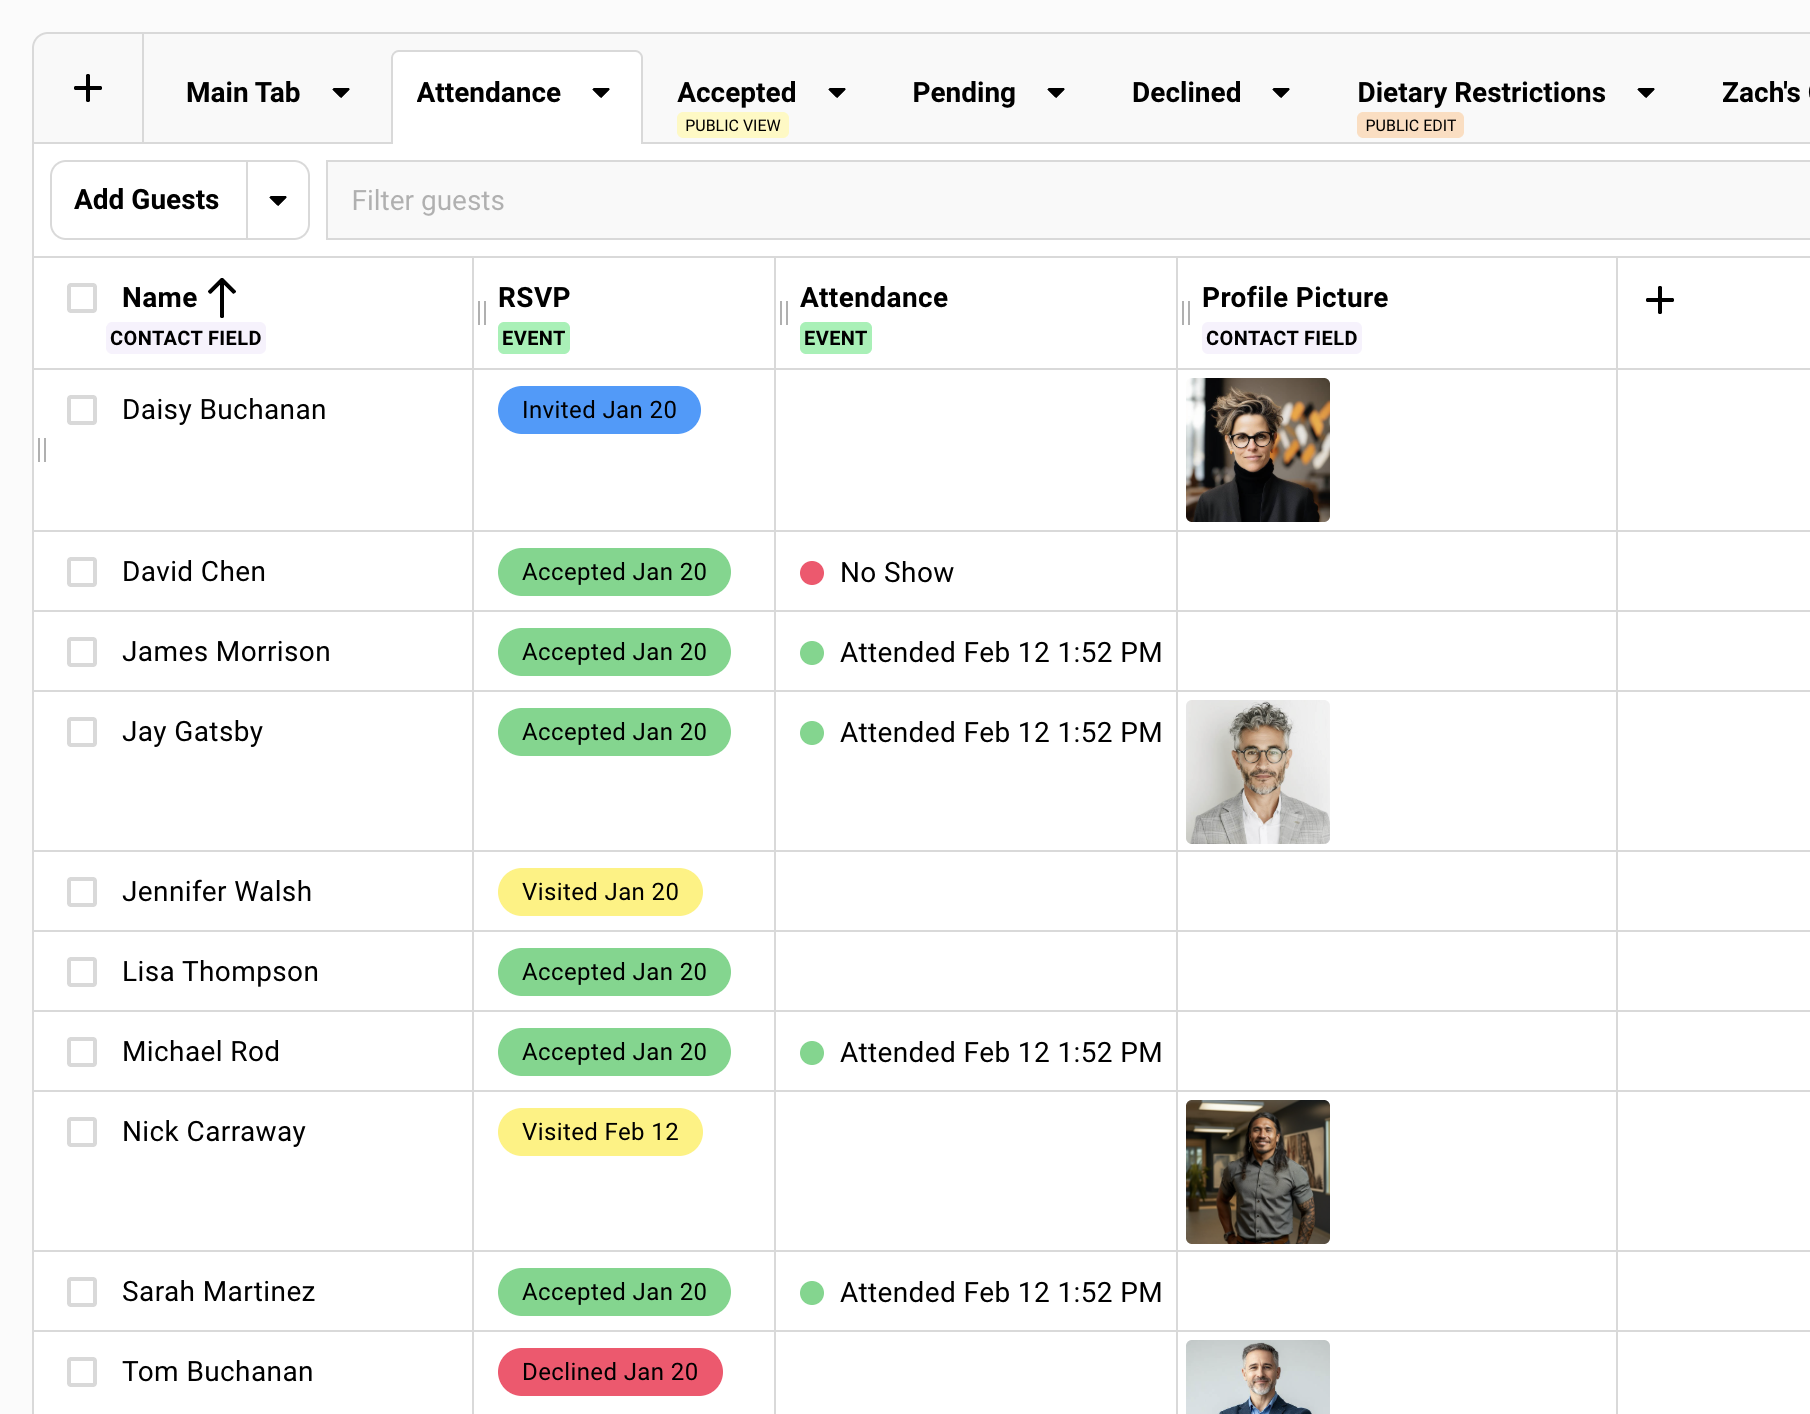
### Marking No-Shows
[Section titled “Marking No-Shows”](#marking-no-shows)
Your team already knows who attended and who didn’t. You have the check-in data. Marking no-shows makes that information explicit for future reference.
Mark no-shows when you want your team to know for certain that someone didn’t attend. Not just infer it from a blank field.
Why mark no-shows explicitly+
Explicit no-show labels matter when:
* Your CRM tracks attendance history and you want complete, unambiguous records
* Teams follow up differently with guests who attended vs. confirmed no-shows
* You plan future invite lists based on clear attendance patterns
* Future teams will reference this event and need clarity, not guesswork
For virtual events or when the distinction doesn’t affect your workflow, skip it. No harm done.
The bulk workflow+
1. Open your guest list and enable the **Attendance** column in the columns drawer.
2. Filter by **RSVP Status = Accepted** and **Attendance = blank**.
3. Select all filtered guests using the checkbox in the header row.
4. Click **Edit Column Values** in the action bar.
5. Set **Attendance** to **No-Show**.
6. Apply. Done.
Two filters, one bulk edit.
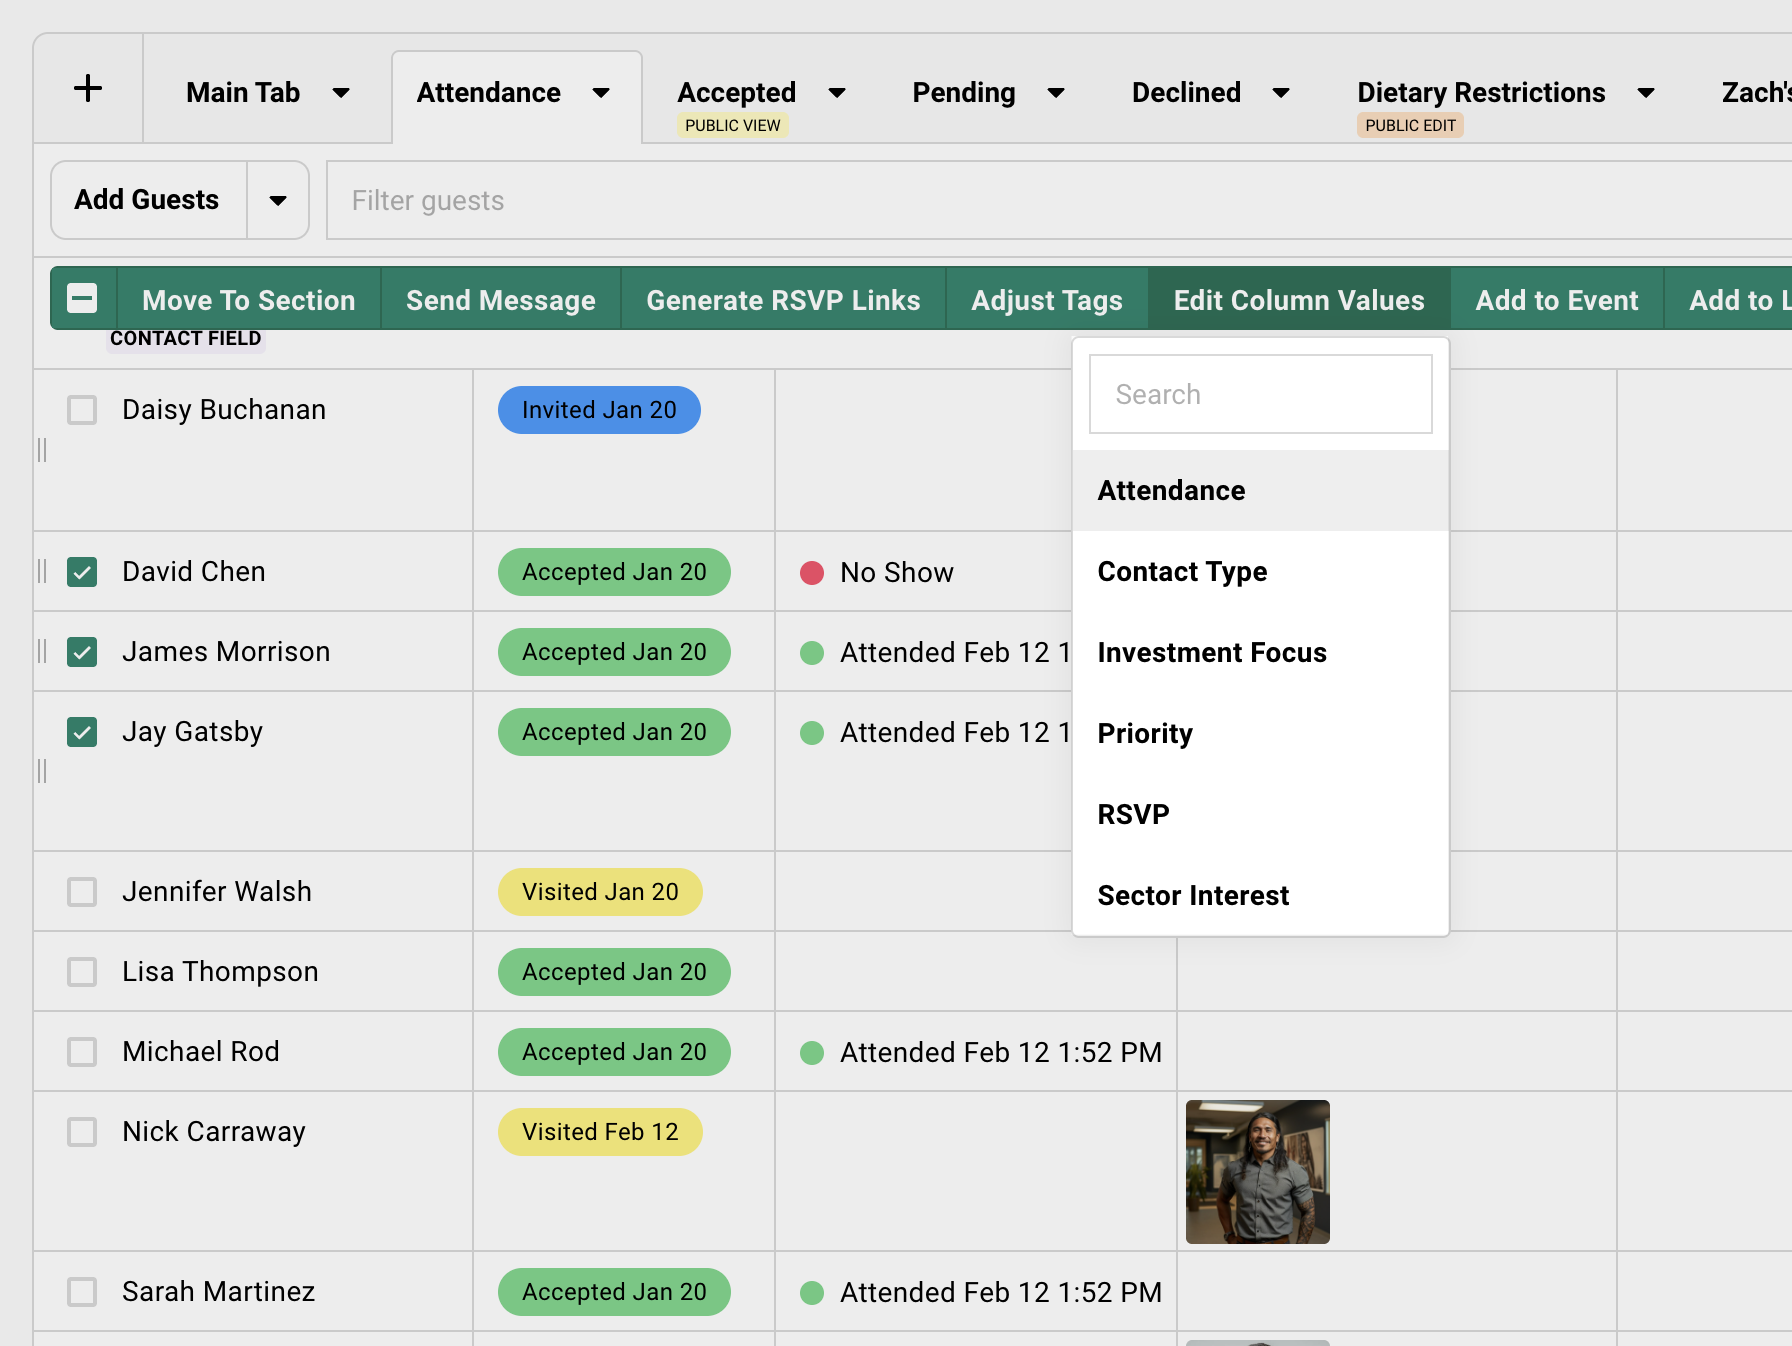
## Cleaning Up Your Contacts
[Section titled “Cleaning Up Your Contacts”](#cleaning-up-your-contacts)
Gatsby matches contacts by email. When someone registers with an email already in your system, no duplicate gets created. But guests use whatever email is convenient. You have their work address. They register with a personal one. Gatsby sees a new email and creates a new contact.
This is most common with public registration. Clean it up while you remember who is who.
### Finding Duplicates
[Section titled “Finding Duplicates”](#finding-duplicates)
Gatsby can generate a list of potential duplicates by matching similar names with different email addresses.
Creating a duplicate list+
1. Go to **Contacts** in the main navigation.
2. Click the dropdown next to **Add Contact**.
3. Choose **Create list of duplicate contacts** from the dropdown.
4. Gatsby scans for contacts with similar names and different emails.
5. The list appears in your Events and Lists area showing potential duplicates.
What you will see+
Pairs of contacts with similar names and different email addresses. “John Smith ()” next to “John Smith ().”
Review each pair before merging. Similar names are not always the same person. “Sarah Chen” at one company might not be the “Sarah Chen” at another.
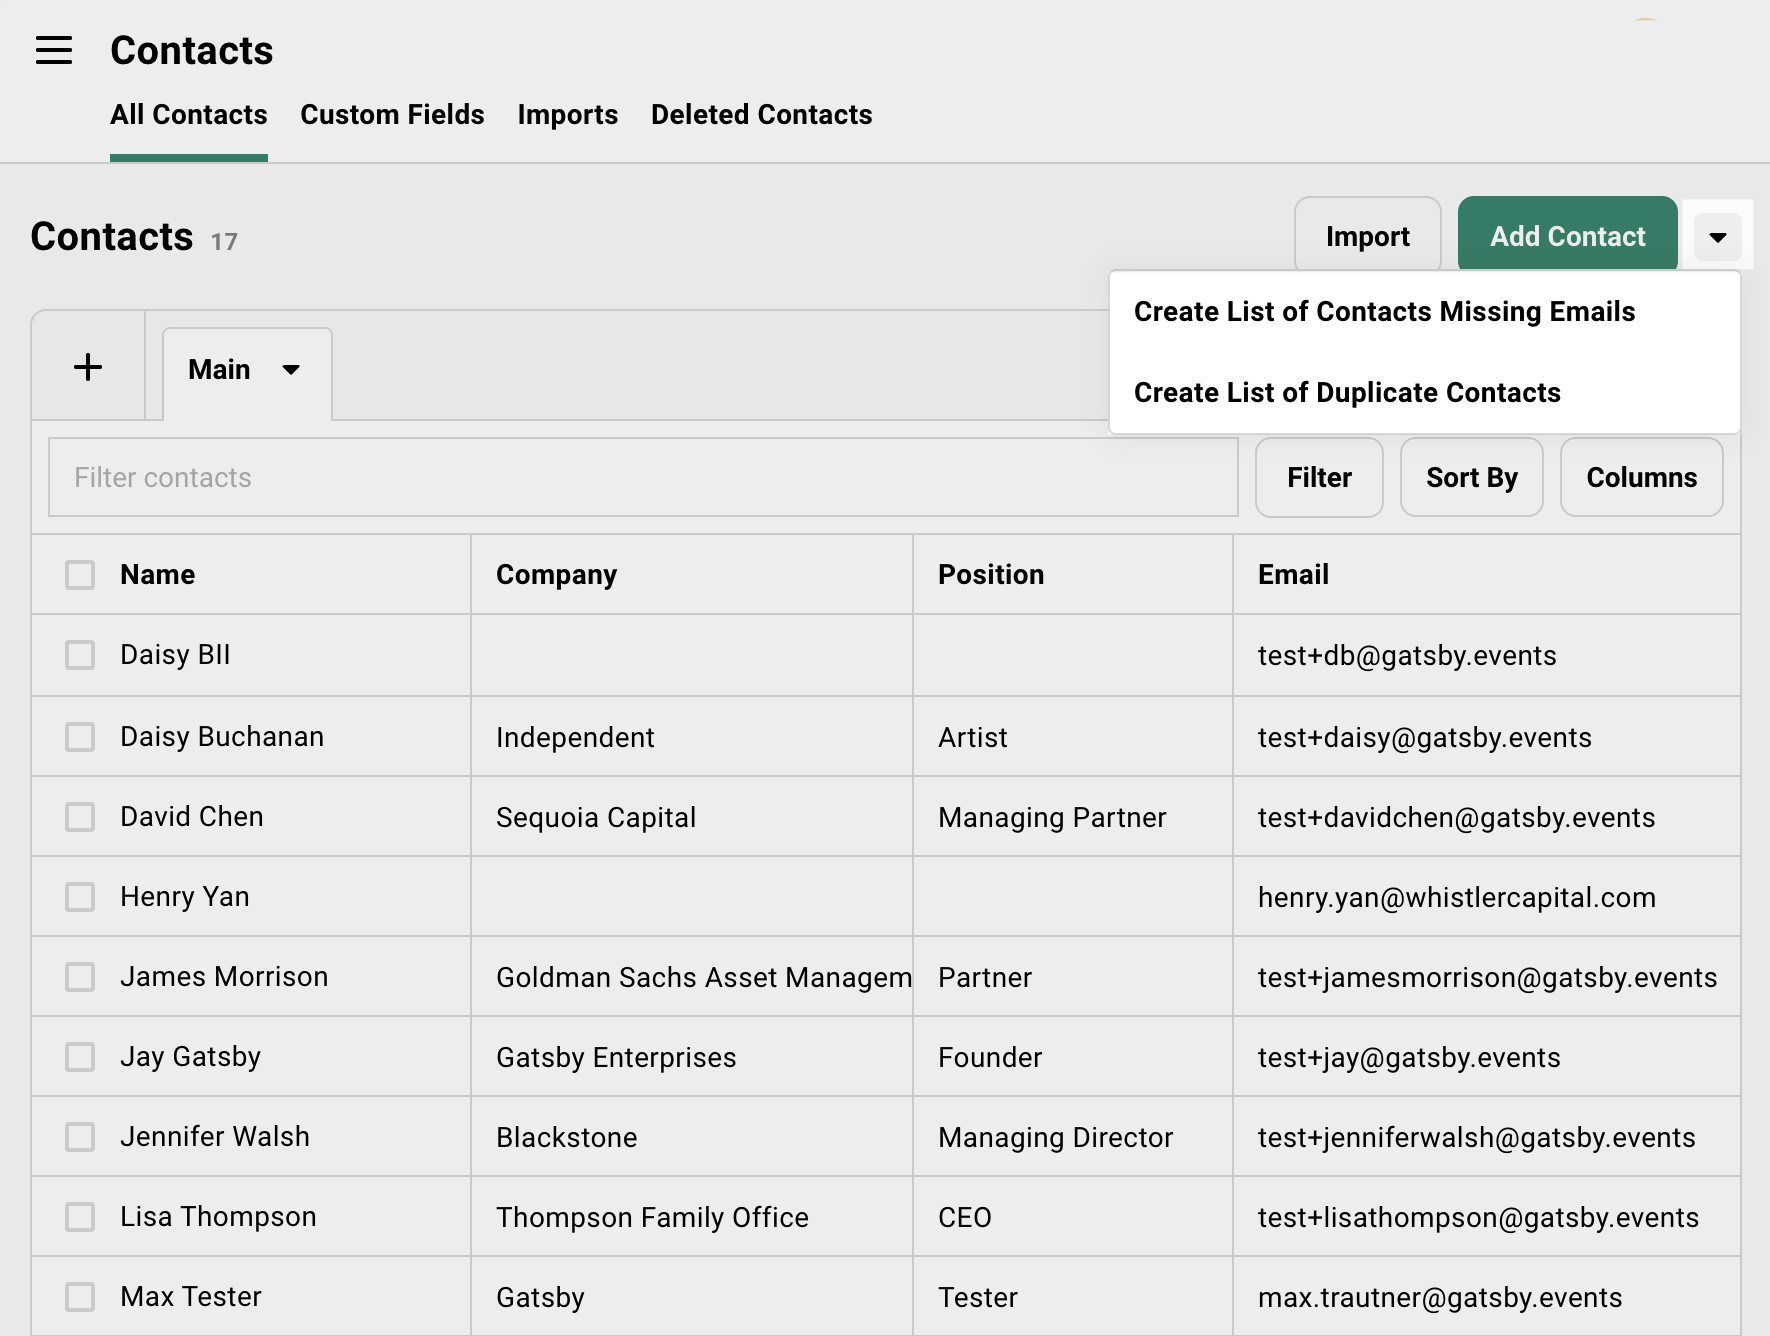
### Merging Contacts
[Section titled “Merging Contacts”](#merging-contacts)
When you merge, one contact becomes the primary. The other contact’s email becomes a secondary address on the merged profile. Future deduplication checks against both addresses.
Before you merge+
You don’t need to add both contacts to the same event first. Event history from both contacts merges onto the merged profile automatically.
The merge process+
1. On a guest list, select the contacts you want to merge. The duplicates list works well for this.
2. In the green action bar, click **More Options** » **Merge Contacts**.
3. Choose the contact you want to keep (the “winning” contact).
4. Confirm the merge.
5. The losing contact’s email moves to the “Other emails” field on the winning contact.
Choosing the primary email+
If the guest registered with an email you prefer as primary, you can swap it after merging.
1. Open the merged contact profile.
2. Find the email addresses section.
3. Swap the primary and “other” emails.
Future communications use the primary email by default.
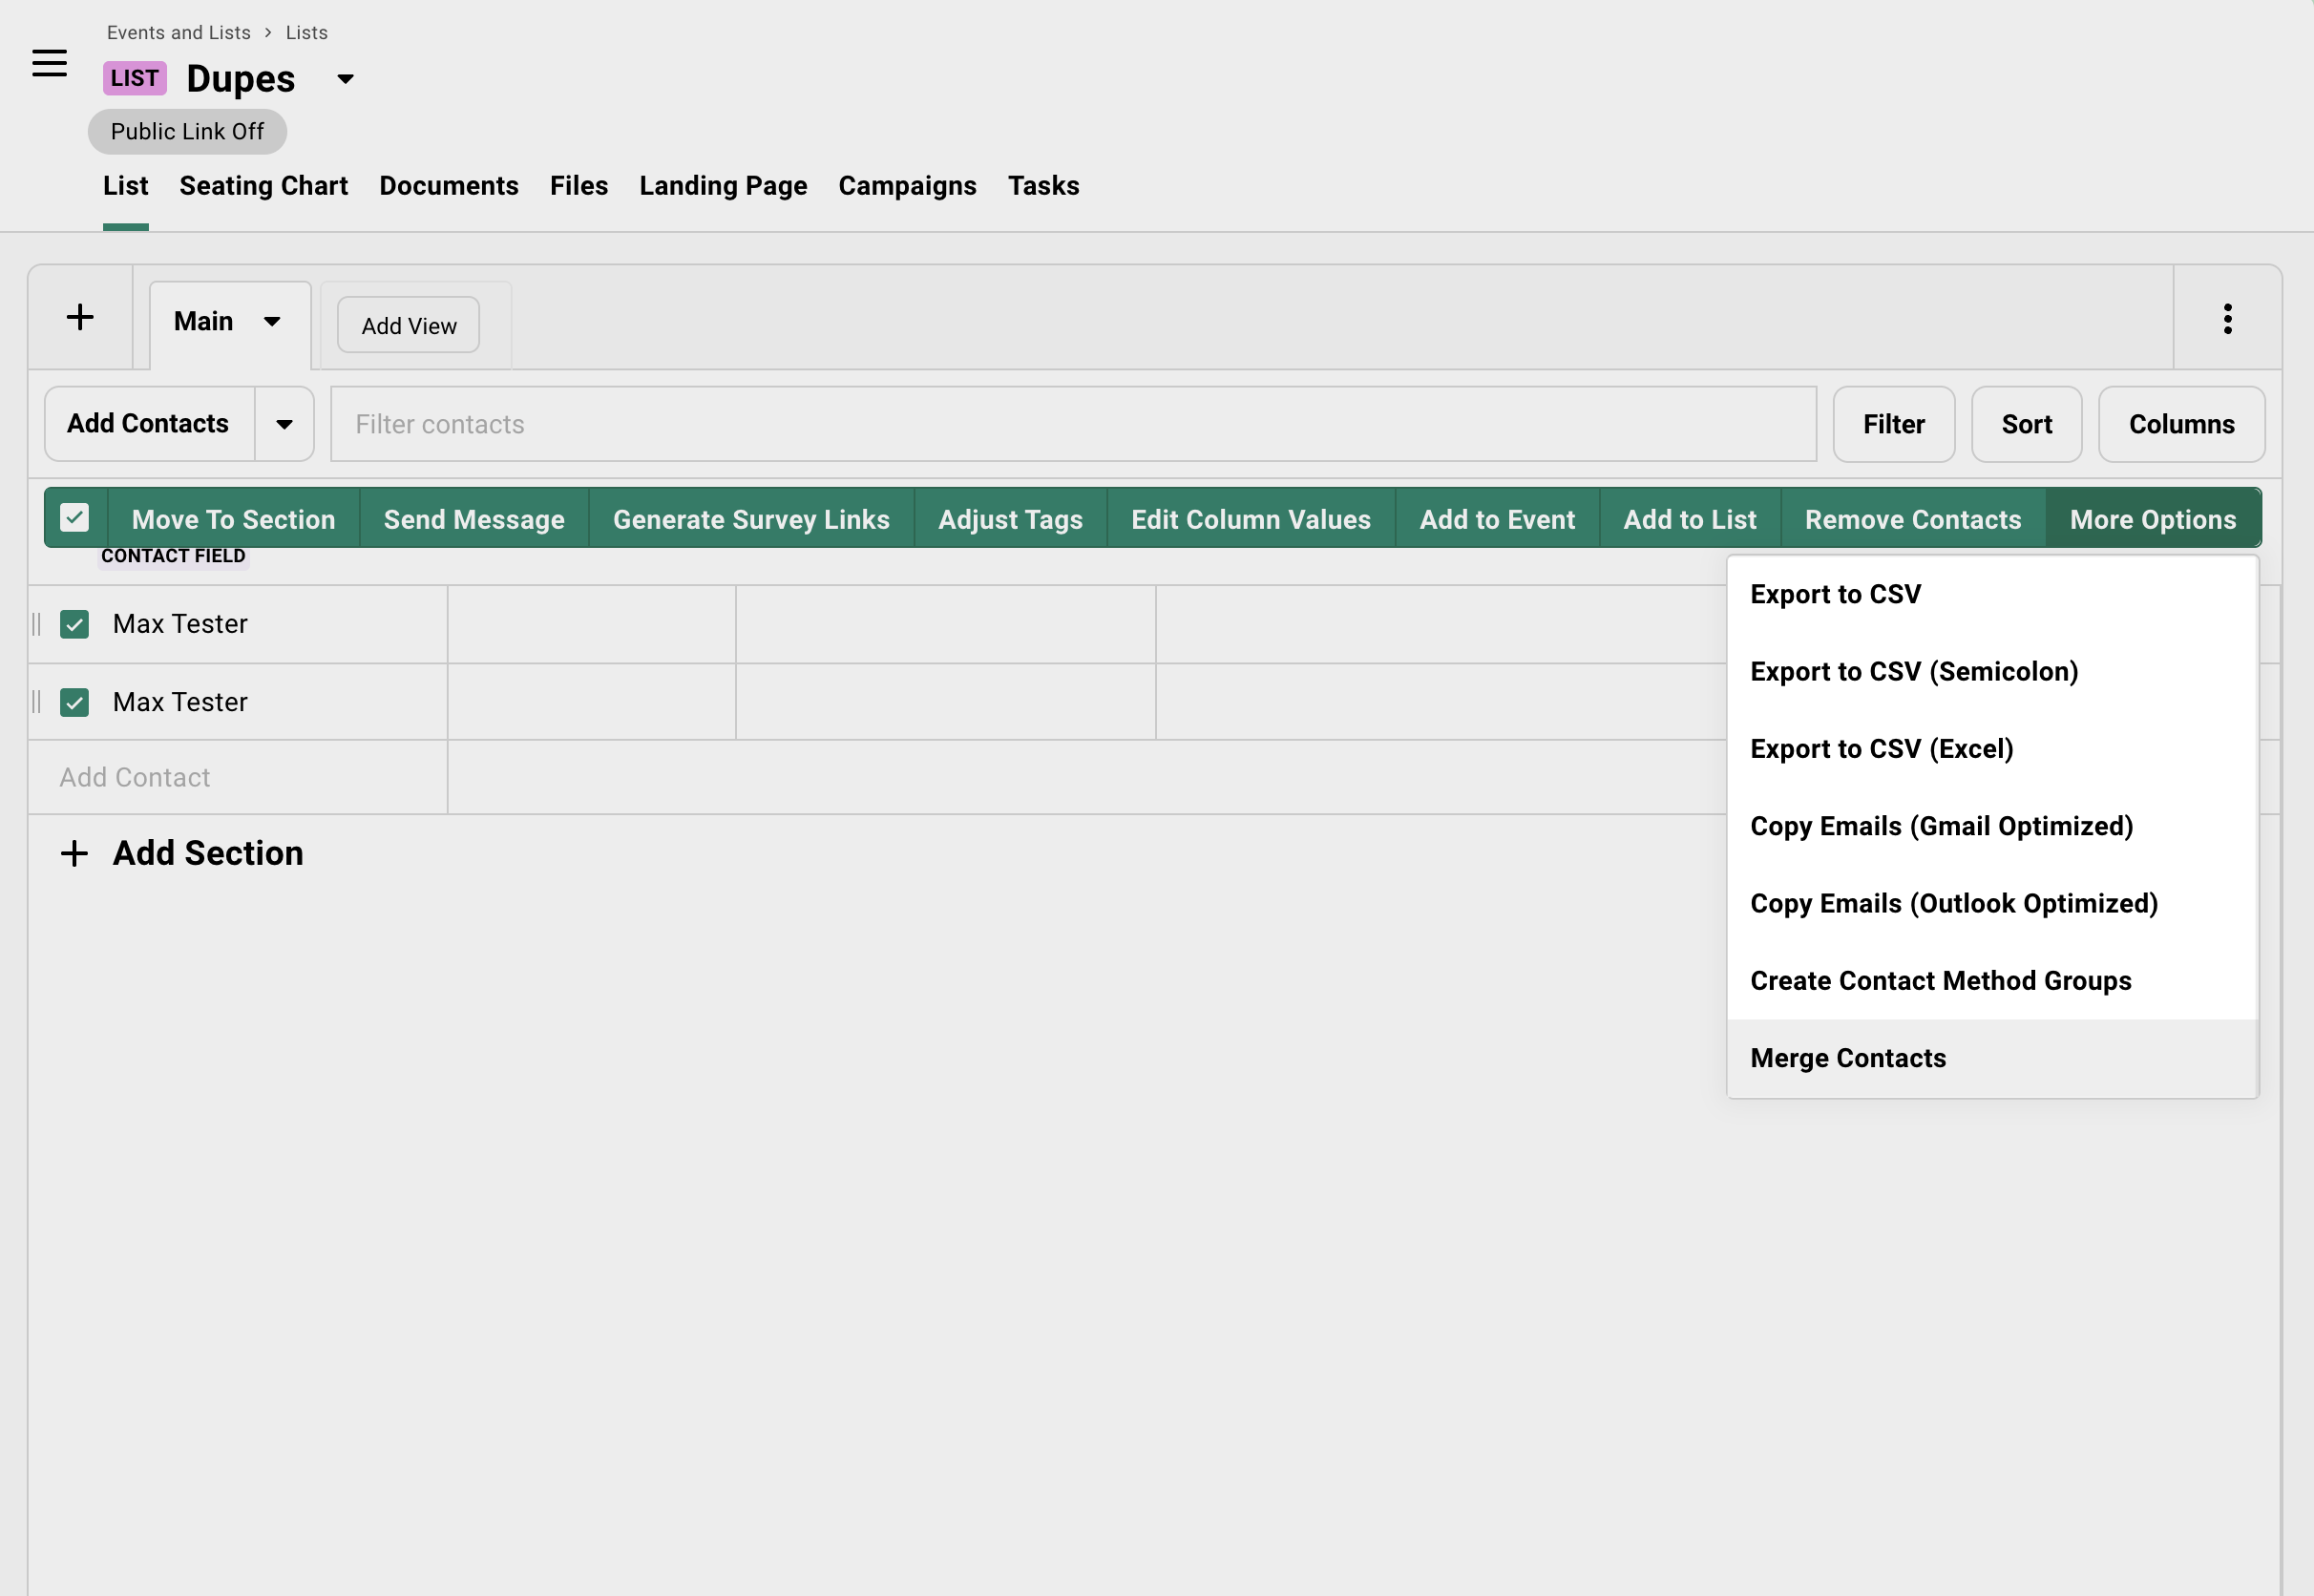
## Follow-Up Communication
[Section titled “Follow-Up Communication”](#follow-up-communication)
Guests showed up. Now what?
A thank-you note is table stakes. Personal follow-up from relationship owners is what turns a good event into a relationship milestone. The difference between “nice event” and “I should introduce you to my colleague” often comes down to what happens in the 48 hours after.
### Sending Thank-You Emails
[Section titled “Sending Thank-You Emails”](#sending-thank-you-emails)
Filter by Attended, select all, send message. The mechanics are simple. The details make it memorable.
The basic workflow+
1. Open your guest list.
2. Filter by **Attendance = Attended**.
3. Select the filtered guests.
4. Click **Send Message** in the action bar.
5. Compose your thank-you and send.
Same campaign tool as invitations. Different filter.
Adding personal notes+
Use custom fields to include personalized follow-up without sending 50 individual emails.
1. Create a custom event-level column like “Follow-up Note” on your guest list. Your team can edit these directly in the event.
2. Share a filtered view with your team or relationship owners.
3. They fill in personal notes for their guests.
4. Once complete, export the column data and import it back to a custom field on the contact profile using a CSV.
One campaign, 50 personal emails. The guest who discussed their new fund gets a note about their new fund. The guest who mentioned their daughter’s graduation gets a note about that.
**Process note**: To use custom columns in email merges, transfer the data to a custom field first. Export needs only name, email, and the column. On import, map to the appropriate custom field.
When to send from a partner account+
The thank-you from the relationship owner matters more than the thank-you from the events team.
The email comes from the partner’s actual account. Replies go to them. They integrate their email directly, emails you send in Gatsby appear in their sent folder.
### Post-Event Surveys
[Section titled “Post-Event Surveys”](#post-event-surveys)
You could repurpose the event landing page for a survey. But you would lose your registration history and confuse guests who return.
A separate **list** keeps post-event operations clean. Survey data stays organized. Your event records remain intact.
Why use a list instead of the event+
**Preserves registration history**
Your event is in a past state. To repurpose the event, you’ll need to push the date/time back and reset RSVP status to get better tracking… that means losing some critical info.
***
**No calendar invite confusion**
Lists do not send calendar invites. Events do. A survey should not land on anyone’s calendar.
***
**Cleaner data organization**
Survey responses live in their own place. Event data stays where it is. You can pull survey columns into your event view when needed.
The workflow+
1. Create a new list. Name it something clear like “March Dinner Survey.”
2. Go to the Landing Page tool and build your form using the Survey section.
Use the “Skip to survey” option so you don’t need to actually design a landing page.
3. Add attended guests from your event to the list.
4. Send a campaign email from the List with each guests’ unique survey link.
Guests click, complete the survey, done. Their responses live on the list.
Pulling survey data back into the event+
Want to see survey responses alongside event data?
1. Open your event’s guest list.
2. Go to the Columns drawer.
3. Add Fields » Other Events/Lists
Find your survey List and add it to this dialog box.
4. Select the survey response columns from your survey list.
Survey data appears next to attendance data. Export includes everything.
[Contact Lists](/platform/events-lists/contact-lists/)
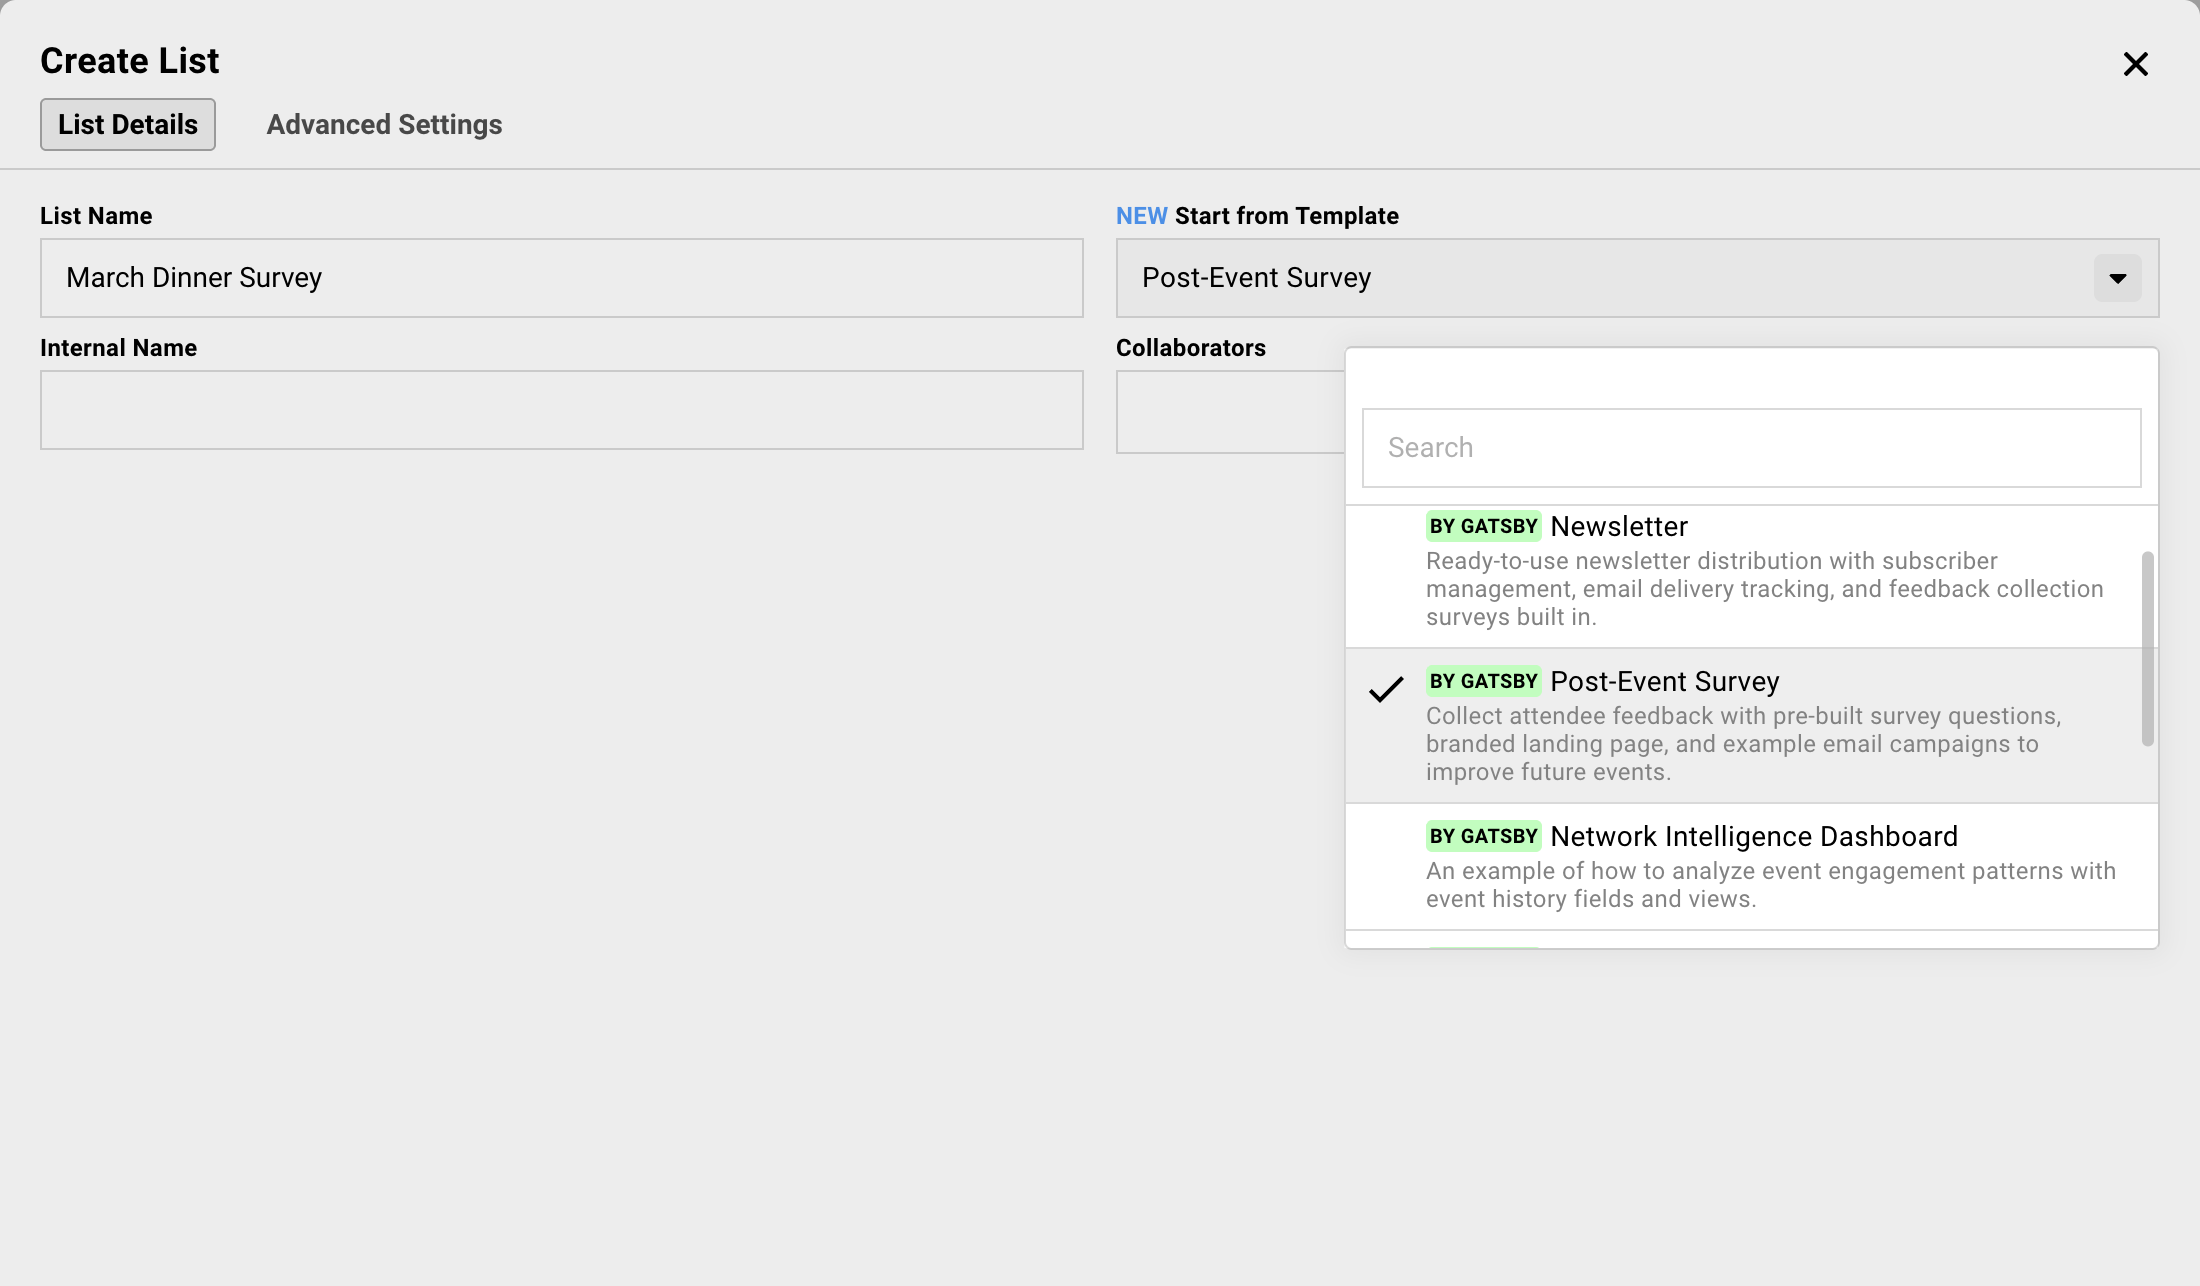
## Exporting and Reporting
[Section titled “Exporting and Reporting”](#exporting-and-reporting)
Before you archive the event, get the data out. Stakeholders want spreadsheets. Your CRM needs updates.
The Reporting tool shows how this event compared to your others.
Exporting guest data+
1. Open your guest list.
2. Configure the view with the columns you want to export.
3. Select all guests.
4. Click **More Options** then **Export to CSV**.
What you see is what you export. If a column is not visible, it is not in the export. Configure your view first.
CRM sync options+
**Native integrations**
Salesforce, Affinity, and Altvia connect directly. Attendance and RSVP data sync automatically based on your configuration.
***
**Webhooks and Zapier**
For HubSpot, Attio, or custom systems. Events fire when RSVPs change, guests check in, or contacts update. Build the workflow that fits your stack.
***
**API**
For custom integrations. Full access to guest data, attendance records, and contact profiles.
The Reporting tab+
The Reporting tab shows trends across events. RSVP rates, attendance rates, best times to send invites.
Filter by event tags to compare similar events. Your Q1 dinners vs. your Q2 dinners. Conference sessions vs. networking events.
Table view gives granular metrics. Dashboard view shows the big picture.

## Capturing What Worked
[Section titled “Capturing What Worked”](#capturing-what-worked)
Six months from now, you will not remember what made this event work. The email subject line that outperformed. The landing page layout that converted. The survey question that got actual responses.
Save them now or reinvent them later.
Saving email templates+
1. Open the campaign that performed well.
2. Click the three-dot menu next to the subject line.
3. Select **Save as Global Template**.
4. Name it clearly. “Q1 Dinner Invitation” or “High-Performing Follow-Up.”
The template appears in your campaign library for all future events.
Saving landing page templates+
1. Go to **Landing Page Templates** in your event.
2. Find the design you want to save.
3. Duplicate it to your global template library.
Available across all future events. Start from what worked instead of starting from scratch.
Saving the entire event as a template+
For recurring events, save the whole thing.
1. Open the event you want to replicate.
2. Use the dropdown option next to the event name at the top » “Save as Template”.
3. Choose the options to want to carry over and save this event as a template.
Your event template can include settings, survey questions, email templates, and landing page designs. Your next quarterly dinner starts 80% done.
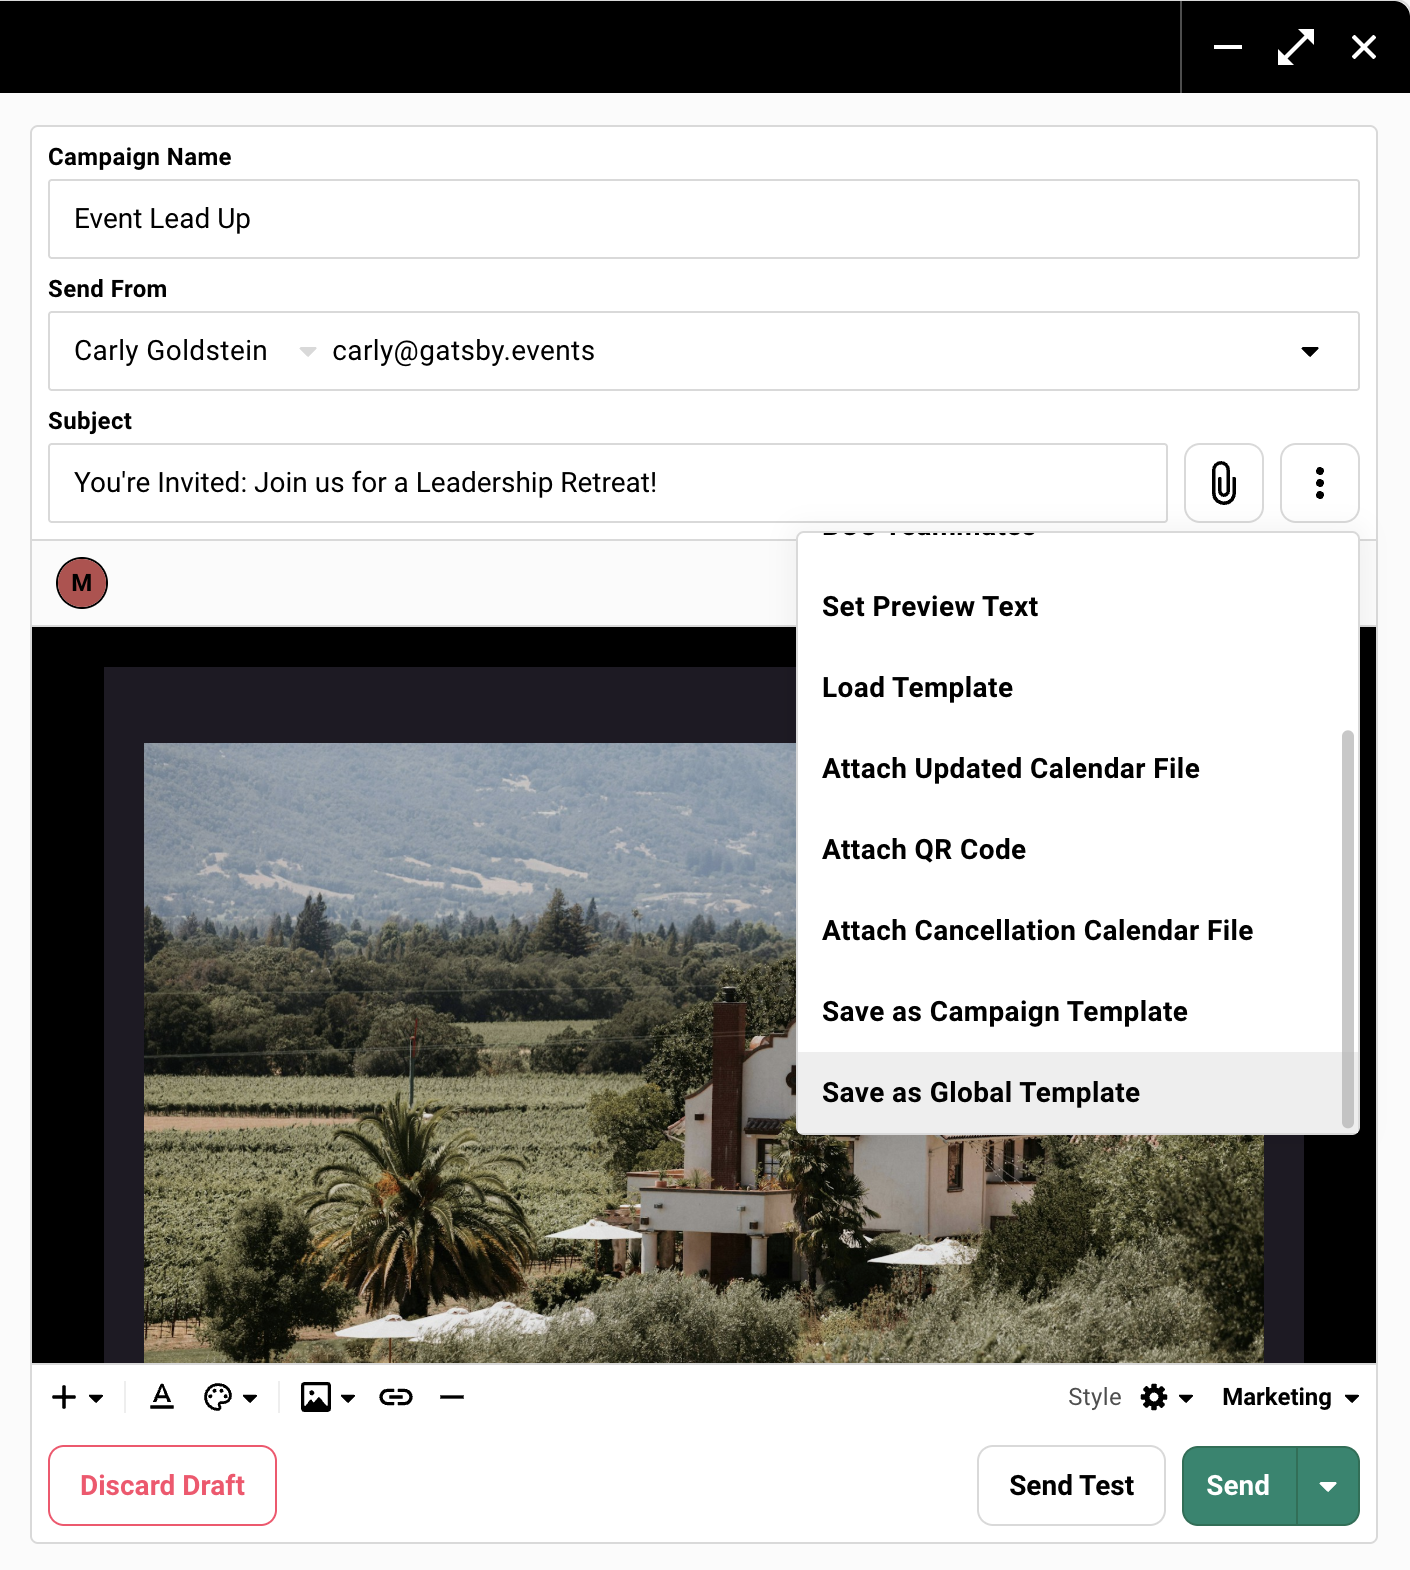
## Building Guest Profiles
[Section titled “Building Guest Profiles”](#building-guest-profiles)
Your team interacted with guests all night. Notes live in their heads, not your system. A week later, the details fade. Two weeks later, they are gone.
Capture interaction notes while they are fresh. The context carries forward to the next event.
Setting up an interaction notes column+
1. Create a custom event-level column on your guest list. Name it “Interaction Notes” or “Post-Event Notes.” Use text type.
2. Enable the public link for your guest list.
3. Enable editing on the public link and select this notes column as editable.
4. Share the public link with your team.
5. Team members add notes without logging into Gatsby.
**Where to save this data**: You have options.
If your team does this continually across events, you can leave notes at the event level or in a custom field. Click into a guest profile, see all their events, and reference the notes column from each event. If it’s saved as a custom field, these notes are visible in their guest profile.
If you want notes accessible across any event, export the column and import it back to a custom field using a CSV. Export needs only name, email, and the notes column. On import, choose what to map to which custom field in Gatsby. Clean up the data before importing.
What to capture+
* Key conversation topics
* Follow-up requests (“Send me that article”)
* Relationship context (“Mentioned new role starting in Q2”)
* Anything useful for the next interaction
You do not need a transcript. A few sentences is enough.
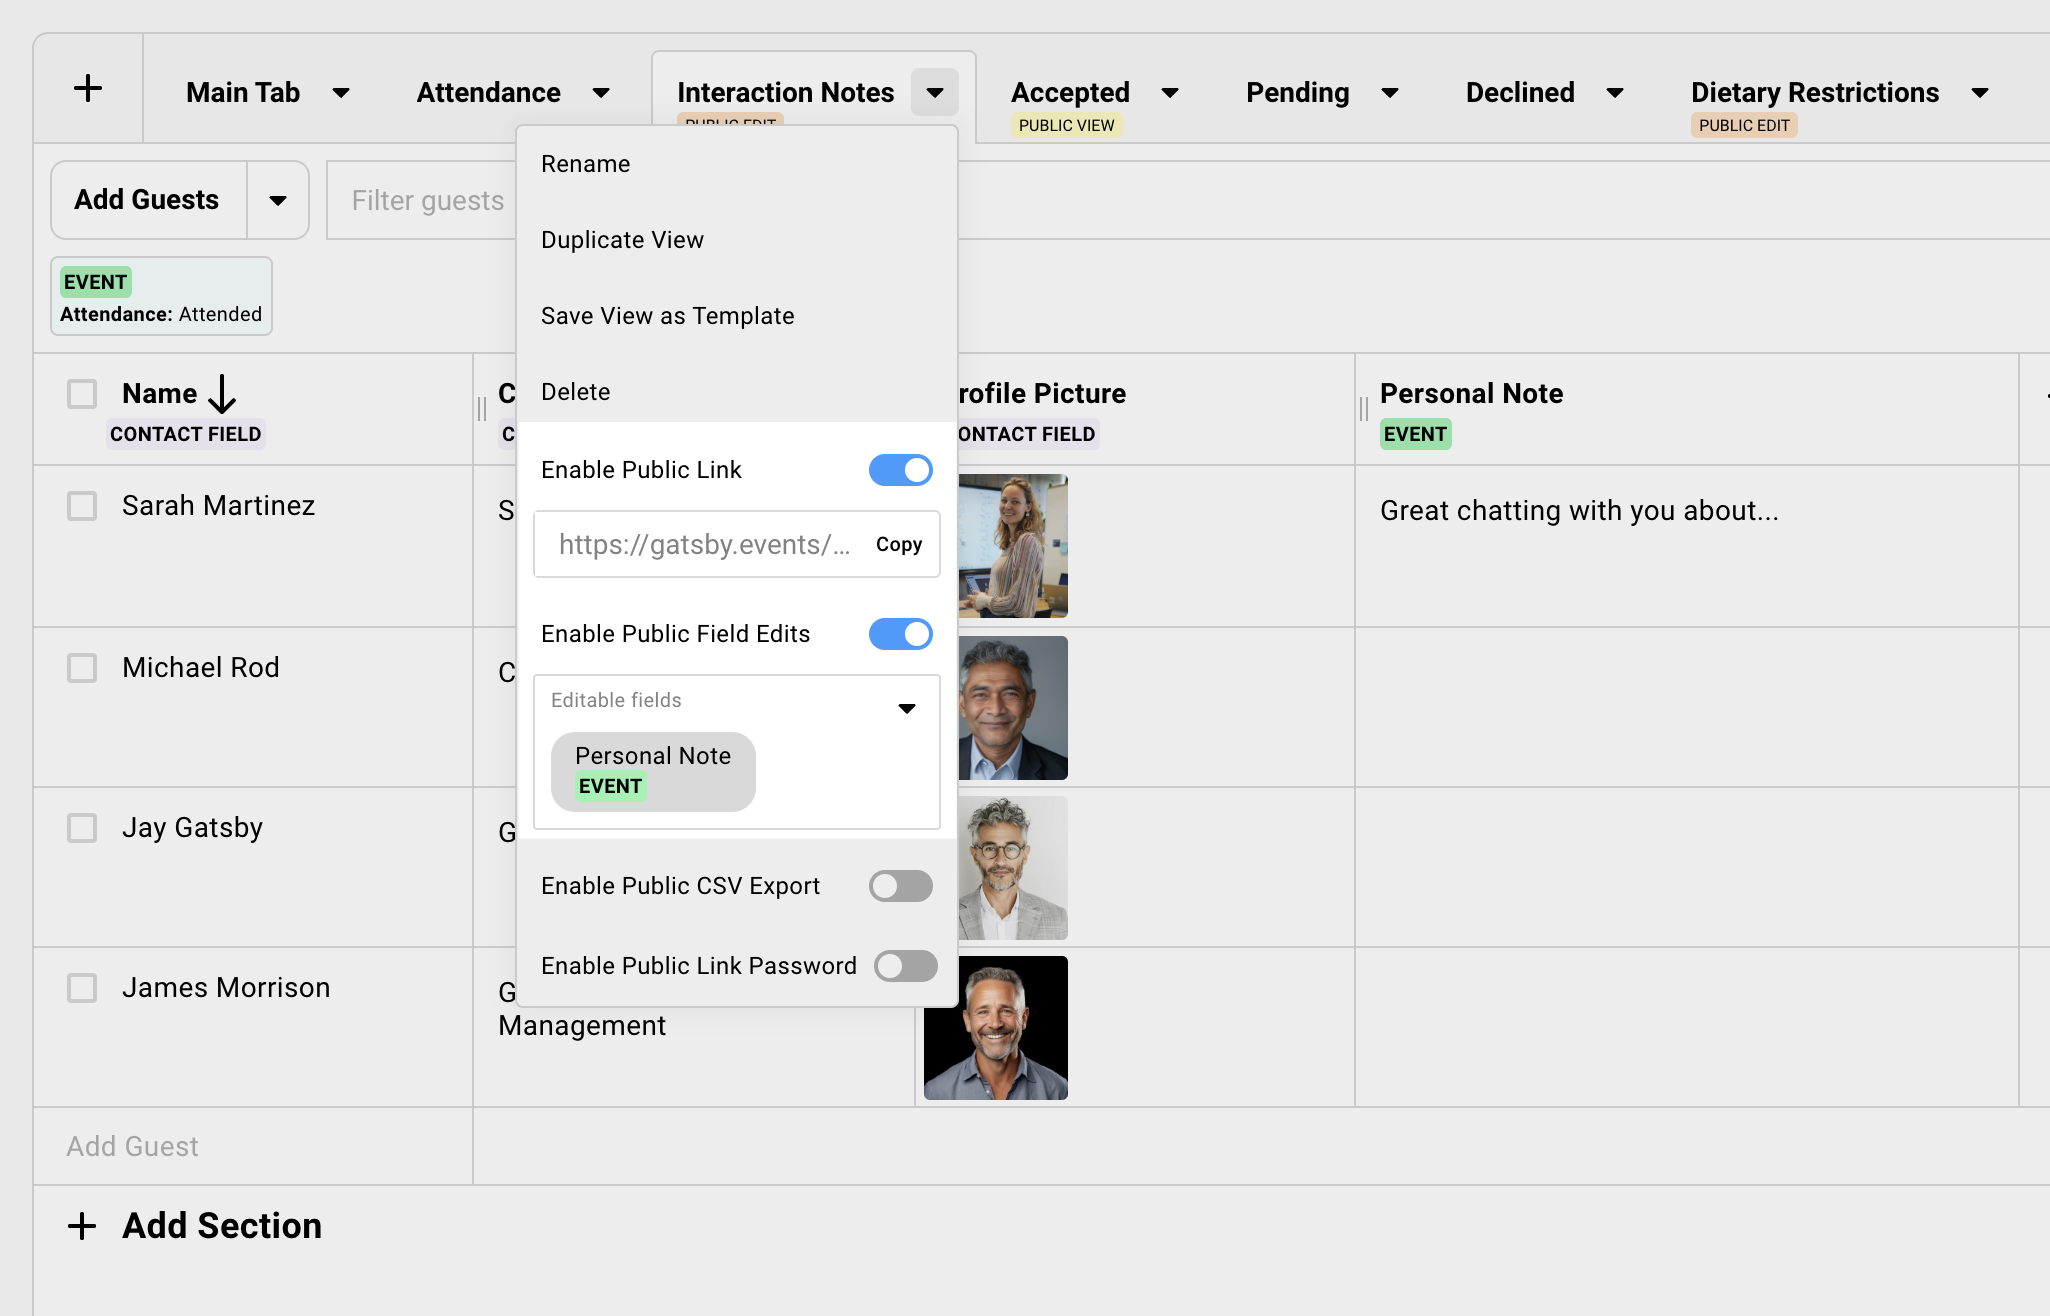
## Common Questions
[Section titled “Common Questions”](#common-questions)
Do I have to mark no-shows?+
No. Some teams skip it. But if you sync to a CRM or want accurate attendance history, the few minutes are worth it.
Can I send the thank-you email from the same campaign tool as invitations?+
Yes. Same workflow. Filter by Attended instead of your invite list.
What if I use a CRM integration?+
Attendance and RSVP data sync automatically based on your configuration. You may still want to mark no-shows manually, clean duplicates, and capture interaction notes. Those benefit from human judgment.
# Canceling or Postponing Events
> How to communicate with guests when plans change. Archiving an event tells nobody, and it does not stop a campaign you already scheduled. Here is how to handle guest communication yourself.
## What Archiving Actually Does in Gatsby
[Section titled “What Archiving Actually Does in Gatsby”](#what-archiving-actually-does-in-gatsby)
Gatsby has no separate cancel. The control is **Archive Event**, and it is a filing action: it takes the event off your dashboard. It tells nobody. Guests who already RSVP’d will show up unless you tell them otherwise.
When you archive an event:
* The event moves to **Archived Events**, at the bottom of **Events and Lists**
* Its parent and child links are removed, and restoring it later won’t bring them back
* No new emails go out on their own
* No calendar invites are removed or updated
* Your guests see no change at all
**Archiving does not stop a campaign you already scheduled.** A send that is queued for tomorrow morning still lands tomorrow morning, for an event you archived tonight. Open **Campaigns** and cancel the send yourself, before you archive.
If invitations never went out, archive and move on. If guests are expecting to attend, the archive is the last step, not the first.
## Canceling an Event
[Section titled “Canceling an Event”](#canceling-an-event)
Four things to do, in this order: stop new registrations, stop any scheduled sends, notify your guests, archive the event.
Step 1: Close Registration+
In the Registration tab, select **Invite Landing Page** on the left, then set the **RSVPs** dropdown on the right from **Open** to **Closed**. This prevents new RSVPs from any outstanding invitation links.
Do this first.
Step 2: Cancel anything already scheduled+
Open **Campaigns** and look for sends that haven’t gone out yet. Cancel them.
Nothing else in this process does it for you. Archiving the event at the end won’t, and a scheduled send stays live right up to the moment it fires, so an invitation can land in your guests’ inboxes hours after you’ve called the event off.
Step 3: Send a cancellation campaign+
Use Campaigns to email guests who accepted. Filter by RSVP status to reach everyone who committed.
Include why you’re canceling (if appropriate) and any next steps.
Step 4 (optional): Rename the event and send an update+
If you edit event details and rename the event like, “\[CANCELED] Event Name”, we’ll give you the option to send a calendar invite notice to your guests who have been sent a calendar invite before.
This renames the event in their calendar for extra clarity.
Step 5: Archive the event+
Do this last, once the emails have gone out.
1. Click the dropdown next to the event name.
2. Select **Edit Event Details**.
3. Click **Archive Event**, bottom left of the dialog.
4. Tick **I understand**, then confirm.
The event moves to **Archived Events**, at the bottom of **Events and Lists**.

## Postponing an Event
[Section titled “Postponing an Event”](#postponing-an-event)
Same flow, one key difference: preserve the event. When you set the new date, you can re-engage the same guests without starting over.
What to Do Now+
1. Close registration.
2. Send a campaign explaining the postponement and when you’ll share the new date.
3. Edit event details and rename the event with something like “\[Postponed] Event Name”
4. Do NOT archive the event. Keep it active so you can update it later.
When You Have a New Date+
1. Edit event details, set the new date and time, and rename the event.
2. Send the calendar invite update now (or share later)
3. Send a follow-up campaign.
Include guests’ personal RSVP links so they can confirm or change their response.
## What About Calendar Invites?
[Section titled “What About Calendar Invites?”](#what-about-calendar-invites)
Guests have the event on their calendar. Should you remove it for them?
You can send calendar updates or deletions through Gatsby. But we recommend a simpler approach: tell guests the event is canceled and let them remove it from their own calendar.
Why? A calendar invite disappearing without explanation feels abrupt. Guests wonder if something went wrong. A clear email followed by them managing their own calendar is cleaner.
If You Still Want to Send a Calendar Update+
Rename the event to include “\[CANCELED]” in the title. When you save, Gatsby offers to send a calendar update to guests who already have the invite.
This updates the title on their calendar without removing the event.
Why We Don't Recommend Calendar Deletions+
Gatsby can remove calendar invites by changing guest RSVP status to “Declined.” But this deletes RSVP tracking data and sends a system notification that can feel impersonal.
Better to communicate clearly and let guests handle their calendars.
## Common Questions
[Section titled “Common Questions”](#common-questions)
What about guests who never RSVP'd?+
Pending guests never received calendar invites. They only know about the cancellation if you email them.
Consider whether you want to send a campaign to invited-but-not-responded guests, or just those who accepted.
Can I restore an archived event?+
Yes. Archiving deletes nothing.
Find the event under **Archived Events**, at the bottom of **Events and Lists**. Open the three-dots menu on its card and choose **Restore Event**, the only item there.
One thing doesn’t come back. If the event had parent or child links, the archive removed them, and restoring won’t rebuild them. Undo on the toast that appears right after archiving is the only path that does.
What do guests see after I archive the event?+
Nothing changes for them. Archiving is invisible to guests. Their invitation still sits in their inbox, their personal RSVP link still works, and any calendar invite they accepted is still on their calendar.
The one thing that does change what they see is closing registration, which is Step 1. Gatsby leaves your landing page content alone and swaps the button for its closed state, typically **RSVP Closed**.
That is the whole reason this page exists: if you want guests to know, you have to tell them.
# Your First Event in Gatsby
> Learn Gatsby by building your first event. Create an event, set up registration, add guests, send invitations, and track responses in one complete walkthrough.
## The Five Steps
[Section titled “The Five Steps”](#the-five-steps)
Every event in Gatsby follows the same pattern.
1. Create your event
2. Set up registration
3. Add guests to the guest list
4. Send them an invitation
5. Track responses and run check-in
This guide covers that basic flow. By the end, you will have sent real invitations and understand how the pieces connect.
[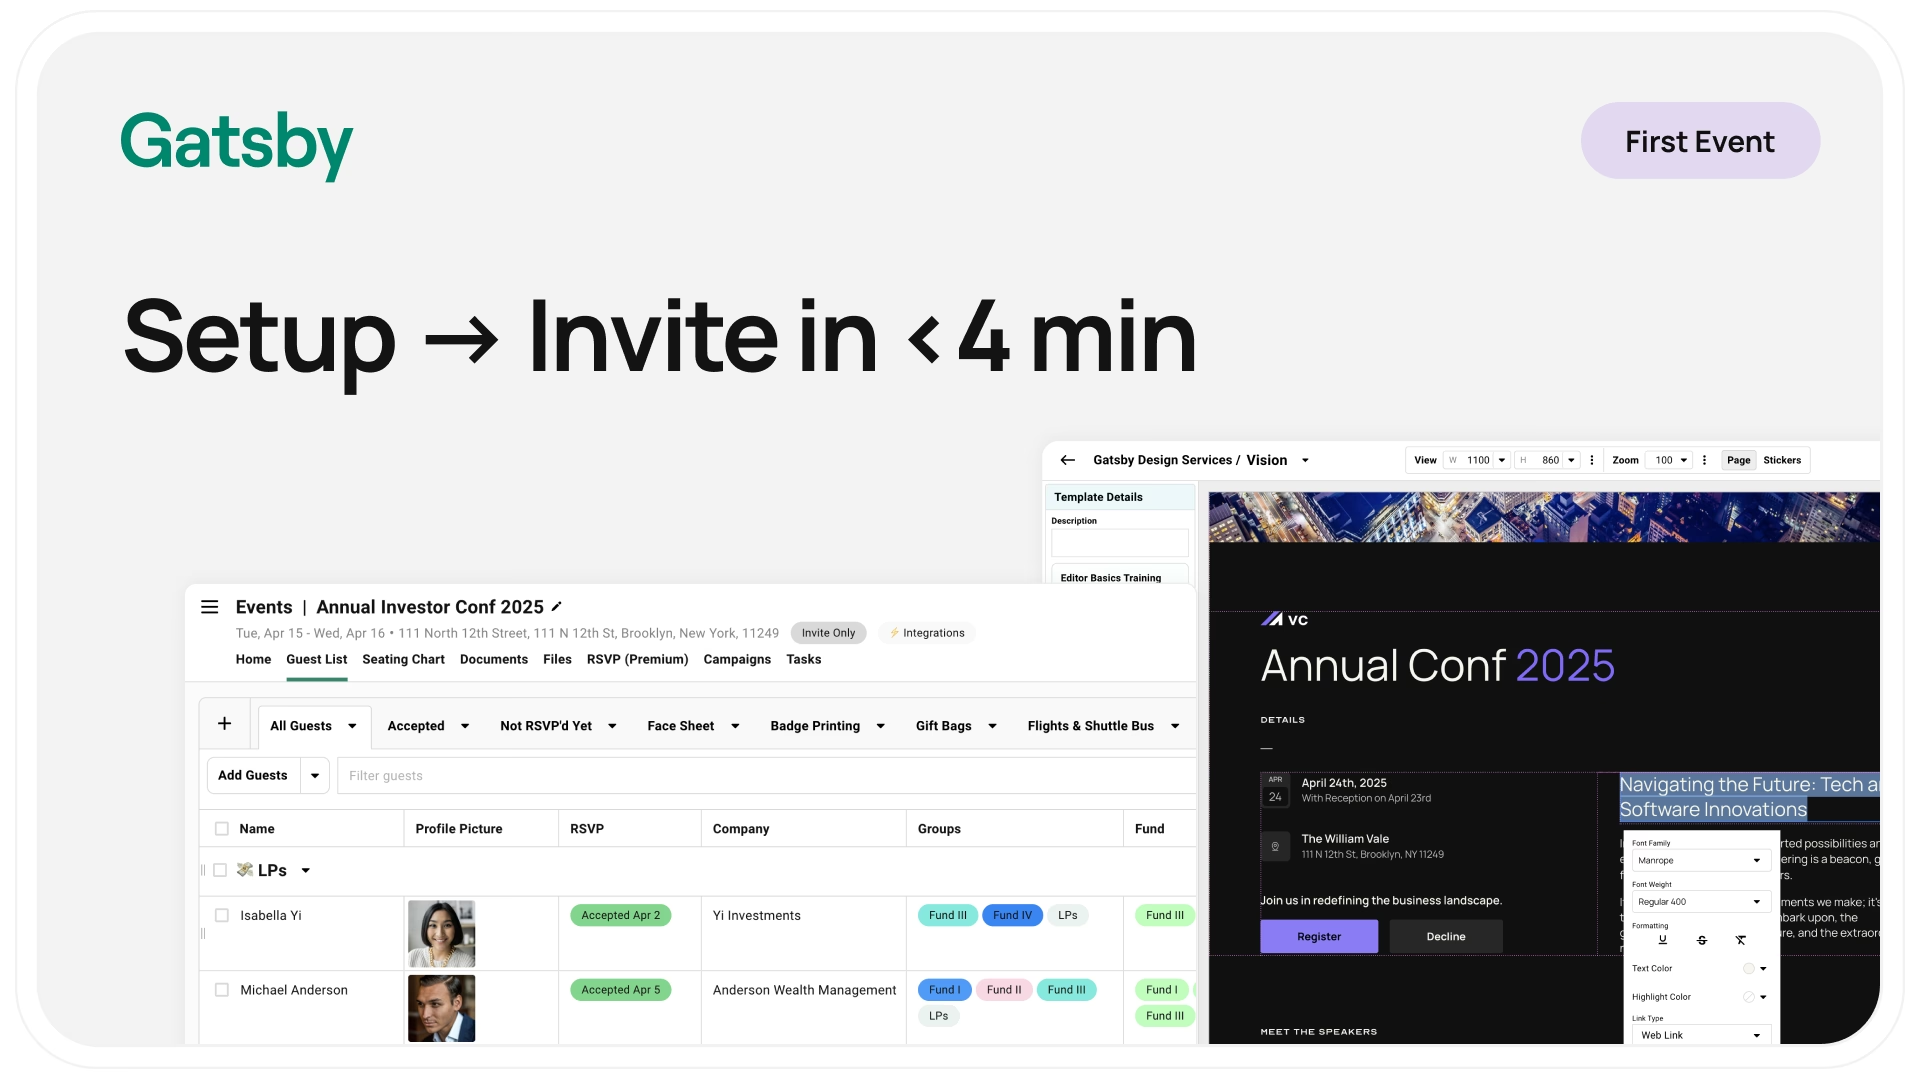](/videos/gatsby-first-event.mp4)
Looking for a quick start? Just watch this. The video covers the core concept and walks through the full flow.
### Step 1: Create Your Event
[Section titled “Step 1: Create Your Event”](#step-1-create-your-event)
Creating an event takes 30 seconds. You only need a name.
How to create an event+
1. Go to the Events & Lists dashboard.
2. Click **Create Event**.
3. Enter a name for your event.
4. Add date and time if you know them. (Skip if you do not.)
5. Click **Create**.
That’s it. Everything else is optional at this point.
You are now inside your event. The tabs across the top are your tools: **Guest List**, **Registration**, and **Campaigns** (emails). You’ll use all three.
[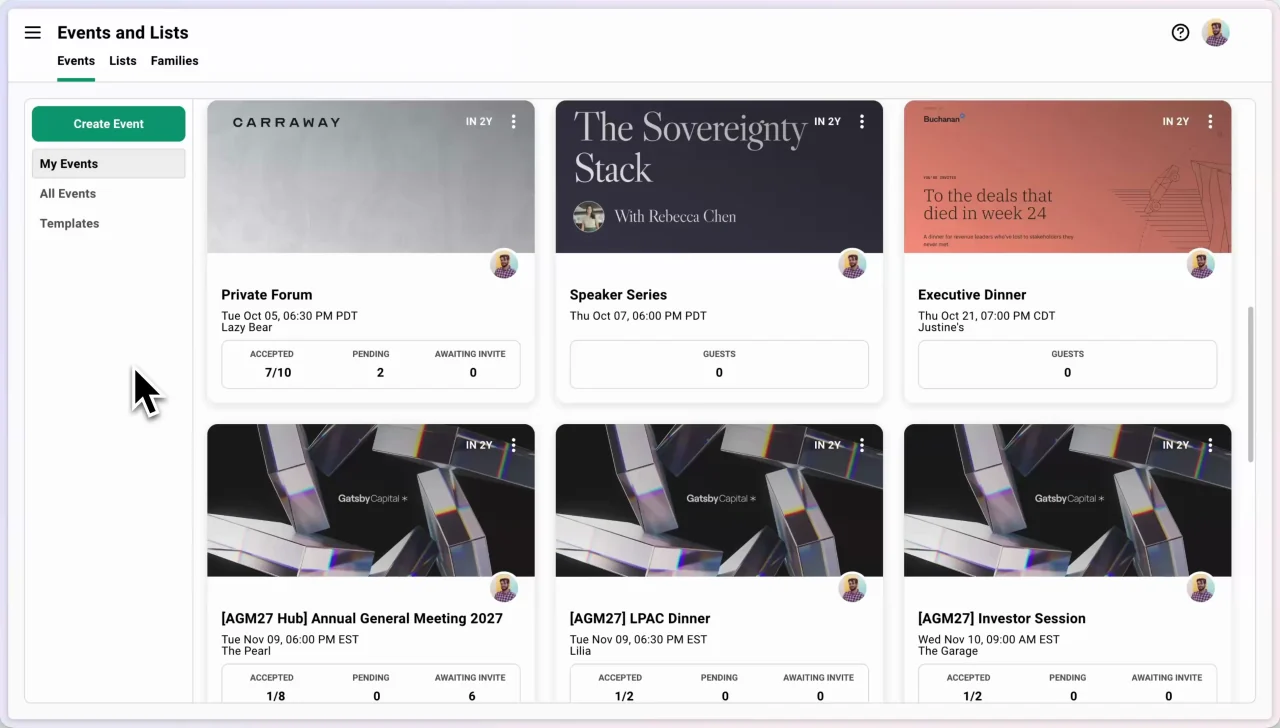](/videos/playbook-first-event-step-1-create-event.mp4)
### Step 2: Set Up Registration
[Section titled “Step 2: Set Up Registration”](#step-2-set-up-registration)
The **Registration** tab is where you set up an RSVP flow for your event. You will create a landing page (your event website) and configure a survey (registration forms) with calendar invite delivery.
Choose a landing page template+
1. Go to the **Registartion** tab.
2. Click **Landing Page Templates**.
3. Browse the Global Templates.
Find one that fits your event style.
4. Click a template to preview it.
5. Select **Duplicate to Event** to copy it to your event.
6. Click **Use as Landing Page** to make it active.
You now have a registration page. When guests click their invitation link, this is what they see.
Customize your page+
At minimum, add your event date and time to the page. Beyond that, the default templates are professional and ready to use. You can edit colors, images, and fonts to fit your brand. You can switch the editor to Advanced mode to change layouts, text size, copy/paste blocks around and more.
Find the “Video Help Center” when logged into Gatsby for additional videos about the Landing Page Editor.
Check the rest of your registration settings+
Before you move on, take a quick look at these:
***
**Surveys**
Go to the Surveys tool inside the Registration tab. This is where you modify questions guests see when they register. Dietary restrictions, company name, position. Review what’s there and adjust to fit your event.
***
**Confirmation Emails**
Check your confirmation emails. These are the automatic notification emails guests receive after they register.
***
**Calendar invites**
Make sure the calendar invite organizer is set to your organization. Guests receive the calendar invite when they register, not when you send the invitation.
[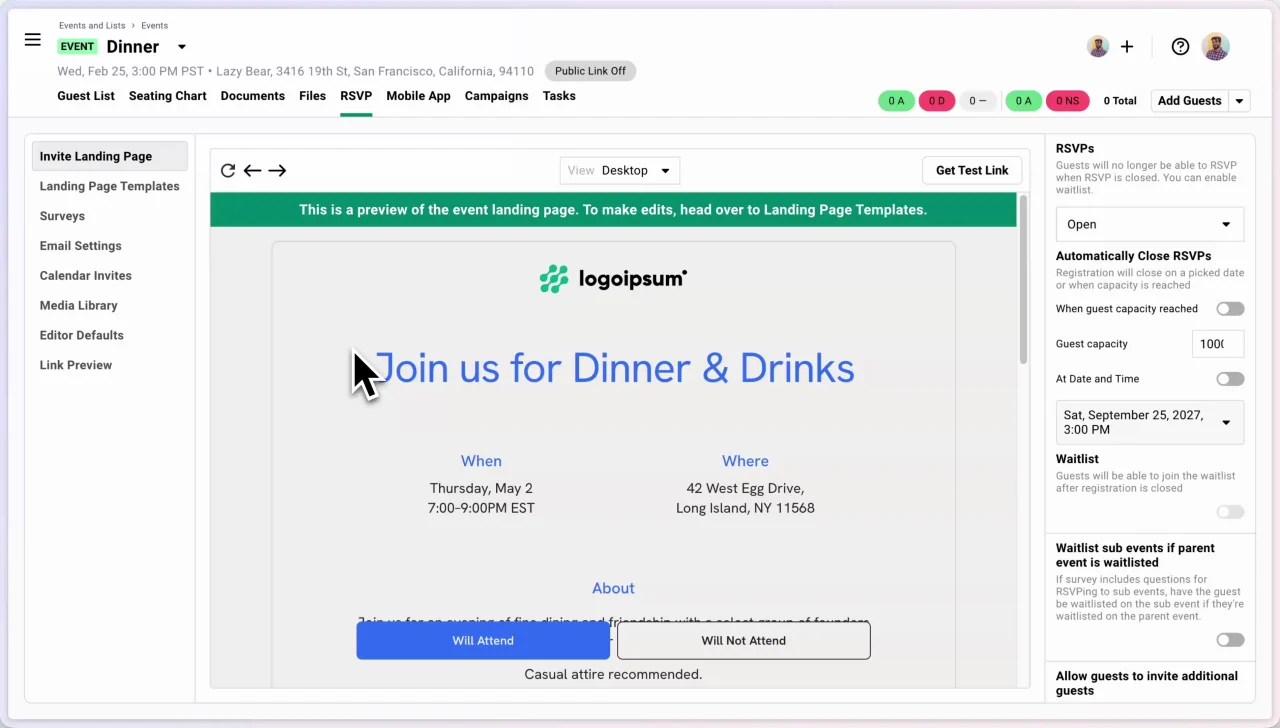](/videos/playbook-first-event-step-2-registration.mp4)
### Step 3: Add Guests
[Section titled “Step 3: Add Guests”](#step-3-add-guests)
Guests need to be on your guest list before you can do anything with them. You can’t send someone a campaign or track their RSVP until they’re on the list. Start by adding yourself so you can test the full experience.
Add yourself first+
1. Click the **dropdown arrow** next to the **Add Guests** button on your guest list.
2. Click **Create Contact**.
3. Add your name and email address, and finish the process to add yourself to the guest list.
You are your first guest. Test the entire experience before sending to anyone else.
**Next time:** Just search for your name in the main “Add Guests” option to quickly add youself again. You don’t need to “Create Contact” every time.
Add more guests+
Three ways to add guests after yourself:
***
**Search and add**
Find existing contacts by name. Add them one at a time. Good for small, curated lists.
***
**Upload a spreadsheet**
CSV import with names, emails, and any other details. Best for larger lists.
***
**Pull from another event or list**
Copy guests from a previous event or a list. Their contact info carries forward automatically.
For now, you just need yourself on the guest list. You will add everyone else after you have tested the full flow.
[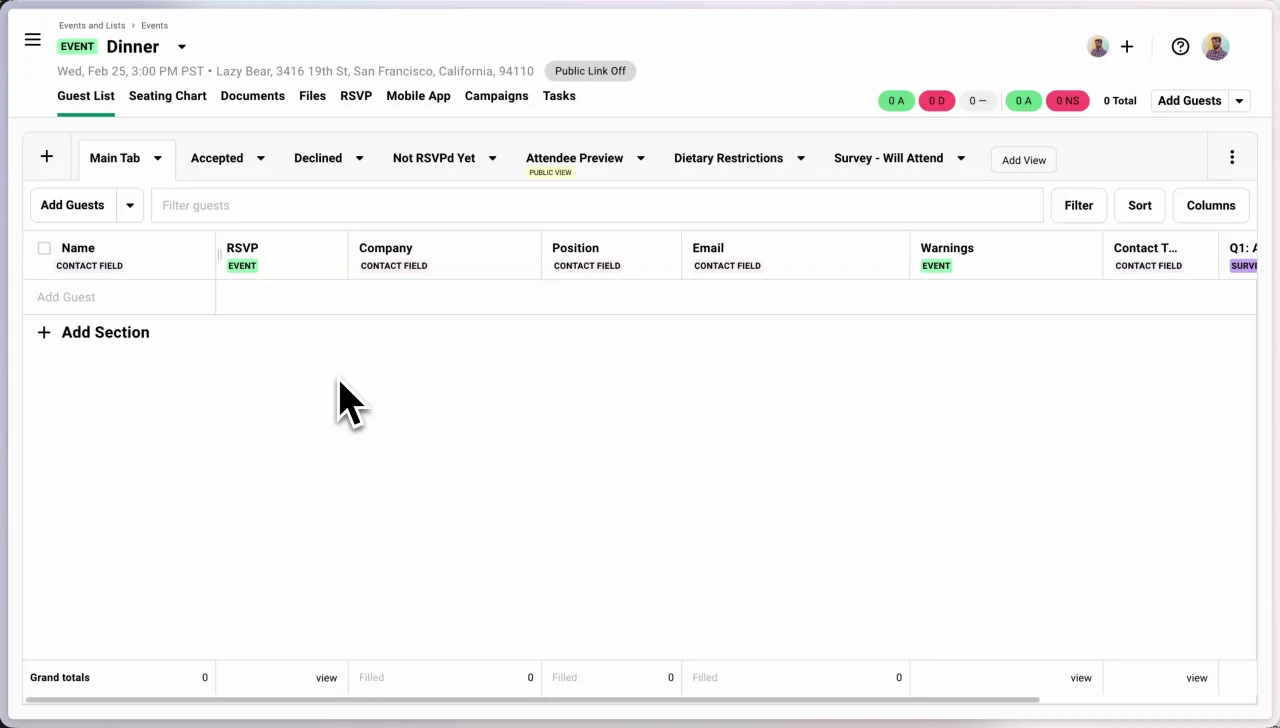](/videos/playbook-first-event-step-3-add-guests.mp4)
### Step 4: Send Your First Invitation
[Section titled “Step 4: Send Your First Invitation”](#step-4-send-your-first-invitation)
Campaigns are how you send emails from Gatsby. Your invitation is a campaign email that contains an RSVP link pointing guests to the registration page you just built.
Create your invitation campaign+
1. Go to the **Campaigns** tab.
2. Click **New Campaign**.
3. Select **Draft**.
4. Fill in the basics:
* **Campaign name** (internal, guests do not see it)
* **Sender** (your connected email)
* **Subject line** (what guests see in their inbox)
5. Write your invitation message.
6. Use the `+` button to insert `{firstName}` for personalization.
7. Use the `+` button to insert `{rsvpLink}` for their registration link.
**This link is crucial. It is unique to each guest.**
The RSVP link explained+
Each guest gets a unique link. The link knows who they are, pre-fills their info, and tracks their response.
If someone forwards the email, the link still points to the original guest. This is intentional. It maintains tracking accuracy.
Do not paste a URL manually. Always use the + menu to insert the RSVP link. The system generates the correct unique link for each recipient.
Test before you send+
1. Click **Add Recipients**.
2. Find yourself and add only yourself.
3. Send the campaign to yourself.
4. Open your email. Click the link.
5. Complete registration on the landing page.
6. Check that everything works.
You will see your status change on the guest list.
**Want to re-test?** Remove yourself from the guest list and re-add yourself. We won’t send you the confirmation email automatically twice, and restoring yourself or resetting your RSVP status doesn’t reset that. **Send Test** won’t show it either, since test links don’t trigger confirmation emails.
Once your test works, add your other guests as recipients and send. Your first invitations are out.
The RSVP link is not optional. Without it, guests have no way to register. Use the `+` menu to insert it. Do not paste a link manually.
[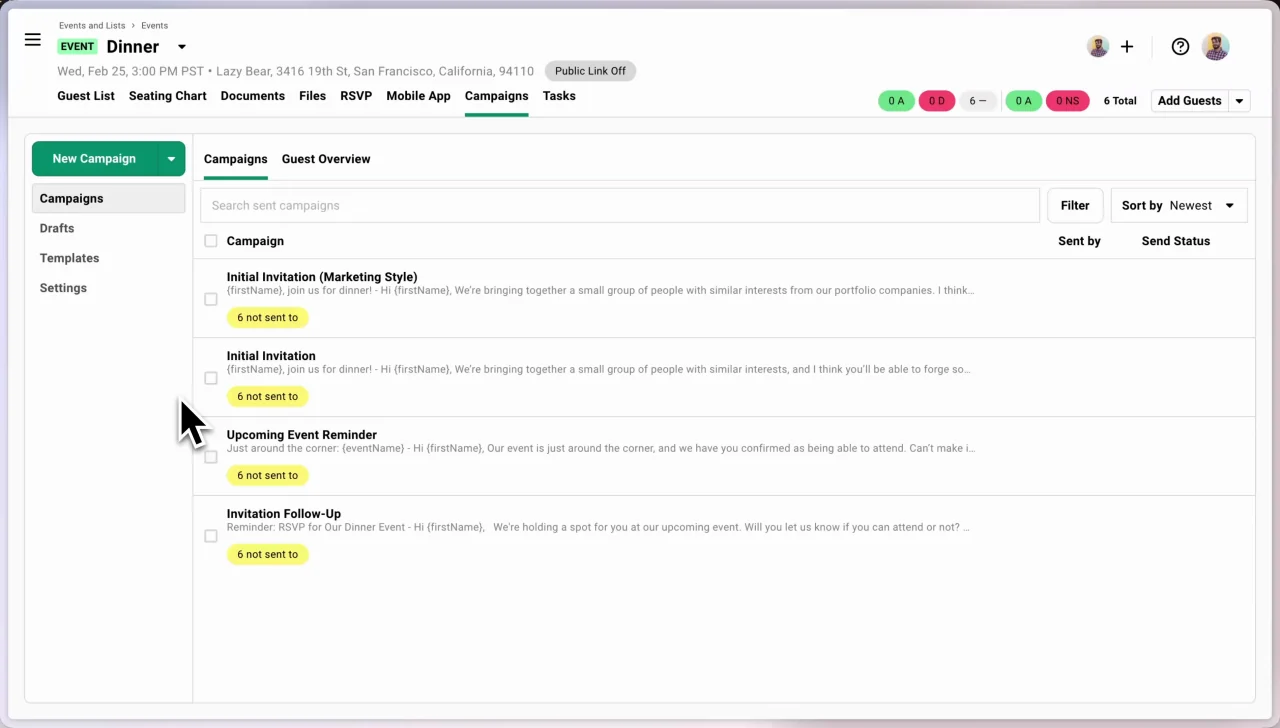](/videos/playbook-first-event-step-4-send-campaign.mp4)
### Step 5: Track Responses and Run Check-In
[Section titled “Step 5: Track Responses and Run Check-In”](#step-5-track-responses-and-run-check-in)
Your guest list updates in real time. Watch statuses change as people respond.
What the statuses mean+
* **Invited** - Sent the link, no action yet
* **Visited** - Clicked the link, did not complete registration
* **Accepted** - Confirmed attending
* **Declined** - Confirmed not attending
Filter by status to see who needs attention. “Visited” guests are warm leads. They started but did not finish. Worth a personal follow-up.
Send a follow-up+
1. Filter your guest list by “Invited” and “Visited” to find non-responders.
2. Select them.
3. Click **Send Message**.
4. Either re-send them your existing campaign or create a new follow-up campaign.
That is your first event. You created it, set up registration, added guests, sent invitations, and tracked responses. Every future event follows this same pattern.
[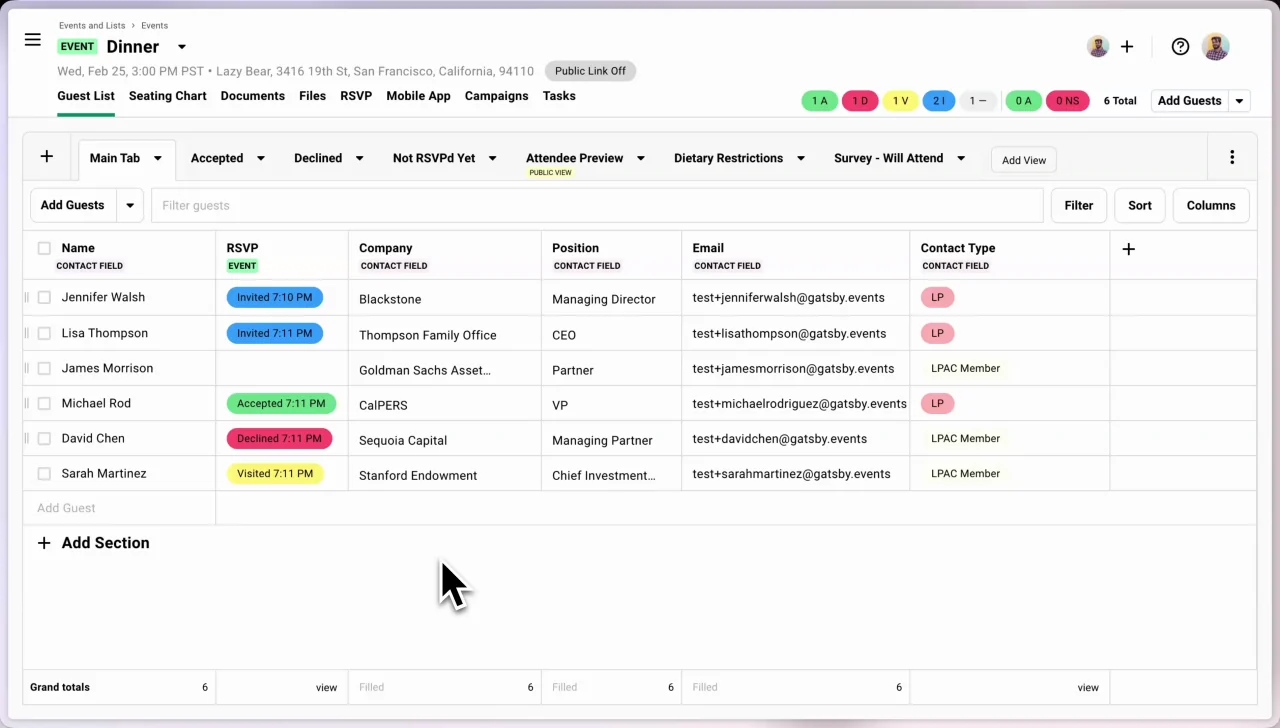](/videos/playbook-first-event-step-5-track.mp4)
## What’s Next
[Section titled “What’s Next”](#whats-next)
You have completed the core workflow. Every event uses these same five steps. As you get comfortable, explore these features.
Collect more information+
Add survey questions to your registration form. Gather dietary restrictions, company info, session preferences, or custom data.
[Registration forms](/platform/registration/registration-forms/)
Customize confirmation emails+
The automatic email guests receive after registering can include your message and calendar invite. Make it match your brand.
[Confirmation emails](/platform/email-campaigns/confirmation-emails/)
Day-of tools+
Check in guests with the mobile app. Print badges. Manage seating. Track who actually showed up versus who RSVPed.
[Day-of event tools](/platform/day-of-event/event-check-in/)
Duplicate for next time+
Once you have run an event successfully, duplicate it for your next one. Your settings, designs, and templates carry forward. Second events take half the time.
## Common Questions
[Section titled “Common Questions”](#common-questions)
Can I edit everything after creating the event?+
Yes. Event details, landing pages, guest lists, campaigns. All editable anytime. Nothing locks.
Made a typo in your event name? Change it. Want to swap the landing page template? Go ahead. Gatsby is designed for iteration.
What if I make a mistake?+
You cannot break anything permanently. Remove guests and re-add them. Delete campaigns and create new ones. Duplicate your event to create a sandbox for testing.
The only thing you cannot undo is a sent email. Test before you send.
Why does the RSVP link matter so much?+
The link is unique per guest. It tracks who clicked and who registered. If you paste a generic link or forget to include it, you lose all tracking and guests cannot register.
Use the `+` menu in a Campaign email. Let Gatsby generate the link.
Where is the calendar invite?+
Calendar invites are attached to confirmation emails (the automatic email after registration) by default.
What if guests reply by email instead of clicking the link?+
You can manually update their RSVP status on the guest list. Click their status field, select Accepted or Declined. Choose whether to send them a confirmation email.
It happens. Some people just hit reply. You have the tools to handle it.
Should I use a 'public' link?+
Personal invitation links give you better tracking and control.
Enable and send your event’s public link later if you need open registration or social sharing. Personal links are the default for high-touch events.
# Follow Up with Guests
> Send reminder emails to guests who received invitations but have not responded. Use guest list views to filter by RSVP status and send targeted follow-ups that feel personal, not automated.
## Why Follow-ups Require Your Judgment
[Section titled “Why Follow-ups Require Your Judgment”](#why-follow-ups-require-your-judgment)
You might expect a “send follow-up” button that automatically reminds everyone who has not responded. Gatsby does not work that way.
Every event is different. Your VIP dinner follow-up should read differently than your conference reminder. A one-click solution would strip that control away.
Gatsby gives you the building blocks:
* Guest list filters that identify who needs follow-up
* Saved views you can reuse across events
* Campaign tools that send personalized emails with unique RSVP links
You decide the timing, the message, and the approach. That flexibility is intentional.
## Building Your Follow-up Workflow
[Section titled “Building Your Follow-up Workflow”](#building-your-follow-up-workflow)
The key to effective follow-ups is knowing exactly who needs one.
Gatsby’s guest list filters let you identify non-responders instantly. Save those filters as views and you have a reusable workflow for every event.
### Understanding RSVP Statuses
[Section titled “Understanding RSVP Statuses”](#understanding-rsvp-statuses)
Before you filter, understand what the statuses mean. Each tells you something different about where the guest is in their decision process.
Blank (No Status)+
Guest has been added to your list but never received an invitation. They are not candidates for a follow-up. They need an initial invite first.
Invited+
Guest received your invitation email but has not interacted with it. The email may be unopened or simply waiting for them to act.
Visited+
Guest clicked their RSVP link and viewed the landing page but did not submit a response. They are interested but uncommitted.
These guests are often your warmest follow-up targets.
Accepted — Survey Incomplete+
Guest started the RSVP process but did not finish the survey questions (only fires if there are required questions on the registration form).
Accepted / Declined / Maybe / Waitlist+
Guest has responded. They do not need a follow-up unless you are specifically re-engaging Maybes or accepting Waitlisted guests.
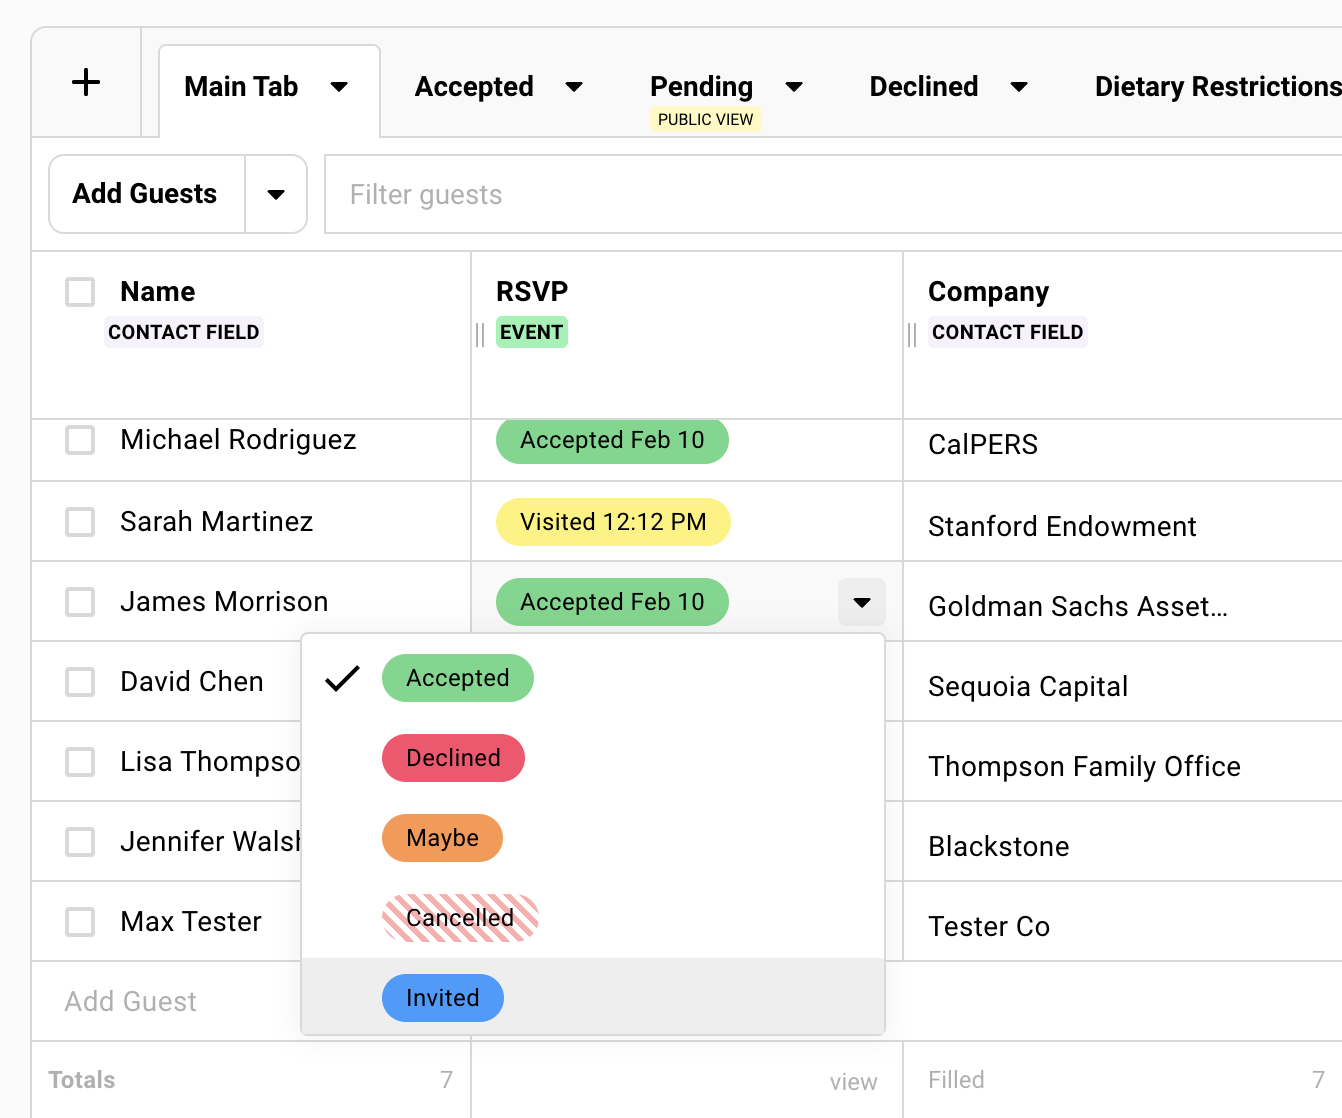
### Creating a “Not RSVP’d Yet” View
[Section titled “Creating a “Not RSVP’d Yet” View”](#creating-a-not-rsvpd-yet-view)
A saved view filters your guest list to show only the people who need a follow-up. Create it once and reuse it throughout your event.
Create a New Guest List View+
On your guest list, click **Add View** » **Not RSVP’d Yet**.
This creates a new tab on your guest list with a pre-applied RSVP status filter. It will show guests who have not registered for your event either way.
Modify this filter if you like to remove blank RSVP status and optionally add “Accepted - Survey Incomplete”. Do not include Accepted, Declined, or Waitlist unless you have a specific reason.
Add the Last Sent Campaign column (optional)+
Click **Columns** » **Add Fields** » **Campaigns** » **Last Sent Campaign**.
This shows which email each guest received most recently and when. Useful for timing your follow-ups.
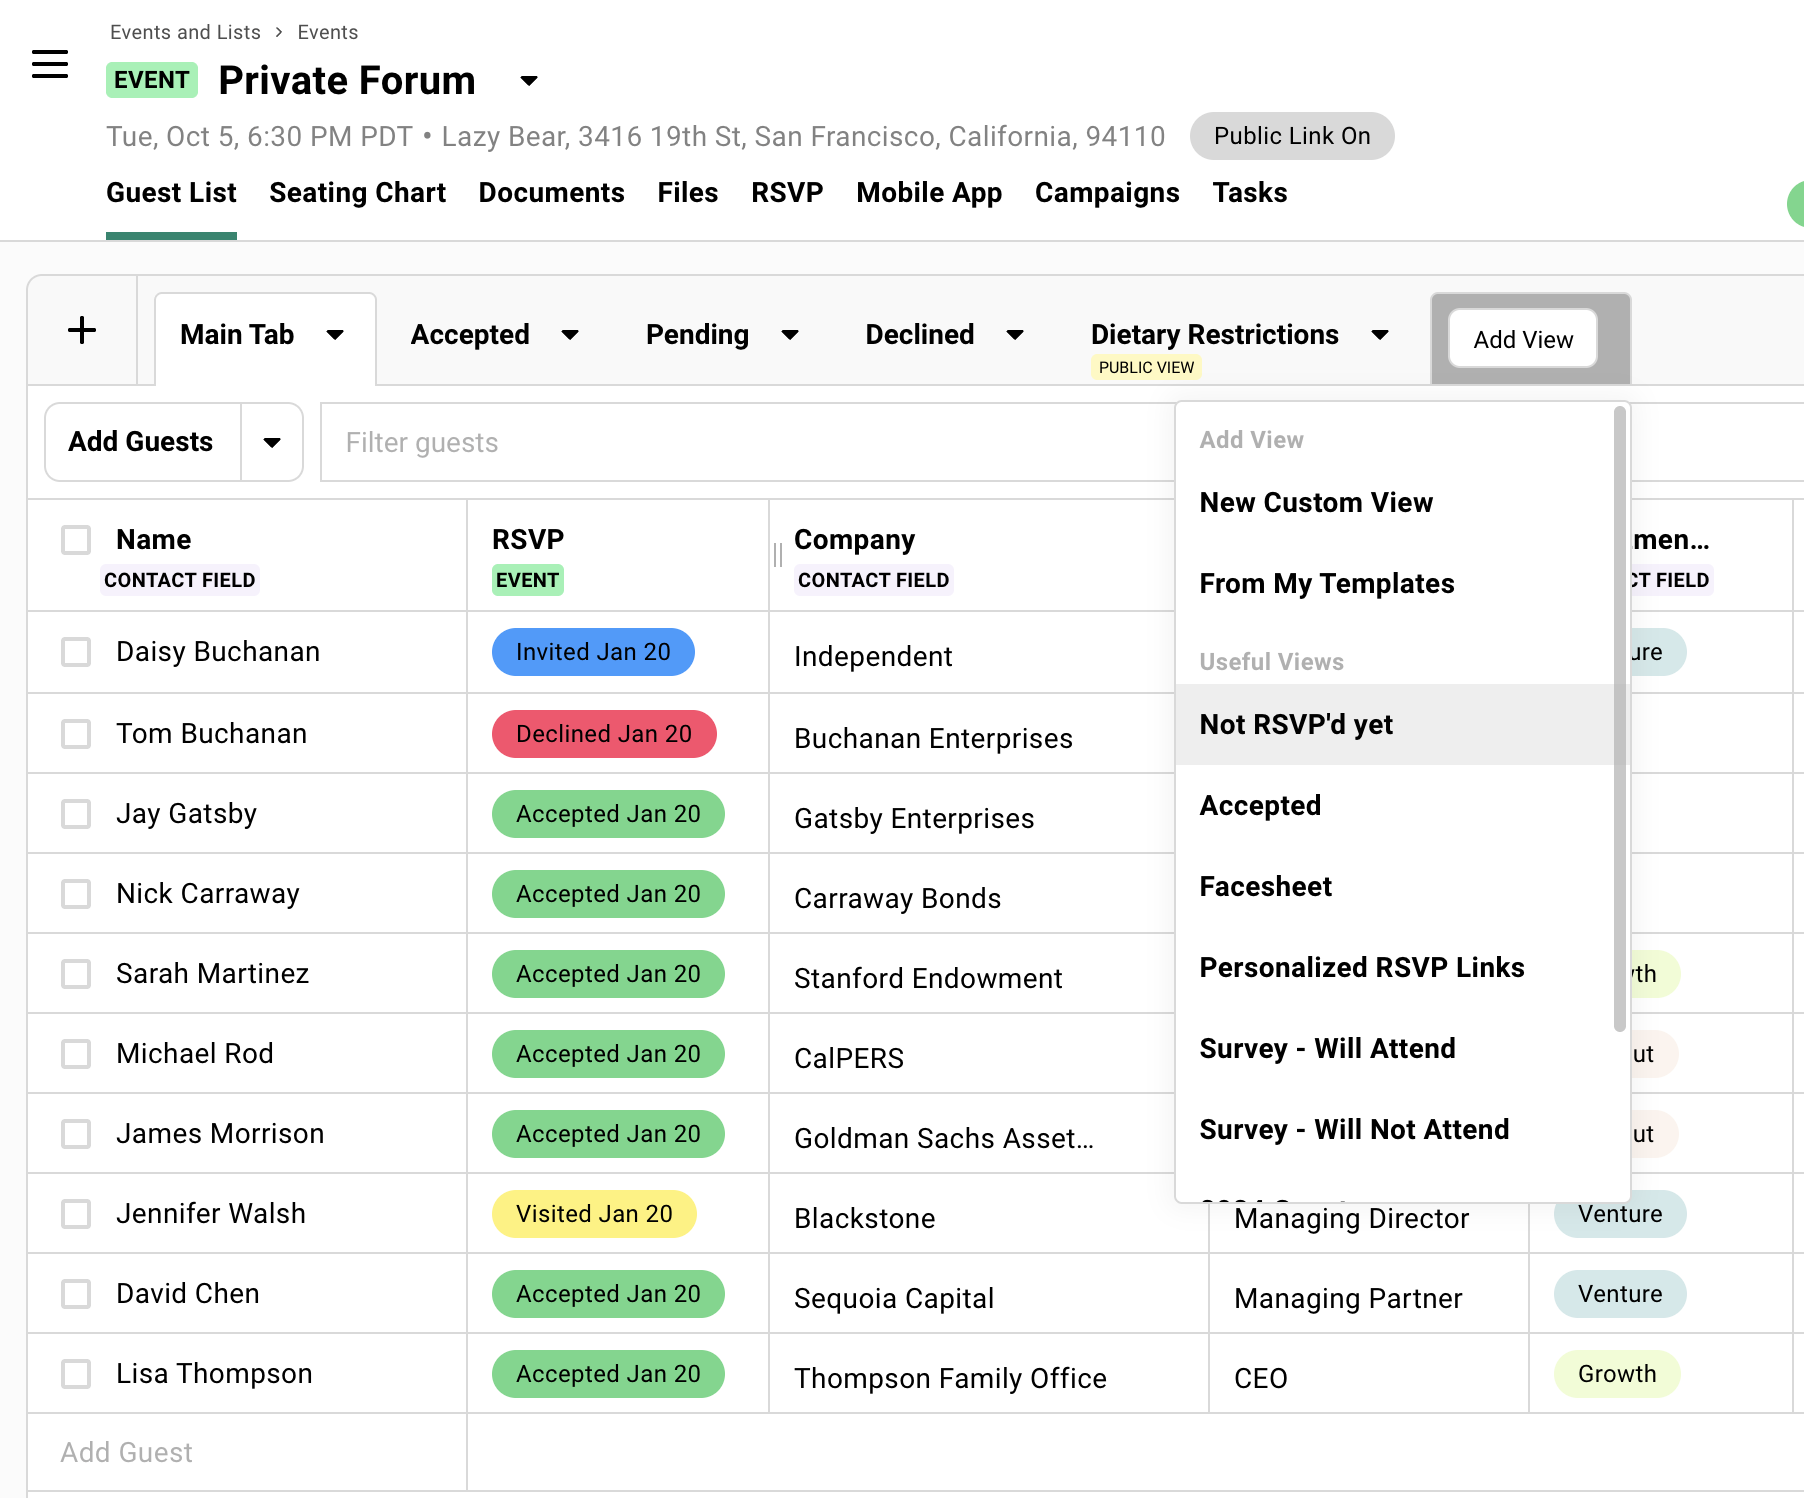
## Sending a Follow-up Email
[Section titled “Sending a Follow-up Email”](#sending-a-follow-up-email)
With your follow-up view active, you can select guests and send them a message directly from the guest list.
Select your recipients+
Click **Select All** to choose everyone in the filtered view, or select individual guests manually.
Only visible guests in your current view will be selected.
Send message+
Click **Send Message** in the toolbar that appears. This opens the campaign composer with your selected guests as recipients.
Include the RSVP link+
In the composer, click the **+** icon and select **RSVP Link**. This inserts the `{rsvpLink}` merge tag, which becomes each guest’s unique personal link when the email sends.
Never send a follow-up without the RSVP link.
Choose new or existing+
You can write a fresh follow-up message or select an existing campaign from the Campaigns tab to resend.
Both options work. See best practices below for guidance on which approach to use.

## Follow-up Best Practices
[Section titled “Follow-up Best Practices”](#follow-up-best-practices)
Sending the same exact invitation a second time rarely works. If they did not respond the first time, something needs to change. Either the timing was wrong, the message did not land, or they need a different approach.
Good follow-ups feel personal, not automated. Here’s what works.
Change the format+
If your first invite was image-heavy and designed, make your follow-up plain text. It reads more like a personal note from a colleague than a marketing blast.
The contrast catches attention.
Add urgency or context+
Include a deadline (“Please let us know by Friday”), mention limited capacity (“We’re finalizing the seating chart”), or explain why their response matters (“We want to make sure we have you on the list”).
Ask for a decision either way+
Some guests avoid responding because they are unsure. Give them permission to decline: “Just let us know either way so we can plan accordingly.”
This often converts fence-sitters into confirmed attendees or clean declines.
Adjust your subject line+
“Reminder: \[Event Name]” or “Following up: \[Event Name]” signals this is a second touchpoint. Some people filter or sort by subject, so differentiation helps.
Timing matters+
Send your first follow-up 5-7 days after the initial invitation. Send a second follow-up 3-4 days before your RSVP deadline (if you set one).
Do not send more than 2-3 follow-ups total unless the event is very high-stakes.
## Common Questions
[Section titled “Common Questions”](#common-questions)
What is the difference between Invited and Visited status?+
“Invited” means they received the email but have not interacted. “Visited” means they clicked the link and viewed your landing page but did not submit a response.
Both need follow-ups, but Visited guests are often warmer leads since they showed interest.
Can I see who opened my invitation email?+
If you have email tracking enabled (Team Settings), you can see open and click rates at the campaign level. Individual open tracking can be show on the guest list using the Columns » Add Fields » Campaigns option and choosing **Opened**.
The “Visited” status tells you they clicked through to the landing page.
Should I include guests with blank status in my follow-up?+
No. Blank status means they never received an invitation in the first place. Send them an initial invite, not a follow-up.
Your follow-up view should exclude blank status guests.
What if someone says they never got the original invitation?+
Check that their email address is correct in the guest list. Resend the invitation directly to them.
Event-related emails sometimes land in spam or get caught by corporate filters, especially if they include images, lots of links, and heavy HTML formatting.
How many follow-ups is too many?+
Two or three is standard. More than that and you risk annoying people. If someone has not responded after three touches, they are either not interested or the event is not a priority for them.
Consider a phone call or personal outreach for truly VIP guests.
Can I automate follow-ups in Gatsby?+
Gatsby does not have automated drip campaigns for follow-ups.
Follow-up timing and messaging varies widely between events. The saved view workflow makes manual follow-ups fast and targeted.
# Save The Dates (that act like pre-registration)
> Build a save-the-date that doubles as a one-click RSVP. Months before the formal invite goes out, you can see who plans to come. That intent data feeds your venue, sponsor, and wave-one invite plan.
## Why
[Section titled “Why”](#why)
You can send a save-the-date that announces the date and hope guests add it to their calendars.
Or, you can send a save-the-date that basically let’s you **track who actually wanted it on their calendar.**
When you need this setup+
High-stakes, relationship-driven events three to six months out. Annual meetings, portfolio summits, board dinners, and member retreats.
If your event is two weeks away, you don’t need this. If it’s a casual dinner, an ICS attachment is enough.
This setup earns its weight when the event has stakes and you have the runway to use the data.
What guests see and what you get back+
On the guest side, it feels like clicking an ICS attachment.
One email, a button labeled **Request calendar invite**. Then, a confirmation screen, and moments later an email comes back with the calendar invite attached. No landing page, no calendar picker, no questions.
On your side, you get a few things worth the setup:
* **Per-guest pre-registration data.**
Names, not estimates. You can see exactly who pre-registered the moment they click.
* **A real number for venue, sponsor, and speaker conversations.**
“Sixty regulars have expressed interest” lands differently than “we’re expecting about a hundred.”
* **A wave-one invite signal.**
When the formal invite goes out months later, you already know who’s bought in. The pre-registered get the lighter touch. The people who didn’t engage are where the personal outreach earns its keep.

## How it works
[Section titled “How it works”](#how-it-works)
Underneath, this is Gatsby’s RSVP with one toggle changed.
The save-the-date email goes out with each guest’s personalized RSVP link, so when they click, Gatsby already knows who they are.
With **Skip the page, go straight to the survey** on, there’s no landing page in the way. They click, they’re confirmed, and the calendar invite goes out as the attachment on the confirmation email.
That’s the whole technique.
The setup below tunes the confirmation email and the calendar entry so they read as your own work, then links the save-the-date to the eventual formal-invite event so the guest list builds itself.
## Setting It Up
[Section titled “Setting It Up”](#setting-it-up)
The whole setup is five steps.
1\. Create the formal-invite event (the parent)+
Create this one first, even though you won’t send anything from it for months. It’s the event you’ll eventually use for the **real invite**, and you want save-the-date guests to sync into it from day one.
1. Go to **Events and Lists**. Click **Create Event**.
2. Name it for the real event (like “Gatsby Capital’s AGM 2027”).
3. Set placeholder date, time, and location. (You can update them later). Guests won’t see this event until you send the formal invite.
4. Open the **Advanced** tab and **enable children**. This is what lets you link a save-the-date underneath it.
5. Click **Create**.
2\. Create the save-the-date event (the child) and link them+
This is the event your guests actually interact with for your Save The Date.
Use the **Calendar Invite Only Event** template. It’s built for the one-and-done flow, so the RSVP link is already stripped out of confirmation emails and calendar invites.
1. Go to **Events and Lists**. Click **Create Event**.
2. Name it clearly (like “Save the Date: Gatsby Capital’s AGM 2027”).
3. Select the **Calendar Invite Only Event** template.
4. Set the actual event date, time, and location. This is what guests will see on their calendars. If the start time isn’t nailed down, use midnight-to-midnight for an all-day hold and push a calendar update later.
5. Open the **Advanced** tab, enable **Parent**, and select your formal-invite event (“Gatsby Capital’s AGM 2027”). Click **Create**.
From this point on, anyone who gets added to the save-the-date event syncs upward into the formal-invite event’s guest list automatically. When you send the formal invite months later, the guest universe is already there.
See [Event Families](/platform/events-lists/families/) for the full picture.
3\. Skip straight to the survey and strip the RSVP link from downstream messages+
Three small toggles in the save-the-date event, all pointing at the same idea: this is a one-touch flow, so nothing downstream should invite guests to come back.
1. In the save-the-date event, go to **Registration » Invite Landing Page**. Under **How guests get in**, turn on **Skip the page, go straight to the survey**. This is what turns the experience into a single click. Without it, guests land on a full landing page first.
2. Go to **RSVP** » **Email Settings** » **Acceptance Confirmation**. Confirm the calendar invite is attached (it should be by default). Change the sender to a real person or a shared address like `ir@yourfirm.com`, and add a short line like “Formal invite to follow.” Remove the `{rsvpLink}` merge tag if it’s still in the body.
3. Go to **RSVP** » **Calendar Invite** and click **Edit**. Confirm the organizer. Remove the `{rsvpLink}` from the description if it’s still there.
Skip survey questions in this event. Even one breaks the one-click feel. The save-the-date is a hand-raise, not a registration form. Save the questions for the formal invite.
For the full reference on these settings, see [Registration Forms](/platform/registration/registration-forms/), [Confirmation Emails](/platform/email-campaigns/confirmation-emails/), and [Calendar Invites](/platform/registration/calendar-invites/).
4\. Upload your guests to the save-the-date event+
Add guests to the save-the-date event through its **Guest List** tab, the same way you’d add them to any other event. Because the save-the-date is linked as a child of the formal-invite event, guests appear in the parent’s guest list automatically.
You don’t need to upload them to the formal-invite event yourself. The Family link handles it.
5\. Build the campaign and rename the RSVP button+
Compose the save-the-date as a normal campaign in the save-the-date event. Keep it short. The calendar invite is the payload, not the email body.
The one detail worth getting right is the button label. It’s tempting to use “Add to Calendar,” but most implementations of that phrase open a calendar picker, which isn’t what this button does. Something closer to the action works better. “Request calendar invite” or “Send me the calendar invite” both signal what’s actually about to happen.
1. In the save-the-date event, go to **Campaigns**. Click **New Campaign**.
2. Compose your save-the-date email.
3. Insert the **`{rsvpLink}`** merge tag via the **+** menu in the editor.
4. Change the button text from “RSVP” to something like **Request calendar invite** or **Send me the calendar invite**.
5. Send a test to yourself. Click through to confirm the one-click flow works end to end.
6. Send to your guest list.
For more on writing campaigns, see [Campaigns](/platform/email-campaigns/campaigns/).

## After Setup
[Section titled “After Setup”](#after-setup)
Reading the intent data+
The save-the-date event’s guest list already shows you who pre-registered. Anyone with an **Accepted** status raised their hand.
For a fuller view, open your **formal-invite event** (the parent). Everyone who pre-registered is already synced in from the Family link. Open **Columns** » **Add Fields** » **Other Events/Lists**, pick the save-the-date event, and add its **RSVP** column. You now have a single guest list showing your full universe, with a column you can sort on to separate the hand-raisers from everyone else.
Sending the formal invite later+
Send it from the **formal-invite event** you created up front, not by repurposing the save-the-date. Build the landing page, configure the real RSVP, write the campaign. All the normal invitation setup. See [Sending Event Invitations](/playbooks/invitation-workflows/sending-invitations/) for the standard workflow.
Use the save-the-date RSVP column on the guest list to split your work in two: the people who pre-registered get the lighter touch (a polished blast, maybe a short personal note), and the people who didn’t are where the partner texts, handwritten cards, and personal outreach earn their keep.
Why not just repurpose the save-the-date event? It’s already sent confirmation emails and calendar invites to its accepted guests. Confirmation emails fire automatically only once per guest per event, so resetting statuses and re-sending wouldn’t generate a new calendar invite. The separate formal-invite event is the only way to send a real calendar invite to the same person twice.
Avoid renaming the save-the-date event into the formal invite as a shortcut. Pushing a calendar update from a renamed event before the real invite lands reads as presumptuous and confuses guests about whether they’ve already RSVPed.
What guests will see on their calendar+
Guests end up with two entries on their calendar: the save-the-date hold, and the real event once they accept the formal invite. The save-the-date sits with a clear title, so they’ll know which to delete, and that delete is one click.
The alternative is one calendar entry that morphs from save-the-date to real event, which costs you the first impression of your formal invite. The one-click cleanup is the better tradeoff.
## Common Questions
[Section titled “Common Questions”](#common-questions)
Will guests get a calendar invite if I manually mark them as Accepted?+
Yes (if you want). Confirmation emails (and the calendar invite attached to them) fire automatically when the guest acts through the registration page. Manually changing RSVP status on the guest list will give you the option to send the confirmation email.
Does the save-the-date RSVP carry over to the formal-invite event?+
The guest bubbles up via the Family link. They appear on the formal-invite event’s guest list the moment you upload them to the save-the-date event. The RSVP *status* doesn’t carry, since they’re different commitments and you’ll want to ask for the real one separately.
You can see both columns side by side on the formal-invite event’s guest list if you like.
What if I never created the formal-invite event up front?+
No worries. Select your guests in the Save the Date event, and use the “Add to Event” option to add them to your main event.
The “create the parent first” recommendation is about avoiding having to manually add guests to the event where you send your formal invite; it’s not a hard requirement.
Do I have to use Event Families?+
No. You can keep the save-the-date standalone and use its own guest list as the pre-registration record. When you build the formal-invite event later, you’d add the guests to your main event yourself.
Families just save you that step. The save-the-date guest list pre-populates the formal-invite event automatically, and you can pull the save-the-date RSVP column onto the formal-invite guest list for wave-one planning.
Can I include an ICS attachment as a fallback?+
Technically yes, in practice it works against you.
Guests pick whichever calendar option shows up first, usually the ICS preview at the top of the email, and you get no signal back. The whole point of this setup is the data on the back end, so committing to the RSVP/Request button is what makes it pay off.
# Sending Event Invitations
> Send event invitations and understand the complete workflow from campaign to registration to confirmation emails with calendar invites.
## How Invitations Work in Gatsby
[Section titled “How Invitations Work in Gatsby”](#how-invitations-work-in-gatsby)
Sending an invitation feels like a single action. But several pieces work together: your campaign email, the registration website, confirmation emails, and calendar invites.
An invitation is a campaign email that contains an RSVP link. When guests click and register, separate systems handle confirmation and calendar invites.
> **Campaign Email** (that you send) → Contains an **RSVP Link** → that takes guests to a **Registration Page** → where they RSVP and get a **Confirmation Email** (automatic) → that includes the **Calendar Invite**.
What triggers each step+
Each step in the workflow fires automatically once the previous one completes.
***
**Campaign sends**
When you click Send. You control the timing and recipients.
***
**Registration happens**
When the guest clicks your RSVP link and completes the survey form on your landing page.
***
**Confirmation email fires**
Gatsby sends this after registration. It includes event details and any message you configured.
***
**Calendar invite attached**
By default, the calendar invite is attached to the confirmation email. Guests add it to their calendar from there.
[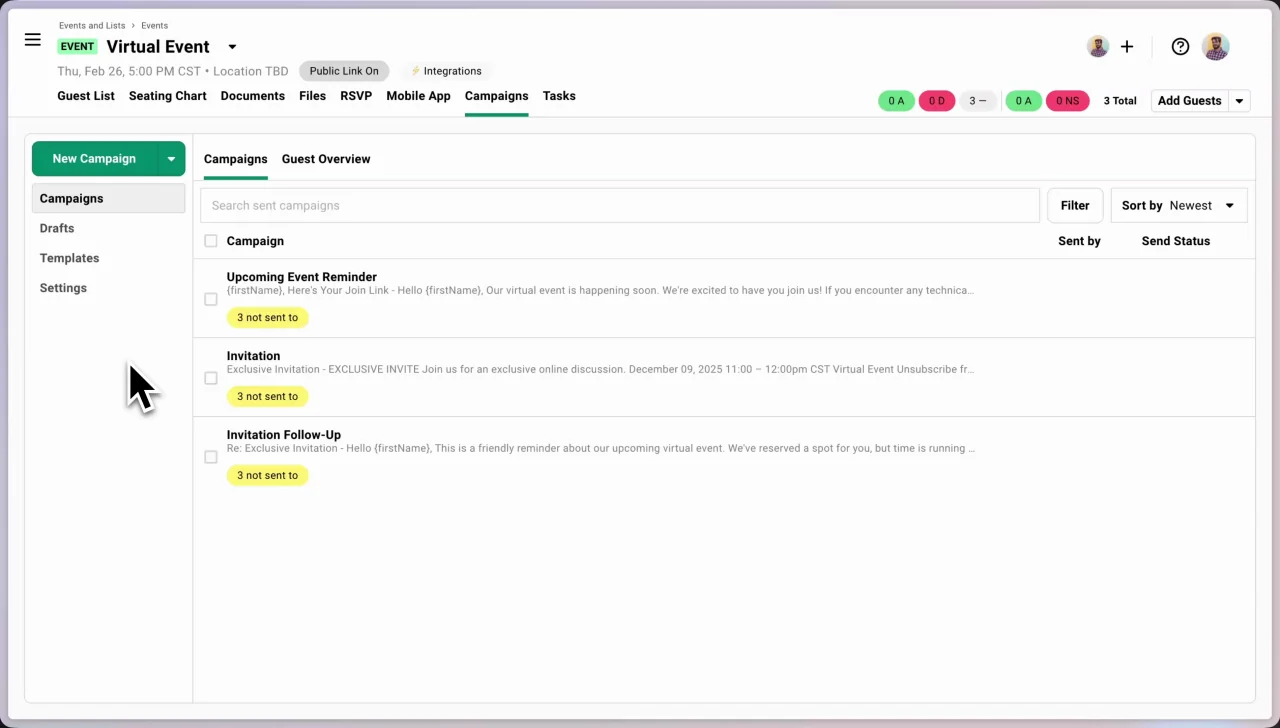](/videos/playbook-sending-invites-1-overview.mp4)
## Before You Send
[Section titled “Before You Send”](#before-you-send)
Four things need to be ready. If any are missing, your invitation will have problems.
* **[Email integration](/platform/account-settings/email-configuration/)** connected. Send from a real person’s address, not a system one.
* **[Registration](/platform/registration/capacity-waitlists/)** configured. Access model, capacity limits, deadline.
* **[Landing page](/platform/registration/landing-pages/)** built. Branding, event details, survey questions.
* **[Guest list](/platform/events-lists/guest-lists/)** populated. Guests need to exist before you can send to them.
## The RSVP Link in Your Campaign
[Section titled “The RSVP Link in Your Campaign”](#the-rsvp-link-in-your-campaign)
When you send guests an RSVP link, each recipient gets their own unique URL. Think of it like a magic link. Gatsby knows who clicked, pre-fills known information, and tracks their response. Guests confirm instead of typing.
One thing to know: these links are **non-transferable.** If someone forwards your invitation, the link still belongs to the original guest. It does not create a new registration.
Gatsby also supports **public links** for open registration where anyone with a URL can register themselves. Different use case, different setup.
[Learn about link types](/platform/registration/registration-links/)

## Creating and Sending Your Campaign
[Section titled “Creating and Sending Your Campaign”](#creating-and-sending-your-campaign)
Quick steps to send+
1. Go to the Campaigns tab. Click **New Campaign**.
2. Choose **Draft**.
3. Add your campaign name (internal only), sender email, and subject line.
4. Write your invitation using the editor.
5. Insert the RSVP link using the **+** menu.
6. Select recipients from your guest list.
7. Send.
Writing invitations that get opened+
Your invitation competes with every other email in your guest’s inbox. The ones that get opened look personal. The ones that get ignored look like marketing blasts.
* **Send from a person, not a brand.** “Sarah Miller” gets opened. “Events Team” gets filtered.
* **Short subject, specific.** “Dinner on March 12th” beats “You’re Invited to Our Exclusive Networking Event.”
* **Keep the email brief.** Your landing page carries the details. The email’s job is to get the click.
* **Use merge fields.** “Hi `{firstName}`” is the minimum.
* **One clear RSVP link.** Not buried in a paragraph.
For detailed campaign editing guidance, see [Creating Campaigns](/platform/email-campaigns/campaigns/).
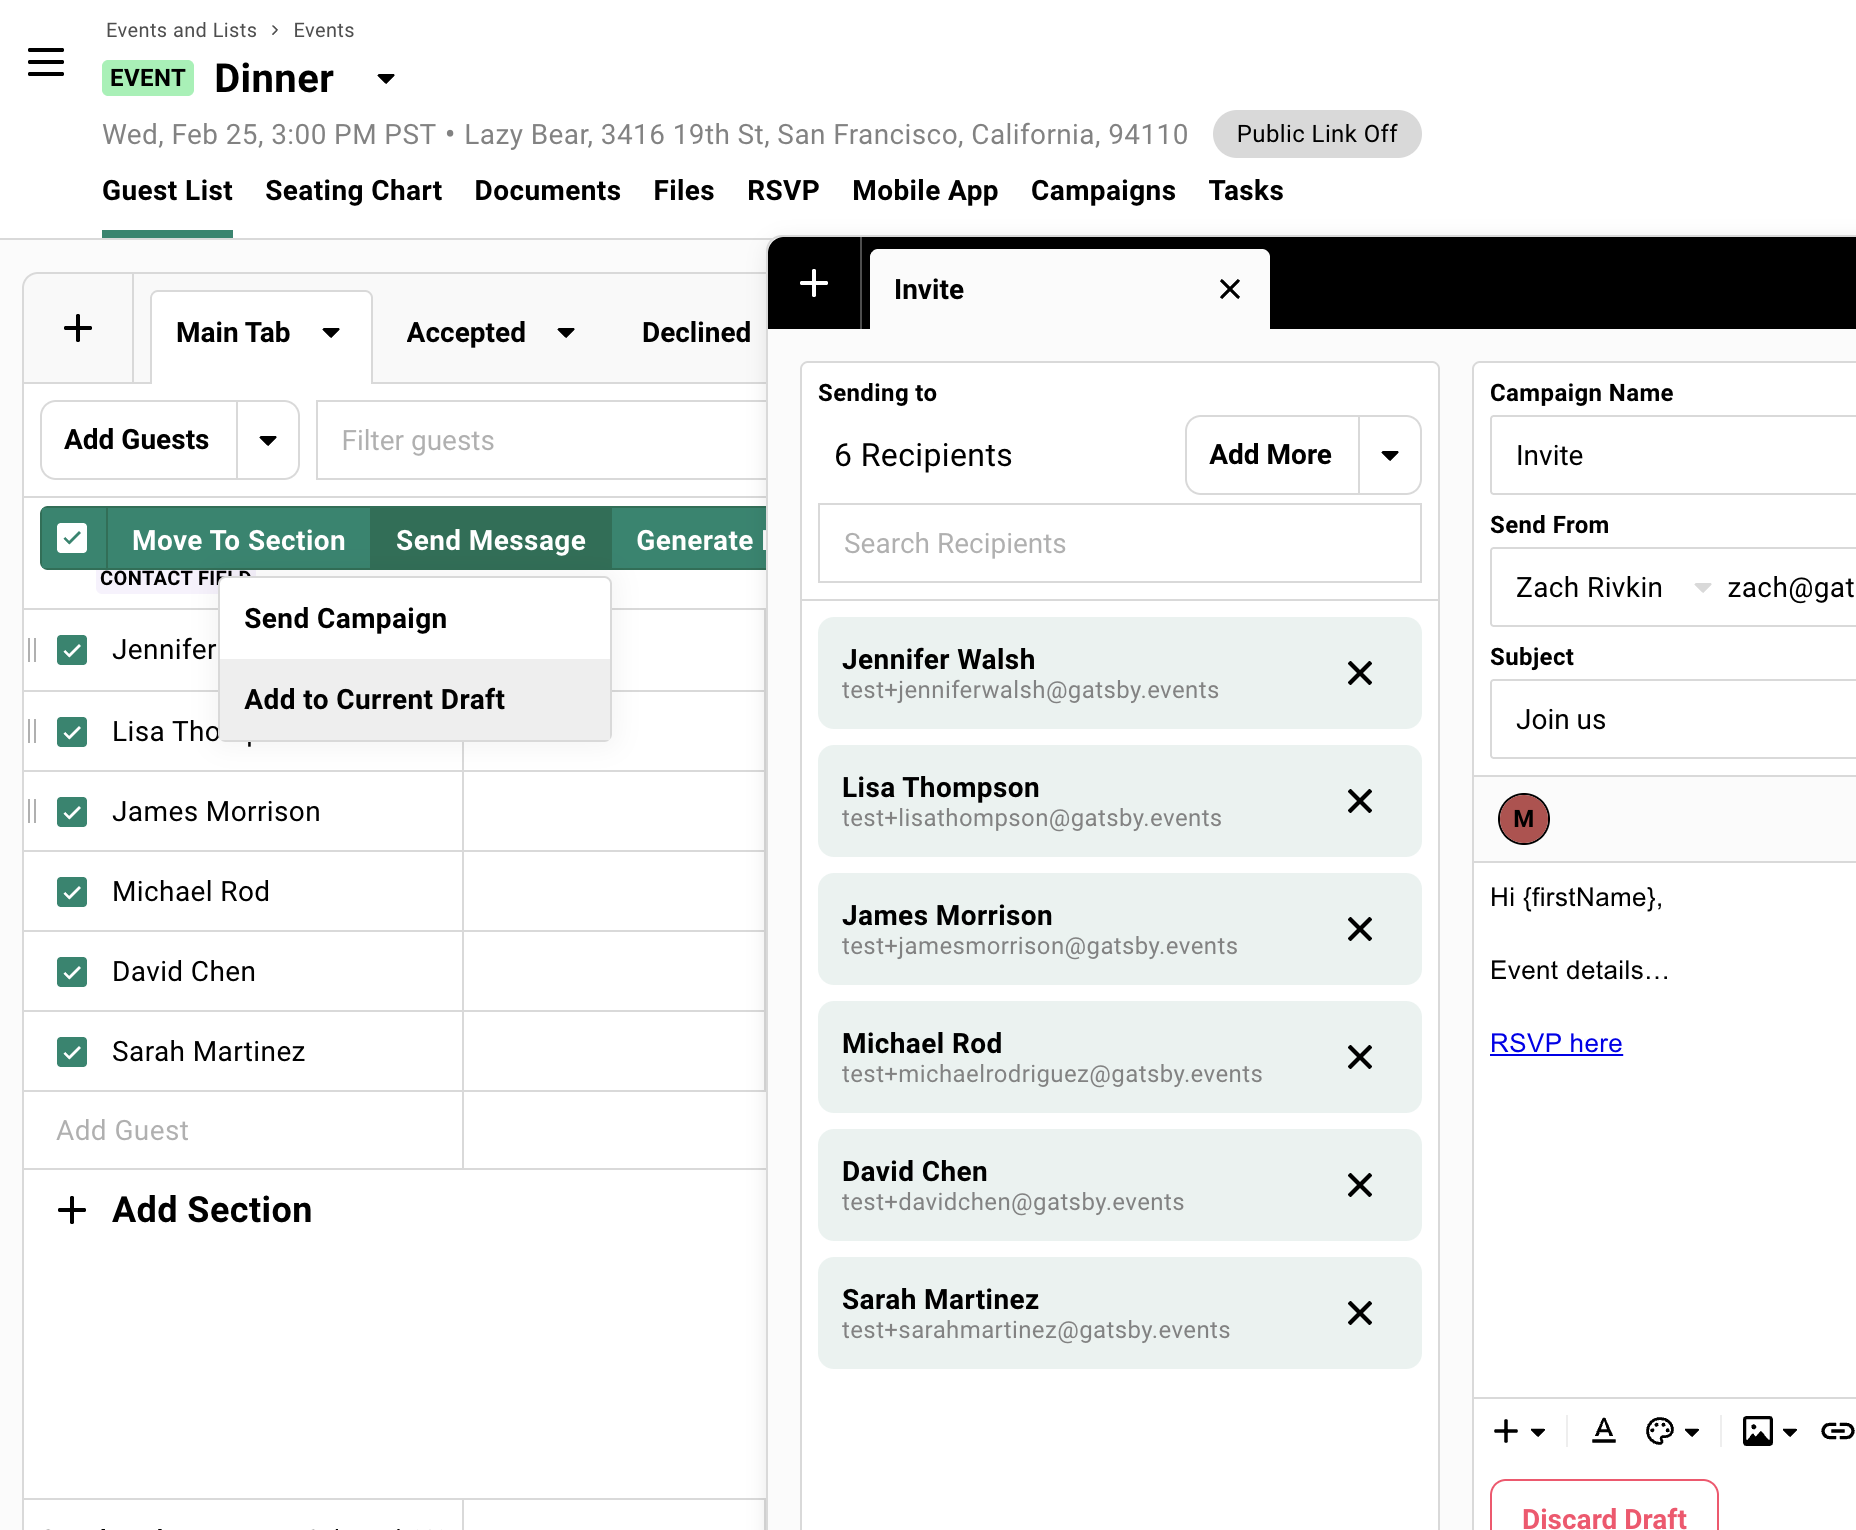
## Test Before You Go Live
[Section titled “Test Before You Go Live”](#test-before-you-go-live)
Your first email to guests needs to be right. The best way to know: invite yourself.
Add yourself as a guest and send the campaign to yourself only. Open the email, click the link, complete registration, check for the confirmation email and calendar invite.
How to test (step-by-step)+
1. Add yourself as a guest to the event. Use your real email address.
2. Create your invitation campaign with an RSVP link.
3. Send the campaign to yourself only.
4. Open the email in your inbox. Click the RSVP link.
5. Complete registration on the landing page.
6. Check for the confirmation email and calendar invite.
7. Verify everything looks right: branding, information, timing.
What you are checking+
**Email arrives correctly**
* Subject line displays as expected
* Formatting looks right
***
**RSVP link works**
* Takes you to your event’s landing page
***
**Landing page displays properly**
* Your branding appears
* Buttons work
* Survey questions show up
***
**Registration completes**
* Status updates in your guest list
***
**Confirmation email sends**
* Arrives in your inbox
* Calendar invite is attached
* Event details are correct (date, time, location, description)
After testing, you can remove yourself and any other team members you used as tests guests from the guest list.
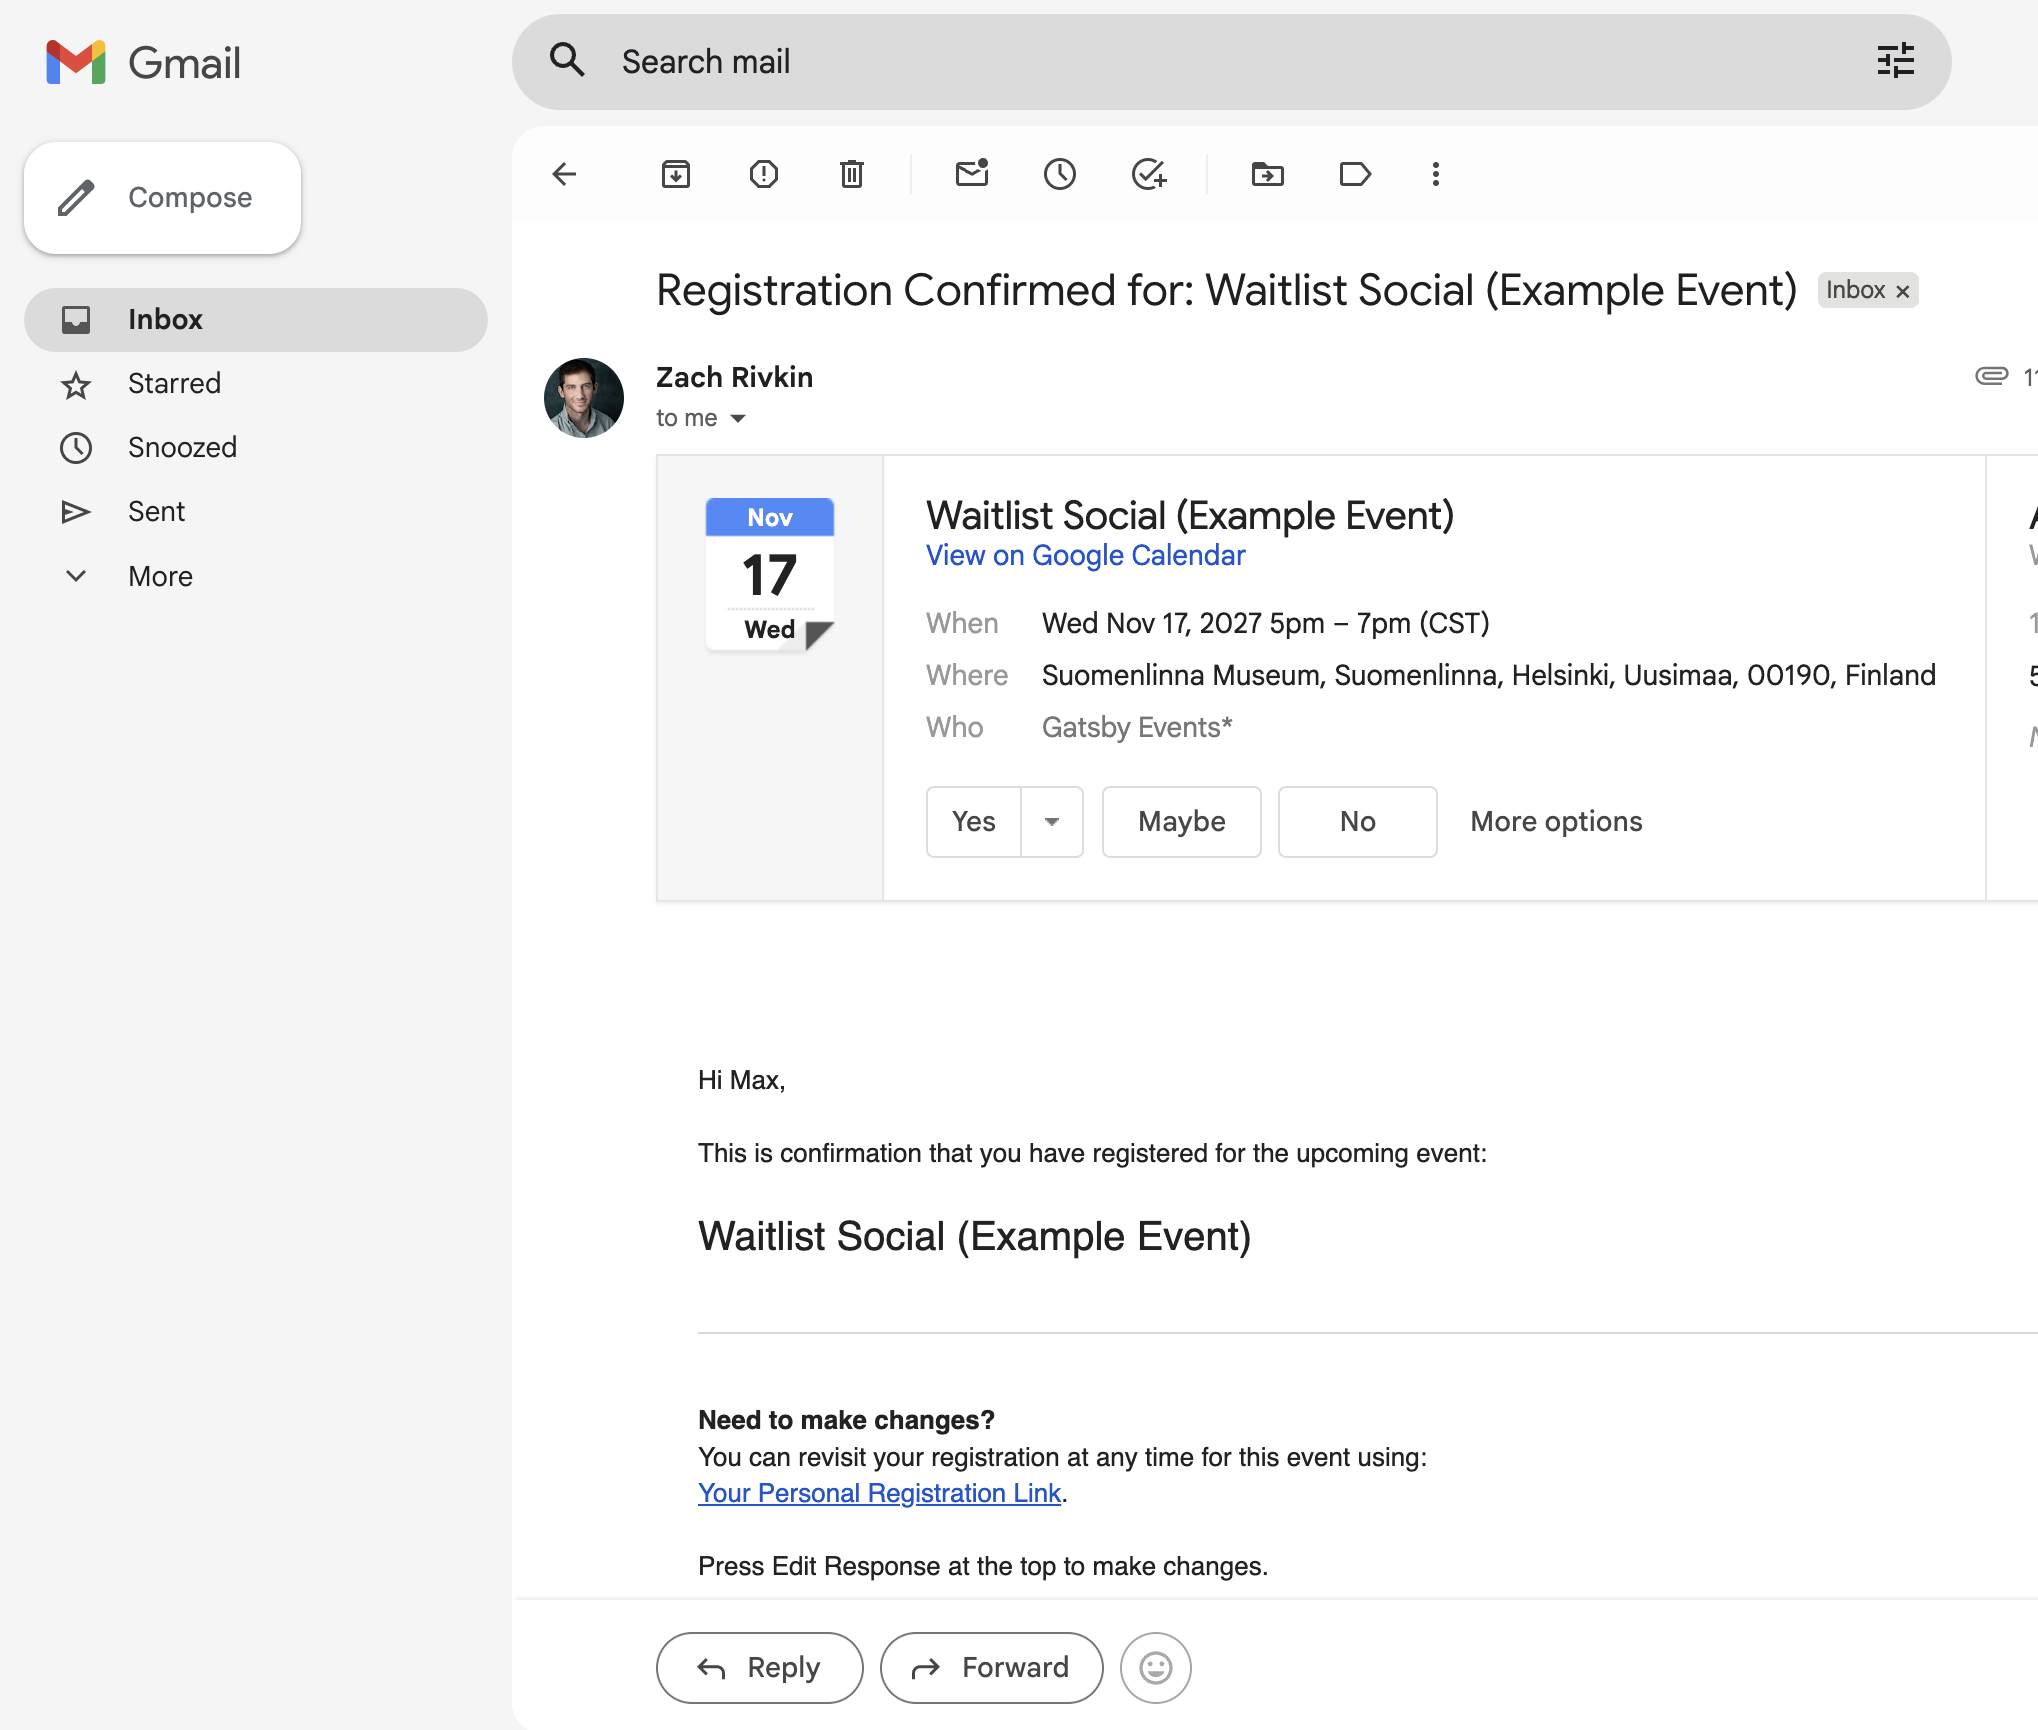
## After You Send
[Section titled “After You Send”](#after-you-send)
Responses show up on your guest list as they come in. You will see RSVP statuses change as guests visit your landing page and either accept or decline.
Sends from a Gmail or Outlook sender don’t land all at once. Gatsby paces them at about one email every 8 to 10 seconds, so 100 invitations take about 15 minutes. For lists over about 500, send from SendGrid. See [Sender Settings](/platform/email-campaigns/sender-settings/).
When you are ready to nudge people who have not responded, duplicate your campaign and filter recipients to “Invited” and “Visited” RSVP status only. This skips anyone who already answered.
## Common Questions
[Section titled “Common Questions”](#common-questions)
Why did my guests not get a calendar invite?+
Calendar invites attach to confirmation emails. Confirmation emails send after registration. If guests have not registered, they will not have calendar invites.
Check:
1. Did the guest actually complete registration? (Look at their RSVP status)
2. Did they register through the public link? The public link has its own **Add to Guest Calendar** setting, and if it’s off, public registrants don’t get the invite.
3. Is the calendar invite attached to the Confirmation email? (Registration » Confirmation Emails. If it’s missing, add it back from the three-dots menu on the Accepted email.)
[Configure calendar invites](/platform/registration/calendar-invites/)
Can I send different invitations to different groups?+
Yes. Create separate campaigns for each group. Use Guest List sections or filters to target specific segments by tag, custom field, or RSVP status.
[Learn about email recipients](/platform/email-campaigns/campaigns/)
What if I need to add more guests after sending?+
Add the new guests to your guest list. Open your original campaign and use “Not Sent To” tab to add only the new people. Or duplicate the campaign if you need to change the message.
What is the difference between an invitation campaign and a confirmation email?+
Invitation campaigns are emails you write and send manually. Confirmation emails are automatic messages that Gatsby sends when someone registers.
[Learn about confirmation emails](/platform/email-campaigns/confirmation-emails/)
# AI Landing Pages
> Prompt Lovable, Bolt, or v0 to design a custom, animated, multi-page landing page for your event. Gatsby wraps it with the RSVP frame and runs registration like a native template.
## Premium Landing Pages, Built by AI
[Section titled “Premium Landing Pages, Built by AI”](#premium-landing-pages-built-by-ai)
Tell Lovable, Bolt, or v0 what you want. An animated globe that pulses with your event location. A custom typeface. A multi-page agenda with anchor-link navigation. A scroll-driven hero that introduces your speakers. The AI ships a fully designed site in minutes. Point Gatsby at the published URL, and Gatsby wraps it with the RSVP frame guests need to register, the confirmation email they receive, and the guest-list tracking your team relies on.
The design feels like you hired an agency. The registration plumbing comes with Gatsby.
[See a live example.](https://gatsby.events/gatsby-capital/rsvp-test/invite?e=fintech-global-summit-2026\&t=1778257186151)

## What You Can Build Now
[Section titled “What You Can Build Now”](#what-you-can-build-now)
A new path opens up for the page guests land on. Describe what you want in plain language to a tool like Lovable, Bolt, or v0, and it produces a polished, custom-designed site in minutes. Animation, multi-page navigation, custom typography, a bespoke brand expression — anything you can describe in a prompt is on the table. The kind of page that used to mean an agency engagement now takes an afternoon.
What AI Landing Pages unlock+
**Animation as a core part of the design.** A particle hero. A scroll-driven map. A dynamic chart that loads in. Anything that has to move.
***
**Anchor links and multi-page navigation.** A nav bar that scrolls to “Agenda,” “Speakers,” and “Venue” within the page. A separate “About the host” page. A press kit page. Anything past a single scroll.
***
**A bespoke brand expression.** A flagship event where the page itself is part of the brand moment. The look and feel a great in-house designer would produce.
***
**A site that already exists.** Your marketing team already built the conference site on Webflow or Framer. You want guests to register through Gatsby without sending them to a separate URL.
## How It Works
[Section titled “How It Works”](#how-it-works)
Two pieces. The AI-built site you publish to a public URL. The Gatsby landing page that wraps it with RSVP.
### The Structure
[Section titled “The Structure”](#the-structure)
Your AI-built site loads inside a Gatsby landing page. Guests don’t see the seam. They scroll your custom design, then hit Accept or Decline on the Gatsby RSVP frame. When they click, the standard Gatsby registration flow takes over: confirmation email, calendar invite, guest list update, all the same as a native template.
The AI-built site doesn’t need to know anything about Gatsby. No RSVP button. No registration form. Tell the AI to leave those out. Gatsby supplies them.
What Gatsby handles+
The RSVP buttons. The registration form. The confirmation email. The calendar invite. Capacity and waitlist logic. Per-guest tracking. Survey questions. Everything that touches your guest list runs through Gatsby exactly as it would for a native landing page.
What the AI-built site handles+
The visual design. The copy. The animations. The agenda layout. The speaker bios. The navigation structure. Anything visual or content-related is yours to control on the site you publish.
## Setting It Up
[Section titled “Setting It Up”](#setting-it-up)
Steps to publish an AI Landing Page+
1. **Build the page with an AI site builder.**
Lovable, Bolt, or v0. Or Webflow, Framer, or hand-coded if your team prefers. Whatever produces a hosted webpage.
2. **Publish to a public URL.**
Most AI site builders include a free preview URL. Some require a paid plan to publish. See the hosting checklist below before you commit to a tool.
3. **Copy the published URL.**
Open it in a fresh incognito window to confirm it loads without a login prompt.
4. **In your Gatsby event, open the Landing Page editor.**
From your event’s **Registration** tool, open **Landing Page Templates**, then switch to the **Global Templates** tab. Find the **Portal** template and duplicate it to your event. The copy will appear in your event’s template list. Hit “Edit” to change the template.
5. **Paste the URL into the embed block.**
In the template editor, click the embed block on the canvas. A settings panel will appear on the right. Paste your published URL into the URL field there and save. Gatsby loads your site in the preview so you can see exactly what guests will see.
6. **Configure the Gatsby RSVP frame.**
Still in the template editor, choose modify the “Invite Buttons” block to be customized for your event.
7. **Set the template as “In Use” and send a test invite.**
Once you’re happy with the template, set it as the active template for your event. Then send the invite to yourself first. Click through, scroll the page, and submit the RSVP to confirm the full registration flow lands cleanly.
What the preview shows you+
The Gatsby template preview renders your AI-built site exactly as a guest will see it, including how the RSVP frame overlays on top. Cycle through desktop, tablet, and mobile preview to confirm responsiveness. AI-generated sites are usually mobile-friendly out of the box, but it’s worth a quick check.
## Writing the Prompt
[Section titled “Writing the Prompt”](#writing-the-prompt)
Your AI builder takes the prompt literally. A good prompt does three things: describes the design and content you want, tells the model the page will be wrapped by Gatsby (so it leaves the RSVP buttons out), and asks for a public URL with no login.
### A Prompt That Works
[Section titled “A Prompt That Works”](#a-prompt-that-works)
Here’s a prompt that produced the [Fintech summit example](https://gatsby.events/gatsby-capital/rsvp-test/invite?e=fintech-global-summit-2026\&t=1778257186151) at the top of this page. Adapt the bracketed parts to your event and use it as a starting point.
> I want you to create an elegant landing page for **a global Fintech conference in Switzerland**. Include **a two-day agenda and a speaker section**. The hero should include **an animated visualization of financial centers across the globe, highlighting the event as the epicenter**.
>
> This is going to be embedded in another site, so leave out any RSVP or registration buttons. I’ll handle that myself.
>
> Publish it to a public URL where login isn’t required so I can embed it cleanly within an iframe.
Why each part matters+
**The first paragraph is the brief.** Be specific about tone, content sections, and any signature visual you want. “Elegant,” “playful,” “editorial,” and “minimal” produce very different results. The more concrete you are about content sections (hero, agenda, speakers, sponsors, venue, FAQ), the less you’ll have to add later.
***
**The second paragraph protects the integration.** Without it, the model will add its own Eventbrite-style RSVP button or registration form. Both would duplicate the Gatsby frame and confuse guests.
***
**The third paragraph sets the hosting requirement.** Most AI site builders default to a public preview URL. Some default to private. Naming it up front saves a round-trip.
Things to iterate on after the first generation+
Most prompts won’t land perfectly on the first try. Common follow-ups:
* “Change the hero animation to something more subtle.”
* “Add a sponsor logo strip below the speaker section.”
* “Use a serif typeface for the speaker names.”
* “Make the agenda a tabbed view, one tab per day.”
* “Remove the contact form at the bottom. Registration is handled separately.”
Iterate inside the site builder until you’re happy with the page, then publish. The Gatsby side doesn’t need to change while you iterate. Each republish updates what your guests see automatically.
## Hosting and Access Checklist
[Section titled “Hosting and Access Checklist”](#hosting-and-access-checklist)
The single biggest reason an AI Landing Page breaks is access. The site has to be reachable to anyone with the URL, without a login, password, or paywall.
### The Three Rules
[Section titled “The Three Rules”](#the-three-rules)
It must be hosted at a public URL+
A preview that only loads inside the builder’s editor isn’t enough. You need a real URL that you can open in a fresh incognito window and see the full page.
Most AI site builders offer a free public preview. Some require a paid plan to publish. Check your tool’s pricing page before you commit:
* **Lovable:** Free tier includes a public preview URL.
* **Bolt:** Free preview URLs available; custom domains require a paid plan.
* **v0:** Public deployments available on free and paid plans.
* **Webflow / Framer:** Free tier publishes to a subdomain. Custom domains require a paid plan.
* **Claude Artifacts:** Public sharing is available on most plans, but Anthropic blocks Artifact URLs from being embedded in an iframe. The shared link won’t load inside Gatsby. Design the page in an Artifact, download the HTML from the Artifact’s code panel, and host it on Vercel, Netlify, or Cloudflare Pages instead. Then paste that URL into Gatsby.
If your tool only offers private previews on its free tier, you’ll need a paid plan or a different tool.
It must not be behind a login+
If the site requires the visitor to sign in to view it, the embed will show a login screen instead of your page. Some AI builders ship with a default “preview password” or auth gate. Turn those off before you copy the URL.
It must not be password-protected+
Same logic as login. A password-protected page renders a password field, not your design. If your tool added one by default (some Webflow and Framer templates do), remove it before publishing.
**The fast test.** Open the URL in an incognito window. If you see your full page without any prompt to log in, enter a password, or accept an invitation, you’re good. If you see a wall of any kind, fix it before pasting the URL into Gatsby.
### One More Constraint Worth Knowing
[Section titled “One More Constraint Worth Knowing”](#one-more-constraint-worth-knowing)
Some hosts may block their pages from being embedded inside other sites. They do this by sending a hidden instruction to the browser — a setting called a `Content-Security-Policy` header — that says “don’t let anyone display me inside another page.” The specific line that blocks Gatsby looks like `frame-ancestors 'none'` (or a list of allowed sites that doesn’t include gatsby.events). If you paste a URL into Gatsby and the preview shows an empty frame or a “refused to connect” error, this is almost always the cause.
Most AI site builders don’t block embedding. The ones that do usually offer a way to allow it. If you hit this, you have three options — from easiest to most involved.
⚠️ **One important caveat.** Some hosts enforce embed-blocking at a level the page itself can’t override. If the site returns response headers like the ones below, Options 1 and 2 won’t help — there’s no setting to toggle and no safelist to add Gatsby to. Option 3 (download and rehost) is your only path. Claude Artifacts is the most common example: Anthropic blocks embedding on every Artifact URL with no way to opt out, so Claude users should plan to download the HTML and host it elsewhere from the start.
```plaintext
x-frame-options: DENY
content-security-policy: frame-ancestors 'none'; base-uri 'self'; object-src 'none'
```
Option 1: Remove the restriction in your builder's settings+
Look in your builder’s dashboard for a section called “security headers,” “custom headers,” or “advanced.” If you find one, look for the line containing `frame-ancestors 'none'` and delete it. Republish your site, then paste the URL back into Gatsby — the preview should load.
If you can’t find a setting like this, your builder probably doesn’t expose it. Move on to the next option.
Option 2: Add gatsby.events to the safelist+
If your security team wants to keep blocking embeds from everywhere *except* Gatsby, you don’t have to remove the restriction — you can add Gatsby as an allowed exception instead. Change the line to read:
`frame-ancestors 'self' https://gatsby.events`
That tells the browser “still block embedding for everyone, but allow Gatsby specifically.” Republish and the preview will load.
This is the right path when your IT or compliance team has signed off on the security header and doesn’t want it removed wholesale.
Option 3: Download the code and republish it somewhere you control+
If your builder won’t let you change the header at all, the last option is to take your site’s code with you. Most AI builders have an “export” or “download code” button — use it to get the source files.
Once you have them, open the project in a text editor (or hand it to a developer) and search for `frame-ancestors`. Wherever it appears, delete that line. The restriction sometimes lives inside the site’s code, and sometimes inside a small configuration file like `_headers` or `next.config.js` — anything with `frame-ancestors 'none'` needs to go.
Then upload the project to a host that doesn’t add the restriction by default. Vercel, Netlify, and Cloudflare Pages all work and all have free tiers. Once it’s live at the new URL, paste that URL into Gatsby and you’re set.
## Common Questions
[Section titled “Common Questions”](#common-questions)
Can I edit the AI-built site without touching Gatsby?+
Yes. Edits you publish on the AI builder appear automatically the next time a guest loads the Gatsby landing page. You don’t need to touch Gatsby unless you’re changing the RSVP frame itself.
What happens if my AI builder or host goes down?+
The Gatsby page still loads, but the AI-built content area will show a blank frame or a browser error. Pick a reputable host. If reliability matters, lean toward established platforms (Vercel, Netlify, Cloudflare Pages, Webflow, Framer) over preview URLs from a brand-new builder.
Can the AI-built site live on my own domain?+
Yes. As long as the URL is public and isn’t blocked from iframing, the domain doesn’t matter. Pointing your custom domain at the host first is fine. Gatsby just needs the URL.
Do guests notice the seam between the AI page and the Gatsby frame?+
Not unless they go looking. The Gatsby URL is what they see in their browser. The AI-built site loads inside it. To them, it’s one page.
Will analytics on the AI-built site capture Gatsby traffic?+
Yes, if you’ve set up analytics on the AI-built site. Tools like Plausible, Fathom, or GA will record visits the same way they would on any embedded page. Cross-domain tracking has the usual caveats. If precise attribution matters, talk to whoever runs your analytics stack.
Does this work on mobile?+
Yes, as long as the AI-built site is responsive. Most AI builders generate responsive layouts by default. Check the Gatsby template preview’s mobile view before going live.
# Running Events with Multiple Sessions
> Set up a single registration flow where guests pick which sessions they'll attend. Each session gets its own guest list, capacity limits, and calendar invite.
## Your Summit Has Six Sessions. Now What?
[Section titled “Your Summit Has Six Sessions. Now What?”](#your-summit-has-six-sessions-now-what)
You’re running a two-day summit with a mix of dinners, breakouts, keynotes, and optional add-ons. Guests aren’t attending all of it. They need to pick.
Gatsby handles this through a single registration event where guests RSVP and select their sessions. Each session is its own event behind the scenes, with its own guest list, capacity settings, seating chart, and calendar invite. Guests register once. You get a clean list for every session.
When you need this setup+
Any time guests are choosing between sessions, tracks, or sub-events within a larger event. Annual meetings with optional dinners and breakout discussions. Multi-day summits where not everyone attends everything. Conferences with capacity-limited workshops that need automatic waitlisting.
If everyone’s attending the same thing, you don’t need this.
What guests see+
They get one invitation email. They click through to your landing page, register, and check the sessions they want.
Next, you choose. But, here’s what we recommend:
They get a confirmation email from the main event (no calendar invite) plus a separate confirmation with a calendar invite for each session they picked. Their calendar shows exactly what they chose. If they change their mind later, they click the same original link and update their registration and session selection.
What you get on the back end+
**A scoped guest list for every session.**
Everyone who selected “Reception Dinner” is on the Reception Dinner guest list. Build your seating chart from that list. Hand your caterer a headcount from that list.
***
**Capacity and waitlists per session.**
Set the wine tasting to 40. When it fills, guest 41 gets waitlisted. Each session runs independently.
***
**One view of all attendees.**
Your registration event’s guest list shows everyone who registered. Survey response columns show which sessions each guest picked. Add columns from session events (via “Other Events/Lists” in the Columns drawer) to see per-session RSVP status.
***
**Calendar invites that match.**
Each session sends its own invite with the correct date, time, and location. No one gets calendar blocks for sessions they didn’t pick.

## Setting It Up
[Section titled “Setting It Up”](#setting-it-up)
Three pieces make this work: a registration event where guests land and RSVP, session events that each carry their own guest list and calendar invite, and a survey question that connects them.
### Create the Registration Event
[Section titled “Create the Registration Event”](#create-the-registration-event)
This is where you do a full event setup. You make a landing page, add guests, and invite them.
Steps to create the registration event+
1. Go to **Events and Lists**.
2. Click **Create Event**.
3. Name your event clearly (like “Summit 2027”).
4. Set an **Internal Name** that identifies this as the registration hub (like “\[Registration] Summit 2027”).
5. Set the general date, time, and location. Guests won’t see these details. They’re for your own organization.
This is your registration hub. You send invitations from here, guests land here, and your main attendee list lives here.
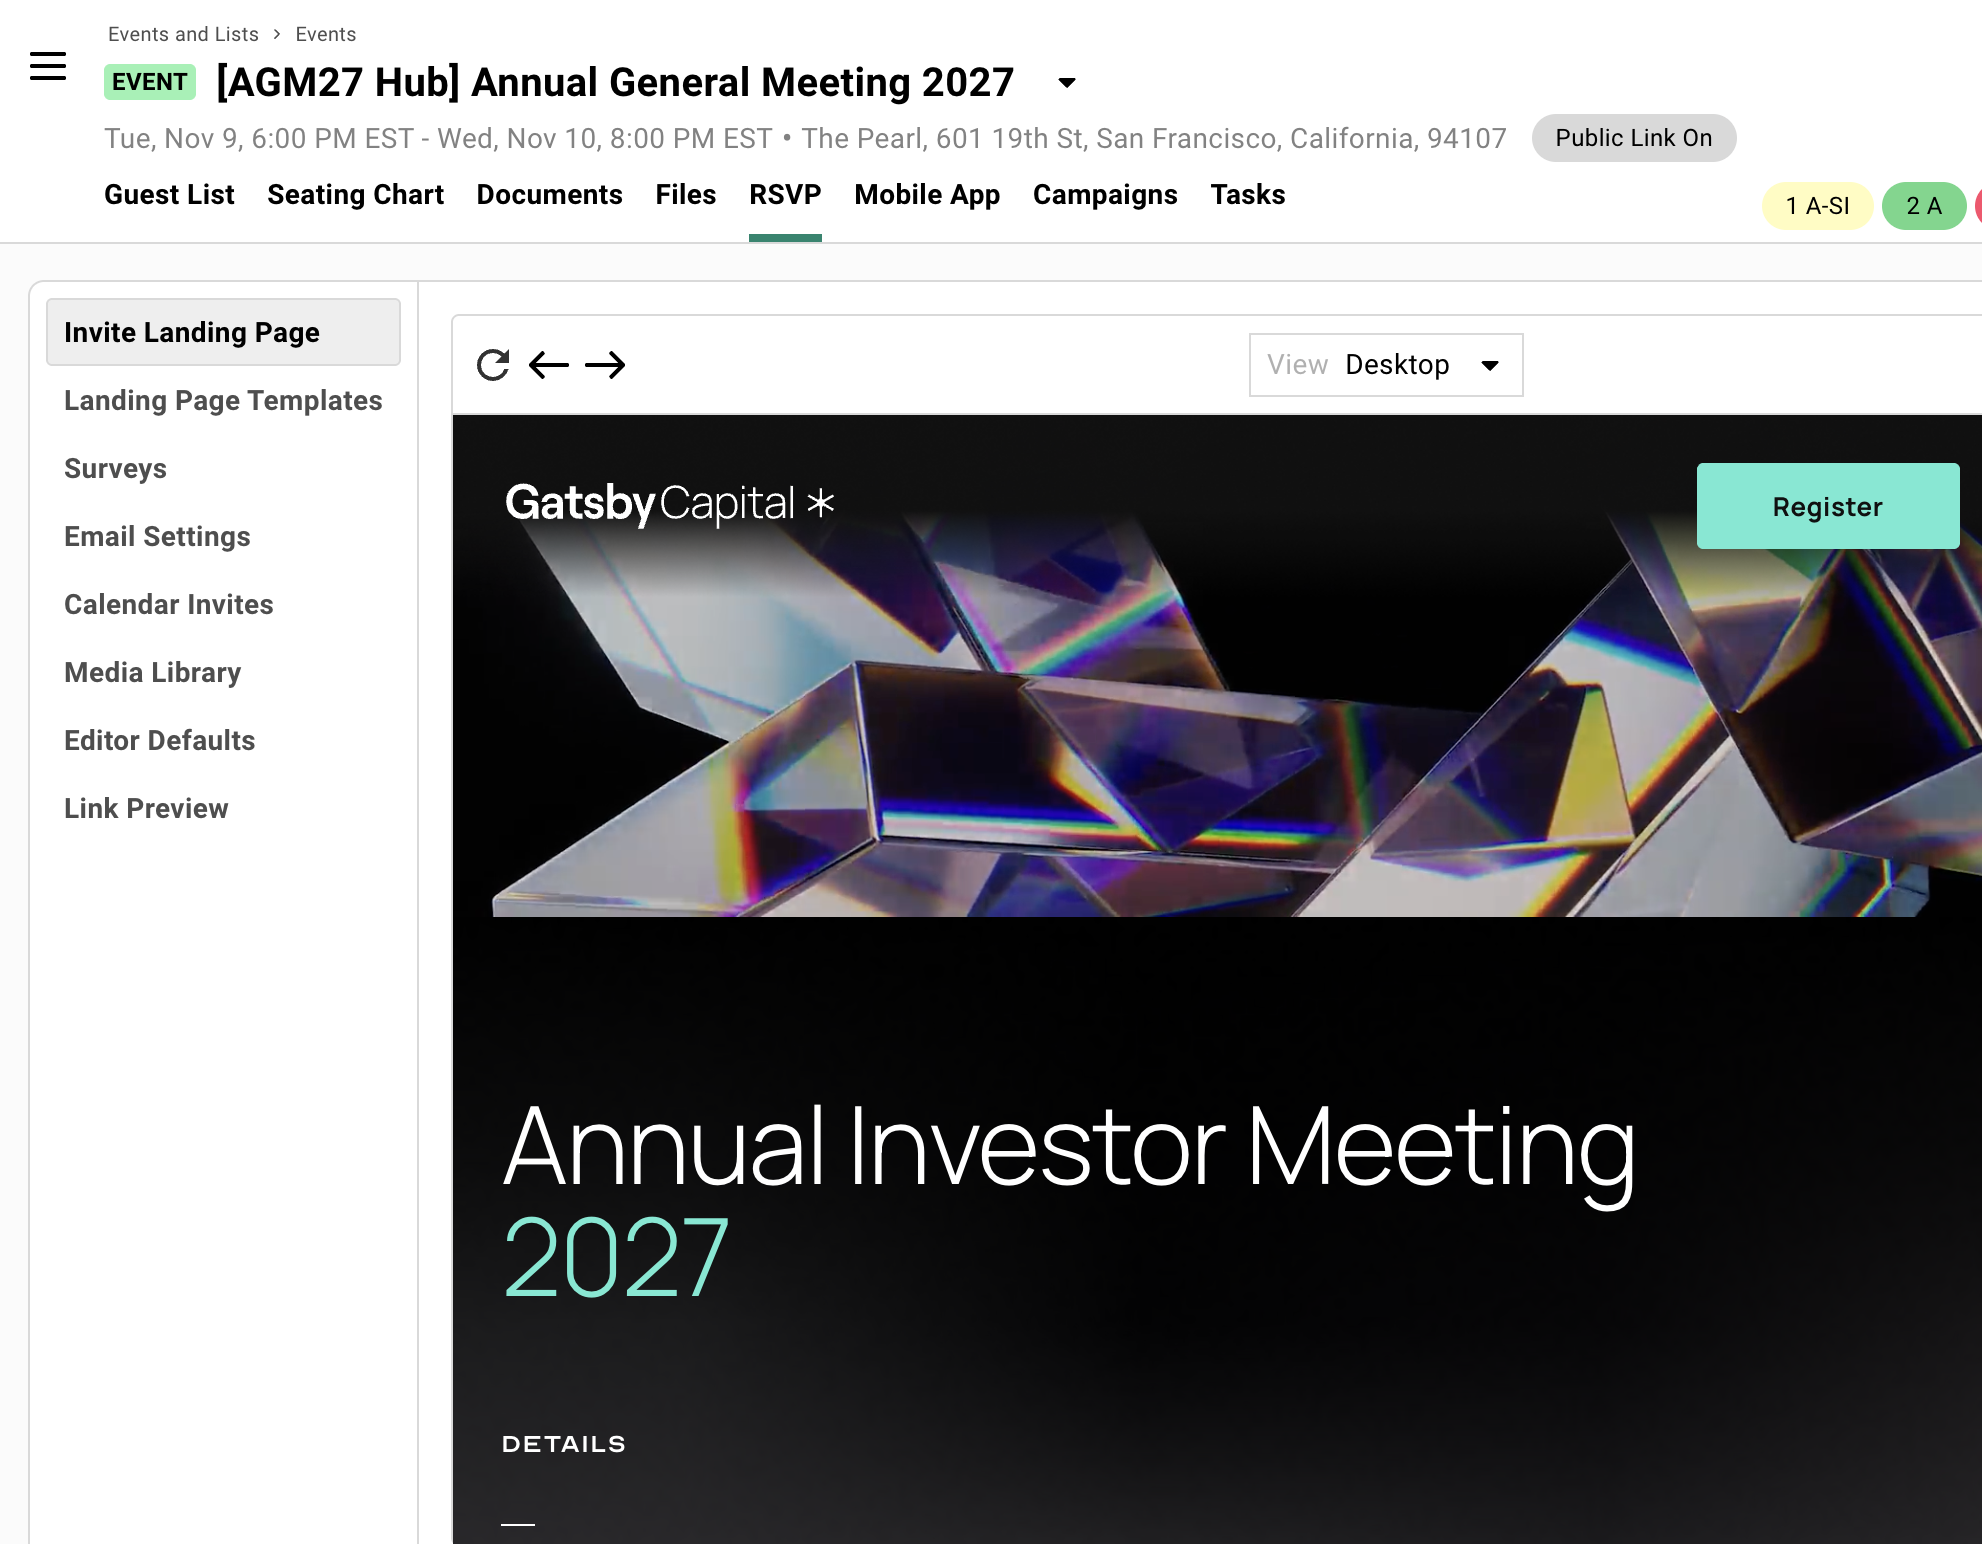
### Create Your Session Events
[Section titled “Create Your Session Events”](#create-your-session-events)
Each session becomes its own event. This is what gives you per-session guest lists, capacity settings, and separate calendar invites.
Steps to create session events+
1. Go to **Events and Lists**. Click **Create Event**.
2. Name it with the session name (like “Summit 2027, Reception Dinner” or “Summit 2027, Monday Workshop”).
3. Add something like “Calendar Only” or “Sub-Event” to the internal name for clarity (like “\[Calendar Only] Summit 2027 Dinner”).
4. Select the **Calendar Invite Only Event** template from the dropdown.
This template streamlines settings by removing the `{rsvpLink}` from confirmation emails and calendar invites.
5. Set the specific date, time, and location for this session. This is what appears on the calendar invite guests receive.
6. Click **Create**, then repeat for each session.
What the Calendar Invite Only template does+
This template removes the RSVP link from emails. Guests never visit these events directly.
These events don’t need landing pages, campaigns, or uploaded guest lists.
They exist to hold session-specific settings (capacity, location, time) and send calendar invites.
Everything else flows through the registration event.
Setting capacity and waitlists on sessions+
Open any session event and go to its event settings. Set your capacity limit there.
When that session fills up through registration, additional guests are automatically waitlisted on that session’s guest list. Your other sessions aren’t affected.
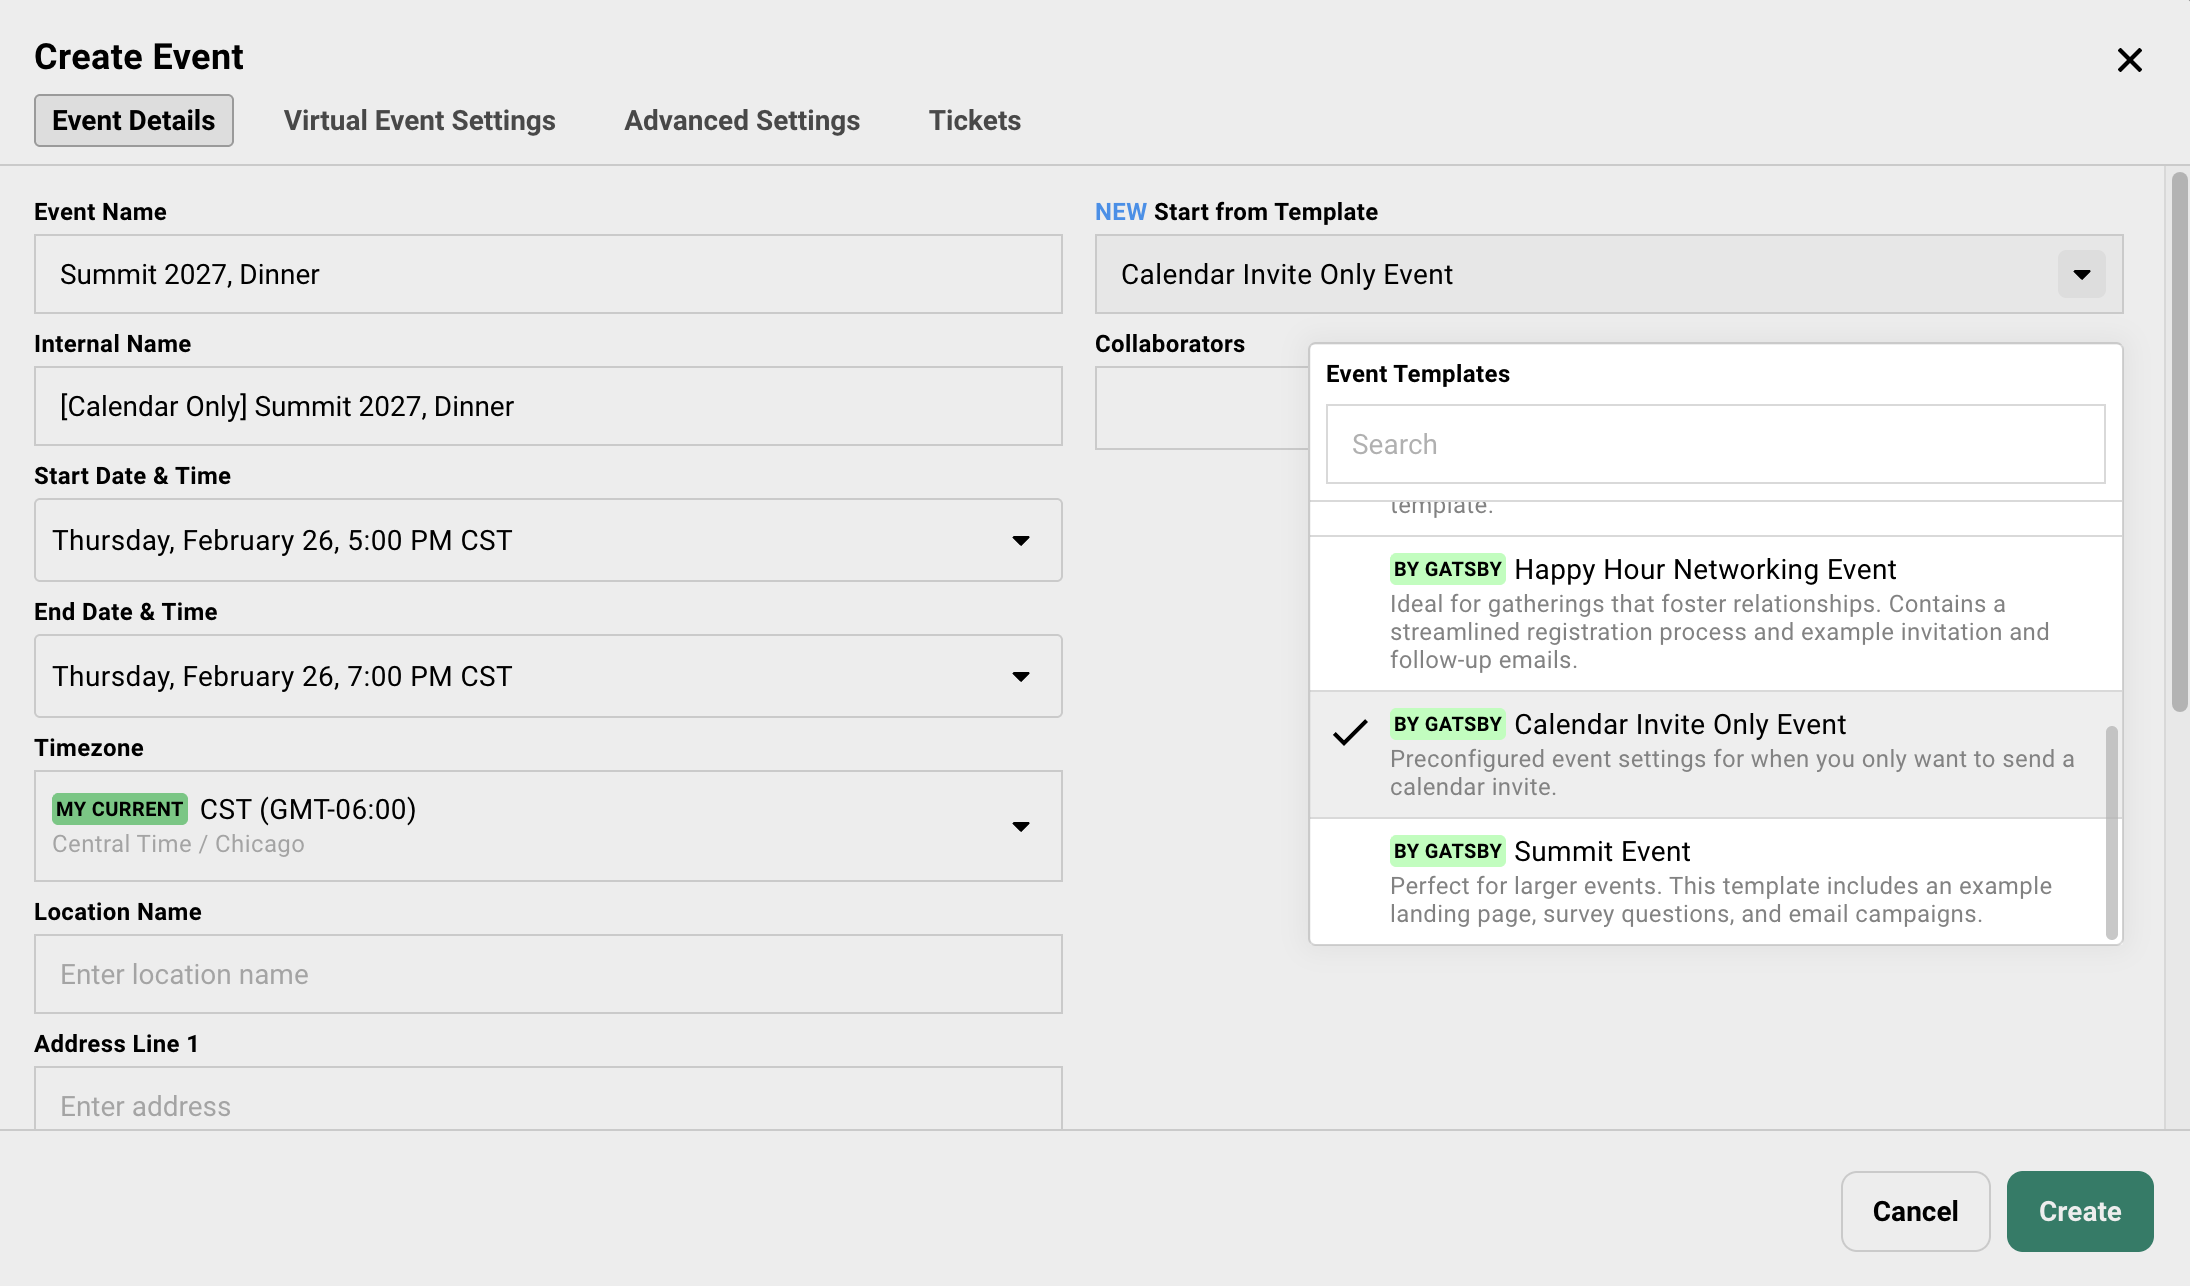
### Connect Sessions to Your Registration Flow
[Section titled “Connect Sessions to Your Registration Flow”](#connect-sessions-to-your-registration-flow)
Back in your registration event, add a survey question that lists your sessions. When a guest checks a box, they’re added to that session’s guest list and receive its calendar invite.
Steps to add the session selection question+
1. In the registration event, go to **Registration** » **Surveys**.
2. Add a new question.
3. Under **Event RSVP**, choose **Multiple Events - Multiple Select**.
4. Change the heading to something guests will understand (like “Which sessions will you attend?”).
5. Click **Add Other Events** and select your session events.
6. Keep **Send confirmation email from child event** turned ON.
(The label says “child event” because Gatsby uses that term internally for linked events.) This is what triggers the calendar invite for each session a guest selects.
The **Send confirmation email from child event** toggle is critical. Without it, guests won’t receive calendar invites for the sessions they select. The “child event” label refers to the session events you linked in the question.
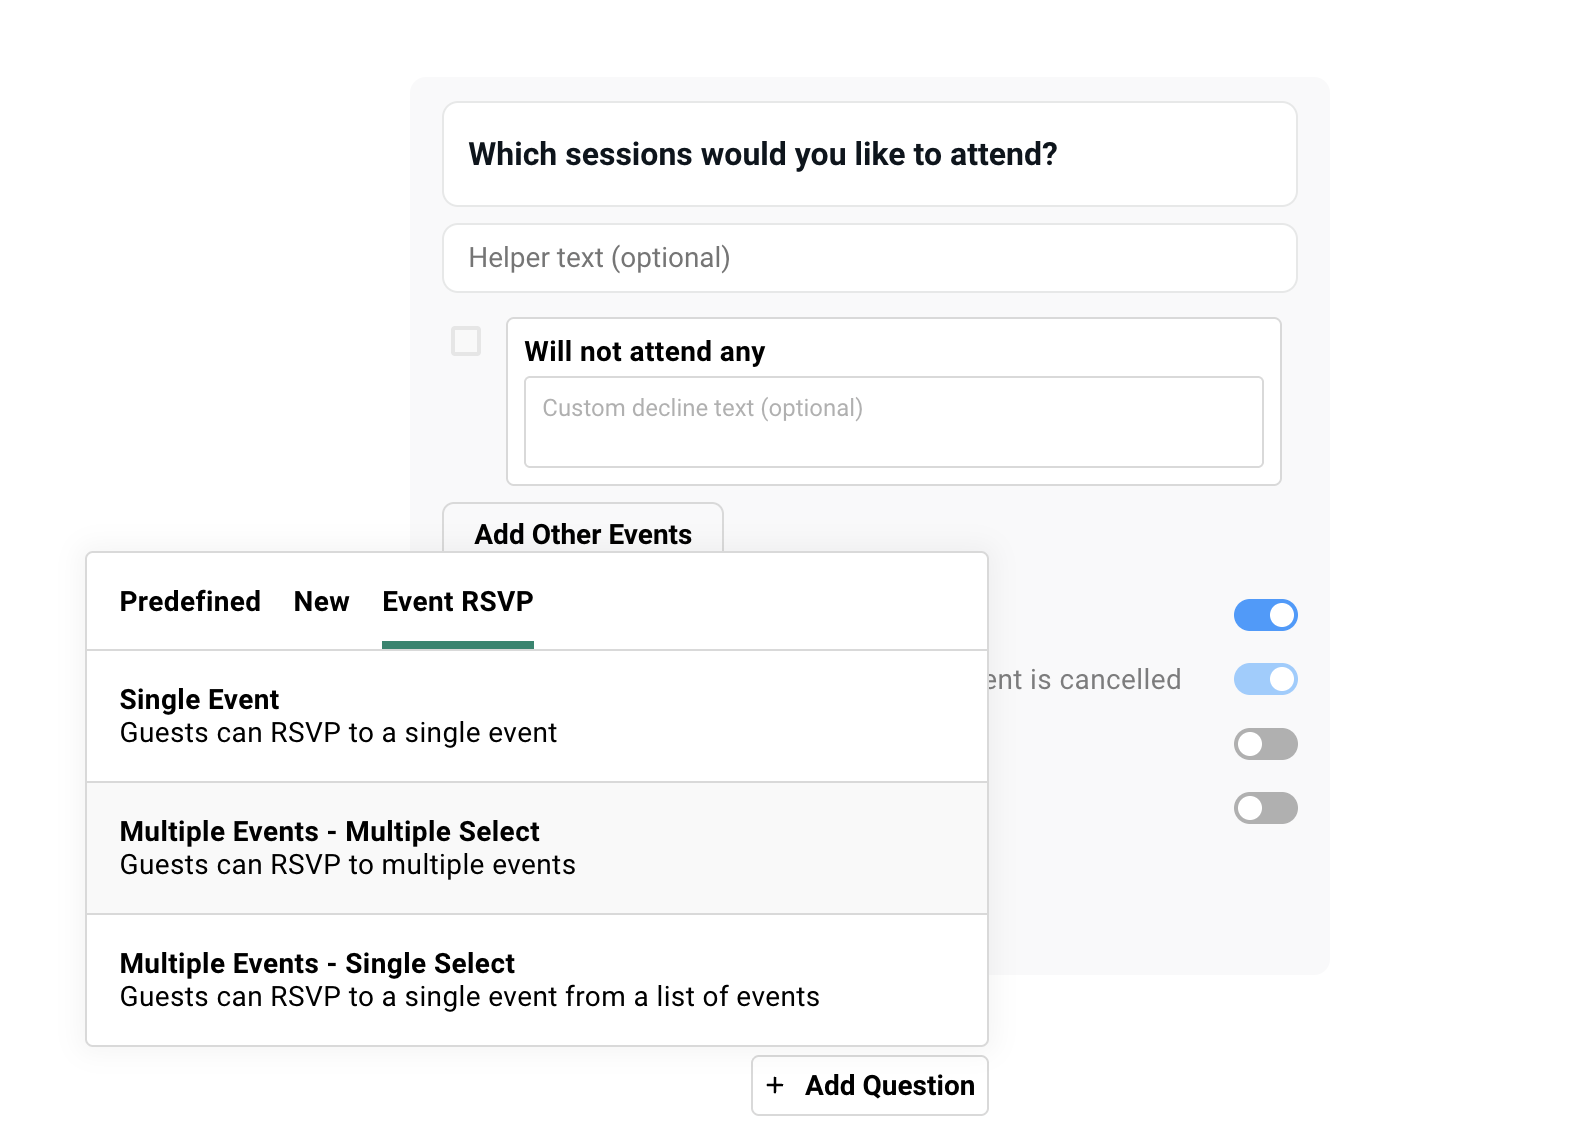
## Configuring Confirmation Emails
[Section titled “Configuring Confirmation Emails”](#configuring-confirmation-emails)
Two sets of emails go out when someone registers: one from the registration event and one from each session they picked. Both need configuration.
### Registration Event Email
[Section titled “Registration Event Email”](#registration-event-email)
This email confirms their overall RSVP and provides them a link to edit their registration. It should not include a calendar invite.
Steps to configure registration event email+
1. Go to **Registration** » **Confirmation Emails** in the registration event.
2. Click the **X** next to **Calendar Invite Attachment** to remove it.
3. Keep the confirmation email enabled. Guests need their RSVP link to update their selections later.
4. Optional: Add a line like “You’ll receive separate calendar invites for each session you selected.”
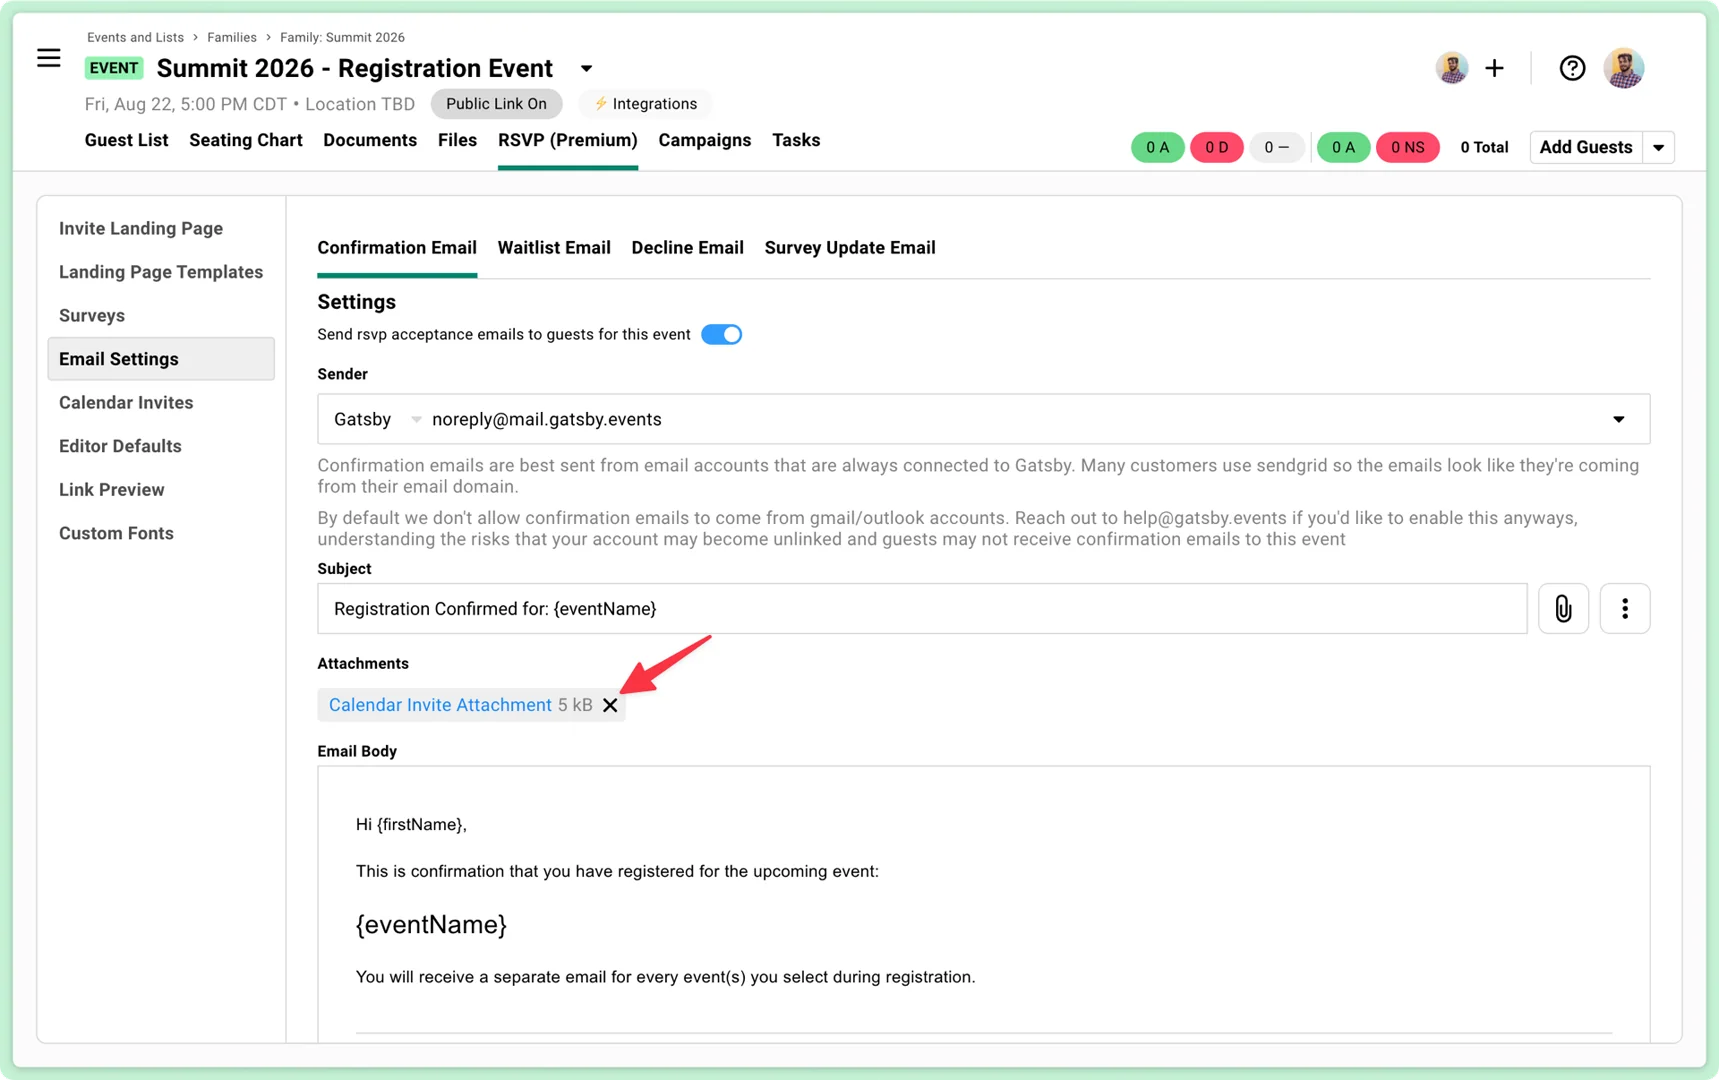
### Session Event Emails
[Section titled “Session Event Emails”](#session-event-emails)
Each session event sends its own confirmation with a calendar invite attached. Remove the RSVP links from these emails so guests manage everything through the registration event.
Steps to configure session event emails+
1. In each session event, go to **Registration** » **Confirmation Emails**.
2. Verify the calendar invite is attached. (It should be by default.)
3. Remove any `{rsvpLink}` merge tags from the email body.
4. Under **Registration** » **Calendar Invite**, remove the `{rsvpLink}` from the calendar invite description field.
5. Add guidance like: “To update your registration, use your original invitation link.”
6. Repeat for each session event.
Why remove the RSVP link from session emails+
You want one place where guests manage their registration: the main registration event. If they click an RSVP link from a session email, they land on an empty page with nothing useful. Point them back to the original registration link instead.
## After Setup
[Section titled “After Setup”](#after-setup)
Cleaning up the revisit flow+
When guests return to update their session picks, you don’t want them seeing a “Will you attend?” question about the registration event. They already said yes.
1. In your registration event, go to **Registration** » **Invite Landing Page**.
2. Scroll down on the settings panel.
3. Toggle ON **Hide RSVP attendance question on revisiting invite**.
Returning guests now only see your session selection survey question and can de-select options to cancel their registration on the separate session events.
Showing different sessions to different guests+
Need a board-only dinner or a speaker green room? You’ll need **separate session selection questions** for each guest segment.
One thing to know: the **Only show question if…** condition controls the visibility of the entire survey question. You can’t show or hide individual sessions within a single question. To give different guests different session options, create multiple questions.
**Example:** Your summit has 8 sessions. Six are open to everyone. Two (board dinner, executive briefing) are VIP-only.
1. Create your first **Multiple Events - Multiple Select** question. Add the 6 open sessions. Leave the visibility condition blank so every guest sees it.
2. Create a second **Multiple Events - Multiple Select** question. Add the 2 VIP-only sessions. Set **Only show question if…** to a condition like “Guest Type = VIP.”
3. Customize the heading on each question so guests know what they’re looking at (like “Which sessions will you attend?” for the open sessions and “VIP Sessions” for the restricted ones).
VIP guests see both questions during registration. Everyone else sees only the first. Works well for board member dinners, speaker-only prep sessions, sponsor-exclusive events, or executive tracks.
When different audiences need different landing pages+
Your 400-person conference has a VIP dinner the night before. VIPs should see it on the landing page agenda. Your general audience shouldn’t. Gatsby has one landing page per event and no conditional logic on page content. So different landing pages means different registration events.
Since the session events in this setup are standalone (not linked as children), this is straightforward.
1. Create a new event for the second audience (like “Summit 2027 - VIP Registration”).
2. Design its landing page with the VIP-specific agenda and content.
3. Add a **Multiple Events - Multiple Select** survey question pointing to the same session events. (Plus any VIP-only sessions.)
4. Enable **Send confirmation email from child event** on that question.
5. Configure confirmation emails the same way as your primary registration event.
6. Upload your VIP guest list to this event and send invitations from here.
Each registration event maintains its own separate guest list. Guests don’t bleed between them. If you need a combined view of all registrants across both, see the reporting section below.
If you were using Event Families here (parent-child links), connecting the same session events to multiple registration events would cause guests to bubble up into all parents. Keeping events standalone and linking only through survey questions avoids that problem entirely.
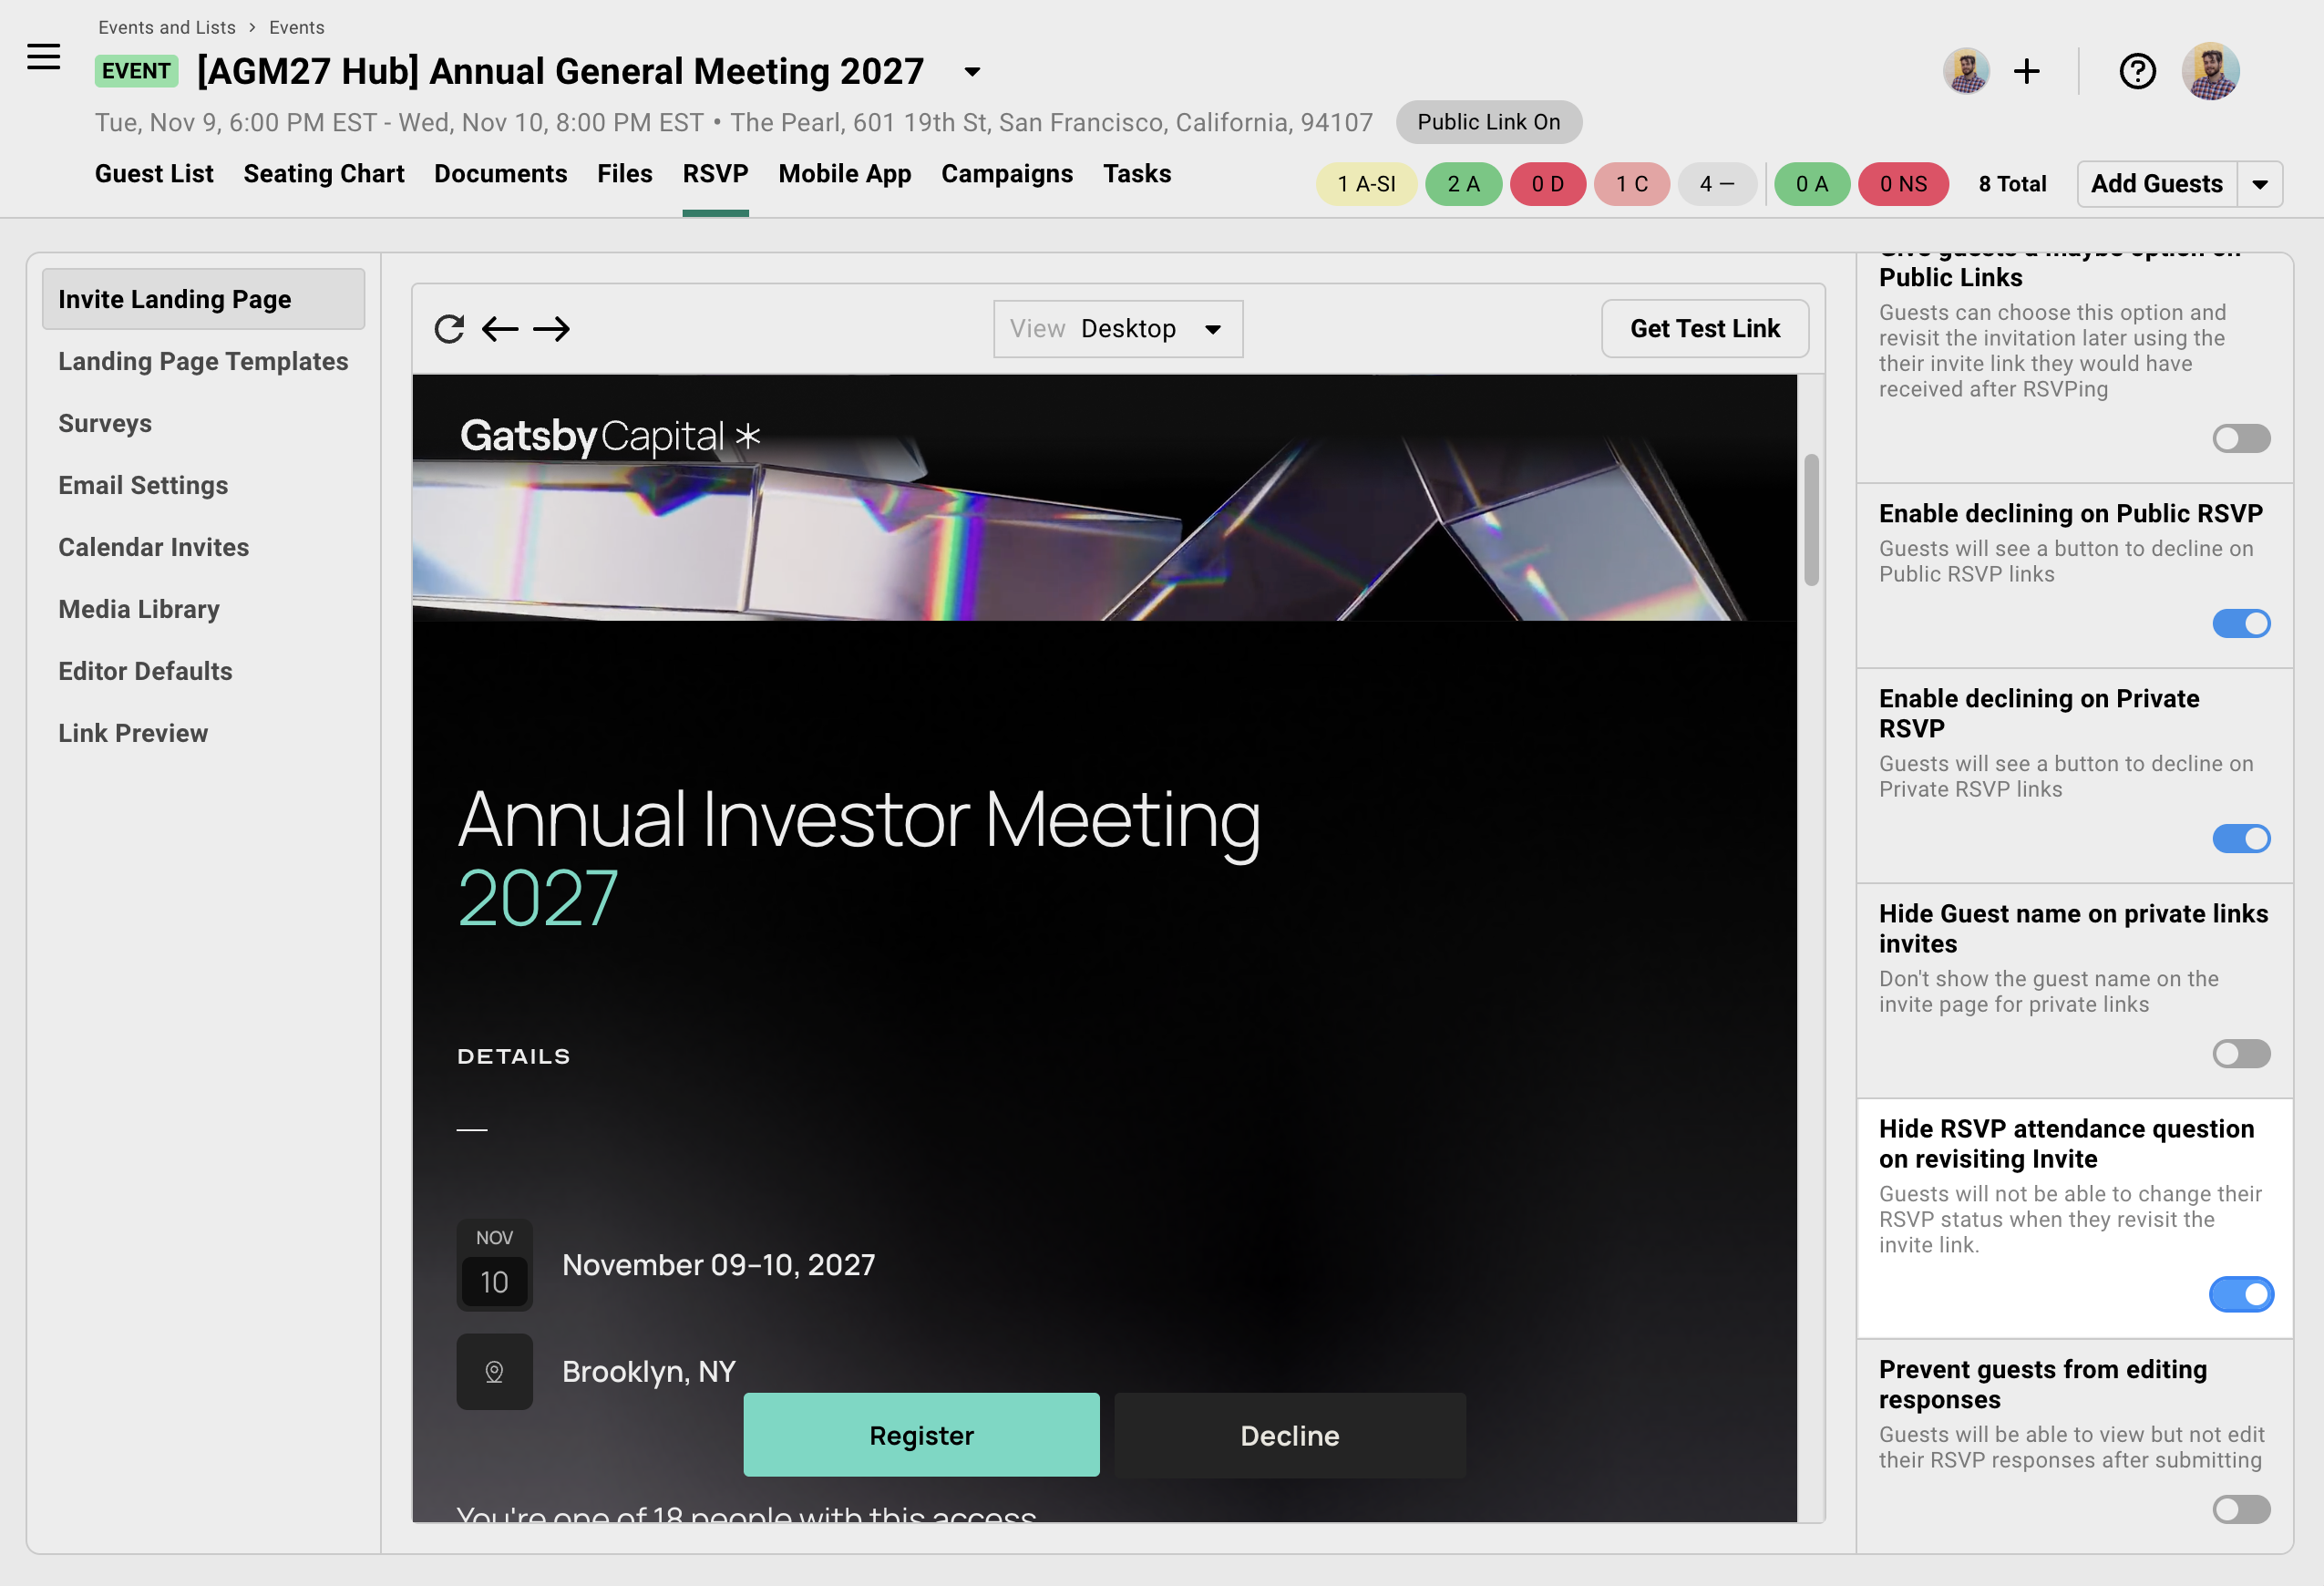
## Tracking Everyone in One Place
[Section titled “Tracking Everyone in One Place”](#tracking-everyone-in-one-place)
Your registration event’s guest list already shows every registrant. The session selection survey response is stored as a column, so you can see which sessions each guest picked directly from the guest list.
For per-session detail, open **Columns** » **Add Fields**, find each session event under **Other Events/Lists**, and enable its **RSVP** column. This gives you a column per session showing each guest’s RSVP status (Accepted, Waitlisted, etc.) without leaving the registration event.
Optional: Overview list for multiple registration events+
If you’re running separate registration events for different audiences (VIP and general, for example) and want one combined view, create a Gatsby **List** and use **Families** to link the registration events.
1. Go to **Events and Lists** » **Families**.
2. Click **Create Family**.
3. Click **Add Parent** » **Create New List**. Name it something like “Summit 2027 - All Registrants.”
4. Click **Add Child** and link each of your registration events.
5. Guests from all linked registration events automatically appear in the overview list.
6. Add columns from session events (via “Other Events/Lists”) to see per-session RSVP status across everyone.
This is the only place in this setup where Families come into play. It’s optional. It’s for reporting only. It doesn’t affect the registration flow or guest experience.
## Common Questions
[Section titled “Common Questions”](#common-questions)
When should I use this vs. a single event?+
Are guests choosing between sessions that happen at different times and need separate calendar entries? If yes, this is your setup.
If everyone’s attending the same thing and needs one calendar block, a single event is all you need.
Why can't I just send multiple calendar invites from one event?+
Gatsby sends one calendar invite per event. That’s a deliberate constraint.
Separate events mean each session gets its own guest list, its own capacity settings, its own seating chart. The calendar invite is just one benefit of the structure. The per-session operational tools are the bigger win.
Will this create duplicate guests?+
No. A guest appears once in your registration event regardless of how many sessions they pick. The survey response column shows which sessions they selected.
In each session event, they also appear once.
Can I set different capacities for different sessions?+
Yes. Each session event has its own capacity and waitlist settings.
A workshop capped at 30 will waitlist the 31st person while your 200-person keynote still has room. These run independently.
What if I add a new session after registration is open?+
Create the new session event, then add it to your survey question.
Guests who return to update their registration will see it.
Already-registered guests won’t see it unless they revisit. Send a campaign letting them know about the new session with a link back to their registration.
A registered guest wants to add a session. Can they register on the session event directly?+
Not in this setup. Session events have no landing page or registration form of their own, and building one means creating a separate mini registration experience on that event.
Send the guest back to their original registration link instead. They update their registration and select the session in the session selection question. That adds them to the session’s guest list and sends its calendar invite.
Can I use the seating chart for individual sessions?+
Yes. Each session event has its own guest list, which means its own seating chart. You’re building the dinner seating chart from the 60 people who selected dinner, not from your full 400-person attendee list.
Do I need to use Families for this setup?+
No, and we recommend you don’t link sessions as children of the registration event. The session selection survey question works between any events. Parent-child links are a contact roll-up only: they copy guests up into the parent’s guest list, and removing a guest from a parent removes them from every child.
Families are useful if you want consolidated reporting across multiple registration events (like combining VIP and general attendee lists into one overview). But they’re optional. See the “Tracking Everyone in One Place” section above.
Can different guest segments see different landing pages?+
Yes. Create a separate registration event for each audience, each with its own landing page design. Add the same session selection survey question pointing to the same session events. Each registration event keeps its own guest list.
See “When different audiences need different landing pages” above for the full walkthrough.
# Private Events
> Control who can register, what guests see before they confirm, and whether you need to approve each attendee. Personal RSVP links, hidden venue details, and approval workflows for events that require discretion.
## Three Levels of Private
[Section titled “Three Levels of Private”](#three-levels-of-private)
“Private event” means different things depending on who you ask. Most people mean one of three things, and each one requires a different setup in Gatsby.
1. **Control who registers.**
Only people on your guest list can RSVP. This is the default.
2. **Control what people see.**
Confirmed guests get the address. Everyone else sees a general location.
3. **Approve each attendee.**
Registrations land in a queue. Nobody gets confirmed until you say so.
Most events only need the first. Some need the first and second. A few need all three. Figure out which question you’re answering before you start configuring.
## Controlling Who Can Register
[Section titled “Controlling Who Can Register”](#controlling-who-can-register)
Every guest you add to an event gets a unique RSVP link tied to their contact profile. When they click it, their name and information are pre-filled. There’s no public URL unless you create one. If someone isn’t on your list, they don’t have a way in.
How personal links work+
When a guest clicks their link, a few things happen automatically.
***
**Identity is known immediately**
The link is tied to their contact profile. Gatsby knows who clicked, when they clicked, and what they did. No ambiguity about which John Smith just registered.
***
**Information is pre-filled**
Name, email, and any other known fields are already populated. Your guest confirms rather than types.
***
**RSVP status updates to “Visited”**
Before they even register, you can see they opened the link. Filter your guest list by “Visited” to find people who looked but haven’t committed.
***
**Registration is attributed**
When they complete the form, the response ties directly to their contact profile in Gatsby. Their history follows them to future events.
What happens if a guest forwards their link+
The link opens for whoever clicks it. They can see whatever’s on your landing page. But the link still belongs to the original guest. If the forwarded person tries to register, they’re submitting the original guest’s RSVP, not creating their own.
This actually works well for one scenario: an executive assistant opening the link on behalf of their boss and completing the registration. It stays attributed to the right person.
For everything else, it creates confusion. Include a line in your invitation like: *“This invitation is unique to you. If you’d like to bring a colleague, reply to this email and we’ll send them their own.”*
You can also toggle on a setting that displays whose registration the link belongs to, which helps if someone opens a forwarded link and realizes it’s not theirs.
Setting up your guest list and sending invitations+
1. Add contacts to your event. Import them, add individually, or pull from an existing list.
2. Go to the **Campaigns** tab and create a new draft.
3. Write your invitation. Use the **+** menu to insert the RSVP link merge field. This generates a unique link for each recipient.
4. Select your recipients and send.
Each guest receives their own link. Track who opened, who clicked, and who registered from your guest list.
Following up with non-responders+
Filter your guest list by **Invited** to find people who haven’t clicked their link. Filter by **Visited** to find people who clicked but didn’t register. Send a follow-up campaign to either group. Two clicks.
[Learn about link types](/platform/registration/registration-links/)

## Controlling What Guests See
[Section titled “Controlling What Guests See”](#controlling-what-guests-see)
You can’t prevent someone from screenshotting a page or telling a friend what they read. What you can control is whether your venue address appears on a page that anyone with a forwarded link could see.
The approach is straightforward: remove the specific address from your landing page and put it in your confirmation email instead.
How to hide the venue address+
**On your landing page:**
1. Go to **Landing Page Templates** in your event.
2. Edit your active template.
3. Find the location block and replace the specific address with something general. “SoMa, San Francisco” or “Details provided upon confirmation.”
**In your confirmation email:**
1. Go to **Confirmation Emails** under the **Registration** tab.
2. Edit the confirmation email content.
3. Add the full venue address, directions, parking instructions, and any attachments like agendas or briefing materials.
The confirmation email only goes to guests who register through their personal link. If you’re using the approval workflow, it only goes to guests you’ve approved.
What about the calendar invite?+
The calendar invite pulls the location from your event settings. If you want that to stay vague too, set your event location to the general version.
You can update it closer to the event date and send calendar updates to confirmed guests only.
A note about confirmation emails and SendGrid+
Confirmation emails require SendGrid. If your team is using Gmail or Outlook for campaigns, your account admin needs to configure SendGrid separately for notification emails.
[Confirmation email setup](/platform/email-campaigns/confirmation-emails/)
If you trust everyone on your guest list and the venue isn’t sensitive, skip all of this. Put the full address on the landing page. Personal links still restrict who can register regardless of what’s visible.
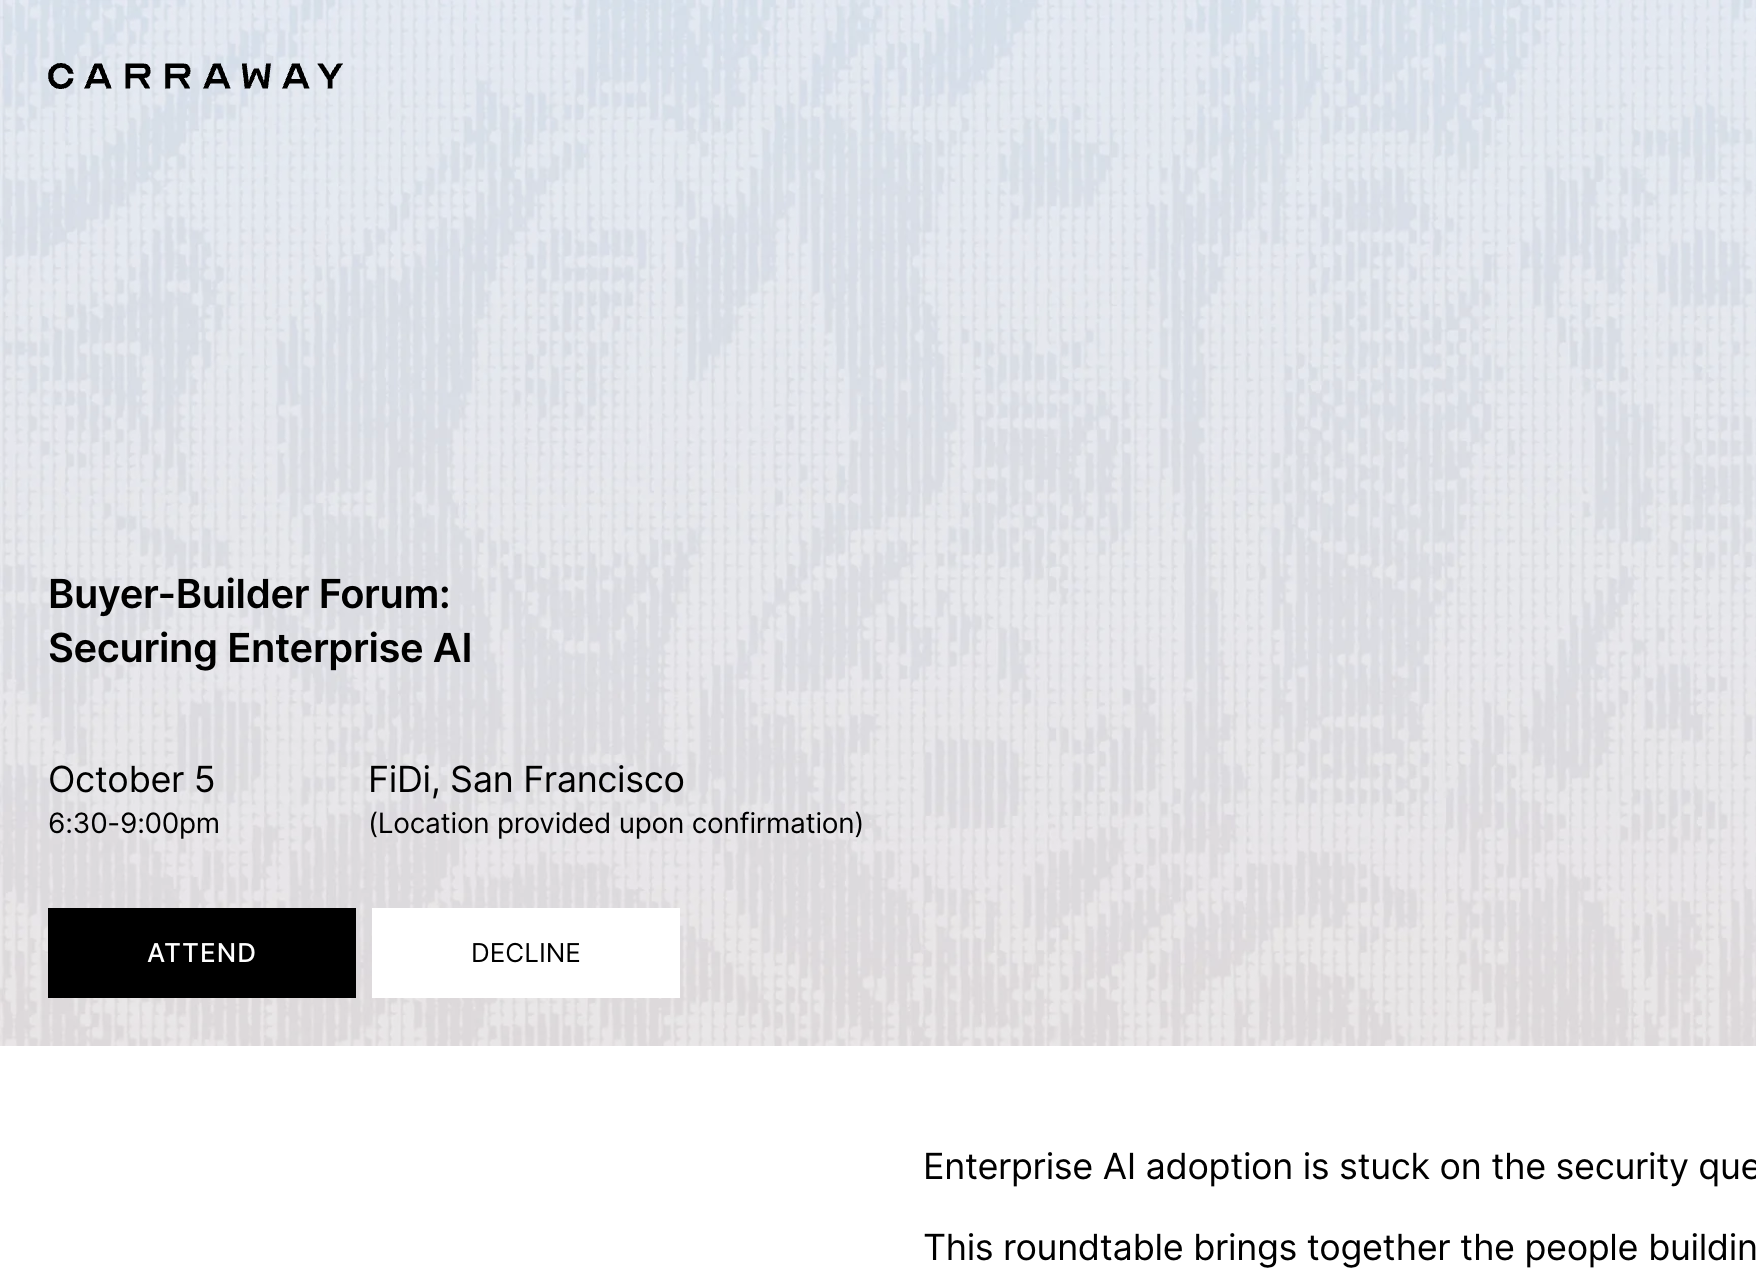
## Approving Each Attendee
[Section titled “Approving Each Attendee”](#approving-each-attendee)
Waitlist mode turns registration into a two-step process. Guests register, but instead of getting confirmed immediately, they land in a queue. You review each one and decide who gets in.
This adds friction. Your guests register and then wait. Don’t use it unless the vetting step is genuinely necessary.
When this makes sense+
* You’re running an **apply-to-attend** event and need to vet each person.
* You’re accepting registrations from a **public link** but want to screen who actually gets confirmed.
* You have a carefully curated guest list but want to **verify each registration** before sharing the venue.
* You have hard **capacity constraints** and want to hand-pick who fills the remaining spots.
How to set up waitlist mode+
1. Set your event’s registration mode to **Waitlist**: in the **Registration** tab, select **Invite Landing Page** and set the **RSVPs** dropdown to **Waitlist**. To waitlist only public-link registrants, turn on **Enable Waitlist for Public Links** in the public link settings instead.
2. Configure your waitlist email. This is what guests receive when they register. It should set expectations: their registration is received, you’ll follow up with confirmation.
3. As registrations come in, review them on your guest list. You can see survey responses, contact history, and any other information you’ve collected.
4. When you’re ready to approve someone, change their status to **Accepted**.
5. You can then choose to send the confirmation email with venue details, calendar invite, (and whatever else you’ve included), or follow-up with a campaign email.
Until you approve them, they don’t get the confirmation. If you’ve hidden venue details from the landing page, they have no way to see the address.
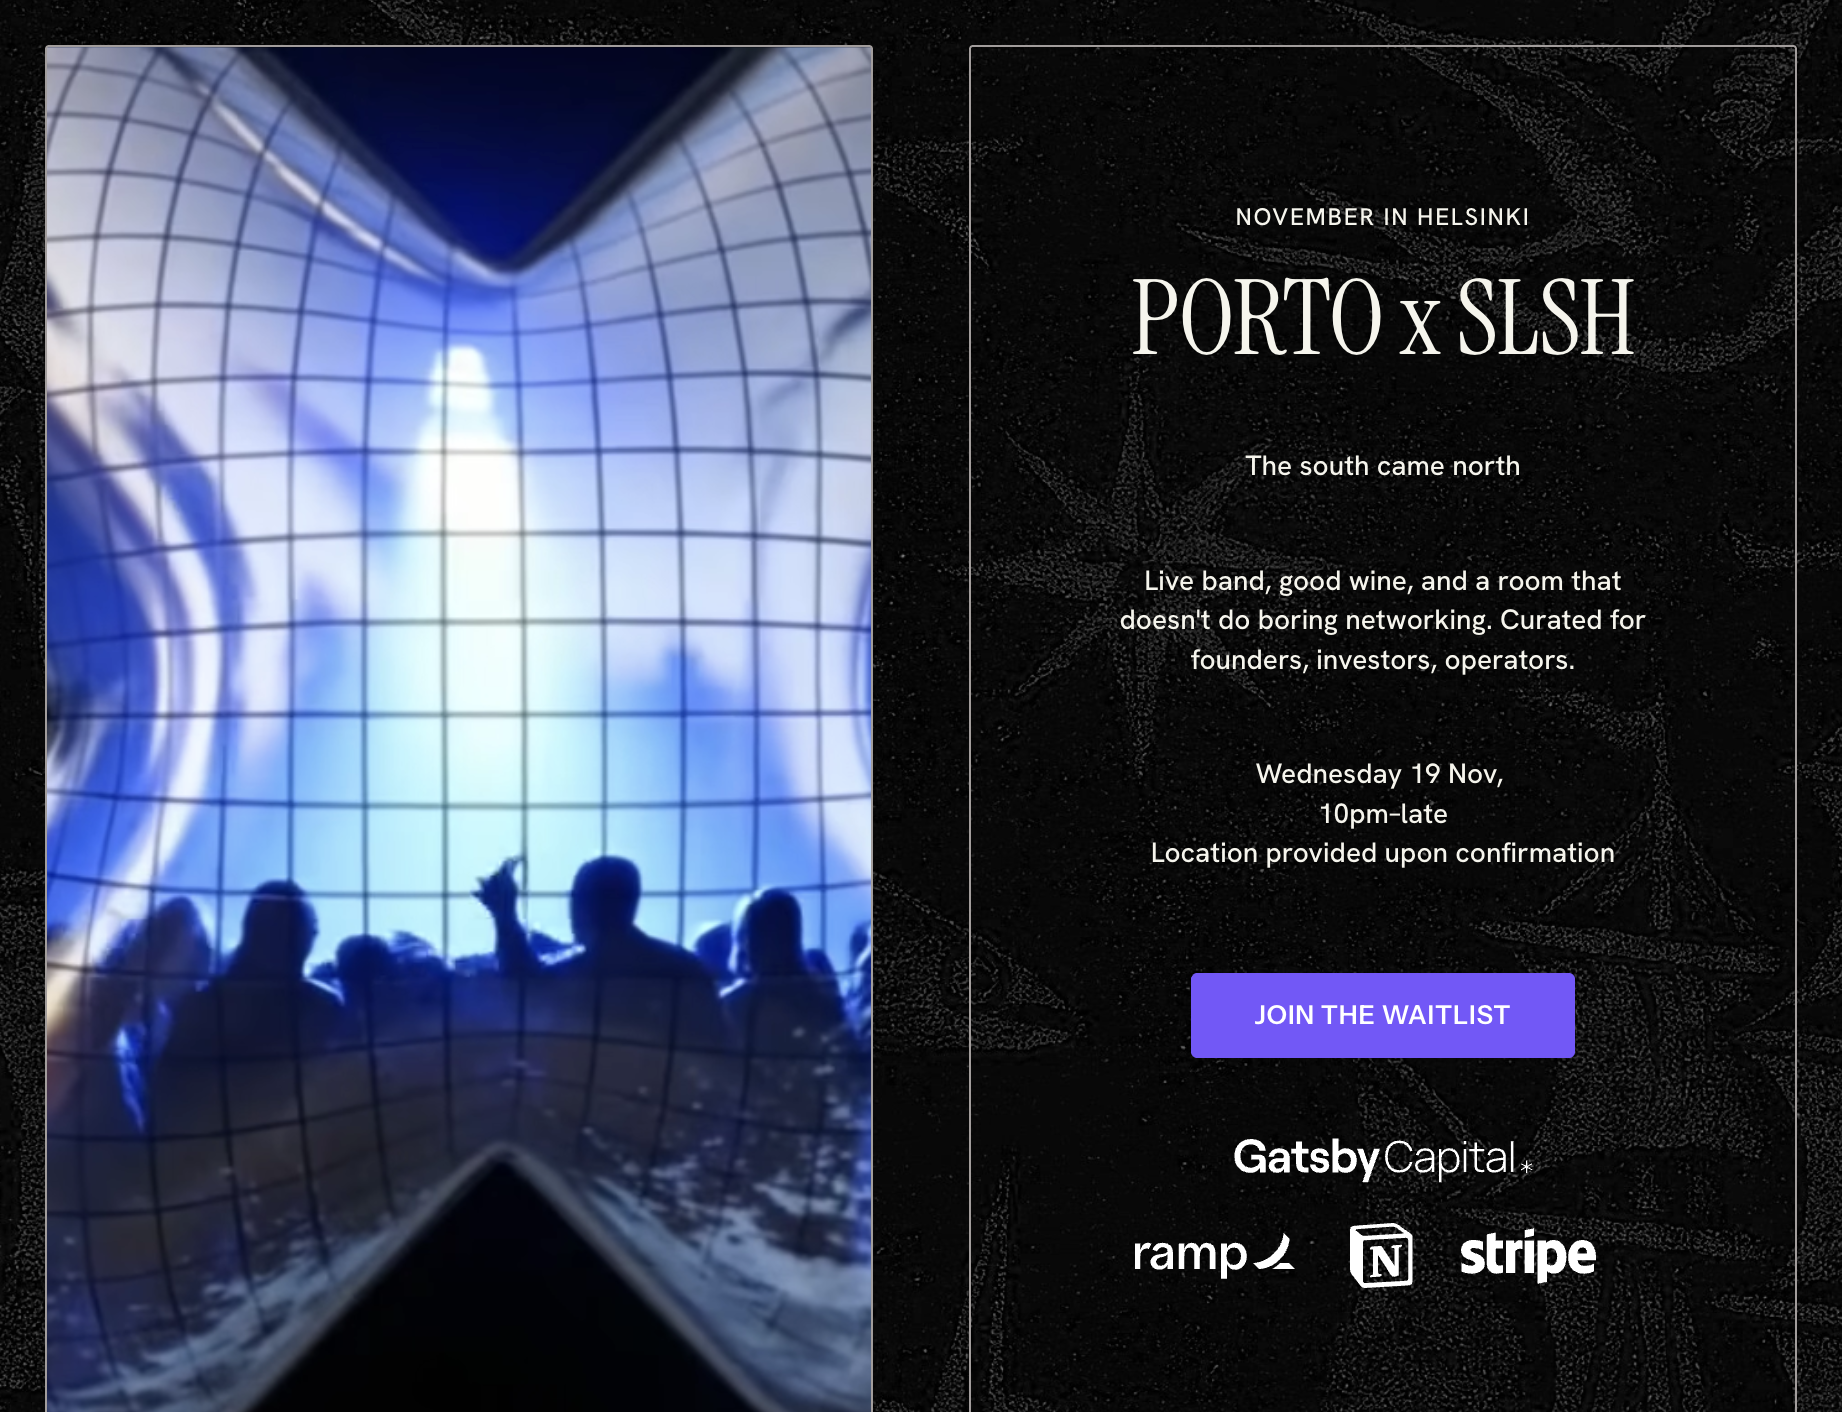
## Common Scenarios
[Section titled “Common Scenarios”](#common-scenarios)
Here’s how the three levels combine in practice.
Standard invite-only dinner+
Personal links only. Full venue details on the landing page. You trust the guest list and want a simple experience. This is the default.
Dinner at a private residence+
Personal links plus hidden address. Landing page says the neighborhood or city. Confirmation email includes the actual address, gate code, and parking instructions. Guests who forward their link can see the event exists but not where it is.
Apply-to-attend conference session+
Public link with waitlist mode. Anyone can apply. You review each registration and approve selectively. Confirmation email includes the venue and session details. People who don’t get approved never see the logistics.
High-security investor meeting+
Personal links, hidden address, and waitlist mode. Only people on your list can register. Each registration is reviewed before confirmation. Venue details are delivered only after approval. Maximum control at every step.
## Common Questions
[Section titled “Common Questions”](#common-questions)
Can I hide things besides the venue address?+
You control everything on the landing page. Remove speaker names, agenda details, attendee lists, whatever you want. Put sensitive details only in the confirmation email.
Do guests need a Gatsby account?+
No. They click their link, see their pre-filled information, and register. No login, no account creation.
Can I modify the guest list after sending invitations?+
Yes. Add new contacts and send them a separate invitation campaign. Each new guest gets their own personal link. Remove people if needed.
How do I know if someone viewed the page but didn't register?+
Their status shows “Visited.” Filter your guest list by this status to see everyone who clicked but didn’t complete registration.
Can an assistant register on behalf of their executive?+
Yes. The assistant opens the personal link, sees the pre-filled info, and completes the registration. It stays attributed to the right person. The confirmation email also goes to any executive assistant email associated with that contact profile.
# Pricing
> If the people at your events matter to your business, let's talk.
## Tell us what you’re running
Pricing scales with your team size and event volume. We’ll walk through what it costs.
Talk to us
Included
* Guest profiles that carry forward across every event
* Invitations sent from your people’s actual email accounts
* Calendar invites that update when plans change
* RSVP pages with your brand
* Seating charts, check-in, and name badges in one place
* Human support over email and Slack
* SOC 2 Type II certified
Available as add-ons
* \+
API access
* \+
CRM and premium integrations
* \+
Guest-facing mobile app
* \+
Custom domain setup
## Trusted by top teams












## What Gatsby replaces
[Section titled “What Gatsby replaces”](#what-gatsby-replaces)
This is what most teams are working with before they switch.
Outdated spreadsheets
Three versions of your guest list. One is wrong.
Invites in spam
Invitations that landed where no one saw them.
Random seating
Seating chart rebuilt from scratch every time.
Clipboards at the door
Check-in tracked on paper or a shared doc.
Someone’s memory
Dietary needs, titles, and guest history stored in one person’s head.
Starting over
Every new event begins at zero.
Gatsby puts all of this in one system. Guest context carries forward. When someone leaves your team, the knowledge stays.
Talk to us
We’ll walk through what Gatsby looks like for your team and what it costs.
## What teams say after switching
[Section titled “What teams say after switching”](#what-teams-say-after-switching)
”Gatsby enabled a more coordinated fellowship program. Tracking attendance and invites was so easy! We use Gatsby all the time to get the 8VC network together.”
Caroline · Director of Ops, 8VC
”Gatsby has saved me a lot of hassle with event planning and messaging. Importing contacts, grouping them, and sending personalized messages has been a big time-saver. The product is easy to use and, most importantly, support from the team has been exemplary.”
Dilip · VP, BD & Marketing
”What I appreciate most about Gatsby is that the team really listens to customer feedback and tailors the product to our needs. The new features the team has rolled out are super thoughtful.”
Martha · Operations & EA
”Having hosted many events over the years, Gatsby is the best platform I’ve used. It played a key role in making sure our event ran smoothly.”
Jennifer · Head of HR
## FAQs
[Section titled “FAQs”](#faqs)
How does pricing work?+
Pricing depends on your team size and event volume. Most teams pay annually. No per-guest fees. On a call we’ll figure out which plan fits and whether any add-ons make sense for your workflow.
Is Gatsby right for my organization?+
If events are how you build and maintain relationships, yes. Some of our teams run a hundred events a year. Others started with a single high-stakes dinner and grew from there. What they have in common is that the guest experience and the relationships behind it aren’t something they want to improvise.
What kind of teams use Gatsby?+
Venture capital and private equity firms running portfolio events and LP gatherings. Membership organizations coordinating ongoing programs. University departments managing alumni and donor events. Law firms hosting client dinners. Consultancies running partner programs. Family offices coordinating gatherings. Field marketing teams who care about brand and guests making better connections at their events. Generally teams where events are core relationship infrastructure.
Do you offer implementation support?+
Yes. We’ll help train your team. Most teams are running live events within a week or two.
What kind of support do you provide?+
You get **human** support over email or Slack. Let us know ahead of your event and we’ll be available for anything urgent, including after hours.
How do you handle data security?+
We’re SOC 2 Type II certified. We do regular security audits and we never share or sell your information. Your contacts stay yours.
Do you support SSO and 2FA?+
Yes. Google Workspace SSO is included in the base platform. Two-Factor Authentication can be enforced. We support Okta as well.
Can we use our own branding?+
Yes. Your RSVP pages and emails match your brand. Custom domain setup is available as an add-on.
Can we export our data?+
Always. Export your contacts, event history, and engagement data anytime in CSV or Excel. No lock-in.
Can I test before my event goes live?+
Yes. You can run a full test event without affecting your real guest list.
## Tell us what you’re running
We’ll walk through what makes sense for your team.
Talk to us
# Privacy Policy
Effective date: Monday Oct 7, 2024
## Summary
[Section titled “Summary”](#summary)
**Last Revised: April 15, 2026**
This privacy policy (“Privacy Policy”) for Gatsby, Inc. (“Gatsby”, “we”, “us” “our”) describes how we collect, use and disclose information about users of the Gatsby website (), services, tools, features and functionalities (collectively, the “Services”). For the purposes of this Privacy Policy, “you” and “your” means you as the user of the Services.
By using or accessing our Services in any manner, you acknowledge that you accept the practices and policies outlined below, and you hereby consent that we will collect, use and share your information as described in this Privacy Policy. If you do not agree to this Privacy Policy, please do not access and use the Services.
Remember that your use of Gatsby’s Services is at all times subject to our Terms of Use, which incorporates this Privacy Policy. Any terms we use in this Policy without defining them have the definitions given to them in the Terms of Use.
You may print a copy of this Privacy Policy. If you have a disability, you may access this Privacy Policy in an alternative format by contacting .
## What this Privacy Policy Covers
[Section titled “What this Privacy Policy Covers”](#what-this-privacy-policy-covers)
This Privacy Policy covers how we treat Personal Data that we gather when you access or use our Services, or otherwise engage with us (“Personal Data”). This Privacy Policy does not cover the practices of companies we don’t own or control or people we don’t manage.
## Personal Data
[Section titled “Personal Data”](#personal-data)
### Categories of Personal Data We Collect
[Section titled “Categories of Personal Data We Collect”](#categories-of-personal-data-we-collect)
This chart details the categories of Personal Data that we collect and have collected over the past 12 months:
| Category of Personal Data | Personal Data We Collect | Categories of Third Parties With Whom We Share this Personal Data |
| -------------------------------------------------------------------- | ------------------------------------------------------------------------------------------------------------------------------------------------------------------------------------------------------------- | --------------------------------------------------------------------------------------- |
| Profile or Contact Data | First and last name, Email, Unique identifiers such as passwords | Service Providers, Parties You Authorize, Access or Authenticate |
| Payment Data | Billing Address | Service Providers (specifically our payment processing partner, currently Stripe, Inc.) |
| Device/IP Data | Device/IP Data, IP address, Device ID, Type of device/operating system/browser used to access the Services | Service Providers |
| Web Analytics | Web page interactions, Referring web page/source through which you accessed the Services, Non-identifiable request IDs, Statistics associated with the interaction between device or browser and the Services | Service Providers |
| Geolocation Data | IP-address-based location information | Service Providers |
| Inferences Drawn From Other Personal Data Collected | Profiles reflecting contact attributes, Profiles reflecting user behavior | Service Providers, Parties You Authorize, Access or Authenticate |
| Other Identifying Information that You Voluntarily Choose to Provide | Identifying information in emails or letters you send us or post to other users | Service Providers, Parties You Authorize, Access or Authenticate |
| Professional or Employment-Related Data | Employer, Job title | Service Providers, Parties You Authorize, Access or Authenticate |
### Categories of Sources of Personal Data
[Section titled “Categories of Sources of Personal Data”](#categories-of-sources-of-personal-data)
We collect Personal Data about you from the following categories of sources:
* You
* Third Parties
* Vendors
* Third-Party Accounts
## How We Use Your Personal Data
[Section titled “How We Use Your Personal Data”](#how-we-use-your-personal-data)
Gatsby does not sell or share your personal data with Third Party Data Processors, unless through a Third Party such as a CRM that your Organization has specifically connected to your Gatsby instance.
Gatsby app’s use of information received, and the app’s transfer of information to any other app, from Google APIs, will adhere to [Google API Services User Data Policy](https://developers.google.com/terms/api-services-user-data-policy), including Limited Use Requirements.
To the extent that any data from your Gmail or Google Calendar account to which you provide the Gatsby app access constitutes Personal Data under this Privacy Policy, it will be subject to the provisions of this Privacy Policy. Notwithstanding anything else in this Privacy Policy, if you provide the Gatsby app access to data from your Gmail or Google Calendar account, the app’s use of that data will be subject to these additional restrictions:
This data will be read by humans only in the following cases:
### Our Commercial or Business Purposes for Collecting Personal Data
[Section titled “Our Commercial or Business Purposes for Collecting Personal Data”](#our-commercial-or-business-purposes-for-collecting-personal-data)
The ways in which we may use your Information are as follows:
* Providing, Customizing and Improving the Services
* Marketing the Services
* Corresponding with You
* Meeting Legal Requirements and Enforcing Legal Terms
We may associate this information with your account (if you have a registered account), the device you use to access the Services, or email that you use to engage with Gatsby.
# How We Share Your Personal Data
[Section titled “How We Share Your Personal Data”](#how-we-share-your-personal-data)
We disclose your Personal Data to the categories of service providers and other parties listed in this section. \[Depending on state laws that may be applicable to you, some of these disclosures may constitute a “sale” of your Personal Data.] For more information, please refer to the state-specific sections below.
### Service Providers
[Section titled “Service Providers”](#service-providers)
These parties help us provide the Services or perform business functions on our behalf. They include:
* Parties You Authorize, Access or Authenticate
* Customers
\[If you are a contact of a Gatsby customer and/or a contact of a Gatsby customer’s end users or employees, we may disclose Professional or Employment-Related Data that we collect about you from third-party vendors, to such customer in connection with our provision of certain services.]
* Legal Obligations
We may share any Personal Data that we collect with third parties in conjunction with any of the activities set forth under “Meeting Legal Requirements and Enforcing Legal Terms” in the “Our Commercial or Business Purposes for Collecting Personal Data” section above.
* Business Transfers
All of your Personal Data that we collect may be transferred to a third party if we undergo a merger, acquisition, bankruptcy or other transaction in which that third party assumes control of our business (in whole or in part). Should one of these events occur, we will make reasonable efforts to notify you before your information becomes subject to different privacy and security policies and practices.
* Affiliates and Professional Advisers
We may share any Personal Data that we collect with our affiliates or otherwise within our corporate group, and professional advisors, such as auditors, law firms, or accounting firms.
## Tracking Tools, Advertising and Opt-Out
[Section titled “Tracking Tools, Advertising and Opt-Out”](#tracking-tools-advertising-and-opt-out)
The Services use cookies and similar technologies such as pixel tags, web beacons, clear GIFs and JavaScript (collectively, “Cookies”) to enable our servers to recognize your web browser, tell us how and when you visit and use our Services, analyze trends, learn about our user base and operate and improve our Services. Cookies are small pieces of data- usually text files - placed on your computer, tablet, phone or similar device when you use that device to access our Services. Please note that because of our use of Cookies, the Services do not support “Do Not Track” requests sent from a browser at this time.
You can decide whether or not to accept Cookies through your internet browser’s settings. Most browsers have an option for turning off the Cookie feature, which will prevent your browser from accepting new Cookies, as well as (depending on the sophistication of your browser software) allow you to decide on acceptance of each new Cookie in a variety of ways. You can also delete all Cookies that are already on your device. If you do this, however, you may have to manually adjust some preferences every time you visit our website and some of the Services and functionalities may not work.
To explore what Cookie settings are available to you, look in the “preferences” or “options” section of your browser’s menu.
To find out more information about Cookies, including information about how to manage and delete Cookies, please visit [http://www.allaboutcookies.org](http://www.allaboutcookies.org/) or if you are located in the European Union.
## Third Party Website and Links
[Section titled “Third Party Website and Links”](#third-party-website-and-links)
We may provide links to third-party websites or other online platforms operated by third parties. If you follow links to sites not affiliated or controlled by us, you should review their privacy and security policies and other terms and conditions. We do not guarantee and are not responsible for the privacy or security of these sites, including the accuracy, completeness, or reliability of their information. Information you provide on public or semi-public venues may also be viewable by other users of the Services without limitation as to its use by us or by a third party. Our inclusion of such links does not, by itself, imply any endorsement of the content on such platforms or of their owners or operators except as disclosed on the Services. We expressly disclaim any and all liability for the actions of third parties, including but without limitation to actions relating to the use and/or disclosure of Personal Data by third parties. Any information submitted by you directly to these third parties is subject to that third party’s privacy policy.
## Data Security
[Section titled “Data Security”](#data-security)
Gatsby encrypts all data at rest and transit and uses industry best practices to secure its systems. Gatsby’s infrastructure is independently monitored by third parties and is undergoing SoC2 Type 2 compliance.
## Personal Data of Children
[Section titled “Personal Data of Children”](#personal-data-of-children)
We do not knowingly collect or solicit Personal Data about children under 13 years of age and, we expect our customers to avoid storing any information related to children under the age of 13 in our systems.
If we learn we have collected Personal Data from a child under 13 years of age, we will make commercially reasonable efforts to delete that information from our database. If you believe that a child under 13 years of age may have provided Personal Data to us, please contact us at .
## State Law Privacy Rights
[Section titled “State Law Privacy Rights”](#state-law-privacy-rights)
### California Resident Rights
[Section titled “California Resident Rights”](#california-resident-rights)
Any California residents under the age of eighteen (18) who have registered to use the Services, and who have posted Information in the publicly-viewable portion of the Services, can request that such Information be removed from the Services by contacting us at . We will make reasonable good faith efforts to remove the Information from prospective public view or anonymize it so the minor cannot be individually identified. This removal process cannot ensure complete or comprehensive removal. For instance, third-parties may have republished the Information and archived copies of it may be stored by search engines and others that we do not control.
Under California Civil Code Sections 1798.83-1798.84, California residents are entitled to contact us to prevent disclosure of Personal Data to third parties for such third parties’ direct marketing purposes. If this law applies to you and you wish to obtain further information about our sharing, you may make one request each year by contacting us at .
Your browser may offer you a “Do Not Track” option, which allows you to signal to operators of websites and web applications and services that you do not wish such operators to track certain of your online activities over time and across different websites. Our Services do not support Do Not Track requests at this time. To find out more about “Do Not Track,” you can visit [www.allaboutdnt.com](https://www.allaboutdnt.com).
### Nevada Resident Rights
[Section titled “Nevada Resident Rights”](#nevada-resident-rights)
\[If you are a resident of Nevada, you have the right to opt-out of the sale (as defined by N.R.S. 603A) of certain Personal Data to third parties who intend to license or sell that Personal Data. We do not “sell” your Personal Data as defined by N.R.S. 603A; however, if you would like to make such a request you may do so by contacting us at .]
## Subprocessors
[Section titled “Subprocessors”](#subprocessors)
You can find the list of Gatsby Subprocessors [here](https://gatsbylabs.notion.site/gatsbylabs/Gatsby-Subprocessors-92c7f1df940042ebb8745aaa0d8d67a4)
## Transfers of Personal Data
[Section titled “Transfers of Personal Data”](#transfers-of-personal-data)
The Services are hosted and operated in the United States (“U.S.”) through Gatsby and its service providers, and if you do not reside in the U.S., laws in the U.S. may differ from the laws where you reside. By using the Services, you acknowledge that any Personal Data about you, regardless of whether provided by you or obtained from a third party you integrated Gatsby to, is being provided to Gatsby in the U.S. and will be hosted on U.S. servers, and you authorize Gatsby to transfer, store and process your information to and in the U.S., and possibly other countries.
## SMS and Text Messaging
[Section titled “SMS and Text Messaging”](#sms-and-text-messaging)
All the above categories exclude text messaging originator opt-in data and consent; this information will not be shared with any third parties.
## Changes to this Privacy Policy
[Section titled “Changes to this Privacy Policy”](#changes-to-this-privacy-policy)
We’re constantly trying to improve our Services, so we may need to change this Privacy Policy from time to time. If we make changes that are material, we will use reasonable efforts to attempt to provide notice to you by placing a notice on the Gatsby website, by sending you an email at the last email address you provided us and/or by some other means. However, it is your sole responsibility to review the Privacy Policy from time to time to view any such changes. The updated Privacy Policy will be effective as of the time of posting, or such later date as may be specified in the updated Privacy Policy. If you use the Services after any changes to the Privacy Policy have been posted, that means you agree to all of the changes. Use of information we collect is subject to the Privacy Policy in effect at the time such information is collected.
## Contact Information
[Section titled “Contact Information”](#contact-information)
If you have any questions or comments about this Privacy Policy, the ways in which we collect and use your Personal Data or your choices and rights regarding such collection and use, please do not hesitate to contact us at:
# SMS Terms of Service
> Gatsby Events SMS messaging terms of service and program details
Effective date: September 24, 2026
## Gatsby Events SMS
[Section titled “Gatsby Events SMS”](#gatsby-events-sms)
1. Gatsby Events sends event-related text messages to guests and event participants. Messages may include RSVP confirmations, event reminders, schedule updates, check-in notifications, and other communications related to events you are invited to or registered for.
2. You can cancel the SMS service at any time. Just text **STOP** to the short code. After you send the SMS message “STOP” to us, we will send you an SMS message to confirm that you have been unsubscribed. After this, you will no longer receive SMS messages from us, including messages sent on behalf of any organization that uses Gatsby. To start receiving messages again, text **START** to the short code.
3. If you want to stop hearing from one organization but keep hearing from others, reply **BLOCK** and we will stop messages from the organization that most recently texted you. You can also manage every organization individually at [gatsby.events/sms-help](https://gatsby.events/sms-help), where you verify your phone number and turn each one on or off.
4. If you are experiencing issues with the messaging program you can reply with the keyword **HELP** for more assistance, or you can get help directly at:
Email copied to clipboard
5. Carriers are not liable for delayed or undelivered messages.
6. As always, message and data rates may apply for any messages sent to you from us and to us from you. Message frequency varies based on your event activity. If you have any questions about your text plan or data plan, it is best to contact your wireless provider.
7. If you have any questions regarding privacy, please read our privacy policy: [gatsby.events/privacy-policy](https://gatsby.events/privacy-policy/)
# Terms of Service
> Gatsby Labs Inc. Terms of Service
## 1. Terms
[Section titled “1. Terms”](#1-terms)
By accessing the website at [http://gatsby.events](http://gatsby.events/), you are agreeing to be bound by these terms of service, all applicable laws and regulations, and agree that you are responsible for compliance with any applicable local laws. If you do not agree with any of these terms, you are prohibited from using or accessing this site. The materials contained in this website are protected by applicable copyright and trademark law.
## 2. Use License
[Section titled “2. Use License”](#2-use-license)
Permission is granted to temporarily access Gatsby materials (software, application(s), information and services) on Gatsby Labs, Inc’s website. This is the grant of a license, not a transfer of title, and under this license you may not:
1. modify or copy the materials;
2. attempt to decompile or reverse engineer any software contained on Gatsby Labs, Inc’s website;
3. remove any copyright or other proprietary notations from the materials; or
4. transfer the materials to another person or “mirror” the materials on any other server.
This license shall automatically terminate if you violate any of these restrictions and may be terminated by Gatsby Labs, Inc at any time. Upon terminating your viewing of these materials or upon the termination of this license, you must destroy any downloaded materials in your possession whether in electronic or printed format.
## 3. Lawful Use
[Section titled “3. Lawful Use”](#3-lawful-use)
Gatsby Labs, Inc shall only be used for lawful purposes and you shall use the Gastby Labs, Inc services only in compliance with the Terms and the Agreements, the CAN-SPAM Act and regulations thereunder and all other applicable U.S., state, local and international laws in your jurisdiction, including but not limited to:
1. United States anti-spam legislation and any other policies, laws, or regulations related to unsolicited emails, spamming, privacy, obscenity, or defamation, copyright and trademark infringement and child protective email address registry laws;
2. laws relating to advertising, sales or promotional efforts or practices, redemption, refunds and provision of your products or services;
3. laws that govern false, unfair and deceptive practices, coupons, gift cards or certificates, defective products or services, unclaimed property, alcohol or tobacco, health and safety, fire, and hygiene standards;
4. laws that govern lotteries, sweepstakes, contests and promotions;
5. laws that govern the collection of donations and charitable giving (collectively, “Applicable Laws”).
## 4. Disclaimer
[Section titled “4. Disclaimer”](#4-disclaimer)
The materials on Gatsby Labs, Inc’s website are provided on an ‘as is’ basis. Gatsby Labs, Inc makes no warranties, expressed or implied, and hereby disclaims and negates all other warranties including, without limitation, implied warranties or conditions of merchantability, fitness for a particular purpose, or non-infringement of intellectual property or other violation of rights.
Further, Gatsby Labs, Inc does not warrant or make any representations concerning the accuracy, likely results, or reliability of the use of the materials on its website or otherwise relating to such materials or on any sites linked to this site.
## 5. Limitations
[Section titled “5. Limitations”](#5-limitations)
In no event shall Gatsby Labs, Inc or its suppliers be liable for any damages (including, without limitation, damages for loss of data or profit, or due to business interruption) arising out of the use or inability to use the materials on Gatsby Labs, Inc’s website, even if Gatsby Labs, Inc or a Gatsby Labs, Inc authorized representative has been notified orally or in writing of the possibility of such damage. Because some jurisdictions do not allow limitations on implied warranties, or limitations of liability for consequential or incidental damages, these limitations may not apply to you.
## 6. Accuracy of materials
[Section titled “6. Accuracy of materials”](#6-accuracy-of-materials)
The materials appearing on Gatsby Labs, Inc’s website could include technical, typographical, or photographic errors. Gatsby Labs, Inc does not warrant that any of the materials on its website are accurate, complete or current. Gatsby Labs, Inc may make changes to the materials contained on its website at any time without notice. However Gatsby Labs, Inc does not make any commitment to update the materials.
## 7. Links
[Section titled “7. Links”](#7-links)
Gatsby Labs, Inc has not reviewed all of the sites linked to its website and is not responsible for the contents of any such linked site. The inclusion of any link does not imply endorsement by Gatsby Labs, Inc of the site. Use of any such linked website is at the user’s own risk.
## 8. Modifications
[Section titled “8. Modifications”](#8-modifications)
Gatsby Labs, Inc may revise these terms of service for its website at any time without notice. By using this website you are agreeing to be bound by the then current version of these terms of service.
## 9. Governing Law
[Section titled “9. Governing Law”](#9-governing-law)
These terms and conditions are governed by and construed in accordance with the laws of Texas and you irrevocably submit to the exclusive jurisdiction of the courts in that State or location.
Contact us for questions:
Email copied to clipboard
# Troubleshooting
> Quick solutions organized by what's actually broken.
## Critical: Event-Live Issues
[Section titled “Critical: Event-Live Issues”](#critical-event-live-issues)
**Event starts in 2 hours. Check-in app won’t connect. Badge printer throwing errors. VIPs didn’t receive calendar invites. Registration link down.**
This section is for when it’s all on fire.
Email sending: Emergency workarounds+
**What happened:** Emails failing to send during critical time.
**Quick fixes:**
1. **Check sender authentication:** Team Settings » Linked Services » Reconnect email account
2. **Hit sending limit:** Switch to SendGrid (contact support for emergency setup)
3. **Emails not processing:** Send in smaller batches of 500
4. **Use personal email:** Send directly from Gmail/Outlook as one-off
5. **Manual workaround:** Export guest list » Send from personal client with BCC
**Long-term solution:** Set up SendGrid before your next event.
Confirmation emails not sending+
**Check these:**
1. **Notification email toggled off:** Registration » Confirmation Emails » Accepted Email » Toggle must be ON
2. **Spam folder:** Have test guest check spam/junk
3. **SendGrid authentication:** Team Settings » Verify DNS records with IT
**Fix:** Most common is toggled-off notification email. Check Confirmation Emails first.
Calendar invites missing+
**Two types of problems:**
**Calendar invite not attached to email:**
* Registration » Confirmation Emails » Accepted Email » Add Calendar Invite from three-dot menu
**Calendar invite attached but not arriving:**
* Test with personal email first
* Check if SendGrid is authenticated (Team Settings)
* Verify calendar organizer is set (Registration » Calendar Settings)
**Quick test:** Add yourself as guest, register, check what arrives.
Walk-Ins and unexpected arrivals at the door+
**Two methods to check them in:**
**Method 1: Search and add**
1. Open check-in (app or web)
2. Search their name
3. Click **+ Add New Guest**
4. Fill info, check in, print badge
**Method 2: Kiosk self-registration**
1. Enable Walk-In Registration in Kiosk Settings
2. Guest types their name
3. Not found? They fill out form themselves
4. Badge prints automatically
New contacts sync to database immediately.
Badge printer won't connect+
**iOS app troubleshooting:**
1. **Bluetooth on?** Device Settings » Bluetooth » On
2. **Printer powered and paired?** Settings » Bluetooth » Look for printer name
3. **Reconnect in app:** Gatsby app » Settings » Printers » Tap printer » Connect
4. **Still failing?** Forget device in iOS Bluetooth, re-pair from scratch
**Supported:** Brother QL-820NWB, Zebra with full Bluetooth
**Not supported:** Android (iOS only for badge printing)
Badge print errors/issues+
**Common problems:**
**Blank badges printing:**
* Template has no fields selected » Edit template » Add fields
**Misaligned printing:**
* Wrong label size » Confirm DK2205 or equivalent
* Template margins off » Adjust in badge designer
**Printer stops mid-event:**
* Check label supply » Swap roll
* Bluetooth disconnected » Reconnect in app Settings » Printers
**Badge won’t print at all:**
* Check printer connection status in app
* Restart printer, reconnect Bluetooth
QR codes won't scan+
**Check-in app issues:**
1. **Camera permissions:** Device Settings » Gatsby » Allow Camera
2. **Lighting too dim:** Move to better-lit area or use device flashlight
3. **QR code damaged:** Guest shows confirmation email » Manual check-in
4. **Wrong QR code:** Guest showing ticket from different system » Search by name
**Guest app QR codes (for check-in):**
* Have guest open Gatsby Guest app » Show QR code from there
* Backup: Search guest by name in check-in tool
Sent emails to the wrong people by mistake+
**Immediate actions:**
1. **Send correction email ASAP:** Acknowledge mistake, clarify who should attend
2. **Update guest list:** Mark incorrect recipients as Declined or remove
3. **Resend to correct people:** Create new campaign with apology and correct link
**Can’t recall emails.** Send lands immediately. Only option is follow-up correction.
**Prevention:** Always send test to yourself first. Double-check recipient selection before clicking send.
Test links were sent to real guests+
**What happened:** Sent test/preview link instead of real personal links.
**Fix:**
1. **Send correct links immediately:** Create new campaign with real `{rsvpLink}` merge tag
2. **Explain in email:** “We sent incorrect registration link. Please use this one instead.”
3. **Check responses:** Test link responses won’t register correctly
**Prevention:** Use **Not Sent To** filter when resending. Never use test link in real campaigns.
Event link redirects to home page+
**Common causes:**
1. **Event deleted or archived:** Can’t fix - event is gone
2. **Public link disabled:** Event Details » Public Link dropdown » Enable
3. **Landing page not published:** Registration » Landing Page » Click Publish
4. **Wrong URL copied:** Get fresh link from Event Details
**Quick check:** Try link in incognito browser to rule out caching.
'Guest not found' error+
**When registering:**
1. **Personal link for different guest:** They need their own link (check sent emails)
2. **Email mismatch:** Guest using different email than invited with
3. **Not on guest list:** Add them manually first, then generate their link
**When checking in:**
1. **Search by alternate name:** Try nickname, maiden name, informal name
2. **Not registered yet:** Add as walk-in during check-in
Registration buttons not working+
**Check these settings:**
1. **RSVP buttons turned off:** Registration » Invite Landing Page » **What guests can choose**. Set **Previewing as** to the kind of guest reporting the problem, and the line under it names the buttons they get.
2. **Registration mode closed:** Event Details » Registration » Change from “Do not allow registration”
3. **Capacity reached:** Check if at capacity, adjust or disable capacity limit
4. **JavaScript error:** Try different browser, clear cache
**Quick test:** View in incognito browser. If works there, it’s browser cache issue.
Mobile registration broken+
**Symptoms:** Buttons don’t work, layout destroyed, content cut off on phones.
**Fixes:**
**Layout destroyed:**
* Landing page template issue » Switch to mobile-responsive template
* Preview on actual device before going live
**Buttons not responding:**
* RSVP button settings disabled » Enable in landing page settings
* JavaScript not loading » Test in different mobile browser
**Content cut off:**
* Template margins too wide » Edit template » Adjust mobile view
* Use the editor’s device previews » Test all screen sizes
**Prevention:** Always test landing page on actual mobile device before sending invitations.
## Registration Problems
[Section titled “Registration Problems”](#registration-problems)
Anyone can register (not what I wanted)+
**What happened:** Public link enabled when you wanted invite-only.
**Fix:**
1. **Disable public link:** Event Details » Public Link dropdown » Disable
2. **Check existing registrations:** Filter guest list by Registration Source “Public Link”
3. **Move to waitlist if needed:** Select unwanted registrations » Change Status » Waitlist
4. **Enable approval workflow:** Change Registration Mode to “Wait for approval”
**For future:** Keep public link disabled until intentionally enabling it.
Guests bypassing waitlist+
**Common causes:**
1. **Personal links sent before waitlist enabled:** Personal links ignore waitlist settings
2. **Team members marking guests Accepted manually:** Bypasses waitlist
3. **Multiple registration methods:** Public link in waitlist, personal links accept directly
**Fix:**
1. **Set Registration Mode:** Change to “Wait for approval” (applies to ALL registration methods)
2. **Review accepted guests:** Check who got through, move to waitlist if needed
3. **Disable personal link registration:** Use public link only for waitlist mode
**Prevention:** Enable “Wait for approval” mode BEFORE sending any invitations.
Calendar invites not being sent to guests+
**Check these:**
1. **Calendar invite not attached:** Registration » Confirmation Emails » Accepted Email » Three-dot menu » Add Calendar Invite
2. **Confirmation email disabled:** Registration » Confirmation Emails » Accepted Email » Toggle must be ON
3. **No calendar organizer set:** Registration » Calendar Settings » Set organizer to connected Google account
4. **SendGrid not configured:** Notification emails require SendGrid
5. **Only public link registrants missing it:** Public link settings » **Add to Guest Calendar** must be ON
6. **Updates not going out:** The organizer’s connected Google or Outlook account may need reconnecting in Team Settings » Linked Services. Then send from **Unshared Event Updates**.
**Test:** Register yourself, check what email arrives.
Guests have duplicates on their calendar+
**What happened:** Guest received calendar invite multiple times, added each one.
**Causes:**
* Sent invitation campaign WITH calendar attached + confirmation email also has calendar
* Multiple event updates sent
* Guest registered multiple times
**Fix for guest:** They need to manually delete duplicate calendar entries. You can’t remote-delete.
**Prevention:** Only attach calendar to confirmation email, not invitation campaigns.
Public Link registrants not getting confirmation emails+
**Check:**
1. **SendGrid configured?** Notification emails require SendGrid for public registrations
2. **Confirmation email toggled off?** Registration » Confirmation Emails » Accepted Email » Toggle ON
3. **Spam folder:** Have test registrant check spam/junk
**Common mistake:** Using Gmail/Outlook for notification emails. Switch to SendGrid.
Waitlist emails not sending+
**Check:**
1. **Waitlist email toggled off:** Registration » Confirmation Emails » Waitlist Email » Toggle ON
2. **SendGrid not configured:** Waitlist notifications require SendGrid
3. **Guest status not actually Waitlist:** Check RSVP Status column
**Test:** Manually change guest to Waitlist status, check if email sends.
Missing calendar invites in confirmation emails+
**Two scenarios:**
**Calendar invite was attached, not arriving:**
* Check spam folder first
* Verify calendar organizer is connected Google account with permissions
**Calendar invite never attached:**
* Registration » Confirmation Emails » Accepted Email » Three-dot menu » Add Calendar Invite
**Multi-session setups:** The registration hub’s confirmation usually has no calendar invite. Each session event sends its own, which requires **Send confirmation email from child event** to be on in the session selection question.
## Email Delivery Problems
[Section titled “Email Delivery Problems”](#email-delivery-problems)
Emails going to spam+
**Immediate fixes:**
1. **Send from authenticated domain:** Set up SendGrid with SPF, DKIM and DMARC in place (contact support)
2. **Send as a person, not a brand:** A plain, short email from a named individual clears filters that a designed, image-heavy send from a shared address does not. See Basic vs Marketing style in Campaigns.
3. **Test with yourself:** Send to your own Gmail/Outlook, see if it lands in spam
**Long-term solutions:**
1. **Protect your domain reputation.** Deliverability is scored on the sending domain over time, not on any one campaign. One send to a stale list can suppress inbox placement for months afterwards.
2. **Warm up a new sending domain.** Start around 50 emails and increase gradually over several weeks. A new domain that opens with a thousand-recipient send is treated as a new bulk sender, because that is what it is.
3. **Clean your list.** Remove bounced addresses and anyone who has not engaged in a year. Bounce rate and spam complaints are the two signals that move your reputation fastest.
4. **Turn off open tracking if you don’t need it.** The tracking pixel is an external image request, and some filters weight it. Gatsby’s Reporting measures **Visited** (a guest reaching your RSVP page), which is a better signal anyway and costs nothing in deliverability.
**Prevention:** Use SendGrid from day one. Gmail/Outlook have stricter spam filters.
All emails failing+
**Check these in order:**
1. **Sender account disconnected:** Team Settings » Linked Services » Reconnect Gmail/Outlook
2. **Hit sending limit:** Google caps an account at about 2,000–2,500 emails/day; Microsoft’s cap depends on your Microsoft agreement » Send large lists from SendGrid
3. **Account suspended:** Check sender’s email account status
4. **Network issue:** Try sending single test email first
**Emergency workaround:** Send from personal email client with BCC until Gatsby email fixed.
Delivery to specific domains failing+
**Corporate email filters:**
Some companies block external event platforms. Common with finance, government, healthcare.
**Workarounds:**
1. **Ask guest to whitelist:** Have them add and your SendGrid domain
2. **Alternative email:** Collect personal email as backup
3. **Phone follow-up:** For VIPs, confirm via call/text they received invite
**No universal fix.** Their IT controls their email filters.
Email sending limits hit+
**What happened:** Google caps one account at about 2,000–2,500 emails per day. Microsoft’s cap depends on your organization’s Microsoft agreement.
**Immediate fix:**
1. **Stop current send:** Cancel if still processing
2. **Wait 24 hours:** Limit resets daily
3. **Send in smaller batches:** About 500 per day per sender. Select a range on the guest list with Shift and watch the selected count in the lower-left corner.
**Permanent solution:**
Set up SendGrid. SendGrid senders aren’t subject to the Google or Microsoft caps. Contact support for setup.
**Prevention:** Use SendGrid for any send over about 500 recipients.
Campaign is sending slowly+
**What happened:** Gatsby paces sends from Gmail and Outlook senders at about one email every 8 to 10 seconds. 100 emails takes about 15 minutes, and a couple of thousand takes several hours. For Google senders, pacing is shared across all of your in-progress sends, so a small send started while a large one is going out waits behind it.
**Fix:** Nothing is broken; the send will finish. For large lists, send from SendGrid, which isn’t paced this way.
Authentication required notice+
**What happened:** SendGrid needs DNS authentication to send from your domain.
**Fix:**
1. **Contact Gatsby support:** Request DNS records for your domain
2. **Send to IT team:** They add SPF, DKIM, DMARC records to DNS
3. **Wait for propagation:** 24-48 hours for DNS changes
4. **Support verifies:** Gatsby confirms authentication active
**Can’t self-serve this.** Requires IT team + Gatsby support coordination.
Can't add a SendGrid sending address+
**Common issues:**
1. **No domains to pick from:** The add dialog builds the address from a name you type and a domain you choose. If it says no sending domain is authorized yet, DNS still needs setting up (contact support)
2. **The domain you want isn’t listed:** Only domains Gatsby has verified appear, so a missing one has not been verified yet
3. **Save stays grayed out:** Both the name and the address have to be filled in, and the address has to pass verification
4. **It says the address already exists:** It is already on your list. To let someone else send from it, use **Edit Who Can Send** on that row
**Process:** Contact support → Get DNS records → IT adds to DNS → Gatsby verifies → You can add a SendGrid sending address
**Timeline:** 2-5 business days depending on IT responsiveness.
A SendGrid address isn't in my send-from list+
Check the **Who can send** column next to that address in **Team Settings » Linked Services » SendGrid**.
1. **Reads “No one yet”:** Nobody has access, so it appears for nobody. Open the three dots on the row, choose **Edit Who Can Send**, and check yourself or whoever needs it
2. **No such column:** Access isn’t the problem. Confirm the address is on the list at all
3. **“Edit Who Can Send” is missing:** Your org doesn’t restrict SendGrid addresses per person, so everyone can already send from every address
## Landing Page & Mobile Issues
[Section titled “Landing Page & Mobile Issues”](#landing-page--mobile-issues)
Landing Page completely blank+
**Check:**
1. **Published?** Landing Page editor » Top-right » Click Publish
2. **Template deleted?** Restore from template library or duplicate from another event
3. **Browser cache:** Try incognito/private browser
4. **Loading error:** Check browser console for JavaScript errors
**Quick test:** View in different browser. If works there, clear cache in original browser.
Mobile layout destroyed+
**Fixes:**
1. **Switch template:** Use mobile-responsive template from library
2. **Check preview:** Landing Page editor » Device preview » Test mobile view
3. **Remove custom CSS:** Advanced edits might break mobile, revert to template default
**Prevention:** Always preview mobile BEFORE publishing. Test on actual phone, not just desktop preview.
Content cut off on phones+
**Common causes:**
* Template margins too wide for mobile screens
* Fixed-width elements don’t scale
* Too much content in hero section
**Fixes:**
1. **Edit margins:** Advanced mode » Adjust section padding/margins
2. **Simplify hero:** Reduce content in top section
3. **Switch template:** Choose mobile-first template
**Test on real device** before going live.
Registration buttons show differently when editing Landing Page+
**This is normal.**
The template editor keeps every button on hand so you can style it. The **RSVP buttons** card in its left column splits them into the ones this event’s guests see and the ones they don’t see. The published page shows buttons based on:
* **What guests can choose** on the Invite Landing Page
* Registration mode
* Capacity settings
* Guest’s current RSVP status
**Fix:** On the Invite Landing Page, set **Previewing as** to that kind of guest to see their actual buttons, or click **Get test link for this view** to walk their flow.
## Check-In & Day-of-Event
[Section titled “Check-In & Day-of-Event”](#check-in--day-of-event)
Different devices showing different guest counts+
**What happened:** Check-in not syncing across devices.
**Common causes:**
1. **No internet connection:** Check-in requires internet to sync
2. **Using same account on multiple devices:** One device kicks other out, causing sync issues
3. **Offline changes:** Changes made offline don’t sync until reconnected
**Fix:**
1. **Verify internet:** All devices connected to WiFi or cellular
2. **Use different accounts:** Each iPad uses different team member login
3. **Refresh check-in:** Close and reopen check-in view to force sync
**Prevention:** Test sync between devices BEFORE event starts. Ensure all devices have internet.
## Guest List & Data Issues
[Section titled “Guest List & Data Issues”](#guest-list--data-issues)
Duplicate guests appearing+
**Common causes:**
1. **Different email addresses:** Same person, two emails ( and )
2. **Name variations:** “John Smith” vs “J. Smith”
3. **CSV import with mismatched emails**
**Fix:**
1. **Merge duplicates:** Select both on a guest list » **More Options** » **Merge Contacts**. Event history merges automatically, so they don’t need to be on the same event.
2. **Choose primary:** Select which email/data to keep
3. **Set associated contact:** Link personal email to work email for future
**Prevention:** Import CSVs with consistent email format. Use “Associated Contact” feature for people with multiple emails.
CSV import not working+
**Common issues:**
1. **File size too large:** Break into smaller files (5,000 rows max recommended)
2. **Email column missing:** An email column is strongly recommended — it’s how Gatsby matches an incoming row to an existing contact, so without it every row creates a new record and duplicates are likely. It is not strictly required: you can import contacts with no email address and fill the addresses in later. Those contacts show a [**Missing Email** warning](/platform/events-lists/guest-list-warnings/) on the guest list and can’t be sent campaigns or personal RSVP links until an address is added. But, you do need at least one email address in the import file. This only applies to CSV import: adding a contact one at a time with **Create Contact** requires an email address.
**Only have names?** Give each guest a unique placeholder email instead of leaving it blank, such as `yourname+guest1@yourfirm.com` and `yourname+guest2@yourfirm.com`. Mail to a `+` address still arrives in your own inbox, and the placeholder lets Gatsby generate a personal RSVP link and match the contact on future imports. When you get the real address, replace the placeholder on the contact profile. The RSVP link stays the same.
3. **Special characters in names:** Use Excel-optimized export format
4. **File encoding issue:** Save as UTF-8 CSV
**Fix:**
1. **Check required columns:** In a CSV import, email is strongly recommended but not mandatory for every row (at least one row needs one). Create Contact always requires an email.
2. **Test with small file first:** 10 rows to verify format works
3. **Use Gatsby’s export format:** Export sample, use as template
Missing guest data+
**Why guests might be “missing”:**
1. **Filters active:** Check top-right of guest list for active filters
2. **Wrong view:** Switch to “All Guests” view
3. **Section filter:** Unassigned guests hidden if viewing specific section
4. **Search typo:** Try broader search terms
**Fix:** Clear ALL filters » Switch to All Guests view » Search again
**Data actually deleted?** Actions » Add Guests » Restore Deleted Guests
CSV export is missing data+
**What exports:**
Only visible columns in current view + active filters.
**Fix:**
1. **Add columns:** Columns button » Add Fields » Select what you need
2. **Clear filters:** Export with no filters for complete guest list
3. **Switch view:** Use “All Guests” view for full export
**Invisible columns don’t export.** Must be visible in view first.
Shared views showing wrong data+
**Common issues:**
1. **Filters applied:** Shared view includes filters from when link created
2. **Columns updated:** Original creator changed columns, reshare to update
3. **Permissions:** External viewer seeing limited data by design
**Fix:**
1. **Recreate share link:** Update view, generate new share link
2. **Clear filters before sharing:** Ensure “All Guests” view
3. **Check what’s visible:** Open shared link yourself to verify
## Event Configuration
[Section titled “Event Configuration”](#event-configuration)
Conditional logic broken+
**Survey form conditional logic not working:**
**Check:**
1. **Logic correctly configured?** Registration » Survey » Edit question » Show/hide rules
2. **Parent question answered?** Conditional question only shows if parent answered correctly
3. **Personal link vs public link:** Some conditionals based on guest data (only work with personal links)
4. **Test both link types:** Personal link shows conditions based on guest data, public link doesn’t
**Fix:** Test with yourself as guest. Answer parent question, verify child question appears.
Guests stuck or greyed out in seating chart+
**Common causes:**
1. **Already seated elsewhere:** Guest assigned to different table/seat
2. **Declined status:** Declined guests appear greyed out
3. **Section mismatch:** Table in different section than guest
**Fix:**
1. **Check current assignment:** Click guest » See if already seated
2. **Change RSVP status:** Move from Declined to Accepted
3. **Move to correct section:** Use section dropdown to match table section
**Force assign:** Drag guest to seat even if greyed out (overrides most restrictions)
Need to move everyone in Seating Chart quickly+
**Bulk operations:**
1. **Export seating:** Guest list » Columns » Add Table + Seat » Export CSV
2. **Edit in spreadsheet:** Update Table/Seat assignments in bulk
3. **Import back:** Import CSV » Map to Table and Seat columns
**Rearranging visually:**
1. **Multi-select:** Click multiple guests » Drag to new table
2. **Table swap:** Select all at Table A » Move to Table B » Move Table B to Table A
**Clear all seating:** Actions » Clear Seating (starts from scratch)
Seating Chart table layout wrong+
**What happened:** Tables in wrong positions, wrong shape, or wrong capacity.
**Fix:**
1. **Edit table:** Click table » Edit » Change capacity, shape, position
2. **Delete and recreate:** Sometimes faster than fixing
3. **Use template:** Floor Plans » Load venue template if available
**Reset layout:** Delete all tables, start fresh with cleaner layout.
Child guests not appearing in parent+
**Event families sync issue:**
**Check:**
1. **Family relationship set?** Child event » Event Details » Advanced » Set parent
2. **Guest on child list?** Verify guest actually added to child event
3. **Sync delay:** Wait 30 seconds, refresh parent guest list
**Fix:**
1. **Re-establish relationship:** Remove parent connection, save, re-add parent, save
2. **Manually add to parent:** If sync broken, add guest to parent directly
**Prevention:** Set up family relationships BEFORE adding guests to child events.
## System & Performance
[Section titled “System & Performance”](#system--performance)
Performance considerations+
**What affects speed:**
* Guest list size (10,000+ guests may load slower)
* Number of custom fields (100+ custom fields impacts performance)
* Complex conditional logic in surveys (nested conditions slow rendering)
* Large image files on landing pages (compress before uploading)
* Many guests × many view tabs × many email campaigns on the same event
**If Gatsby feels slow:**
1. **Refresh the browser tab:** A network drop can leave the guest list partly loaded, so guests or columns look missing. A refresh reloads the full data set.
2. **Reduce visible columns:** Hide unused columns in guest list views
3. **Use filters:** Filtered views load faster than All Guests with 5,000+ people
4. **Compress images:** Landing page images under 2MB load faster
5. **Clear browser cache:** Old cache sometimes causes slowness
**For very large events (5,000+ guests):**
Contact support. We can optimize your instance.
Browser compatibility+
**Supported browsers:**
* **Chrome** (recommended)
* **Safari** (macOS/iOS)
* **Firefox**
* **Edge**
**Minimum versions:**
* Chrome 90+
* Safari 14+
* Firefox 88+
* Edge 90+
**Issues with old browsers:**
* Landing page editor may not load
* Check-in QR scanner won’t work
* Some interactive elements break
**Fix:** Update to latest browser version. Use Chrome if problems persist.
**Internet Explorer:** Not supported. Never was, never will be. Use Edge instead.
***
**Still stuck?**
Contact Gatsby support with:
* Screenshot of the error/problem
* What you were trying to do
* Your event date (for priority handling)
Email copied to clipboard
# What's New in Gatsby
> Your go-to spot for the latest features, updates, and improvements that make event management actually work.
## Recent Updates
[Section titled “Recent Updates”](#recent-updates)
[Q3 2026](/whats-new/2026-q3/)
#### [Quick Events, the Gatsby MCP Server, Tasks, and SMS Campaigns](/whats-new/2026-q3/)
[A four-step builder for the smaller events, an MCP server that connects Claude or ChatGPT to your guest data, task management inside every event, and texts to your guests. Plus per-guest Zoom join links and rebuilt reporting.](/whats-new/2026-q3/)
[View release notes →](/whats-new/2026-q3/)
[Q1 2026](/whats-new/2026-q1/)
#### [Kiosk Mode, Badge Designer, Event Calendars, and Seating Chart Color Coding](/whats-new/2026-q1/)
[Self-service check-in on iPad, a desktop badge designer that syncs to all check-in devices, public and private event listing pages with autofill registration, and seating chart color coding by any guest field.](/whats-new/2026-q1/)
[View release notes →](/whats-new/2026-q1/)
[2025](/whats-new/2025/)
#### [Lists, Ticketing, Multi-Event Registration, and More](/whats-new/2025/)
[Contact Lists replaced Groups with full event-level functionality. Paid ticketing launched. Multi-event registration, one-click RSVPs, BYOB SendGrid, and significant iOS app updates.](/whats-new/2025/)
[View release notes →](/whats-new/2025/)
# 2025 Product Updates
> 2025 product updates for Gatsby Events — Lists, Ticketing, Multi-Event Registration, One-Click RSVPs, Family Tree View, iOS app updates, and more.
## Lists
[Section titled “Lists”](#lists)
Groups became Lists. The name is the least interesting part of this change.
Lists carry full event-level functionality: landing pages, surveys, seating charts, campaigns, custom columns, and views. The difference is structural. Lists have no date and send no calendar invites.
If you needed a registration form for something that wasn’t an event (a newsletter signup, a gift address collection, a post-event survey), you used to create a fake event and turn off the calendar invite. Lists remove that workaround.
* Post-event surveys without creating another event
* Newsletter subscriber management with campaigns and engagement tracking
* Registration forms for anything without a date (membership renewals, program applications, vendor onboarding)
* Network dashboards like “2025 VIP Prospects” that pull data columns from past events
Create a List from the dashboard. You’ll find it alongside Events and Families.
[Learn more about Lists](/platform/events-lists/contact-lists/)
## Ticketing
[Section titled “Ticketing”](#ticketing)
Gatsby now supports paid event registration. Ticket purchasing, QR codes on purchase, waitlists for sold-out tiers, promo codes, configurable sales tax, and a full refund flow. Payment tracking lives right on your guest list.
Ticketing is not enabled by default. To get access, email:
Email copied to clipboard
[Learn more about Ticketing](/platform/registration/ticketing/)
## Multi-Event Registration
[Section titled “Multi-Event Registration”](#multi-event-registration)
You can now offer registration for multiple events from a single survey form without setting up parent-child event linking.
Add a survey question that lists other events available for registration. When a guest selects additional events, they’re registered on each one independently. Each event keeps its own guest list, capacity, and settings. No family hierarchy needed.
Parent-child linking still exists for when you want guests to roll up into an overview parent. It just isn’t required for multi-event registration anymore.
[Learn more about Multi-Event Registration](/platform/events-lists/families/)
## One-Click RSVPs
[Section titled “One-Click RSVPs”](#one-click-rsvps)
A new option on invite links: skip the landing page and send guests straight to the survey. If there are no survey questions, the link goes straight to confirmation and sends a calendar invite. One click from email to confirmed.
* **With survey questions:** Guest lands directly on the form. No landing page in between.
* **Without survey questions:** Guest clicks the link and gets a confirmation with a calendar invite. Done.
This also makes save-the-dates simple. Create an event, enable “invite link skips to survey” with no questions, and send a campaign. Recipients click once and get a proper calendar hold.
## BYOB SendGrid
[Section titled “BYOB SendGrid”](#byob-sendgrid)
You can connect your own SendGrid API key in Gatsby settings and send all emails through your account instead of Gatsby’s shared infrastructure.
Two reasons to do this. First, you see every email Gatsby sends in your own SendGrid dashboard: opens, bounces, spam reports, delivery logs. Second, your emails go through your dedicated IP. If another Gatsby customer has deliverability problems, it doesn’t affect you.
Once connected, all emails from Gatsby (campaigns, notifications, confirmations) route through your SendGrid account.
[Learn more about Email Configuration](/platform/account-settings/email-configuration/)
## Family Tree View
[Section titled “Family Tree View”](#family-tree-view)
A visual builder for event families. Your parent-child event connections display as tree diagrams in the Families tab. You can see the entire structure at a glance and create new connected events directly from the tree.
[Learn more about Family Tree View](/platform/events-lists/families/)
## Landing Page Embed Blocks
[Section titled “Landing Page Embed Blocks”](#landing-page-embed-blocks)
A new block type in the Advanced Editor: embeds. Add Google Maps, YouTube videos, Vimeo players, or any iframe-compatible content directly to your event page.
Supported types: Google Maps (interactive), YouTube, Vimeo, and generic iframe.
[Learn more about Embed Blocks](/platform/registration/landing-pages/)
## Horizontal Set Blocks
[Section titled “Horizontal Set Blocks”](#horizontal-set-blocks)
Another addition to the Advanced Editor. Horizontal Sets let you arrange content in a row with dynamically added or removed columns. Items within a column use a fixed width, but auto-wrap is available so content flows naturally when the row fills up.
[Learn more about Horizontal Set Blocks](/platform/registration/landing-pages/)
## Revisit RSVP Bar
[Section titled “Revisit RSVP Bar”](#revisit-rsvp-bar)
When a guest revisits their personal RSVP link after responding, a bar at the top of the page shows their name and current status. For ticketed events, it shows whether payment is complete or still needed. No more guessing whether the system recorded their response.
## iOS App Updates
[Section titled “iOS App Updates”](#ios-app-updates)
Both Gatsby iOS apps got significant updates in 2025. The guest-facing mobile app received a full overhaul. The host app (used for check-in and badge printing) got a major UI refresh.
[Learn more about the Guest App](/platform/day-of-event/guest-app/) | [Learn more about the Host App](/platform/day-of-event/event-check-in/)
### Improvements
[Section titled “Improvements”](#improvements)
* **Seating Chart PDF Exports:** Export your seating chart as a PDF from the three-dots menu. Options include high DPI, per-table exports with guest lists, and dietary restrictions printed by guest.
* **Event Family Cancellations:** A new “Are you attending?” Yes/No question at the top of surveys. When a guest says No, you can cascade the cancellation to all connected events in the family. Guests get a double-confirmation step to reduce accidental cancellations.
* **Media Library:** Upload images and videos once, reuse them across landing page templates without re-uploading. Update an asset in one place and it updates everywhere.
* **Soft Deletes for Contacts:** Deleting a contact from a guest list no longer removes them permanently. Contacts can be restored.
* **REST API Expansion:** The API now supports deleting guests, searching for people, and RSVP tracking. [API docs](https://www.buildwithgatsby.com)
### Under the Hood
[Section titled “Under the Hood”](#under-the-hood)
* Significant pre-compute and caching improvements across the platform. Faster load times and better observability for the engineering team to identify and resolve issues quickly.
# 2026 Q1 Product Updates
> What shipped in Q1 2026, including event calendars, kiosk check-in, the badge designer, Zebra printer support, and seating chart color coding.
## New in Q1
[Section titled “New in Q1”](#new-in-q1)
Public and private event listing pages, kiosk check-in, a desktop badge designer, Zebra printer support, and seating chart color coding.
### Calendars: Public and Private Event Listing Pages
[Section titled “Calendars: Public and Private Event Listing Pages”](#calendars-public-and-private-event-listing-pages)
You can now build event listing pages at their own URL. Public calendars let anyone see your upcoming programming in one place. Private calendars give each person on a contact list a personalized link.
Find it in the left nav under **Calendars**, available to all customers.
[View Example Calendar](https://gatsby.events/showcase/events/upcoming-events/)
Public calendars+
Set a title, customize the URL slug, upload a logo, and add a description. Then add events manually. Nothing appears on a calendar automatically when you create an event in Gatsby. Every calendar is curated.
Each event entry shows the date, city, name, optional description, and a View Event button. Upload a featured image and override the event title in that event’s **Link Preview** settings. Those settings feed every calendar the event appears on.
Public calendars can be embedded via iframe on an external website.
URL structure: `gatsby.events/your-org-slug/events/your-calendar-slug`. The custom domain add-on replaces the root domain.
Private calendars+
Associate a calendar with one or more contact lists. Events on a private calendar can be set without public links, so they’re not discoverable anywhere else.
To distribute: go into each associated contact list, open **Campaigns**, and insert the new merge tag. Each recipient gets a unique link tied to their contact record. If your calendar is tied to three lists, send three separate campaigns, one from each list. You cannot send directly from the calendar.

When a contact opens their link and clicks an event, their information is already filled in. They add themselves to the guest list without your team touching it.
The personalized link is tied to a contact record but is not technically enforced. A forwarded link opens and acts on behalf of the original contact. This works for an EA RSVPing for a manager. Include a note in your distribution email that the link is personal.
A few things to know+
* No grid view, no month view, no iCal sync. Visitors see a chronological list.
* Branding is limited to your logo and event images. No font or color controls… yet!
* Analytics are calendar-level: total page views and total event clicks. Click the event clicks count to see a per-event breakdown.
[Full Calendars Reference](/platform/events-lists/calendars/)

## Check-In Upgrades: Kiosk Mode, Badge Designer, and Zebra Printer Support
[Section titled “Check-In Upgrades: Kiosk Mode, Badge Designer, and Zebra Printer Support”](#check-in-upgrades-kiosk-mode-badge-designer-and-zebra-printer-support)
Three updates to check-in that together change what size of event Gatsby can handle end-to-end. See the [Badge Printing](/platform/day-of-event/badge-printing/) docs for the full reference.
Kiosk Mode+
Turn an iPad into a self-service check-in station. Guests search their own name, see results as they type, confirm their badge, and print without anyone working the line. Walk-in registration is available too: a guest not on the list can complete your registration form at the kiosk, get added to the guest list, and receive a confirmation email if notification emails are configured.
Set it up in **Event > On-Site tab**. Kiosk mode requires account-level enablement. Contact your account manager to activate, or email:
Email copied to clipboard
A few details worth knowing:
* When two guests share a name, results show their company and position information so guests can self-select the right record.
* If your event has required survey questions, the kiosk surfaces them for guests who haven’t answered yet, including pre-registered guests with missing data.
* Exit kiosk mode by typing a secret phrase in the name search field. For a harder lock, use iOS Guided Access to prevent guests from leaving the app entirely. Guided Access is an Apple feature you configure on the device before the event.
Badge Designer+
The badge designer has moved from the iOS app to desktop. You get a drag-and-drop canvas where you control every element: which fields appear, placement, text size, and font weight.
Any guest data field can go on a badge: name, company, table assignment, dietary restrictions, custom fields, any single-select or multi-select data you’ve collected. A QR code element links to a static URL you define, the same for all guests on that template.
Templates are global across all events. There’s no way to scope a template to a specific event. A naming convention helps: prefix templates with the event name or series so your staff knows which to select at check-in. Templates sync to all check-in devices automatically once saved.
One important limitation: text does not wrap. Names or companies longer than the field width get cut off. Test templates with your longest names before the event and build an alternate for outliers.
If you’re currently using a Brother printer, your workflow doesn’t change. Recreate your badge design in the new desktop designer, save it, and it syncs to your devices. The Brother connects the same way it always did.
Zebra Printer Support+
Gatsby now supports the Zebra ZD621 series with full Bluetooth. The ZD621 prints on foldable cardstock that hangs from a lanyard, not adhesive labels. Pre-print your branded background onto the cardstock before the event, then Gatsby prints guest information on top at check-in. Color branding comes from your pre-printed background; the Zebra prints guest data in black and white.
Pair the Zebra to your iOS check-in device over Bluetooth, same setup as the Brother. Gatsby has a recommended rental partner for ZD621 printers that ships to your venue, helps with cardstock design, and provides lanyards. Contact Gatsby for the referral.
Compatibility note: not all Zebra models work. Some have Bluetooth only for pushing printer settings, which isn’t enough to receive print jobs. You need a ZD621 series model with full Bluetooth.
Zebra support requires account-level enablement. Contact your account manager, or email:
Email copied to clipboard
## Seating Chart Color Coding and Display Controls
[Section titled “Seating Chart Color Coding and Display Controls”](#seating-chart-color-coding-and-display-controls)
You can now color-code seats on your seating chart by any guest field. Pick RSVP status and declined or canceled guests show up across the whole layout immediately. Pick a custom field and you have a visual map of the room without opening a single filter.
Find the setting in **Event > Seating Chart > gear icon** (bottom left). Select a field, choose which values to highlight, assign colors, and the chart updates immediately. Color configuration saves per chart and carries through to view-only share links and PDF exports. See the [Seating Charts](/platform/day-of-event/seating-charts/) docs for the full reference.
Details and limitations+
* Only single-select and multi-select fields are eligible. Text and number fields aren’t available in the color picker.
* Built-in options are RSVP status and dietary restrictions. Custom fields like company stage or relationship tier need to exist in your account to appear as options.
* If a guest has multiple values in a multi-select field, their seat shows color stripes, one per value.
* You can only color by one field at a time. To view two fields simultaneously, duplicate the chart and configure each copy separately.
The same gear menu includes two additional display controls: adjustable font size for guest name labels and a toggle for vertical name rotation. Both apply globally to that chart and are independent across charts in the same event.

### iOS App Improvements
[Section titled “iOS App Improvements”](#ios-app-improvements)
* **Check-in toast.** Check-in now shows a notification with the guest’s name. Tap it to open their contact profile.
* **QR scanner confirmation.** The QR code scanner now shows a confirmation after a successful scan.
* **Print setting.** New setting to control whether scanning a QR code automatically closes the scanner and presents the print option when a printer is connected.
* **All contacts page.** You can now browse your full Gatsby contact list and view guest profiles from the app.
# 2026 Q3 Product Updates
> What shipped in Q3 2026, including Quick Events, the Gatsby MCP server, Tasks, SMS Campaigns, per-guest Zoom join links, and rebuilt reporting.
## New in Q3
[Section titled “New in Q3”](#new-in-q3)
A faster way to run the dinner for twelve, your AI tool connected to your guest data, real task management inside every event, and texts to your guests.
### Quick Events
[Section titled “Quick Events”](#quick-events)
The dinner for twelve never felt worth the full event builder. So it went to a consumer invite tool, and the guest list went with it.
Quick Events gives those events four steps inside Gatsby (**Details**, **Design**, **Guests**, **Invite**) and a polished, mobile-first invitation sent from your own Gmail or Outlook. Every RSVP lands on the same contact record as your largest events, so six months from now you can still see who came.
Quick Events is free for existing Gatsby customers. Look for **Create Quick Event** next to **Create Event**.
What's included+
* Six templates (Dinner, Garden, Gala, Soirée, Happy Hour, and Celebration), plus your own banner image, logo, and color.
* Capacity limits, a waitlist, an RSVP deadline, and a Maybe option.
* Up to four guest questions: company, position, dietary restrictions, and one of your own.
* Test sends, scheduled sends, and follow-ups to each RSVP group once the invitations are out.
When to create a full event instead+
Seating charts, badges, check-in, paid ticketing, plus-ones, full registration forms, and texts are full-event features. A Quick Event can’t be converted into a full event later, so if the dinner might grow into any of those, start with **Create Event**.
[Full Quick Events Reference](/platform/events-lists/quick-events/)

### The Gatsby MCP Server
[Section titled “The Gatsby MCP Server”](#the-gatsby-mcp-server)
Connect Claude or ChatGPT to your Gatsby account and ask about your own contacts and events in plain English. “I’m in New York next Tuesday. Who from my contacts is there and worth a coffee?” Or: “Which FinTech founders have been to at least one of our events?”
The AI sees exactly what you see in the app, and it stays read-only unless an admin changes that. Ready-made skills in the [Skill Gallery](/gallery/) cover year-over-year event performance, RSVP forecasting, guest recommendations, and seating.
The MCP server is built on the [Gatsby API](/platform/integrations/api/), a paid add-on. If your account already has API access, the MCP server is free. To turn it on, email:
Email copied to clipboard
[Full MCP Server Reference](/platform/integrations/mcp/)
### Tasks
[Section titled “Tasks”](#tasks)
Who’s building the landing page? Did anyone confirm the caterer? That work used to live in a side spreadsheet. Now it lives in the event.
Assign each task to one person or several, give it a due date, and mark it **Blocked** when it’s stuck. **My Tasks** at the top of the Events page shows everything assigned to you across every event, overdue first.
A few things to know+
* The tab is hidden by default. Open an event, click the **+** at the end of the tab bar, and turn on **Tasks**.
* Switch between **Board**, **List**, and **Cards**. Gatsby remembers your choice.
* Tasks take subtasks, priorities, and tags, and an event can hold more than one task list. New events offer a starter checklist.
* Your existing tasks moved over automatically.
* External Collaborators see only the tasks assigned to them.
[Full Tasks Reference](/platform/events-lists/tasks/)

### SMS Campaigns
[Section titled “SMS Campaigns”](#sms-campaigns)
Some messages only matter if they arrive in time: the room change, the start time that moved, the reminder the night before. Those can now go out as texts.
Every event gets a free **SMS Auto-Reminder**: one text, 24 hours before the event, to every guest who accepted. Turn it on per event under **Registration » SMS Auto-Reminder**.
The paid SMS add-on lets you write your own texts. Merge in each guest’s first name and personal RSVP link, then send now, schedule it, or set it as a reminder.
A few things to know+
* Texts go to US phone numbers only.
* Every text opens with your organization’s name and ends with how to reply STOP, HELP, or BLOCK. Opt-outs are checked again at every send. See [SMS Consent](/platform/email-campaigns/sms-consent/) for how consent is recorded.
* Add the **SMS Opt-in** question to a survey to collect consent when a guest RSVPs.
* Quick Events can’t send texts, including the auto-reminder.
* External Collaborators can’t send texts.
[Full SMS Campaigns Reference](/platform/email-campaigns/sms-campaigns/)
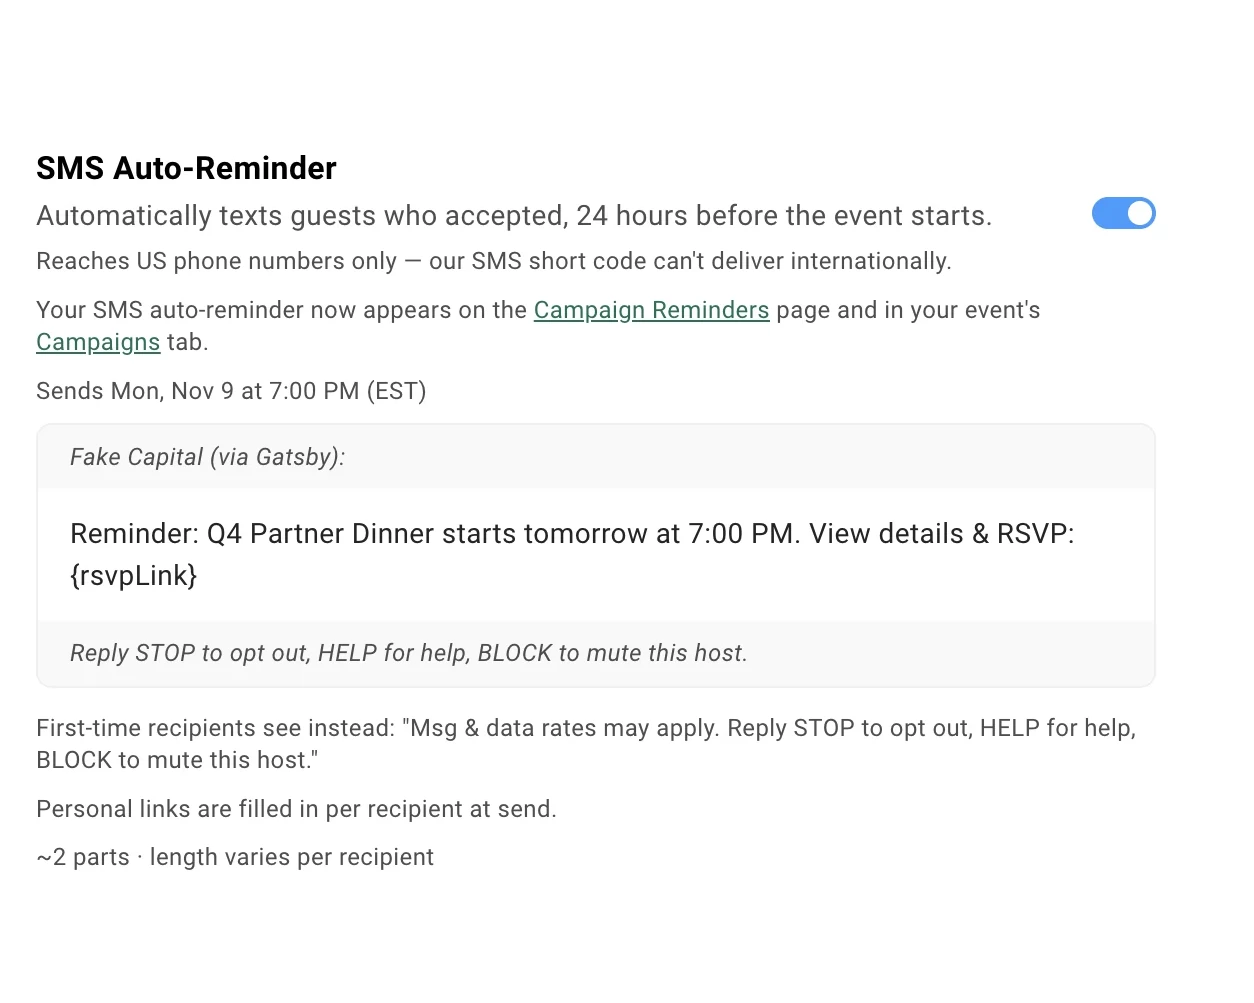
### Also New
[Section titled “Also New”](#also-new)
* **A Zoom join link for every guest.** Register guests for a Zoom webinar through your Gatsby RSVP, and each one gets their own join link in their calendar invite. A webinar that requires registration now actually requires it. See [Zoom Integration](/platform/integrations/zoom/).
* **Reporting, rebuilt.** Dashboard numbers now match each event’s RSVP summary exactly. Filter by event tag and export to CSV. See [Reporting](/platform/reporting/overview/).
* **Campaign Reminders.** Schedule a follow-up that checks RSVP status when it sends, so guests who already replied don’t get nudged. Time it against the event date and manage every reminder from one dashboard. Email reminders need a SendGrid sender. See [Campaign Reminders](/platform/email-campaigns/reminders/).
* **Invite a teammate to connect their inbox.** Send an invite from **Linked Services** or the campaign composer. They sign in with Google or Outlook in about 30 seconds, and you never handle their password. See [Email Configuration](/platform/account-settings/email-configuration/).
# See what great events look like
> Walk through live open registration and get the same emails your guests receive.
## Strategic Events
1. [](/examples/strategic-events/annual-general-meeting)
### [Annual Meeting (AGM)](/examples/strategic-events/annual-general-meeting)
[Compliance-conscious, document sharing, formal program](/examples/strategic-events/annual-general-meeting)
2. [](/examples/strategic-events/executive-dinner)
### [Executive Dinner](/examples/strategic-events/executive-dinner)
[Three RSVP options, briefing opt-in, and no-pitch expectations](/examples/strategic-events/executive-dinner)
3. [](/examples/strategic-events/private-forum)
### [Private Forum](/examples/strategic-events/private-forum)
[Advisory council, private check-in](/examples/strategic-events/private-forum)
## Curated Access
1. [](/examples/curated-events/speaker-series)
### [Speaker Series](/examples/curated-events/speaker-series)
[Apply to attend](/examples/curated-events/speaker-series)
2. [](/examples/curated-events/waitlisted-social)
### [Waitlist Social](/examples/curated-events/waitlisted-social)
[Curated access social event](/examples/curated-events/waitlisted-social)
## Community & Team
1. [](/examples/community-events/team-offsite)
### [Team Offsite](/examples/community-events/team-offsite)
[Multi-day, logistics-heavy, activity selection](/examples/community-events/team-offsite)
2. [](/examples/community-events/user-summit)
### [User Summit](/examples/community-events/user-summit)
[Ticketed registration with group checkout and promo codes](/examples/community-events/user-summit)
## Want to run events like these?
30 minutes. We’ll talk about your event and show you how to set it up.
Book a demoGet support
# How Gatsby Works
> Guest history, preferences, and dietary needs carry from one event to the next, all behind your brand.
The Gatsby Model
The platform starts with **Contacts**: everyone you’ve ever invited, their dietary restrictions, their seating preferences, their attendance history. Add a contact to an **Event** (with a date) or a **List** (ongoing, no date).
From there, run **Campaigns** to invite them, **Registration** to collect RSVPs, and **Day-of Tools** to check them in and seat them. After the event, attendance syncs to your **CRM**.
Every interaction writes back to the contact. Next time you invite them, you see everything.
*Explore exactly how Gatsby works.*
[Your browser does not support the video tag.](/videos/platform-guestlist.mp4)
Core Objects
## Contacts, events, and lists
01
### [Contact Profiles](/platform/contacts/contact-profiles/)
[Every RSVP, custom field, and attendance record in one place.](/platform/contacts/contact-profiles/)
02
### [Guest Lists](/platform/events-lists/guest-lists/)
[Filter by RSVP status, dietary needs, or any custom field you've added.](/platform/events-lists/guest-lists/)
03
### [Contact Lists](/platform/events-lists/contact-lists/)
[Newsletters and directories without event dates.](/platform/events-lists/contact-lists/)
Invite & Register
## Get people to say yes
Personalized links that recognize who’s clicking. Public registration for everyone else.
[Your browser does not support the video tag.](/videos/platform-rsvp-settings.mp4)
### [Registration Links](/platform/registration/registration-links/)
[Personalized URLs that pre-fill what you already know.](/platform/registration/registration-links/)
### [Capacity & Waitlists](/platform/registration/capacity-waitlists/)
[Set a cap. Waitlisted guests move up based on your curation.](/platform/registration/capacity-waitlists/)
[Your browser does not support the video tag.](/videos/platform-landing-pages.mp4)
### [Landing Pages](/platform/registration/landing-pages/)
[Pages use your fonts and colors. Add agendas, parking, speaker bios.](/platform/registration/landing-pages/)
### [Forms and Surveys](/platform/registration/registration-forms/)
[Conditional logic shows different questions to different tiers.](/platform/registration/registration-forms/)
[Your browser does not support the video tag.](/videos/platform-campaigns.mp4)
### [Campaigns & Invites](/platform/email-campaigns/campaigns/)
[Queue from real Gmail or Outlook accounts. Track replies and bounces.](/platform/email-campaigns/campaigns/)
### [Sender Settings](/platform/email-campaigns/sender-settings/)
[Connect Gmail, Outlook, or SendGrid. Control who sends from which address.](/platform/email-campaigns/sender-settings/)
Day-of-Event
## When the doors open
A partner adds three guests at 6:45 AM. Seating, badges, check-in sync automatically.
[Your browser does not support the video tag.](/videos/platform-seating-charts.mp4)
### [Seating Charts](/platform/day-of-event/seating-charts/)
[Drag-and-drop tables with dietary restrictions and guest context visible.](/platform/day-of-event/seating-charts/)
### [Guest Lists](/platform/events-lists/guest-lists/)
[The guest list sits next to the chart. Filter by table, sort by name, drag to assign.](/platform/events-lists/guest-lists/)
[Your browser does not support the video tag.](/videos/platform-checkin.mp4)
### [Event Check-In](/platform/day-of-event/event-check-in/)
[QR scan, tap, or search. Walk-ins get added in seconds.](/platform/day-of-event/event-check-in/)
### [Badge Printing](/platform/day-of-event/badge-printing/)
[Print on arrival. No pre-printed tubs, no handwritten nametags.](/platform/day-of-event/badge-printing/)
### [Guest App](/platform/day-of-event/guest-app/)
[Event schedules, attendee directory, and push notifications on guests' phones.](/platform/day-of-event/guest-app/)
Integrations
## Event data flows to your CRM
RSVPs, attendance, and notes sync as they happen.
### [Affinity](/platform/integrations/affinity/)
[Two-way sync: guest lists, RSVPs, attendance, notes.](/platform/integrations/affinity/)
### [Salesforce](/platform/integrations/salesforce/)
[Field updates in real time. RSVPs map to campaigns, attendance logs to activities.](/platform/integrations/salesforce/)
### [Altvia](/platform/integrations/altvia/)
[Event attendance and LP interactions sync to your fund admin records.](/platform/integrations/altvia/)
### [Attio](/platform/integrations/attio/)
[Guest data and attendance sync into Attio records automatically.](/platform/integrations/attio/)
### [Zoom](/platform/integrations/zoom/)
[Webinar links generate automatically. Attendance writes back to guest profiles.](/platform/integrations/zoom/)
### [Webhooks & Zapier](/platform/integrations/webhooks-zapier/)
[Trigger Slack alerts, compliance workflows, or custom automations from event activity.](/platform/integrations/webhooks-zapier/)
## Not sure where to start?
30 minutes. We’ll ask about your events and show you how similar teams set them up.
Book a demoGet support